
Miata LFX Swap (Singular Motorsports & Good-Win Racing)
 12-08-2016, 12:50 AM
#381
Supporting Vendor

Thread Starter
iTrader: (3)

Join Date: Jul 2006
Location: San Diego
Posts: 3,303
Total Cats: 1,216
Time for a long-due update! I've been plugging away on the new front chassis section over the past month. In expected domino effect, changing one thing required changing two things associated with it and so on and so on.
Where we left off, I decided to cut off everything forward of the shock towers and build everything new to save any weight possible from the nose. Several things up front that this new structure needs to support; splitter, radiator, oil and power steering coolers, ducting, intake, front bumper, front sway bar, etc. I began with building a jig for all the existing mounting point positions that I knew I needed to recreate (pic further up this page).
Frame rail and front of tower strengthened and capped to build the new sway bar mounts out from:
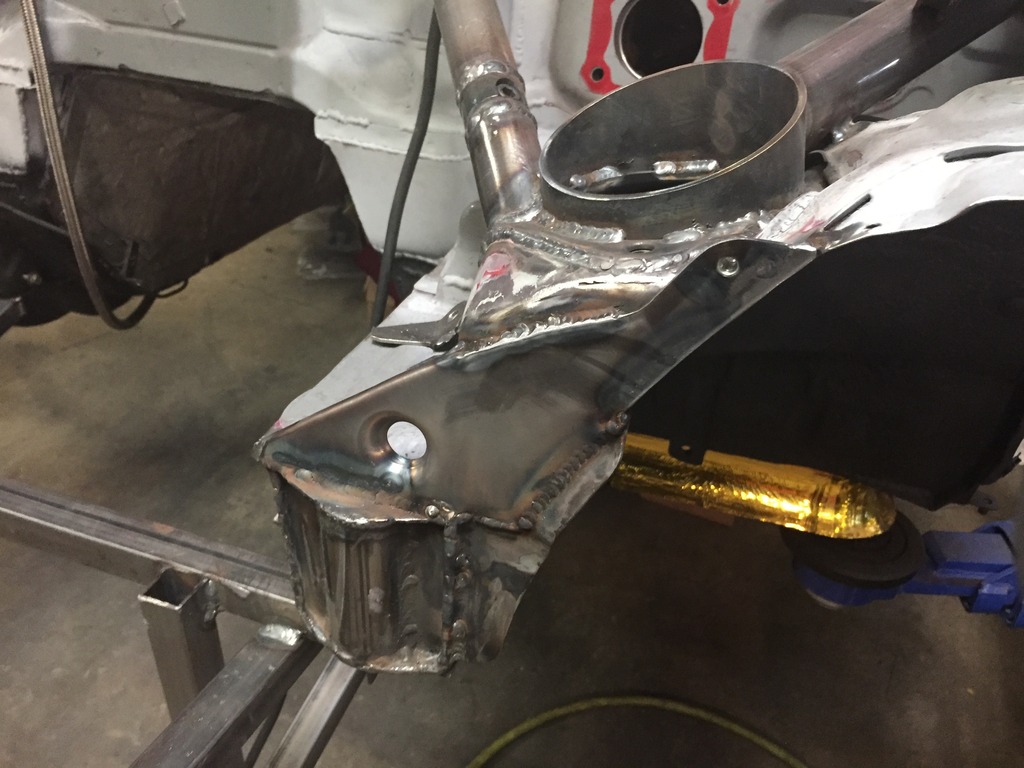
Building the new structure around the jig:
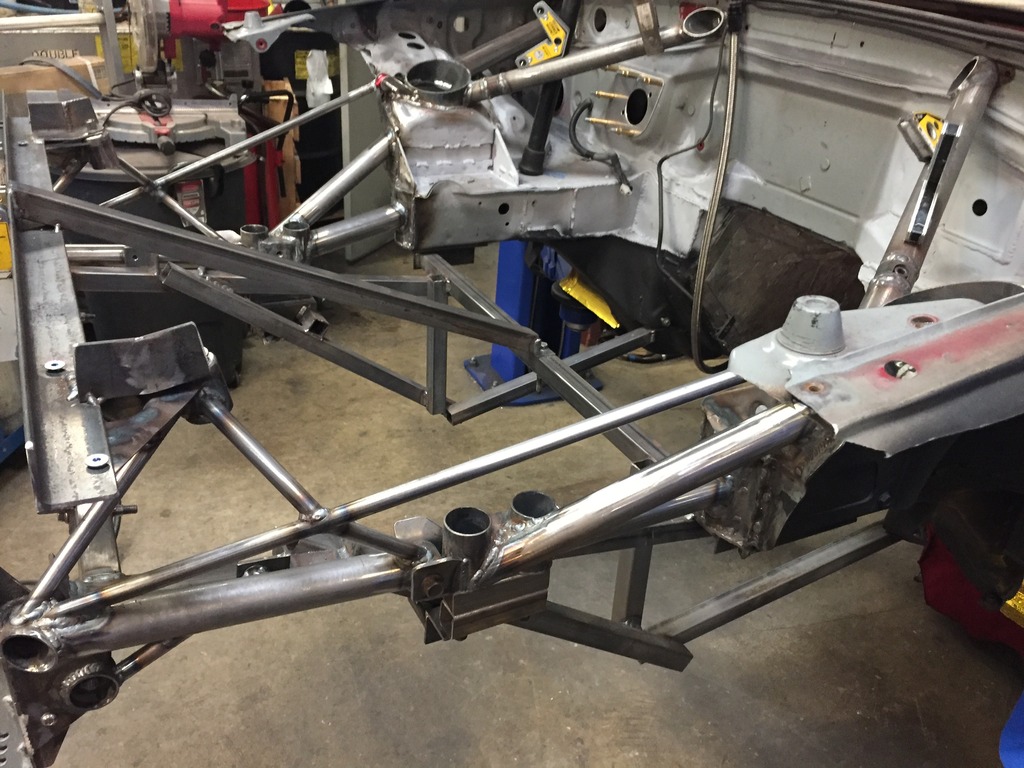
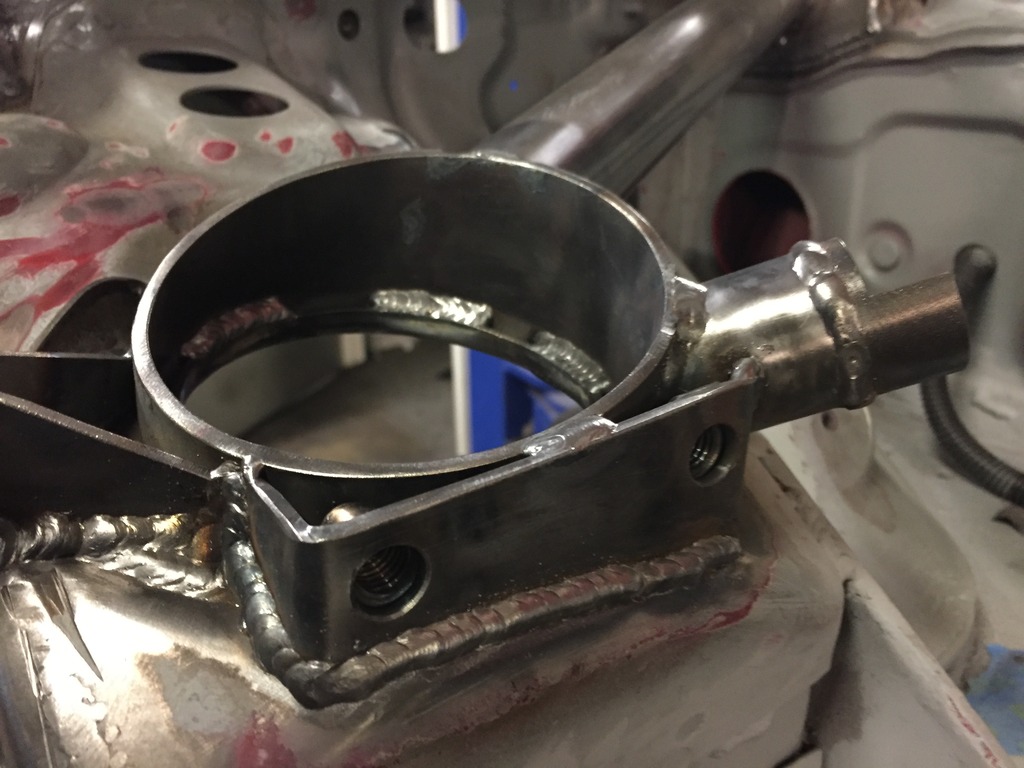
If I'm going through the trouble to make everything, might as well build some tricks into it so the front sway bar mounts are fixed, but everything forward from there is removable:
The front section removes with just one bolt and one quick disconnect pin on each side:
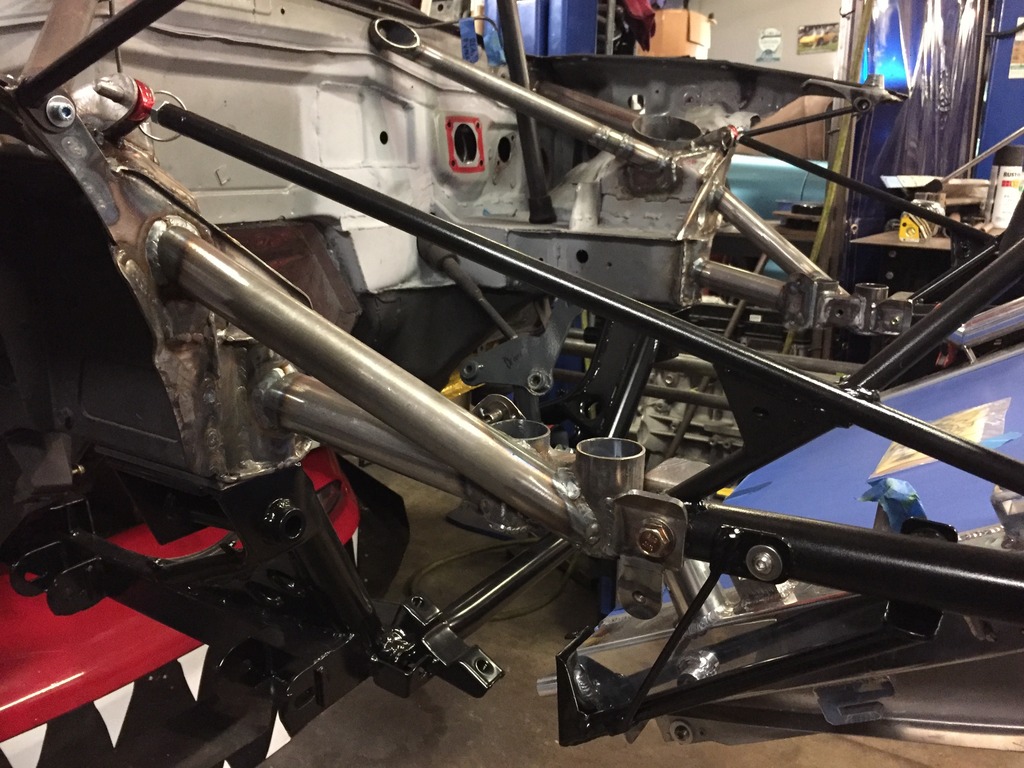
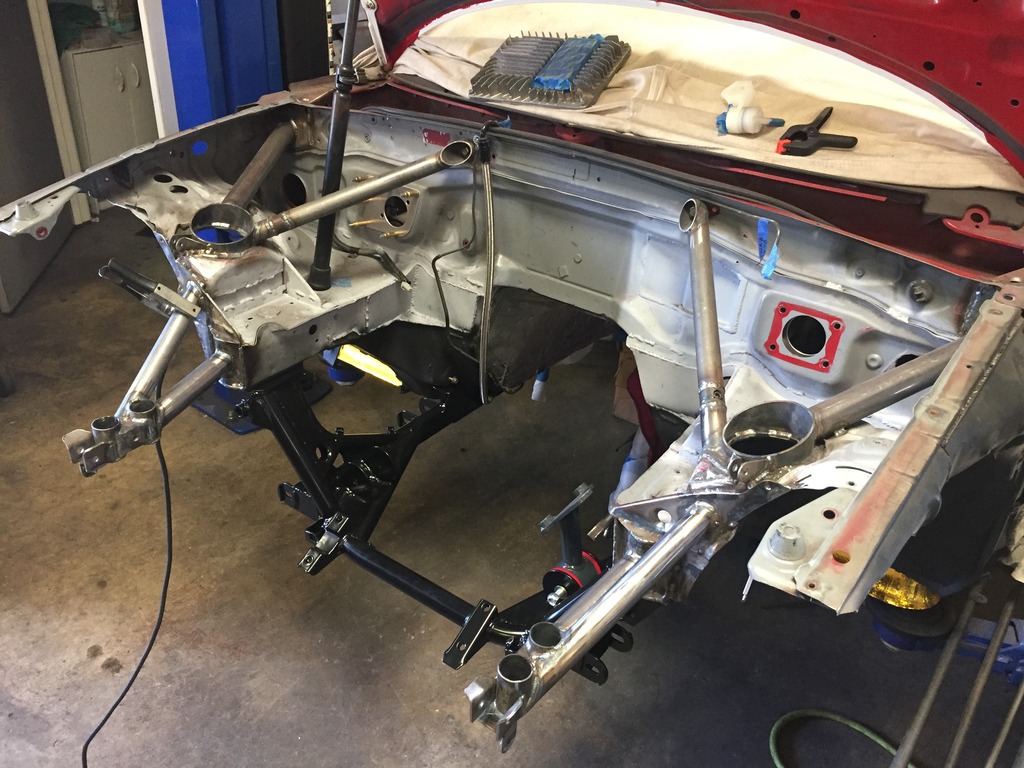
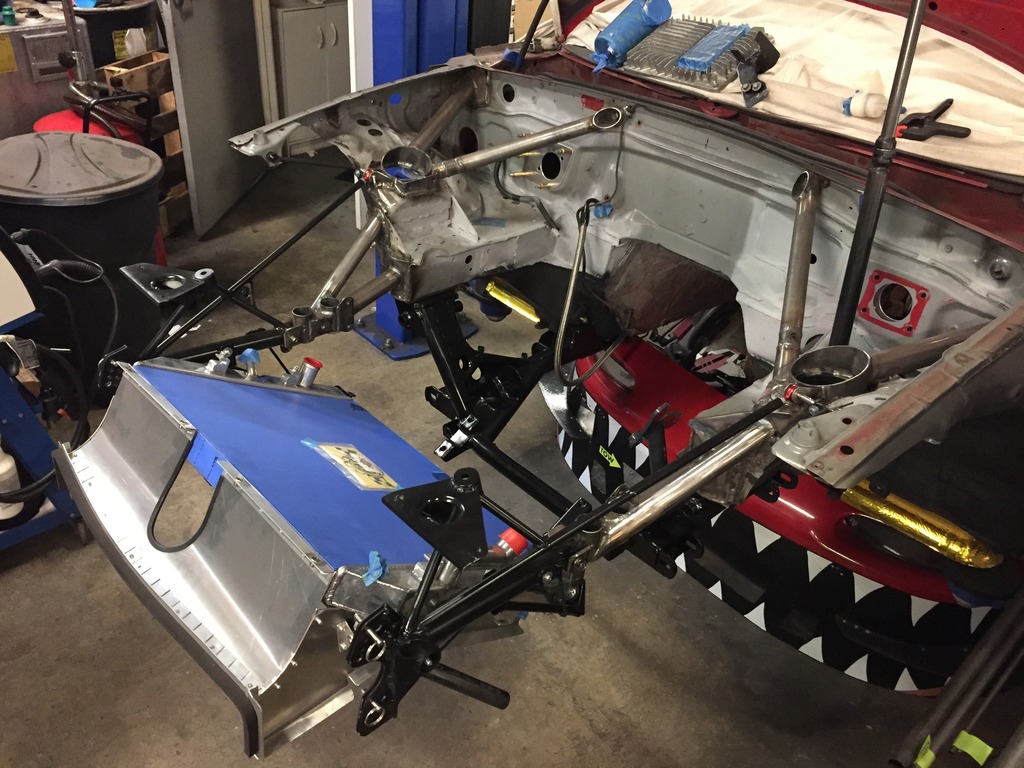
Front section in place with the radiator and ducting being test-fit. I'm really excited for this removable nose section. The idea is that when serious engine work is needed, after removing the splitter (just pull 4 pins) and disconnecting hoses, I can essentially remove the entire front of the car in a matter of minutes as one intact assembly and set it aside, then it re-installs as a unit when done:
I'm moving the front tow point to the passenger side shock tower to shift that weight back a bit. Added a mounting point for the new tow hook to the tower:
I drew up a tow hook to go from there up through the hood, that's being cut at the waterjet soon.
Weighed everything that got cut off and everything before it was welded on. This project shaved 25 lbs off the front of the car.
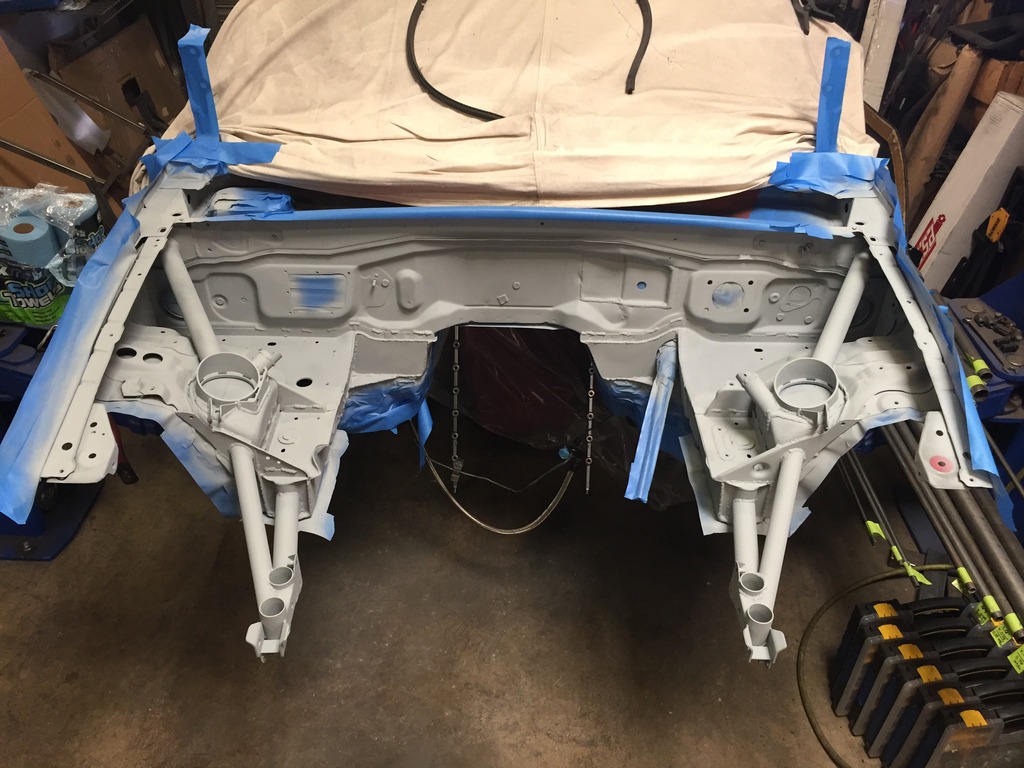
With all that done, on to painting it. Everything is in primer here. In the end it looks pretty simple, belying the complexity that went into the many details - which I think is a mark of an efficient design:
Just finished two tone paint in the engine bay today, so I'm just about ready to get back on track and start bolting parts in for good soon!
Where we left off, I decided to cut off everything forward of the shock towers and build everything new to save any weight possible from the nose. Several things up front that this new structure needs to support; splitter, radiator, oil and power steering coolers, ducting, intake, front bumper, front sway bar, etc. I began with building a jig for all the existing mounting point positions that I knew I needed to recreate (pic further up this page).
Frame rail and front of tower strengthened and capped to build the new sway bar mounts out from:
Building the new structure around the jig:
If I'm going through the trouble to make everything, might as well build some tricks into it
so the front sway bar mounts are fixed, but everything forward from there is removable:The front section removes with just one bolt and one quick disconnect pin on each side:
Front section in place with the radiator and ducting being test-fit. I'm really excited for this removable nose section. The idea is that when serious engine work is needed, after removing the splitter (just pull 4 pins) and disconnecting hoses, I can essentially remove the entire front of the car in a matter of minutes as one intact assembly and set it aside, then it re-installs as a unit when done:
I'm moving the front tow point to the passenger side shock tower to shift that weight back a bit. Added a mounting point for the new tow hook to the tower:
I drew up a tow hook to go from there up through the hood, that's being cut at the waterjet soon.
Weighed everything that got cut off and everything before it was welded on. This project shaved 25 lbs off the front of the car.
With all that done, on to painting it. Everything is in primer here. In the end it looks pretty simple, belying the complexity that went into the many details - which I think is a mark of an efficient design:
Just finished two tone paint in the engine bay today, so I'm just about ready to get back on track and start bolting parts in for good soon!

Last edited by ThePass; 12-08-2016 at 01:27 AM.

Reply
 7
7

7
12-08-2016, 01:01 AM
#382
SADFab Destructive Testing Engineer


iTrader: (5)
Join Date: Apr 2014
Location: Beaverton, USA
Posts: 18,642
Total Cats: 1,866
Epic Ryan. Epic.
Now you just need some AN16 quick disconnect coolant fittings, and oil fittings and you can pull the nose off without spilling any fluids
Now you just need some AN16 quick disconnect coolant fittings, and oil fittings and you can pull the nose off without spilling any fluids
Reply
0
0
12-08-2016, 01:10 AM
#383
Supporting Vendor
Thread Starter
iTrader: (3)
Join Date: Jul 2006
Location: San Diego
Posts: 3,303
Total Cats: 1,216
The thought crossed my mind 
But, quick disconnects are anywhere from $150-$400 per connection so I put that idea aside for the moment. However, I DID include threaded mounts where I might put brackets for those fittings in the future
But, quick disconnects are anywhere from $150-$400 per connection so I put that idea aside for the moment. However, I DID include threaded mounts where I might put brackets for those fittings in the future
Reply
1
1
12-08-2016, 01:19 AM
#385
Senior Member

Join Date: Jul 2014
Location: Milwaukee, WI
Posts: 1,144
Total Cats: 558
I've followed this build for the last 2 years.. figured its about time to post and stay subscribed as an LFX swap is on the radar as an option for my build. Absolutely amazing work like usual
Reply
0
0
12-08-2016, 03:15 PM
#388
Supporting Vendor
Thread Starter
iTrader: (3)
Join Date: Jul 2006
Location: San Diego
Posts: 3,303
Total Cats: 1,216
Thanks guys
Paint dried overnight so I unmasked it today to see how it turned out.
The bay is a medium gray and the cage in the car is pearl white, so I carried that color into the engine bay where the cage extends to the shock towers.


Paint dried overnight so I unmasked it today to see how it turned out.
The bay is a medium gray and the cage in the car is pearl white, so I carried that color into the engine bay where the cage extends to the shock towers.
Reply
4
4

 12-11-2016, 03:21 AM
#393
Supporting Vendor
Thread Starter
iTrader: (3)
Join Date: Jul 2006
Location: San Diego
Posts: 3,303
Total Cats: 1,216
Big day, engine and transmission are officially in! For the final time (fingers crossed).
Clutch and flywheel installed:

Transmission and engine joined and put 'er in as one unit:


Notes on installing engine...
We decided to put the engine and transmission in as one unit because room is tight around the top of the bellhousing to the tunnel and firewall. With the long flywheel/clutch assebly, it didn't look like it would be possible to get the bellhousing over the clutch with the engine already in place. With the front of the car absent we had more options than usual so with the subframe already in we lifted the whole engine/trans and dropped it in tail-first and then lifted the tail of the trans to align the engine mounts. This would have been very difficult with a front of a car there and was still a good bit of work.
Discussing options after doing it this way, we're thinking the best method in the future is to assemble the subframe and engine mounts along with the engine and trans out of the car, put that whole assembly on a dolly and then lower the car onto the assembly. We figure this is going to be the easiest method for those with an intact nose as well.
Other notes...
Before they went in I installed the brake booster and brake master cylinder. Here I'm using the wilwood 1" master cylinder kit with tandem reservoirs which pairs very well with most big brake kits.
Also installed the clutch master cylinder. For this, I forgot to snap a photo but I had to do a little grinding on the clutch pedal itself - the new Wilwood master cylinder's clevis on the end of the rod works mounts to the Miata clutch pedal, but the wilwood clevis is not as deep as the Miata's, so the pedal bottoms out in the throat of the clevis' "U" shape when fully pressed down or not pressed at all. You can easily see it when test fitting the clevis to the pedal. A little grinding on the pedal creates the clearance needed.
Funny, when you get rid of the front of the car the alternator and power steering pump clearances really open up

Clutch and flywheel installed:
Transmission and engine joined and put 'er in as one unit:
Notes on installing engine...
We decided to put the engine and transmission in as one unit because room is tight around the top of the bellhousing to the tunnel and firewall. With the long flywheel/clutch assebly, it didn't look like it would be possible to get the bellhousing over the clutch with the engine already in place. With the front of the car absent we had more options than usual so with the subframe already in we lifted the whole engine/trans and dropped it in tail-first and then lifted the tail of the trans to align the engine mounts. This would have been very difficult with a front of a car there and was still a good bit of work.
Discussing options after doing it this way, we're thinking the best method in the future is to assemble the subframe and engine mounts along with the engine and trans out of the car, put that whole assembly on a dolly and then lower the car onto the assembly. We figure this is going to be the easiest method for those with an intact nose as well.
Other notes...
Before they went in I installed the brake booster and brake master cylinder. Here I'm using the wilwood 1" master cylinder kit with tandem reservoirs which pairs very well with most big brake kits.
Also installed the clutch master cylinder. For this, I forgot to snap a photo but I had to do a little grinding on the clutch pedal itself - the new Wilwood master cylinder's clevis on the end of the rod works mounts to the Miata clutch pedal, but the wilwood clevis is not as deep as the Miata's, so the pedal bottoms out in the throat of the clevis' "U" shape when fully pressed down or not pressed at all. You can easily see it when test fitting the clevis to the pedal. A little grinding on the pedal creates the clearance needed.
Funny, when you get rid of the front of the car the alternator and power steering pump clearances really open up
Reply
3
3
12-11-2016, 03:51 AM
#394
Senior Member

Join Date: May 2007
Location: Atlanta
Posts: 997
Total Cats: 156
Can confirm, dropping the body onto the subframe is a piece of cake. And you can drop the transmission out of the car if you twist the starter hump out of the way while loosening the subframe bolts and prying gently and hoping the whole thing doesn't fall on your head. You can drop the transmission - but you'll never get it back in that way. And the heater core hard pipes covers one of the bellhousing bolts so you're going to be draining the system to drop the transmission. Lesson learned - drop the subframe, it's really not that bad.
How do I know this?
We went with the spec flywheel and stage 1 clutch (daily driven). It's 15lbs lighter than stock (55lbs vs 40 - flywheel, pp, friction disc) No more 2500rpm vibration in the driveline! I think there's pictures of our subframe dolly in my thread - it's a couple of fence posts with carpenter screws drilled into harbor freight dollys. The engine is balanced forward, so be wary when moving it around without the transmission attached to balance it out. Also, because of how the clutch slave's bleeder valve is positioned, you'll need to reverse bleed the slave - we snagged a large veterinarian syringe like this - https://www.amazon.com/EXELint-Dispo...445793&sr=8-11. I think I was able to thread the miata clevis onto the wilwood rod - I remember I had to make something fit but it was pretty trivial.
Looking really good.
Last edited by gooflophaze; 12-11-2016 at 03:59 AM. Reason: fixed yt link
Reply
1
1
12-11-2016, 11:33 AM
#395
Junior Member

Join Date: Jul 2015
Location: grayson, ga
Posts: 295
Total Cats: 25
the "tech" looking intake manifold has really grown on me. i think you should drop plans to add that hokey carbon fiber manifold cover and just "own it". i do really like the red heads. (attn j. perez.)
Reply
0
0
01-11-2017, 11:55 PM
#396
Supporting Vendor
Thread Starter
iTrader: (3)
Join Date: Jul 2006
Location: San Diego
Posts: 3,303
Total Cats: 1,216
Just before the holidays hit I was deep in connecting hoses and wiring for the final time. Bit of a mess while sorting through what still needs to be figured out, needs to be tweaked, etc. but here's a quick snapshot of about where we are at the moment:

And, decided to spring for some trick fittings to go hand in hand with the quickly removable front end design, still waiting on parts to arrive but for now here's a teaser of the dry break fittings that will be going on the power steering lines:

And, decided to spring for some trick fittings to go hand in hand with the quickly removable front end design, still waiting on parts to arrive but for now here's a teaser of the dry break fittings that will be going on the power steering lines:
Reply
5
5

 01-12-2017, 11:10 AM
#400
Junior Member

Join Date: Jan 2007
Posts: 230
Total Cats: -23
Love trick hardware. My dream is to one day have all quick-disconnect and dry break fittings for all electrics and fluids on my own car. I've had good success with Jiffy-Tite push lock dry break quick disconnects in the past for low-pressure fuel in motorcycle applications. I know St�ubli is very popular also. Seems like there's lots of brand names out there now. Not sure if it's become like so many shocks where a number of them are made in the same factory in Taiwan and just private labeled with different colors.
Reply
0
0


