My build/progress thread
 07-12-2008, 02:51 AM
#21
Senior Member
Thread Starter
iTrader: (1)
Join Date: Feb 2006
Location: Detroit
Posts: 1,234
Total Cats: 0
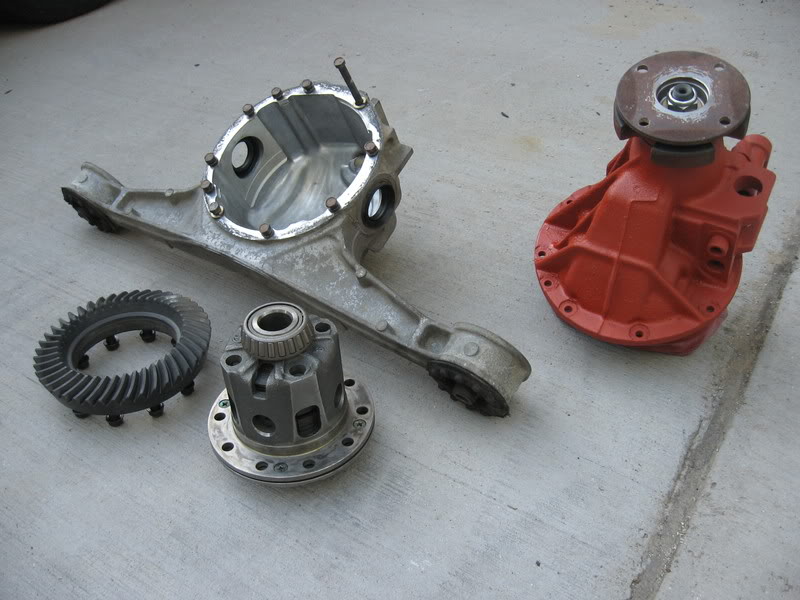
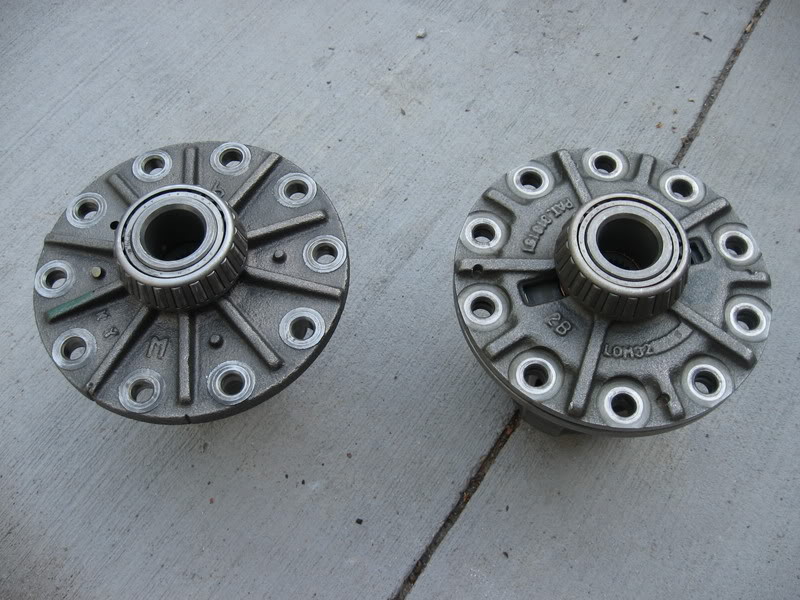
I only had time to clean up the 1.8 Miata housing and carrier today. Hopefully tommorow I can lube it and put it together. I found a local shop who specializes in setting up gears so I will be taking it to them for final adjustment.
This is only half the rear end crap I have. I can't wait to get it finished and sell everything off, takes up too much space. Anyone need a 1.8 open diff or rx7 housing? I'll have my 1.6 VLSD out soon enough.
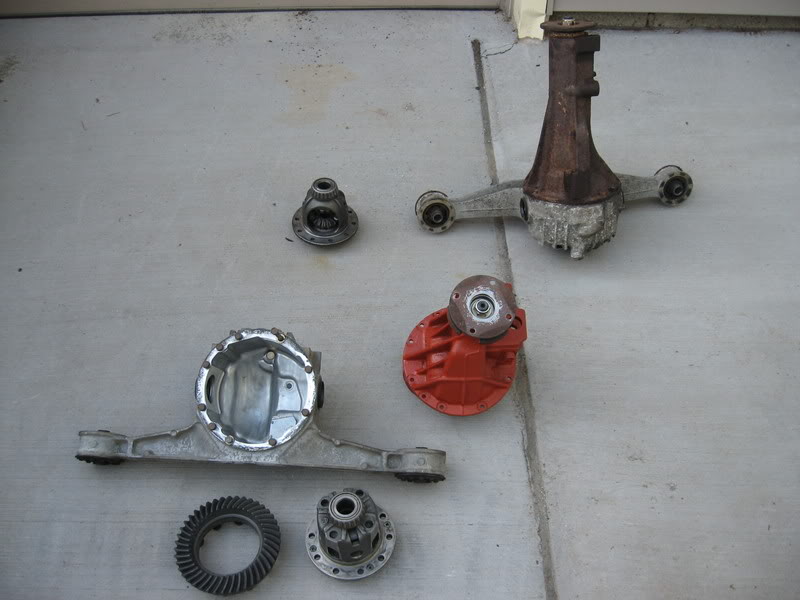
I wire brushed the whole front housing. Hopefully it prevents it from looking how it did before, just like the rx7 one.
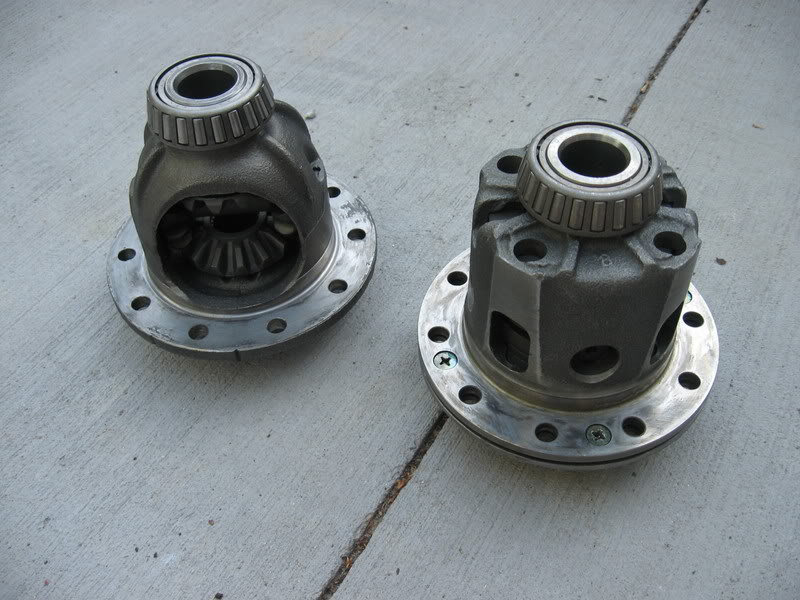
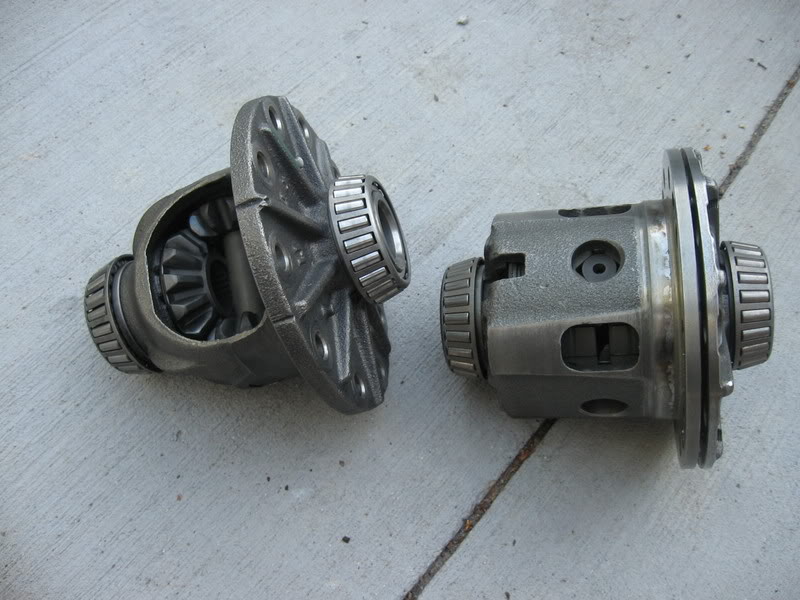
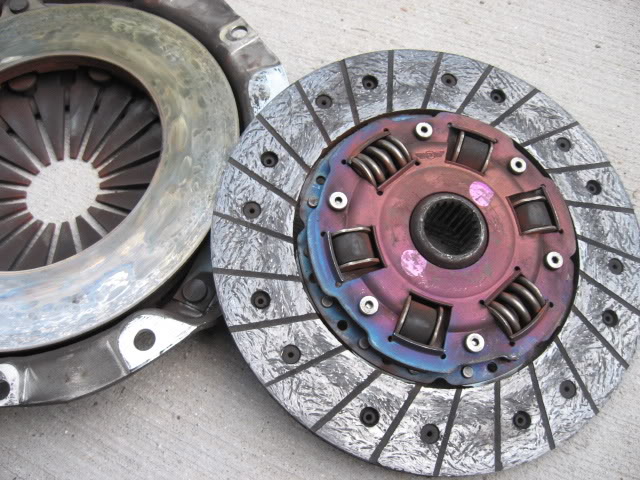
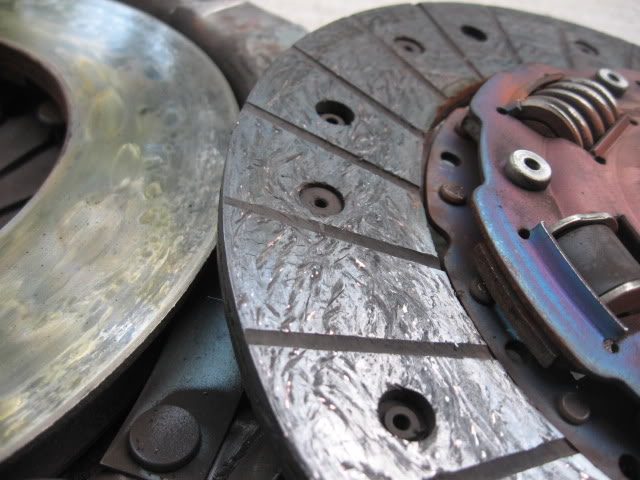
Some pictures of the clutch lsd next to the open. Took these incase someone needs them for an FAQ or something. I already had them out. Clutch one is not tightened down obviously.
This is only half the rear end crap I have. I can't wait to get it finished and sell everything off, takes up too much space. Anyone need a 1.8 open diff or rx7 housing? I'll have my 1.6 VLSD out soon enough.
I wire brushed the whole front housing. Hopefully it prevents it from looking how it did before, just like the rx7 one.
Some pictures of the clutch lsd next to the open. Took these incase someone needs them for an FAQ or something. I already had them out. Clutch one is not tightened down obviously.

Reply
 0
0

0
08-13-2008, 11:26 PM
#22
Senior Member
Thread Starter
iTrader: (1)
Join Date: Feb 2006
Location: Detroit
Posts: 1,234
Total Cats: 0
The car is now running at 10psi. The EBC controls were grounding out on the MS case which caused for some difficult tuning. Thankfully everything was squared away. Thanks a ton to the_pipefather for tuning. Only a few problems to iron out and some more boost to add and it's done.
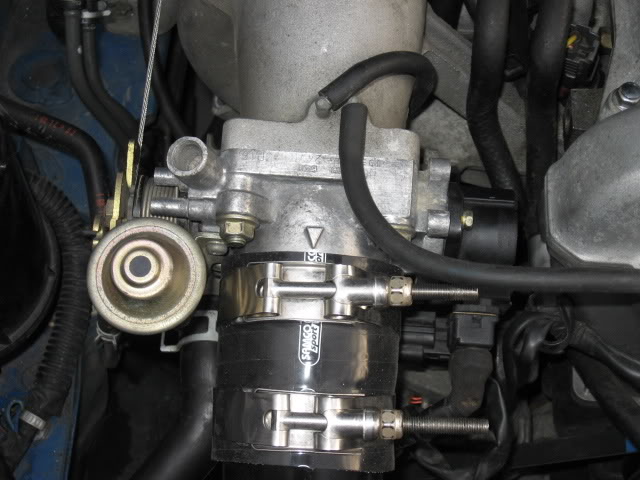
Picture of the Escort GT TB installed. I did notice the throttle cable wheel is a few degrees different. I simply swapped all external parts of the Miata one onto the body of the GT one. Problem solved.
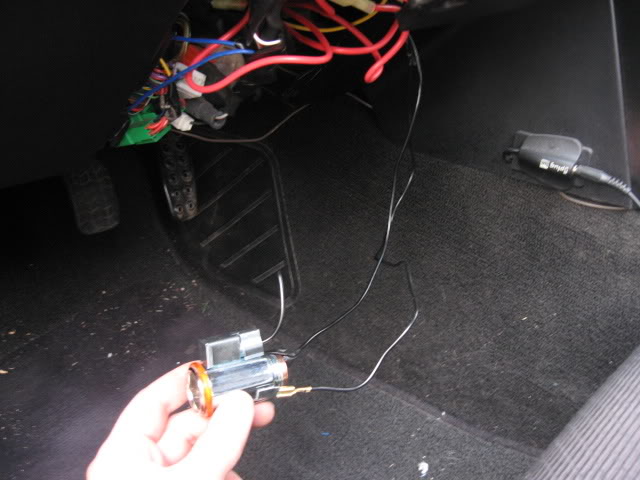
Picture of my emergency power outlet add-on. The laptop battery kept dying so it was off to Harbor Freight for an inverter. My stock lighter is replaced with a starter button, so I had to ghetto wire this in. I'm going to rewire it and tuck it under the dash.
I pulled the soft top out today. To hell with convertibles! I need to put those push-in things back in to tighten it up. Before I do I'm going to talk with my aunt about making a custom carpet to get rid of those factory cuts. She has a fancy *** computer controlled sewing machine.
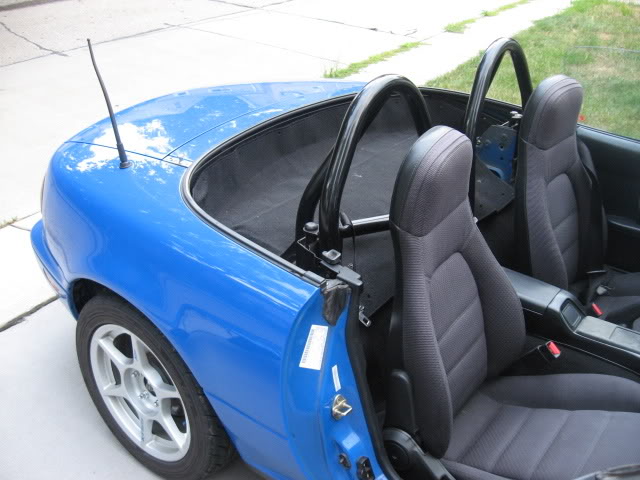
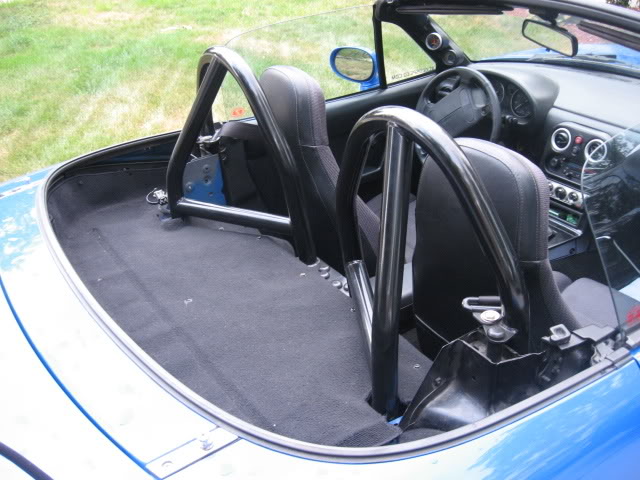
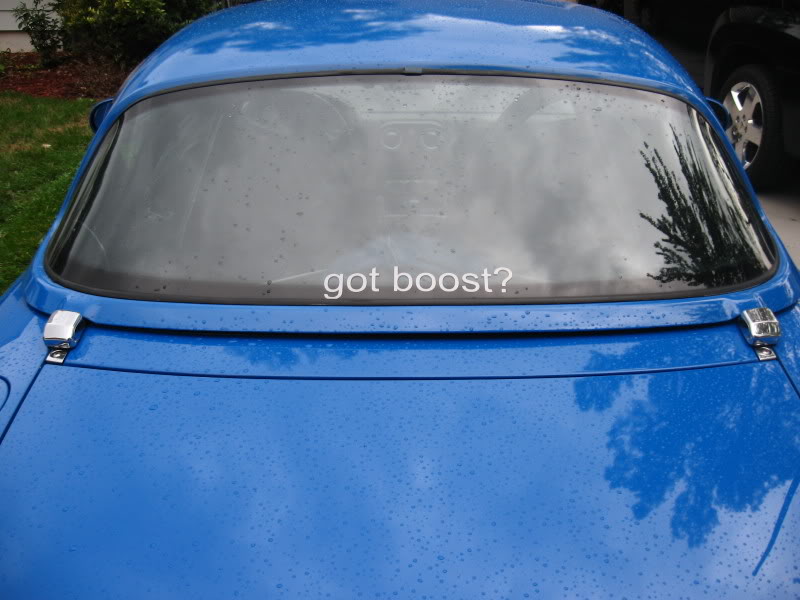
Picture of the rear tray from outside the hardtop glass. Much more space for jackets and crap.
Picture of the Escort GT TB installed. I did notice the throttle cable wheel is a few degrees different. I simply swapped all external parts of the Miata one onto the body of the GT one. Problem solved.
Picture of my emergency power outlet add-on. The laptop battery kept dying so it was off to Harbor Freight for an inverter. My stock lighter is replaced with a starter button, so I had to ghetto wire this in. I'm going to rewire it and tuck it under the dash.
I pulled the soft top out today. To hell with convertibles! I need to put those push-in things back in to tighten it up. Before I do I'm going to talk with my aunt about making a custom carpet to get rid of those factory cuts. She has a fancy *** computer controlled sewing machine.
Picture of the rear tray from outside the hardtop glass. Much more space for jackets and crap.
Reply
0
0
08-13-2008, 11:37 PM
#23
Elite Member
iTrader: (1)

Join Date: Jun 2007
Location: VA, Germany, Afghanistan
Posts: 2,945
Total Cats: 3
I pulled the soft top out today. To hell with convertibles! I need to put those push-in things back in to tighten it up. Before I do I'm going to talk with my aunt about making a custom carpet to get rid of those factory cuts. She has a fancy *** computer controlled sewing machine.
Reply
0
0
08-13-2008, 11:47 PM
#24
Senior Member
Thread Starter
iTrader: (1)
Join Date: Feb 2006
Location: Detroit
Posts: 1,234
Total Cats: 0
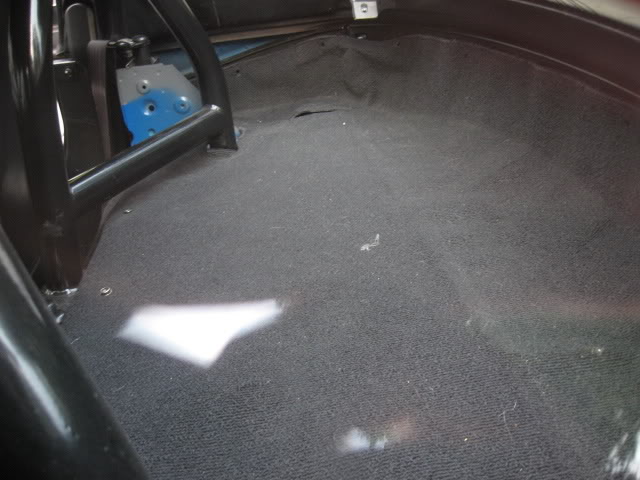
Pulling mine was a no brainer. My soft top was too small and wouldn't close anyway, useless. I never take off the hardtop anyway. The last time I did was because my g/f wanted it off while we went to get ice cream.
I pulled the carpet at first. The fuel pump drove me CRAZY. That is the only sound deadening material left in the car.
I pulled the carpet at first. The fuel pump drove me CRAZY. That is the only sound deadening material left in the car.
Reply
0
0
 08-14-2008, 11:51 PM
#26
Senior Member
Thread Starter
iTrader: (1)
Join Date: Feb 2006
Location: Detroit
Posts: 1,234
Total Cats: 0
Refer to this thread for more info/pictures.
https://www.miataturbo.net/forum/sho...t=escort+gt+tb
Reply
0
0
 08-22-2008, 12:48 AM
#28
Senior Member
Thread Starter
iTrader: (1)
Join Date: Feb 2006
Location: Detroit
Posts: 1,234
Total Cats: 0
Some minor progress. I would have more done but school projects are kicking in.
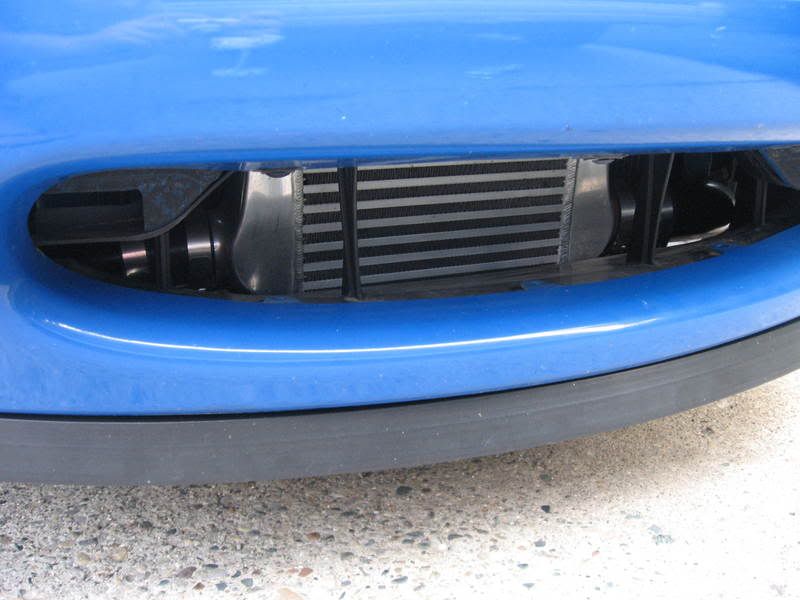
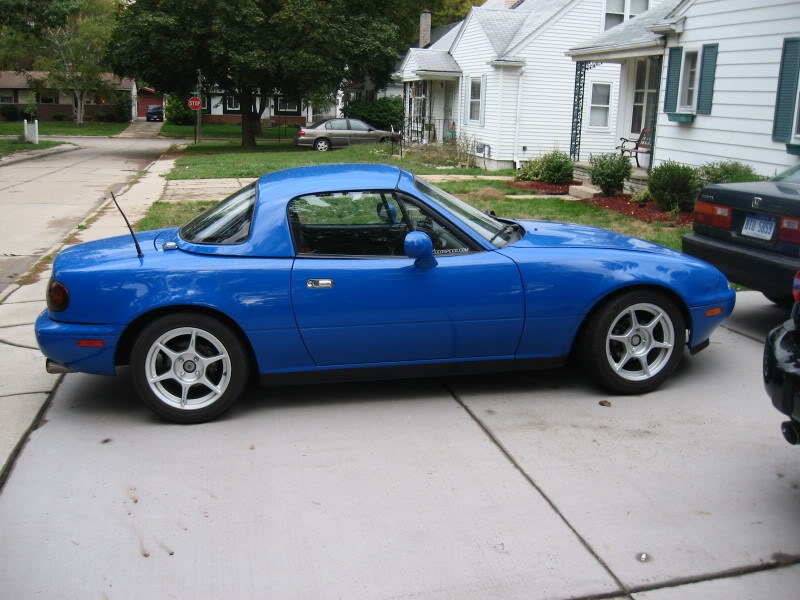
First I added a home depot lip. I would love to have an R lip. I mocked it up in cardboard and drove up my driveway and over the speed bumps at school and found that it would scrape pretty bad. I wouldn't care if it was a $50 lip, but not when it's close to $200. Better than nothing I guess. I scrape this thing on my driveway as it is.
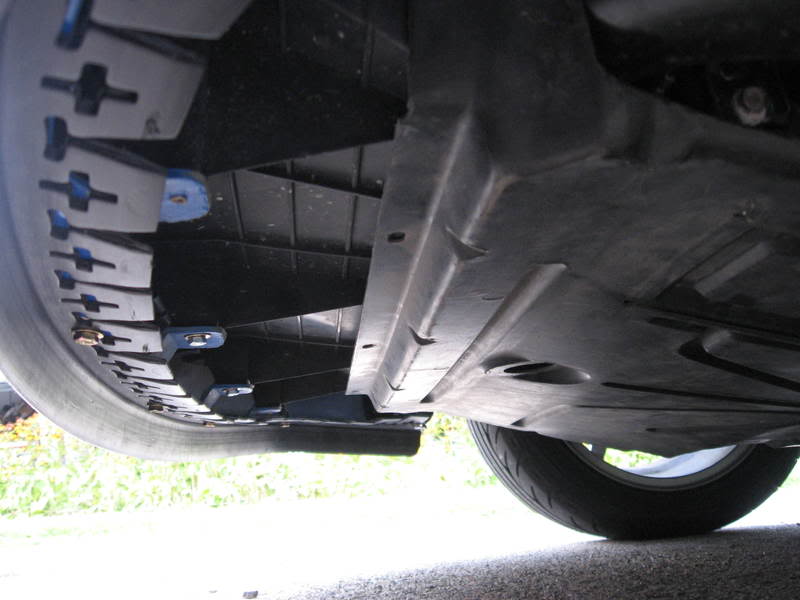
Next I put my undertray and radiator shroud back on. I took this off a year ago and have been dying to put it back on. I want to clean up the edges a bit still. It made a HUGE difference in underhood temps. I didn't have any overheating issues before, but it's a hell of a lot cooler in there now.
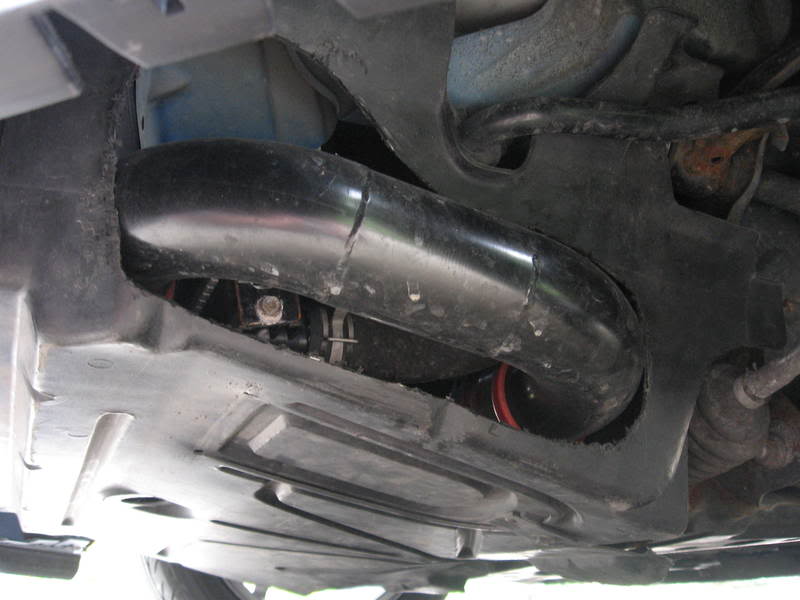
The front shroud required no trimming to fit under my intercooler. I know the little triangle thingies look like ****, I'll trim them all off one day.
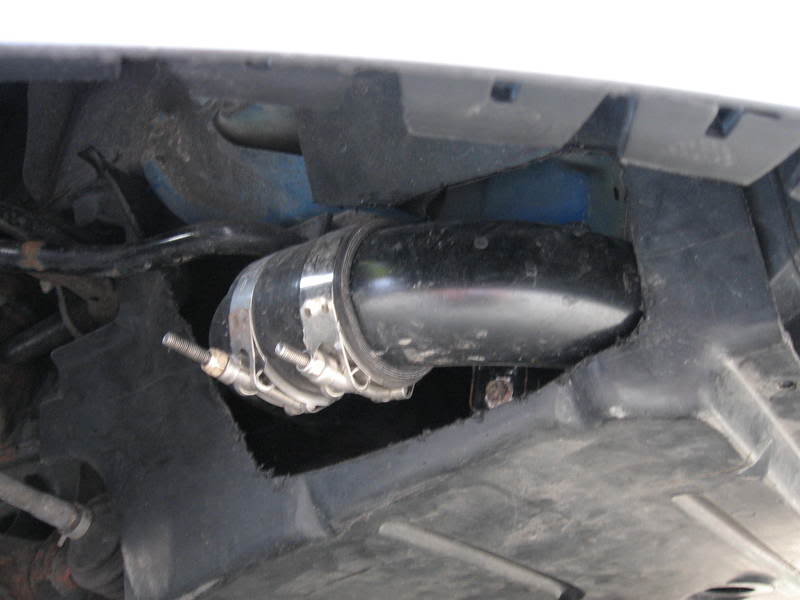
My filter is still on the turbo, sucking in that hot air off the manifold. Hopefully this weekend I can clock the turbo down and trim up the pipes to make it fit. Then I want to build an iso box and put in a naca lid. I also need to make the radiator cover plate. I have a 3'x5' sheet of aluminum to work with.
First I added a home depot lip. I would love to have an R lip. I mocked it up in cardboard and drove up my driveway and over the speed bumps at school and found that it would scrape pretty bad. I wouldn't care if it was a $50 lip, but not when it's close to $200. Better than nothing I guess. I scrape this thing on my driveway as it is.
Next I put my undertray and radiator shroud back on. I took this off a year ago and have been dying to put it back on. I want to clean up the edges a bit still. It made a HUGE difference in underhood temps. I didn't have any overheating issues before, but it's a hell of a lot cooler in there now.
The front shroud required no trimming to fit under my intercooler. I know the little triangle thingies look like ****, I'll trim them all off one day.
My filter is still on the turbo, sucking in that hot air off the manifold. Hopefully this weekend I can clock the turbo down and trim up the pipes to make it fit. Then I want to build an iso box and put in a naca lid. I also need to make the radiator cover plate. I have a 3'x5' sheet of aluminum to work with.
Reply
0
0
09-11-2008, 07:58 PM
#29
Senior Member
Thread Starter
iTrader: (1)
Join Date: Feb 2006
Location: Detroit
Posts: 1,234
Total Cats: 0
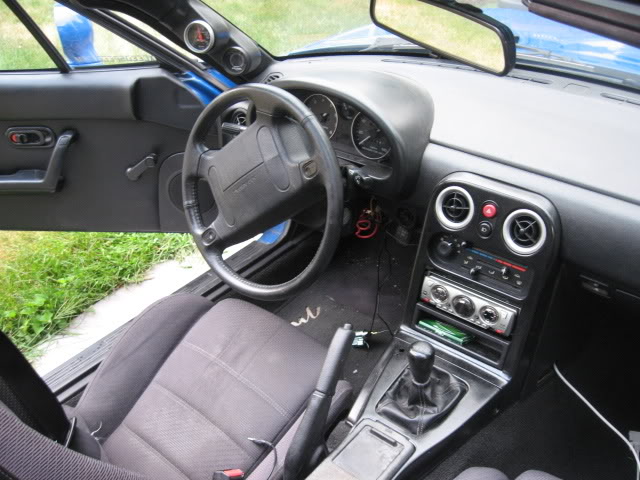
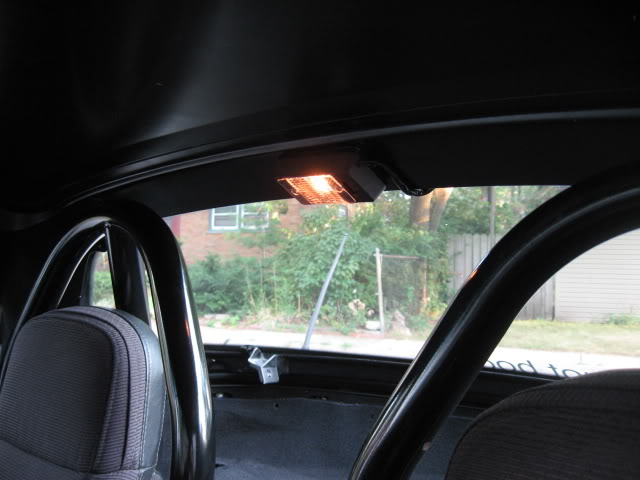
I have been dying to do this ever since I got my hardtop. A dome light! I wish I could have found a better light, but this was the only clear one any of the stores had. I was going to try and fish the wires through the top, but just pulling on the wires made the top start cracking so screw that. I wedged the wires between the glass and the seal. Looks fine, it's not like anyone looks up and back anyway.
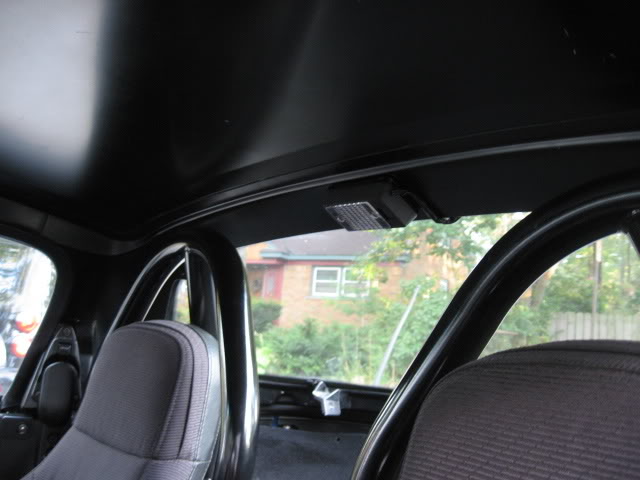
This is during the day time. I'll get a picture tonight in the dark.
I wired in this switch to turn on all the lights at once. No more trying to find **** in the dark, one switch and 3 lights.
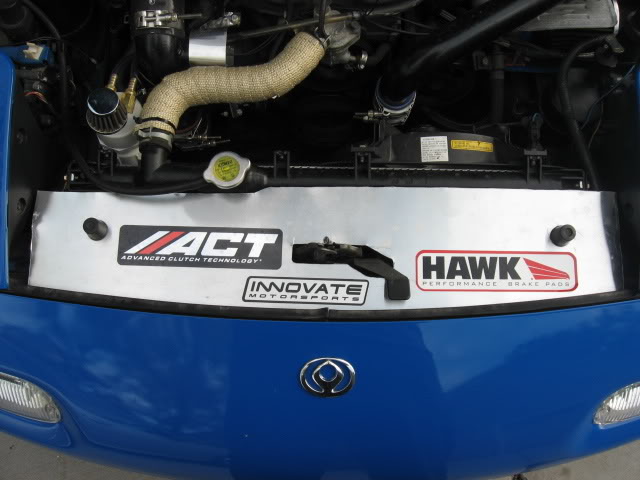
My homemade rad cover. I need to cut out a notch for the hood latch still. Going to flatten the edges on an anvil then run some piping around the edges to clean it up.
My old clutch. Slipped just a little bit. Replaced it with an ACT XTMM which so far has been great.
This is during the day time. I'll get a picture tonight in the dark.
I wired in this switch to turn on all the lights at once. No more trying to find **** in the dark, one switch and 3 lights.
My homemade rad cover. I need to cut out a notch for the hood latch still. Going to flatten the edges on an anvil then run some piping around the edges to clean it up.
My old clutch. Slipped just a little bit. Replaced it with an ACT XTMM which so far has been great.
Reply
0
0
09-11-2008, 08:10 PM
#30
Elite Member
iTrader: (1)
Join Date: Jun 2007
Location: VA, Germany, Afghanistan
Posts: 2,945
Total Cats: 3
That the boss frog double hoop bar? I was planning on getting one but seeing how close the seats are too it i'm not sure my procars would even fit with the bar.... ****.
Reply
0
0
09-11-2008, 09:10 PM
#31
Senior Member
Thread Starter
iTrader: (1)
Join Date: Feb 2006
Location: Detroit
Posts: 1,234
Total Cats: 0
It is a Boss frog. The seats are reclined all the way back so I could get behind it to wire the light in. Not sure if that is the best picture to look at for clearance.
Reply
0
0
09-27-2008, 01:36 AM
#32
Senior Member
Thread Starter
iTrader: (1)
Join Date: Feb 2006
Location: Detroit
Posts: 1,234
Total Cats: 0
Time for a turbo related update. I started by relocating the power steering components to the junk pile. When I pulled out my JRSC I never put the belt back on, so it hasn't worked in a while.
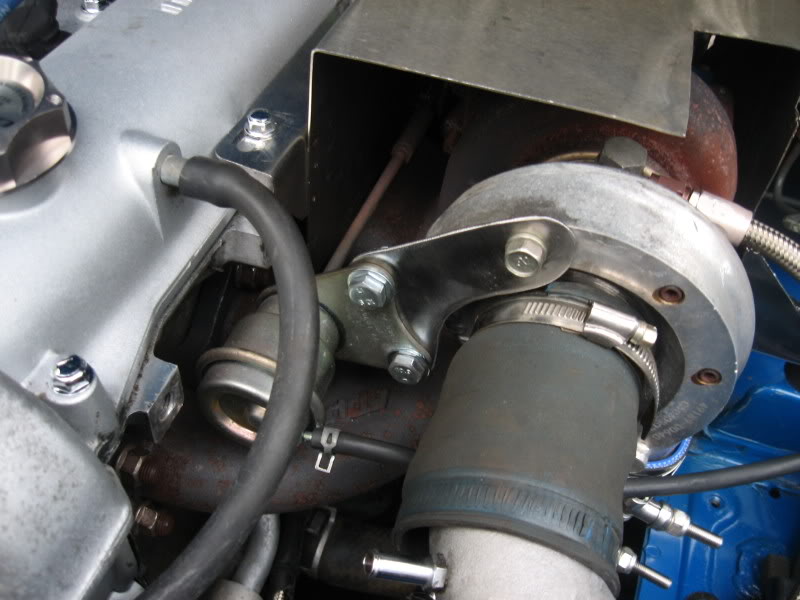
The best part of pulling all that crap out is the room it leaves behind. So I decided to clock the turbo down. Since I ate up most of my budget already I made a goal to simply reconfigure my stripes pipes kit. After hacking up the pipes I needed nothing extra to clock them. I cut off about 14" of piping. Not the best route ever, but not bad considering it was free. The whole project took 4 hours.
The bay is a complete ******* mess. I keep changing everything around and nothing has a permanent spot. I'm going to start working on cleaning it all up now. Everything could use a good washing.
The wastegate bracket is temp. The metal I had intended to use was too thick for my cut off tool. Will fix it tomorrow. A new intake elbow and filter are coming sometime next week.
I basically turned it into an "S" curve. Now that I have the space I'm going to trim my drain and feed lines.
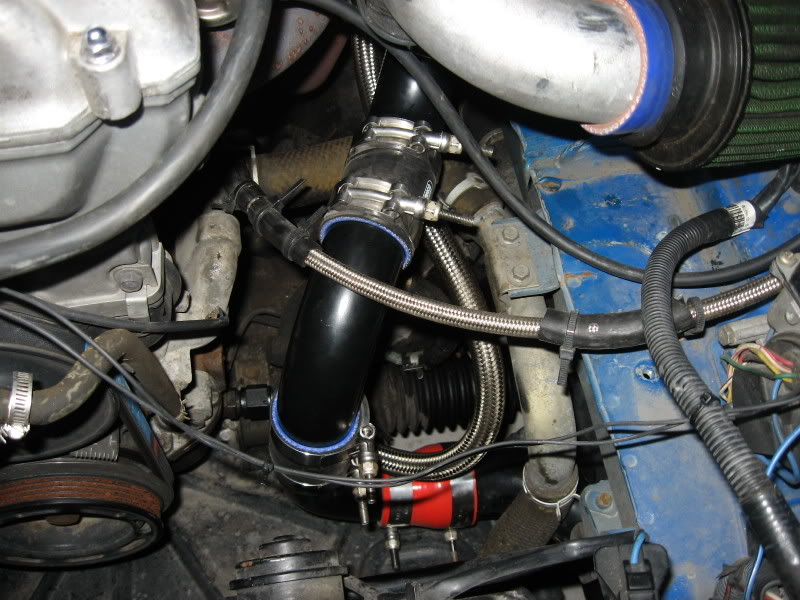
Once my new intake elbow and filter get here I'm going to build an iso box and add in a NACA duct.

I did run into a problem though. I hit boost cut WAY too fast now. I'm pretty sure my wastegate bracket is in the same location as it was before. I can extent the rod a bit to adjust it back down right? Is it normal to have to adjust it afterward?
The best part of pulling all that crap out is the room it leaves behind. So I decided to clock the turbo down. Since I ate up most of my budget already I made a goal to simply reconfigure my stripes pipes kit. After hacking up the pipes I needed nothing extra to clock them. I cut off about 14" of piping. Not the best route ever, but not bad considering it was free. The whole project took 4 hours.
The bay is a complete ******* mess. I keep changing everything around and nothing has a permanent spot. I'm going to start working on cleaning it all up now. Everything could use a good washing.
The wastegate bracket is temp. The metal I had intended to use was too thick for my cut off tool. Will fix it tomorrow. A new intake elbow and filter are coming sometime next week.
I basically turned it into an "S" curve. Now that I have the space I'm going to trim my drain and feed lines.
Once my new intake elbow and filter get here I'm going to build an iso box and add in a NACA duct.
I did run into a problem though. I hit boost cut WAY too fast now. I'm pretty sure my wastegate bracket is in the same location as it was before. I can extent the rod a bit to adjust it back down right? Is it normal to have to adjust it afterward?
Reply
0
0
09-27-2008, 01:41 AM
#33
Senior Member
Thread Starter
iTrader: (1)
Join Date: Feb 2006
Location: Detroit
Posts: 1,234
Total Cats: 0
Nevermind, I see why the wastegate is off. The bracket added some length to it. I thought I had bolted the wastegate behind the bracket. I'll adjust it tomorrow after I build the proper bracket.
Reply
0
0

 09-27-2008, 11:24 AM
#35

Very nice dude. I wish there was a way I could put a undertray back in my car with the Bomex bumper. The dome lights and the center switch to turn them all on is dope, I love that. I'm reading up now on the escort GT tb swap that you linked. I think.....I might need to try and do that.
Keep up the good work man!
Vash-
Keep up the good work man!
Vash-
Reply
0
0
09-27-2008, 05:15 PM
#36
Senior Member
Thread Starter
iTrader: (1)
Join Date: Feb 2006
Location: Detroit
Posts: 1,234
Total Cats: 0
Thanks. I LOVE the dome light and switch. The GT TB swap is really easy.
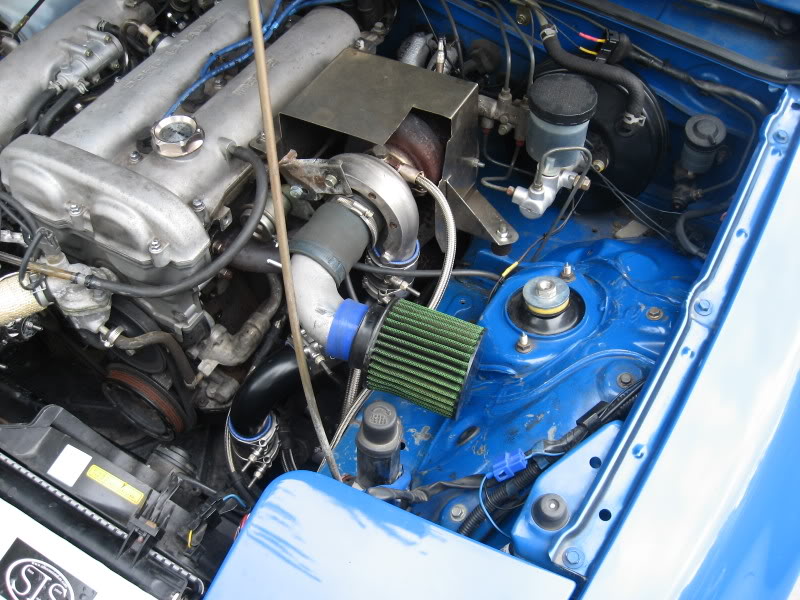
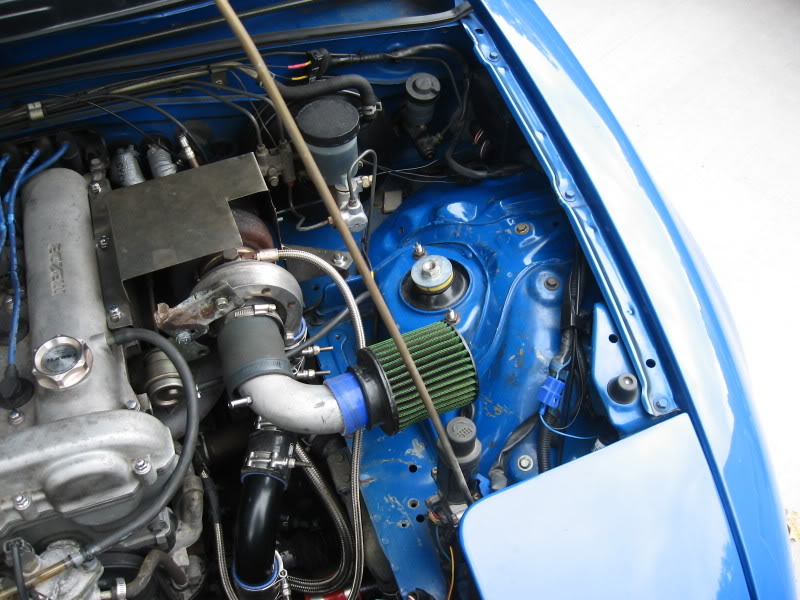
Spent the day tucking away everything I could on the drivers side. I didn't cut any wiring and the fender stayed on. I also relocated my EBC. You can see how chipped up the paint is from the stupid greddy intake setup. I'll have to respray the fender eventually.
I tried to cut my feed line down but the AN fitting wouldn't come off. I'm going to get a new one on Monday and cut it down.
EBC tucked away.
A good overview. I just went and picked up some simple green, time to wash it out.
Reply
0
0
09-29-2008, 02:29 AM
#37
Senior Member
Thread Starter
iTrader: (1)
Join Date: Feb 2006
Location: Detroit
Posts: 1,234
Total Cats: 0
I took it out for a drive today. The turbo spools 1-200 rpm faster now. Throttle response is also a little bit better, especially at high rpm. I also washed out the engine bay. Sprayed some simple green all over, waited 10 minutes, hit it with the power washer and then dried it with the leaf blower. It looks CLEAN finally. I washed and clay bared and waxed the whole car too. I'll be doing a small photo shoot tomorrow.
Reply
0
0
09-30-2008, 07:38 PM
#38
Senior Member
Thread Starter
iTrader: (1)
Join Date: Feb 2006
Location: Detroit
Posts: 1,234
Total Cats: 0
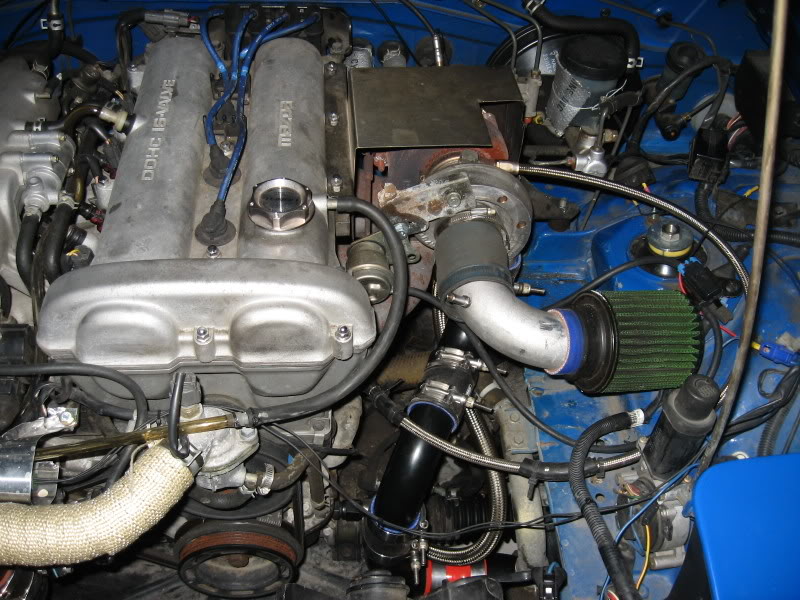
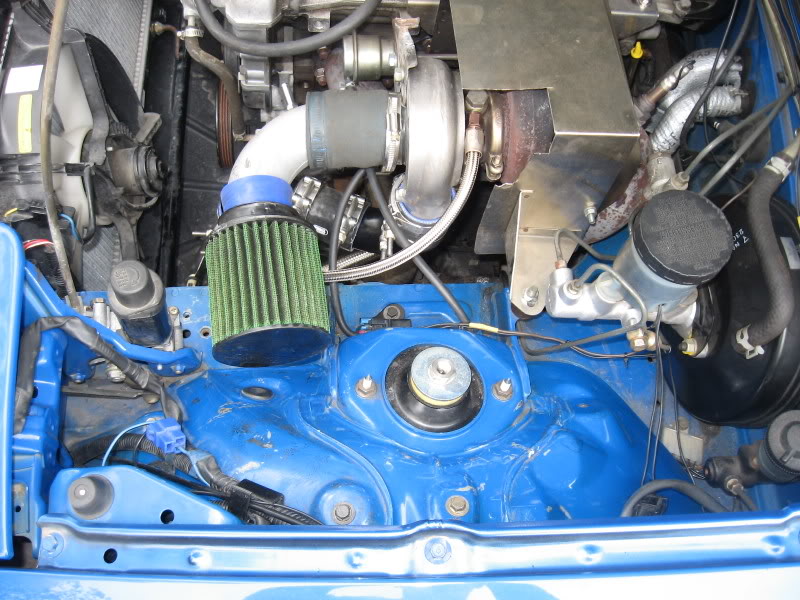
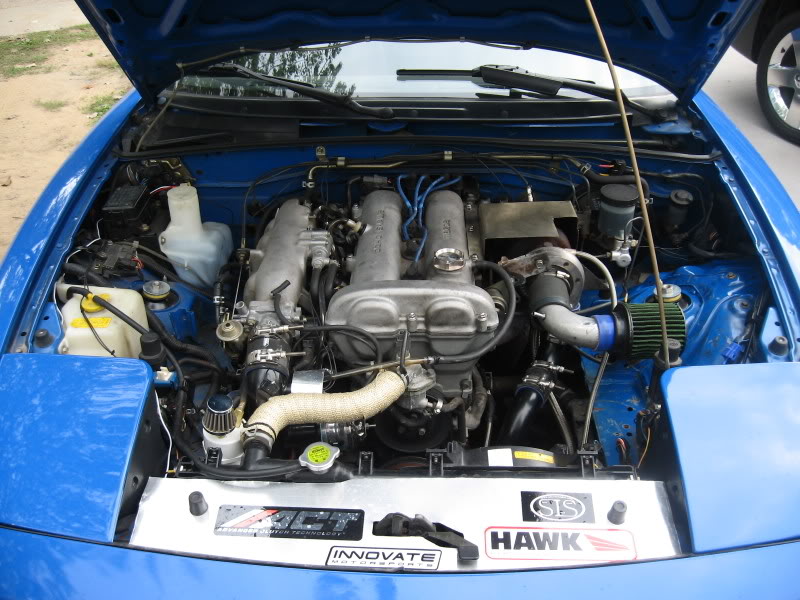
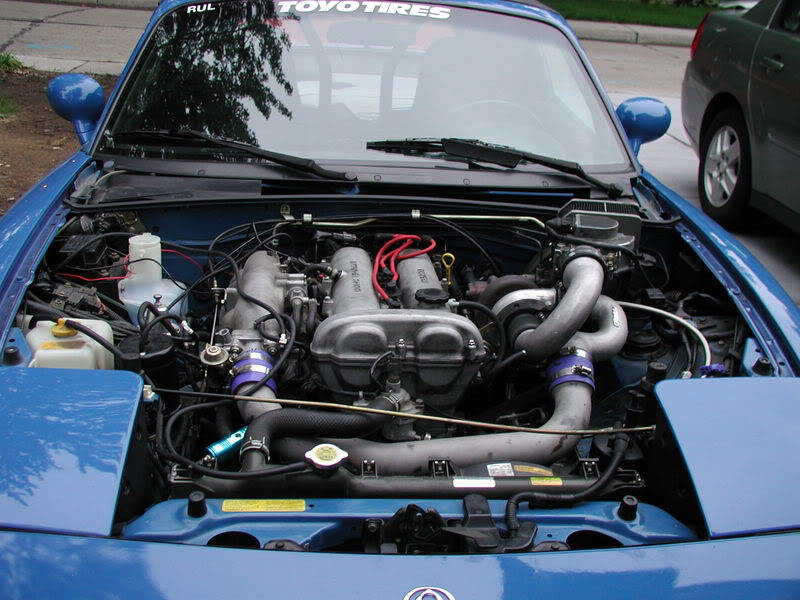
The rain won't let up, but I took some pics anyway. Here is the engine bay after the simple green. HUGE difference.
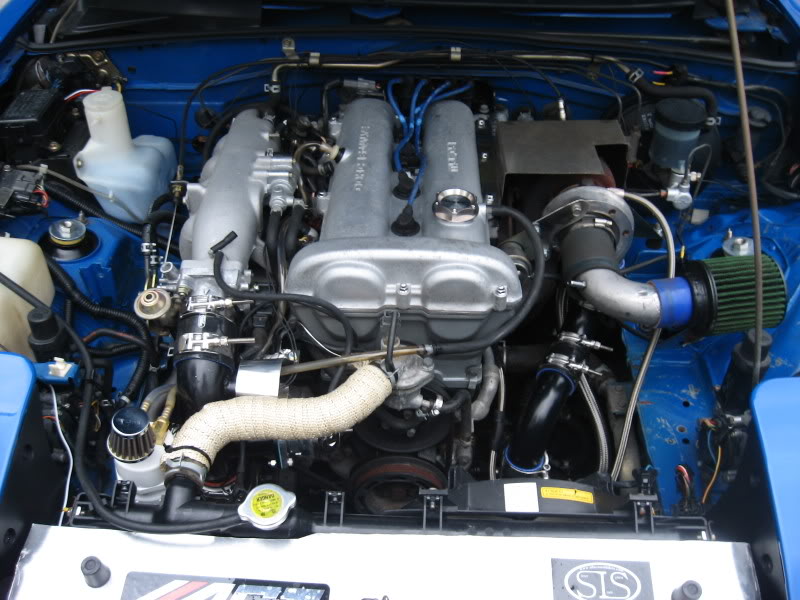
The metal was just too much for all my cut off tools. Took it to work and used an air nibbler, easy. I'm going to reshape the turbo end, looks kinda weird. I think my wastegate was loose, now that I adjusted it the car pulls harder.
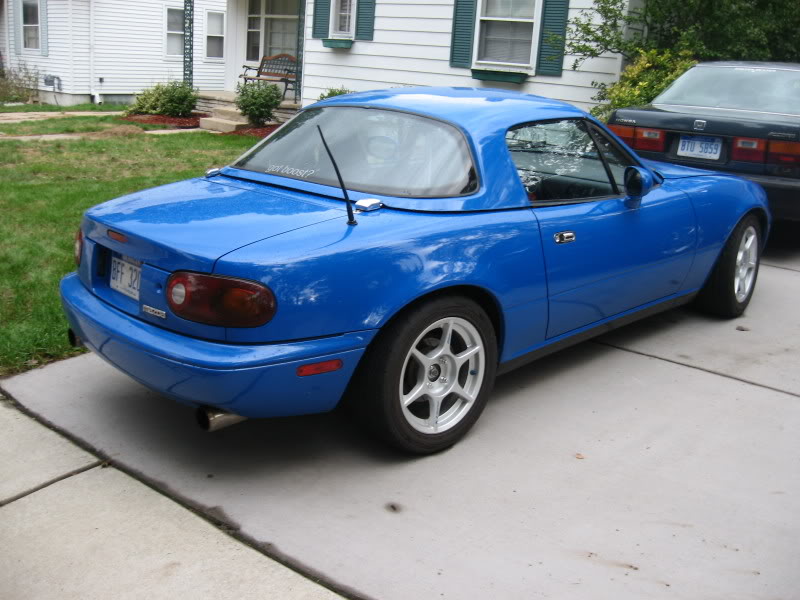
Some pictures of it after the cleaning. It finally looks like I wanted it to. I added some projector fog lights but I haven't had a chance to get any pictures of them yet.
Simple question.
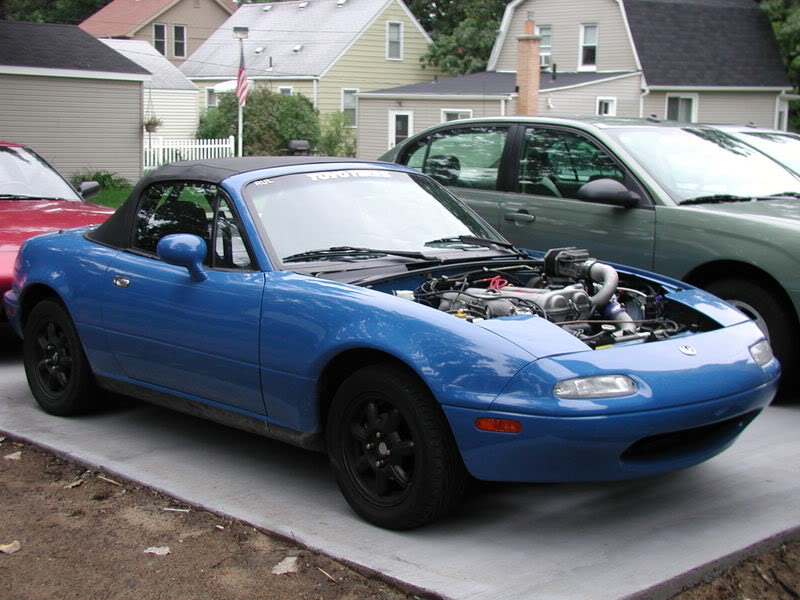
It sure has come a long way. Here it is the first day it was turbo. I should have just run it without a filter, but I was too excited to think I guess.
The metal was just too much for all my cut off tools. Took it to work and used an air nibbler, easy. I'm going to reshape the turbo end, looks kinda weird. I think my wastegate was loose, now that I adjusted it the car pulls harder.
Some pictures of it after the cleaning. It finally looks like I wanted it to. I added some projector fog lights but I haven't had a chance to get any pictures of them yet.
Simple question.
It sure has come a long way. Here it is the first day it was turbo. I should have just run it without a filter, but I was too excited to think I guess.
Reply
0
0


