Windshield replacement, or, how not to paint a car.
 09-29-2012, 03:00 PM
#21
Boost Pope


Thread Starter
iTrader: (8)
Join Date: Sep 2005
Location: Chicago. (The less-murder part.)
Posts: 33,027
Total Cats: 6,593
Well, after striking out with all the chain shops, I finally found a little hole-in-the-wall place in San Marcos run by a couple of guys who could barely speak English (they sounded Syrian perhaps, or maybe Lebanese?) They managed to locate a windshield all the way up in Irvine which is damn near indistinguishable from OEM; clear and un-shaded. (I've learned in my recent queries that "shade" is industry lingo for "annoying green stripe at top of windshield.") No obvious visual distortions that I've noticed, either.
Just had it put in for $198 OTD including molding, and they did a perfectly decent job. It's amazing how much a simple thing like replacing a sand-blasted 22 year old piece of glass can make the car feel new again. I think I also picked up an extra 5 HP.
Just had it put in for $198 OTD including molding, and they did a perfectly decent job. It's amazing how much a simple thing like replacing a sand-blasted 22 year old piece of glass can make the car feel new again. I think I also picked up an extra 5 HP.

Reply
 0
0

0


 10-01-2012, 10:55 AM
#24
Boost Pope
Thread Starter
iTrader: (8)
Join Date: Sep 2005
Location: Chicago. (The less-murder part.)
Posts: 33,027
Total Cats: 6,593
It really is amazing what a difference it makes. I wasn't kidding about it seeming like a new car. See for yourself.
Old windshield:
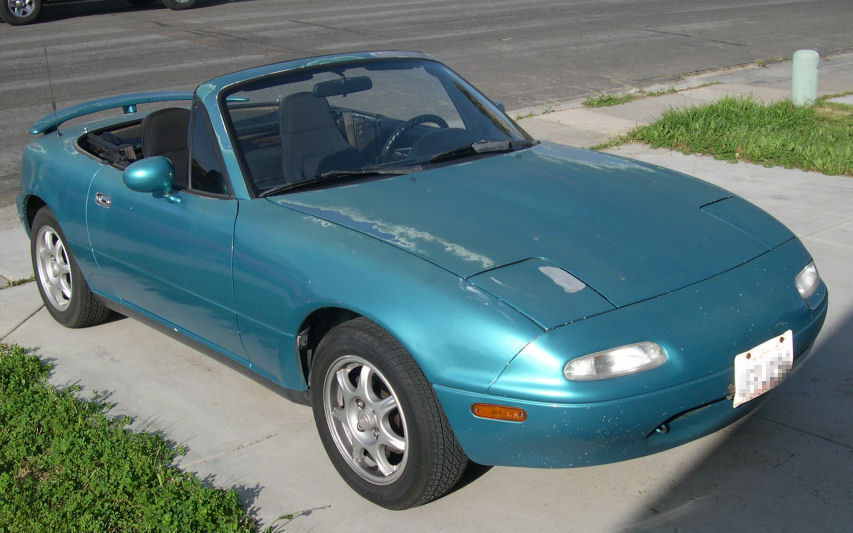
New windshield:
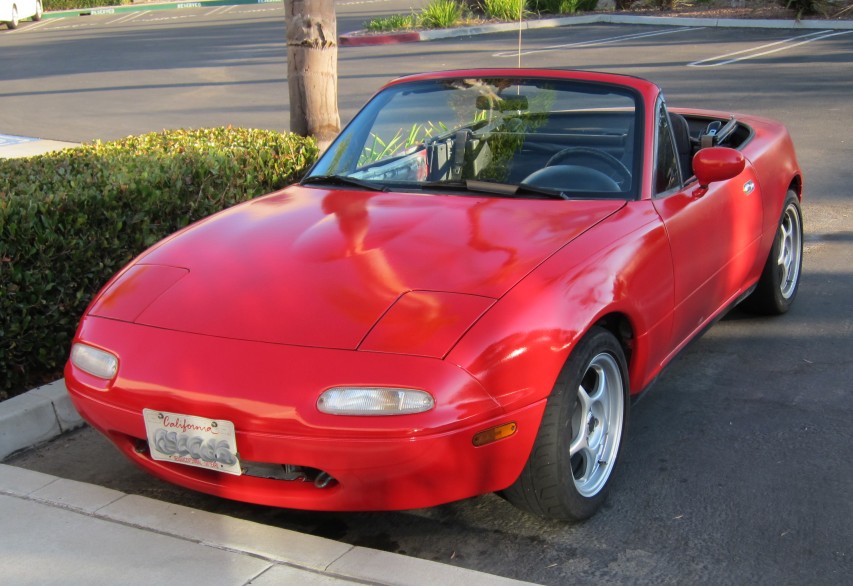
Old windshield:
New windshield:
Reply
0
0
10-01-2012, 01:13 PM
#28
Boost Pope
Thread Starter
iTrader: (8)
Join Date: Sep 2005
Location: Chicago. (The less-murder part.)
Posts: 33,027
Total Cats: 6,593
Ok, then.
The short answer is no, I did not do a roller-job. The longer answer is:
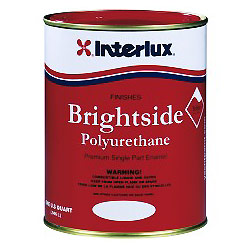
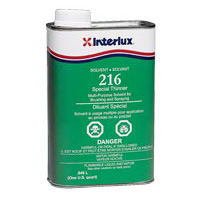
To start with, I spent some time perusing both the "cheap paintjob" threads here and on the web in general. The overall consensus seemed to be that the Interlux Brightside yacht enamel was the present-day paint of choice. So I went down to the local West Marine and picked up a quart of Interlux Brightside in "Sapphire Blue" along with some "Special Thinner 216."
Since I wanted to do a complete re-covering of the vehicle (including the door jambs and all the other little nooks and crannies), and since I already have a compressor, I opted to spray rather than roll. So I picked up a cheap little gun from Harbor Freight that seemed to have decent reviews. Cheap paint, cheap gun:
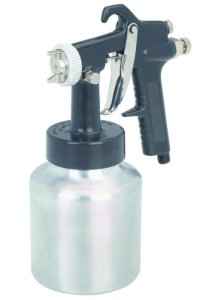
Household Low Volume, Low Pressure Spray Gun
So, with all the tools in-hand, I set into prepping the car. I decided to start with the driver's rear fender, as it seemed to be in the worst shape- it was visibly bondoed and bubbling around the area of the fuel filler. Turns out that the damage on that panel was worse than expected. I literally have no idea what happened to it years ago, but here's what it looked like halfway through the grinding:
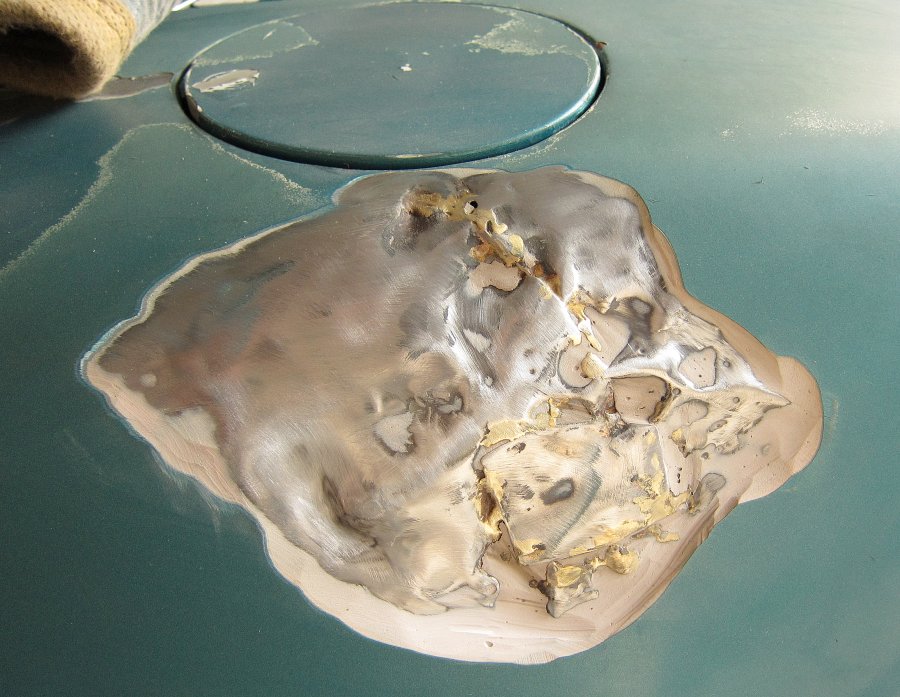
See how thick that Bondo is? And those holes in the metal... It looks like someone attacked the panel with a fire axe, and then tried to repair it with a stick welder.
I'll note here that the paint on the car was in exceedingly rotten shape- it was literally peeling / flaking off right down to the primer in some places. You can see a few such spots on the photo above, but it was like this across the whole car. It was like the vehicle had leprosy.
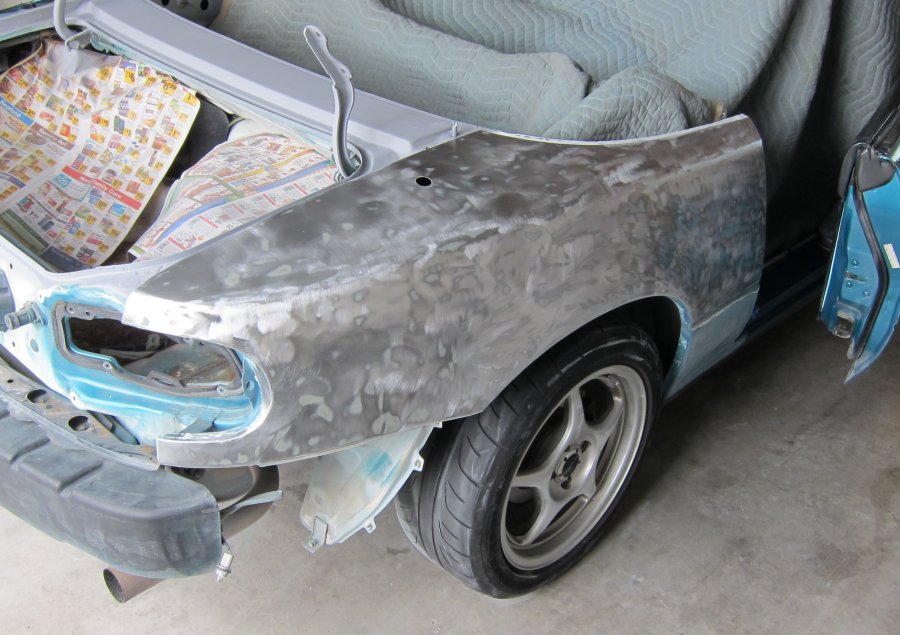
So I really had no choice but to sand all the way down to bare metal in order to get a smooth surface to work with. I decided to do the car in sections, starting with the rear-third first (both fenders, trunklid, bumper, etc., including the rocker panels and door jambs.) As it turns out, the left rear fender wasn't the only interesting panel. Literally every single piece of sheet metal on the car wound up having damage and bondo on it, with the exception of the right rear fender. The trunk lid, in particular, was a real treat. The *entire* top surface of it was bondo, hiding the fact that in addition to the stupid-looking wing which was held in place with a couple of sheet-metal screws, it had once been home to a luggage rack. This was the ONLY undamaged part of the car:
(edit: and the headlight covers. There was no Bondo on them.)
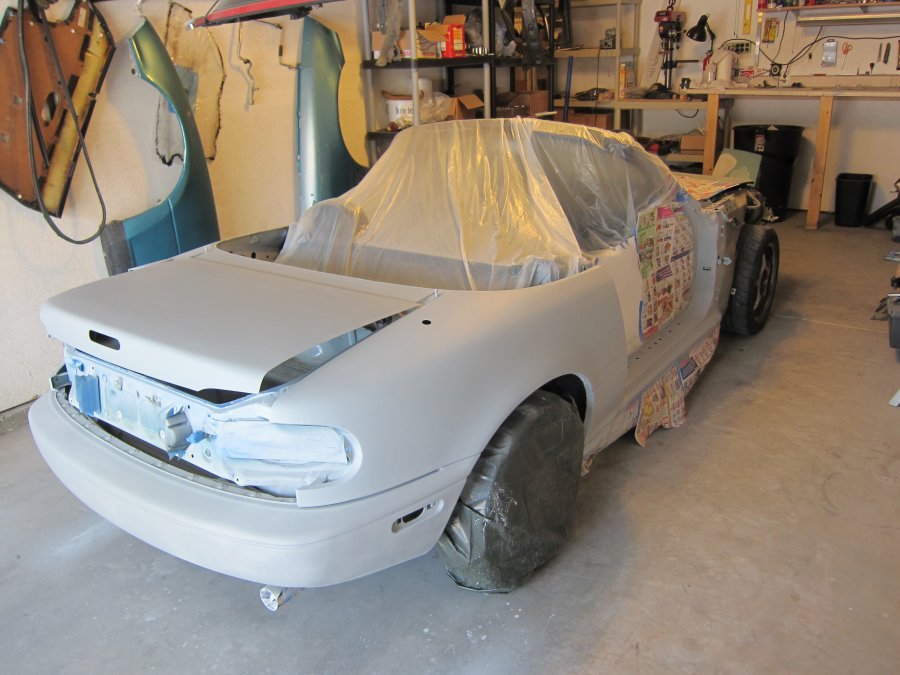
Much, MUCH sweat and work later, the hindquarters were ready for paint:
The Brightside enamel went on quite easily, and laid down into a finish that, while not mirror-flat, was close enough that I felt I could live with it. There was just one little problem with it: the damn stuff never hardened.
Now, I followed the directions to a tee. Y'all know me, and I'm pretty meticulous about things like directions. And yet even after a MONTH of cure time, the paint was still soft enough that I could easily scratch it with my thumbnail:

Well, crap. Time to re-sand and re-prime the ENTIRE back end.
When suddenly, TUBES!
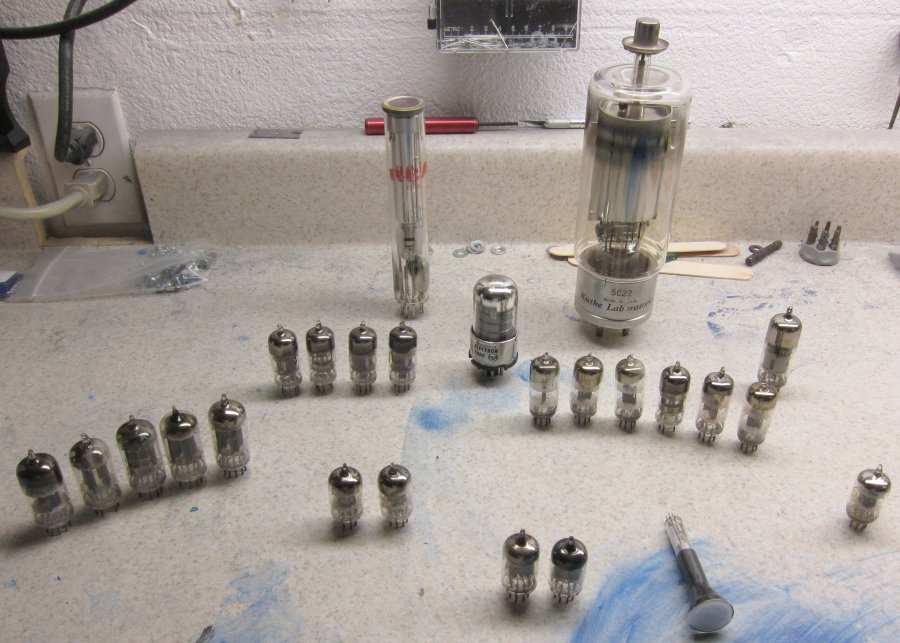
(Ok, there was absolutely no relevance to that. I just happened to have a picture on my camera of a bunch of old vacuum tubes spread out on my workbench in the garage from the same general timeframe as the painting pictures.)
Next, I decided to try a paint which was actually intended for use on cars. My local Kragen happened to carry a Dupli-Color basecoat / clearcoat paint system called "Paint Shop" which comes in 1qt cans, pre-thinned and ready to spray. So I picked up a can of each and decided to give that a shot.
Not wanting a repeat performance, I wisely decided to try a small panel first. Here's the rear trim panel:
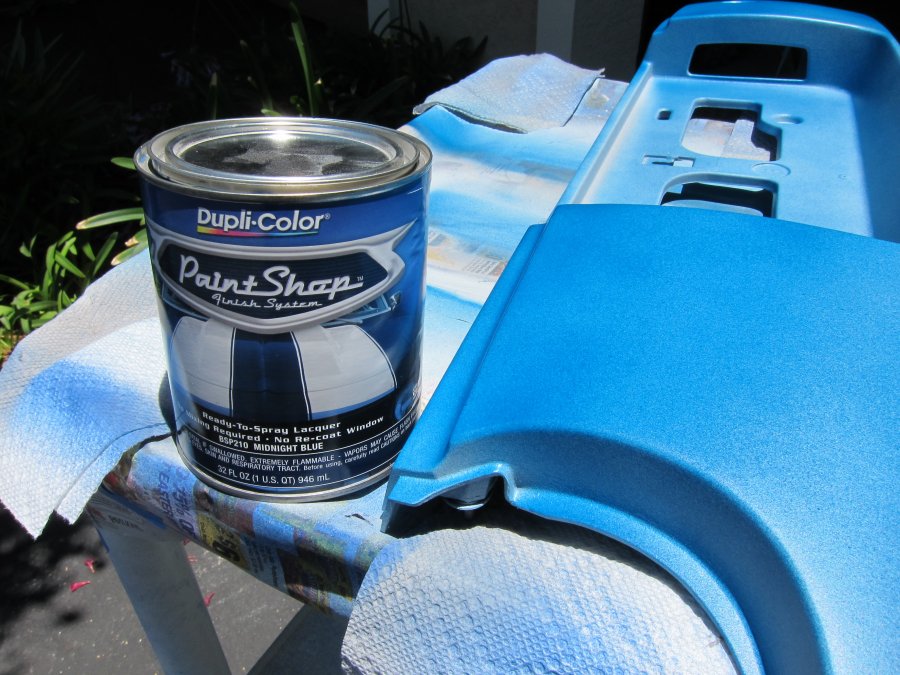
Now, in that image it actually looks pretty good. Trust me, it's camera trickery. The paint which they advertized as "Midnight Blue" actually came out looking like "dark aquamarine" in real life. I mean it was truly hideous. And, like the Interlux, it too proved to be extremely delicate and damage-prone.
At this point, I do something I should have done a long time ago: I start seriously reading about paint. Turns out that for automotive purposes, uncatalyzed paints in general are just garbage. And laquers (such as the Duplicolor) are the worst of the lot. A lot of folks on the various paint / custom forums are saying "You know, you can actually buy a proper catalyzed acrylic enamel for *less money* than you'd spend on that other crap, and it'll work much better."
Turns out that they're right, too. For $80 (plus shipping) you can get a kit containing a gallon of acrylic enamel plus the appropriate reducer and hardener from these folks. So I did that.

Ok, paint job #3. Since this time I am working with "big boy" paint which has to be mixed in batches that have a working life measured in hours, I decided to just go ahead and re-spray the whole rear third, lest I waste a bunch of paint. Not bad, but it turns out that this paint is less forgiving than the stuff I'd been using previously, as it flashes nearly instantaneously. IOW, when the directions say you need to lay down a "full wet coat", they mean it. My crappy little HF gun wasn't cutting it, and leaving me with a sort of sandpaper-like finish. Not to mention that the design of the cup meant I was wasting a lot of paint, as I always wound up sucking air with the cup still 1/3 full.
So junk that, and buy yet another cheap HF gun:
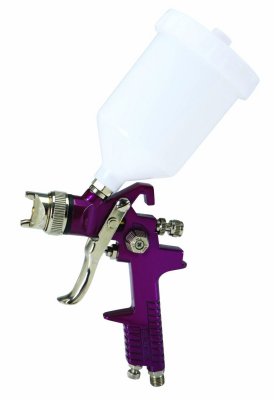
Gravity Feed Spray Gun - 20 Oz. HVLP
This one actually turned out to work really well. Reading the reviews told me everything I needed to know about it. Before use, you need to totally dismantle it, de-burr every single component to get rid of all the little flakes of metal that it will otherwise shed in use, and really clean the dickens out of it to remove every last molecule of the grease that they pack all of its internal workings with. Then open the air needle all the way, open the pattern control about 1/4 of the way, and set the mixture control to about 50%.
I decided that I was getting tired of the car being two different colors, so I decided to go ahead and do the front half with the new gun, and then come back and re-finish the back half later. This time it turned out pretty well. The new gun is really quite easy to use, and let me lay down a decent finish on the first pass. It's not mirror-smooth, but it's definitely shiny. Enough that I'll probably just leave well enough alone and not bother with wet-sanding and polishing. I may have to wet-sand the back end a bit before I re-spray it, but that shouldn't be too hard.
So, in the end, it took a hell of a lot longer than I expected, and cost slightly more. I didn't keep track of all the receipts, but total cost was probably somewhere in the $400 range. Would have been half that had I not screwed around wasting money on two paint systems that didn't work (plus all the extra sanding discs and primer associated with getting them back off and re-prepping).
I also learned a valuable lesson. There's a reason that body shops charge a lot for a decent paint job.
Which brings up a question. When you look at the OEM finish on a new car, it is, in fact, mirror-flat and smooth. It might not be "you can shave in the reflection" shiny, but it's at least flat. No orange-peel at all. How in the hell do the OEMs do that? I cannot imagine that Hyundai is taking the time to wet-sand and polish the paint on an $8,000 car, and yet its finish looks perfect.
The short answer is no, I did not do a roller-job. The longer answer is:
To start with, I spent some time perusing both the "cheap paintjob" threads here and on the web in general. The overall consensus seemed to be that the Interlux Brightside yacht enamel was the present-day paint of choice. So I went down to the local West Marine and picked up a quart of Interlux Brightside in "Sapphire Blue" along with some "Special Thinner 216."
Since I wanted to do a complete re-covering of the vehicle (including the door jambs and all the other little nooks and crannies), and since I already have a compressor, I opted to spray rather than roll. So I picked up a cheap little gun from Harbor Freight that seemed to have decent reviews. Cheap paint, cheap gun:
Household Low Volume, Low Pressure Spray Gun
So, with all the tools in-hand, I set into prepping the car. I decided to start with the driver's rear fender, as it seemed to be in the worst shape- it was visibly bondoed and bubbling around the area of the fuel filler. Turns out that the damage on that panel was worse than expected. I literally have no idea what happened to it years ago, but here's what it looked like halfway through the grinding:
See how thick that Bondo is? And those holes in the metal... It looks like someone attacked the panel with a fire axe, and then tried to repair it with a stick welder.
I'll note here that the paint on the car was in exceedingly rotten shape- it was literally peeling / flaking off right down to the primer in some places. You can see a few such spots on the photo above, but it was like this across the whole car. It was like the vehicle had leprosy.
So I really had no choice but to sand all the way down to bare metal in order to get a smooth surface to work with. I decided to do the car in sections, starting with the rear-third first (both fenders, trunklid, bumper, etc., including the rocker panels and door jambs.) As it turns out, the left rear fender wasn't the only interesting panel. Literally every single piece of sheet metal on the car wound up having damage and bondo on it, with the exception of the right rear fender. The trunk lid, in particular, was a real treat. The *entire* top surface of it was bondo, hiding the fact that in addition to the stupid-looking wing which was held in place with a couple of sheet-metal screws, it had once been home to a luggage rack. This was the ONLY undamaged part of the car:
(edit: and the headlight covers. There was no Bondo on them.)
Much, MUCH sweat and work later, the hindquarters were ready for paint:
The Brightside enamel went on quite easily, and laid down into a finish that, while not mirror-flat, was close enough that I felt I could live with it. There was just one little problem with it: the damn stuff never hardened.
Now, I followed the directions to a tee. Y'all know me, and I'm pretty meticulous about things like directions. And yet even after a MONTH of cure time, the paint was still soft enough that I could easily scratch it with my thumbnail:
Well, crap. Time to re-sand and re-prime the ENTIRE back end.
When suddenly, TUBES!
(Ok, there was absolutely no relevance to that. I just happened to have a picture on my camera of a bunch of old vacuum tubes spread out on my workbench in the garage from the same general timeframe as the painting pictures.)
Next, I decided to try a paint which was actually intended for use on cars. My local Kragen happened to carry a Dupli-Color basecoat / clearcoat paint system called "Paint Shop" which comes in 1qt cans, pre-thinned and ready to spray. So I picked up a can of each and decided to give that a shot.
Not wanting a repeat performance, I wisely decided to try a small panel first. Here's the rear trim panel:
Now, in that image it actually looks pretty good. Trust me, it's camera trickery. The paint which they advertized as "Midnight Blue" actually came out looking like "dark aquamarine" in real life. I mean it was truly hideous. And, like the Interlux, it too proved to be extremely delicate and damage-prone.
At this point, I do something I should have done a long time ago: I start seriously reading about paint. Turns out that for automotive purposes, uncatalyzed paints in general are just garbage. And laquers (such as the Duplicolor) are the worst of the lot. A lot of folks on the various paint / custom forums are saying "You know, you can actually buy a proper catalyzed acrylic enamel for *less money* than you'd spend on that other crap, and it'll work much better."
Turns out that they're right, too. For $80 (plus shipping) you can get a kit containing a gallon of acrylic enamel plus the appropriate reducer and hardener from these folks. So I did that.
Ok, paint job #3. Since this time I am working with "big boy" paint which has to be mixed in batches that have a working life measured in hours, I decided to just go ahead and re-spray the whole rear third, lest I waste a bunch of paint. Not bad, but it turns out that this paint is less forgiving than the stuff I'd been using previously, as it flashes nearly instantaneously. IOW, when the directions say you need to lay down a "full wet coat", they mean it. My crappy little HF gun wasn't cutting it, and leaving me with a sort of sandpaper-like finish. Not to mention that the design of the cup meant I was wasting a lot of paint, as I always wound up sucking air with the cup still 1/3 full.
So junk that, and buy yet another cheap HF gun:
Gravity Feed Spray Gun - 20 Oz. HVLP
This one actually turned out to work really well. Reading the reviews told me everything I needed to know about it. Before use, you need to totally dismantle it, de-burr every single component to get rid of all the little flakes of metal that it will otherwise shed in use, and really clean the dickens out of it to remove every last molecule of the grease that they pack all of its internal workings with. Then open the air needle all the way, open the pattern control about 1/4 of the way, and set the mixture control to about 50%.
I decided that I was getting tired of the car being two different colors, so I decided to go ahead and do the front half with the new gun, and then come back and re-finish the back half later. This time it turned out pretty well. The new gun is really quite easy to use, and let me lay down a decent finish on the first pass. It's not mirror-smooth, but it's definitely shiny. Enough that I'll probably just leave well enough alone and not bother with wet-sanding and polishing. I may have to wet-sand the back end a bit before I re-spray it, but that shouldn't be too hard.
So, in the end, it took a hell of a lot longer than I expected, and cost slightly more. I didn't keep track of all the receipts, but total cost was probably somewhere in the $400 range. Would have been half that had I not screwed around wasting money on two paint systems that didn't work (plus all the extra sanding discs and primer associated with getting them back off and re-prepping).
I also learned a valuable lesson. There's a reason that body shops charge a lot for a decent paint job.
Which brings up a question. When you look at the OEM finish on a new car, it is, in fact, mirror-flat and smooth. It might not be "you can shave in the reflection" shiny, but it's at least flat. No orange-peel at all. How in the hell do the OEMs do that? I cannot imagine that Hyundai is taking the time to wet-sand and polish the paint on an $8,000 car, and yet its finish looks perfect.
Last edited by Joe Perez; 10-01-2012 at 05:42 PM.
Reply
2
2
10-01-2012, 01:38 PM
#30
2 Props,3 Dildos,& 1 Cat
iTrader: (8)
Join Date: Jun 2005
Location: Fake Virginia
Posts: 19,338
Total Cats: 573
Which brings up a question. When you look at the OEM finish on a new car, it is, in fact, mirror-flat and smooth. It might not be "you can shave in the reflection" shiny, but it's at least flat. No orange-peel at all. How in the hell do the OEMs do that? I cannot imagine that Hyundai is taking the time to wet-sand and polish the paint on an $8,000 car, and yet its finish looks perfect.
Reply
0
0
10-01-2012, 01:38 PM
#31

Great writeup, Joe. I remember someone else on here was talking about how when they were looking into paint, they actually found that good automotive paint was actually cheaper than shitty boat paint. May have been a few days ago, or it may have been from a build thread 4 years ago that I just read.
I wish I had a garage, my paint is super duper shitty. About 20% of the clearcoat has just peeled off. But with no garage, I will probably just do a shitty Macco job to keep the rust off until I can paint it for real.
Also Hyundia has robots, you do not.
I wish I had a garage, my paint is super duper shitty. About 20% of the clearcoat has just peeled off. But with no garage, I will probably just do a shitty Macco job to keep the rust off until I can paint it for real.
Also Hyundia has robots, you do not.
Reply
0
0
10-01-2012, 02:23 PM
#32
Boost Pope
Thread Starter
iTrader: (8)
Join Date: Sep 2005
Location: Chicago. (The less-murder part.)
Posts: 33,027
Total Cats: 6,593
But that's beside the point. Assuming you own a compressor, there's just no reason to use anything other than proper automotive paint.
Now, "real" paint is some serious stuff. Once the calatyst is added, you have only a couple of hours to use it before it turns to Jell-o. And more to the point, it contains some kind of foul witches' brew of neurotoxic chemicals, so spraying in a well-ventilated area is a must, plus a decent respirator rated for use with paints of this type.
The one thing which *really* surprised me was how well my compressor handled the load of the spray gun. It's a cheap little 10 gallon unit rated at something like 2HP, and it's always labored quite heard to keep up with thinks like impact wrenches. I didn't think it would be up to the task, but it really came through. Probably ran at about 25% duty cycle with the HVLP gun at 55 PSI, which was really fantastic.
Oh, and another thing: moisture separation is crucial. Even here in relatively dry San Diego, I went through three desiccant filters (the ones with the little blue ***** inside) and that was *after* the air had already passed through a glass-jar filter/regulator. And even at that, I still have a couple teeny little fisheyes in the hood which suggest that a drop or two may have gotten through.
Also Hyundia has robots, you do not.
I assume that I am not thinning the paint adequately, even though on the last pass I used 1/3 thinner to paint, vs the recommended 1/4. I bought an extra bottle of thinner, so I guess I can keep experimenting.
Reply
2
2
 10-01-2012, 03:50 PM
#36
Boost Czar

iTrader: (62)
Join Date: May 2005
Location: Chantilly, VA
Posts: 79,494
Total Cats: 4,080
my car was taken to macco. no prepwork was done--they painted over inperfections, door dings, and rust..not to mention did little masking for overspray. Probably wouldn't have bought the car if I noticed it all...as the finished product did look nice, but it has degraded very quickly and the car is not impressive and kinda embarssing.
I'd consider doing all the prep and having them paint it. I've seen that done with much success, in fact I've helped a friend do his Monte Carlo this way; airplane stripper is fun.
I'd consider doing all the prep and having them paint it. I've seen that done with much success, in fact I've helped a friend do his Monte Carlo this way; airplane stripper is fun.
Reply
0
0
10-01-2012, 03:56 PM
#38
Anyone have any tips to tricking macco into giving you a decent paint job? I don't have a garage, so I don't think I can do that much prep on my own.
I have heard that putting twine under all the rubber trim helps (since they won't do that). Anyone have any other prep tips that could help?
I have heard that putting twine under all the rubber trim helps (since they won't do that). Anyone have any other prep tips that could help?
Reply
0
0
10-01-2012, 03:59 PM
#39
Boost Czar
iTrader: (62)
Join Date: May 2005
Location: Chantilly, VA
Posts: 79,494
Total Cats: 4,080
we had the car towed to them with everything ready to go. Rattle can primed, masked, prepped. they just had to spray paint.
I cant remember if he wet sanded it or not, it was a single stage black on an 88 monte carlo ss. Came out nice.
I cant remember if he wet sanded it or not, it was a single stage black on an 88 monte carlo ss. Came out nice.
Reply
0
0
10-01-2012, 04:34 PM
#40
Boost Pope
Thread Starter
iTrader: (8)
Join Date: Sep 2005
Location: Chicago. (The less-murder part.)
Posts: 33,027
Total Cats: 6,593
It was originally white. Then it was wrecked several times, beaten in ways I can't possibly imagine, Bondo'd all to hell and then badly re-sprayed with poor-quality paint.
When they did the re-spray, it's obvious that the prep-work was minimal. They didn't remove any of the trim from the car and did a lackluster job of masking it, so there was overspray on every single rubber / plastic piece, inside the engine compartment, etc. Worse, there were a lot of areas that didn't quite get painted properly, or were sprayed over without first cleaning off the dirt and grime (eg: in the area of the door hinges) so the paint was falling off and revealing the white underneath.
Because of this, the car needed to be totally dismantled so that the old paintwork could be cleaned up and all of the little nooks-and-crannies properly prepared and re-sprayed. I couldn't have gotten the forward door jambs right without removing the doors, for instance. I ended up removing literally every single nut, bolt and clip that held every body panel on, and finishing each one separately before re-assembly. Every single piece of plastic or rubber came off and got individually sanded to remove the overspray. Some of them also needed repair (the outer side window sills, for instance, were totally degraded) so that also got done off the car.
The fact that the old paint was falling off of the hood, doors and fenders in huge chunks also pretty much necessitated taking the entire car down to the bare metal (or plastic, for the nose and tail) and starting from scratch. I really had no desire at all to pay someone else for the massively time-consuming task.
I suppose if I had a trailer and tow vehicle, I could have done all of this prep work and then hauled the car, in pieces, to a body shop for the finish coat. That's the part that's easy for them and relatively cheap, compared to the probably >100 hours of prep work that went into getting it ready to spray.
And, like I said, I went into this with the wrong impression right from the get-go. I went into this with the impression that I'd just be throwing some boat paint onto it and that would magically be that. After that failed, I really wasn't thinking about alternatives any more, I was just sort of on autopilot.
Reply
0
0


