Harbor Freight Win-or-Fail Thread
 07-05-2016, 07:19 PM
#801
Elite Member
iTrader: (21)

Join Date: Jun 2007
Location: Rochester, NY
Posts: 6,599
Total Cats: 1,263
Haven't tried it with car tires. But, the front ATV tires (12") went on a hell of a lot easier than the back ones (9") did. I'm guessing that car tires would damn near slip right on in comparison.
It is sturdy enough, and although I would redesign the hook/pry tool a bit, it did the job. If it isn't bolted down securely, it would be a pain in the *** to use.
It is sturdy enough, and although I would redesign the hook/pry tool a bit, it did the job. If it isn't bolted down securely, it would be a pain in the *** to use.

Reply
 0
0

0
07-06-2016, 06:06 AM
#802
Junior Member

Join Date: Jan 2015
Location: Spokane, WA
Posts: 221
Total Cats: 34
Manual Tire Changer machine
Manual Tire Changer
Win, with reservations. It works, but it's a hell of a lot of effort to save a few bucks. Unless you're changing tires every week, it's probably not worth the hassle.
I was changing ATV tires, and because of the smaller diameter, they are MUCH harder to stretch on than a regular car tire. Took two of us lots of muscling to get them on.
Bolted to some scrap plywood was barely adequate. Would have been much better bolted down to a concrete floor, but you've gotta want to change a lot of tires to make it worth the floor space.
I still have to pay to discard the old tires.
Reply
0
0
07-06-2016, 08:41 PM
#804
Senior Member
iTrader: (1)

Join Date: Dec 2010
Location: Farmington Hills, MI
Posts: 1,218
Total Cats: 175
The Lincoln wire was a pretty good improvement. It started to actually penetrate and showed signs of flux actually doing it's job.
Then I got a rectifier and giant capacitor and converted it to DC electrode negative. So for a total of $140 into it, it's actually pretty legit. The beads look just like MIG beads should! I'll have to throw down some beads that aren't just on an old rusty brake rotor and post some pics. For just under $200, the 220V flux core/mig comes with DCEN instead of AC, but I don't have access to 220V in the garage.
Reply
0
0
07-06-2016, 11:13 PM
#805
Junior Member
Join Date: Jan 2015
Location: Spokane, WA
Posts: 221
Total Cats: 34
2 updates with the HF flux core. The Lincoln wire was a pretty good improvement. It started to actually penetrate and showed signs of flux actually doing it's job. Then I got a rectifier and giant capacitor and converted it to DC electrode negative. So for a total of $140 into it, it's actually pretty legit. The beads look just like MIG beads should! I'll have to throw down some beads that aren't just on an old rusty brake rotor and post some pics. For just under $200, the 220V flux core/mig comes with DCEN instead of AC, but I don't have access to 220V in the garage.
Reply
0
0
07-06-2016, 11:39 PM
#806
Elite Member

iTrader: (3)
Join Date: Apr 2014
Location: Huntington, Indiana
Posts: 2,885
Total Cats: 616
2 updates with the HF flux core.
The Lincoln wire was a pretty good improvement. It started to actually penetrate and showed signs of flux actually doing it's job.
Then I got a rectifier and giant capacitor and converted it to DC electrode negative. So for a total of $140 into it, it's actually pretty legit. The beads look just like MIG beads should! I'll have to throw down some beads that aren't just on an old rusty brake rotor and post some pics. For just under $200, the 220V flux core/mig comes with DCEN instead of AC, but I don't have access to 220V in the garage.
I'll try to get around to reviewing both this week.
I would be interested in more details about the mods you made.
Reply
0
0
07-07-2016, 12:07 AM
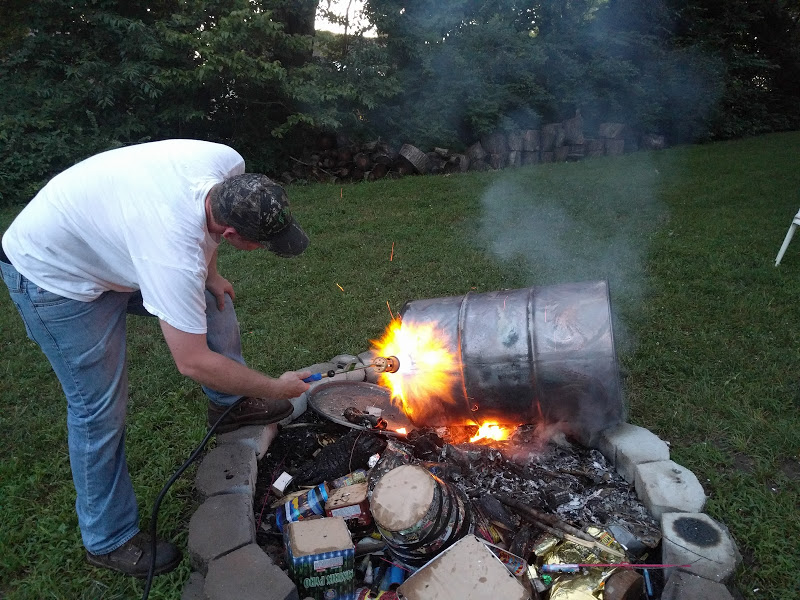
#807

WIN: Propane Torch
We burned two 50 gallon drums tonight in preparation for smoker builds. Torch worked great, turned the barrels red and had no problems burning through some tough *** paint. I wouldn't want to use it for driveway weed destruction, the 6.5' hose is far too short and means your carrying a 20lb propane tank in one hand. $17 and change after 20% off and tax.
Before fire
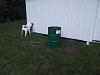
With fire
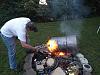
We burned two 50 gallon drums tonight in preparation for smoker builds. Torch worked great, turned the barrels red and had no problems burning through some tough *** paint. I wouldn't want to use it for driveway weed destruction, the 6.5' hose is far too short and means your carrying a 20lb propane tank in one hand. $17 and change after 20% off and tax.
Before fire
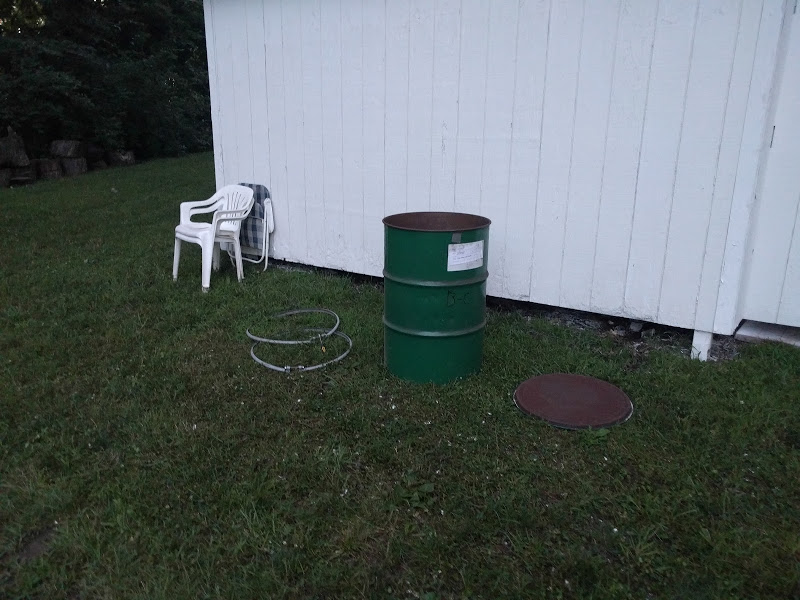
With fire
Reply
0
0
07-07-2016, 08:36 AM
#808
Senior Member
iTrader: (1)
Join Date: Dec 2010
Location: Farmington Hills, MI
Posts: 1,218
Total Cats: 175
Modifying the Harbor Freight 120v welder (if you already own one) - Fab Shop - Drive On Wood!
Here is a write up on this. Basically, find the 8 gauge wires that go to the ground clamp and to the torch handle. Cut these and wire them to the ~AC side of a bridge rectifier (I used a three phase 1600V 150amp but just used two of the phases). The positive side of the rectifier goes to the positive side of a capacitor (I used a 75V 68000mF cap) and then out to the ground plug (yes it's direct current electrode negative, so the ground clamp is high and the torch is low). The negative side of the rectifier goes to the negative side of the cap, then out to the torch. Most of these write ups say to replace the fan, but the newer style of welders come with a computer style fan, rather than the open fan it used to use.
A note about the cap, the bigger the better, but it has diminishing returns. I found a cheap cap on eBay that was larger than what is typically used, and it just barely fits inside the welder.
Here's a picture of what it can do. This was the first weld I tried without messing with wire feed. I just set it to the 6 setting. I'll have to dig up the video I found of someone actually figuring out how many IPM each setting is. The booger weld in the background is the old weld, unfortunately not back to back since that's on a solid brake rotor, but you get the idea.

Reply
0
0
07-09-2016, 12:46 PM
#809
Elite Member
iTrader: (5)
Join Date: Oct 2011
Location: Detroit (the part with no rules or laws)
Posts: 5,677
Total Cats: 800
Anyone try the 50ton shop press on here?
Thinking of buying one for the boys in the shop.
50 Ton Hydraulic Shop Press
Thinking of buying one for the boys in the shop.
50 Ton Hydraulic Shop Press
Reply
0
0
07-09-2016, 06:56 PM
#810
Junior Member
Join Date: Jan 2015
Location: Spokane, WA
Posts: 221
Total Cats: 34
Modifying the Harbor Freight 120v welder (if you already own one) - Fab Shop - Drive On Wood!
Here is a write up on this. Basically, find the 8 gauge wires that go to the ground clamp and to the torch handle. Cut these and wire them to the ~AC side of a bridge rectifier (I used a three phase 1600V 150amp but just used two of the phases). The positive side of the rectifier goes to the positive side of a capacitor (I used a 75V 68000mF cap) and then out to the ground plug (yes it's direct current electrode negative, so the ground clamp is high and the torch is low). The negative side of the rectifier goes to the negative side of the cap, then out to the torch. Most of these write ups say to replace the fan, but the newer style of welders come with a computer style fan, rather than the open fan it used to use.
A note about the cap, the bigger the better, but it has diminishing returns. I found a cheap cap on eBay that was larger than what is typically used, and it just barely fits inside the welder.
Here's a picture of what it can do. This was the first weld I tried without messing with wire feed. I just set it to the 6 setting. I'll have to dig up the video I found of someone actually figuring out how many IPM each setting is. The booger weld in the background is the old weld, unfortunately not back to back since that's on a solid brake rotor, but you get the idea.
Attachment 176226
Reply
0
0
07-10-2016, 07:49 AM
#811
mkturbo.com

iTrader: (24)
Join Date: May 2006
Location: Charleston SC
Posts: 15,178
Total Cats: 1,681
Anyone try the 50ton shop press on here?
Thinking of buying one for the boys in the shop.
50 Ton Hydraulic Shop Press
Thinking of buying one for the boys in the shop.
50 Ton Hydraulic Shop Press
Reply
0
0
07-10-2016, 04:10 PM
#812
Senior Member
iTrader: (1)
Join Date: Dec 2010
Location: Farmington Hills, MI
Posts: 1,218
Total Cats: 175
Maybe my search skills are crap, but all the large uF capacitors I could find on eBay are priced exorbitantly. 50v 50,000uF - $60. That seems average. At that price, There's not much point in doing the project. I can get the bridge rectifier for $10, but capacitors are just too pricey to justify.
This is the one I used, $35. I would agree that it's probably in best interest to find a cheap flux core on craigslist that is already better quality, But, if you have a HF flux core laying around, or get a really good deal on one and you like to tinker, this isn't a bad way to go. I am in $146.65 in this welder.
Reply
0
0
07-11-2016, 01:07 AM
#813

This seemed like the best place to post this, For those of you who are familiar with AvE, you may be interested to know he's endorsed this little bargain boroscope:
For those who aren't familiar with him, you are simply missing out.
For all of $9.99 delivered, I went ahead and ordered one.
For those who aren't familiar with him, you are simply missing out.
For all of $9.99 delivered, I went ahead and ordered one.
Reply
1
1


 07-12-2016, 01:49 AM
#820
Junior Member
Join Date: Jan 2015
Location: Spokane, WA
Posts: 221
Total Cats: 34
I have been looking at the Forney 125 flux welder on Amazon as a possible alternative to the Harbor Freight unit, but one of the reviewers said he hooked his multimeter up to it and found that it was putting out AC as well, rather than DC electrode negative. I guess I'll get the HF unit and do the mods. I found these 63v 22000uF capacitors on eBay for $3.38, so I'll just run three of them in series with a bleed resistor.
Edit:
Just bought the stuff for the welder mod - $27 all in. With the $99 coupon for the welder, that puts it in pretty cheap territory.
Edit:
Just bought the stuff for the welder mod - $27 all in. With the $99 coupon for the welder, that puts it in pretty cheap territory.
Last edited by Dann0; 07-12-2016 at 02:10 AM.
Reply
0
0


