
Fooger's Build

Thread Starter
Elite Member
iTrader: (2)
Joined: Jan 2009
Posts: 4,149
Total Cats: 230
From: Columbus, OH
I experienced running 'trayless' when i did the original turbo install in 2008. after seeing what it did for my temps, I've ran with the tray ever since, and advocated that everyone else do the same. I need to do some ducting though.
Tuned base timing and did a little fuel autotuning, car has been running fantastic at 8psi. Put the boost controller on today, went out, warmed up the car, and then put the pedal to the floor on the way to the gas station for a refill. Turbo/Intake sounded louder than it ever had before, boost went to 10psi and stayed there, car felt like it had less than the original 8psi.... figured I blew a hose off. Sure as ****, when I got to the gas station, checked to find that the intercooler hose blew off the compressor housing. Got it back home under vacuum and let it cool off. Pulled off the intake tubing and loosened the compressor hose clamp to find out that the hose itself had split!!! I think i clamped it too hard and tore it? Does silicone tear like that? There's just not a lot on the compressor high side for the hose to clamp to. If I clamp it too lose, the hose wont hold.
****, Now I've got to tear out the hose and fix/replace....With hard water lines, Power steering, and A/C, this is going to be another royal pain in the ***.
At least I don't have to pull the block...
Reply
 0
0

0

You have the nice silicone hoses from FM, right? See what they say about it. Maybe talk them into replacing it. I popped off some IC piping once as I was leaving base, punched the gas right after getting through the gate and BOOM. Kinda embarassing as I was still on my Emanage setup and had to limp the car to the next driveway.
I feel you on the one issue after another...it's been a year and a half since I turbo'd my Miata, and while it has made a trip across the country and then some, I just can't seem to get everything "right".
Great build, sir!
I feel you on the one issue after another...it's been a year and a half since I turbo'd my Miata, and while it has made a trip across the country and then some, I just can't seem to get everything "right".
Great build, sir!
Reply
0
0
Thread Starter
Elite Member
iTrader: (2)
Joined: Jan 2009
Posts: 4,149
Total Cats: 230
From: Columbus, OH
Thanks messiah!
Yeah, got the replacement hose today, and I installed it. Also replaced the copper washer on the transmission drain plug, and I got the speedo cable replaced. Seems like everything is fixed on the car for now. I even drove out to Home Depot to get some sheet aluminum, in hopes I could do a little bit of ducting (but they were closed when I arrived at 920 pm).
Went out this evening to setup the MBC. After warming up the car, I got the MBC dialed in to 12 PSI at low rpm. The first time I stepped on it, it boost creeped like a mother ******. Straight up to 15 psi and boost cut. Evidently, the WG wasn't ported well enough for 12psi. It held perfect at 8psi though, and so a marked improvement over original. I soo don't want to take this turbo back out, maybe I can get a steel sheet, cut a 2.5" hole in the thing, and bolt the ****** between two exhaust sections until winter? I don't want to pay for EWG - FML.
Autocross this weekend. If a sheet between two exhaust sections doesnt cut it, then I'll be running at 8psi....maybe not such a terrible thing?
Reply
0
0
Thread Starter
Elite Member
iTrader: (2)
Joined: Jan 2009
Posts: 4,149
Total Cats: 230
From: Columbus, OH
Played around a little bit with the exhaust. Threw in a 2.5" restrictor plate to see if it would help with boost creep:
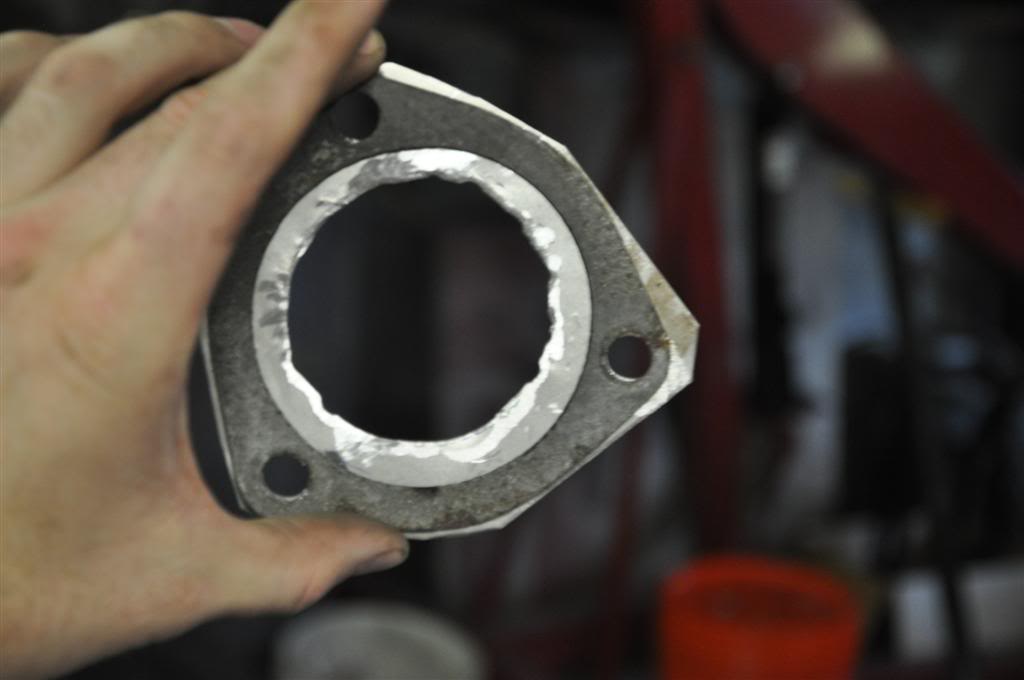
Didnt seem to help, so I thought maybe I needed to go smaller. Cut out a 2" restrictor and tried again:
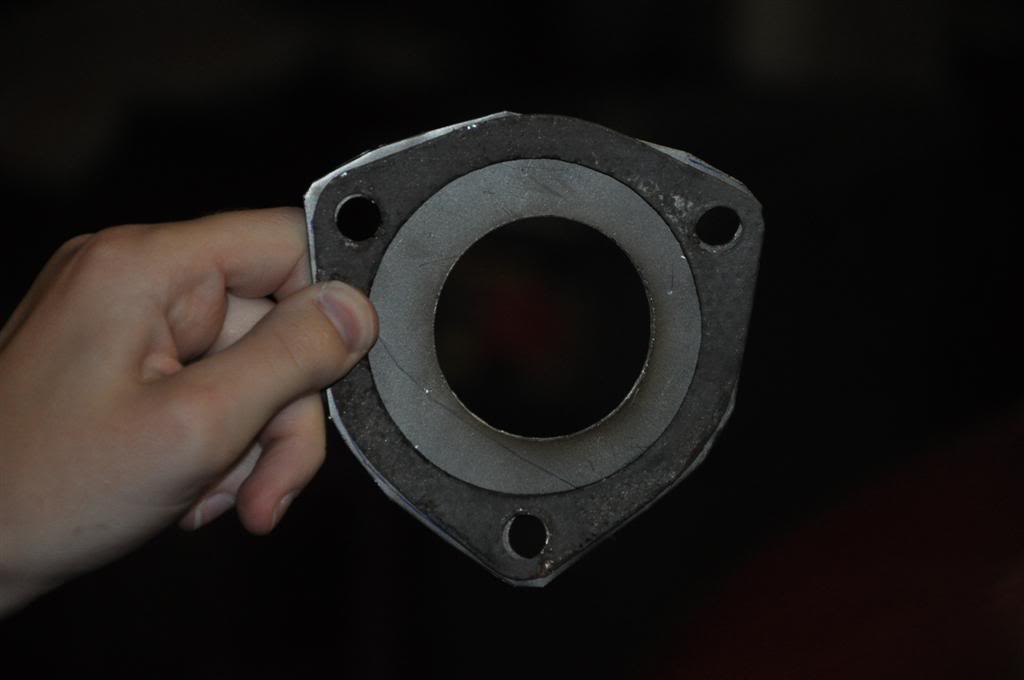
Neither did anything for my boost creep - what they did do was make boost response absolutely terrible. I took them both out, and went to running on wastegate. Oddly enough, I got the same boost creep at 8psi.
I fiddled with my wastegate actuator for awhile. I even put two washers between the WG Mounting bracket and the compressor to see if I could get it to open the WG farther. Changed "wastegate pressure" to 5psi, and still creeped up to 15 psi at redline. Replaced the actuator to its original position and went back to 8psi base. After playing with it and trying to figure out why I was getting creep at 8psi now, but no boost creep at 8psi BEFORE I tried the boost controller, I went - I believe the silicone charge pipe i replaced was radially torn prior to me adding the controller, and letting enough air out that the wastegate held 8psi, but not enough that I noticed it happening. Well, I guess I'll continue to deal with boost creep for awhile...
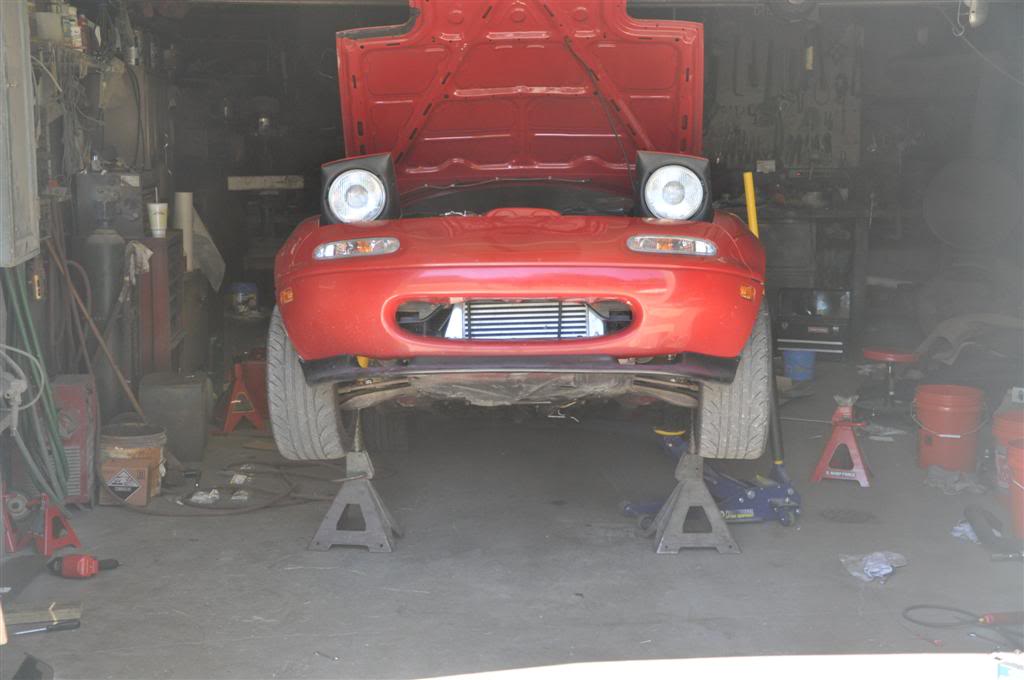
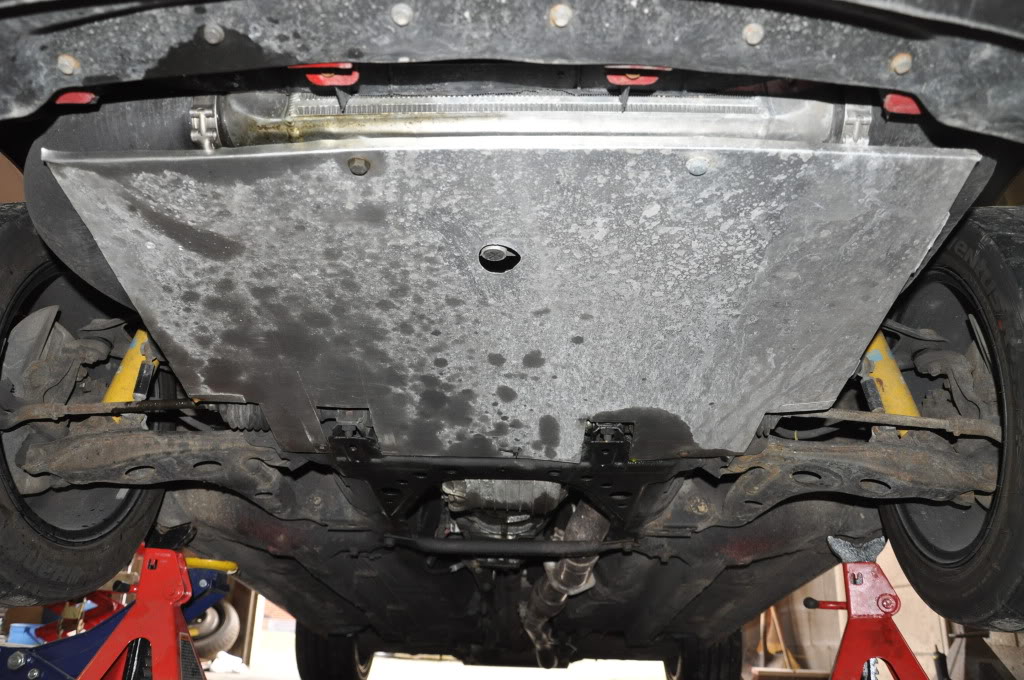
I also decided to do some ducting. I <3 Jackstands:
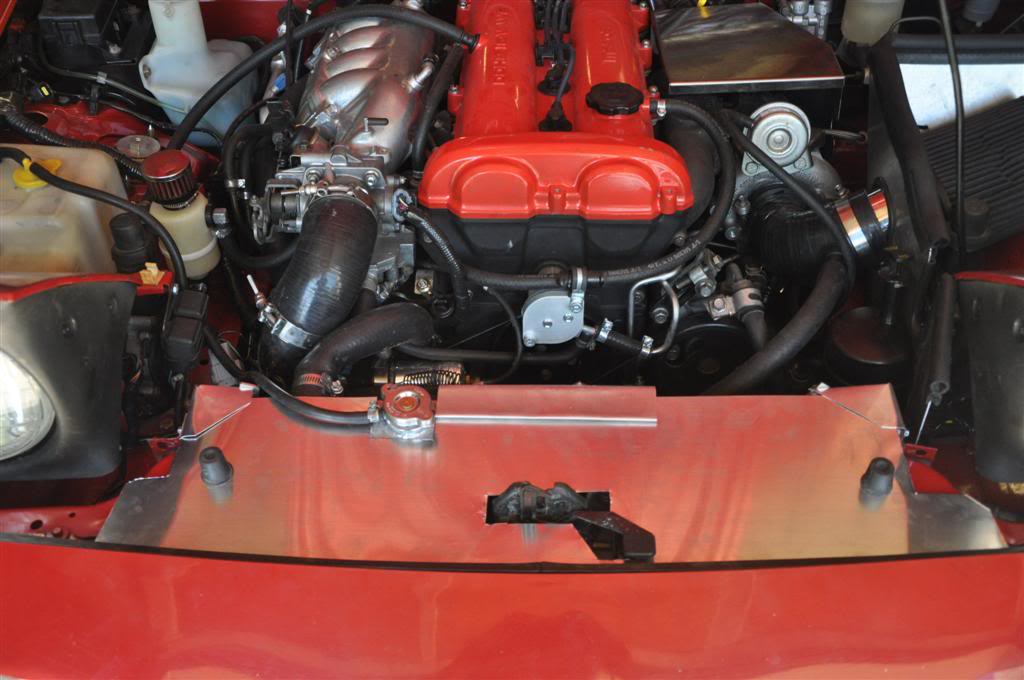
Here's a pic of the upper sheet completed:
Will let you all know how it all works next time I turn the A/C on while driving down the freeway on a 95* day.
Didnt seem to help, so I thought maybe I needed to go smaller. Cut out a 2" restrictor and tried again:
Neither did anything for my boost creep - what they did do was make boost response absolutely terrible. I took them both out, and went to running on wastegate. Oddly enough, I got the same boost creep at 8psi.
I fiddled with my wastegate actuator for awhile. I even put two washers between the WG Mounting bracket and the compressor to see if I could get it to open the WG farther. Changed "wastegate pressure" to 5psi, and still creeped up to 15 psi at redline. Replaced the actuator to its original position and went back to 8psi base. After playing with it and trying to figure out why I was getting creep at 8psi now, but no boost creep at 8psi BEFORE I tried the boost controller, I went
- I believe the silicone charge pipe i replaced was radially torn prior to me adding the controller, and letting enough air out that the wastegate held 8psi, but not enough that I noticed it happening. Well, I guess I'll continue to deal with boost creep for awhile...I also decided to do some ducting. I <3 Jackstands:
Here's a pic of the upper sheet completed:
Will let you all know how it all works next time I turn the A/C on while driving down the freeway on a 95* day.
Reply
0
0

Thread Starter
Elite Member
iTrader: (2)
Joined: Jan 2009
Posts: 4,149
Total Cats: 230
From: Columbus, OH
Thanks Stinging!
Ducting didnt fix my cooling issue.
160* Thermostat didnt fix the issue, but it did seem to help *barely*. I guess a fully open t-stat is a fully open t-stat, regardless of whether it opened up at 160* or 180*. (By the way, in case anyone is wondering, the thermostat in the M-Tuned coolant reroute is a 54mm thermostat, not a stock 52mm thermostat)
With a little bit of experimenting, I found that, when the car overheats (A/C On), and the needle moves to about the 1 o'clock position (Takes about 3-5 minutes to move to the 1 o'clock position, and will continue to climb if I let it), if I slide the heat control from full cold to full hot (leaving the A/C on), the temp gauge will return to normal in 10-20 seconds.
So, Here are the eliminated possibilities:
Airflow through radiator:
1: Stock undertray is in place (and with regard to this issue, has always been in place)
2: Airflow path has been ducted to ensure that air goes through radiator, including the big holes at the top of the radiator, and some work underneath and in the sides.
3: Fans are nearly new SPAL units, sourced through FM. These things move A TON of air. First fan kicks on and off at idle, and runs pretty much constantly under any sort of load. The second fan kicks on with the A/C, and anytime the car gets a little warmer than normal.
Hardware:
1: 55mm all aluminum race radiator sourced through FM at time of the original turbo install
2: M-Tuned Coolant reroute, orignially with 180* thermostat, now with 160* thermostat +two 5/32" holes.
3: Had a 13psi radiator cap, replaced with a 16psi radiator cap, no change in outcome from this.
Coolant properties:
1: I've been running approximately a 30/70 mix of antifreeze/distilled.
2: I've tried burping the cooling system to ensure that all of the air pockets are out of the engine. With the reroute, this meant jacking up the REAR of the car, then dropping the left side of the car while picking up the front right, then dropping the rear of the car while picking up the front left. Once the front of the car was in the air, I removed the uppermost of the threaded plugs from the water neck, and water began coming out, no air.
Coolant flow properties:
When I replaced the 180* t-stat with the 160* t-stat, I had already began to suspect that this was my problem. There just isn't an easy way to prove it. I have not bypassed the heater core (I live in Ohio, It is faily common to use the heater in the morning, the AC in the afternoon, and go topless in the evening), so it still exists as a restriction in that portion of the cooling path - but after my experience with moving the heater switch to full hot, I questioned "how much" of a restriction is the heater core actually providing? Suspecting that far too much coolant was going through the heater core, and not nearly enough of it was going through the radiator, I added some restriction:
I found a piece of leftover fuel line from running the breather tank, I cut it to about 6" and started shoving it into the heater core hose that runs from the head. It fit, but it got sticky in the bends, so before I shoved it all the way in, I pulled it back out, and coated it with some white lithium. I pushed it right on down until my middle finger was in to about the second knuckle, this felt familiar for some reason, and I thought it would be easy to go further, but I stopped there. Slid it back over the copper heater core tube, and tightened the hose clamp.
Unfortunately, we haven't seen any 90*+ days since this mod, but on the 80* day, (I would expect the 10* temperature delta to make a HUGE difference) my experiences are:
Get to operating temp, and get on freeway. Turn A/C on full blast. Needle doesn't budge after 10 minutes. Still rock solid after 20 minutes. Get off freeway, get into town, stop and go, needle still doesn't move a degree.
So I haven't yet been able to test the car on another 90* day, but as I've said, it is rock solid so far. It seems that the M-Tuned reroute may make it easy for coolant to take the heater core route instead of the radiator route, but I'm no fluid dynamacist. Adding additional restriction to the heater core might be another possible (and inexpensive) route for those that can't seem to figure out their own cooling issues. I'll update as soon as we get another 90*+ day.
Reply
0
0

Junior Member
Joined: Dec 2009
Posts: 332
Total Cats: 1
From: Shelbina, MO (North East)
Sounds like a coolant flow issue to me. Hope your restriction got it solved. I would think you could add a fitting somewhere with a smaller hole to make a restriction instead of a hose inside a hose.
I'll be the first to admit that I know almost nothing about the coolant re-route though.
I'll be the first to admit that I know almost nothing about the coolant re-route though.
Reply
0
0
Thread Starter
Elite Member
iTrader: (2)
Joined: Jan 2009
Posts: 4,149
Total Cats: 230
From: Columbus, OH
Sounds like a coolant flow issue to me. Hope your restriction got it solved. I would think you could add a fitting somewhere with a smaller hole to make a restriction instead of a hose inside a hose.
I'll be the first to admit that I know almost nothing about the coolant re-route though.
I'll be the first to admit that I know almost nothing about the coolant re-route though.
Update: Drive home today was 91*. Cranked up the A/C as soon as I got in the car, and came home. Was slow at first, but eventually got moving at about 80 mph. It took about 5 or 6 minutes following an SUV at 80mph before I watched the temp needle barely start to move, it made it to about straight vertical before it stopped moving. When I got to the exit ramp, I simply let off the throttle for a couple seconds, and in the time it took the car to go from 80mph to 60mph, the temp gauge had very quickly returned to what I would consider "normal" temperature, right at about the 11:45 position. To me this is all indicative of a properly functioning cooling system, so it seems that adding the restriction to the heater core line completely solved the issue. Opinions or criticisms?
Reply
0
0
Thread Starter
Elite Member
iTrader: (2)
Joined: Jan 2009
Posts: 4,149
Total Cats: 230
From: Columbus, OH
Ran again a little longer the other day. AC on 2, no problems. Then cranked the A/C to 4 to test it out a bit, about 80mph down the freeway. After about 10 minutes, it just barely started creeping back up, and it took it another 10 minutes or so for the needle to move to the 1 o'clock position. I kept thinking it might come back down, but it didn't. Just a slow steady climb. Eventually I turned the A/C off for a moment, and temps quickly came back down. Checked the overfill tank, and nothing had blown into it, so no boiling apparently, but the end result was that I still couldn't run the A/C on full blast going down the freeway on a 90* Day.
Levnubhin's FM Heat extraction hood arrived Wednesday....
I had about a 10 minute freeway drive at about noon today. Cranked up the A/C several miles before I got to the freeway, and then jumped on the freeway. Within moments, the temperature went DOWN.....WAY DOWN. The needle held between the 1045 and 11 o'clock position for the entire drive. Hot damn, this thing is amazing! I'm heading out to dayton in about an hour. It's a 90 minute freeway drive, and it's currently 94 degrees outside. I'll update this thread as soon as I can with how the A/C holds up.
On a related note, my A/C is COLD AS **** now. OMG I <3 YOU PHIL, but not in a gay way or anything.
Reply
0
0
Thread Starter
Elite Member
iTrader: (2)
Joined: Jan 2009
Posts: 4,149
Total Cats: 230
From: Columbus, OH
So I finally got around to sending my turbine housing to BEGi after several months of proctrastinating on taking the turbo out. The previous porting job did not do anything to cure my boost creep issue. Once I separated the turbine housing from everything else, I took a look at it and quickly noted that the wastegate flapper overlaps the wastegate port by a good solid 1/4" all the way around. So I sent the thing off to BEGi, and about 10 days later I had it back. They did some pretty decent work making the port hole bigger and enlarging the previous channel that I had cut from the manifold flange to the wastegate port. Not wanting to ever have to take the turbine housing off again because of boost creep, I pulled out the dremel and grinded for a little bit on some areas around the port hole that I thought still had pretty significant tolerance/overlap before starting to bolt everything back up. Spent the rest of the evening getting everything back together before I started the car and parked it in the driveway for about 15/20 minutes to warm up. Got in the car and took it for a test drive. Upon going WOT, the car jumped to 8psi, held briefly, and then shot straight up to spark blowout - ****.
Back at home, opened the hood, and found the wastegate signal line laying on the exhaust manifold, and the manifold had melted a hole in the line...****. I was done for the night with the car though. My friend had come over to work on her motorcycle, so We went to work on that.
Next day, cut the melted section of signal line off, rerouted it away from the manifold, and warmed the car up. Took it out and floored it. Boost shot straight to 8psi again, held substantially longer, and then creeped to 10psi by redline....PROGRESS!!!
Added MBC, jumped in car, went straight to 12psi and held rock solid. SWEET!!!
Turned about half a turn, and found 15ish psi, turned it back down a touch to find 14psi and set boost target at 14psi across the RPM range on the Hydra. Runs great, but it feels like it's missing some grunt - needs tuned now, esp for spark, and I'd like to get my WI set up too.
I had a jacking incident in January, the jack slipped off the front subframe and found its way down to the crankshaft pretty quickly. I almost cried, but after inspection, everything looked good except for a broken finger-tab on the radiator drain plug (whew)....oh, and the plastic belly pan was absolutely destroyed in the process...so I built a new one
with a spare sheet of aluminum that I had leftover from radiator overhead shroud.
It's all nasty and roadgrimey and salty now :(
One remaining problem is oil pressure drop near redline. Per the gauge, it looks like the pressure is dropping due to the oil filter restricting, but not 100% sure. The pressure drop is 100% repeatable. I can't convince myself that the engine actually uses more oil at higher RPMs though, and that would be the only reason I could see for the oil pressure actually falling...
Reply
0
0

Thread Starter
Elite Member
iTrader: (2)
Joined: Jan 2009
Posts: 4,149
Total Cats: 230
From: Columbus, OH
Nope, it's still sitting in the box. Just checked, its the DDSv10. Haven't had the time I wanted to install it. About the time I got the FMII installled, I got a phone call: "You're deploying, you've got a month to get your life together". When I got back, there was a 3" exhaust on the car and it was in bad need of a rebuild...I just finally got everything where I "want" it, though the spark map is far from optimal.
Reply
0
0
Thread Starter
Elite Member
iTrader: (2)
Joined: Jan 2009
Posts: 4,149
Total Cats: 230
From: Columbus, OH
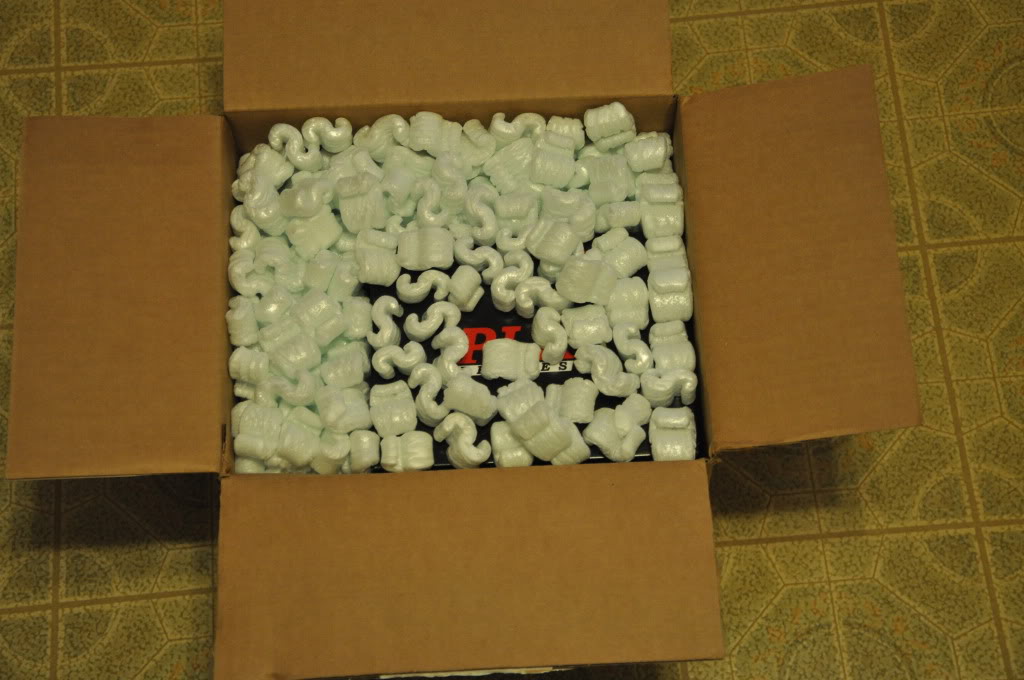
So yes, I did indeed get a package in the mail. It was a rather exciting package to say the least:

2 DM-100 display units
1 AFR sensor
1 Oil Pressure Sensor
1 Fluid temp sensor module w/2 sensors (oil temp, water temp)
1 Boost/Vac sensor
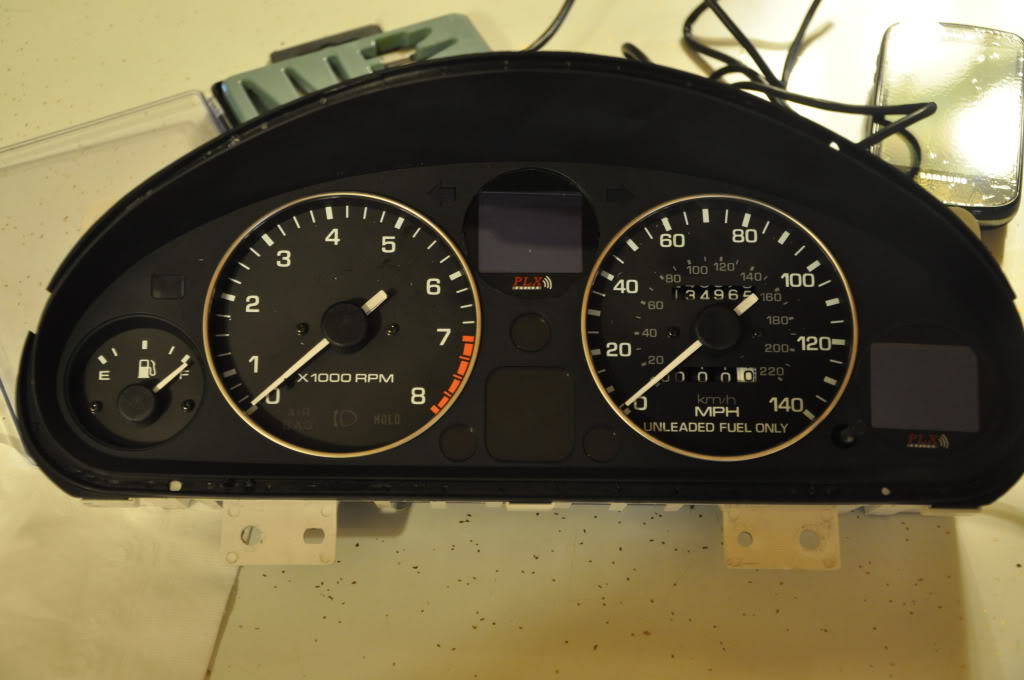
So I got to work quite quickly. The first thing I did was destroy a very expensive display unit:
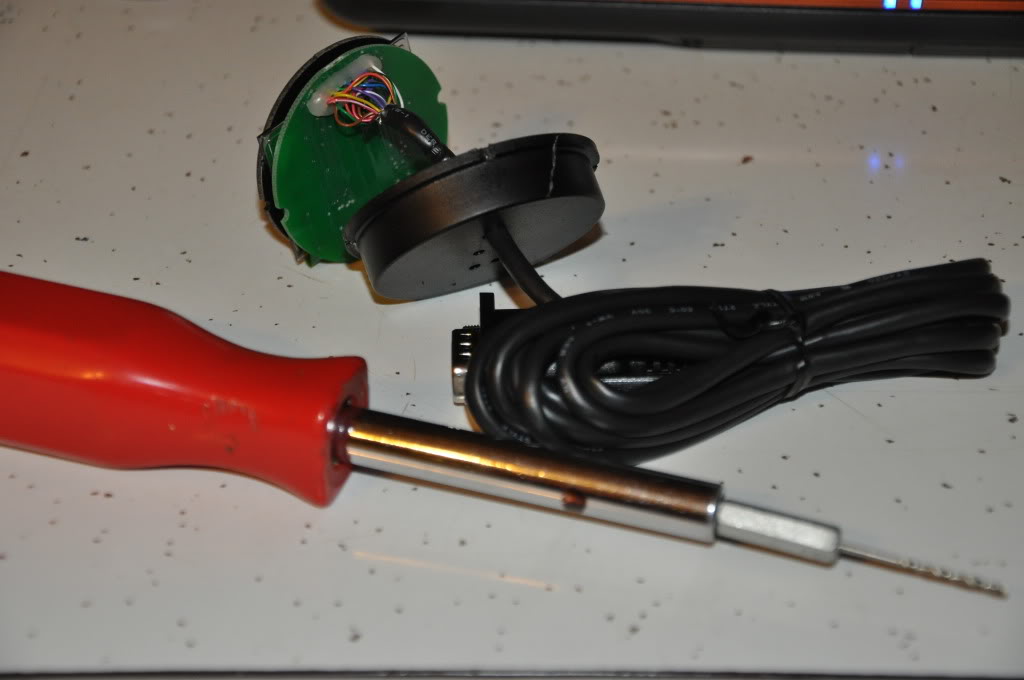
Actually, I destroyed 2 of them. With a drill bit attached to a screwdriver.
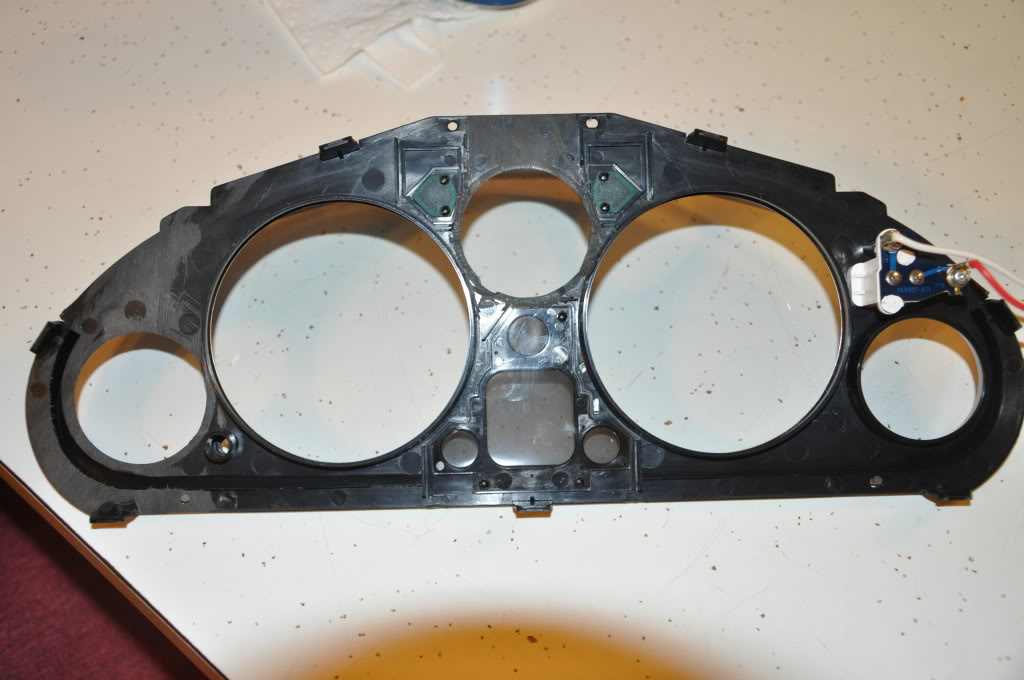
Then I destroyed the black gauge 'bezel' panel/window piece. I actually beat the first one up pretty bad learning how to do it, so it's trash. That's the one pictured in the previous post. I started cutting the bezel ring around the fuel gauge first, then said "oh ****, that's the fuel gauge - FFFFFUUUUUUUUU!!!!!!!!!" Then I shattered the plastic window because I thought I needed to take it off - mazda never intended for those things to come off apparently. Finally, I cut the center hole too big - you can almost push the gauge completely through it. I learned the actual method I used when I did the gauge on the right - basically, the technique I used in the end was to remove the recessed bezel so that the back of the 'bezel' recess was flush with the back of the panel. I started with a dremel and finished each hole with a hand file and a razor blade. Once I knew the gauges would fit where I wanted them to, I needed to go to work on the gauge pods. I originally intended to install the gauges to the back of the black bezel plate, but after some observation/experimentation, I decided to try to mount the gauges as part of the rear gauge housing. I had to cut the **** out of the center gauge cup (the PLX stock piece that works as the rear section of the gauge enclosure) in order to make it fit. I've got two dremel marks in the right side cup where the OEM plastic thingys more or less slide into place before securing with hot glue, other than that, the right cup is completely un-fucked up.
This is the back of the black bezel panel.
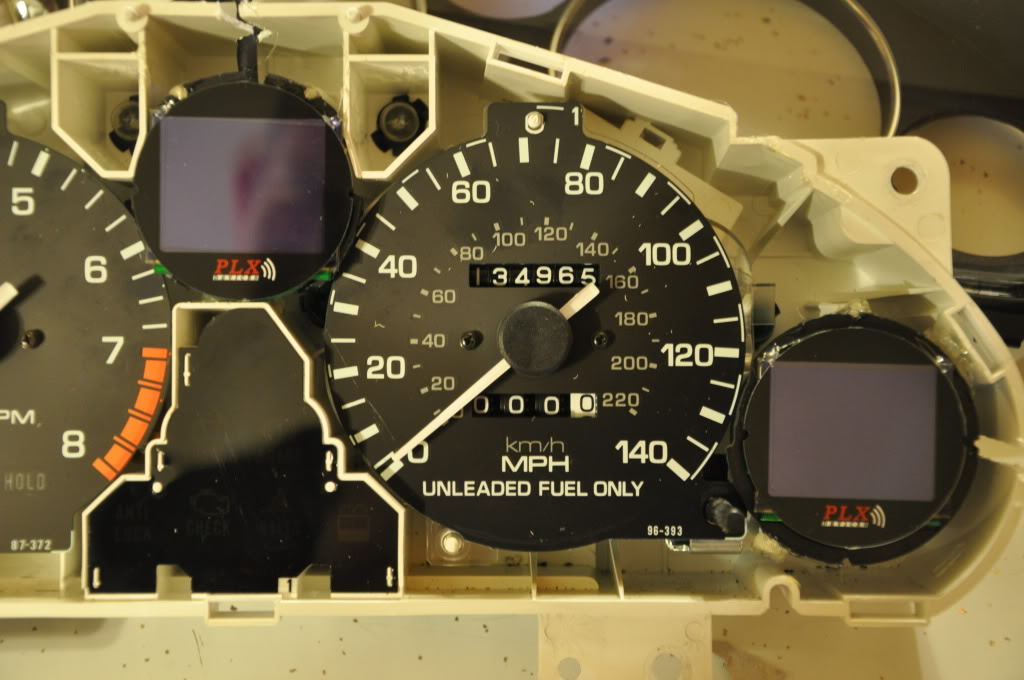
The gauges in place in the main housing in lieu of the stock coolant temp and oil pressure gauges:
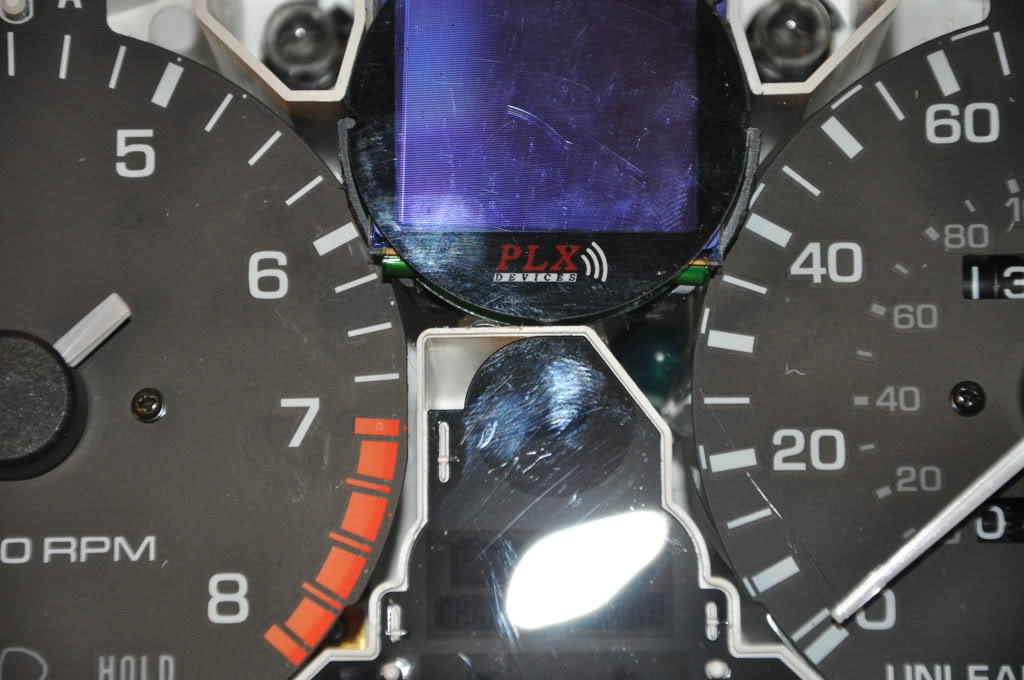
Here is how much the center gauge snuggles with the rest of the stack. The bottom corners of the OLED screen actually overlap the round gauges. The round bezels that slide into place around the gauges actually have an O.D. that interferes with the bottom corners of the OLED screen. I had to barely touch the O.D. of the bezels with a hobby knife in order to remove probably .25mm in order to make it all fit. The end result is unnoticeable in the finished product. I had to cut the **** out of the gauge cup itself. I think I made 7 different cuts in the cup to make it all slide into place.:
I also cut two slits in the white plastic of the cluster to accomodate exit paths for the OLED cables to their control modules. Once the black gauge bezel is snapped into place, it flattens and very slightly compresses the screen plates of the gauges so that they mount flush. I added two tiny dabs of hot glue onto each gauge to hold the hard screenplate (clear lexan with a black rectangle outline) onto the OLED display screen.
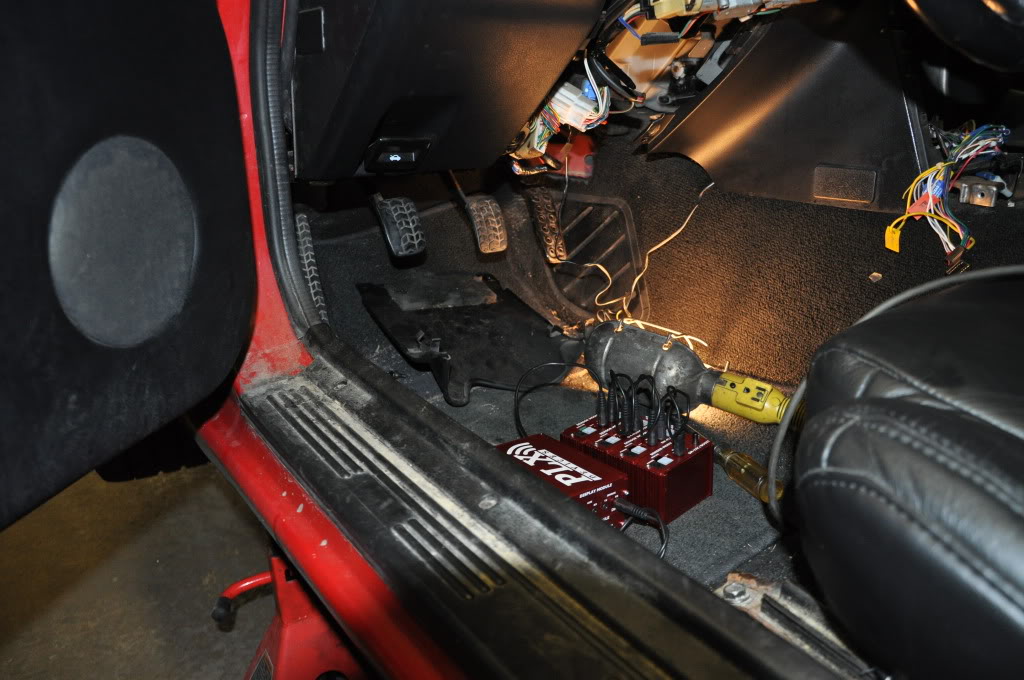
To install the modules (6 of them altogether) I had to find a place to mount them. I tore out the center console panel hoping there would be room behind the stereo, but there's no room there whatsoever. I then went under the steering column and found a nice big open place to play to the right side. It's actually quite roomy, and the photos don't do it justice. Just to the right of the steering column:
A note on "stacking" the sensor/display modules: These things are made to slide together - but they don't do it very well. Nothing short of some heavy blows with a hammer will get them together. The only way that I was willing to put them together was to remove the plates off of the front and rear of each box and remove the enclosed circuit boards (which provided me with a "tube" of sorts), and then took a rubber mallet to them to get the connections started. Once they were started together, I put the module boxes in a vice, insulated from damage with terry towels on both ends, and I literally had to squeeze the things together with a vice. They are NOT coming apart. When I went to put the display module boxes together, I thought I was going to destroy them when I had them in the vice. The end result was that all of the sensor modules were put together, and the display modules were put together. I secured the two clusters to each other with two strips of adhesive mounting tape and a large zip tie before shoving them all up under the dash.
Installed and turned on, car is still not running because I destroyed an oil temp sensor in the process when I was screwing it into my glowshift oil sandwich plate - I'm beginning to hate NPT threads. I found one of my grandpa's old tap and die sets and amazingly it had a 1/8 NPT tap. I tapped out all 3 of the holes in the sandwich plate, removing significantly more metal than I thought I should have. My pressure sensor and my -4an oil feed line adapter screwed in and tightened perfectly now. Installed everything and ran the lines, now just waiting on a new sensor to bolt in and go.
Finished and in, these are my current bootup screens:
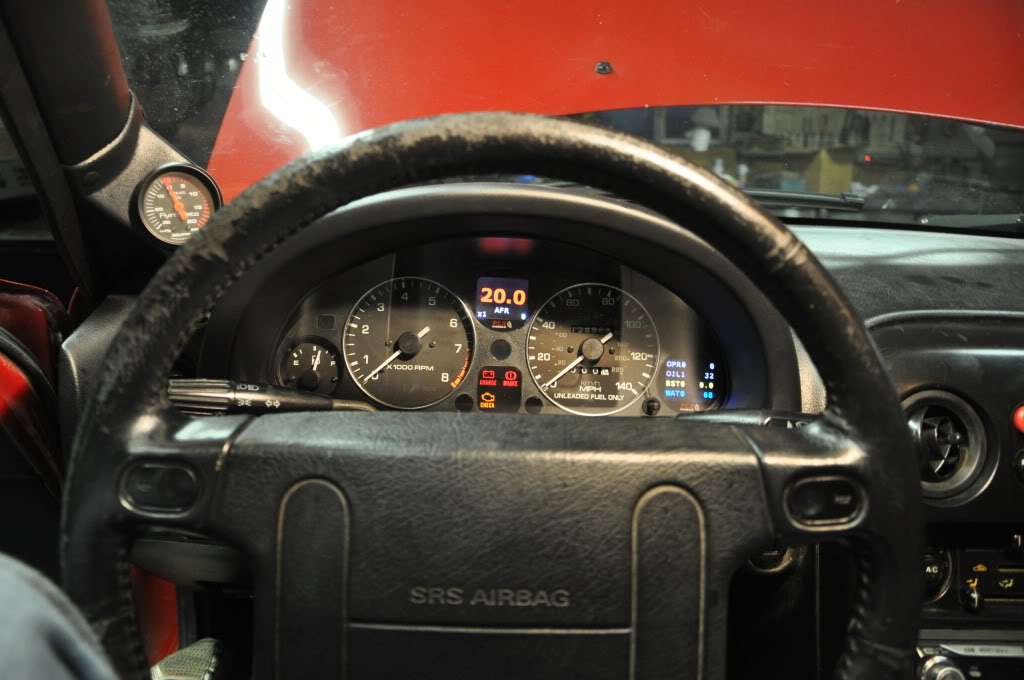
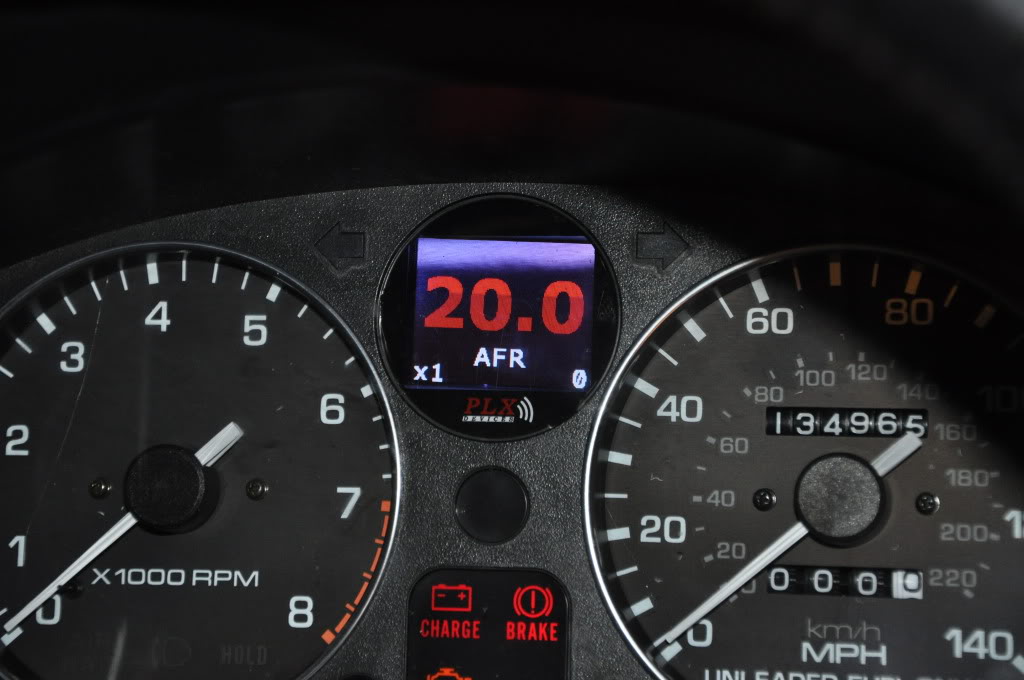
And damn, I must say, these things look GOOD. The only obvious errors in installation is seen on the bottom right and center left of the middle gauge where I chopped out a tiny bit too much of the bezel plate. That was a difficult area to work with.
2 DM-100 display units
1 AFR sensor
1 Oil Pressure Sensor
1 Fluid temp sensor module w/2 sensors (oil temp, water temp)
1 Boost/Vac sensor
So I got to work quite quickly. The first thing I did was destroy a very expensive display unit:
Actually, I destroyed 2 of them. With a drill bit attached to a screwdriver.
Then I destroyed the black gauge 'bezel' panel/window piece. I actually beat the first one up pretty bad learning how to do it, so it's trash. That's the one pictured in the previous post. I started cutting the bezel ring around the fuel gauge first, then said "oh ****, that's the fuel gauge - FFFFFUUUUUUUUU!!!!!!!!!" Then I shattered the plastic window because I thought I needed to take it off - mazda never intended for those things to come off apparently. Finally, I cut the center hole too big - you can almost push the gauge completely through it. I learned the actual method I used when I did the gauge on the right - basically, the technique I used in the end was to remove the recessed bezel so that the back of the 'bezel' recess was flush with the back of the panel. I started with a dremel and finished each hole with a hand file and a razor blade. Once I knew the gauges would fit where I wanted them to, I needed to go to work on the gauge pods. I originally intended to install the gauges to the back of the black bezel plate, but after some observation/experimentation, I decided to try to mount the gauges as part of the rear gauge housing. I had to cut the **** out of the center gauge cup (the PLX stock piece that works as the rear section of the gauge enclosure) in order to make it fit. I've got two dremel marks in the right side cup where the OEM plastic thingys more or less slide into place before securing with hot glue, other than that, the right cup is completely un-fucked up.
This is the back of the black bezel panel.
The gauges in place in the main housing in lieu of the stock coolant temp and oil pressure gauges:
Here is how much the center gauge snuggles with the rest of the stack. The bottom corners of the OLED screen actually overlap the round gauges. The round bezels that slide into place around the gauges actually have an O.D. that interferes with the bottom corners of the OLED screen. I had to barely touch the O.D. of the bezels with a hobby knife in order to remove probably .25mm in order to make it all fit. The end result is unnoticeable in the finished product. I had to cut the **** out of the gauge cup itself. I think I made 7 different cuts in the cup to make it all slide into place.:
I also cut two slits in the white plastic of the cluster to accomodate exit paths for the OLED cables to their control modules. Once the black gauge bezel is snapped into place, it flattens and very slightly compresses the screen plates of the gauges so that they mount flush. I added two tiny dabs of hot glue onto each gauge to hold the hard screenplate (clear lexan with a black rectangle outline) onto the OLED display screen.
To install the modules (6 of them altogether) I had to find a place to mount them. I tore out the center console panel hoping there would be room behind the stereo, but there's no room there whatsoever. I then went under the steering column and found a nice big open place to play to the right side. It's actually quite roomy, and the photos don't do it justice. Just to the right of the steering column:
A note on "stacking" the sensor/display modules: These things are made to slide together - but they don't do it very well. Nothing short of some heavy blows with a hammer will get them together. The only way that I was willing to put them together was to remove the plates off of the front and rear of each box and remove the enclosed circuit boards (which provided me with a "tube" of sorts), and then took a rubber mallet to them to get the connections started. Once they were started together, I put the module boxes in a vice, insulated from damage with terry towels on both ends, and I literally had to squeeze the things together with a vice. They are NOT coming apart. When I went to put the display module boxes together, I thought I was going to destroy them when I had them in the vice. The end result was that all of the sensor modules were put together, and the display modules were put together. I secured the two clusters to each other with two strips of adhesive mounting tape and a large zip tie before shoving them all up under the dash.
Installed and turned on, car is still not running because I destroyed an oil temp sensor in the process when I was screwing it into my glowshift oil sandwich plate - I'm beginning to hate NPT threads. I found one of my grandpa's old tap and die sets and amazingly it had a 1/8 NPT tap. I tapped out all 3 of the holes in the sandwich plate, removing significantly more metal than I thought I should have. My pressure sensor and my -4an oil feed line adapter screwed in and tightened perfectly now. Installed everything and ran the lines, now just waiting on a new sensor to bolt in and go.
Finished and in, these are my current bootup screens:
And damn, I must say, these things look GOOD. The only obvious errors in installation is seen on the bottom right and center left of the middle gauge where I chopped out a tiny bit too much of the bezel plate. That was a difficult area to work with.
Reply
0
0
Thread Starter
Elite Member
iTrader: (2)
Joined: Jan 2009
Posts: 4,149
Total Cats: 230
From: Columbus, OH
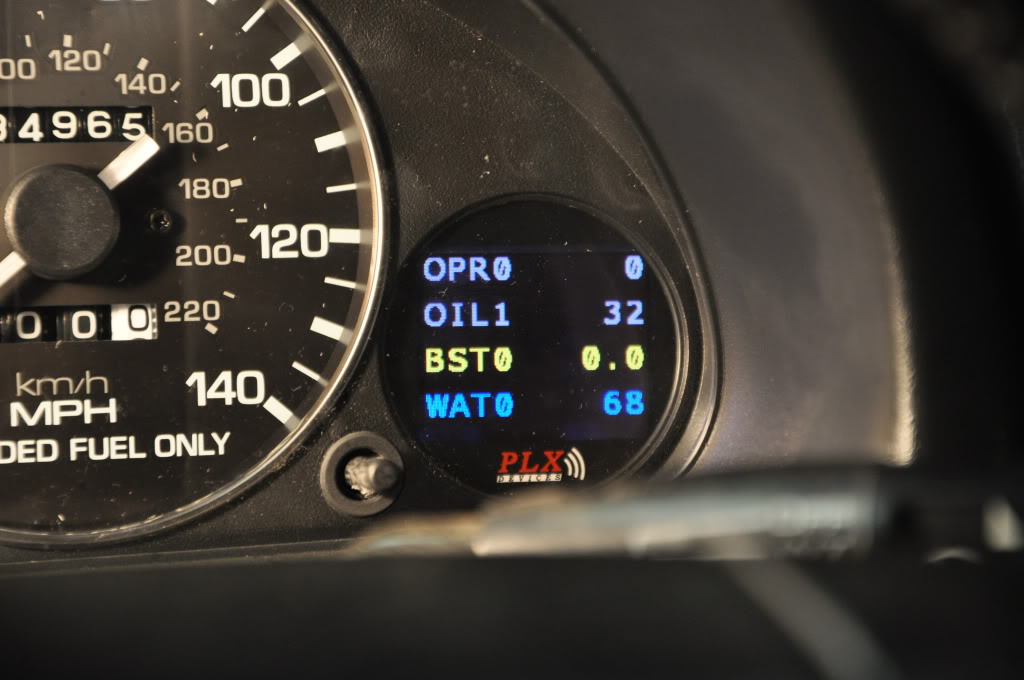
These things have alarms on them too. I actually had to turn the low oil pressure alarm off to get these shots. The alarms red-out the whole screen and display the problem parameter.
Center display alarms:
Oil pressure exceeds 75psi
AFRs go leaner than 12.3 anytime boost is over 5psi
Right side display alarms:
Oil pressure is below 15psi
Oil temp exceeds 230
Boost pressure goes above 15.5psi
Water temp exceeds 210
I'll end up changing the alarm limits once I get it back on the road and see what the gauges decide is "normal" operating ranges. This is pretty cool ****.
Reply
0
0
.
BONERSAUCE
It's great to read about someone else's foibles. If I had a sense of shame I would not post mine but I know everyone has made mistakes.
So you like them little bitches don't you? I do not have the boost module but that is a great idea to set an alarm for AFR in boost!
You will enjoy the real time data graphing too. I bet it will be very useful for boost. I like it for AFR on occasion.
Reply
0
0


