Fooger's Build

 03-13-2010, 08:03 PM
#22
Elite Member
Thread Starter
iTrader: (2)
Join Date: Jan 2009
Location: Columbus, OH
Posts: 4,140
Total Cats: 229
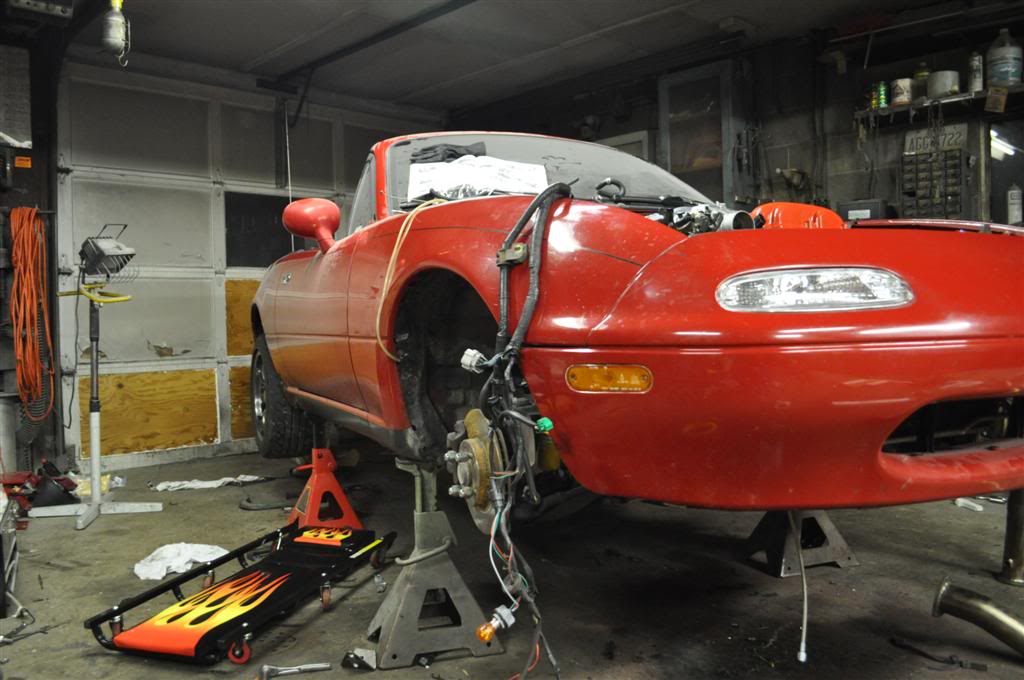
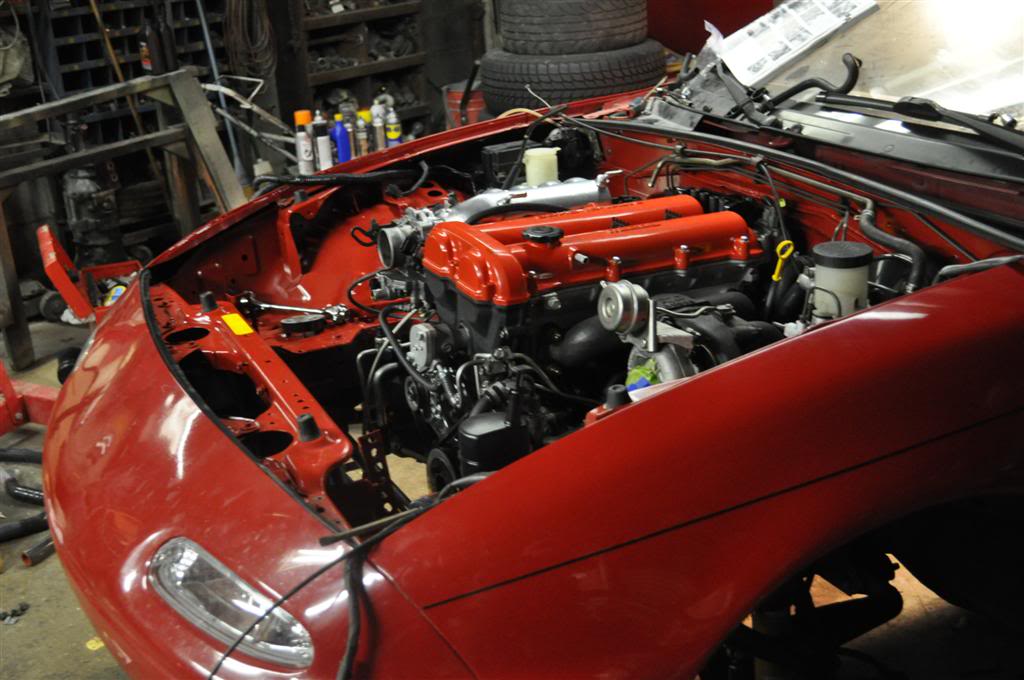
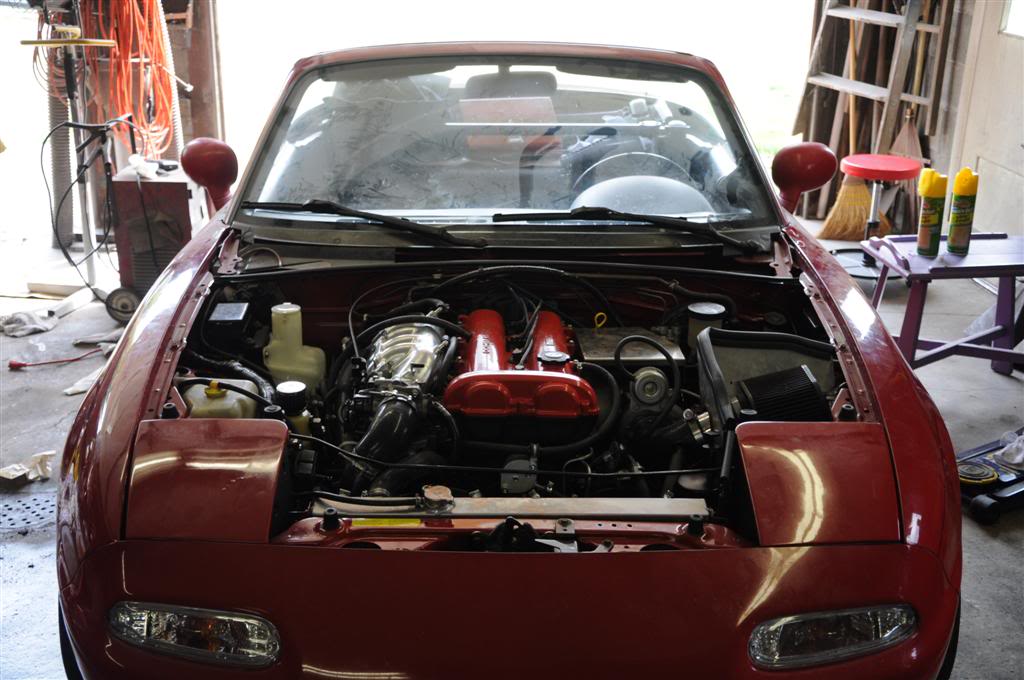
Update -Been awhile, but got the entire drivetrain in, differential, ppf, engine+tranny - WOOT!
My nice, new shifter This one goes to 6, unlike regular ones that only go to 5. So when you're on 5, and you need that extra little bit, you can crank it up another notch!!!
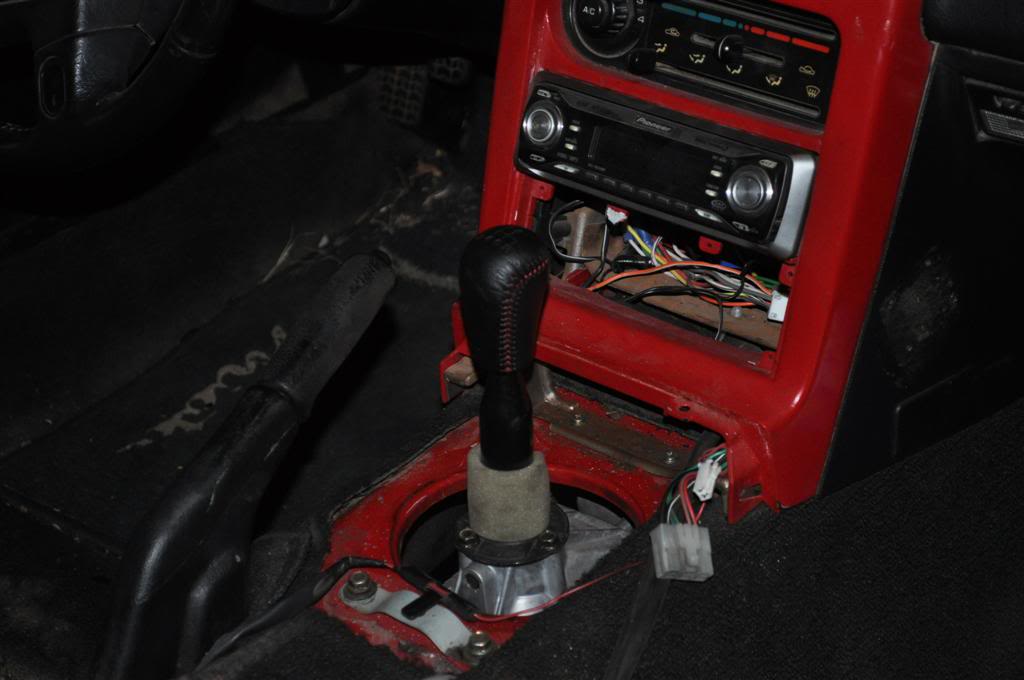
The red on the center console is going away once I'm all done.
And a teaser, finger painted into the dust, for what the future holds....
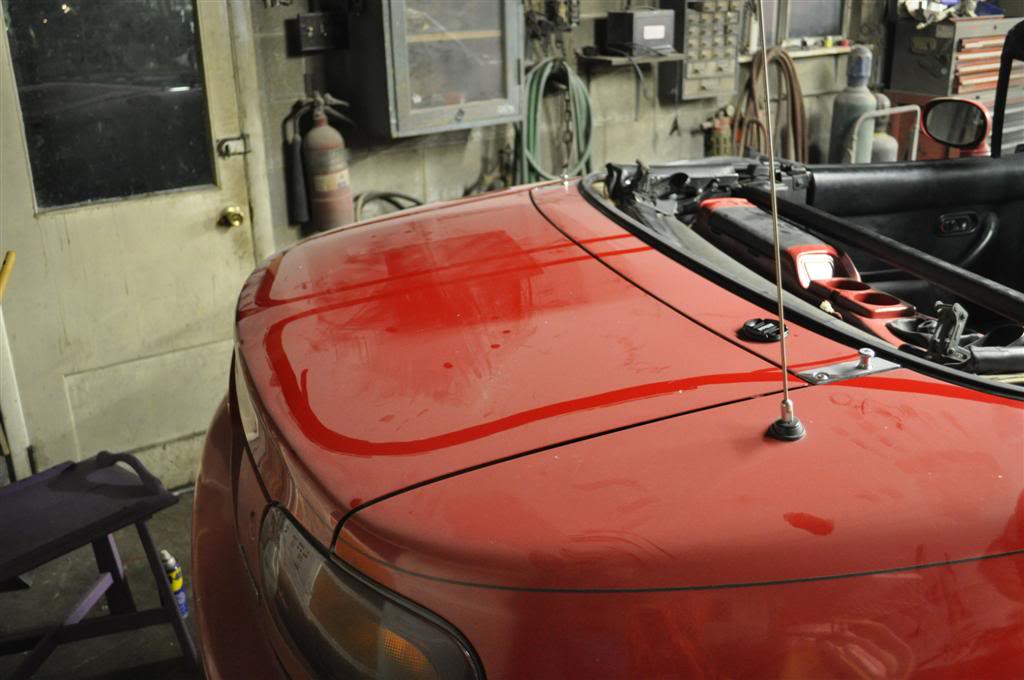
I hope I don't lose too much of the 'stock' appearance by doing this....
Hope to have this thing back on the road by next weekend!!!
My nice, new shifter
This one goes to 6, unlike regular ones that only go to 5. So when you're on 5, and you need that extra little bit, you can crank it up another notch!!!The red on the center console is going away once I'm all done.
And a teaser, finger painted into the dust, for what the future holds....
I hope I don't lose too much of the 'stock' appearance by doing this....
Hope to have this thing back on the road by next weekend!!!

Reply
 0
0

0
04-02-2010, 04:35 PM
#23
Elite Member
Thread Starter
iTrader: (2)
Join Date: Jan 2009
Location: Columbus, OH
Posts: 4,140
Total Cats: 229
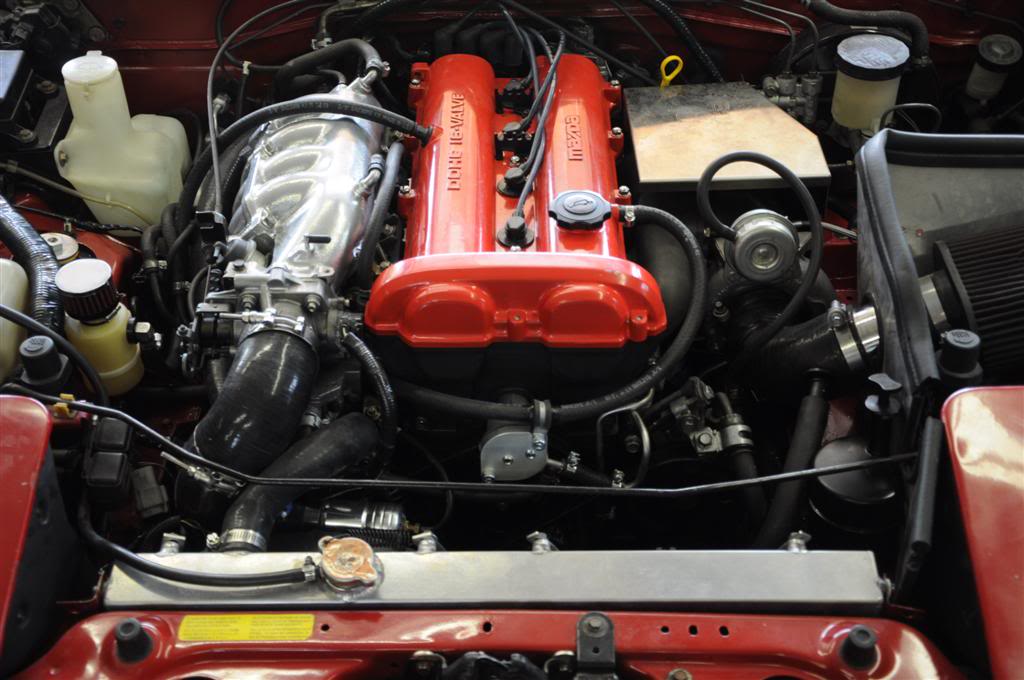
It's taken me like 2 months (was end of October when I actually took the engine out), but finally got the engine in the car!
Yay!
It runs!
Yay!
Only one problem...
The only way i was able to prime the oil pump was through this 'priming port' on the pump housing:
Which isn't really a huge issue, just requires unbolting some of the alternator brackets to get a 6mm hex, u-joint, extension, and ratchet in there - then reattach alternator bracket, retighten belt, and be on our merry way! Car started right up, set the timing with the Hydra, and it runs smooth as butter - 90 psi oil pressure on cold start, dropping down to about 15psi at full operating temperature (per the stock oil pressure gauge).
........
........
........
After sitting for about 30-45 minutes, the oil pump loses it's prime....
......
.......
......
And there's only one way to reprime the oil pump when that happens.....
......
.......
.......
FML
My builder said "that **** sucks" and said he would take care of me if i brought the engine back to him - we can put a stock oil pump back in.
He builds a lot of spec miata engines. They did over 100 miata engines in total last year alone, said this is the first one he's ever heard of doing this.
I emailed travis - waiting to hear from him now.
Yay!
It runs!
Yay!
Only one problem...
The only way i was able to prime the oil pump was through this 'priming port' on the pump housing:
Which isn't really a huge issue, just requires unbolting some of the alternator brackets to get a 6mm hex, u-joint, extension, and ratchet in there - then reattach alternator bracket, retighten belt, and be on our merry way! Car started right up, set the timing with the Hydra, and it runs smooth as butter - 90 psi oil pressure on cold start, dropping down to about 15psi at full operating temperature (per the stock oil pressure gauge).
........
........
........
After sitting for about 30-45 minutes, the oil pump loses it's prime....
......
.......
......
And there's only one way to reprime the oil pump when that happens.....
......
.......
.......
FML
My builder said "that **** sucks" and said he would take care of me if i brought the engine back to him - we can put a stock oil pump back in.
He builds a lot of spec miata engines. They did over 100 miata engines in total last year alone, said this is the first one he's ever heard of doing this.
I emailed travis - waiting to hear from him now.
Reply
0
0
04-08-2010, 09:57 PM
#24
Elite Member
Thread Starter
iTrader: (2)
Join Date: Jan 2009
Location: Columbus, OH
Posts: 4,140
Total Cats: 229
took the engine back to the builder in indianapolis today, (3 hours one way) and we tore down to the oil pump assembly. it turns out that a 1999 or later oil pump housing was put on the car with the boundary engineering gears. (they also ended up putting a 1999 or later block on the car without a convenient oil pickup port) there was one issue we found though. the 1999 and later oil pump housing (ending in "6D" marked on the pump" and gears are 25 thousandths of an inch thicker than the 1994 pump. (they changed it over in july of 2000 - likely to add some oil pumping ability to support VVT and superceded the 1999/2000 pumps for purposes of ordering a new pump, which really isnt an issue if you're not changing gears out) that 25 thousandths of an inch was plenty enough to allow air to flow across the pump gears from the high pressure side to the low pressure side and keep the pump from pulling vacuum when the engine was running. once there was a viscous fluid in the assembly, it was able to maintain normal operating pressure. I was smart enough to 2-day air a new 1994 pump assembly from mazdaspeed and we simply changed out the billet gears (the difference in thickness was enough to feel with your fingers on the 1999/later pump housing. Stock specs for side clearance on the pump gears is something like 3-5 thousandths of an inch, the boundary set was 3.5 thousandths, with an open mesh clearance and outer gear to wall clearances being dead center in the spec range. My builder worked pretty close with me today, I did the simple ****, and he walked me through the precision stuff. The whole shop there is a pretty good crew - they probably had a dozen miata engines in every stage of teardown and rebuild.
I'm working out of town all weekend, but with any luck, I'll be able to get the whole thing back in and running by the end of next week.
I'm working out of town all weekend, but with any luck, I'll be able to get the whole thing back in and running by the end of next week.
Reply
0
0
04-22-2010, 04:46 PM
#25
Elite Member
Thread Starter
iTrader: (2)
Join Date: Jan 2009
Location: Columbus, OH
Posts: 4,140
Total Cats: 229
Car is running!!!
Oil pump self-primed after 10 seconds of cranking after housing switch, installed everythign and filled it up with fluids. Started it up and it sounded good! The Garage Vary Lip looks GREAT on the front of the car. Leather seats are win, seat heaters installed and working. The new headrest speakers function perfectly. 6-speed transmission reverse sensor was all banged up and leaking tranny fluid = bad. I ordered a new sensor from mazda motorsports and plugged it in. Went out for the first test drive and my speedo wasn't working! Yikes. Pulled the speedo gear out, did some troubleshooting, and determined the gear was too small to work with the 4.10:1 sleeve in the tranny. Forum searched pulled up a part number in hustler's "speedo gear fail" thread. Ordered and waiting on that part while turning the 4.10 gear in the 3.636 setup. Speedo should be about 12% pessimistic, so driving accordingly. Daily driven now for 2 days to and from work without problems. Car pulls strong, but i feel like I'm having to relearn the clutch again after driving the stock '99 all winter. Got home from work today, pulled the car into the garage. Took the mail inside then walked back out to pop the hood for a quick inspection. On my way to the car I hear a loud "whoosh!" and think "oh god, what now?"..... The lower radiator hose came off the radiator. Antifreeze all over the garage floor.
Fortunately someone had the insight to install sloped floors and drains in the garage.
Unfortunately I just poured two gallons of hot antifreeze into the sewer system.
Fortunately the radiator hose popped off 30 seconds AFTER i shut the car off. (How freaking lucky is THAT!?)
Unfortunately I have to run to the store to get more antifreeze now.
Fortunately, this is the only "leak" I've had since starting the car the first time after the rebuild.
When I did the initial turbo install, there were half a dozen leaks I had to track down before I got it all right...
Reply
0
0


 06-19-2010, 10:16 AM
#30
Elite Member
Thread Starter
iTrader: (2)
Join Date: Jan 2009
Location: Columbus, OH
Posts: 4,140
Total Cats: 229
Thanks! still tracking down a few issues including an motor oil leak out of the gear housing - pretty sure it's the oil pan seal, but I'm going to UV it to make sure. Might get the engine back together by 4 july. Already replaced the front tranny seal (when i wasnt sure if it was motor oil or not) and then the rear crank seal to no avail. Also checked the CAS, but got no love from that.
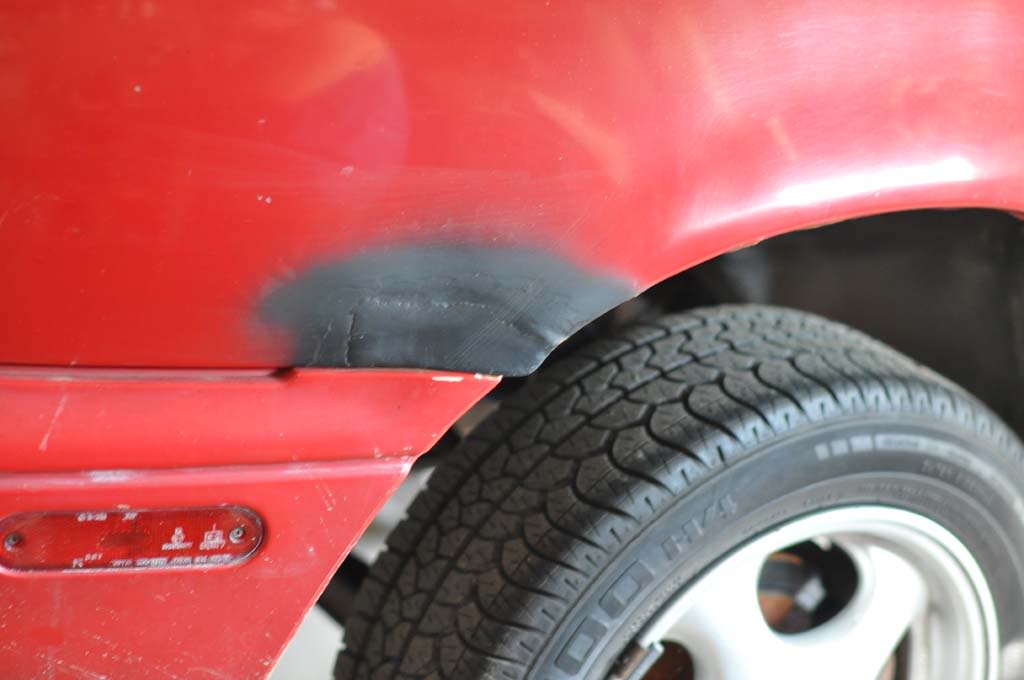
The major rust spots were cleaned up - took the car to a restoration shop where they cut out all the crap (it was REALLY bad on the passenger's side) formed new pieces, and welded them back on. That metal looks great, just need to get the car to a body and paint shop, but I keep wanting to wait for that until after I get the engine sorted.
The major rust spots were cleaned up - took the car to a restoration shop where they cut out all the crap (it was REALLY bad on the passenger's side) formed new pieces, and welded them back on. That metal looks great, just need to get the car to a body and paint shop, but I keep wanting to wait for that until after I get the engine sorted.
Reply
0
0
06-19-2010, 10:19 AM
#31
Elite Member
Thread Starter
iTrader: (2)
Join Date: Jan 2009
Location: Columbus, OH
Posts: 4,140
Total Cats: 229
The radiator hose coming off was due (i believe) to my radiator cap malfunctioning and not allowing pressure to bleed off.
New cap = Easy fix.
Just to be doubly sure it wont come off there again, I put two hose clamps on the hose at the radiator
New cap = Easy fix.
Just to be doubly sure it wont come off there again, I put two hose clamps on the hose at the radiator
Reply
0
0


 08-09-2010, 05:40 PM
#34
Elite Member
Thread Starter
iTrader: (2)
Join Date: Jan 2009
Location: Columbus, OH
Posts: 4,140
Total Cats: 229
Small update to this thread...
Fixed some problems, including resealing the oil pan where builder fucked it up when we replaced the oil pump.
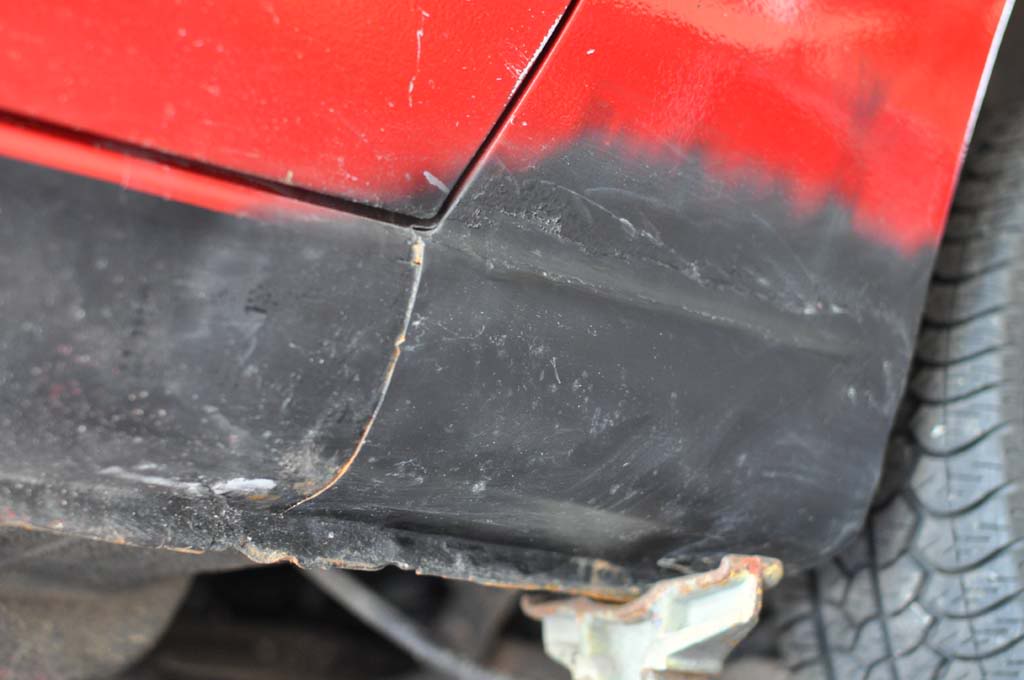
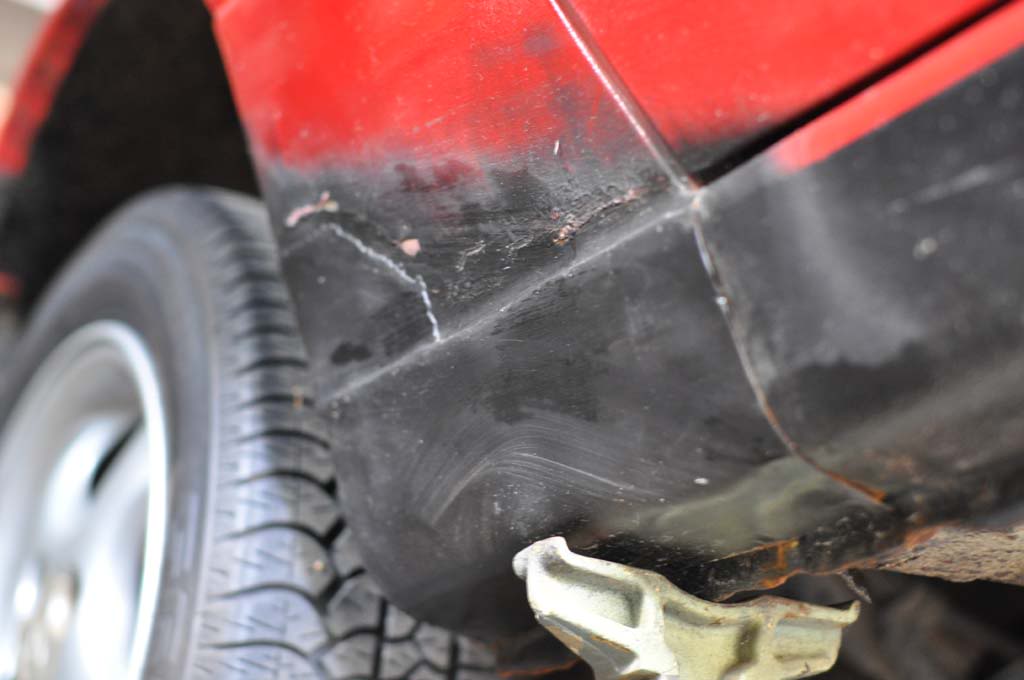
Where once there was rocker panel rust...
now there is.....
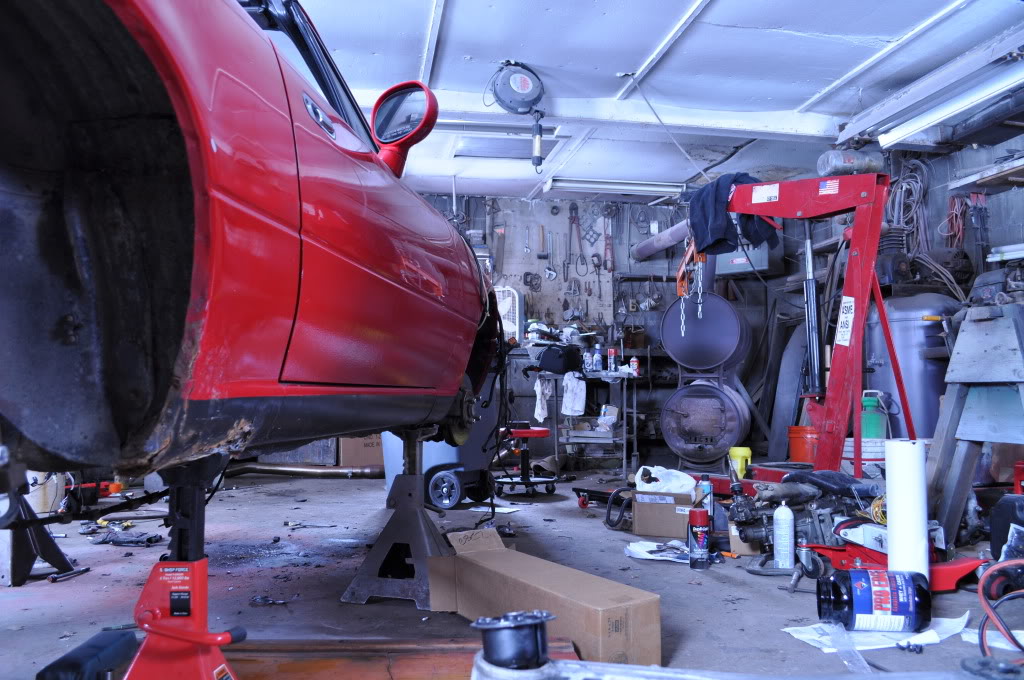
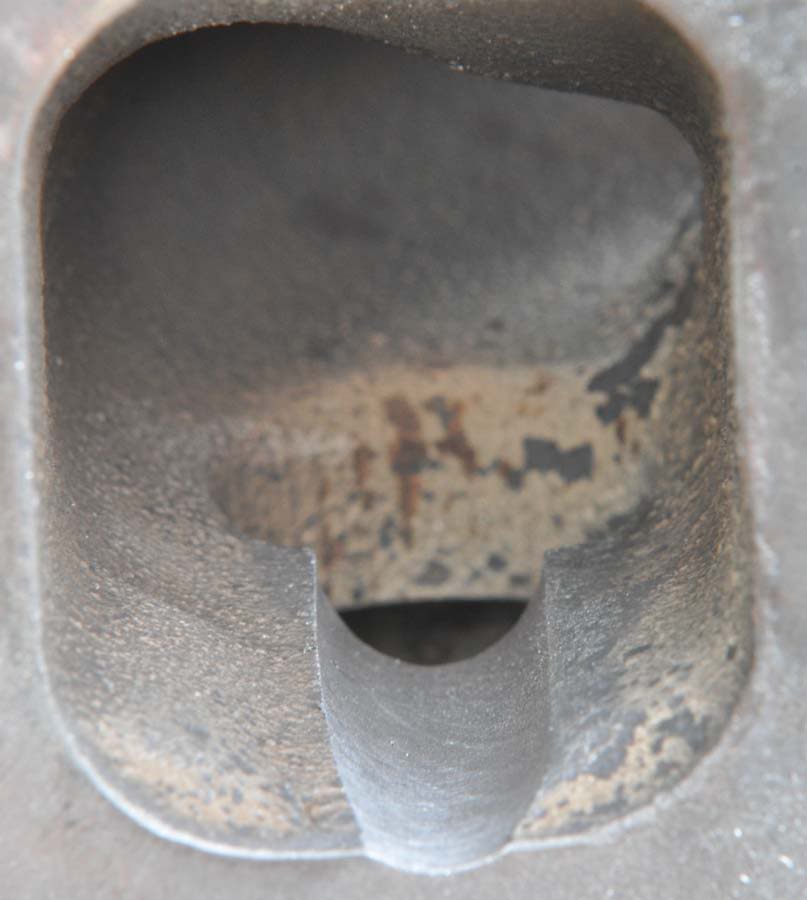
And got something else accomplished today...
About to get a hard run at this to try and 'finish it' again. We'll see if it all works right, or if there's a partout thread around the corner I'm getting sick of this car not running.
Fixed some problems, including resealing the oil pan where builder fucked it up when we replaced the oil pump.
Where once there was rocker panel rust...
now there is.....
And got something else accomplished today...
About to get a hard run at this to try and 'finish it' again. We'll see if it all works right, or if there's a partout thread around the corner
I'm getting sick of this car not running.
Reply
0
0
 08-16-2010, 11:55 AM
#36
Elite Member
Thread Starter
iTrader: (2)
Join Date: Jan 2009
Location: Columbus, OH
Posts: 4,140
Total Cats: 229
**** runz yo!
Oil leak fixed, no more puddles! Thank god! I've got a little bitty tranny fluid leak (1-2 drips parked overnight) The copper washer on my tranny drain plug isn't sized right. I'm going to get a new pair of washers for the plugs and I expect that should fix the problem. Drove to Cincinnati and back, (2 hours each way) and only ran into two problems:
I had the car closed up and A/C on full blast on a 95 degree day. I looked down at the gauges at one point to see it running full hot! Turned the car off and coasted to the side. Turned the key on w/o starting the car to let the fans cool the radiator charge for a minute or two before staring the car with A/C off and watching the gauge drop. Limped it to the next exit and stopped at a gas station, picked up a bottle of 50/50, cracked the radiator cap and let it boil for a minute before opening it up. Filled up the radiator, started the car, and then continued dumping 50/50 into the radiator as the water pump sucked it on down. When all was said and done, I dumped half a gallon of coolant into the radiator before it filled. Capped it, and continued on my way, windows down. Didn't have any cooling problems w/o A/C on. At one point, I turned the A/C back on to "1", and after about 7-8 minutes I watched the needle start running from 11:30 to about 12:30 pretty quick. Shut the A/C off and dropped back down to 11:30 in about 30 seconds. On the way back, weather was cooler and rainy. Had the A/C running and the needle never moved, thankfully. My initial assessment is that I'm boiling coolant due to a weak radiator cap. The cap I previously had failed to release pressure (blew off lower radiator hose) and I replaced it with a 13psi cap. I installed a 16psi cap on it last night, and I'm ordering a higher pressure cap today. Before the rebuild, I could run my A/C full tilt on a scorching hot day and not see the needle climb past 11:45, after the rebuild, I had the radiator cap problem and put on the 13psi cap. I also added the coolant reroute to the new build, so I would expect my cooling ability to have increased pretty significantly.
About the time I got into Cincinnati, I started hearing a very faint squeal, after some testing, decided it was entirely speed based, not RPM based and not load based. Thought it was coming from the front right wheel at first. Stopped and checked the wheel bearings: no play. On the return trip, the squeal got a little louder, and seemed like it only happened when something warmed up, at slower speeds it would eventually go away. At one point it was loud enough that I determined it was coming from behind the instrument cluster, my passenger agreed. A new speedometer cable has been ordered.
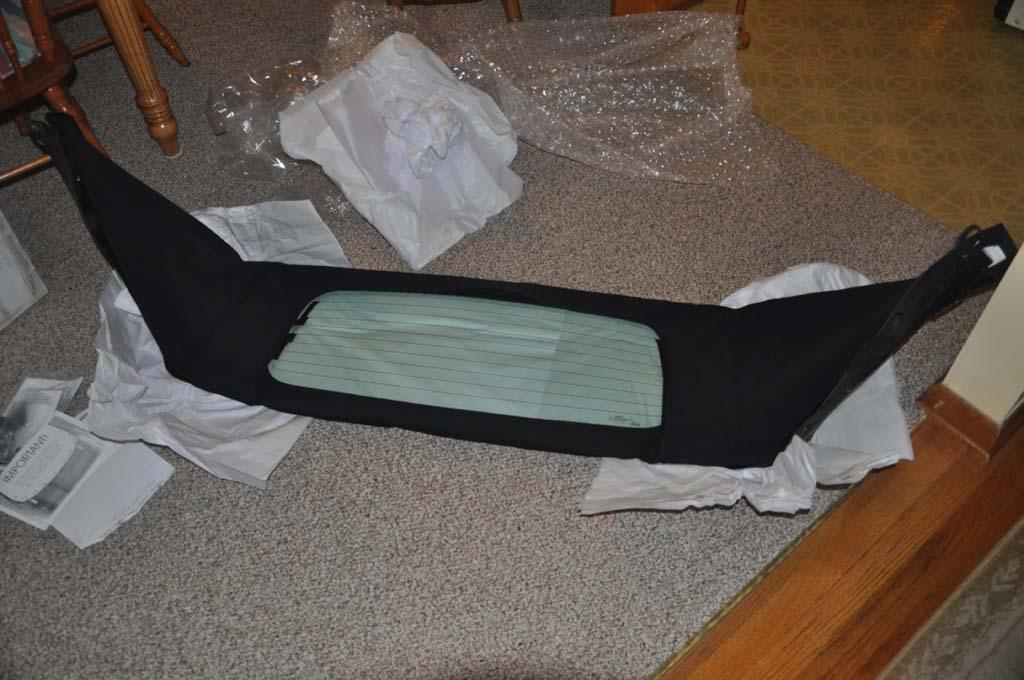
The robbins top had absolutely TERRIBLE instructions. There were at least two times where it says:
4. Do this procedure
5. Before you do 4, you will want to:.....
WHAT THE ****!? If you want me to do 5 before 4, then make 5->4 and make 4->5....bastards!
Oil leak fixed, no more puddles! Thank god! I've got a little bitty tranny fluid leak (1-2 drips parked overnight) The copper washer on my tranny drain plug isn't sized right. I'm going to get a new pair of washers for the plugs and I expect that should fix the problem. Drove to Cincinnati and back, (2 hours each way) and only ran into two problems:
I had the car closed up and A/C on full blast on a 95 degree day. I looked down at the gauges at one point to see it running full hot! Turned the car off and coasted to the side. Turned the key on w/o starting the car to let the fans cool the radiator charge for a minute or two before staring the car with A/C off and watching the gauge drop. Limped it to the next exit and stopped at a gas station, picked up a bottle of 50/50, cracked the radiator cap and let it boil for a minute before opening it up. Filled up the radiator, started the car, and then continued dumping 50/50 into the radiator as the water pump sucked it on down. When all was said and done, I dumped half a gallon of coolant into the radiator before it filled. Capped it, and continued on my way, windows down. Didn't have any cooling problems w/o A/C on. At one point, I turned the A/C back on to "1", and after about 7-8 minutes I watched the needle start running from 11:30 to about 12:30 pretty quick. Shut the A/C off and dropped back down to 11:30 in about 30 seconds. On the way back, weather was cooler and rainy. Had the A/C running and the needle never moved, thankfully. My initial assessment is that I'm boiling coolant due to a weak radiator cap. The cap I previously had failed to release pressure (blew off lower radiator hose) and I replaced it with a 13psi cap. I installed a 16psi cap on it last night, and I'm ordering a higher pressure cap today. Before the rebuild, I could run my A/C full tilt on a scorching hot day and not see the needle climb past 11:45, after the rebuild, I had the radiator cap problem and put on the 13psi cap. I also added the coolant reroute to the new build, so I would expect my cooling ability to have increased pretty significantly.
About the time I got into Cincinnati, I started hearing a very faint squeal, after some testing, decided it was entirely speed based, not RPM based and not load based. Thought it was coming from the front right wheel at first. Stopped and checked the wheel bearings: no play. On the return trip, the squeal got a little louder, and seemed like it only happened when something warmed up, at slower speeds it would eventually go away. At one point it was loud enough that I determined it was coming from behind the instrument cluster, my passenger agreed. A new speedometer cable has been ordered.
The robbins top had absolutely TERRIBLE instructions. There were at least two times where it says:
4. Do this procedure
5. Before you do 4, you will want to:.....
WHAT THE ****!? If you want me to do 5 before 4, then make 5->4 and make 4->5....bastards!
Reply
0
0
08-16-2010, 07:28 PM
#37
Elite Member
Thread Starter
iTrader: (2)
Join Date: Jan 2009
Location: Columbus, OH
Posts: 4,140
Total Cats: 229
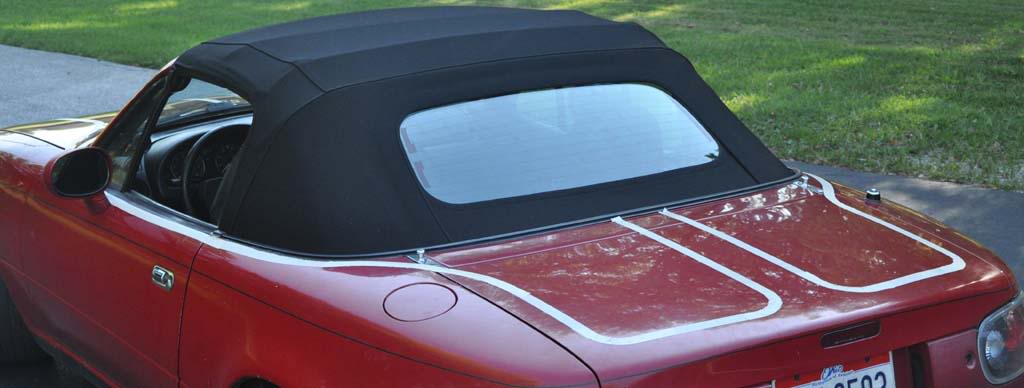
I'm thinking about moving the outside edges of the black stripes out by about 2" before I take it to paint...

 \
\
I don't know what to do with the mirrors yet.
\I don't know what to do with the mirrors yet.
Reply
0
0
08-16-2010, 07:28 PM
#38
Junior Member

Join Date: Dec 2009
Location: Shelbina, MO (North East)
Posts: 332
Total Cats: 1
Doesn't make a lot of sense to me that the lower pressure cap is allowing the car to overheat unless you are boiling the AF out of the radiator. (which could happen)
Any readouts showing what the coolant temp actually is?
Does the hose in the overflow bubble when it is running or when hot?
Overflow tank get too full?
Any readouts showing what the coolant temp actually is?
Does the hose in the overflow bubble when it is running or when hot?
Overflow tank get too full?
Reply
0
0
08-16-2010, 07:37 PM
#39
Elite Member
Thread Starter
iTrader: (2)
Join Date: Jan 2009
Location: Columbus, OH
Posts: 4,140
Total Cats: 229
When it was overheating, the coolant was boiling into the overflow tank. I'm still trying to figure out if boiling coolant was the cause or the effect. It's probably time to do some ducting. The 16psi cap held out slightly better than the 13psi cap on my way home today, 90 degrees and maxxed AC. I don't have any exact readouts on temp. I wasn't logging. Overheating only happens when the AC has been running for an extended period of time (10 minutes or more under freeway cruise) Accel/boost/load doesn't seem to affect it as one might expect from a faulty/blown head gasket.
Reply
0
0
08-17-2010, 11:52 AM
#40
Elite Member
iTrader: (8)

Join Date: Dec 2008
Location: Kingston, Ontario
Posts: 2,910
Total Cats: 51
at a minumum put the factory underbody tray on if you dont have it on now.
that helped my issues which seemed like an air pocket when i was driving..... aka would heat up hot hot and then rapidly drop to regular.
that helped my issues which seemed like an air pocket when i was driving..... aka would heat up hot hot and then rapidly drop to regular.
Reply
0
0


