When you click on links to various merchants on this site and make a purchase, this can result in this site earning a commission. Affiliate programs and affiliations include, but are not limited to, the eBay Partner Network.
Cool thanks. Trying to get this done before the new time trial season starts in mid January.
I didn't think about how horrible the stock Miata's aero is until we did Firebird Main here. It uses the drag strip as part of the road course so there is a half mile straight. There is an NSX in my class that has ~15 less whp and about 400-500 more lbs, but he's going about 10 mph more than I am by the end of that half mile. Might be gearing also, but I'm sure this will help quite a bit.
a little of that could be do to corner exit speed difference. especially considering the fact that he has a mid engine car with alot wider rubber. But yes, miata's aren't very aerodynamic. Anyway, just wondered, what's your comp weight? (car+driver) that puts you in TTA with 251whp. And is that your reclass by greg g, or you up to TTA in points from TTB?
The options Greg gave me were TTA* I could do 235whp at 2160lb or 262whp at 2338lbs. He gave me a TTB** option of 235whp at 2440lbs, but doesn't make any sense to do that one due to the base tire size points refund. The difference between running TTB** and TTA* is five points with the change in base class tire size when running 225s, so basically 5 points is buying me 27hp and about 100lb lighter. Points breakdown is
-19 for 225s, +7 NT01s, +3 6 speed, +3 LSD, +3 shocks, +2 springs, +2 sway bars, +3 air dam, +3 splitter, +4 wing, +7 for *.
So 18 points into TTA. I ran this last year with a 5 speed, no aero, and old suspension. Just had all that budgeted beforehand when I picked my class, except the 6 speed. I blew my second 5 speed this year at the Dec event, so decided to not do canards and diffuser to have a better chance at not losing another transmission. Added the 6 speed, XIDA-S, APR GTC200 wing this month so far. Just need to build that front air dam/splitter and setup the suspension height/corner balance before mid Jan.
My last comp weight was 2400 with 3/4 gas. I'll be gutting the doors and exercising to get that last 50ish lbs out of the car to get near the limit.
That's the 1st I've heard of him giving an option to base-class a miata in TTA - all the points adders, this is why I'm just going to run TTS and suck it up.
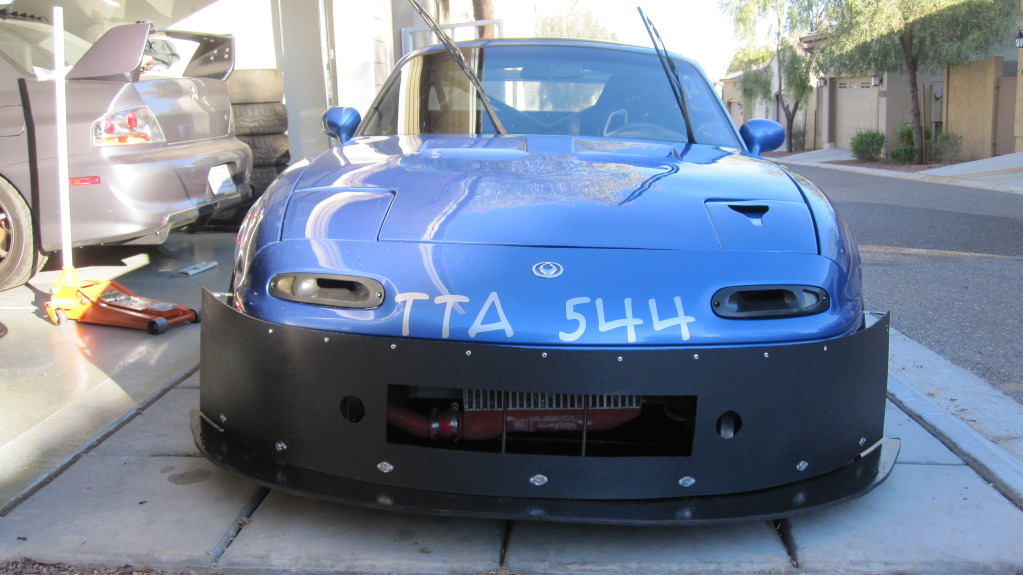
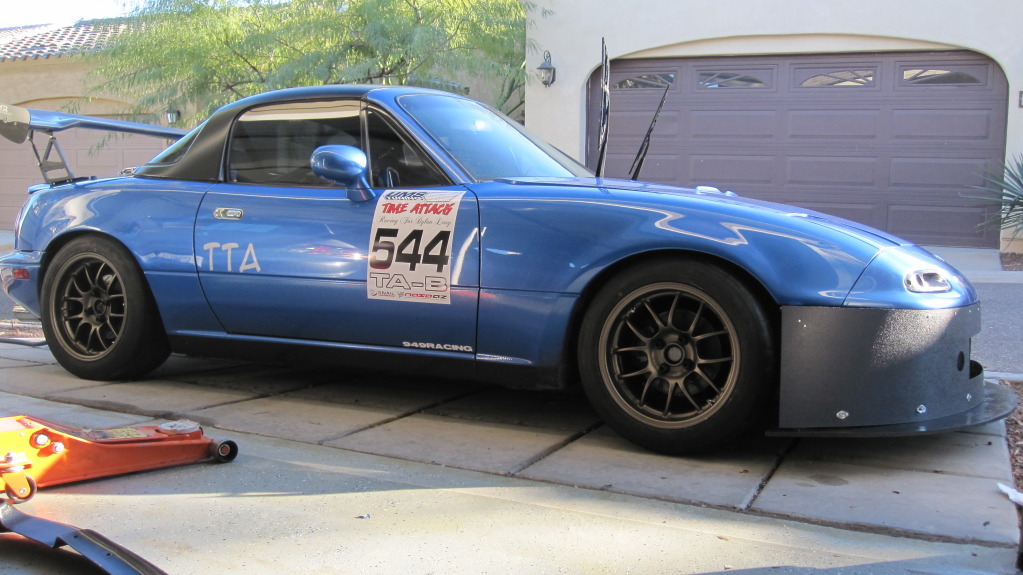
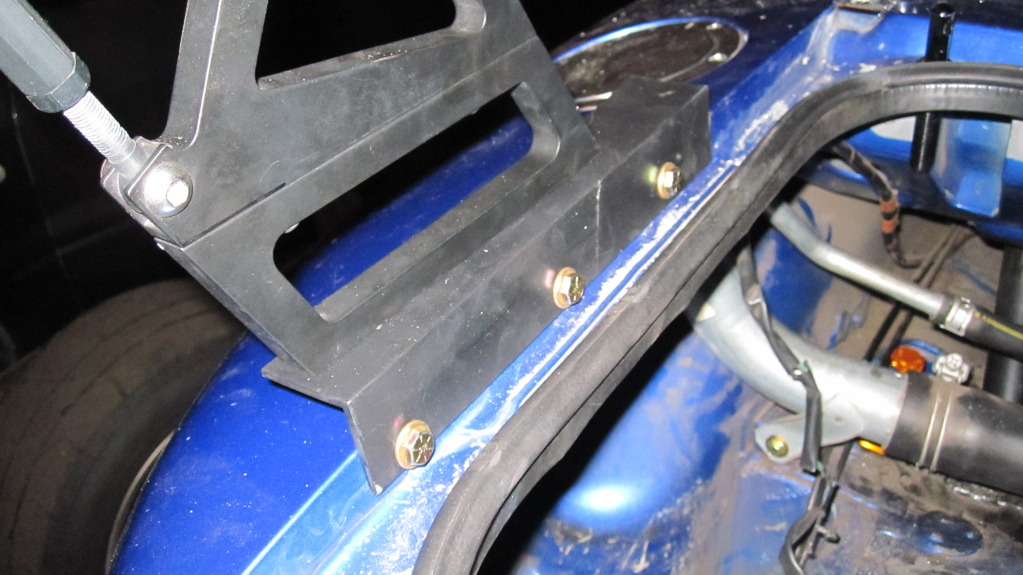
Figure I'll just tack this on here instead of creating a new thread. Thanks to ZX-Tex and Handy Man on how to do the front end. Also thanks the BBundy on his idea on mounting a universal GTC-200.
So first off, I have never really tried to fabricate anything like this. I've only done bolt on type stuff. It's been ages since I've worked with wood, and this is my first attempt at using fiberglass resin so the finish came out pretty crappy. It should be mostly functional still
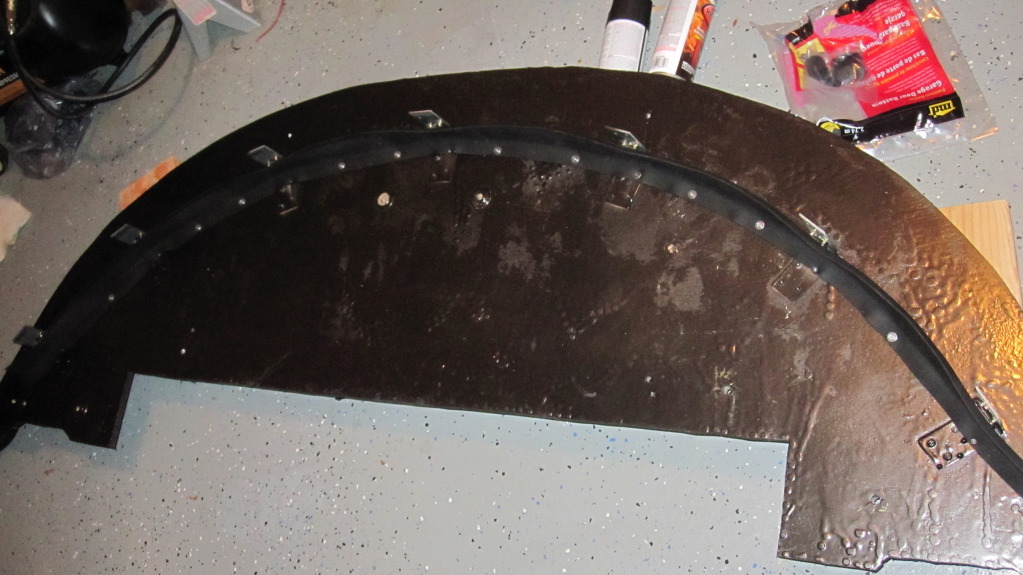
The splitter is 1/2" birch, couldn't find 3/8 around here. The bumper is 1/8" abs plastic.
I couldn't find any L shaped garden edging at the local Lowes and Home Depot, so I used garage door weatherstripping to try to seal the bottom edge. Connecting the abs to the splitter I used Dzus fasteners. The top is just 3/16" rivets.
Many people use splats or canards to try to cover up the exposed tire on the sides. I'm points limited for TT, so I flared the abs out some to cover the tires. Just put two L brackets together and rivited it. It is about 2.5 inches out on each side.
These pictures are test fitting after I did the fiberglass. For some reason the driver's side is hanging a little lower than before. It is just a little over 3.5" off the ground. The backside is mounted to the steering rack on a second smaller piece.
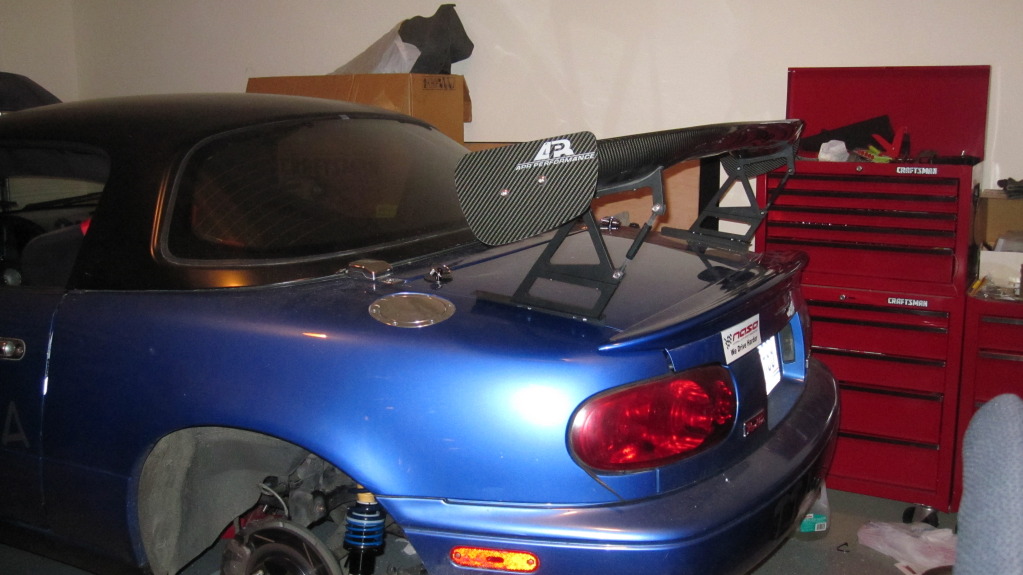
The wing is mounted using BBundy's method. I only have single risers, and the stock wing is a single piece all the way across which prevented me from opening the trunk with the APR installed. I removed the hinges and installed hood pins to the front corners of the trunk, and it still uses the stock latch on the back.
Still more stuff to do, but the next event is tomorrow so ran out of time to make it look pretty.
I am on a long Aero project. I work really slow. I have really liked this thread. To me step one is giving the air coming through the nose a place to go so you are not a hovercraft. So, here is a DIY hood vent. Time: 30+hr drafting, 6hr install including template construction. I have only completed the driver�s side. Passenger side for another day off. $100 in water jet time.


 0
0