When you click on links to various merchants on this site and make a purchase, this can result in this site earning a commission. Affiliate programs and affiliations include, but are not limited to, the eBay Partner Network.
Oil based Zinsser primer & a couple of coats Rustoleum Topside boat paint. Takes forever to dry and stinks to high heaven, but penetrates and is sturdy.
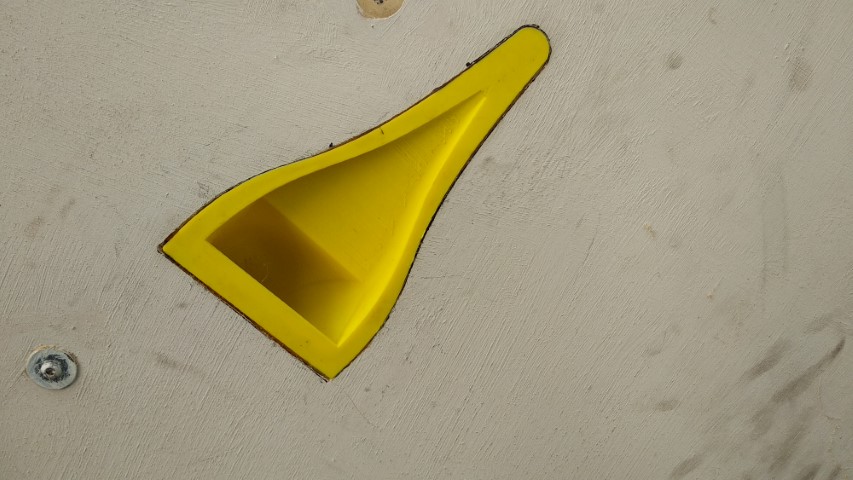
The lower surface has loads of graphite powder mixed in the topcoat so it slides.
Nice work! I'd be interested in a picture of the structure/arrangement of the mount at the subframe. Also, lots of fasteners there, is that overkill, or are you expecting lots of flex, or lots of pressure?
It looks as strong as hell, have you considered the failure mode? Are the fastener holes in the ply the weak point?
1/4" countersunk fasteners at rear to frame are single shier and will tear through wood if much tension is applied.
3/16" countersunk fasteners in lower front hopefully should tear through wood, if reduced shank fasteners holding angle on splitter don't shier first?
Dollars spent: $160 Hours spent: 10ish How effective: ~3 (track tested tbd) Materials used: Convertible Brow, LEXAN, Aluminium, steel hardware Size/thickness of materials: 3/16� Lexan Bracket location: Windshield header & Rollbar Tracks tested on: Spokane County Raceway (reach ~118 in NB1 N/A, no top) Race/TT class built for: Track days, non class specific
Super stable partial top to improve airflow over the car. Significantly reduces air flowing into the cabin. Have tested up to 80mph, will work back up to track speeds in a few weeks during next track event. Very light and sturdy construction fastened with steel hardtop plates and steel ties. I am 5�-7� and have no helmet clearance issues with this setup. Most track days require windows down (took out windows) and didn't want to pay 150 for a fiberglass partial top plus another 150 for freight shipping.
, Push-on rubber trim (https://www.mcmaster.com/12335A29), Staple gun Bracket location: NA airbag sensors in wheel well Weight: 12 lb for undertray/airdam w/brackets Tracks tested on: Buttonwillow 13CW Race/TT class built for: n/a
I wanted to run Supermiata S2 (Airdam + Spoiler) style aero on my miata, but didn't want to swap bumpers or build a full airdam yet. I also wanted to be able to swap the aero bits off as my car still gets street driven. The spoiler is blackbird fabworx and mounts to a spare trunk that gets swapped. The front is birchwood mounted to TSE brackets. The whole kit takes me about an hour to swap on and off. Not pictured are the staples, which I needed to keep the rubber trim in place. I was impressed by how stable the car was at Buttonwillow, especially on Riverside, and the car gained a few MPH on the front straight. Didn't go off, so the aero performance seems consistent or the driver needs to push harder. I still need to workout how to mount the tire shrouds to the airdam. The shrouds are 1/8" abs and bend a bit at speed, but i dont want them to damage the bumper if the undertray gets damaged. I already snagged the undertray on the terrible roads at Lost Hills and had to push the undertray/airdam back into position at the track.
This needs to be changed.
That turnbuckle will drop right out of the eyebolt the moment the splitter gets pushed upwards by a tight turn / kerb / running off track, and you're not going like the results.
This needs to be changed.
That turnbuckle will drop right out of the eyebolt the moment the splitter gets pushed upwards by a tight turn / kerb / running off track, and you're not going like the results.
That or bend the hook. I ran that one day last summer and when I got to about 85mph 2 on my 4 hooks bent straight.
I am beginning to lose my mind looking for 3/8 birch. Does anyone have a recommended next best thing? Other types of hardwoods?
You can laminate the 1/8" sheets of the nice stuff Lowes/Home Depot carries in the project board section, or just use the nicest grade they have. It doesn't have huge voids, but is usually a little thicker than 3/8". That's what I used, and it didn't fare much worse than my frame rails did when I wrecked, lol.
I don't know what you guys call it over there but the best marine grade hard and strong plywood here is called "Maranti".
I have 3 seasons on my one made from this.
I'll search around for this.
Originally Posted by Supe
You can laminate the 1/8" sheets of the nice stuff Lowes/Home Depot carries in the project board section, or just use the nicest grade they have. It doesn't have huge voids, but is usually a little thicker than 3/8". That's what I used, and it didn't fare much worse than my frame rails did when I wrecked, lol.
That will probably work, but I would not trust myself to laminate well enough for it not to split. I am far from a woodworker (my fiancee reminds me all the time).
I am starting to think about going with this 12mm stuff .. Sande Plywood?!
I doubt you'll find 3/8 birch, use 1/2", spray it with 2 or 3 coats of black krylon, no primer. The krylon well act more like a stain then and the first few coats well sink into the wood and seal it, you well also be saving weight. The 1/2" well actually be a little less because it ain't a full 1/2" now days. Mine's been on for 7yrs now with no issues.
I'm glad you like it. Yes, learn from my mistake and get a wing first.
It is riveted to the bumper skin, and then the lower part of the skin was cut off. This gives me a lot more room in there for brake and radiator ducting and saves a bit of weight. The rivets don't have any backing but they aren't quite strong enough, a couple of the more stressed rivets pop out occasionally. I'd recommend backing them with rivet washers. I'm gonna add some washers myself next time they pop out.
The hardest part is getting the air dam cut right. It looks like its a perfect rectangle, but its not. I used the recessed line in the bumper skin as a guide and cut the dam to follow it. I found that a jig-saw worked well for cutting the ABS, a sawzall would probably work too. The hard part is to keep it from melting as you cut it, keep your cutting speeds low and be patient. Of course, a cardboard mock up is crucial.
Good luck, and feel free to ask here or shoot me a PM with any other questions.
Does anyone know the general consensus on the minimal required rivet size? I've got some decent 1/8 aluminum Arrows, but I'm feeling like that won't do it =/
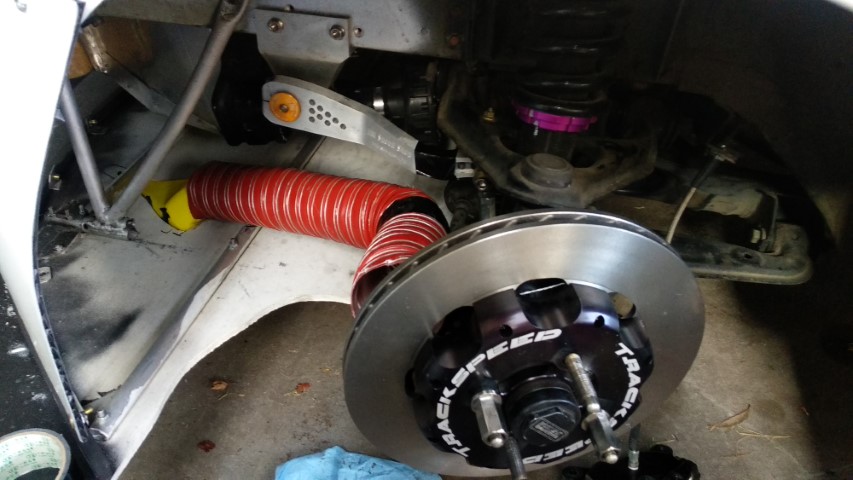
DIY Naca ducts 3d printed, flush mounted in the birch ply splitter floor and feeding 3" hose feeding to the rotor/hub area. Not tested yet to prove it, but along with brake cooling this may even help with extra front downforce.
I designed the ducts myself in Fuision360, and sort of 'winged' the shape (pun intended) so I cannot know for sure if it will work. If you're interested, plenty more details on the car here: www.youtube.com/bbeavis
Dollars spent: ~$10 for the ducts Hours spent: 2hrs to design duct, 1.5days to 3d print, ~4hrs to cut/glue into the splitter and attach hoses. How effective: testing next weekend... Materials used: PLA plastic ducts, 3" hose, zip ties to secure hose to car.
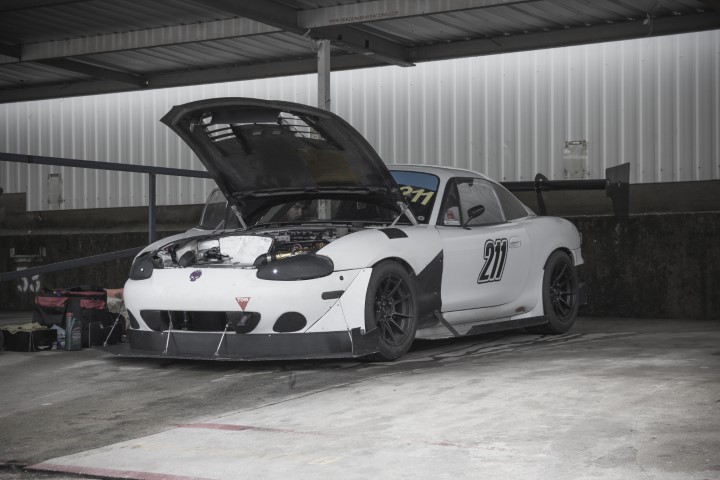
Didn't DIY much, but for whoever that wants to see how a nb2 or msm can use of the shelf parts for aero. Some basically the parts used are Nine Lives Racing Big Swan with the new profile wing mount, BMspec Splitter, Garage Vary Canards, Singular Hood Vents. pictures are from my latest time attack.

 04-11-2019, 02:59 PM


 0
0