When you click on links to various merchants on this site and make a purchase, this can result in this site earning a commission. Affiliate programs and affiliations include, but are not limited to, the eBay Partner Network.
All group buy/preorders are packed and shipping out today!
And while your fender louvers are whizzing through the air, watch the video below that covers all the details that I can think of to help you have a smooth install:
and so the race to see who installs these first begins! Nice video Ryan. Can't wait to get mine on.
Got mine today along with the extra hood vents, thanks Ryan! I'm sure someone will have installed pics well before me. I've always been under the impression that car parts need to sit a number of weeks, if not months, before they can be installed. Kind of like how dirty dishes need to soak overnight before they are ready to be washed.
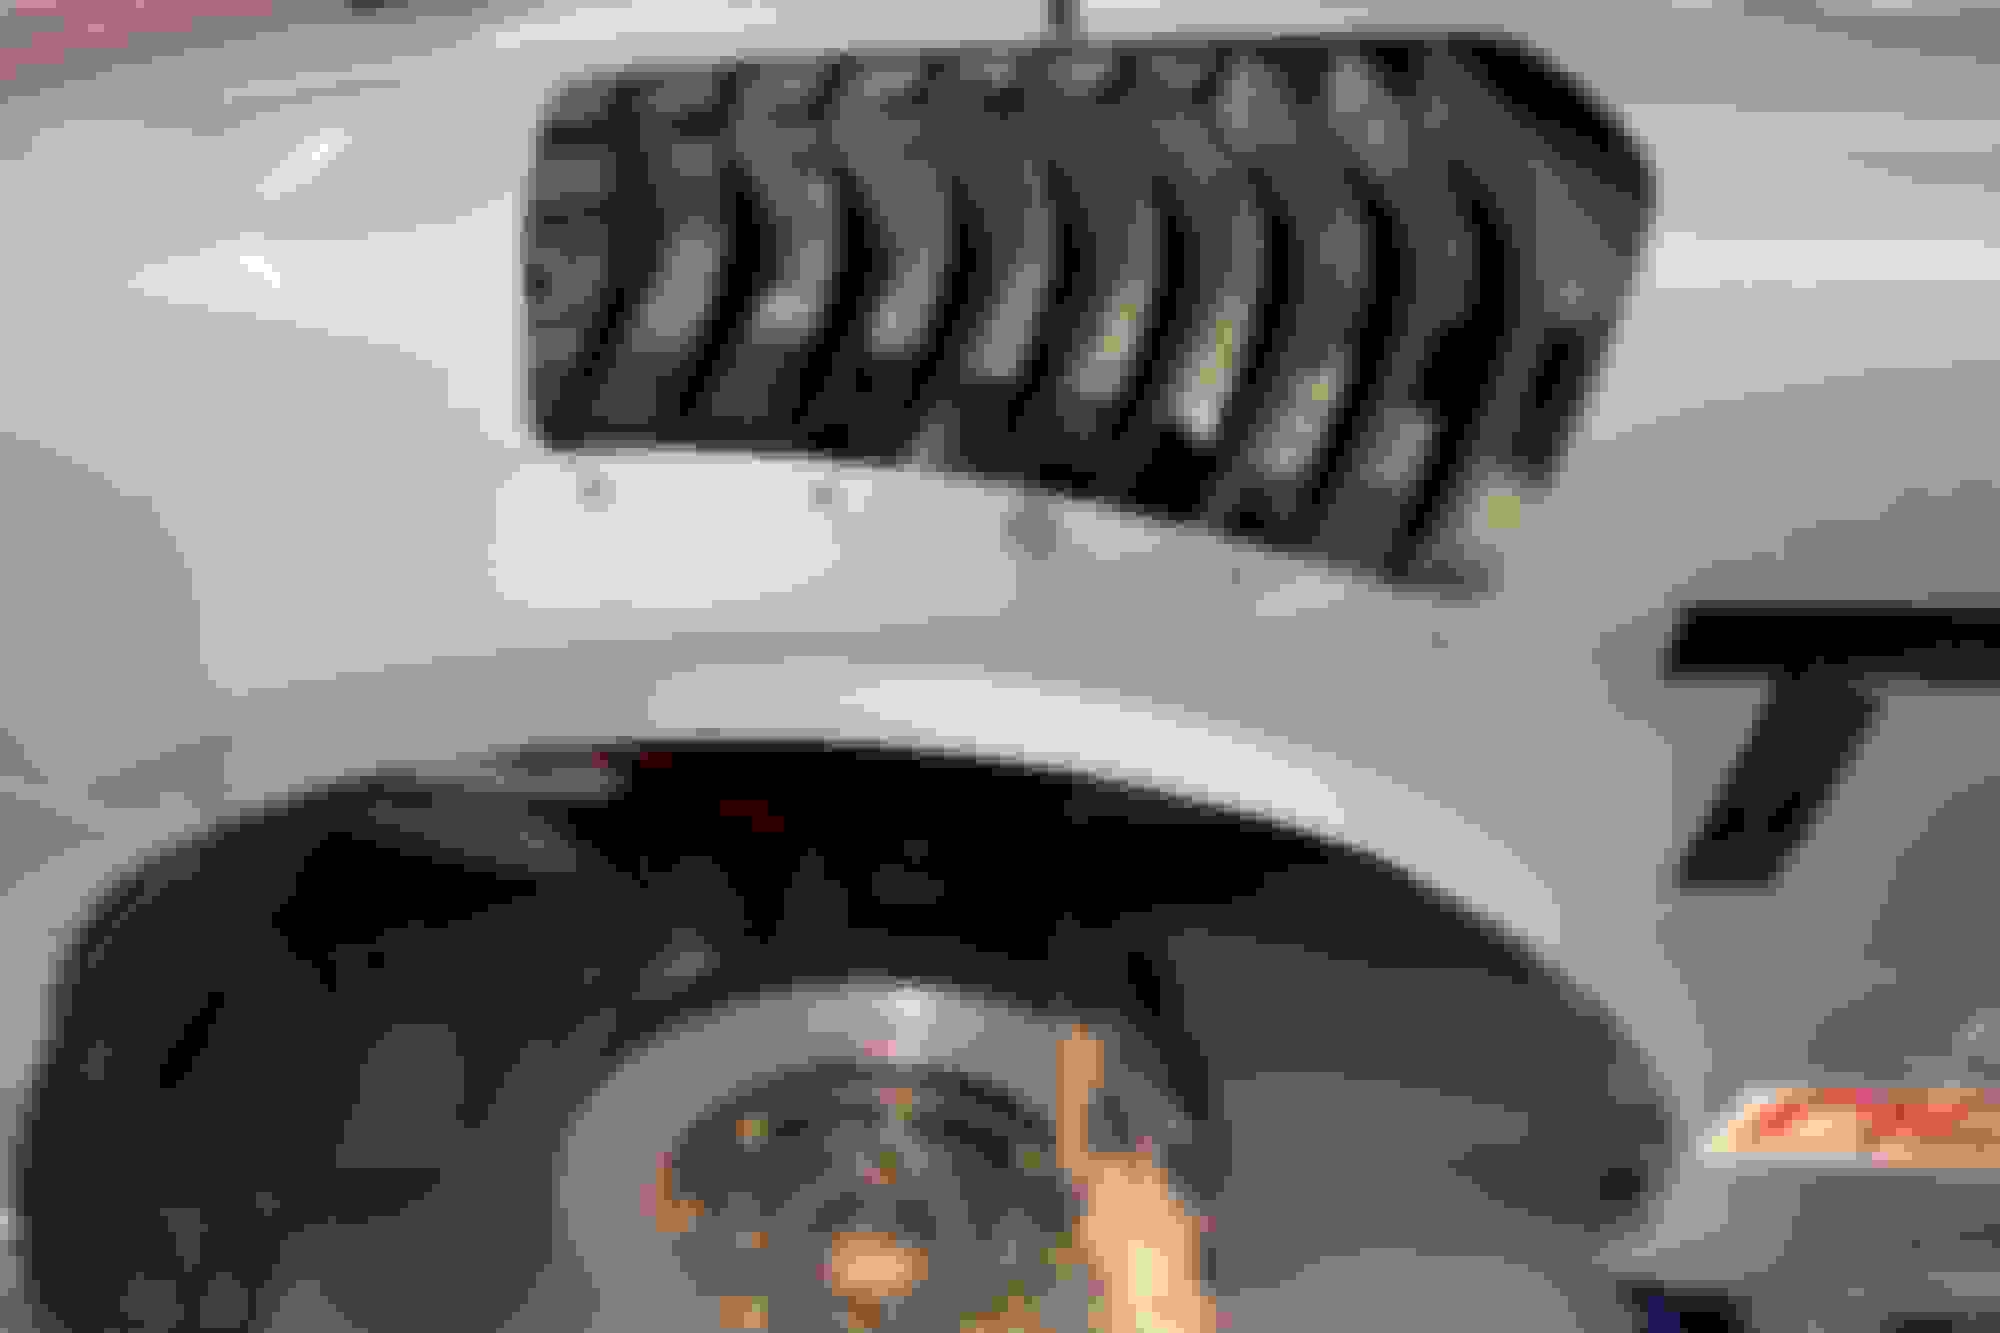
Install almost done. Had a few aero efficiency questions.
Would it be a good idea to form a short Gurney flap / wicker on the leading edge fender cut to improve scavenging? And a reverse blocker inside fender on rear of cut, to prevent reversion as louver in rear is actually below outside the NB2 fender edge?
Last edited by Blkbrd69; May 18, 2023 at 04:44 PM.
Install is looking super clean so far. Nice.
From the testing we did there's no need for a reverse blocker at the rear - there's zero inflow. The airflow in this area is a bit more messy/complicated than the top surface of the hood, so a gurney at the leading edge was less effective in testing than say, on hood louvers.
If you were going to go through the trouble to make one, to make it as effective as possible I'd suggest having it cover not only the front edge, but also have it travel down the top edge of the opening, parallel with the side of the hood too. But it isn't necessary.
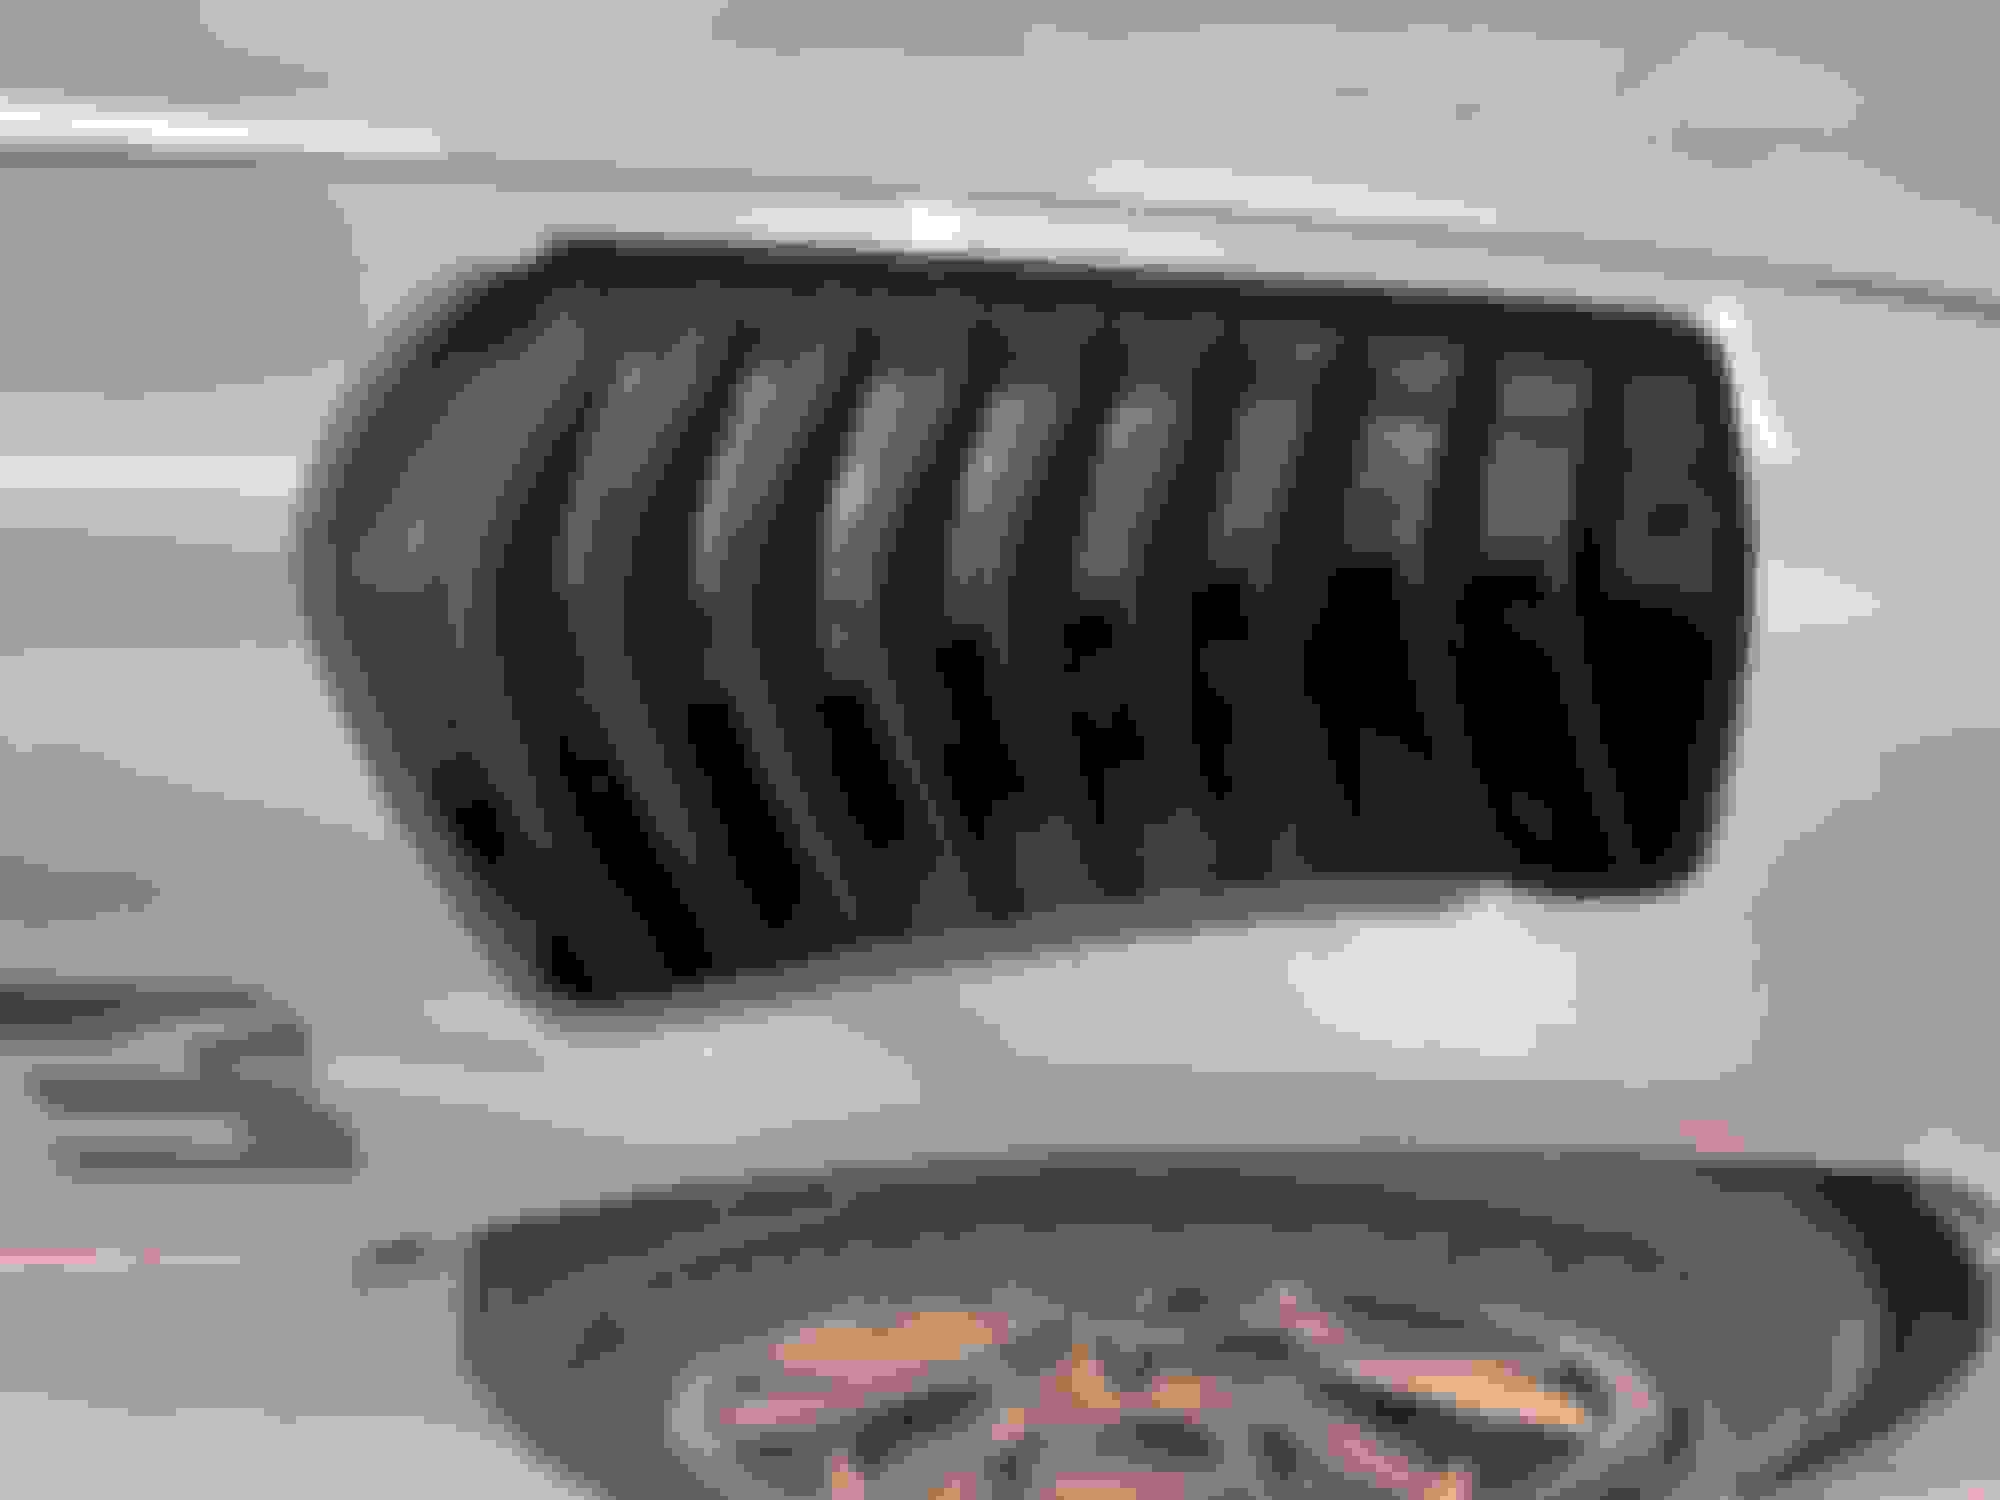
Rough draft just for design purposes.
I take it you are implying a fence on top edge of louver due to hood outwash with an integral gurney something like this?
Not sure if this is going to pass tech but rules say nothing about fences or gurney flaps on fender vents.
Last edited by Blkbrd69; May 18, 2023 at 04:45 PM.
Rough draft just for design purposes.
I take it you are implying a fence on top edge of louver due to hood outwash with an integral gurney something like this?
Not sure if this is going to pass tech but rules say nothing about fences or gurney flaps on fender vents.
We spoke today by phone, but for anyone else following along, yep that's what I was suggesting. Install is looking great. But to be clear for others, you're just having fun fiddling around with things - the vents work great as designed, and do not need this.
We talked about various tools you used for the install. Feel free to post what you used and things you encountered. The more info added to the collective here the better. Personally, I use an angle grinder for the majority of the cut and then a drum sander for the corners, and I suggest removing the fender to make the install easier. But it sounded like you did it with the fender on the car and used a jigsaw, and that perhaps made some steps easier and others harder.
After talking with Ryan I figured I would do a writeup on my Singular fender vent installation.
This is my personal opinion, please use Singulars instructions as the primary reference guide. If you destroy a nice pretty set of fenders, its your fault not Ryans or mine.
All of this is my opinion !! If you have any questions go directly to the source (Ryan) with tons of experience, track and wind tunnel data to back it up.
Note; Many of my overdone engineer/aircraft mechanic steps are not needed!! I just happen to have a very good tool selection due to my profession and hobbies. If you decide to use a hatchet and wood screws they will still do the job.
I can run fender vents in NASA TT3, please read rules as TT4 is hugely different and the points hit is probably not worth it. IMHO: Unless you are actually running at high speed on track with race tires for time in competition for tiny plastic trophies, you shouldn't be cutting up a car for negligible gains. "Especially one with nice crystal blue metallic paint." I am looking for a bit less lift w better cooling as my huge oil cooler is vented to wheel-well. Could get better brake cooling as well, but don't need it with monster Afco brakes.
I would recommend doing all your tire fitment fender rolling & pulling before cutting holes to install vents, as once hole is cut you do loose some integrity. I was fitting 245 Hoosiers at same time so fenders were being heavily massaged. Ryan recommends removing fender, but I figure most people won't.
Measure & position the cutting template properly before laying down. Note: The fender is a compound curve and the paper backer doesn't like a compound curve, use some patience to properly lay down without "many" wrinkles. There are some good guides online on how to put decals on compound curves.
When you do wrinkle it, don't fret as there is some trimming room. Do not overly clean wax off before applying template, as removing them if stuck too well you can pull up small areas of 20+ year old clearcoat. (don't ask). Mask surrounding area off so as not to scratch that pretty paint you are about to butcher. Tape all hood seams, cover hood vents, suspension & windshield as metal chips go everywhere.
I used a large step drill bit for starter hole and to give my first corner radius. Hole saw would work for corners also. I used a jig saw with a fine metal blade to cut outline including radius. Note: You will need to shorten saw blade if you do it with fender on, as blade will hit structure underneath upper/inner portion of fender. (Ryan uses a cutoff wheel instead)
The pattern comes with 2 locator holes. Drill those and check fitment of vent multiple times after pre bending according to Ryans video. Best if vent is perfectly fit to bottom of bumper so it doesn't preload thin fender when secured by any fastener position.
I didn't remove fenders so I had to drill upper holes from top, as I didn't feel like picking them up from underneath with 90* drill. Use Clecos and attach vent from top to drill remainder of upper holes. (worth every penny, some of mine are 40+ years old) (you can always use screws).
Check fit multiple times while tweaking vents to their final shape so there is zero gap or preload. Then drill lower holes from underneath, center moving out clecoing as you go.
Final ream fastener holes one hole at a time while re-clecoing. Deburr upper and lower surfaces of fender with deburring tool / countersink. For lower inner side I used an ancient 90* drill & countersink.
No matter how good you are with a jigsaw/cutoff wheel you will need to clean up cut & properly radius edges. I used a 90* Dotco w a 3/4" sanding drum, 3" sanding discs and 2" Scotchbrite discs for smooth edges. Good time to check for even final trimming with edges of vents and holes. I used a 1/8" piece of plastic bent around clecos to draw smooth even curve.
After final deburring and polishing cut edges, I used Brownells cold bluing to treat bare metal before painting. Primer would be fine. Easy to paint touch up edges and holes while pattern/tape is still installed rolling Q-tip along edge.
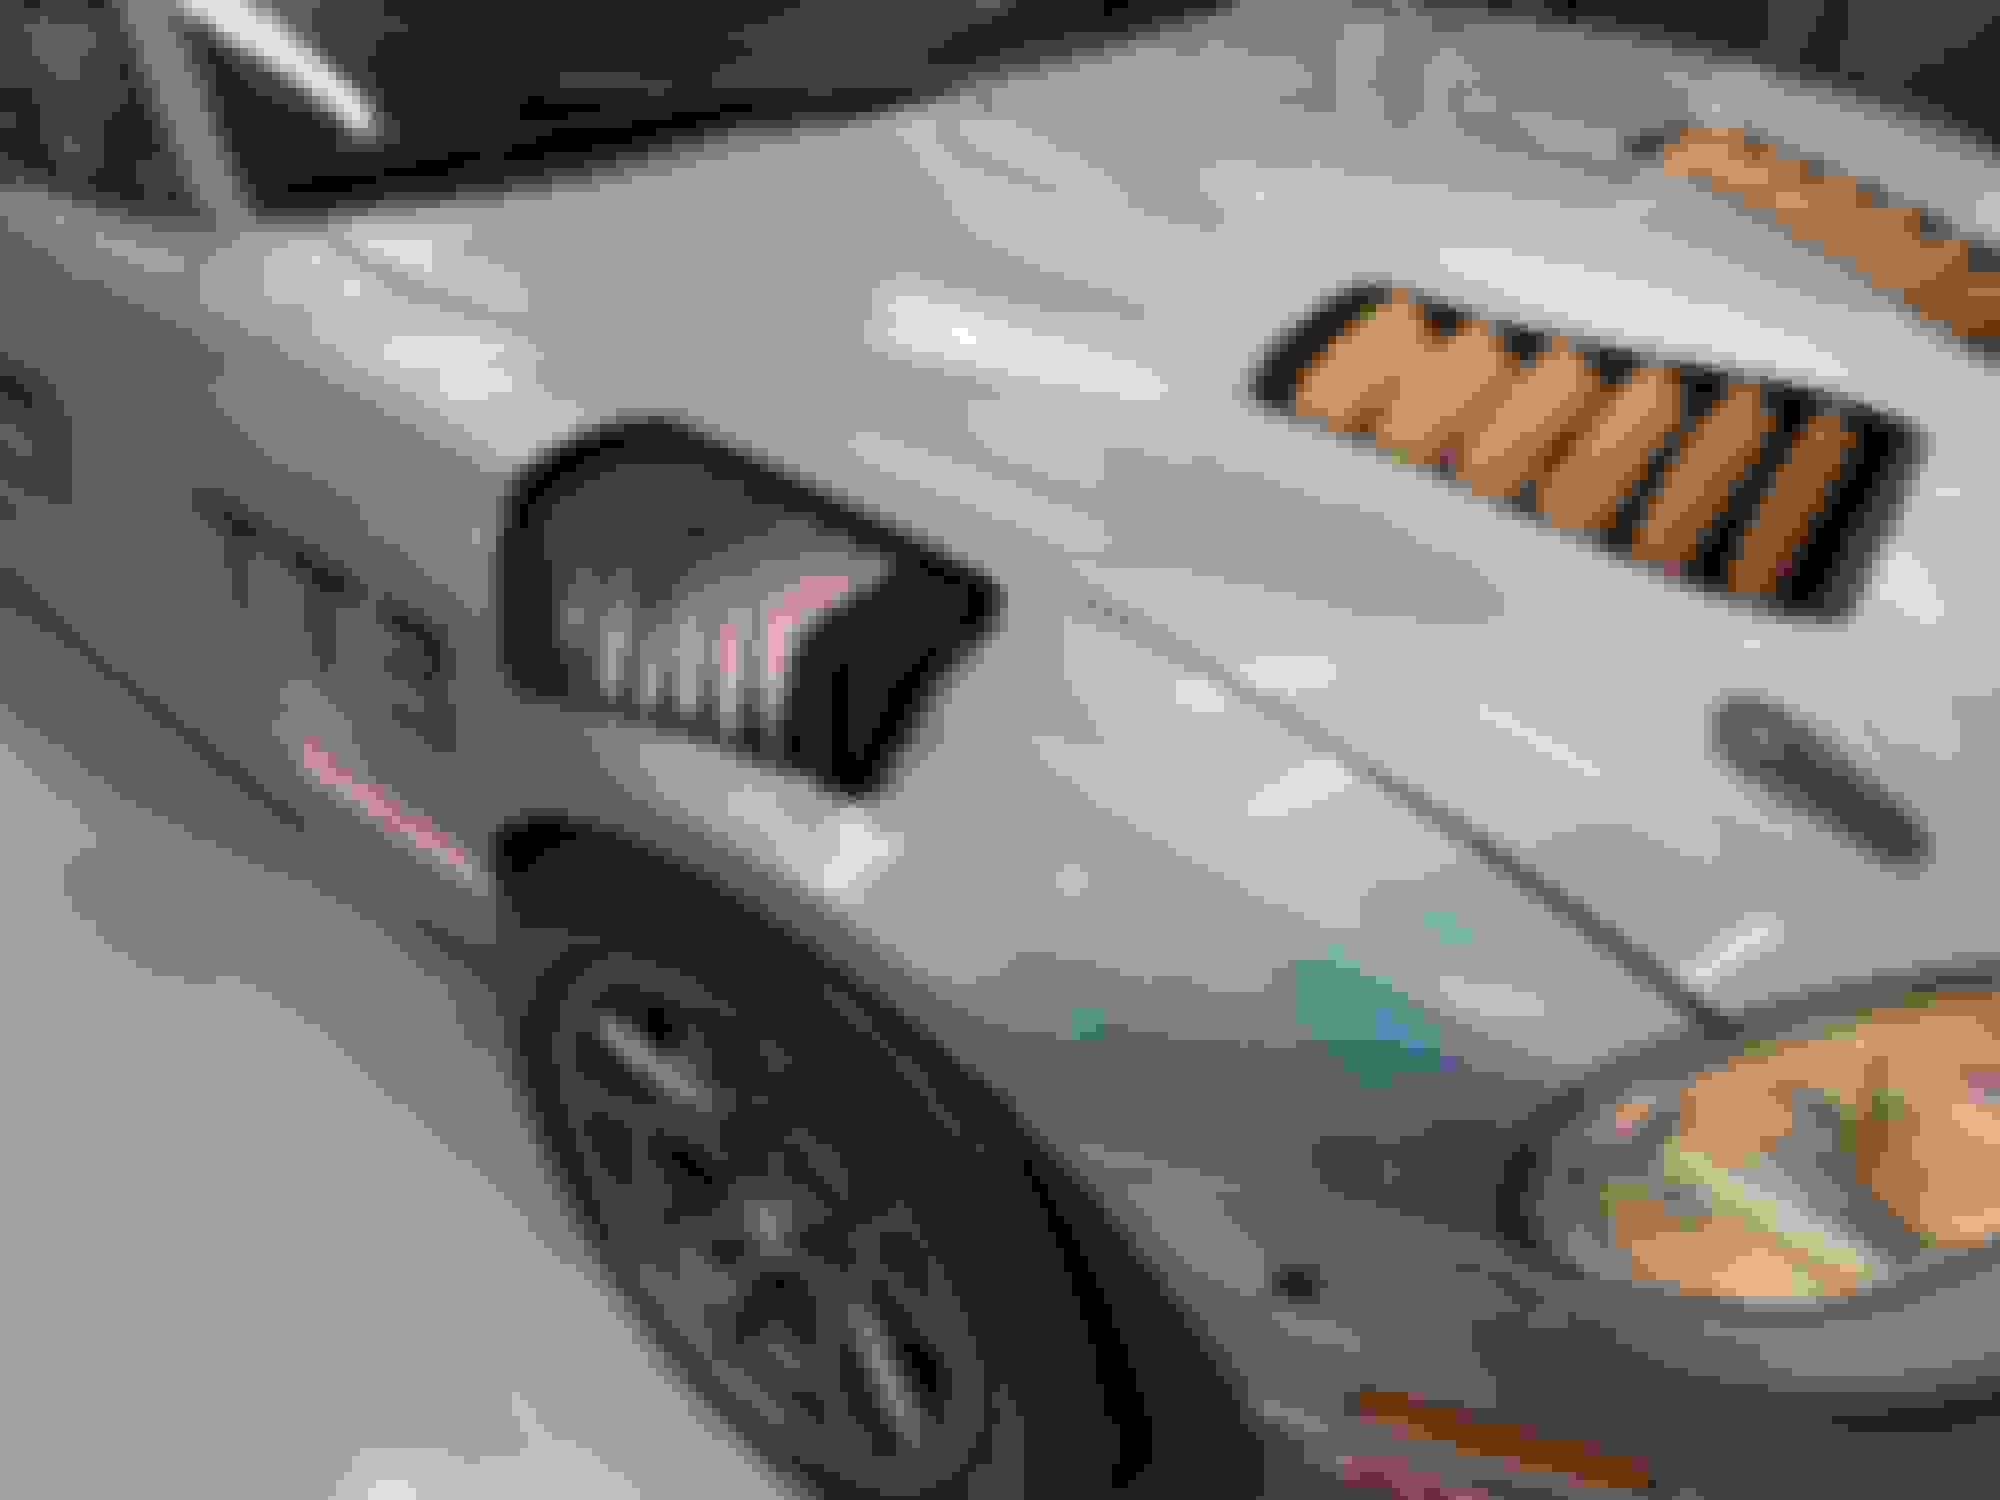
I went way overboard and got creative making a custom Gurney flap and fence out of PVC. "I used drywall edging" with lots of trimming and heat forming. Absolutely not necessary and probably only good for a few %. Just being creative and enjoy peaking peoples curiosity. Painted trim after cleaning and Scotchbrite with Kyron plastic trim paint We will see how long it lasts. Black plastic would have been much better.
Wife decided I needed to use supplied rubber trim to give finished look to area without gurney or fence, so covered nice smooth painted edges with trim.
Riveted on using supplied rivets and secured fwd Gurney portion with 2ea. tiny 3/32" rivets backed by homemade aluminum washers. Used 30 year old hand pop rivet gun. "Use protective tape or rags near rivets as its easy to scratch paint while popping rivets". (Would be nice if they included a couple spare rivets, as one popped early) Had spares in junk drawer.
Accomplished final tweaking of vent angle to what looked good to my CFD brain.
Touched up paint on rivet heads using Q-tip & retouched clear coat where I tore it off.
Considering I'm changing from 225 to 245 Hoosiers, increasing splitter size to 6", spacing out rear fender edge & adding splitter tunnels, there is no way to tell if vents worked alone but data says they do.
Last edited by Blkbrd69; May 18, 2023 at 04:49 PM.


 1
1