
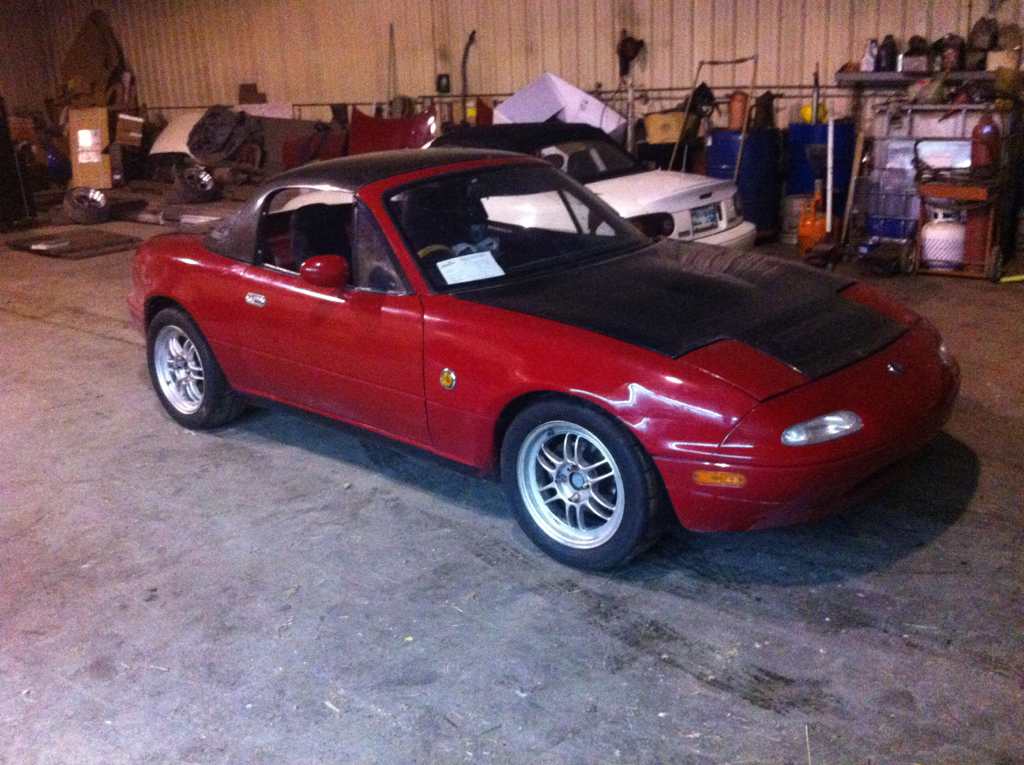
1990 Eunos Build


Thread Starter
Junior Member
Joined: Jan 2011
Posts: 84
Total Cats: 1
From: Winnipeg, Canada
Well finally getting around to writing up something of a Build thread for this car.
I'm missing a lot of stuff but this is just so I can keep track.
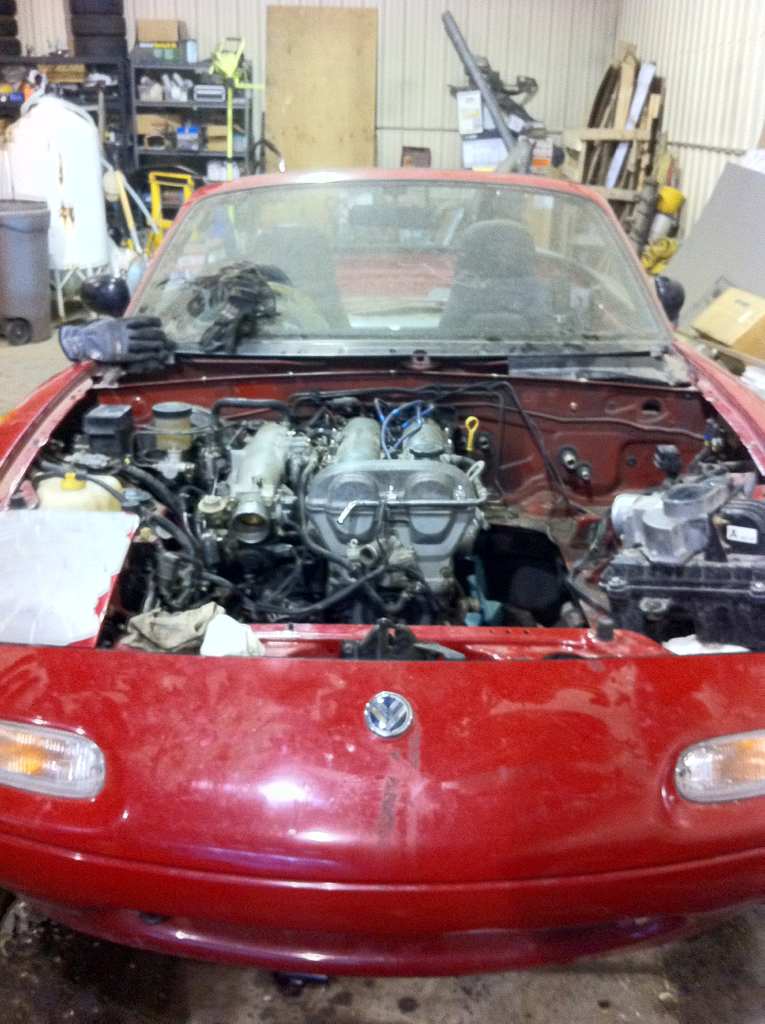
This is 1.6 that i had intentions on autox'ing but im not sure about its future anymore
Mods to date:
Suspension/Wheels/brakes
wilwood 4 piston up front and hawk pads on the back
RS*R Race springs (can't remember the spring rate, but they're stiff as ****)
Tokico blue dampers
Eibach 24mm fron sway bar (solid)
Suspension Techniques rear sway (solid)
Tanabe Strut bar (front)
Enkei RPF1 15x7 / work cr01 15x9/9.5
Wheel Spacers (can't remember what size or who made them)
Body/Interior
AK Fast back, Wide body, Shorty console, hood
rennenmetal Spec Miata hardtop brackets
Momo Hub, Random Crappy JDM Wheel
Engine and stuff.
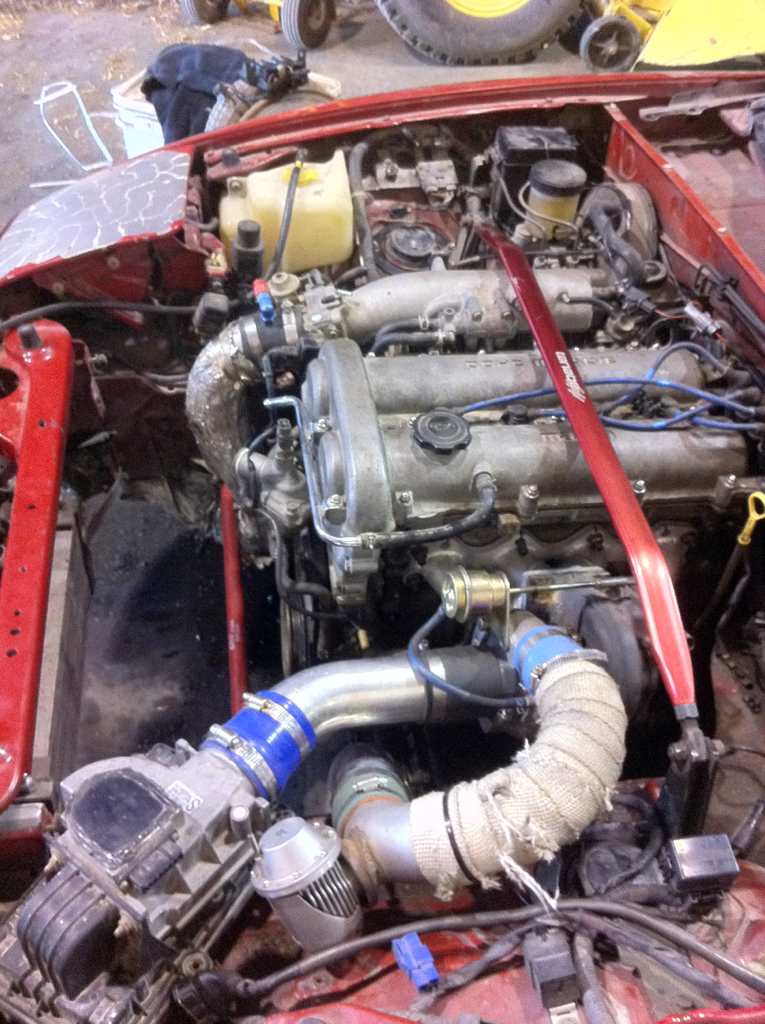
GReddy turbo kit with vibrant front-mount intercooler and custom plumbing
HKS SSQV bov
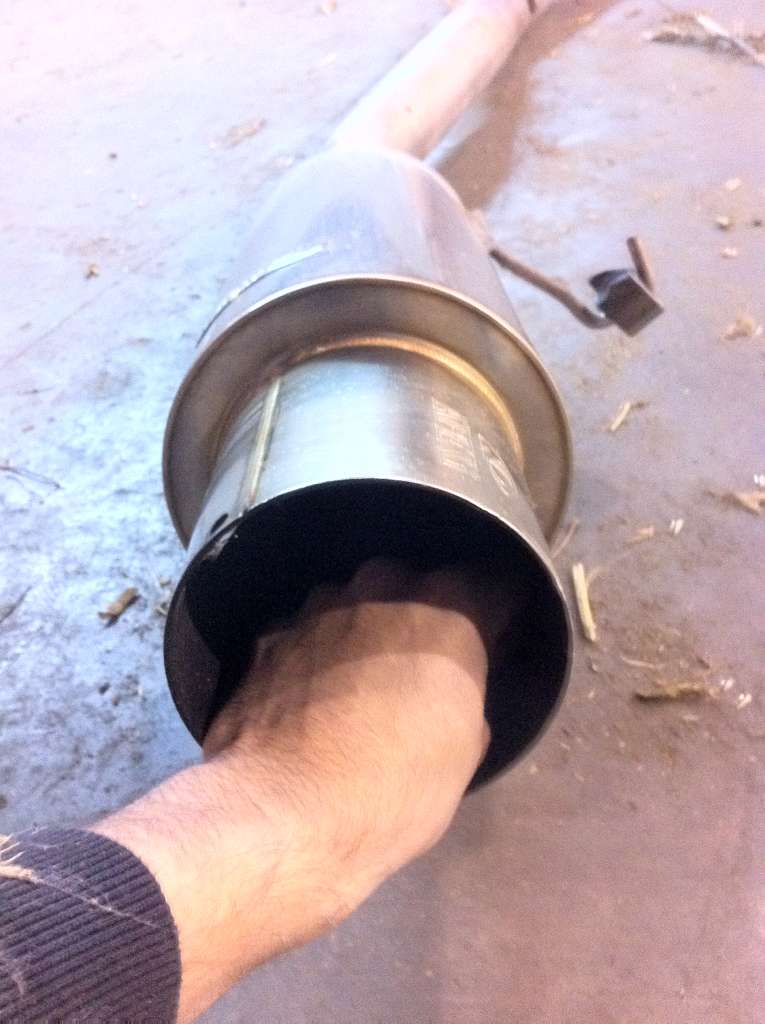
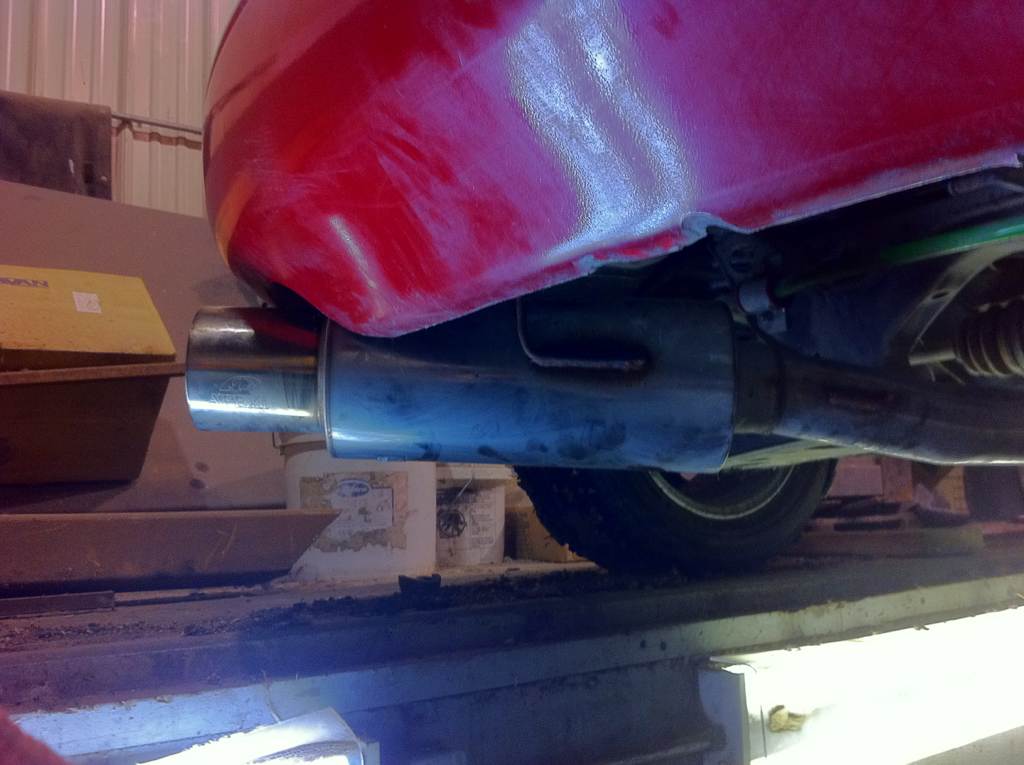
DIY 3" exhaust & downpipe with A'PEXi N1 turbo muffler
CenterForce dual friction clutch kit
Fidanza Flywheel
Aeromotive fpr (not installed yet)
Rev built ms3 (not installed yet)
AEM Uego wideband
AEM oil pressure
AEM Coolant gauge
defi boost gauge and control unit
M-tuned coolant reroute
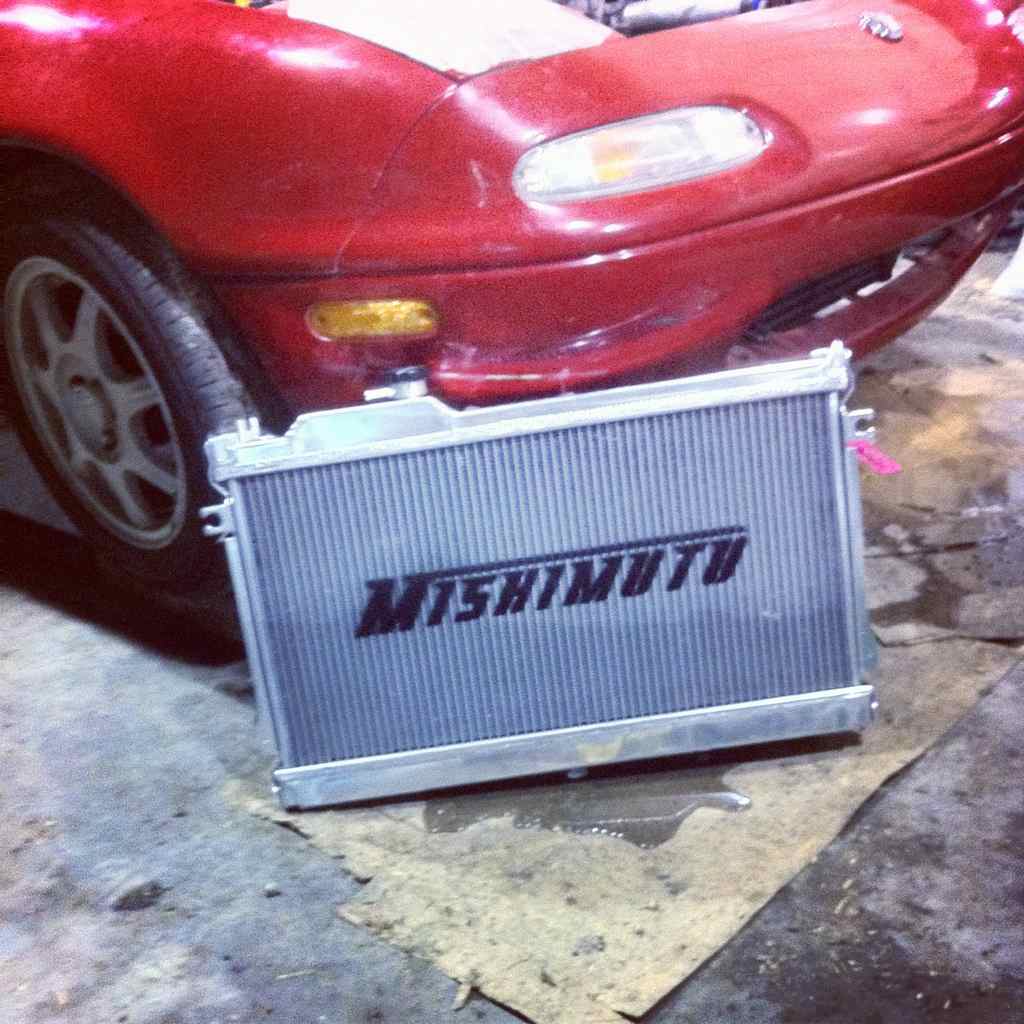
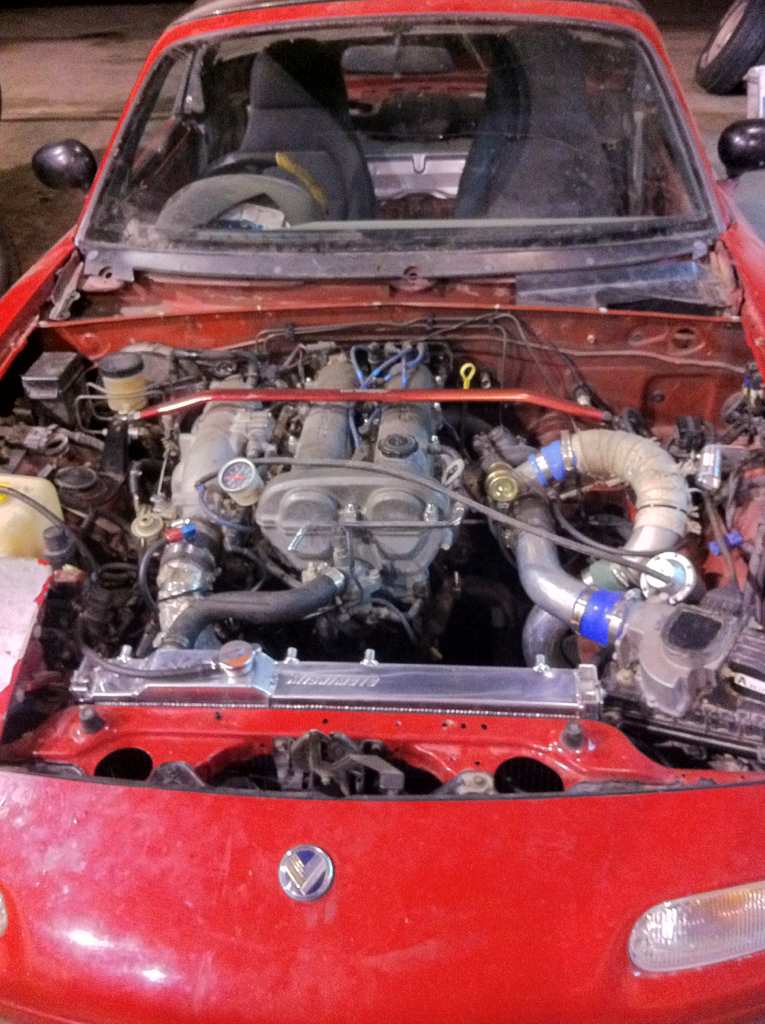
Mishimoto Rad
and here we go...
Picked it up a couple years with a blown motor that was taken out and no idea what i was getting into.
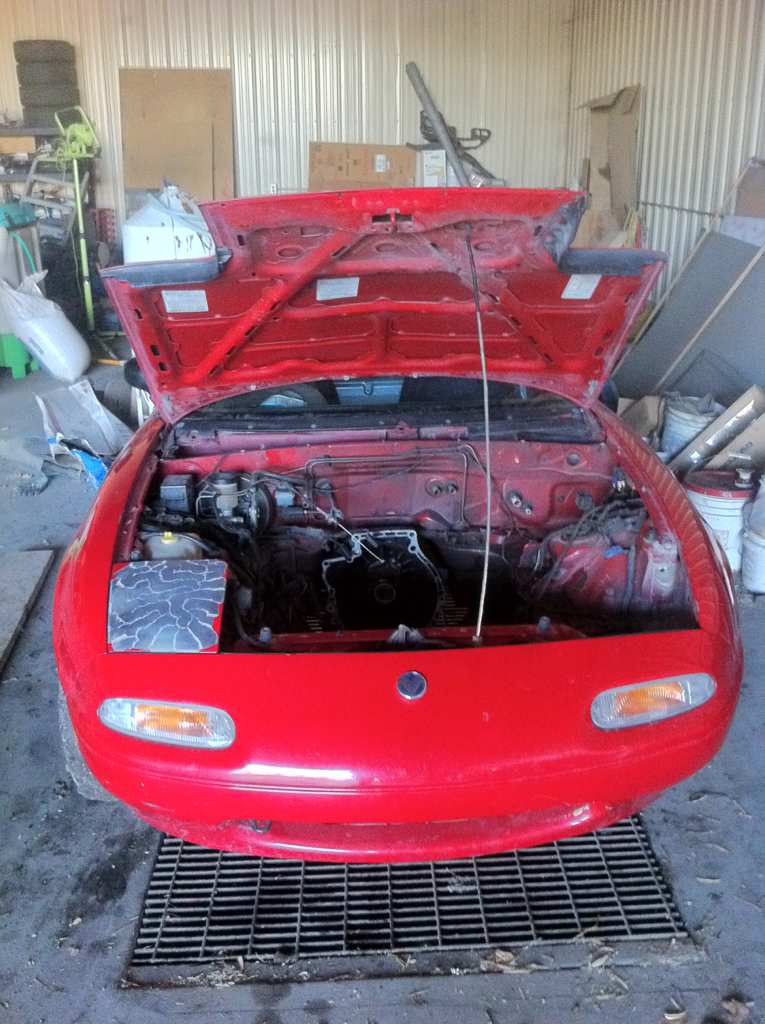
Since I hadn't had experience on building a car or anything like the car just sat while I built motivation to do something with it.
So one day a beat up Miata came along at a salvage auction with another 1.6
which was motivation enough to start dicking around with it

I didn't have an engine crane at the time so we just used what we had, lol.

Since I had it I figured might as well do a few things.
So I took the power steering pump and brackets off.
Took the clutch off to take a look at it

Which didn't look that great.
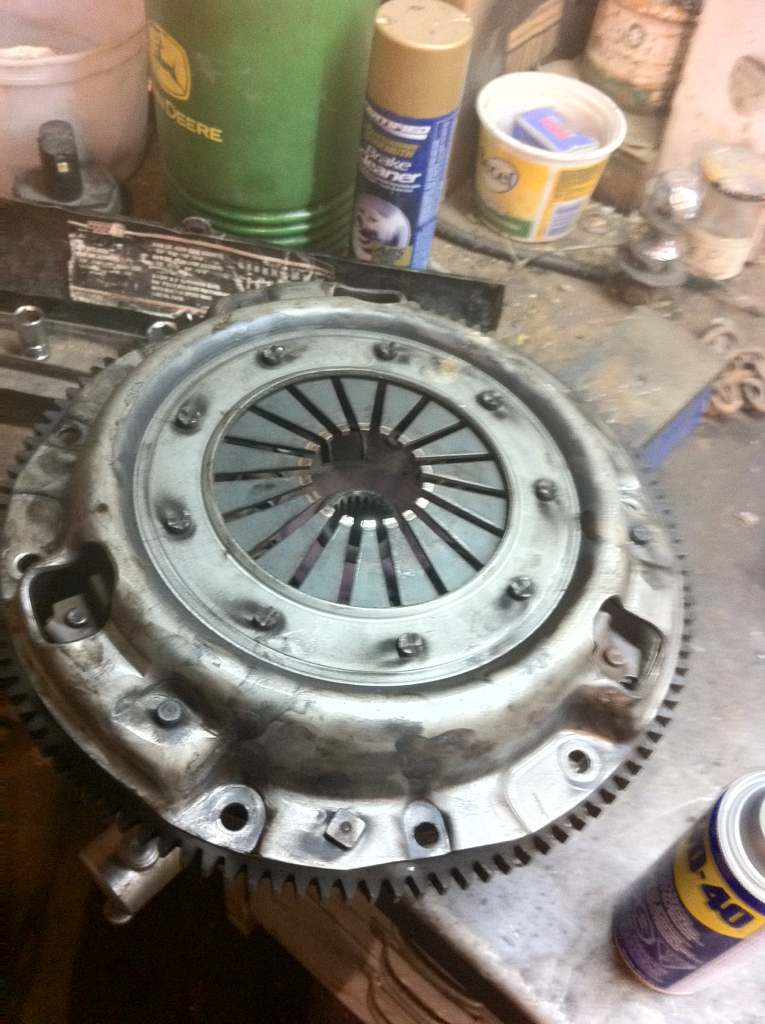
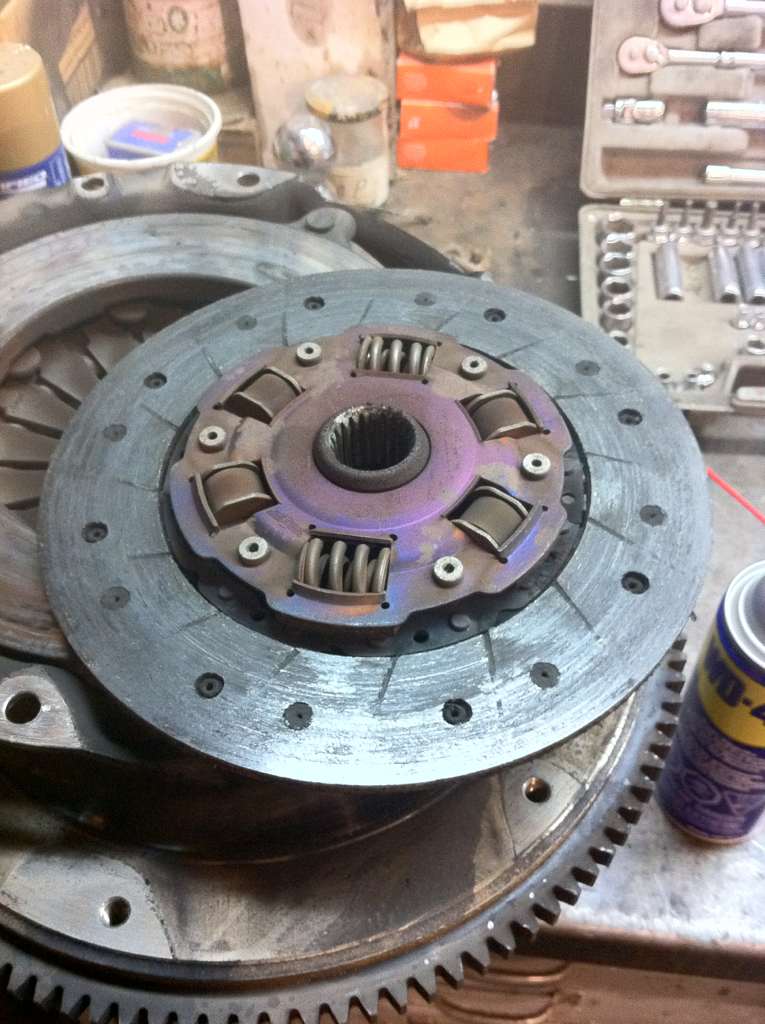
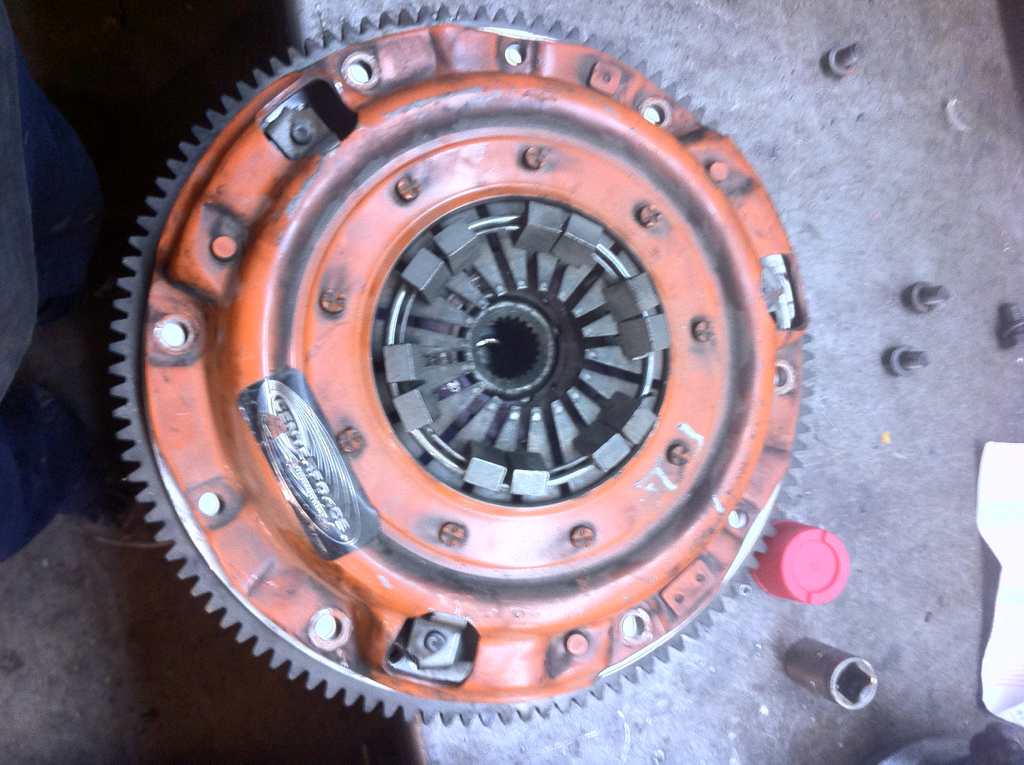
So I replaced that clutch with a
-fidanza lightweight flywheel
-exedy disc
-center force pressure plate
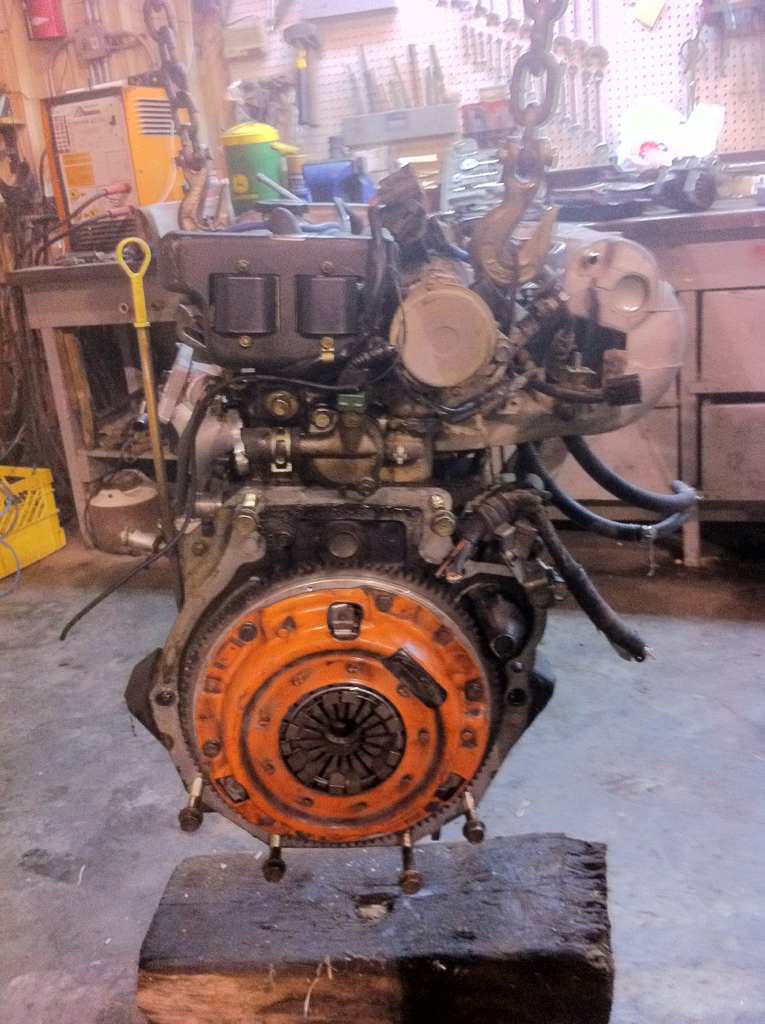
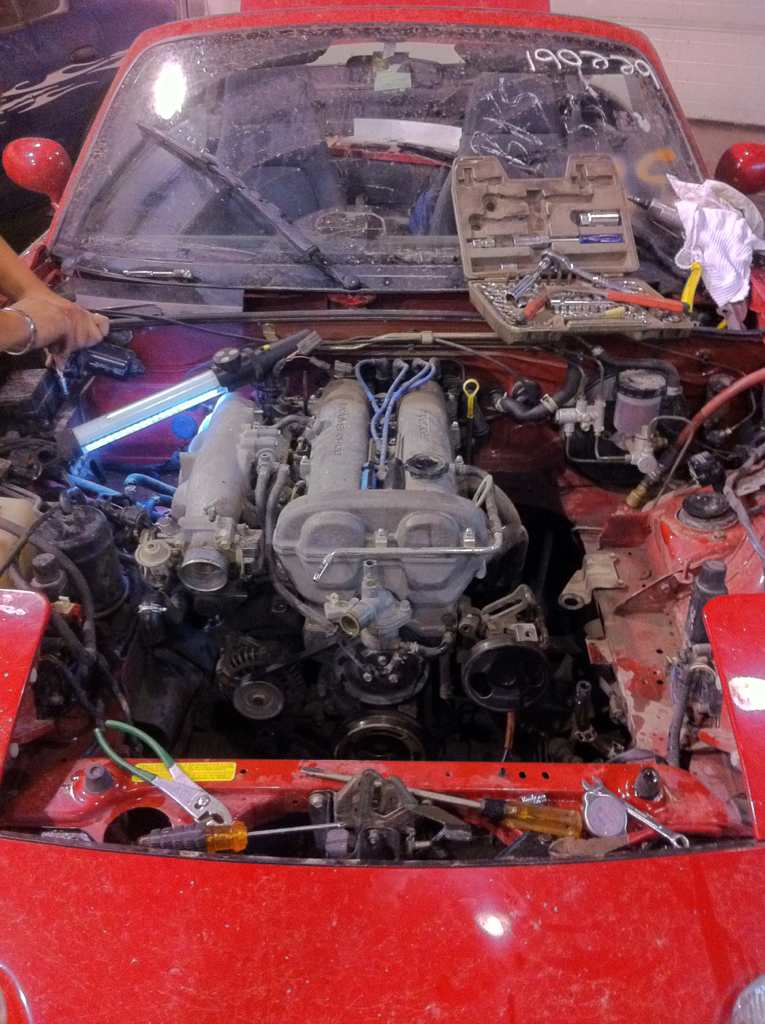
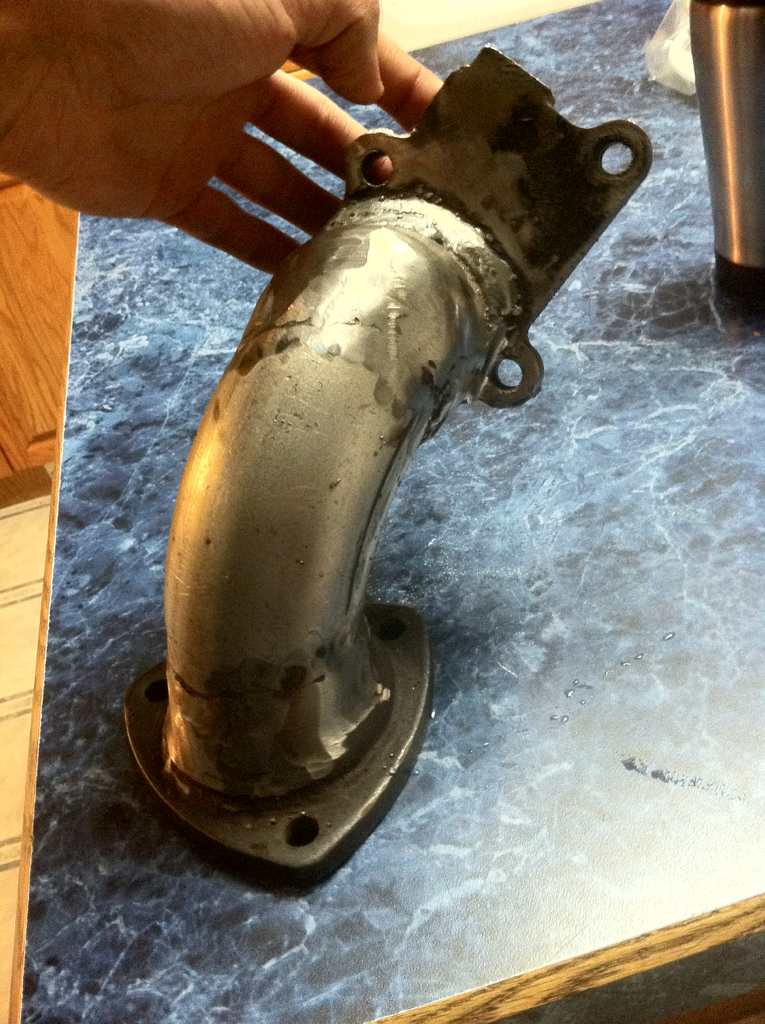
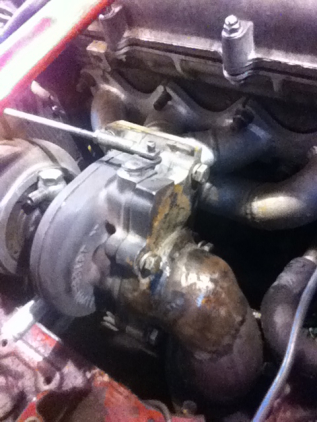
After that i threw on the td04 turbo/etd shorty manifold that came with the car.
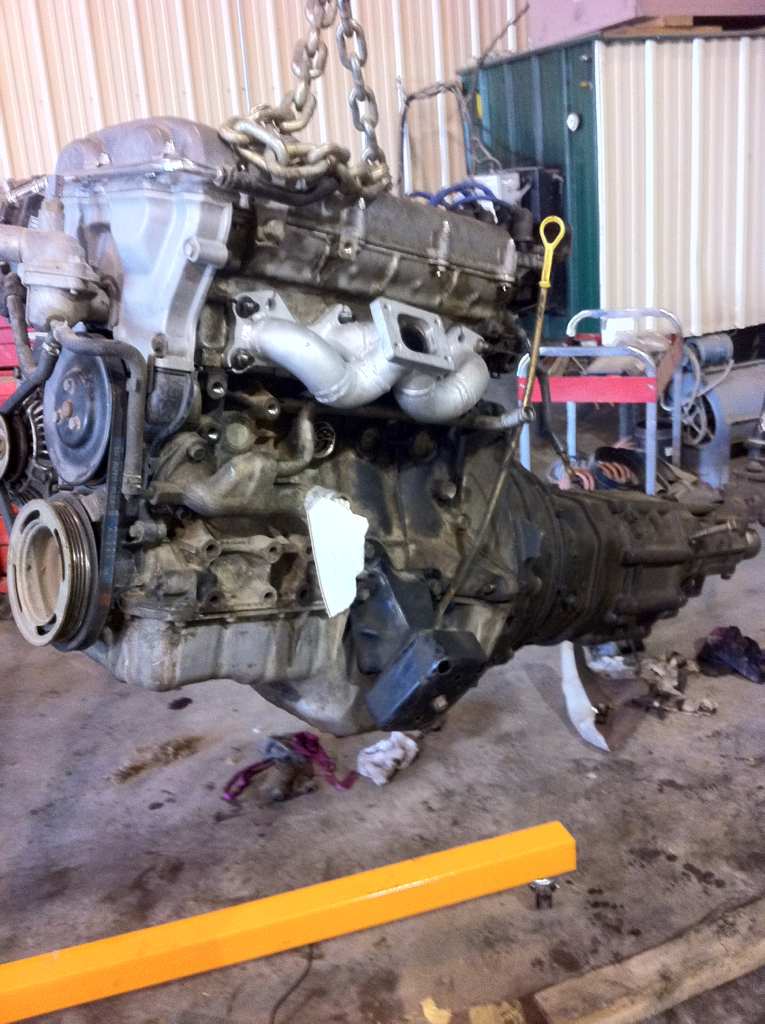
time to stuff it in..
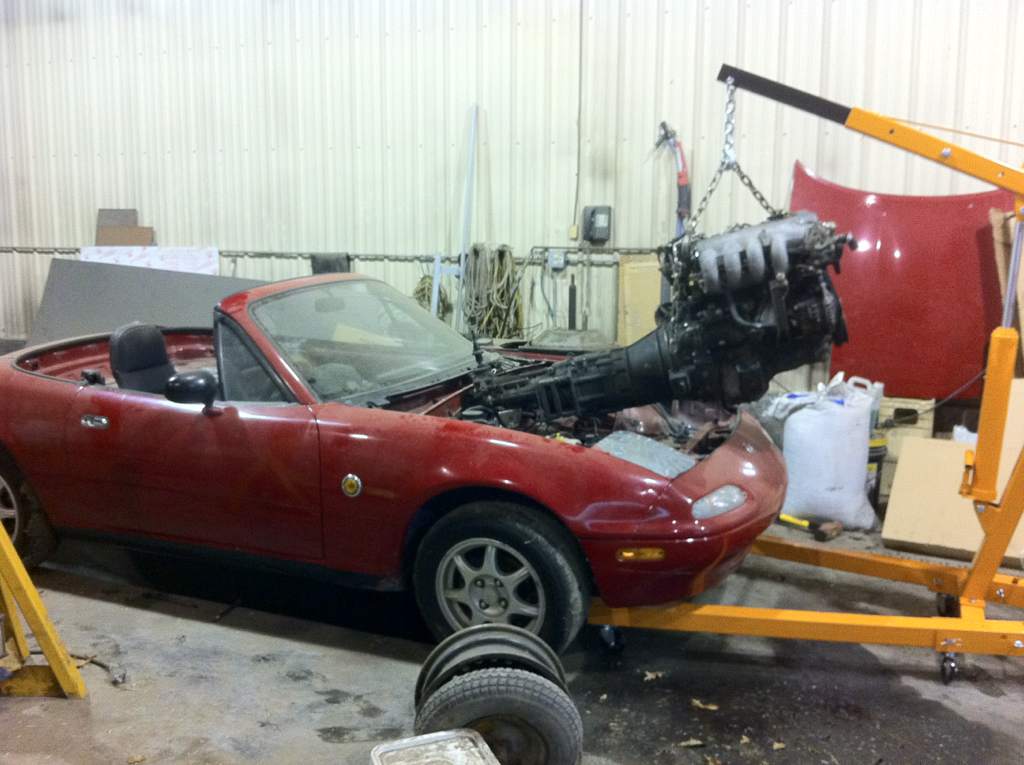
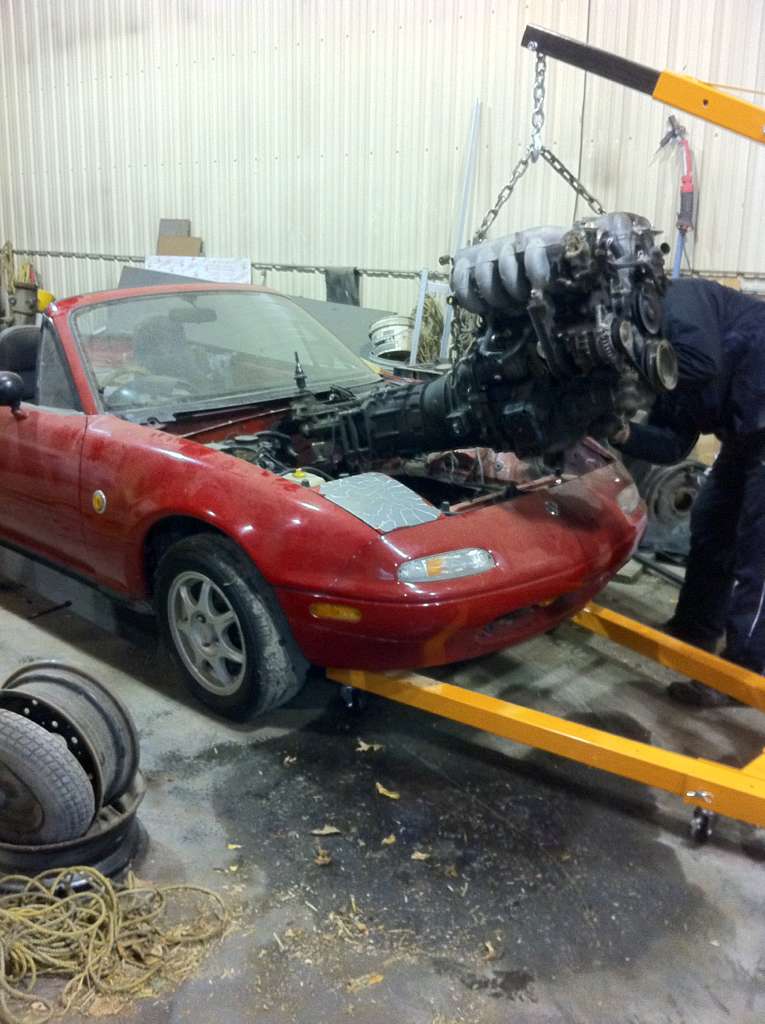
Hurray.
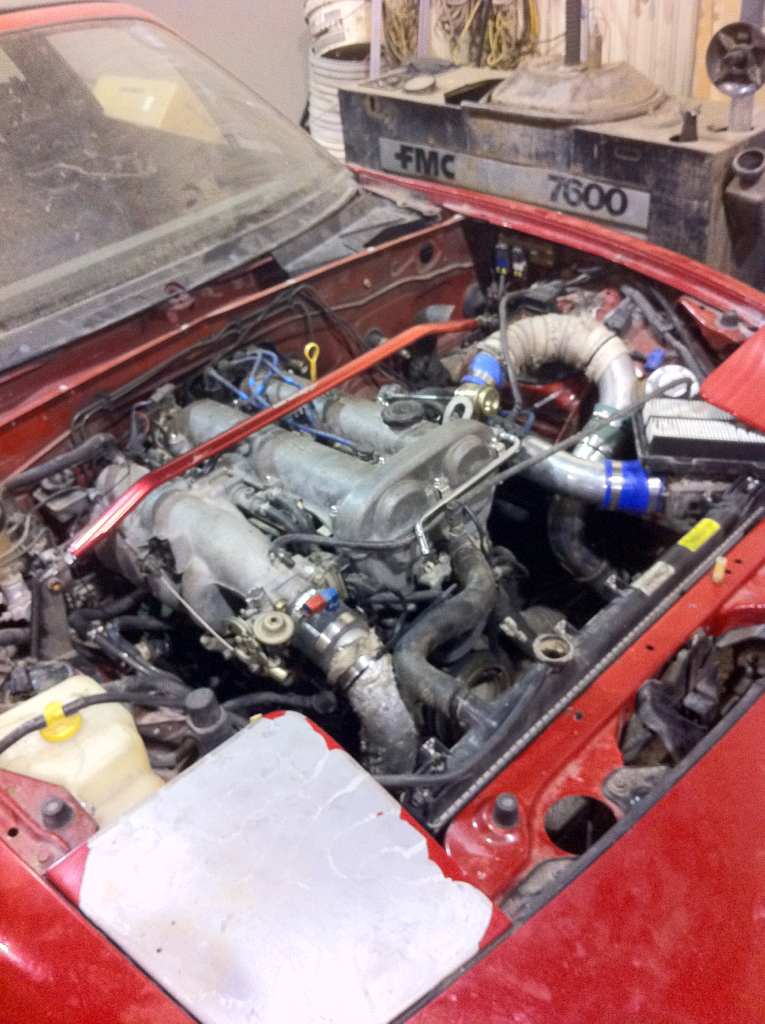
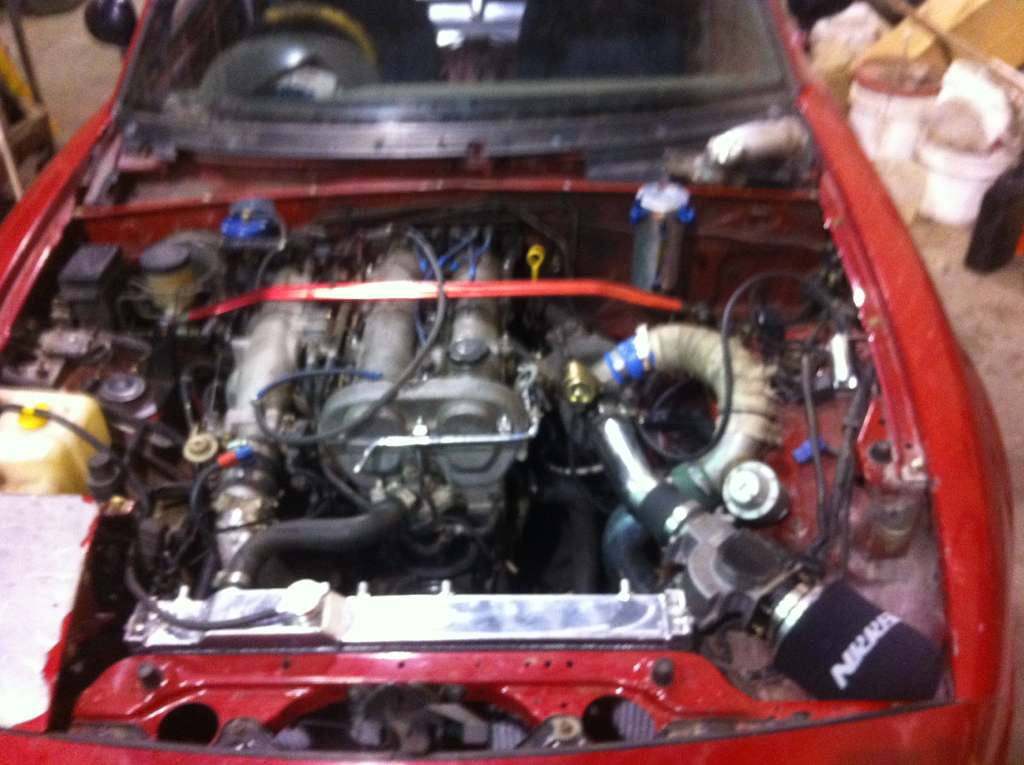
Now it was time to throw on the turbo and the IC piping that was custom made by some exhaust shop from the previous owner, very inefficient
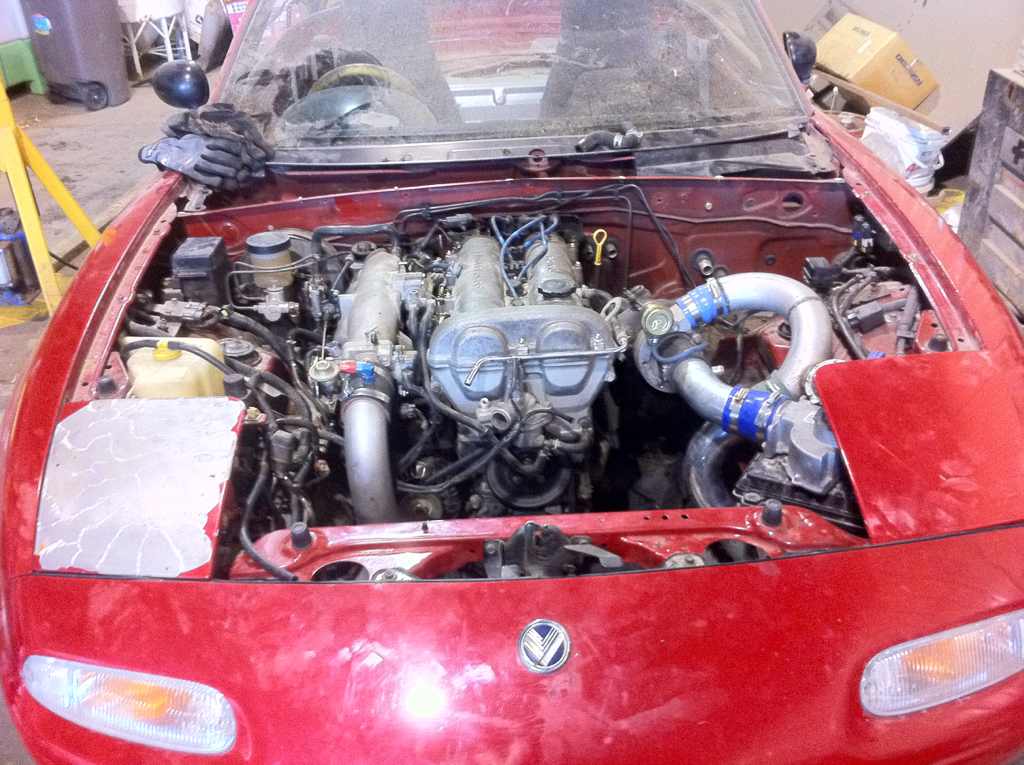
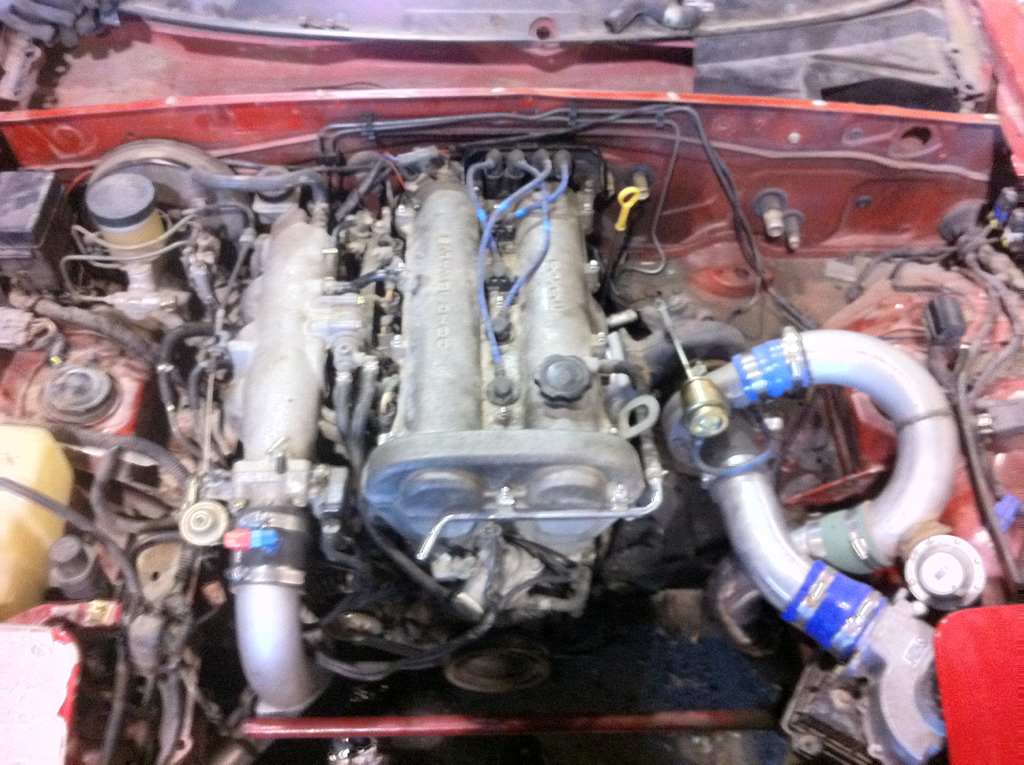
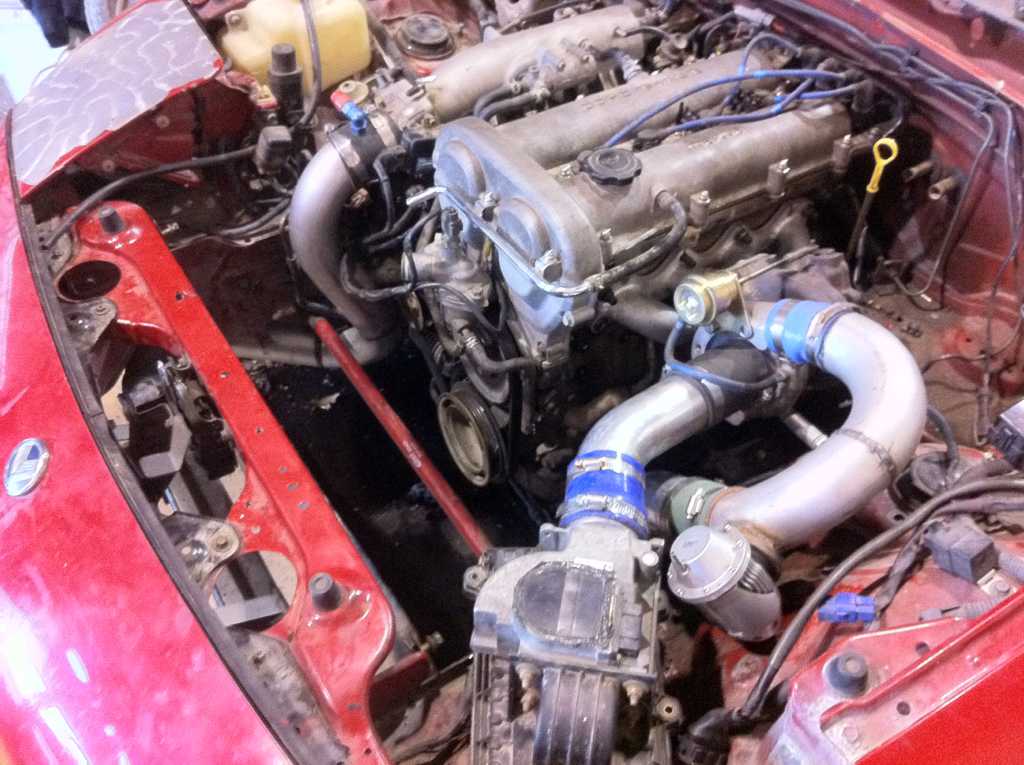
Tied up little odds and ends's added cold wrap on the coldside and mounted Tanabe strut tower brace.
picked up a mishimoto aluminum rad
exhaust junk
Threw that on as a test fit.

made my first (probably last) downpipe
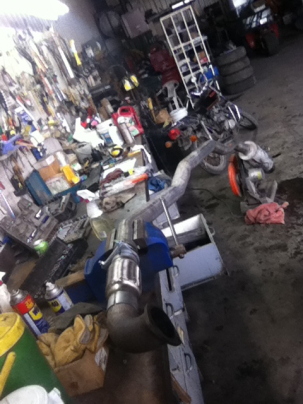
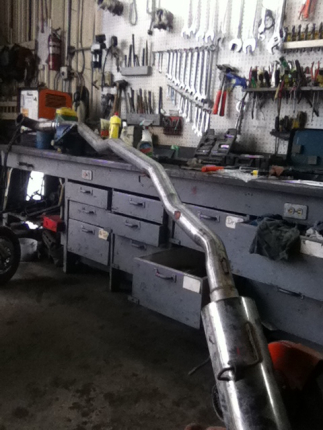
Made sure that it fit on the car and moved on
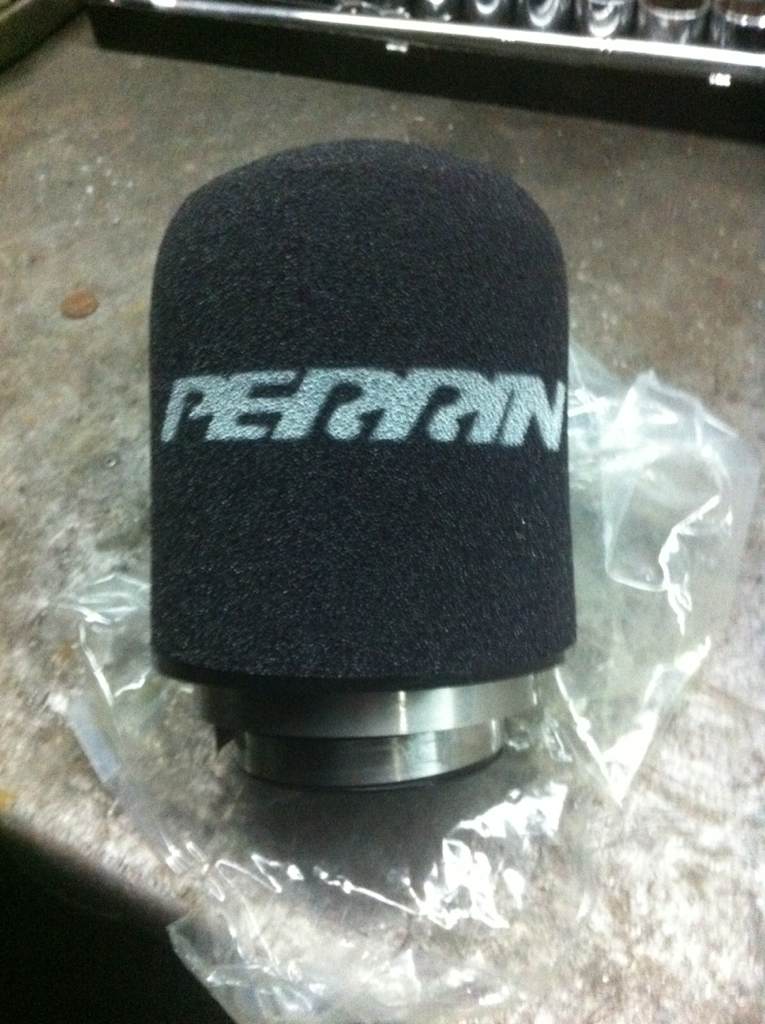
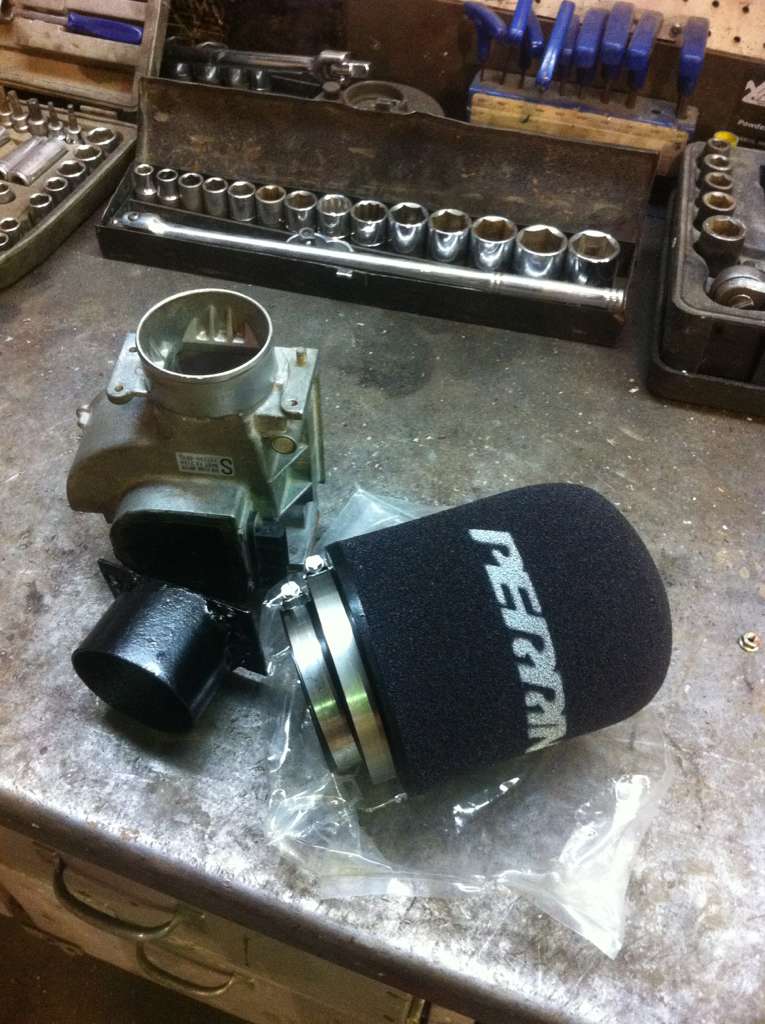
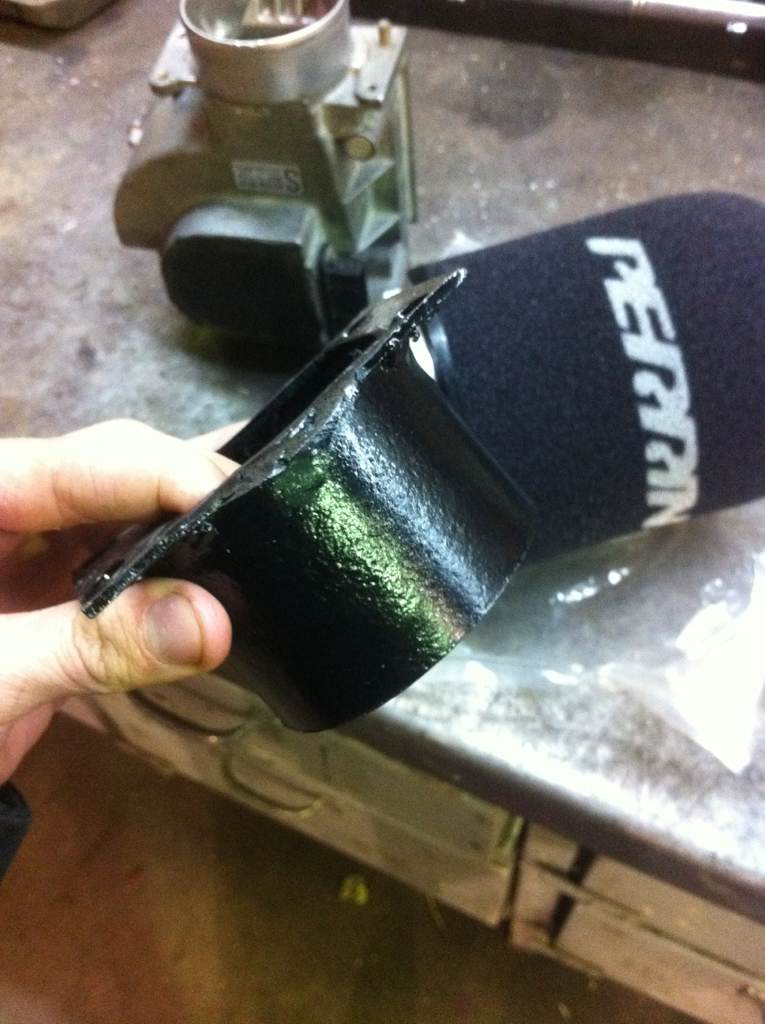
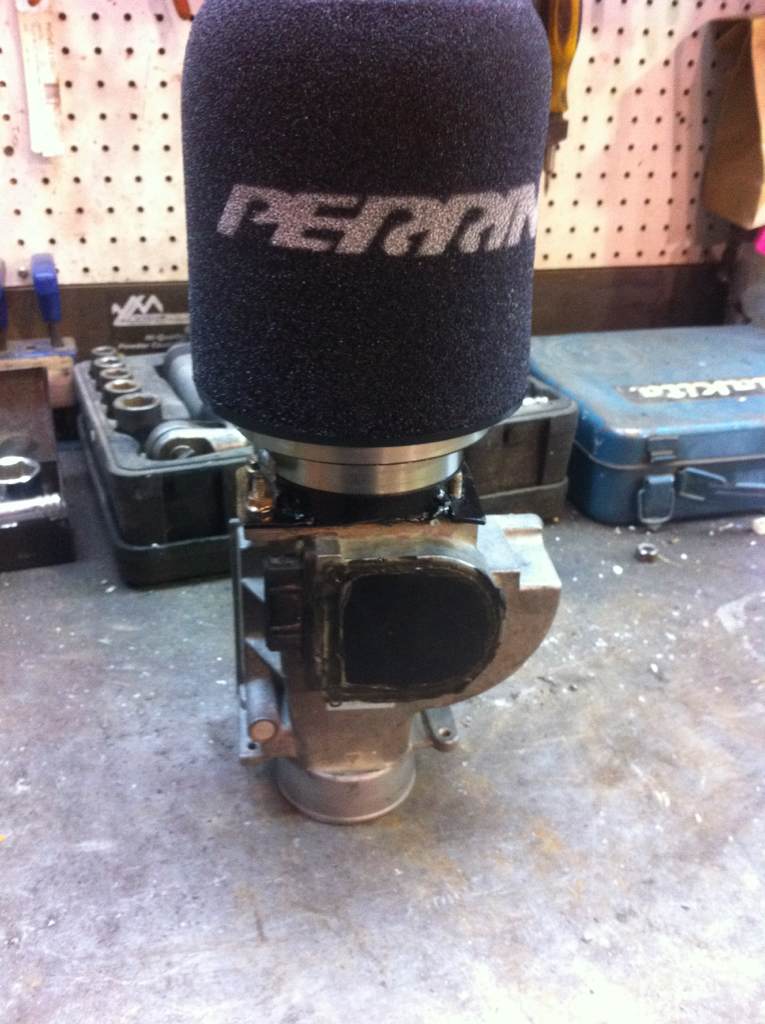
Picked up a perrin foam filter but needed and adapter plate to fit on the MAF so quickly made one with 3inch exhaust pipe hah.

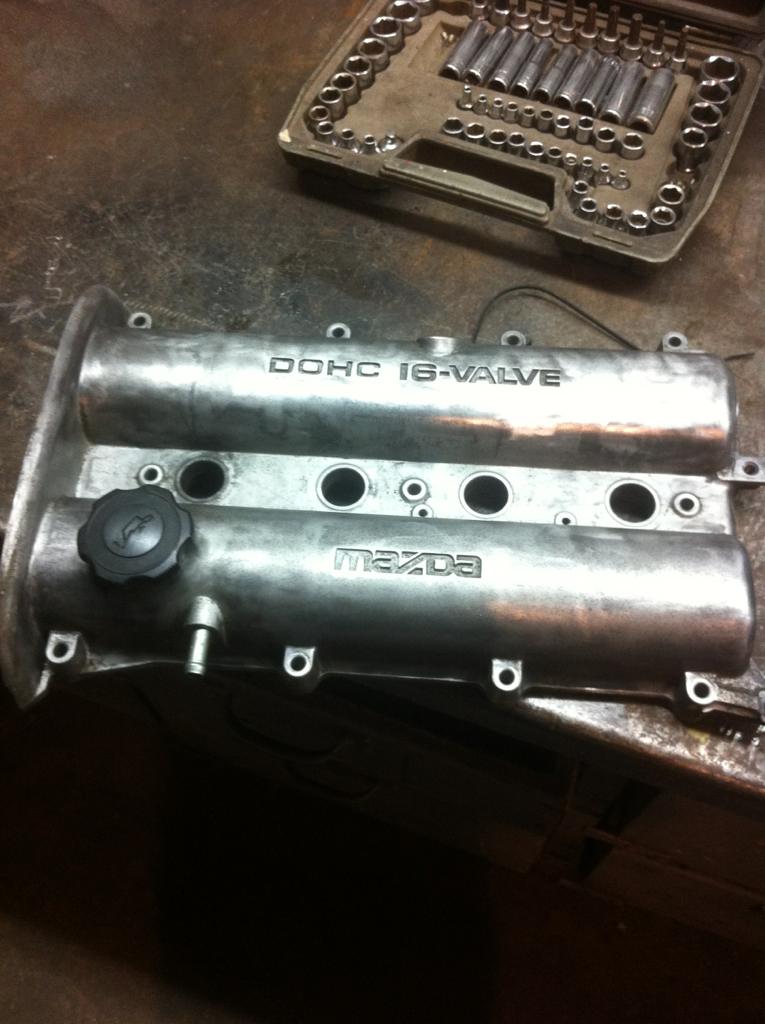
Hurray, valve cover was pissing out oil like crazy so had to replace that

Checked the plugs and they were disgusting so I changed those too and added MSD 8.5 high conductance wires
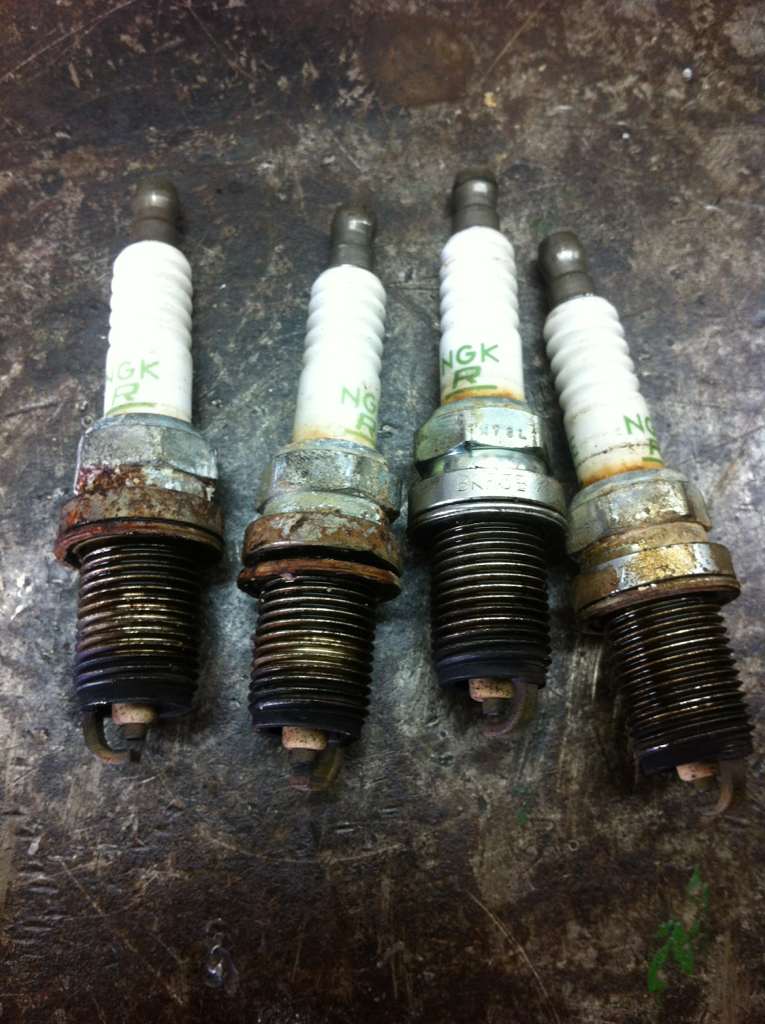
Also went with a bit colder plugs
Poorly polished the valve cover poorly and cut the timing belt cover off
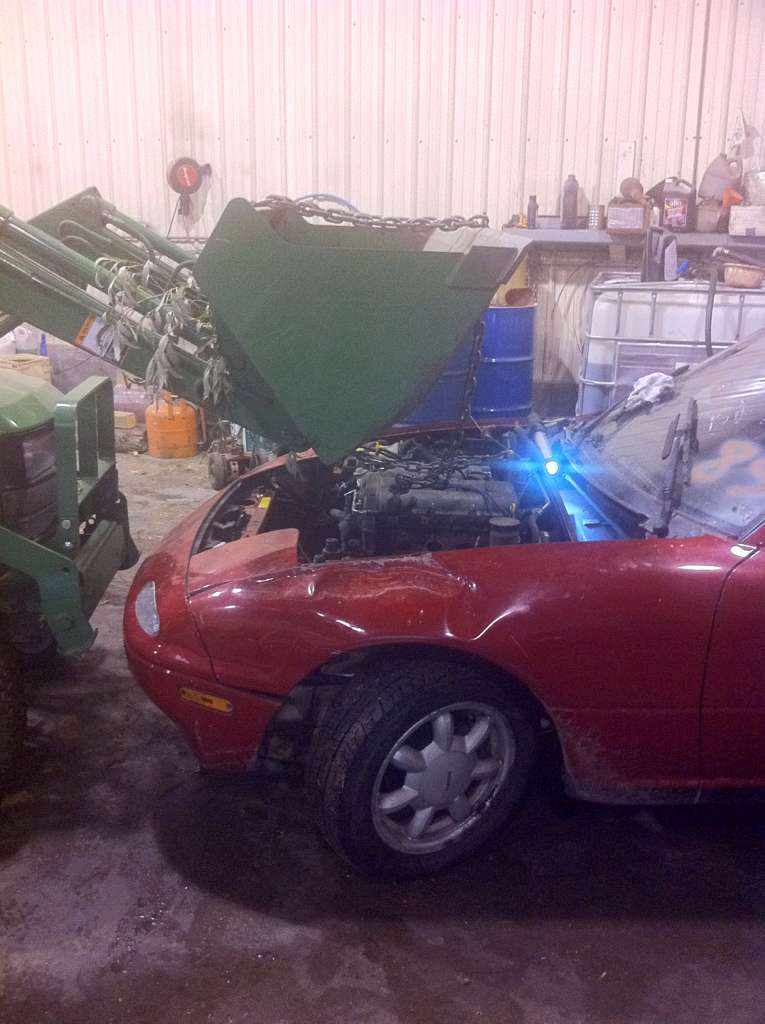
yada yada this is how it sat in 2012


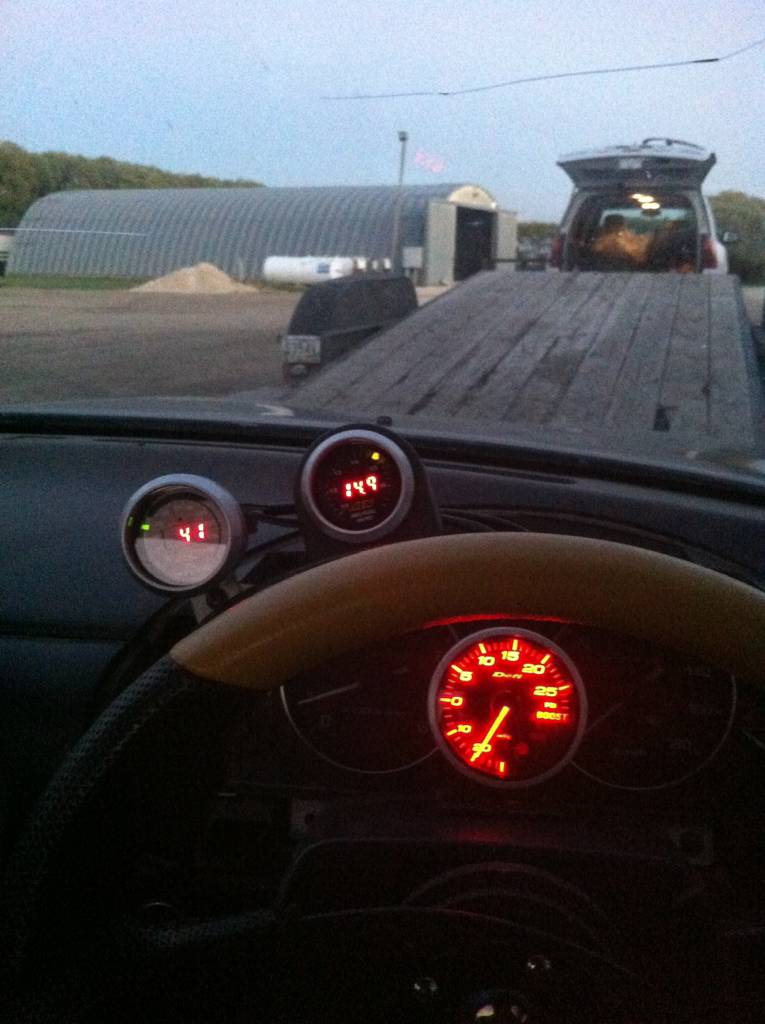
also dyno'd it at some point.
made 227.23/179 @11psi ish (no tune) (yes i was an idiot)
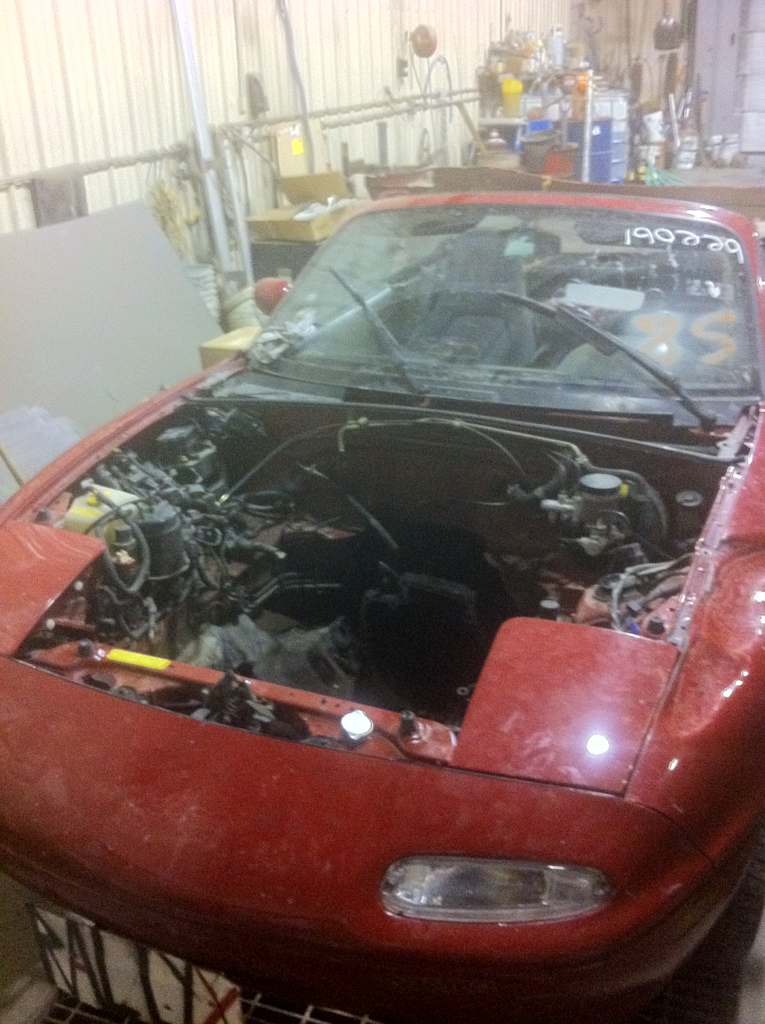
since then i've pulled the motor and did a few seals then popped it back in.
but i will update a bit later.
I'm missing a lot of stuff but this is just so I can keep track.
This is 1.6 that i had intentions on autox'ing but im not sure about its future anymore
Mods to date:
Suspension/Wheels/brakes
wilwood 4 piston up front and hawk pads on the back
RS*R Race springs (can't remember the spring rate, but they're stiff as ****)
Tokico blue dampers
Eibach 24mm fron sway bar (solid)
Suspension Techniques rear sway (solid)
Tanabe Strut bar (front)
Enkei RPF1 15x7 / work cr01 15x9/9.5
Wheel Spacers (can't remember what size or who made them)
Body/Interior
AK Fast back, Wide body, Shorty console, hood
rennenmetal Spec Miata hardtop brackets
Momo Hub, Random Crappy JDM Wheel
Engine and stuff.
GReddy turbo kit with vibrant front-mount intercooler and custom plumbing
HKS SSQV bov
DIY 3" exhaust & downpipe with A'PEXi N1 turbo muffler
CenterForce dual friction clutch kit
Fidanza Flywheel
Aeromotive fpr (not installed yet)
Rev built ms3 (not installed yet)
AEM Uego wideband
AEM oil pressure
AEM Coolant gauge
defi boost gauge and control unit
M-tuned coolant reroute
Mishimoto Rad
and here we go...
Picked it up a couple years with a blown motor that was taken out and no idea what i was getting into.
Since I hadn't had experience on building a car or anything like the car just sat while I built motivation to do something with it.
So one day a beat up Miata came along at a salvage auction with another 1.6
which was motivation enough to start dicking around with it
I didn't have an engine crane at the time so we just used what we had, lol.
Since I had it I figured might as well do a few things.
So I took the power steering pump and brackets off.
Took the clutch off to take a look at it
Which didn't look that great.
So I replaced that clutch with a
-fidanza lightweight flywheel
-exedy disc
-center force pressure plate
After that i threw on the td04 turbo/etd shorty manifold that came with the car.
time to stuff it in..
Hurray.
Now it was time to throw on the turbo and the IC piping that was custom made by some exhaust shop from the previous owner, very inefficient
Tied up little odds and ends's added cold wrap on the coldside and mounted Tanabe strut tower brace.
picked up a mishimoto aluminum rad
exhaust junk
Threw that on as a test fit.
made my first (probably last) downpipe
Made sure that it fit on the car and moved on
Picked up a perrin foam filter but needed and adapter plate to fit on the MAF so quickly made one with 3inch exhaust pipe hah.
Hurray, valve cover was pissing out oil like crazy so had to replace that
Checked the plugs and they were disgusting so I changed those too and added MSD 8.5 high conductance wires
Also went with a bit colder plugs
Poorly polished the valve cover poorly and cut the timing belt cover off
yada yada this is how it sat in 2012
also dyno'd it at some point.
made 227.23/179 @11psi ish (no tune) (yes i was an idiot)
since then i've pulled the motor and did a few seals then popped it back in.
but i will update a bit later.
Reply
 0
0

0
Thread Starter
Junior Member
Joined: Jan 2011
Posts: 84
Total Cats: 1
From: Winnipeg, Canada
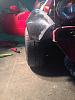
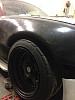
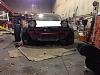
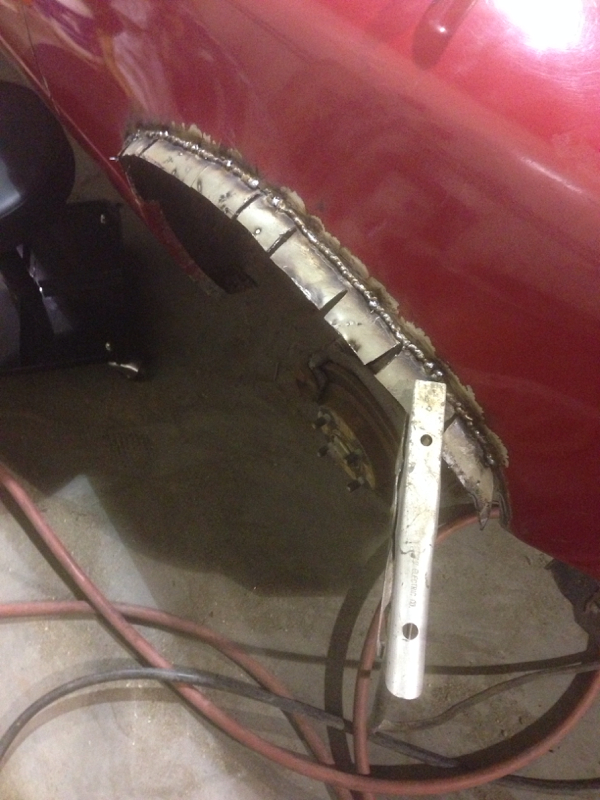
Started dicking around with quarter panel stuff for the rear overs
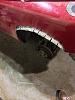
Never tried cutting and welding fenders, but eventually turned out alright. Not like anyone will see it anyways. But just need to seal off the bare steel/ paint it.
Also fitted the Fenders.


Never tried cutting and welding fenders, but eventually turned out alright. Not like anyone will see it anyways. But just need to seal off the bare steel/ paint it.
Also fitted the Fenders.

Reply
0
0


Joined: Sep 2010
Posts: 8,146
Total Cats: 1,087
From: Lake Forest, CA
Well, he said "no tune" before. So does that mean stock injectors, no RRFPR or acu or anything?
If that's the case, it's a wonder it survived the dyno session.
If that's the case, it's a wonder it survived the dyno session.
Reply
0
0

Thread Starter
Junior Member
Joined: Jan 2011
Posts: 84
Total Cats: 1
From: Winnipeg, Canada
and for fenders i went with Autokonexion 40mm fenders from the GT kit and the new 30mm ones they just made.. will post pics soon.
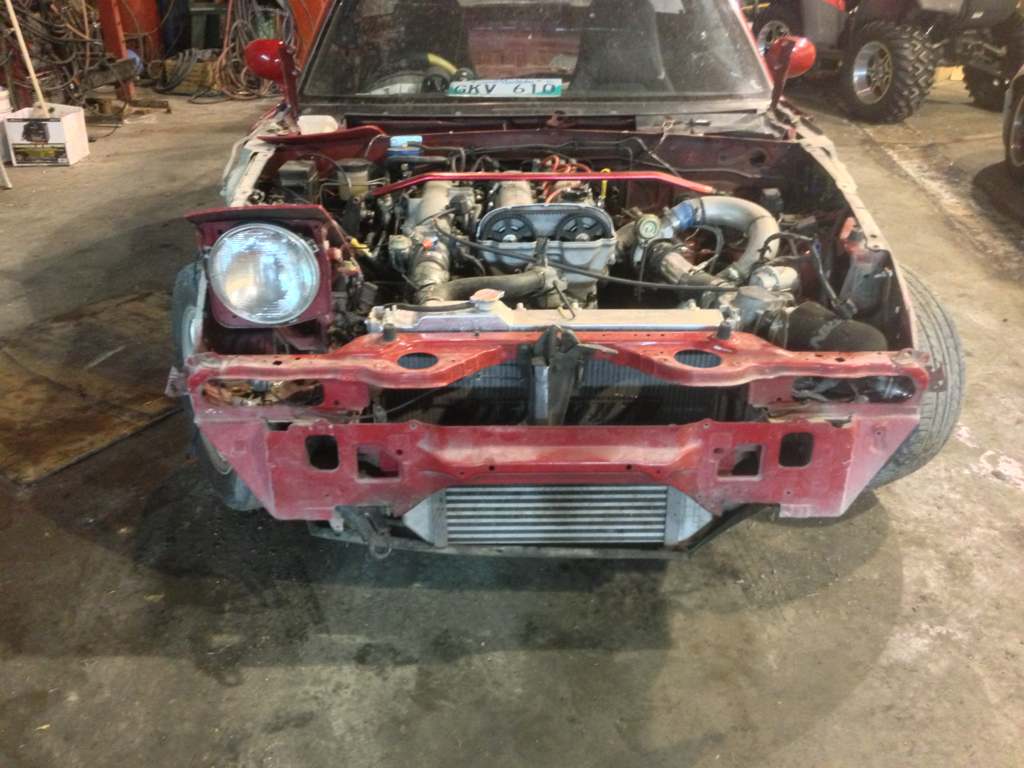
But for management all it had was the Vortech FMU, you can hear it ping like a bastard on the dyno but hopefully i didnt do too much damage.
Ended clocking the turbo and making the IC piping a little more efficient as well.
Reply
0
0
Thread Starter
Junior Member
Joined: Jan 2011
Posts: 84
Total Cats: 1
From: Winnipeg, Canada
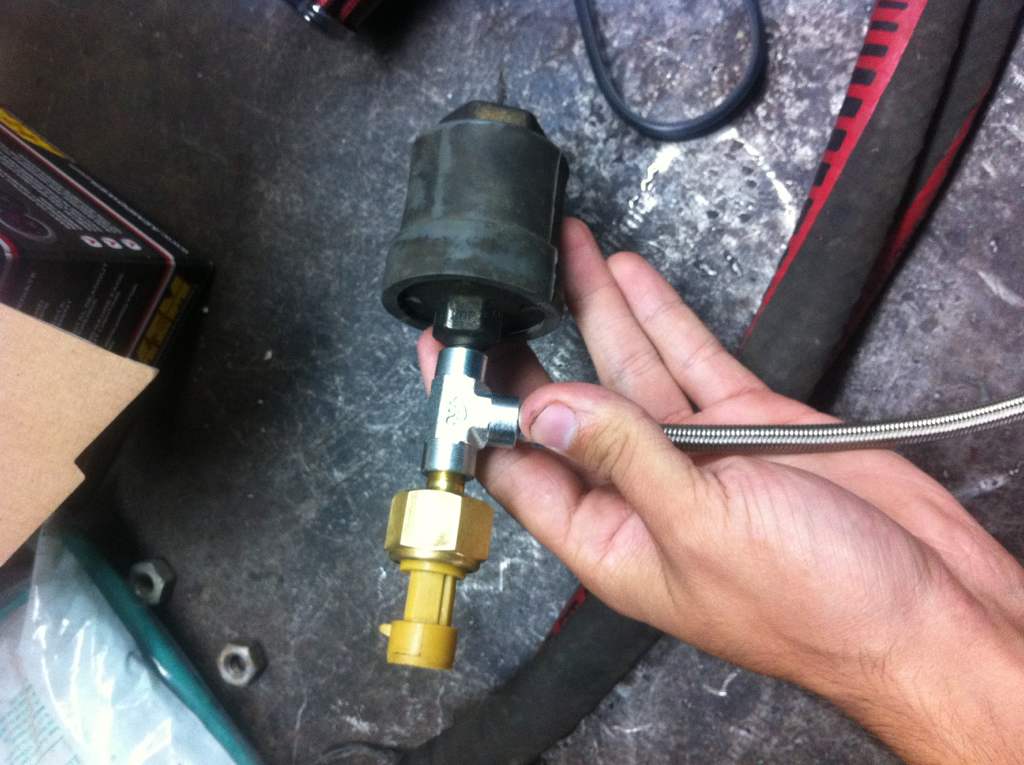
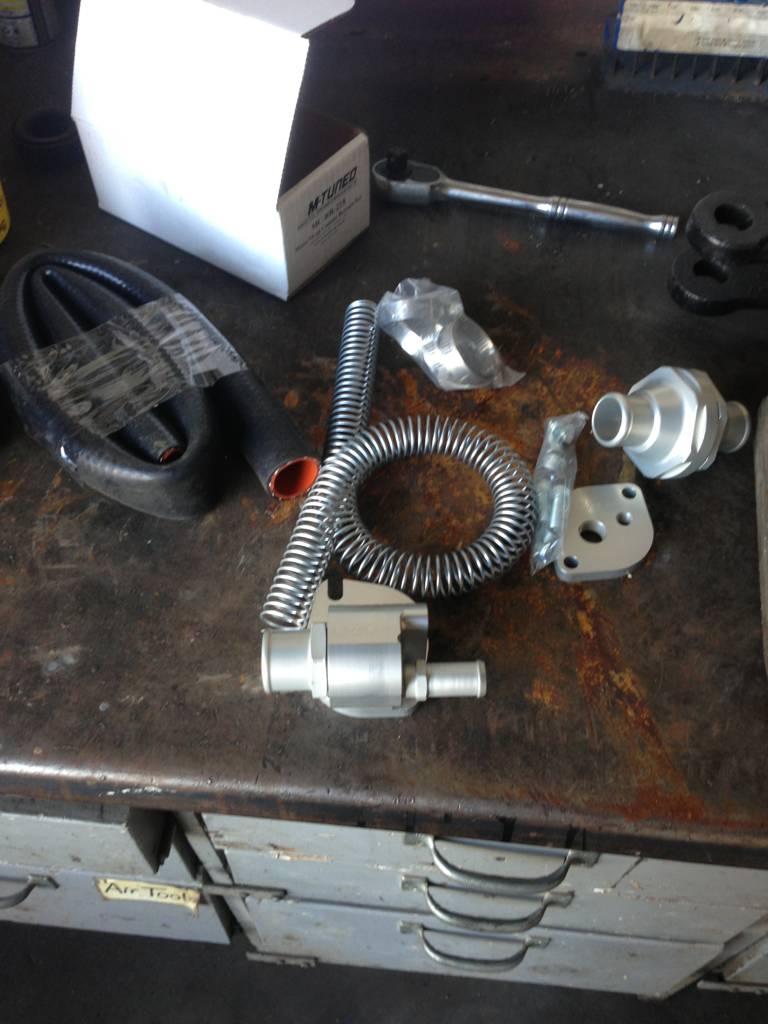
adopted the relocation kitSo I could use my stock and AEM sensor Oil pressure stuffs
Stock on the right and AEM on the left haha.
Also changed the faces to look better and match the defi/stock cluster
couple things i wanted to refresh while motor was out
Mazda OEM HLA
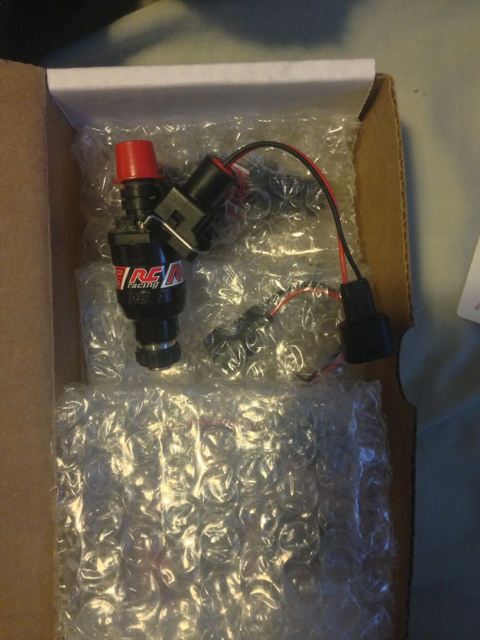
RC 750cc injectors (shitty i know but they were too cheap to say no)
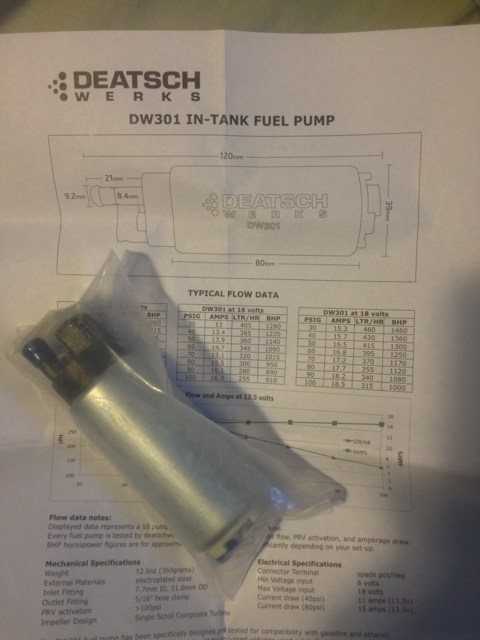
DW 301 fuel pump to replace the walbro 255
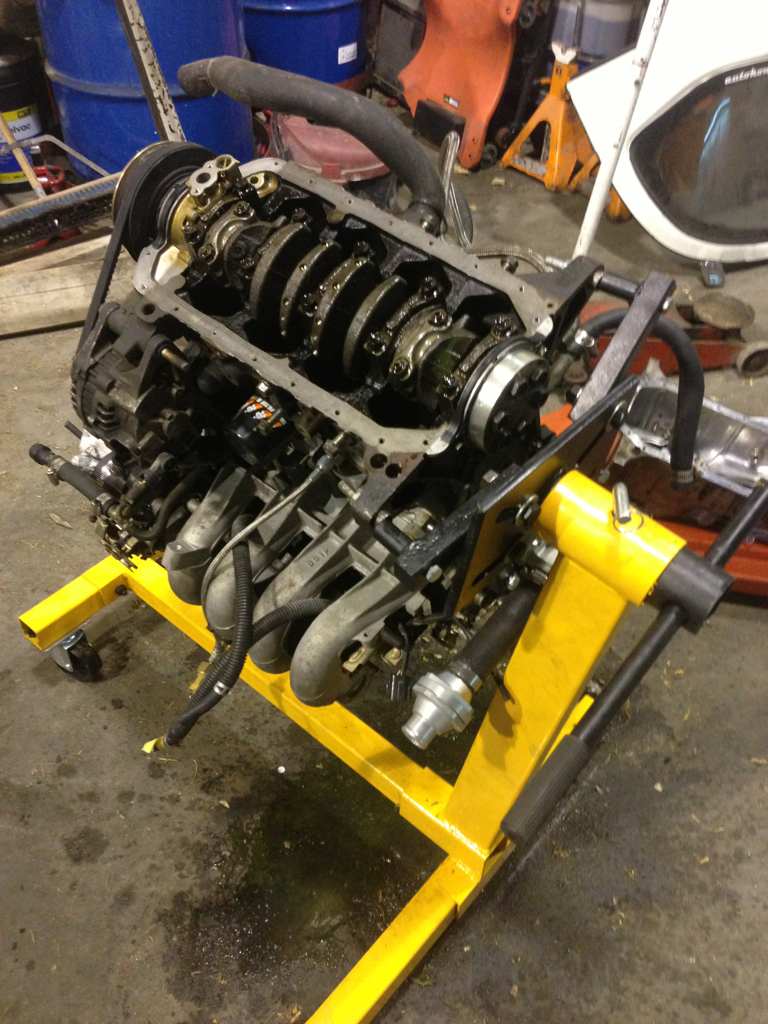
started taking all the crap off to pull the motor
grabbed a coolant reroute from a member on here
pulled the motor... dropped Oil pan & baffle off and started cleaning up
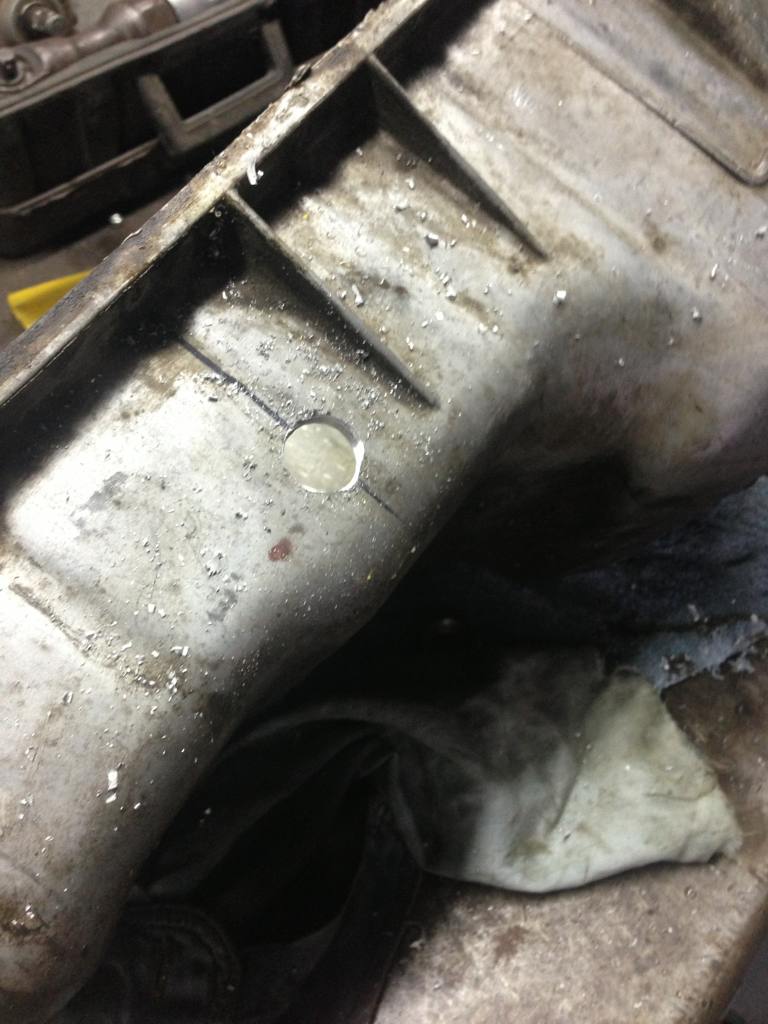
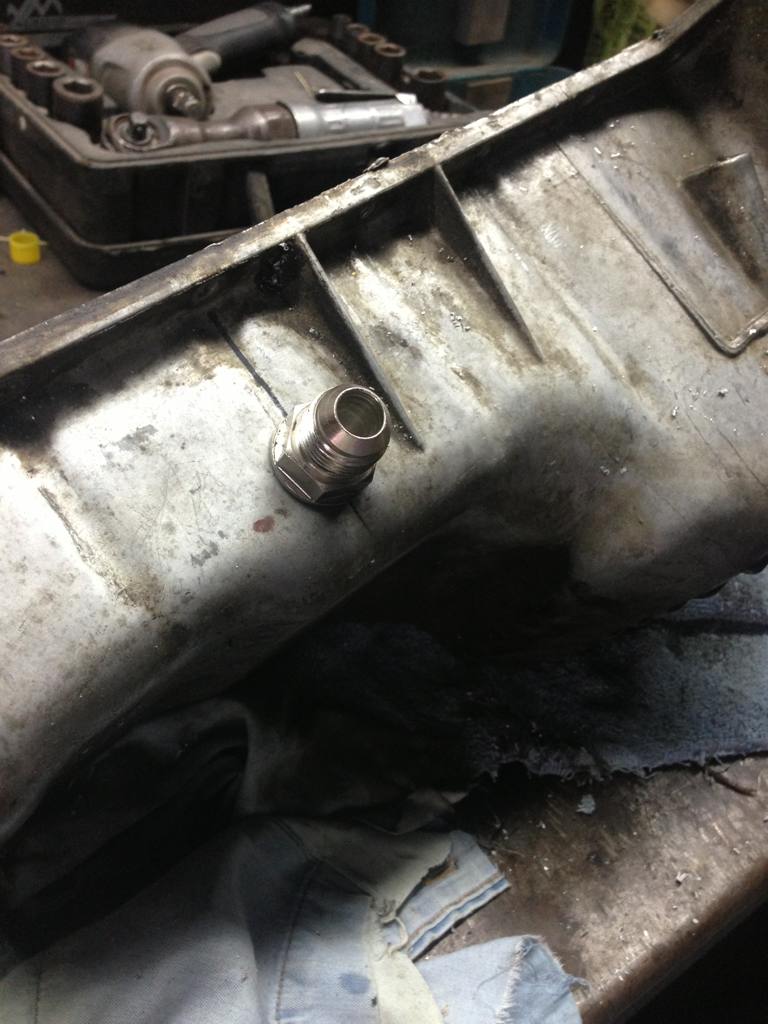
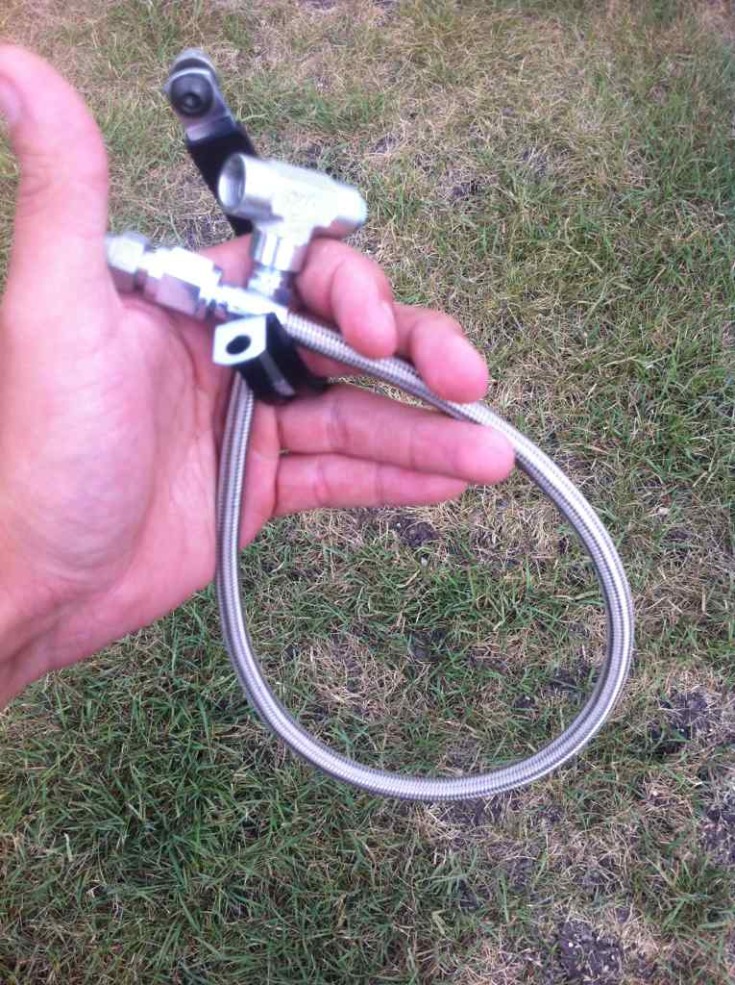
Drilled and tapped it with -8 fitting
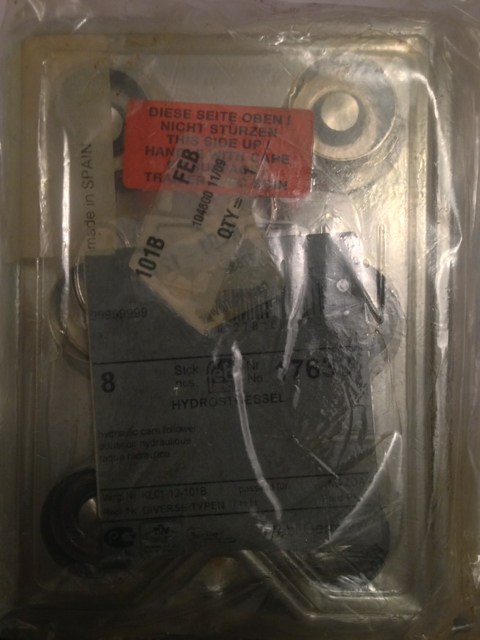
And getting ready to replace a few seals.
Mojo was helping me out the other night
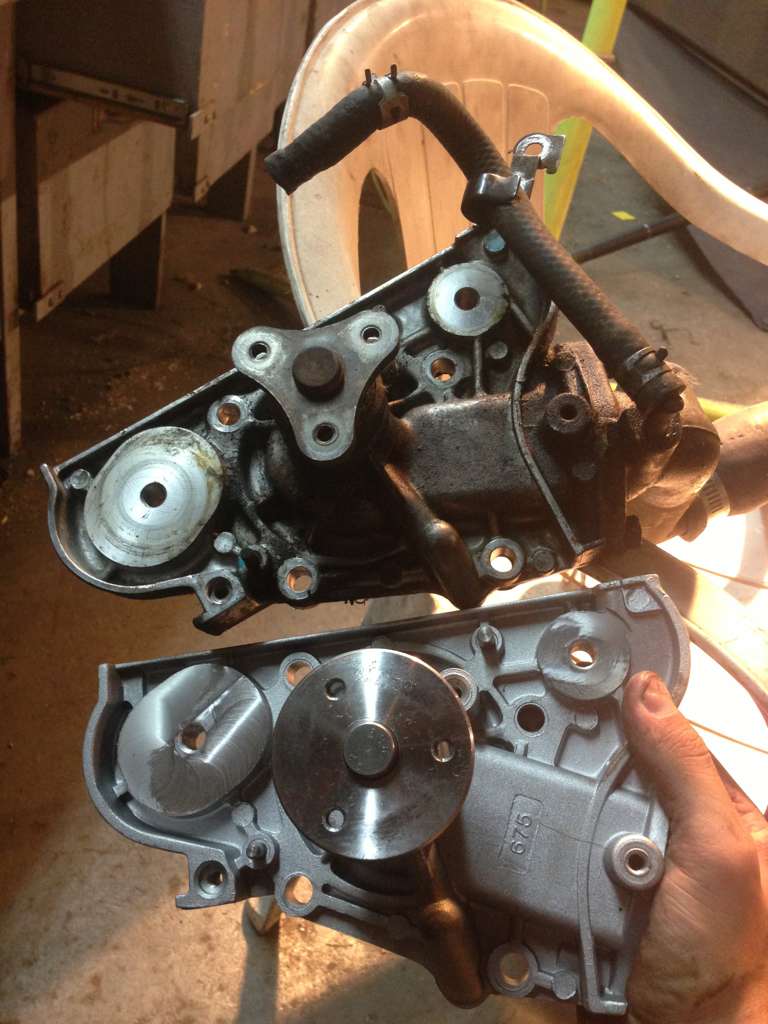
Put in the gates water pump.
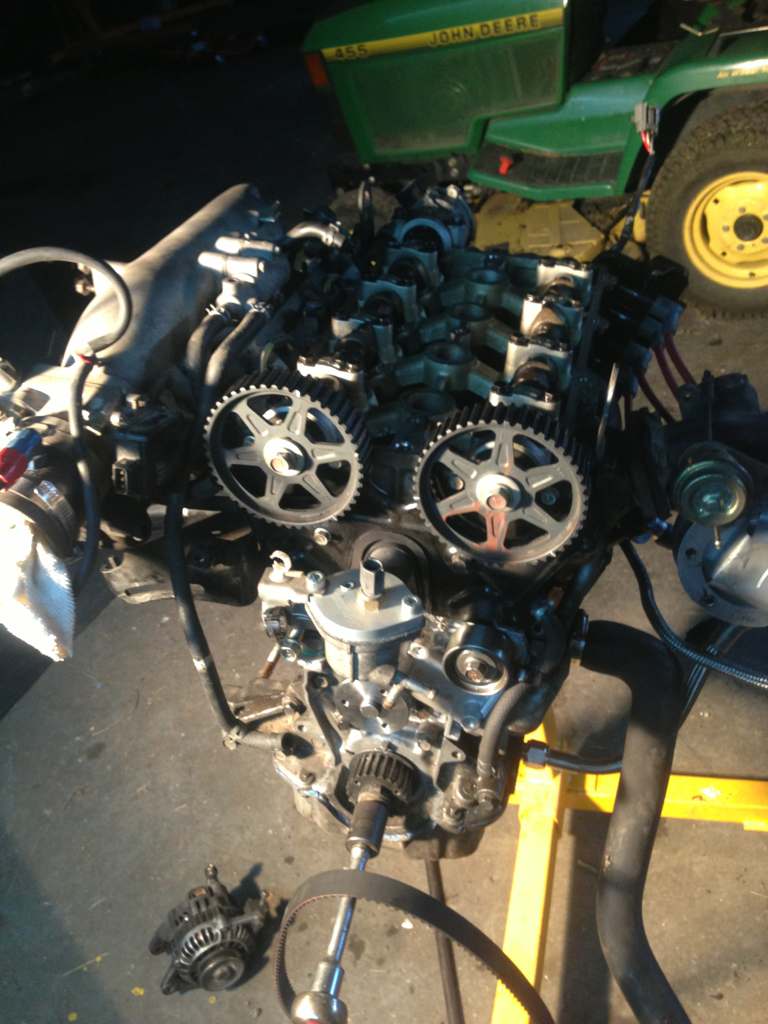
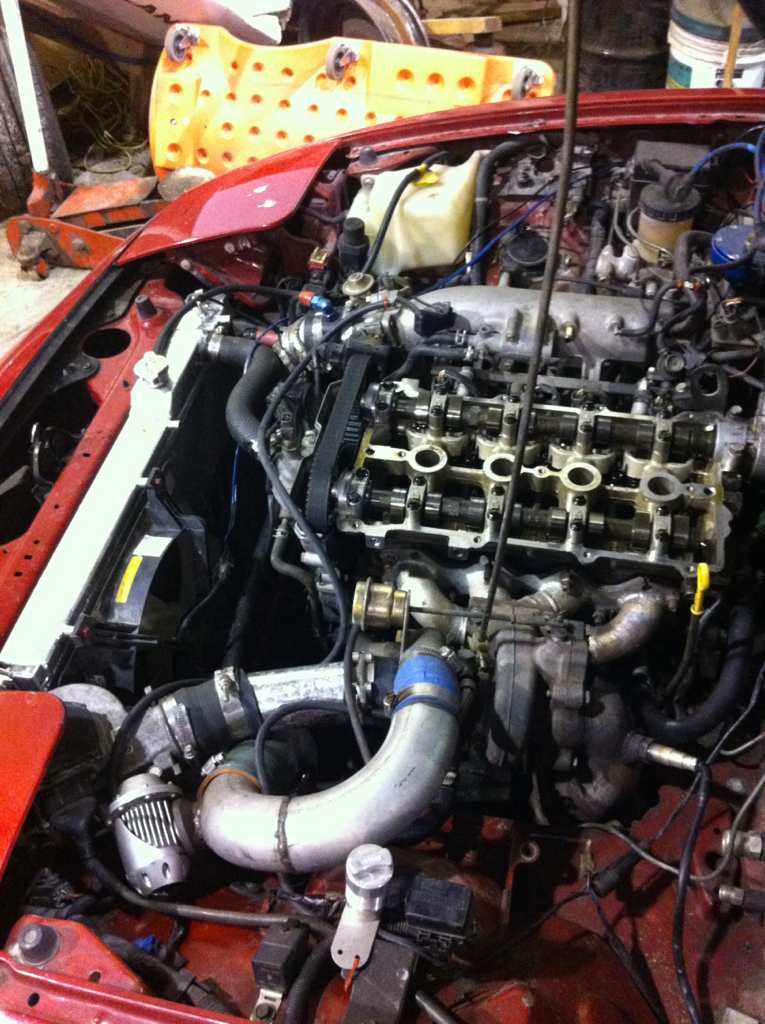
Did the timing belt, looked like it was off a little bit some how. But it's gerd nao
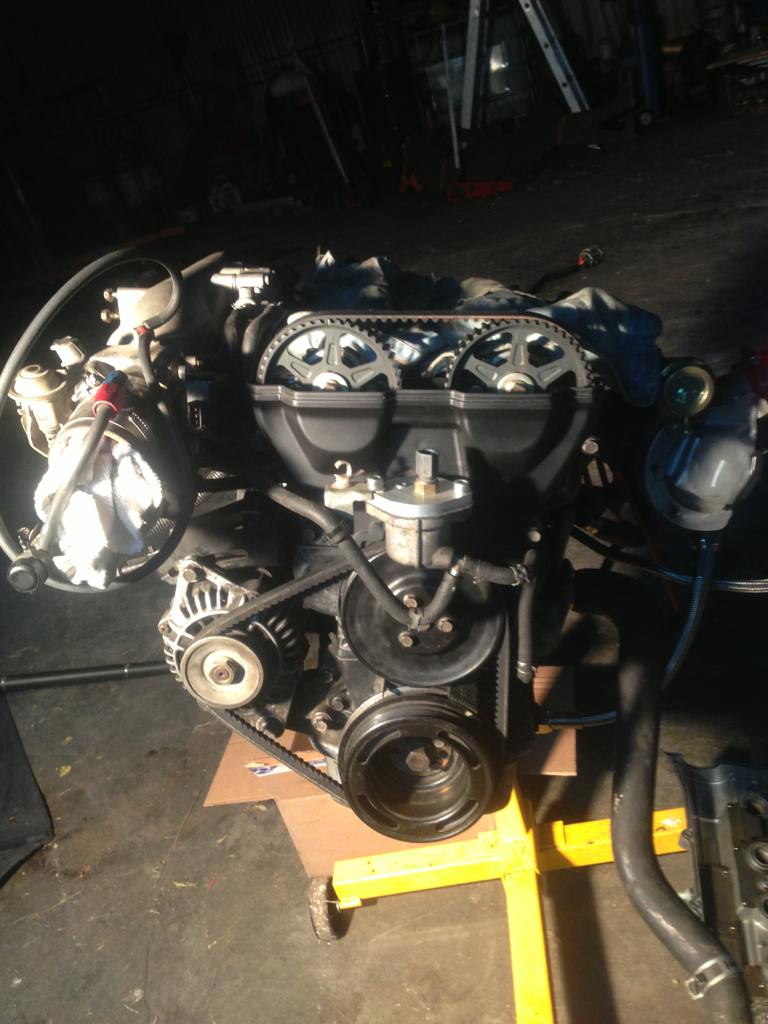
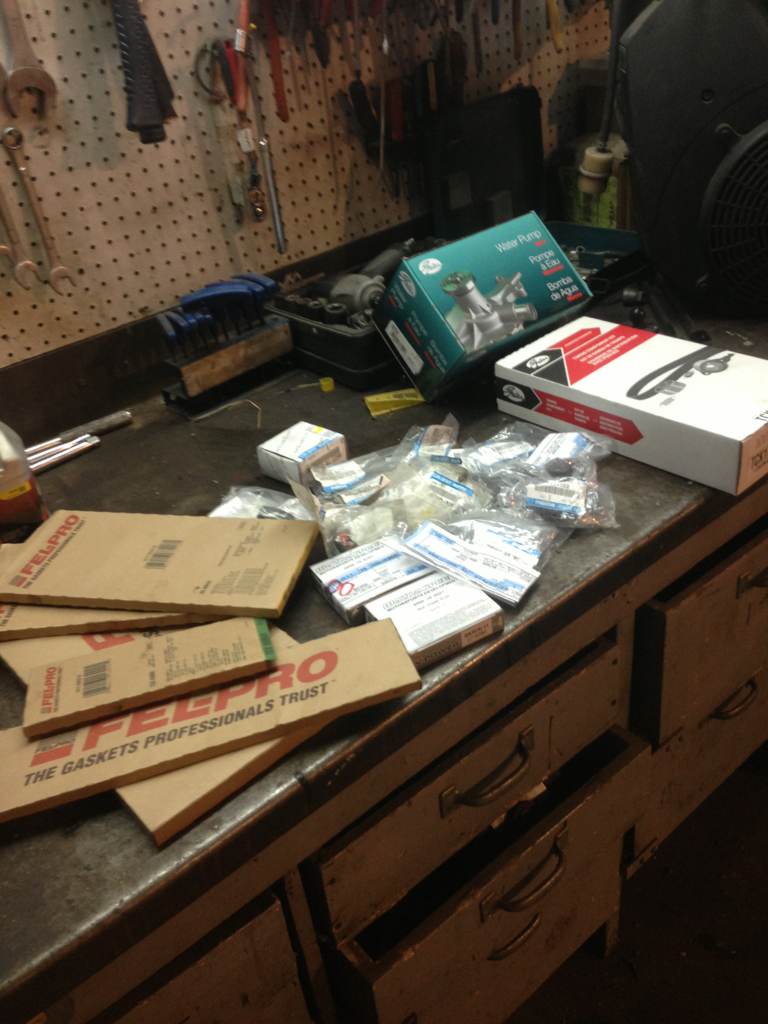
All the seals are in, just need to paint the valve cover, put the injectors in and few others fings
Seals/gaskets
-cam seals
-front crank
-rear crank
-timing belt, idler pulley and tensioner
-water pump & gaskets
-valve cover
-oil pan
-trans input
-trans output
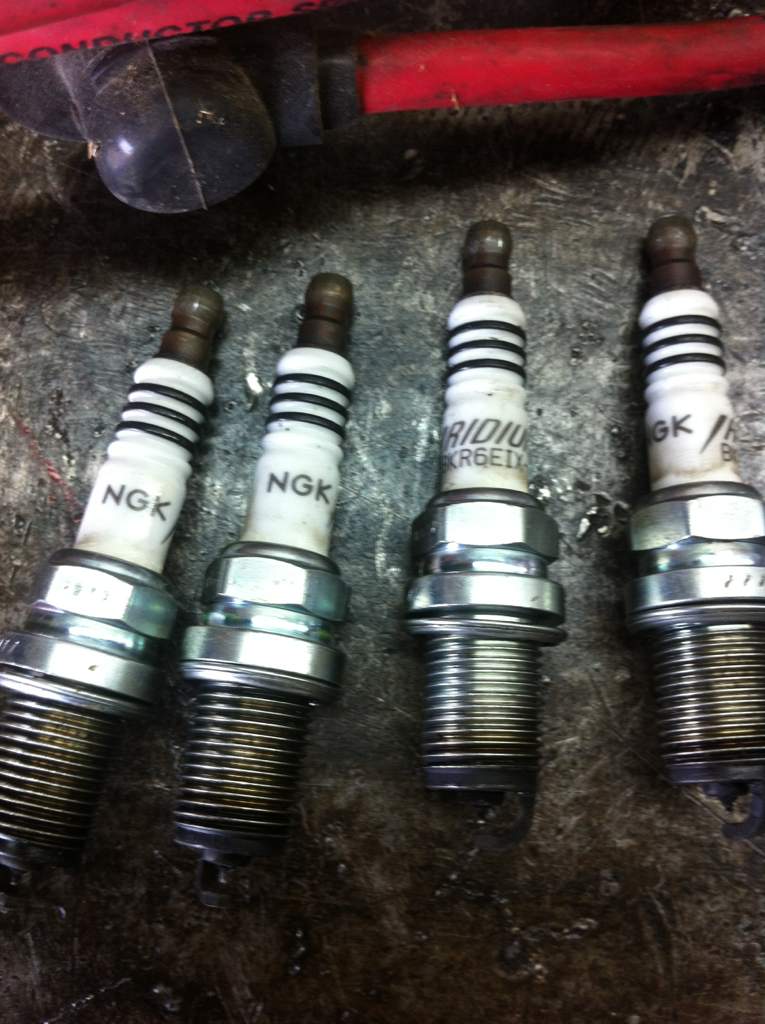
-spark plugs
-throw out bearing
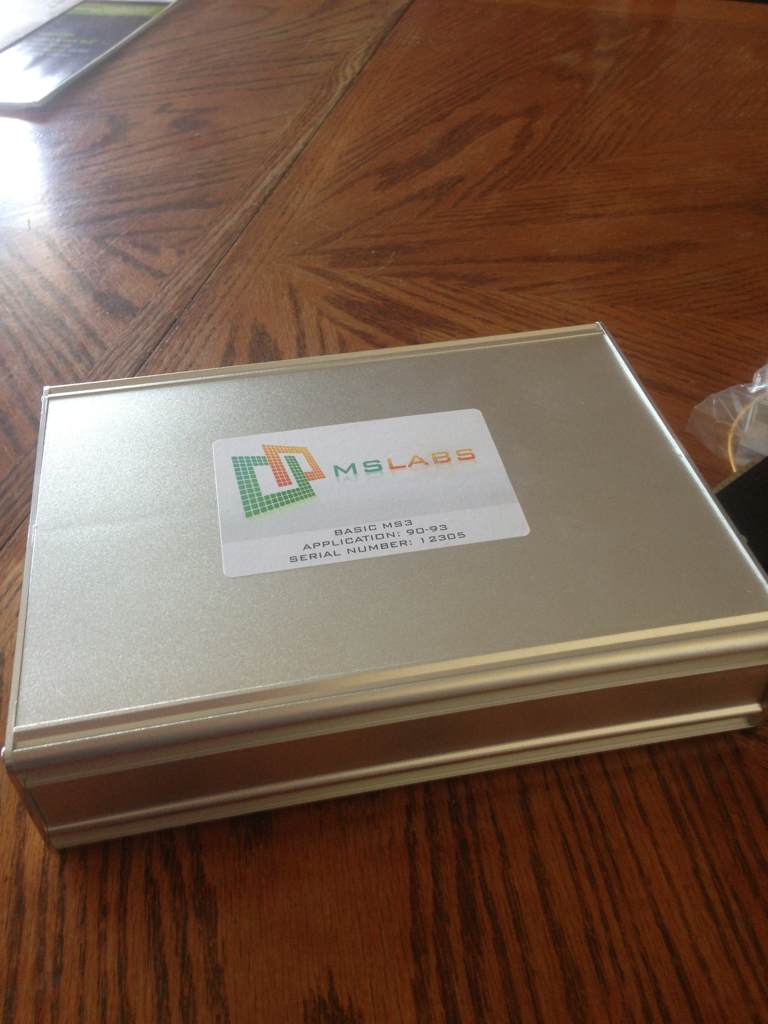
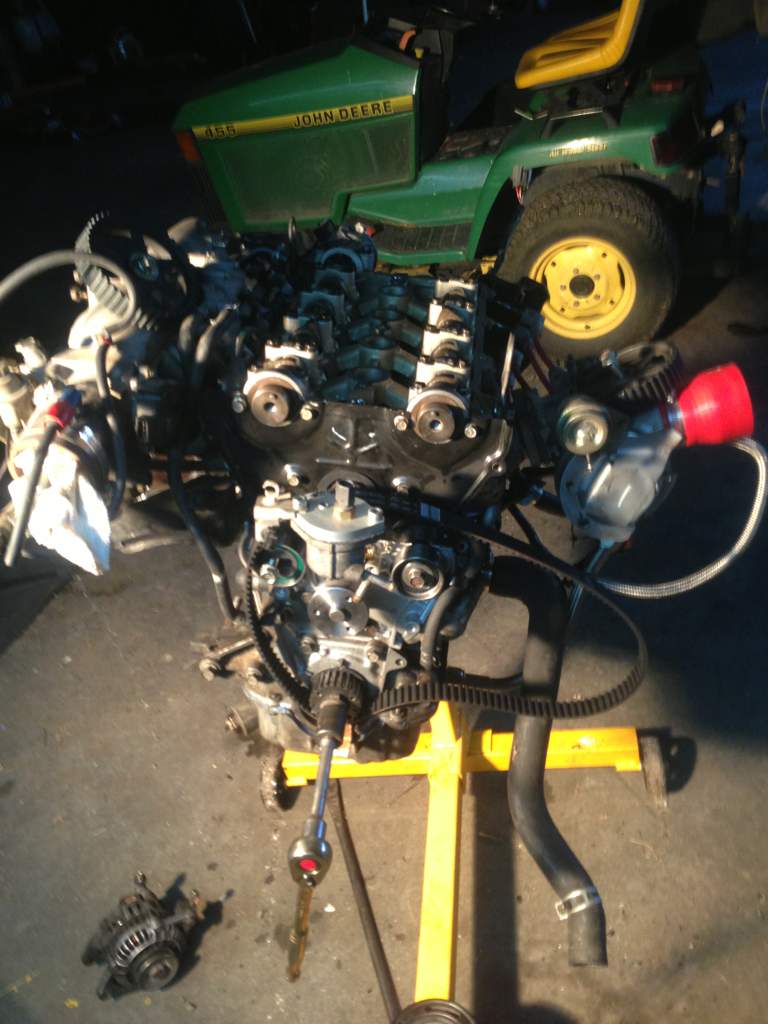
MS3 also came in, getting ready to party
Stock on the right and AEM on the left haha.
Also changed the faces to look better and match the defi/stock cluster
couple things i wanted to refresh while motor was out
Mazda OEM HLA
RC 750cc injectors (shitty i know but they were too cheap to say no)
DW 301 fuel pump to replace the walbro 255
started taking all the crap off to pull the motor
grabbed a coolant reroute from a member on here
pulled the motor... dropped Oil pan & baffle off and started cleaning up
Drilled and tapped it with -8 fitting
And getting ready to replace a few seals.
Mojo was helping me out the other night
Put in the gates water pump.
Did the timing belt, looked like it was off a little bit some how. But it's gerd nao
All the seals are in, just need to paint the valve cover, put the injectors in and few others fings
Seals/gaskets
-cam seals
-front crank
-rear crank
-timing belt, idler pulley and tensioner
-water pump & gaskets
-valve cover
-oil pan
-trans input
-trans output
-spark plugs
-throw out bearing
MS3 also came in, getting ready to party
Reply
1
1
Thread Starter
Junior Member
Joined: Jan 2011
Posts: 84
Total Cats: 1
From: Winnipeg, Canada
Yeah might be a bit excessive. Got it pretty cheap locally. Hoping that the aeromotive fpr will keep it in check. Can always sell it if it's too much
Reply
0
0
Fuel pump should be great. I am a big fan of too much pump rather than not enough. The aeromotive FPR is an awesome unit and should control your pressure just fine. Great progress and I cant wait to see how this thing turns out.
Reply
0
0
Thread Starter
Junior Member
Joined: Jan 2011
Posts: 84
Total Cats: 1
From: Winnipeg, Canada
My thoughts exactly! Hopefully it works out in my favor
Reply
0
0
Thread Starter
Junior Member
Joined: Jan 2011
Posts: 84
Total Cats: 1
From: Winnipeg, Canada
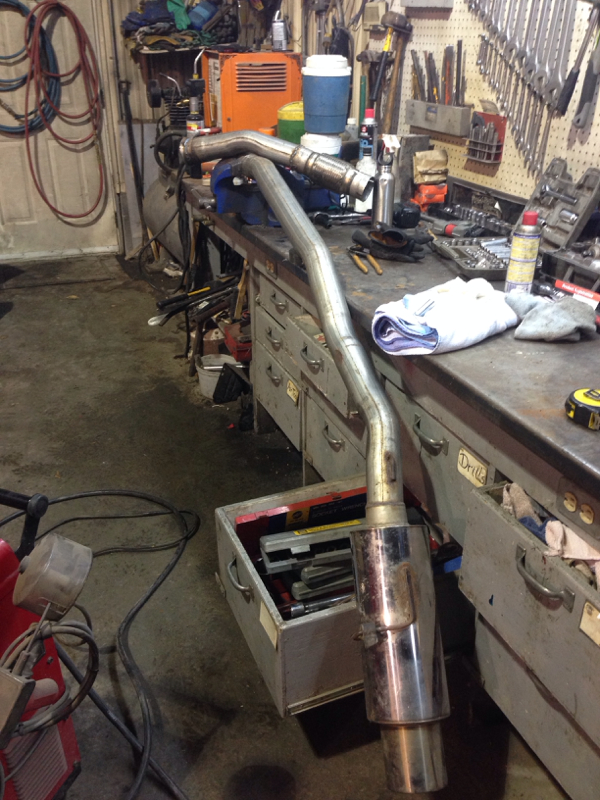
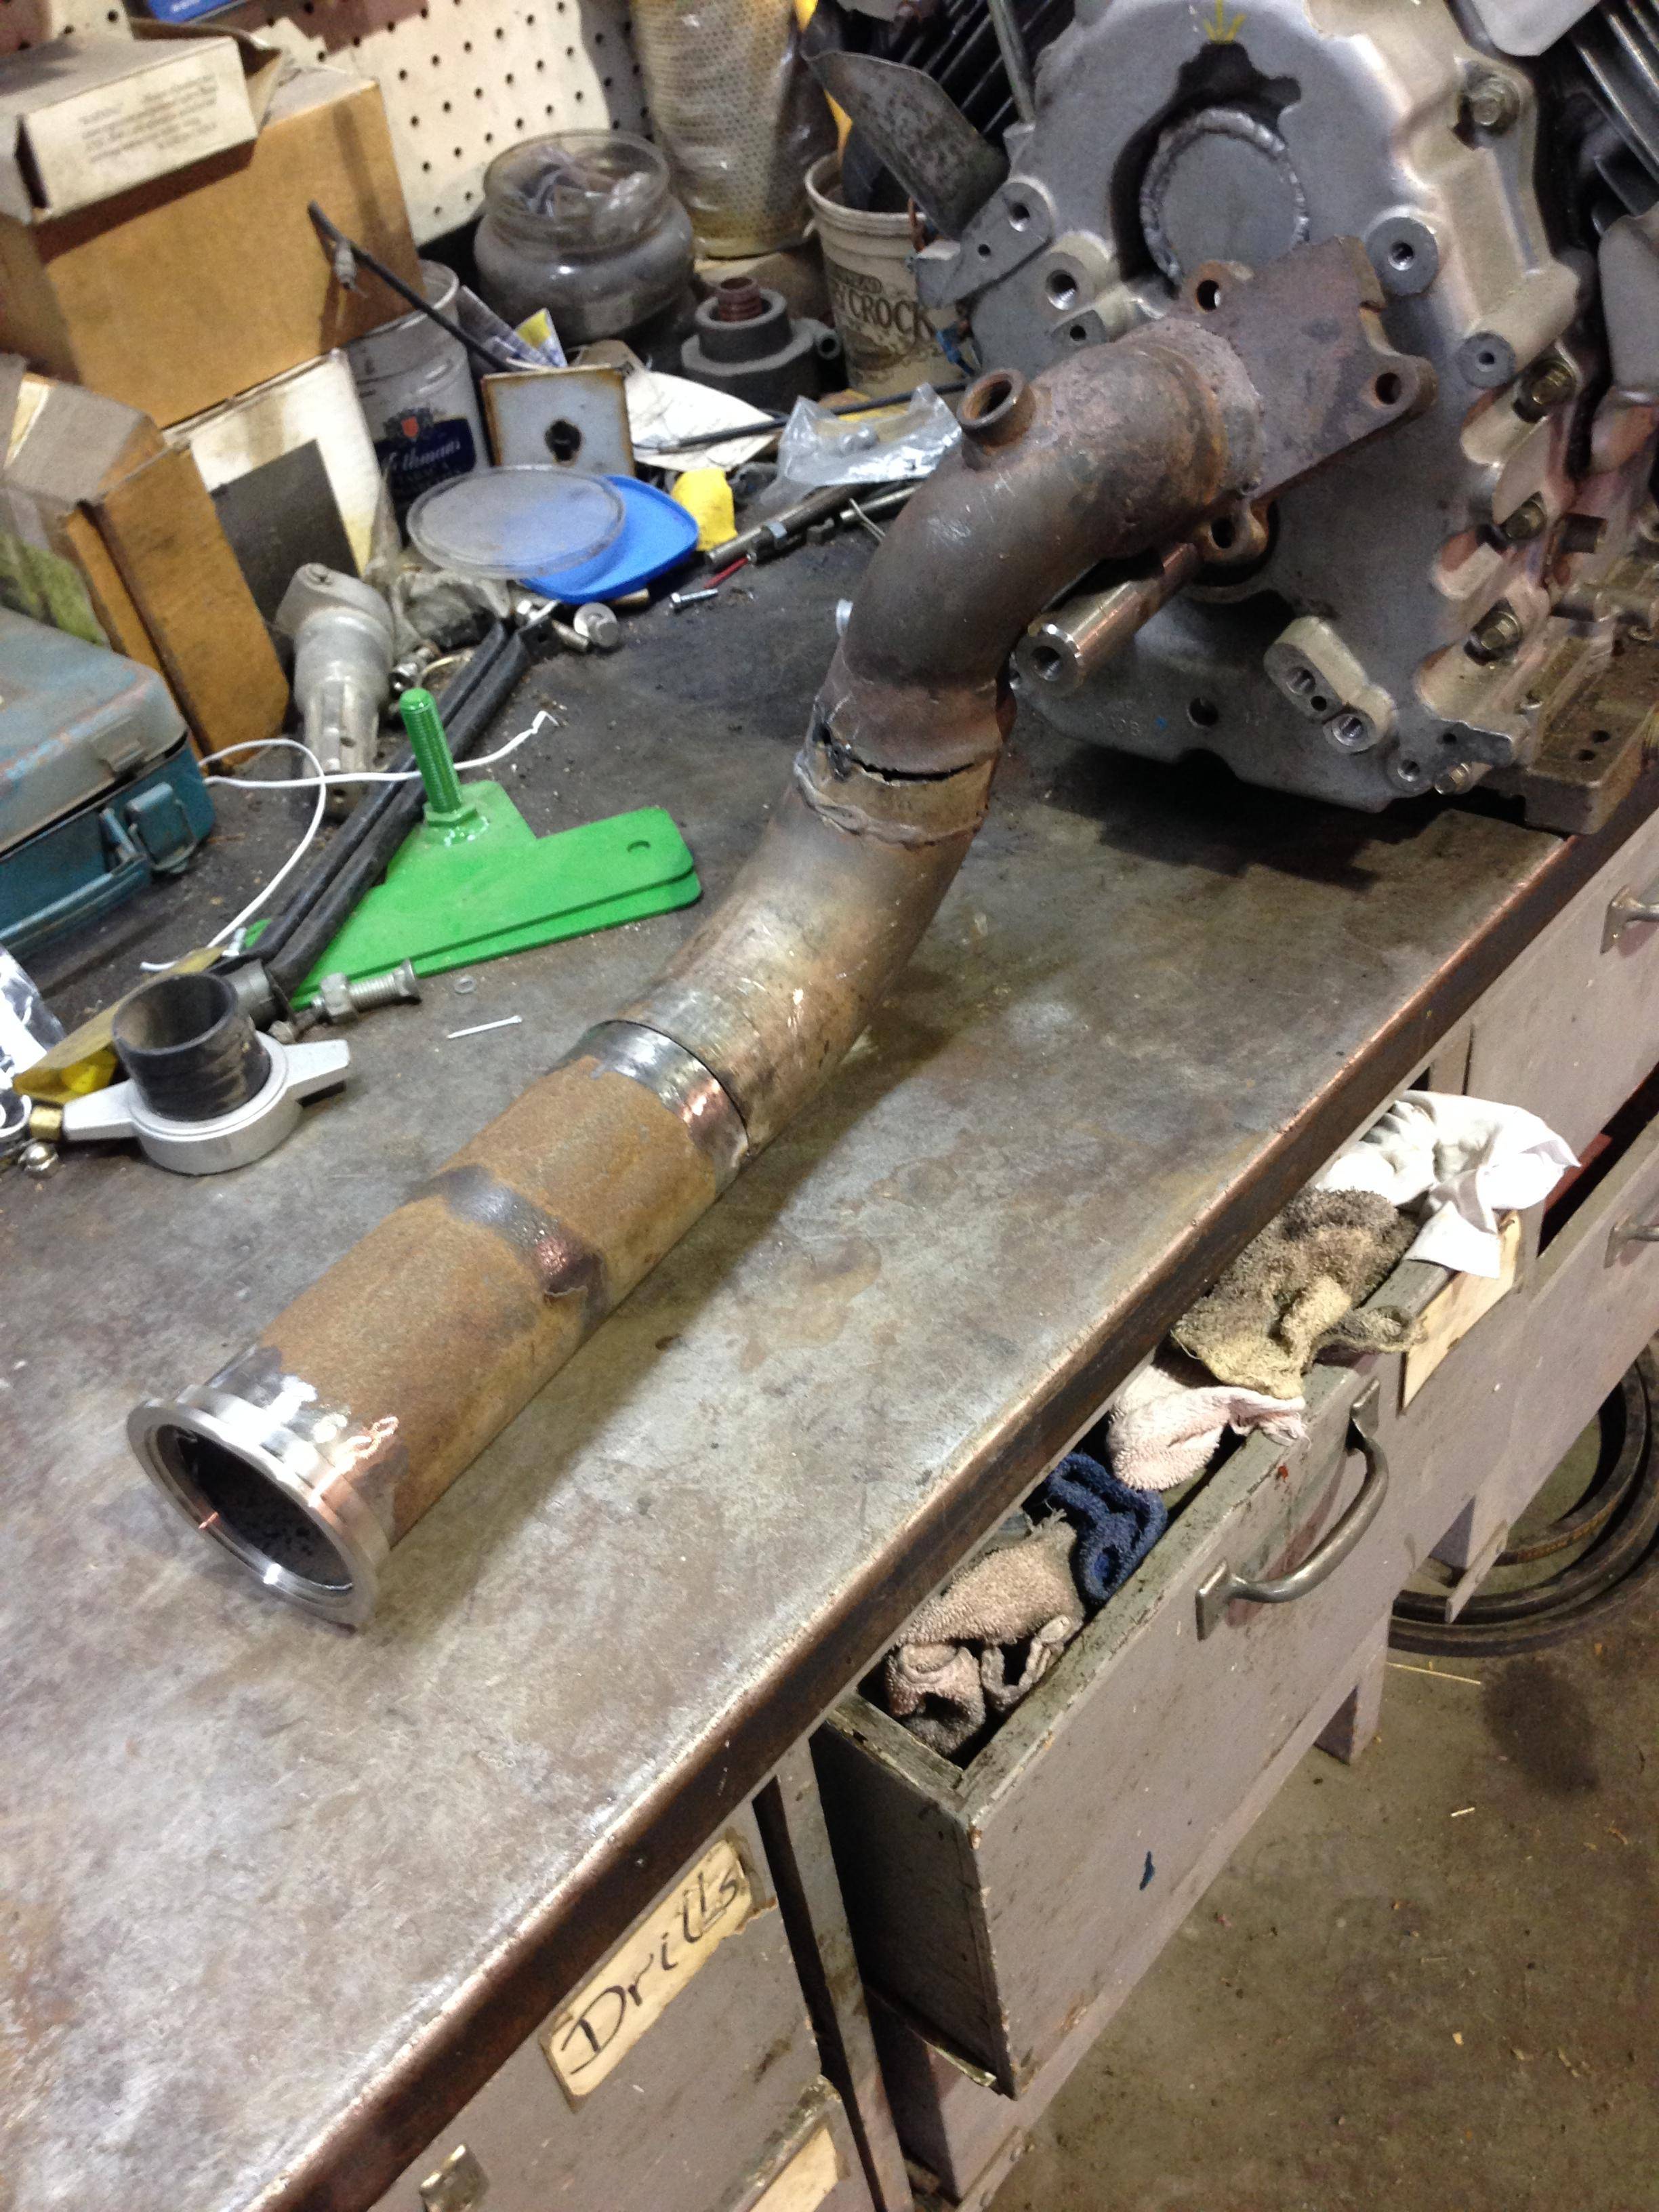
Finished up the exhaust, not that pretty but whatever. Crush bent 3in that came with the car
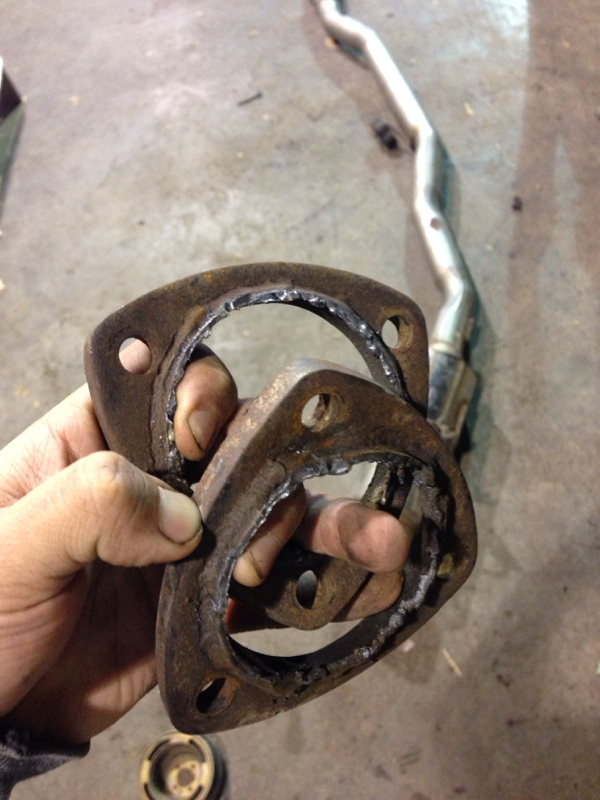
Also cut these out and switched to v-band clamps (never going back lol)
Basically have the motor in and running and all that.
Ended up getting a wobbly crank, and found out it was from a used cog I had got from when I accidentally dropped mine and it had chipped lol...bah


this was probably why.. haha going to order a new one this week hopefully... along with some cam seals and front crank looks like it started leaking too... for whatever reason... maybe the cam seals need rtv

Also cut these out and switched to v-band clamps (never going back lol)
Basically have the motor in and running and all that.
Ended up getting a wobbly crank, and found out it was from a used cog I had got from when I accidentally dropped mine and it had chipped lol...bah
this was probably why.. haha going to order a new one this week hopefully... along with some cam seals and front crank looks like it started leaking too... for whatever reason... maybe the cam seals need rtv
Reply
0
0
Thread Starter
Junior Member
Joined: Jan 2011
Posts: 84
Total Cats: 1
From: Winnipeg, Canada
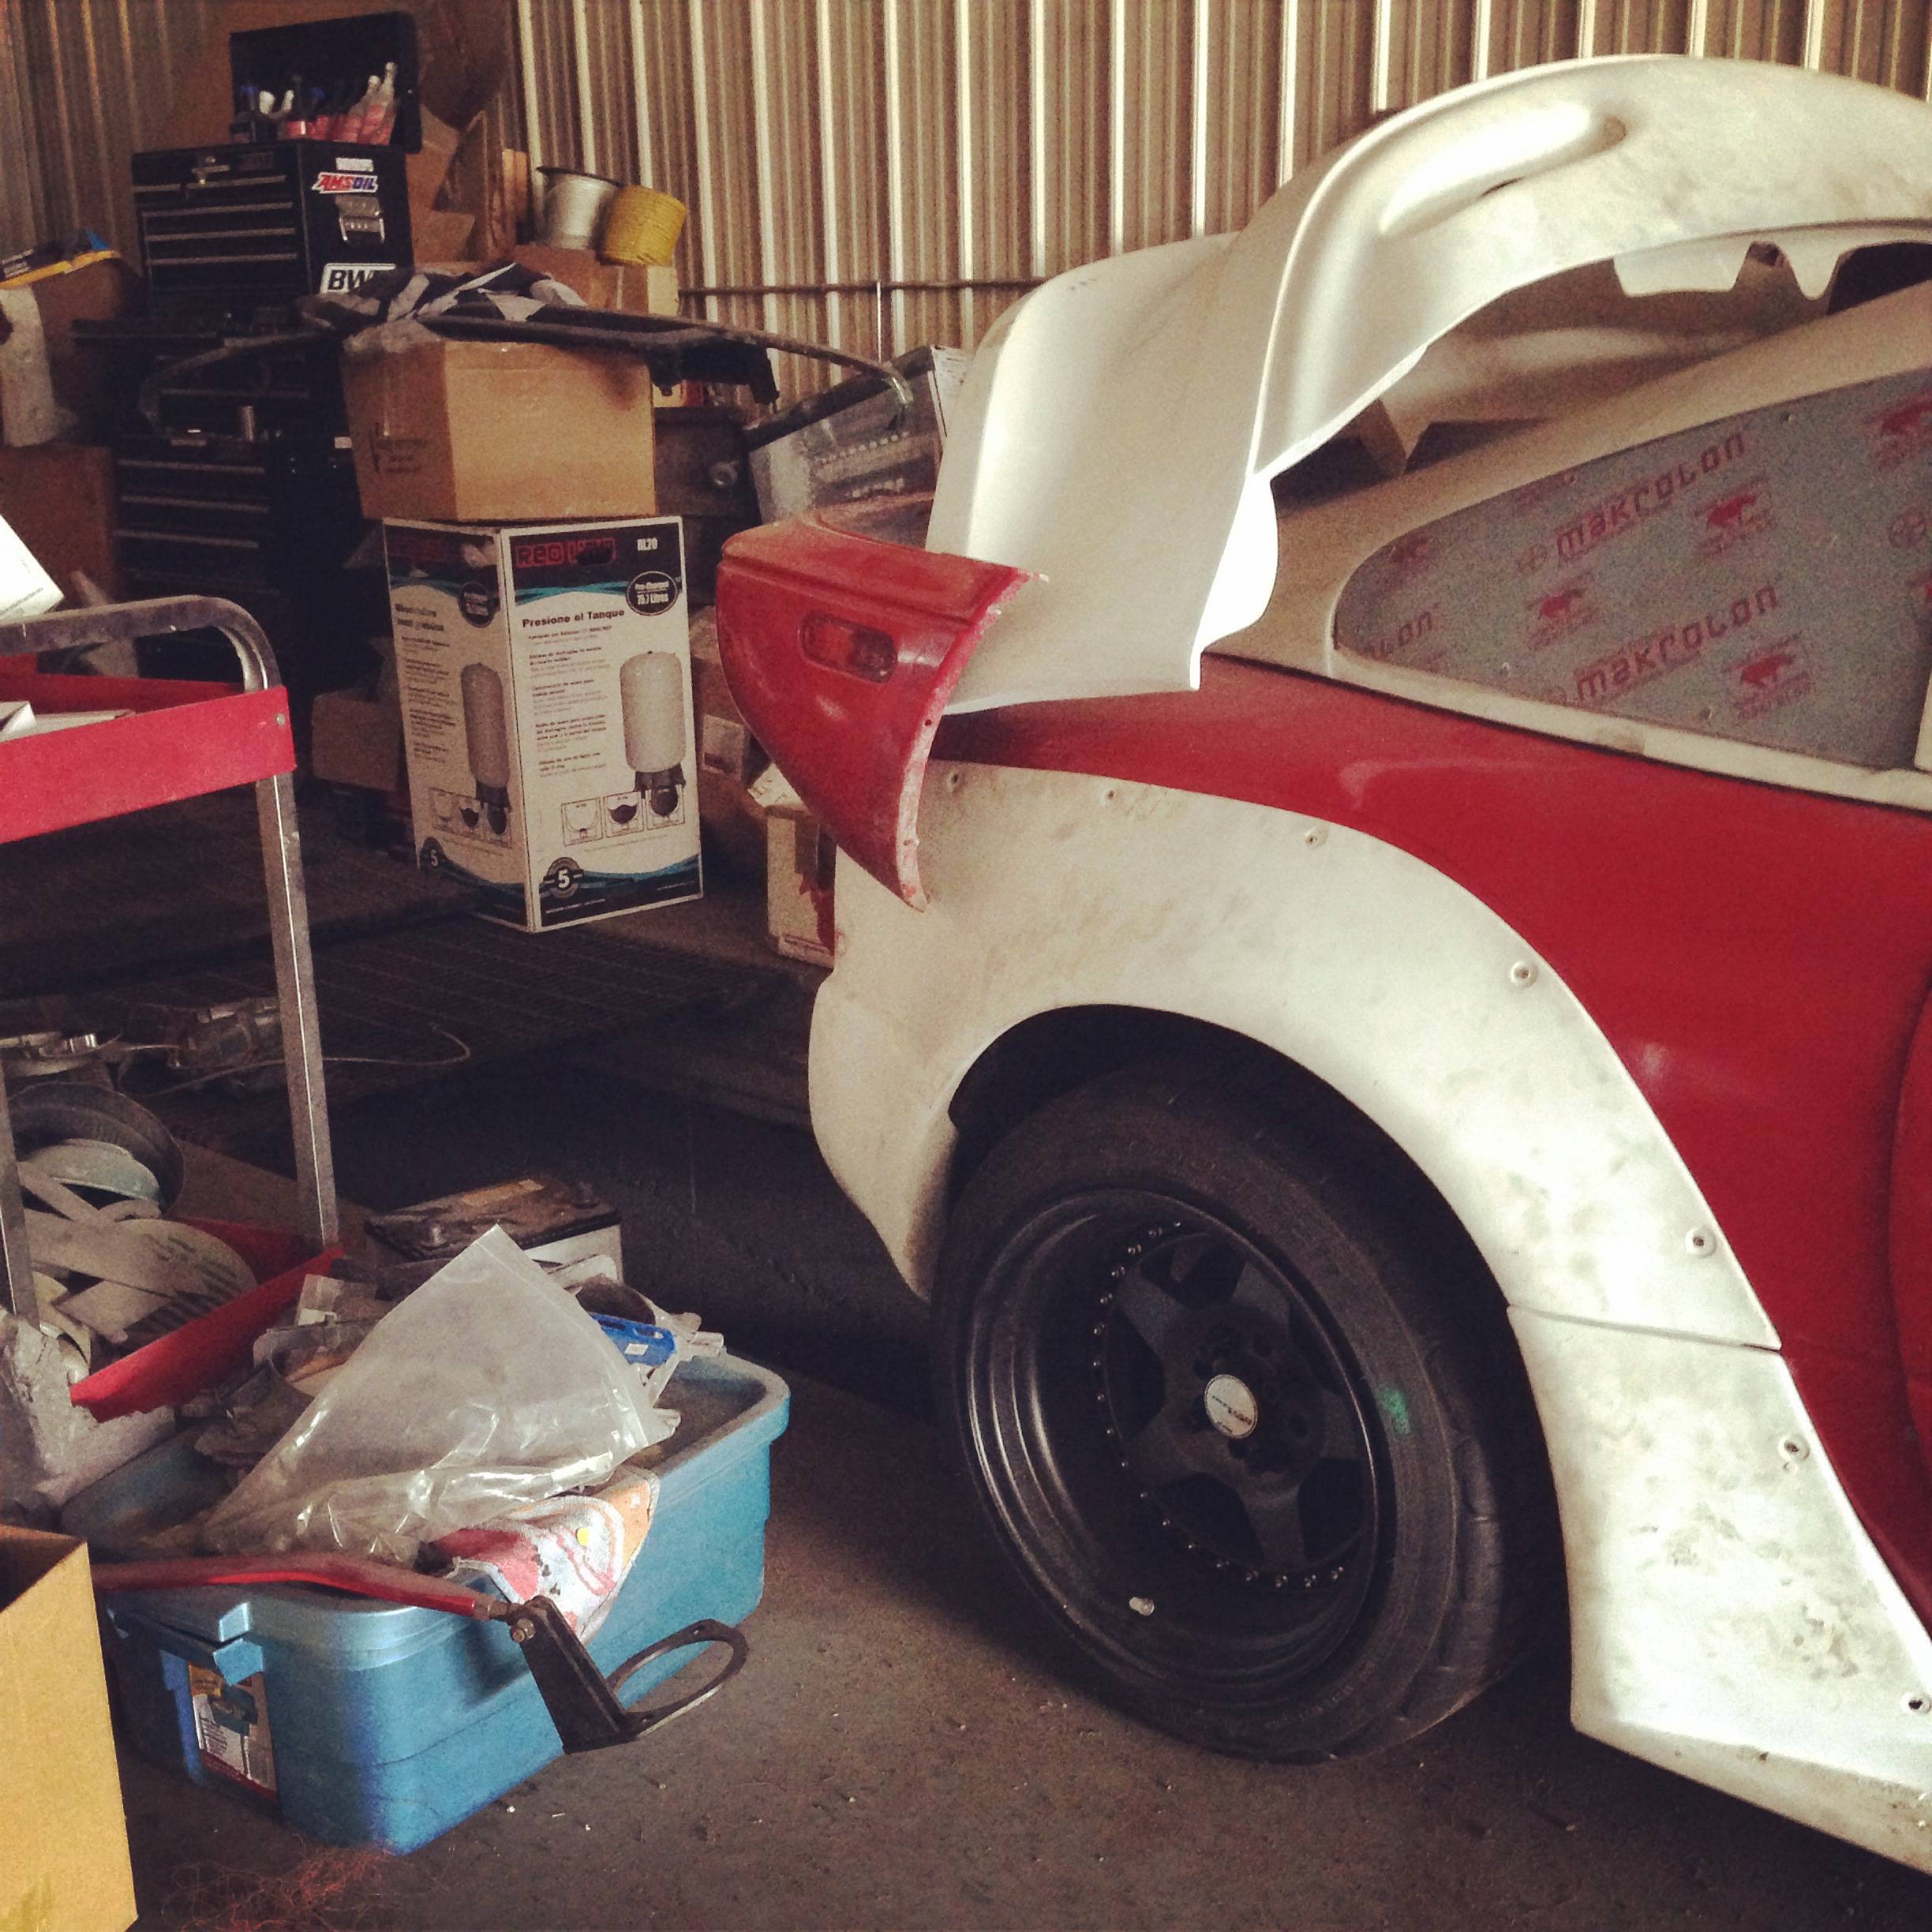
Frog arms installed

Picture from the front with the new autokonexion fenders installed
Started on the rear overs
[IMG]ttps://www.dropbox.com/s/9nzv58pcr3dkph1/2013-10-19%2023.54.22.jpg[/IMG]
didnt take too many pictures of the process unfortunately
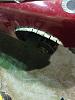


Excuse my welding, never been good at it, and with the metal being so thin and trying not to wrap it didn't help.
Picture from the front with the new autokonexion fenders installed


Started on the rear overs
[IMG]ttps://www.dropbox.com/s/9nzv58pcr3dkph1/2013-10-19%2023.54.22.jpg[/IMG]
didnt take too many pictures of the process unfortunately
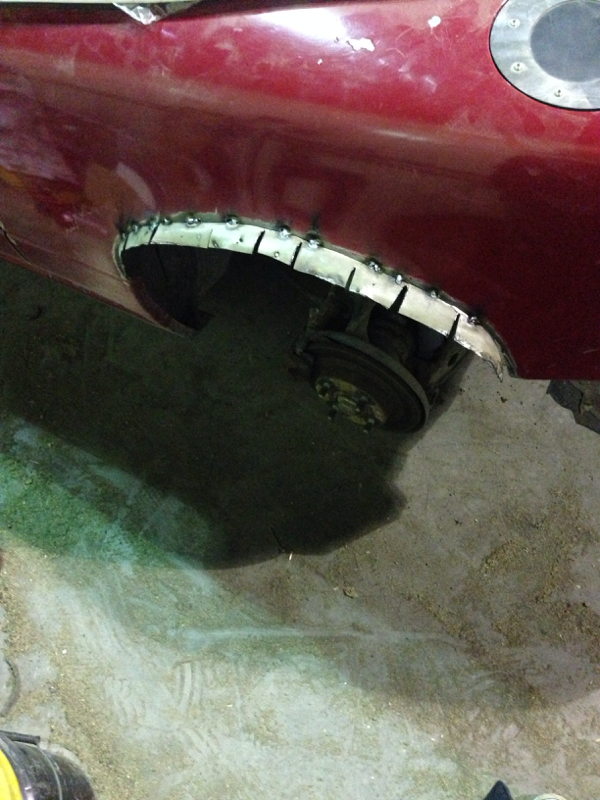
Excuse my welding, never been good at it, and with the metal being so thin and trying not to wrap it didn't help.
Reply
0
0
Thread Starter
Junior Member
Joined: Jan 2011
Posts: 84
Total Cats: 1
From: Winnipeg, Canada
another small update:
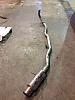
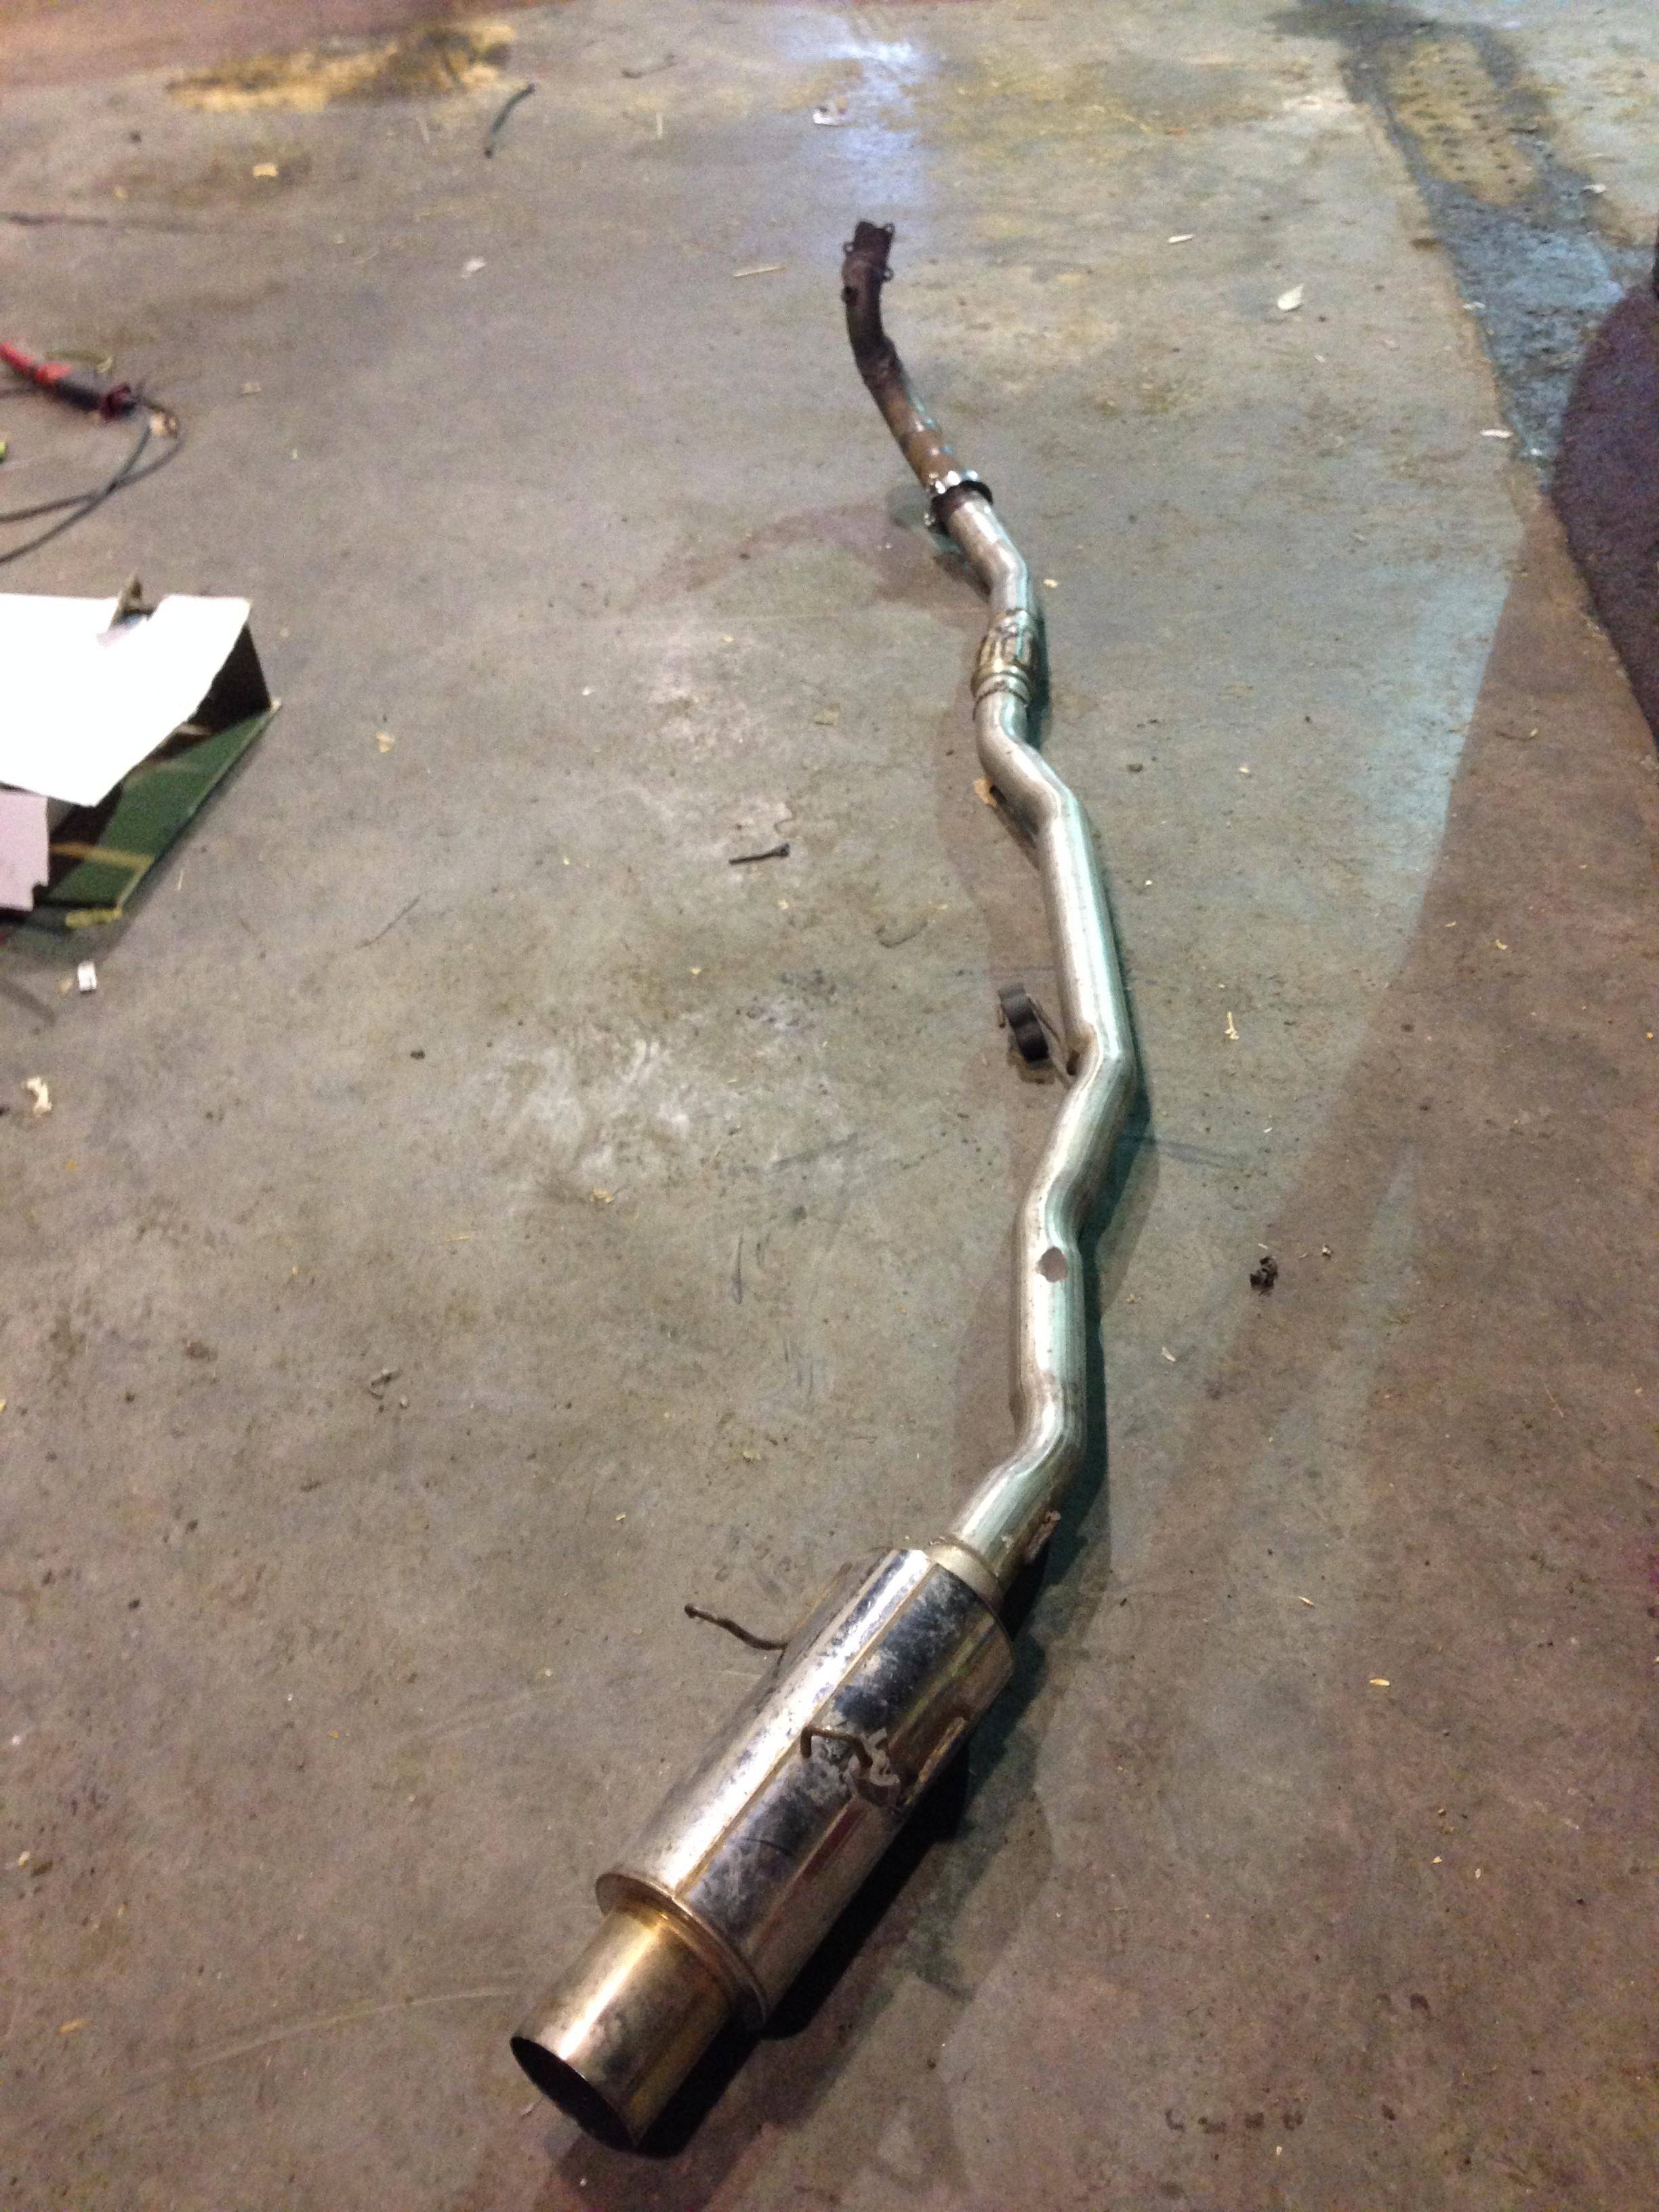
Finished up with my exhaust stuff:
hated the fitment of old one i made, was basically rubbing on the front sub frame, and was a nightmare to bolt back on.

was using this collector flange initially

and switched it out for some ebay v-band flanges
exhaust is just a crush bent 3in (cause cheap) and basically 2.5 in DP
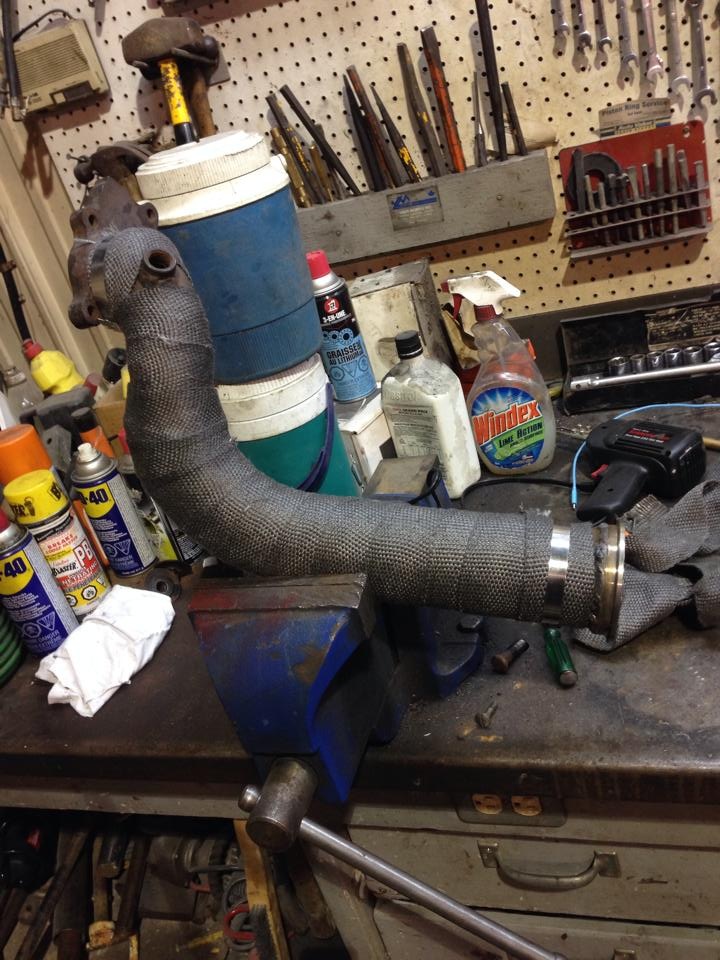
then i wrapped it up, cause it looks pretty now
started rebuilding my front end a bit.
did:
-ball joints (upper/lower)
-tie rod end
-poly bushings in the UCA/LCA
-ARP extended studs
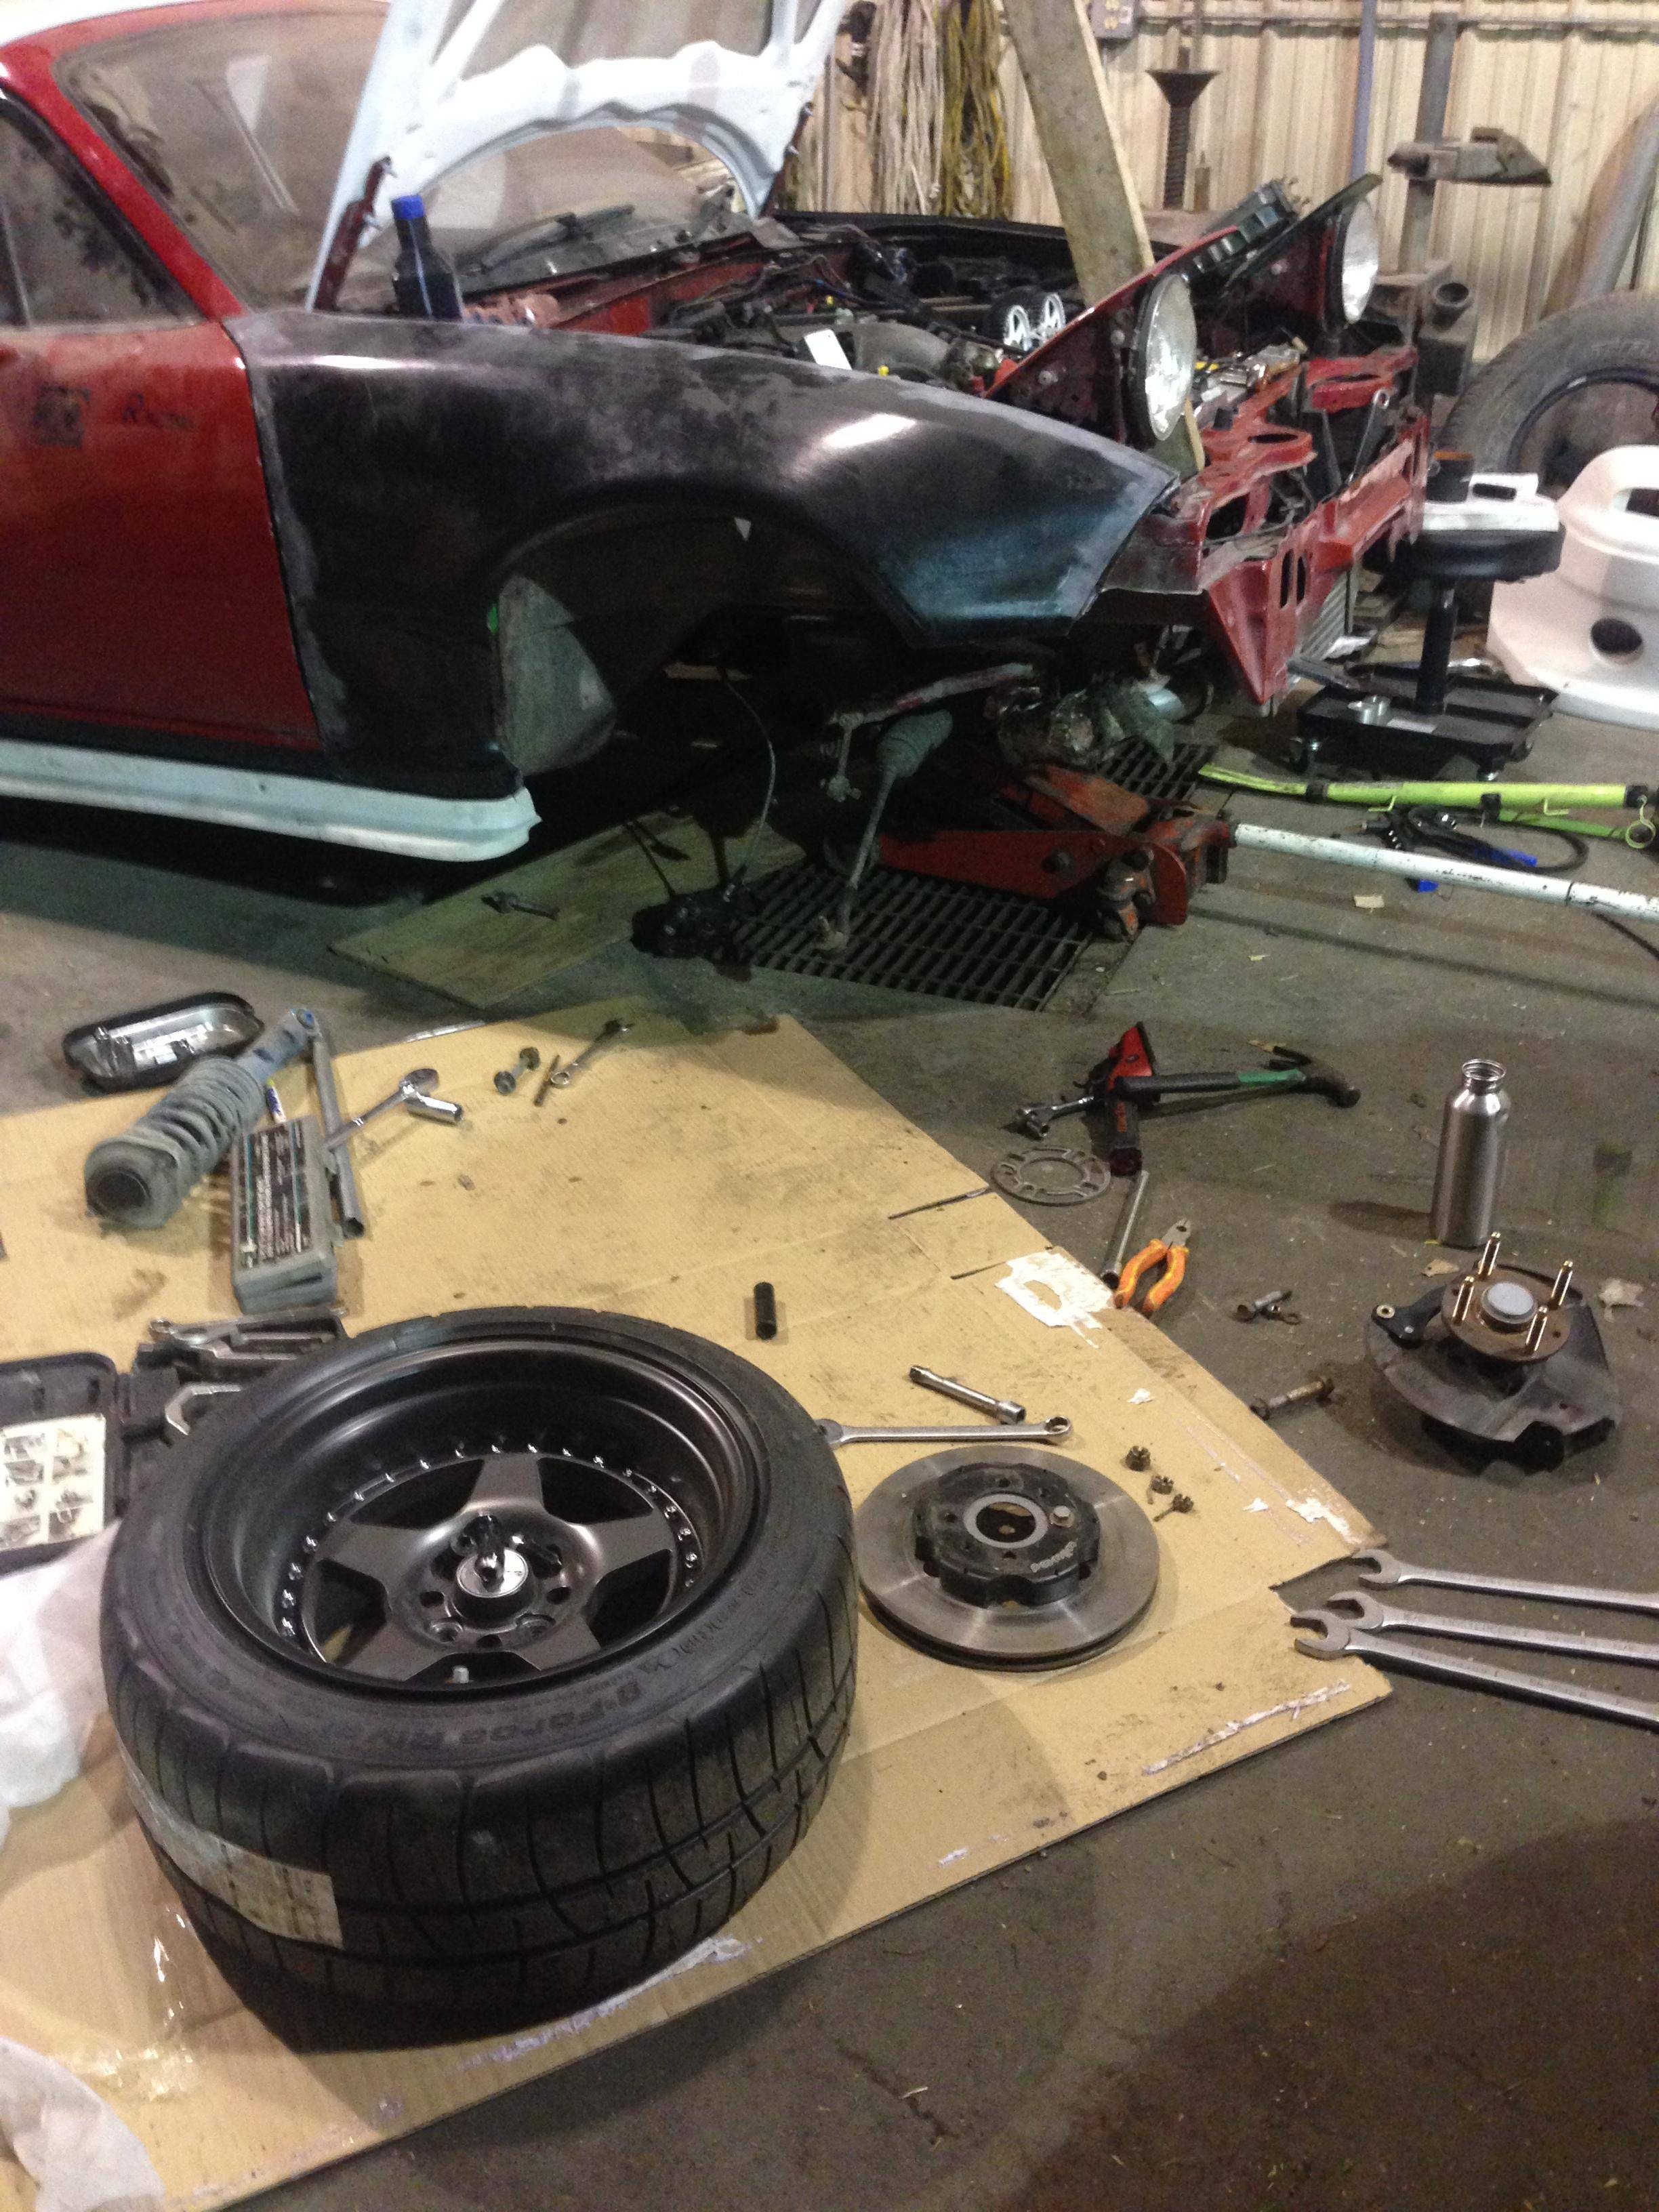
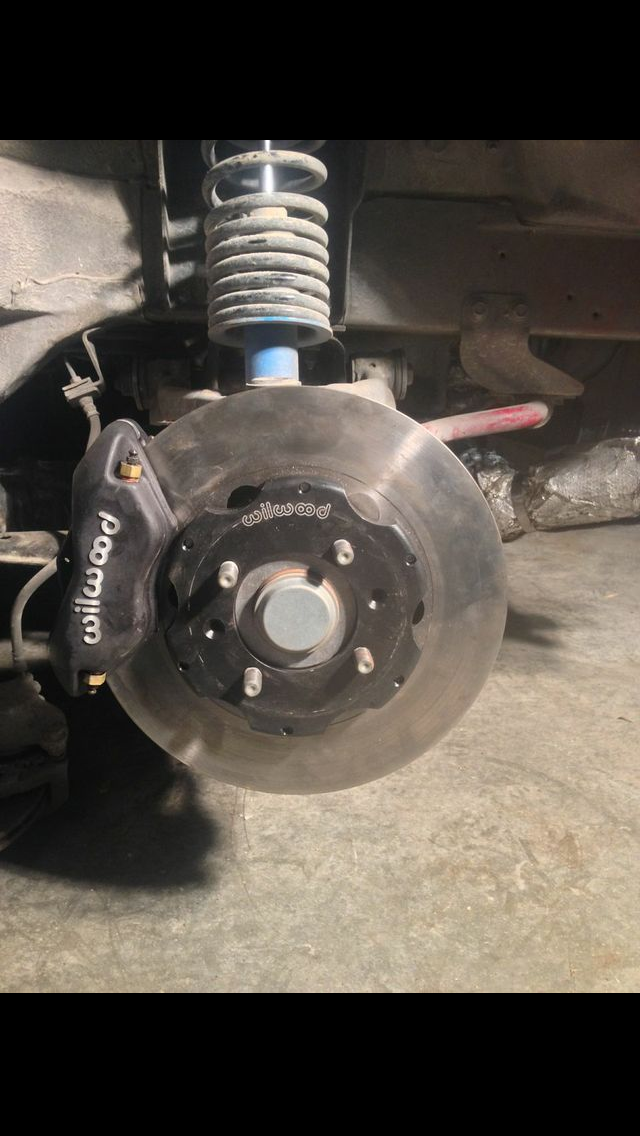
along with throwing on the wildwood kit i had bought from a member on here:
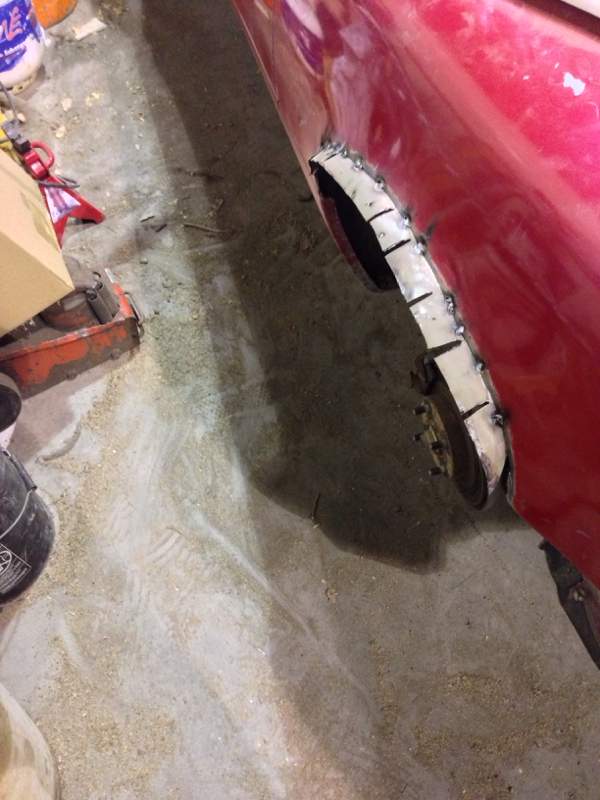
quick shot of the rear overs thrown on:
Finished up with my exhaust stuff:
hated the fitment of old one i made, was basically rubbing on the front sub frame, and was a nightmare to bolt back on.
was using this collector flange initially
and switched it out for some ebay v-band flanges
exhaust is just a crush bent 3in (cause cheap) and basically 2.5 in DP
then i wrapped it up, cause it looks pretty now
started rebuilding my front end a bit.
did:
-ball joints (upper/lower)
-tie rod end
-poly bushings in the UCA/LCA
-ARP extended studs
along with throwing on the wildwood kit i had bought from a member on here:
quick shot of the rear overs thrown on:
Reply
0
0

Thread Starter
Junior Member
Joined: Jan 2011
Posts: 84
Total Cats: 1
From: Winnipeg, Canada
Few new things:
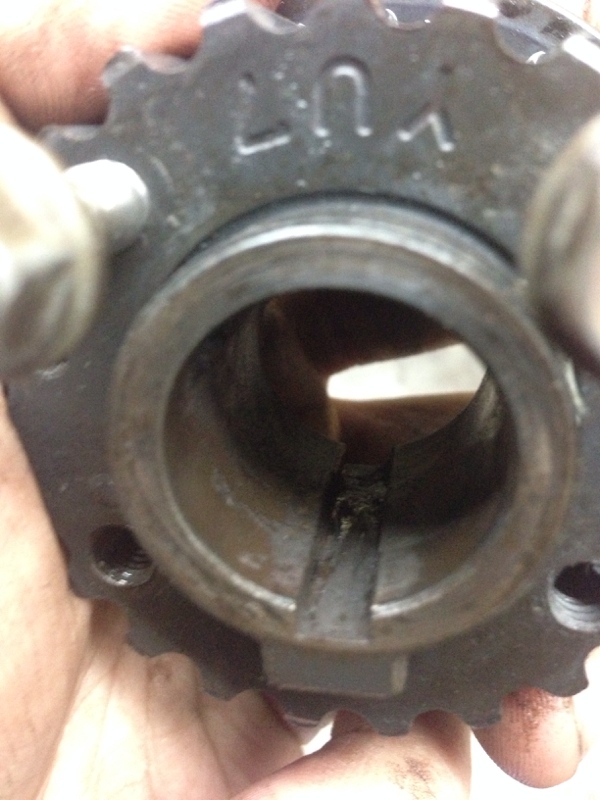
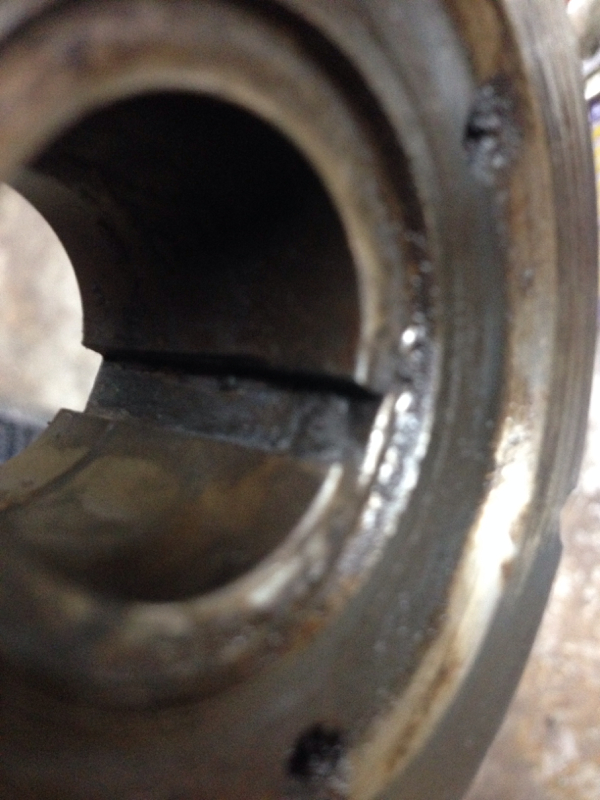
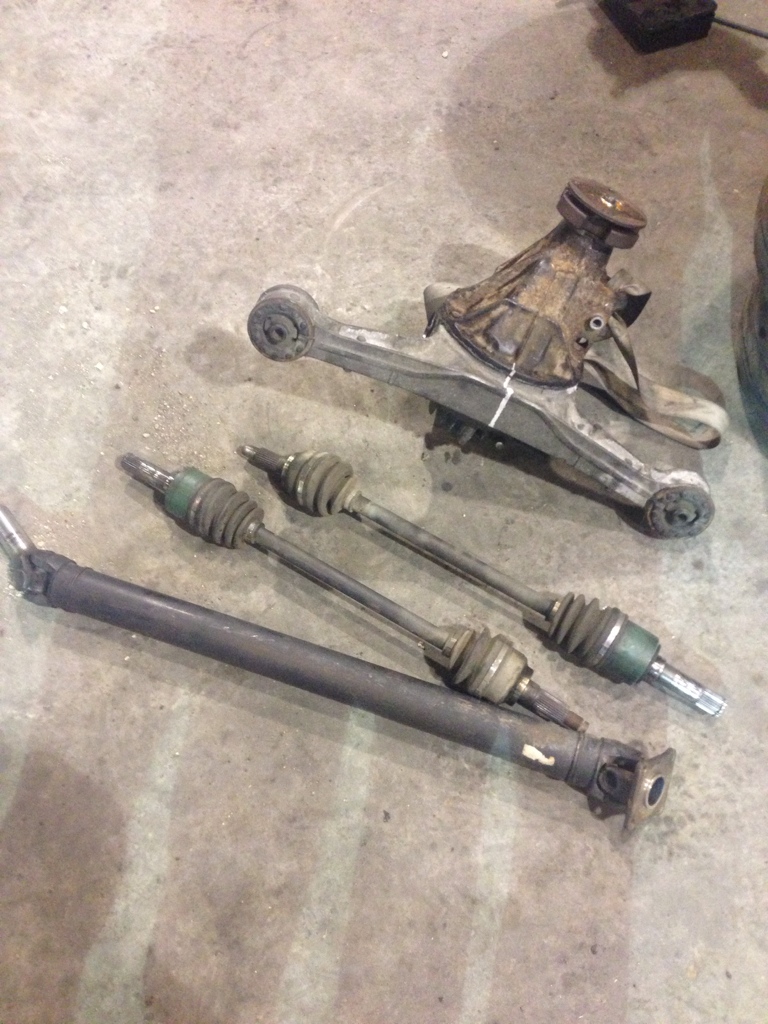
Bought a 96+ Miata diff via ebay for a good price and driveshaft/axles from some other dude.
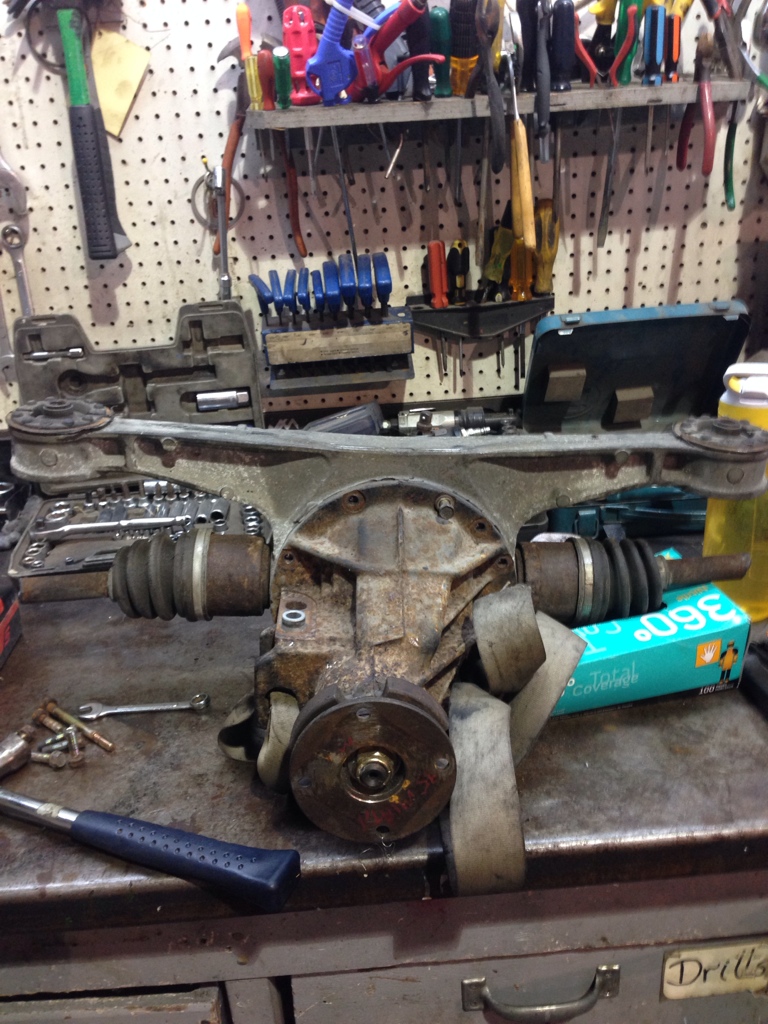
Seeing as they had just cut the stub shafts off and he wasn't really sure whether it had a Torsen or not I wasn't too thrilled about grabbing it but for the price (about the same price as a typical 94+ open diff) I went for it anyways,
With some help got the stub shafts out and cracked it open
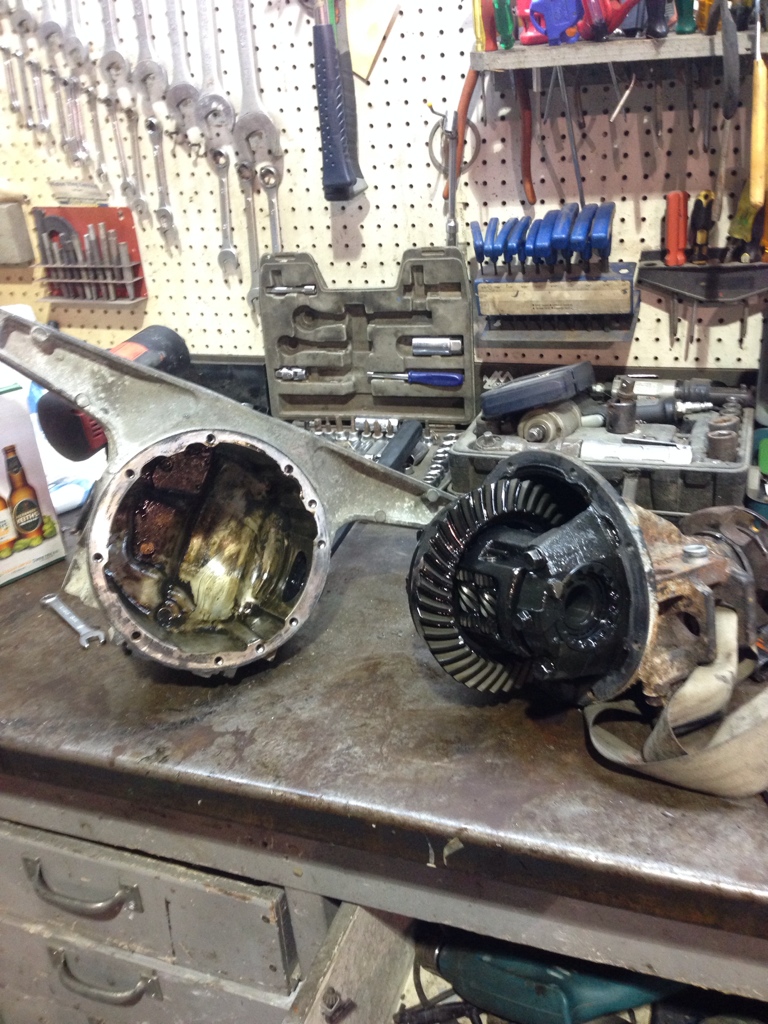
Thankfully it contained a Torsen in hopefully good condition.
Couldn't break the 25 year old axle nuts free that night but I'll take another crack at it this week and throw it together.
Bought a 96+ Miata diff via ebay for a good price and driveshaft/axles from some other dude.
Seeing as they had just cut the stub shafts off and he wasn't really sure whether it had a Torsen or not I wasn't too thrilled about grabbing it but for the price (about the same price as a typical 94+ open diff) I went for it anyways,
With some help got the stub shafts out and cracked it open
Thankfully it contained a Torsen in hopefully good condition.
Couldn't break the 25 year old axle nuts free that night but I'll take another crack at it this week and throw it together.
Reply
0
0


Thread
Thread Starter
Forum
Replies
Last Post
Frank_and_Beans
Supercharger Discussion
13
Sep 12, 2016 08:17 PM


