When you click on links to various merchants on this site and make a purchase, this can result in this site earning a commission. Affiliate programs and affiliations include, but are not limited to, the eBay Partner Network.
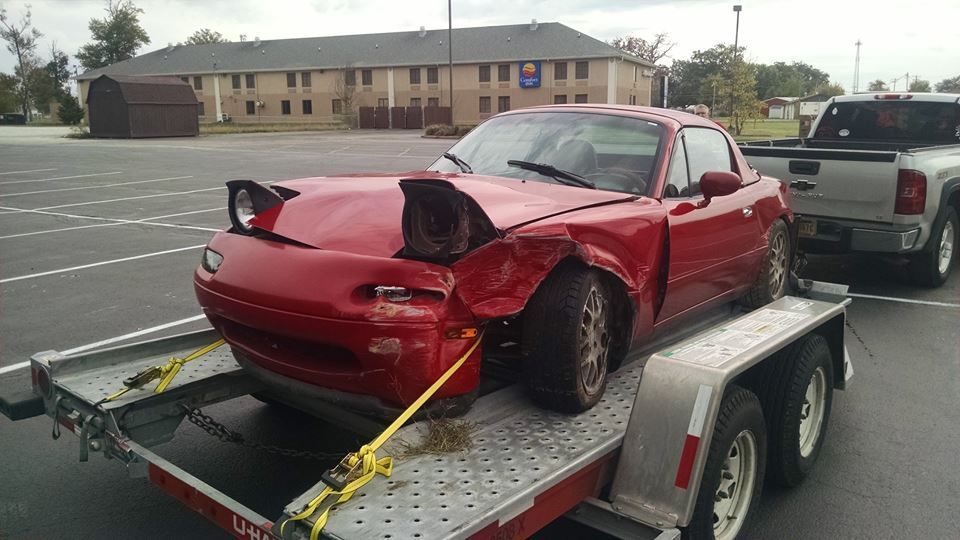
I had a Miata before, I called her Roxanne. We drove all the way across the US and back across Canada before I killed Roxanne.
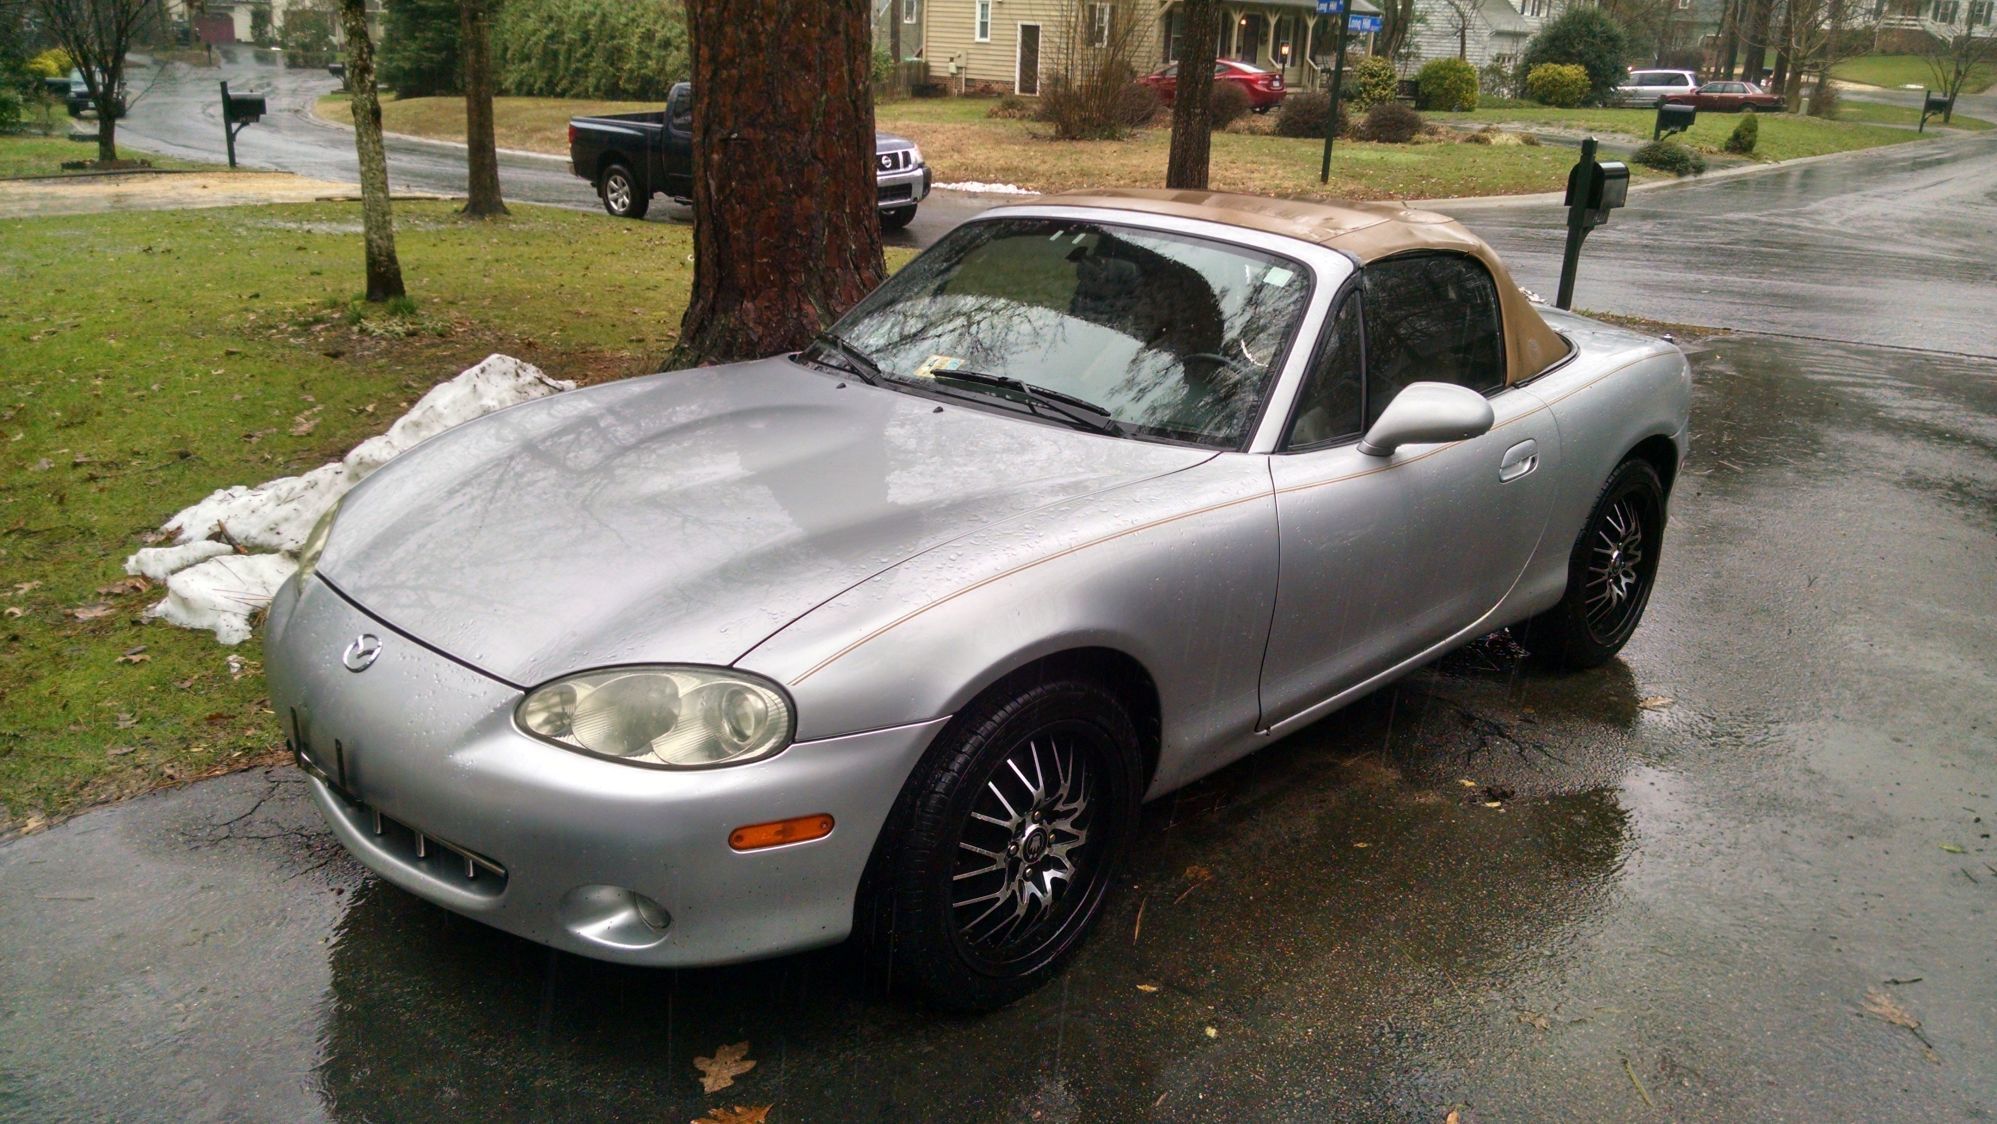
I planned to rebuild Roxanne, got a donor shell and everything. Employment mess ensued, and I no longer felt like moving two junk cars across state lines to get one old 1.6 that needed a paint job. So I bought this grandma owned 2001 Miata LS for the princely sum of $3500 and left three Miatas to rot in my parents driveway while I moved to Detroit.
It's cleaaaann. There's some surface rust on zinc plated surfaces such as bolts and nuts which I blame on the fact that it spent a lot of time in Myrtle Beach, but the underbody is minty fresh. The wheels gotta go, gonna get some 6UL's I think.
I got to drive these in the meantime, so I wasn't totally bereft of a Miata.
I finally got the damn thing to Mitchygan after months of waiting. My dad swapped the leaky radiator hose, replaced the thermostat, then I bought a one way ticket and drove it back. Insurance up here is ridiculous, the roads are flat and poorly maintained, and the only good thing about it is the summer weather. This car is basically my friend and I's excuse to drink some wobble sodas and play with dangerous tools on the weekend.
I like to think we've done a pretty good job of getting it back up to snuff. What's been done so far...
NA top change - both hardtop and Robbins OEM style softtop moved over. The zippered window is awesome.
New water pump, timing belt, OEM coolant hoses, TYC/Amazon radiator, cam and crank seals.
Fresh plugs, wires, air filter, PCV valve and gasket
All fluids changed out - Rotella T6, Motorcraft Tranny Magic, Mobil1 diff oil, new coolant, and other skookum stuff
Crinkle red valvecover, junkyard NA valve cover bolts for extra chrome swag.
Polished the headlights. Left one is still foggy, must be inside the lens.
I fixed the slow/ broken windows with silicone grease and a paperclip.
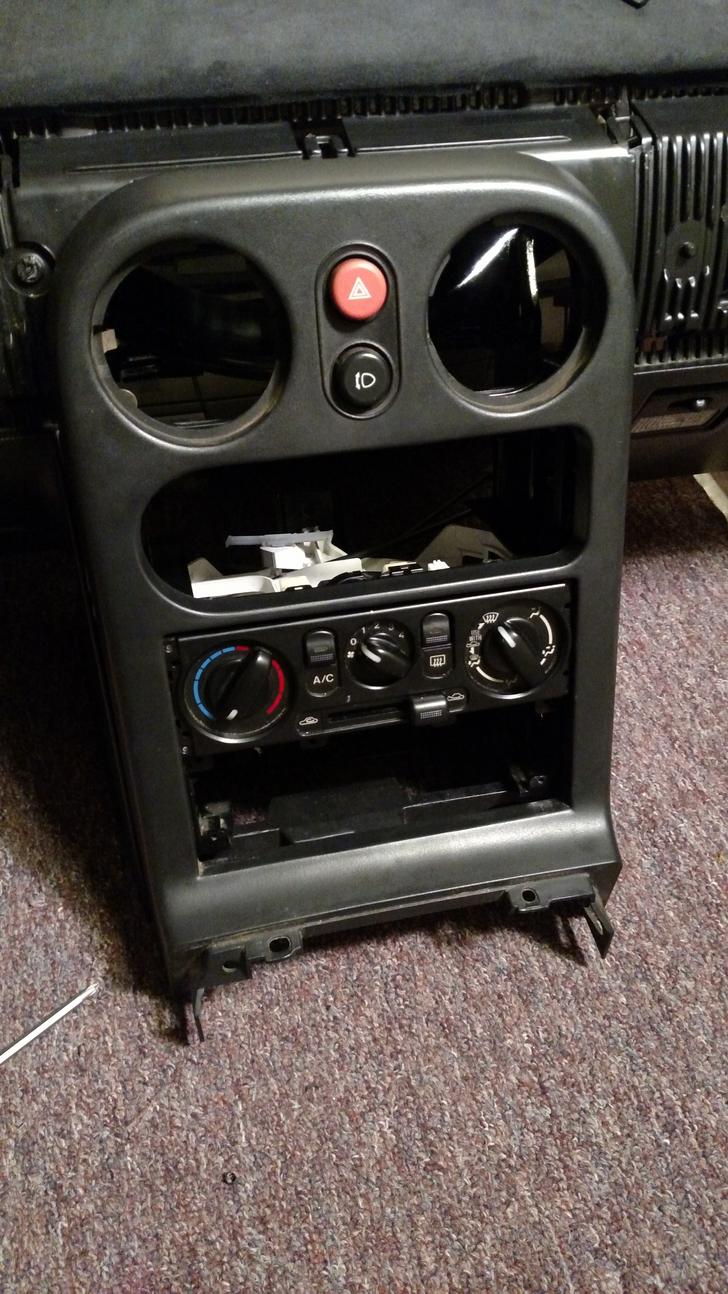
Fugly pinstripes and fake wood interior trim removed. Someone had really bad taste before me.
I've done some old man M.net stuff too. I've replaced the washer nozzles and cabin light with OEM parts from Mitsubishi and Ford, put some DEI heat shielding on the drivers side of the trans tunnel, bought Moss window bushings, Delrin door bushings off eBay, and greased/lubed all visible seals with silicone.
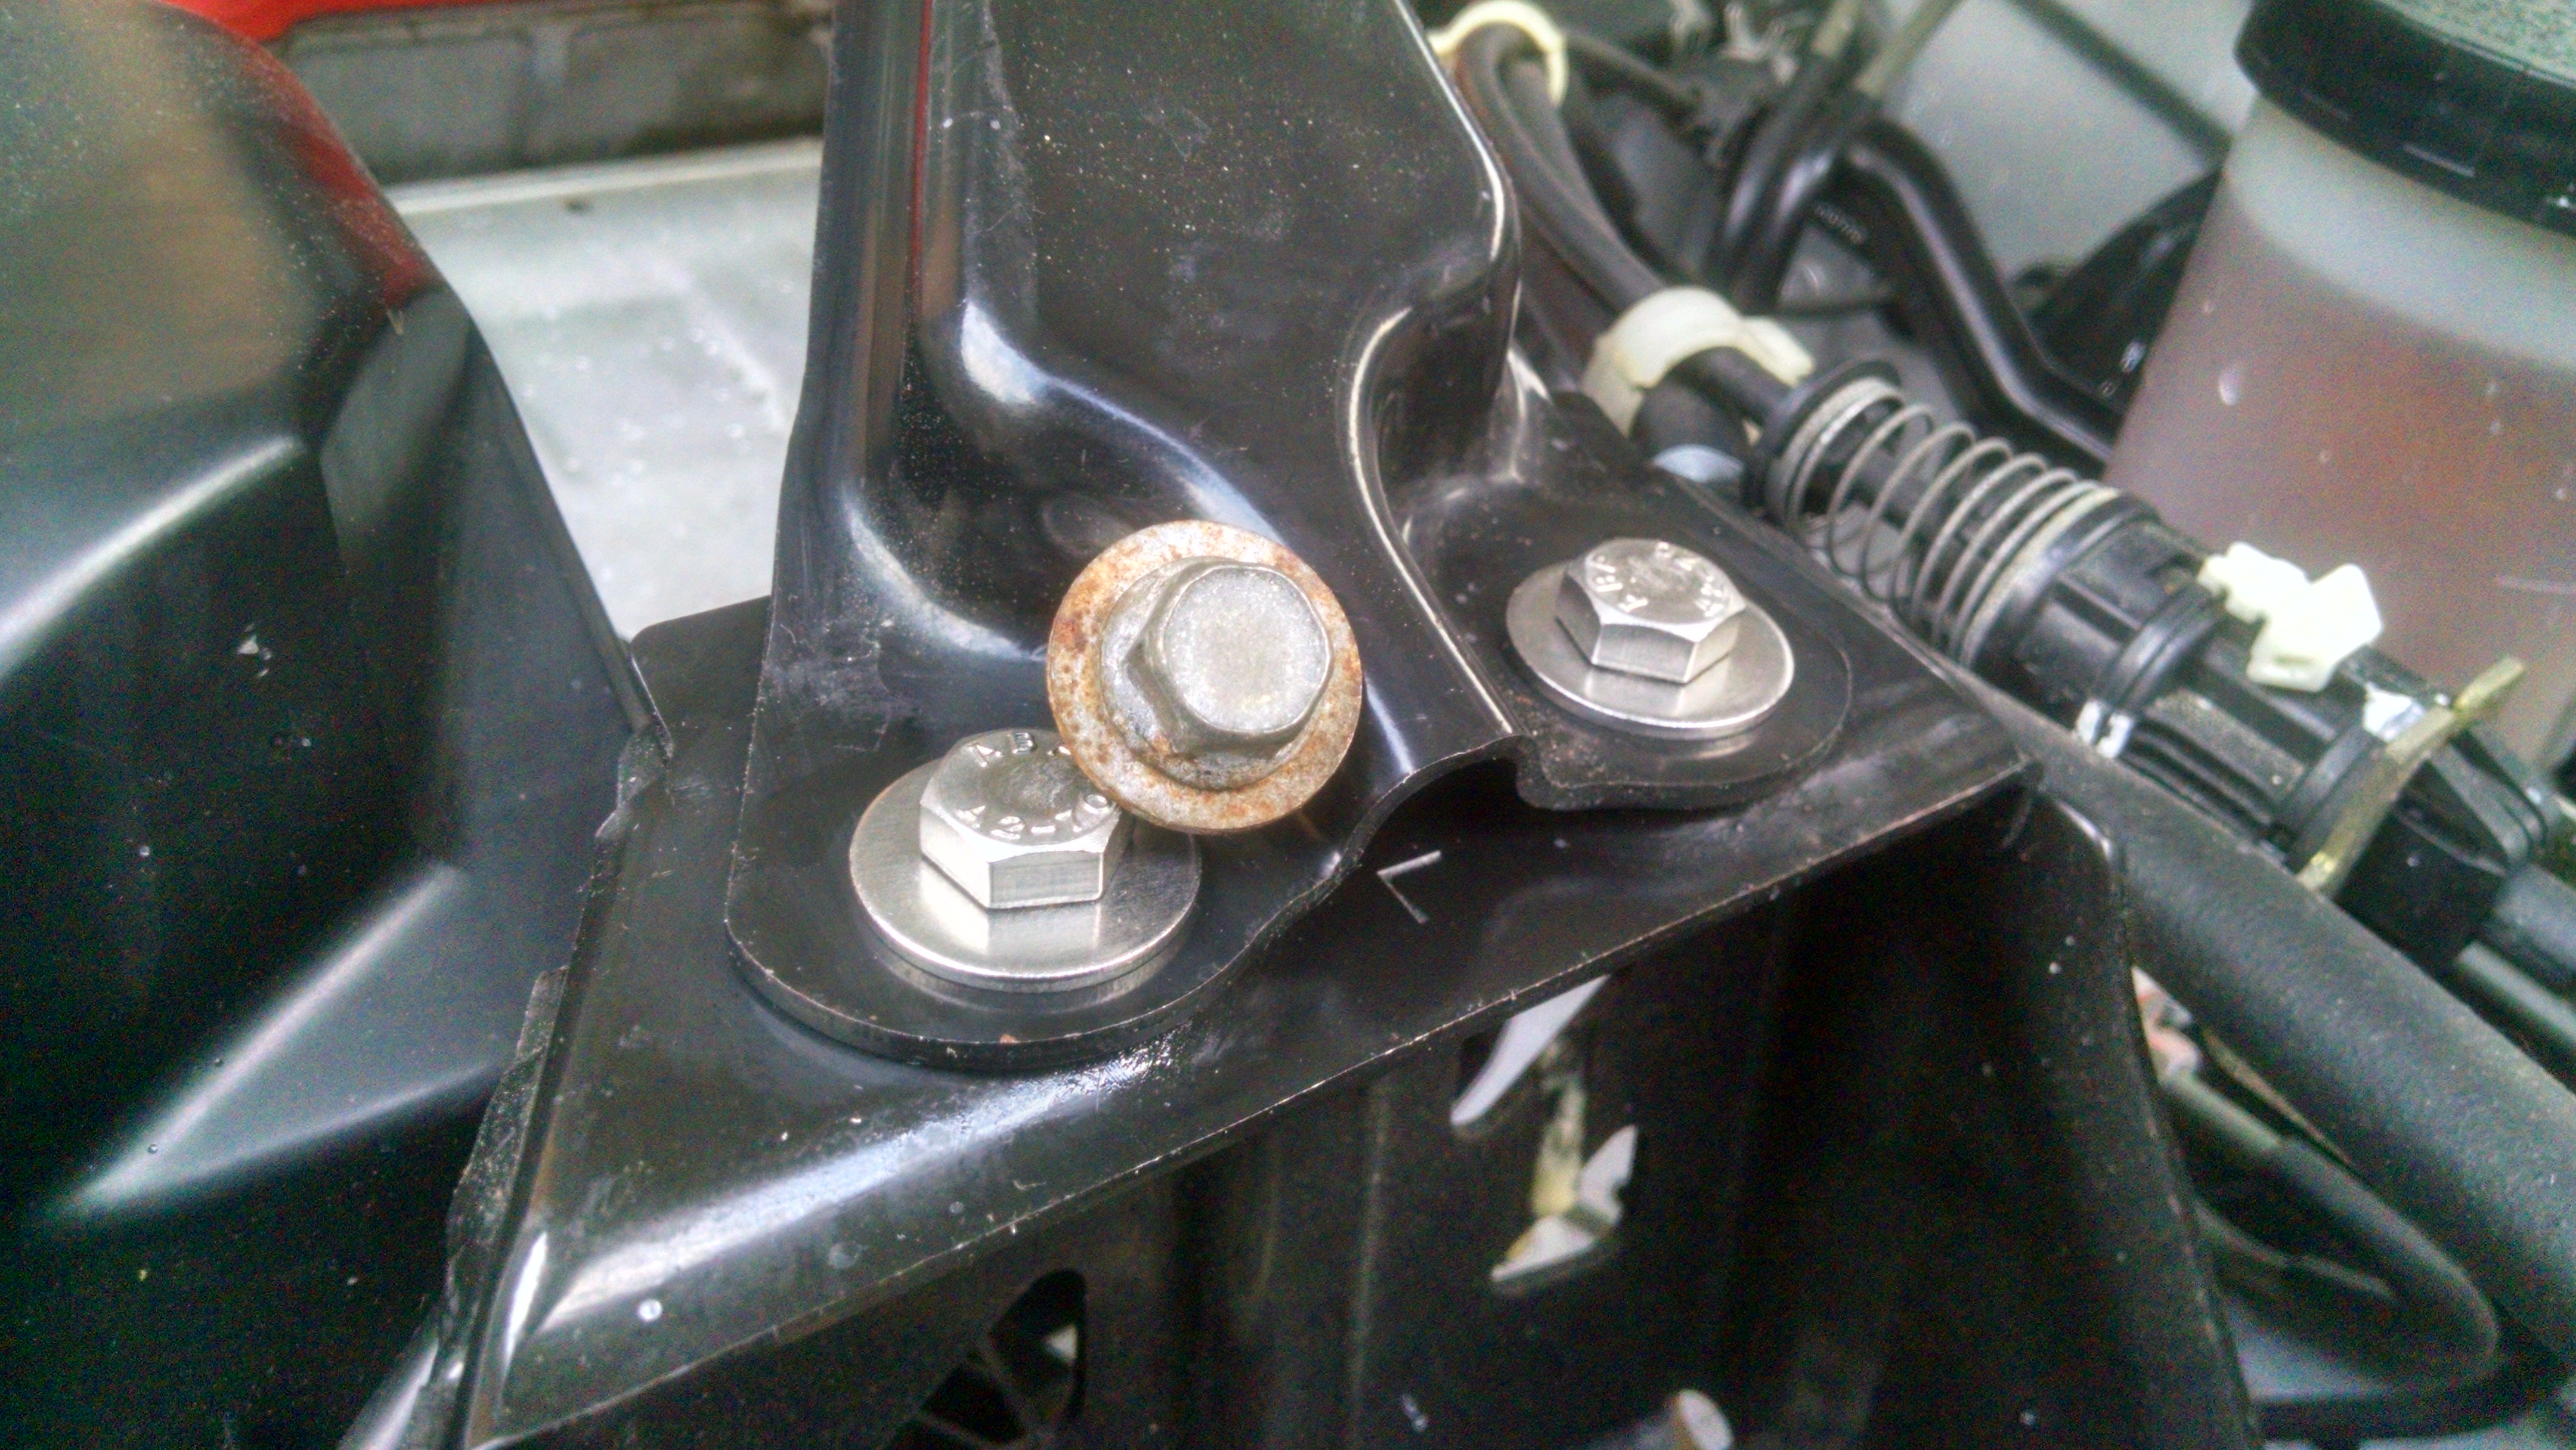
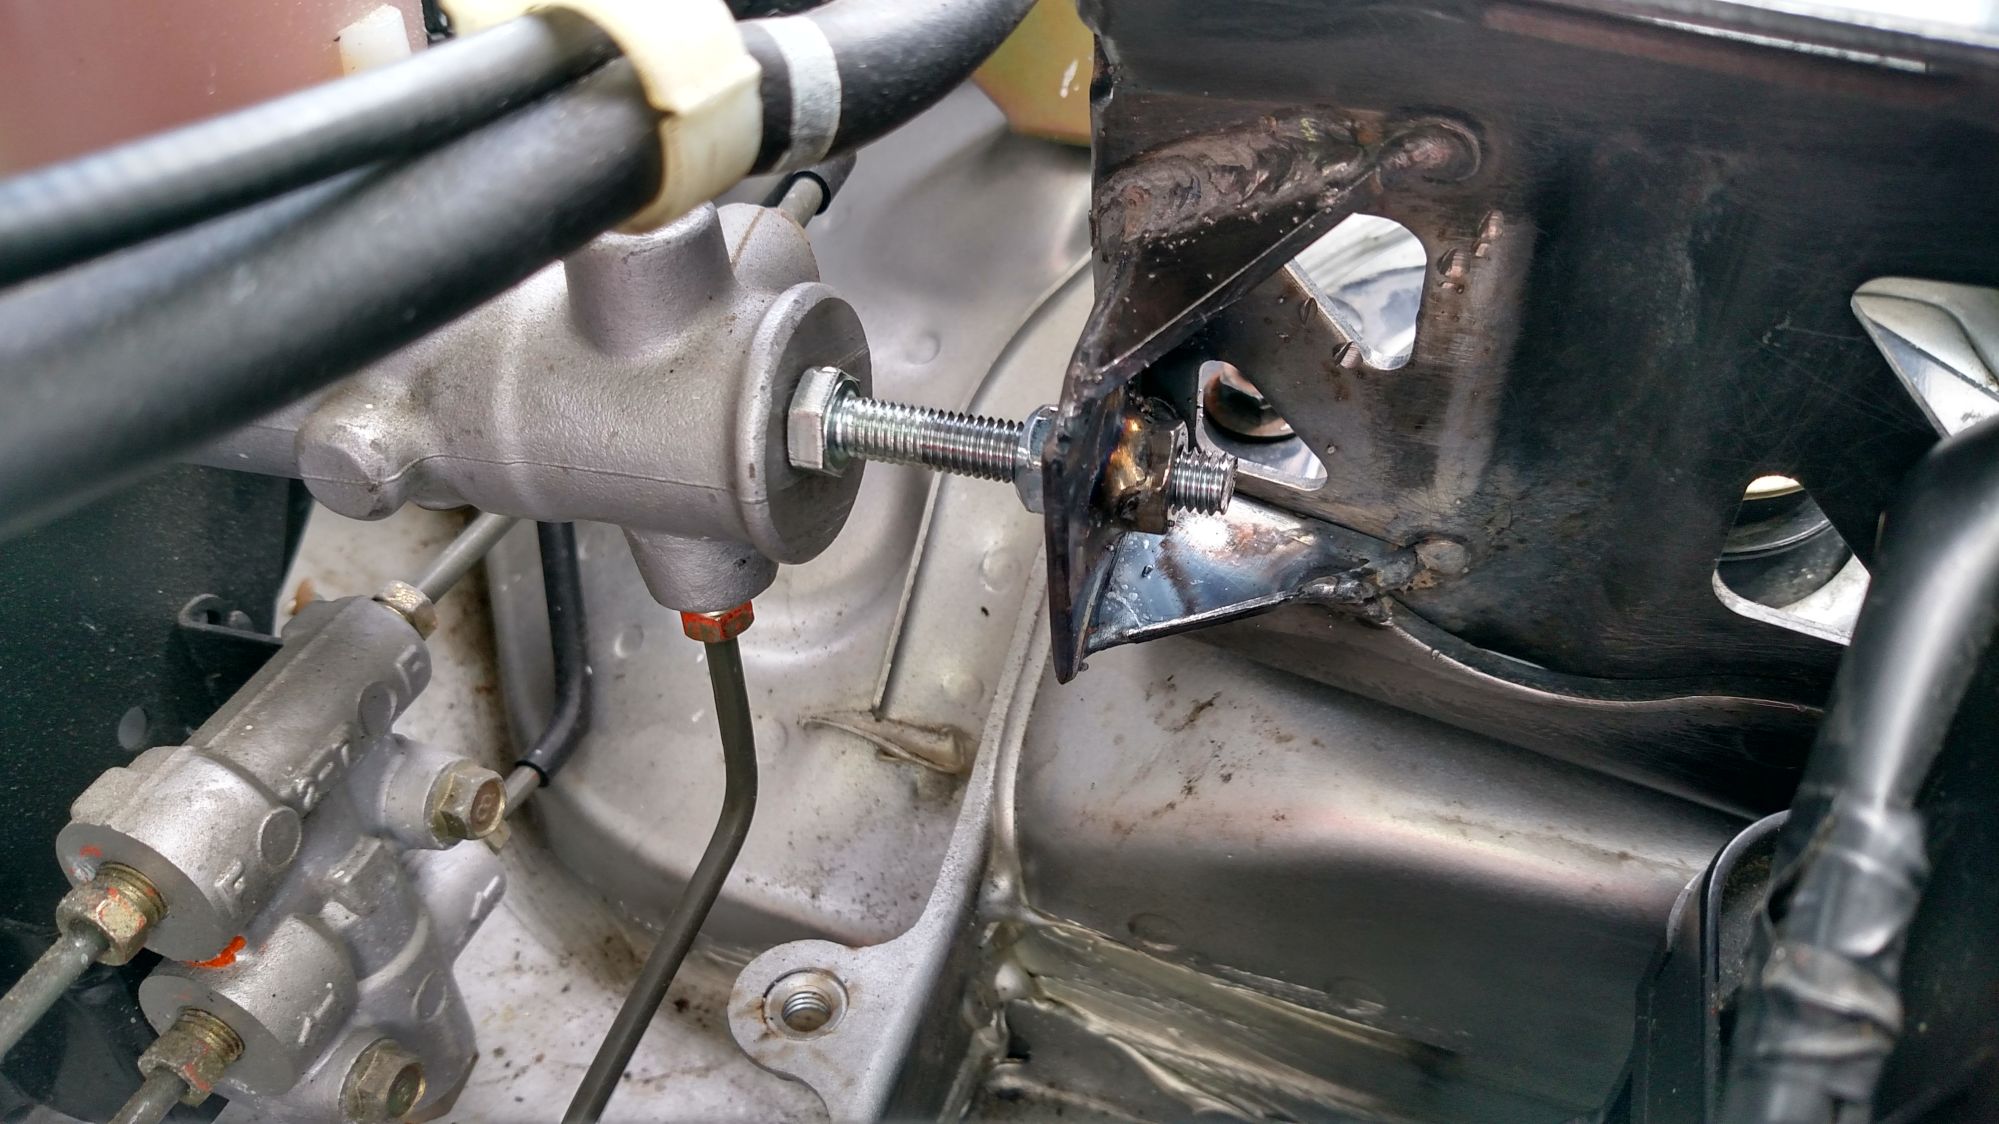
Last week we had fun making our own master cylinder brace out of the factory shock tower brace.
The brakes feel much improved, but I've got SS brake lines to be delivered this weekend and plan on rebuilding the calipers as well. My next steps are to swap over some more parts off my NA like the FM frame rails, the 1.6 interior, and maybe weld up some fender braces. Also leather seats are gross, anyone got a line on cloth seat covers? Not sure I wanna swap over my Momo Start yet. I'm definitely looking at a steering rack depower and weld, my old Miata had manual steering and it was way more awesome.
Next weekend I should be dodging cones in Toledo, but I'm not so sure I wanna pay the Detroit SCCA fees for tomorrow in Livonia. $50 bucks is a lot to pay for a few minutes of driving and a lot of chasing knocked over cones.
I'd post elsewhere since no trubo, but M.net is... yeah, and clubroadster is full of the kind of people that list their used parts for more than new.
Last edited by OptionXIII; Apr 14, 2018 at 03:27 PM.
Reason: Title change attempt
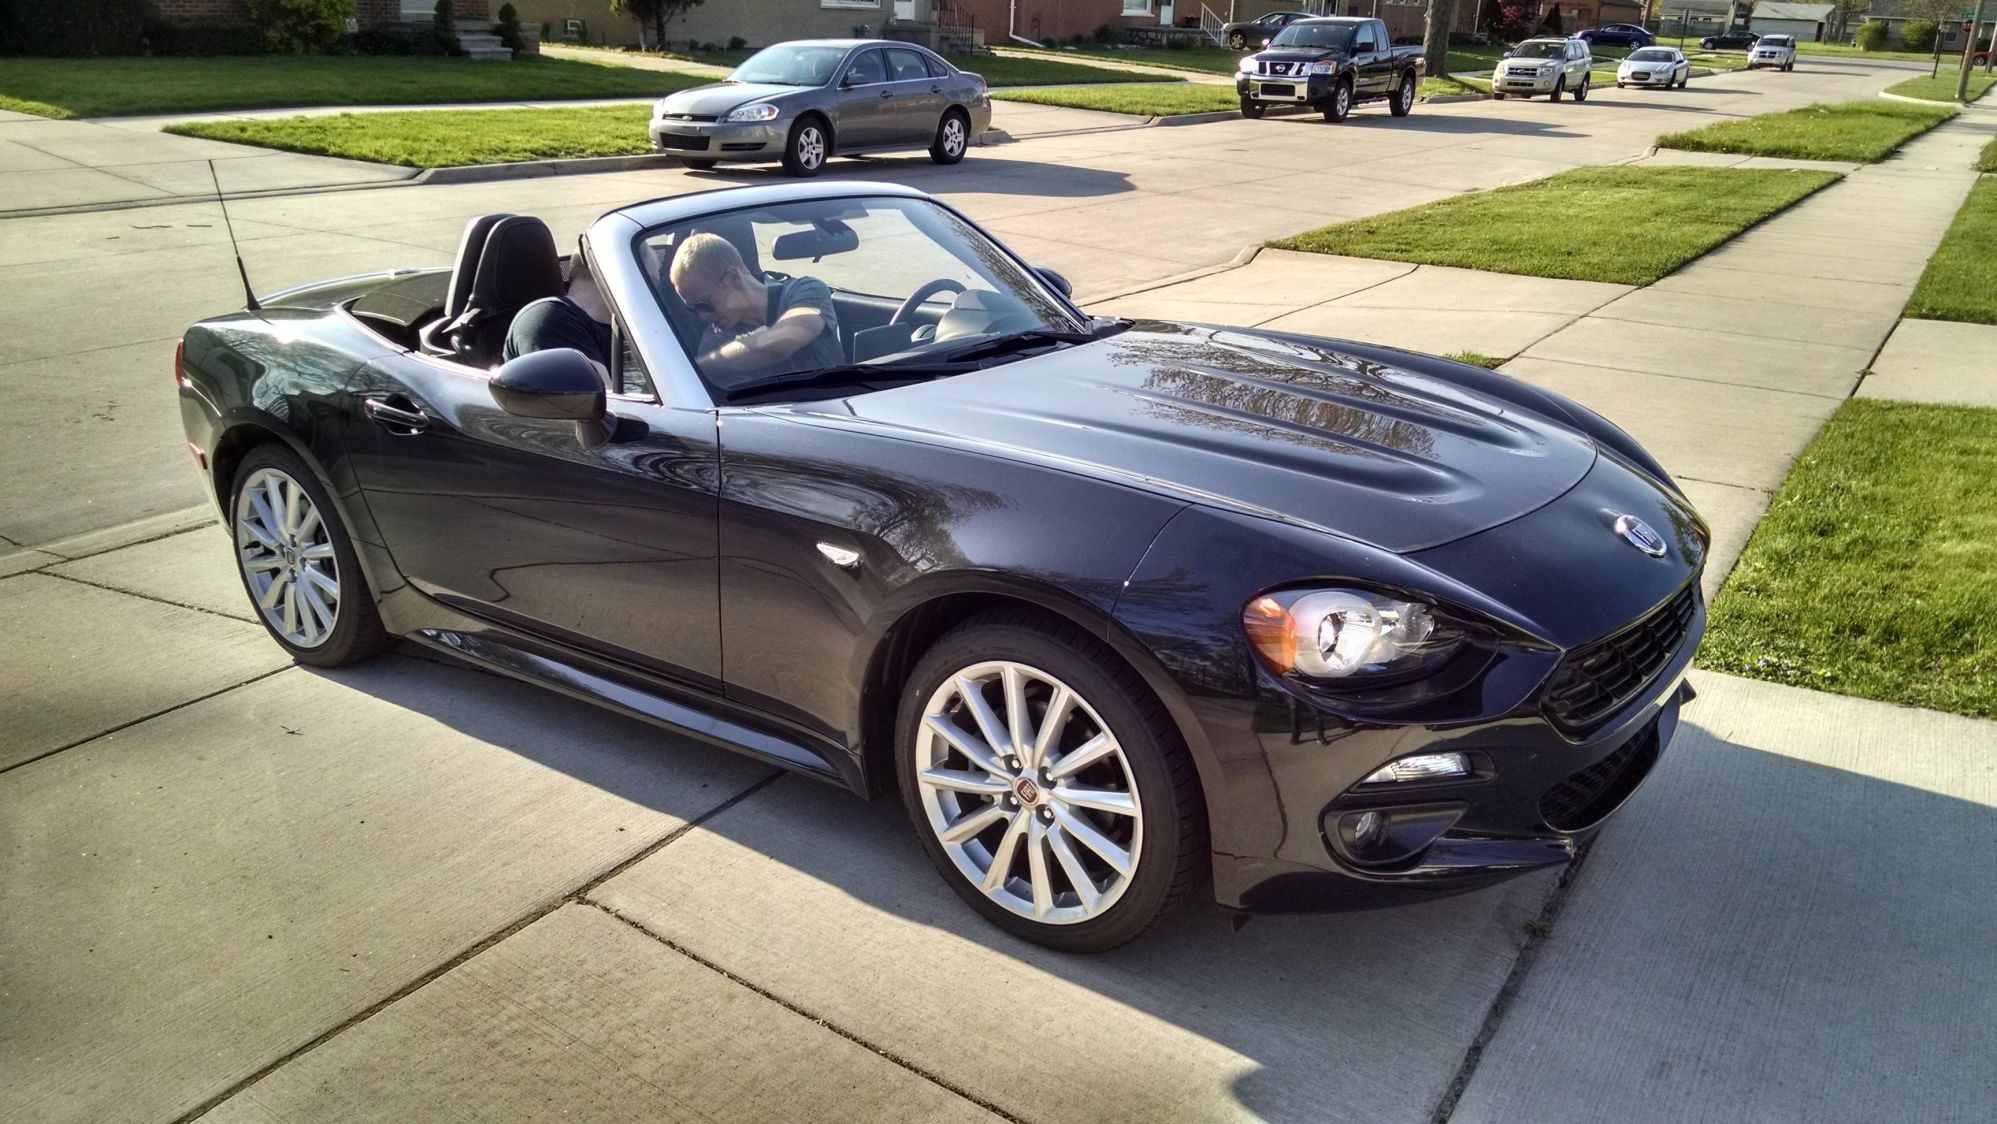
The Fiata... It's got turbo chooch straight from the factory. I've only driven the automatic, and I hadn't driven a Miata in months by that point. I was just giggling the whole time behind the wheel.
I have since installed SS brake lines and took it to the 4th NWOR autocross. My first one looks to be the cleanest, so I'll share that video. Sawing at the wheel or no, first place in the novice catagory isn't too bad for my first hard drive in a new car. My '90 never wanted to oversteer, not the case with this car. I had to work hard to keep the tail in line on corner entry - maybe I'm just not used to power steering, or maybe it needs an alignment, or maybe I shouldn't pretend I'm a vehicle dynamics expert after my third autocross.
So I've got a dilemma - I'm thinking of buying wheels as a Christmas present to myself. I've been happy with the 195/50R15 BFG Sport Comp 2s I ran before, but I also want to be able to run 205s for sticky rubber. Every online discussion declares me an idiot for not running crazy sticky 225s on 15x9s. I'm not looking to force myself to spend $130 on a single tire, not gonna happen.There are plenty of sticky tires in 205 should I choose to go that route, and this car is not about chasing class records/large diddly status.
Am I a fool for thinking 15x7.5 is pretty darn perfect for my goals? Konig Hypergrams are light, the right offset, cheap, and not vaporware like 6ULs.
Otherwise, motivation is flagging. I didn't get the parts off the old car that I wanted over Thanksgiving, and that's where the cheap mods I want to do are sitting. Not having a garage SUCKS; renting my new place without one was a terrible decision. I just don't want to work on my car when it's raining/cold/snowing out and my hands are frozen.
With the big service out of the way, other things have gotten done.
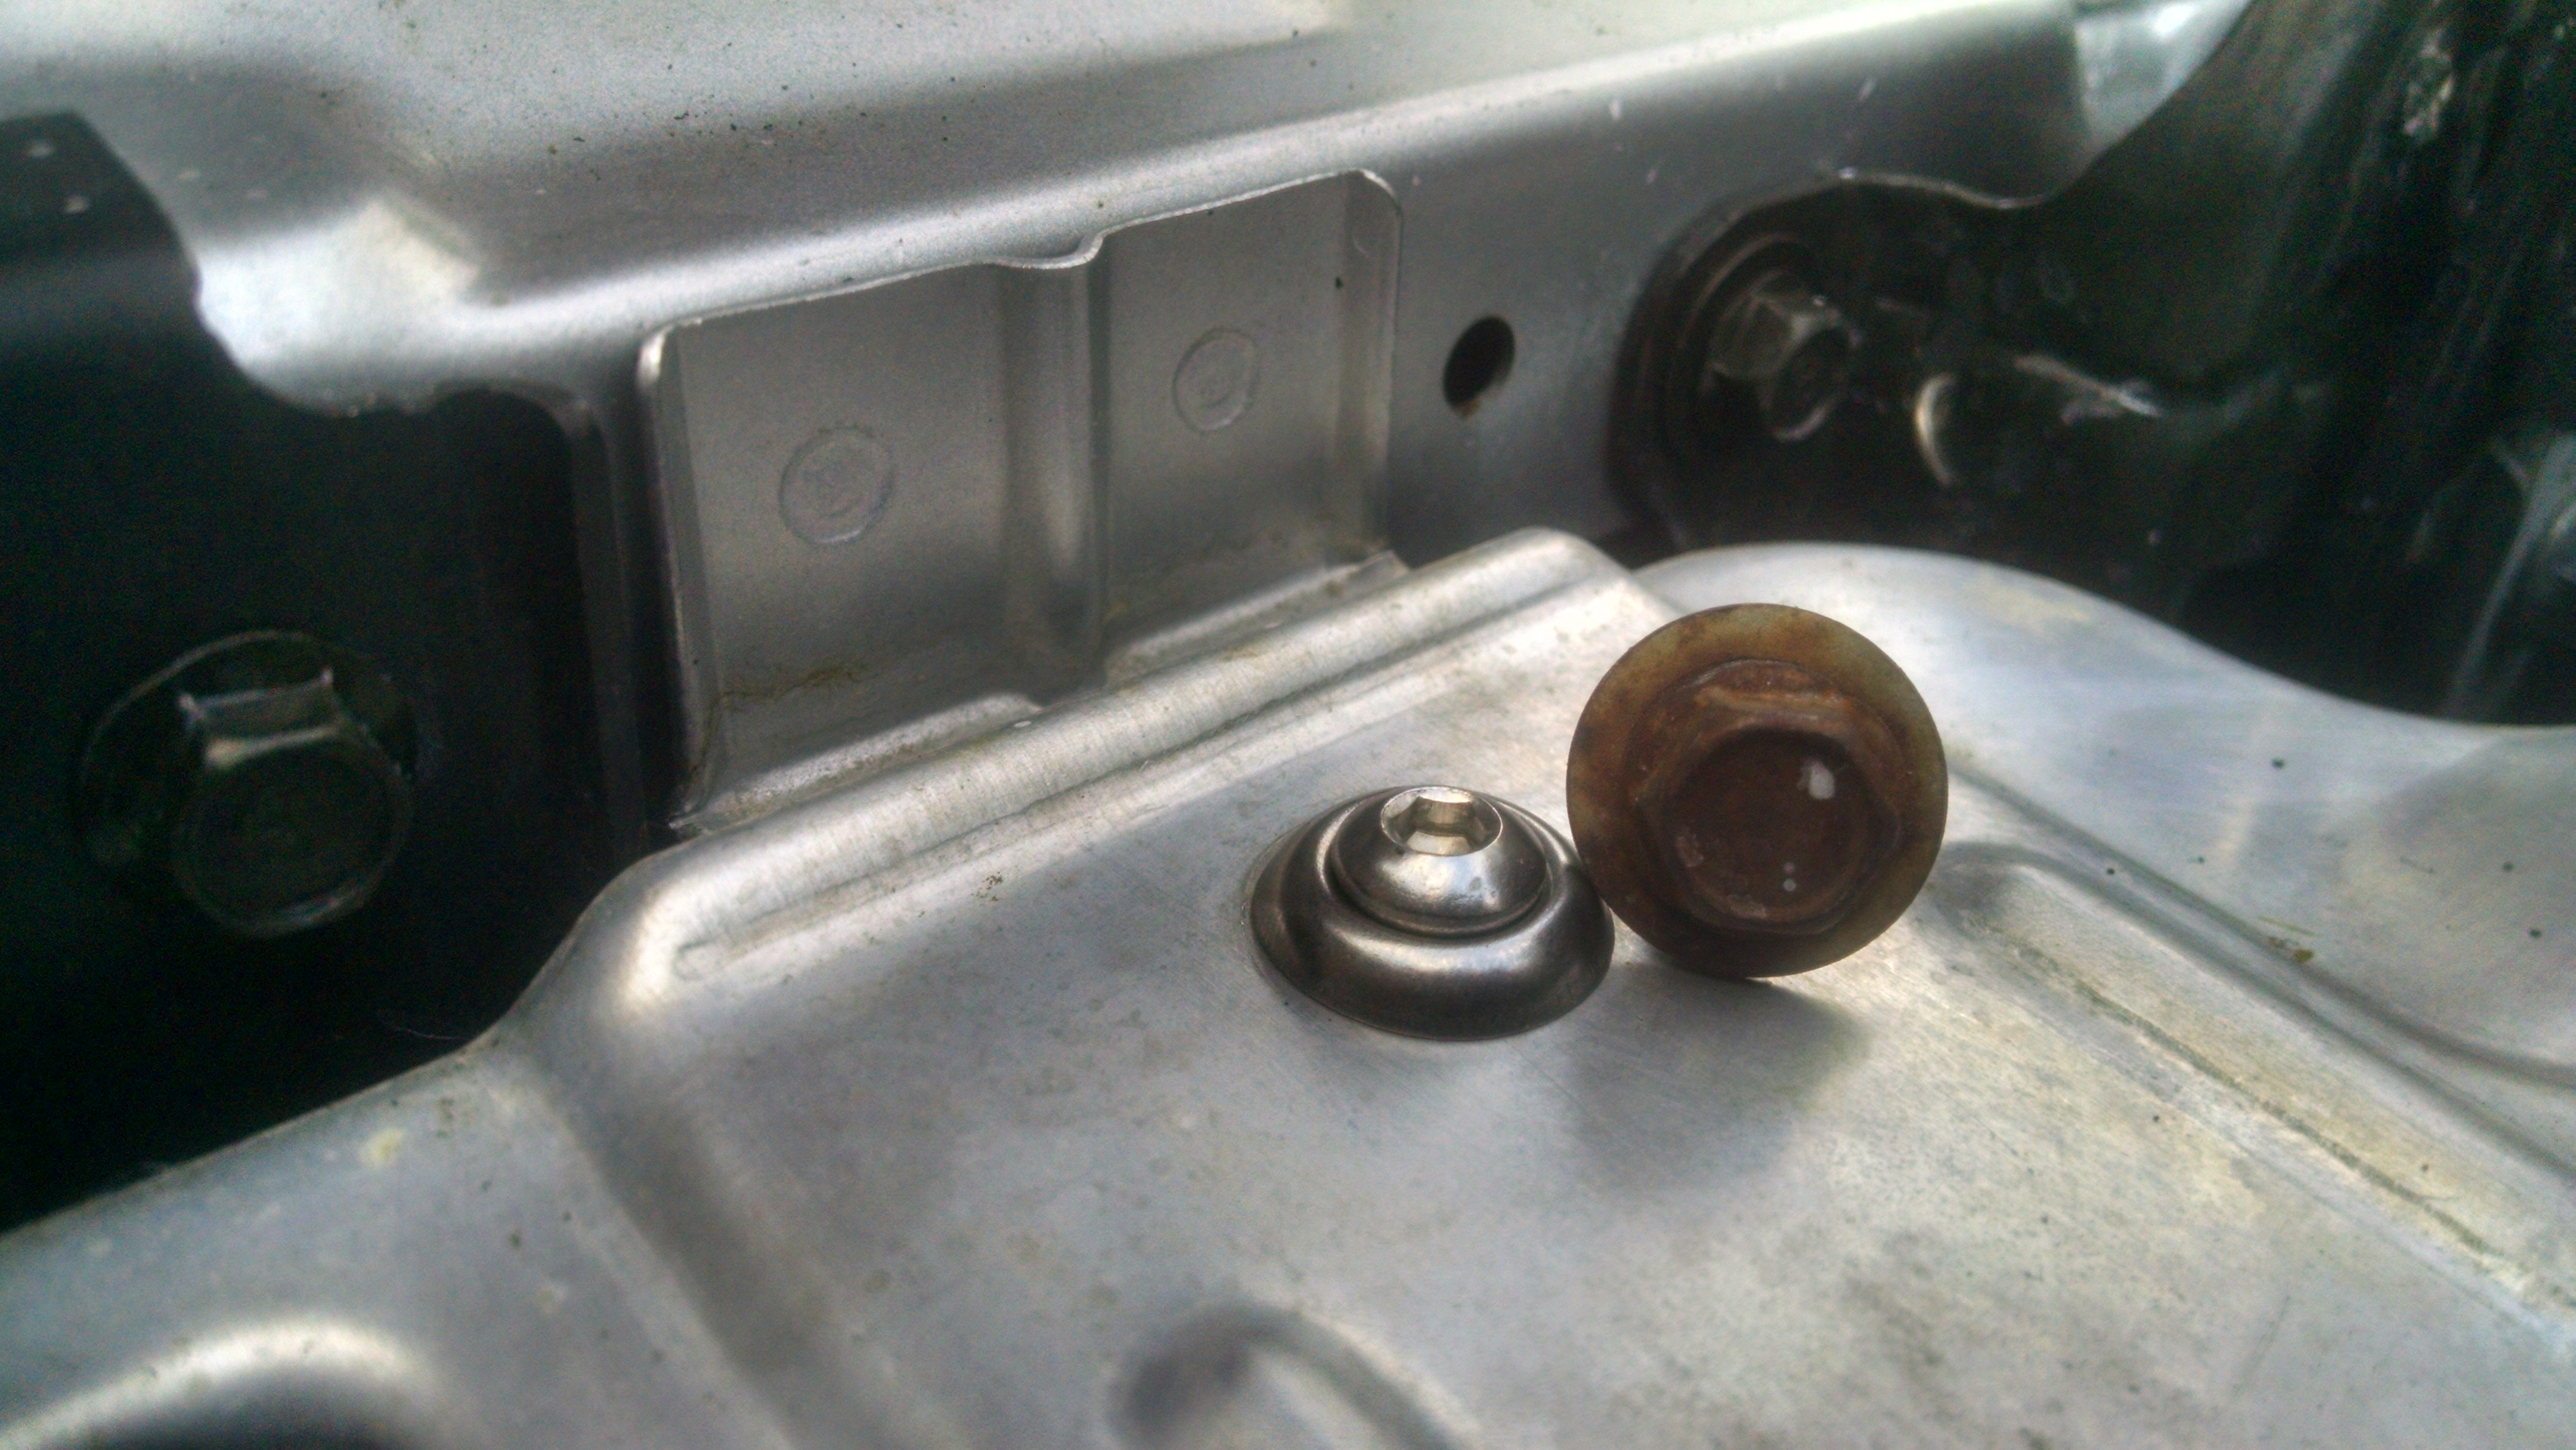
The engine bay needed some cleanup - it's gotten 1.6L chrome VC bolts and some stainless bolts to replace crusty OEM bolts on the radiator shroud and tower brace.
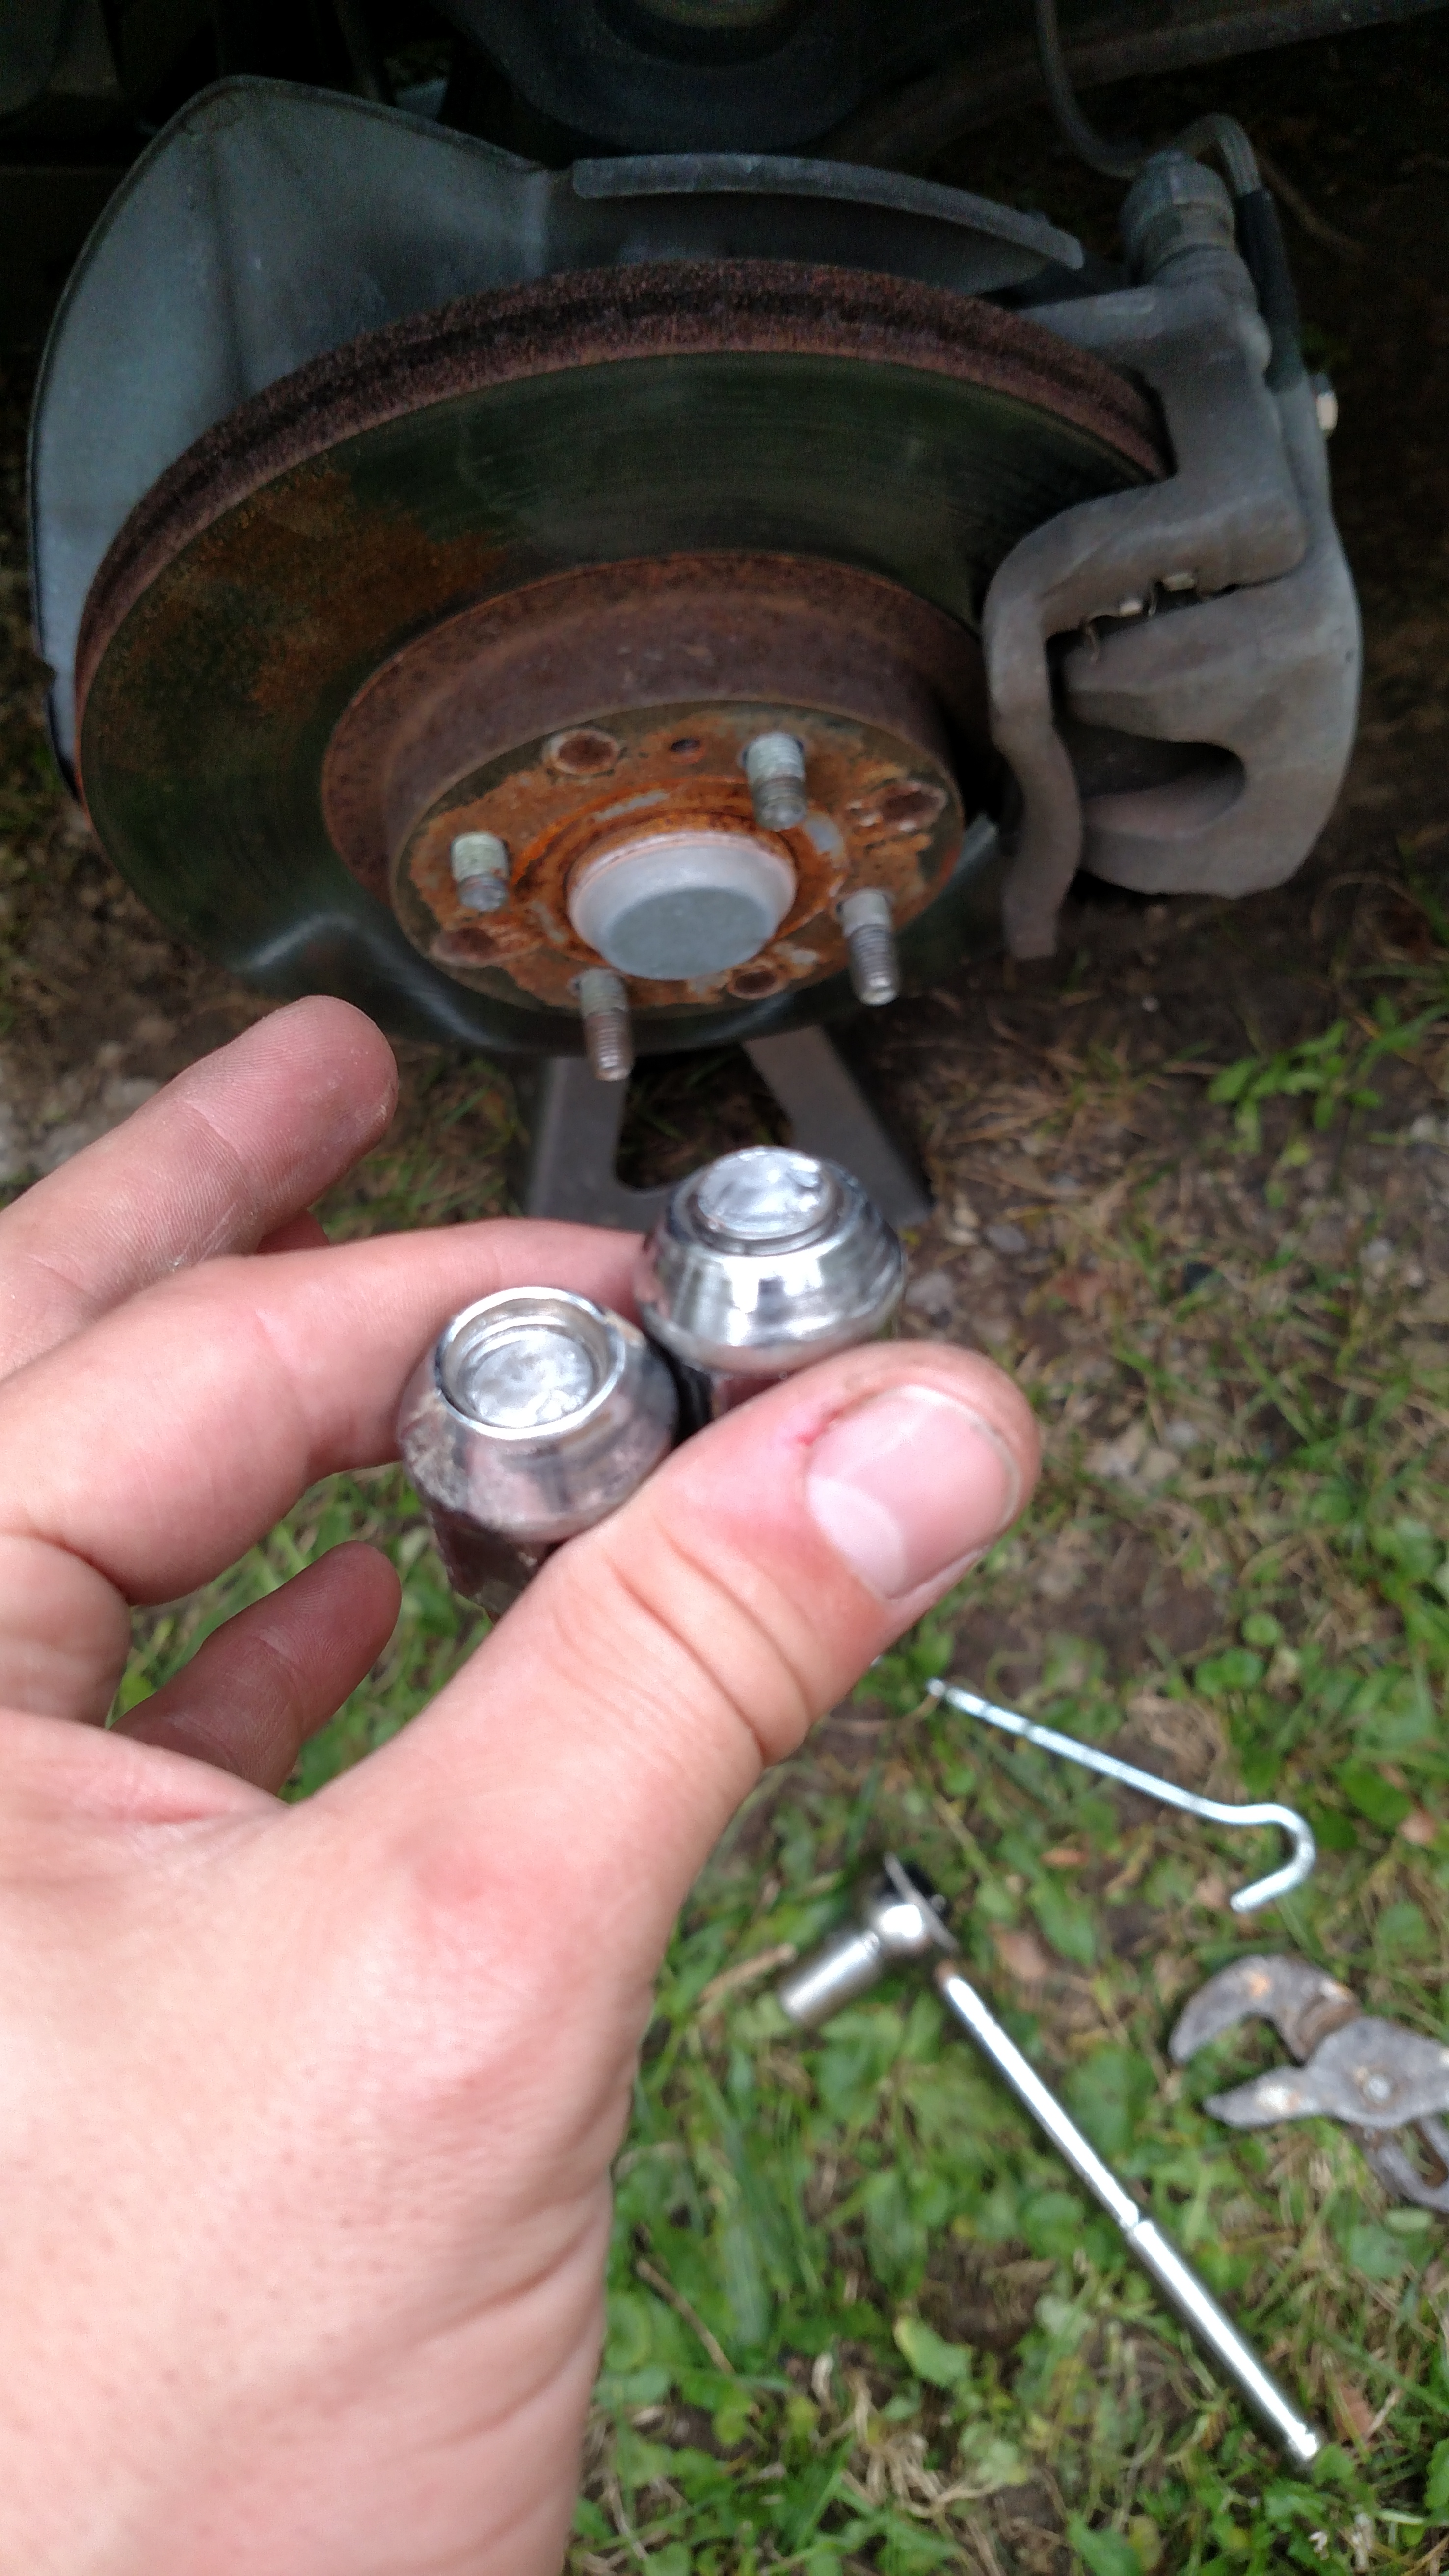
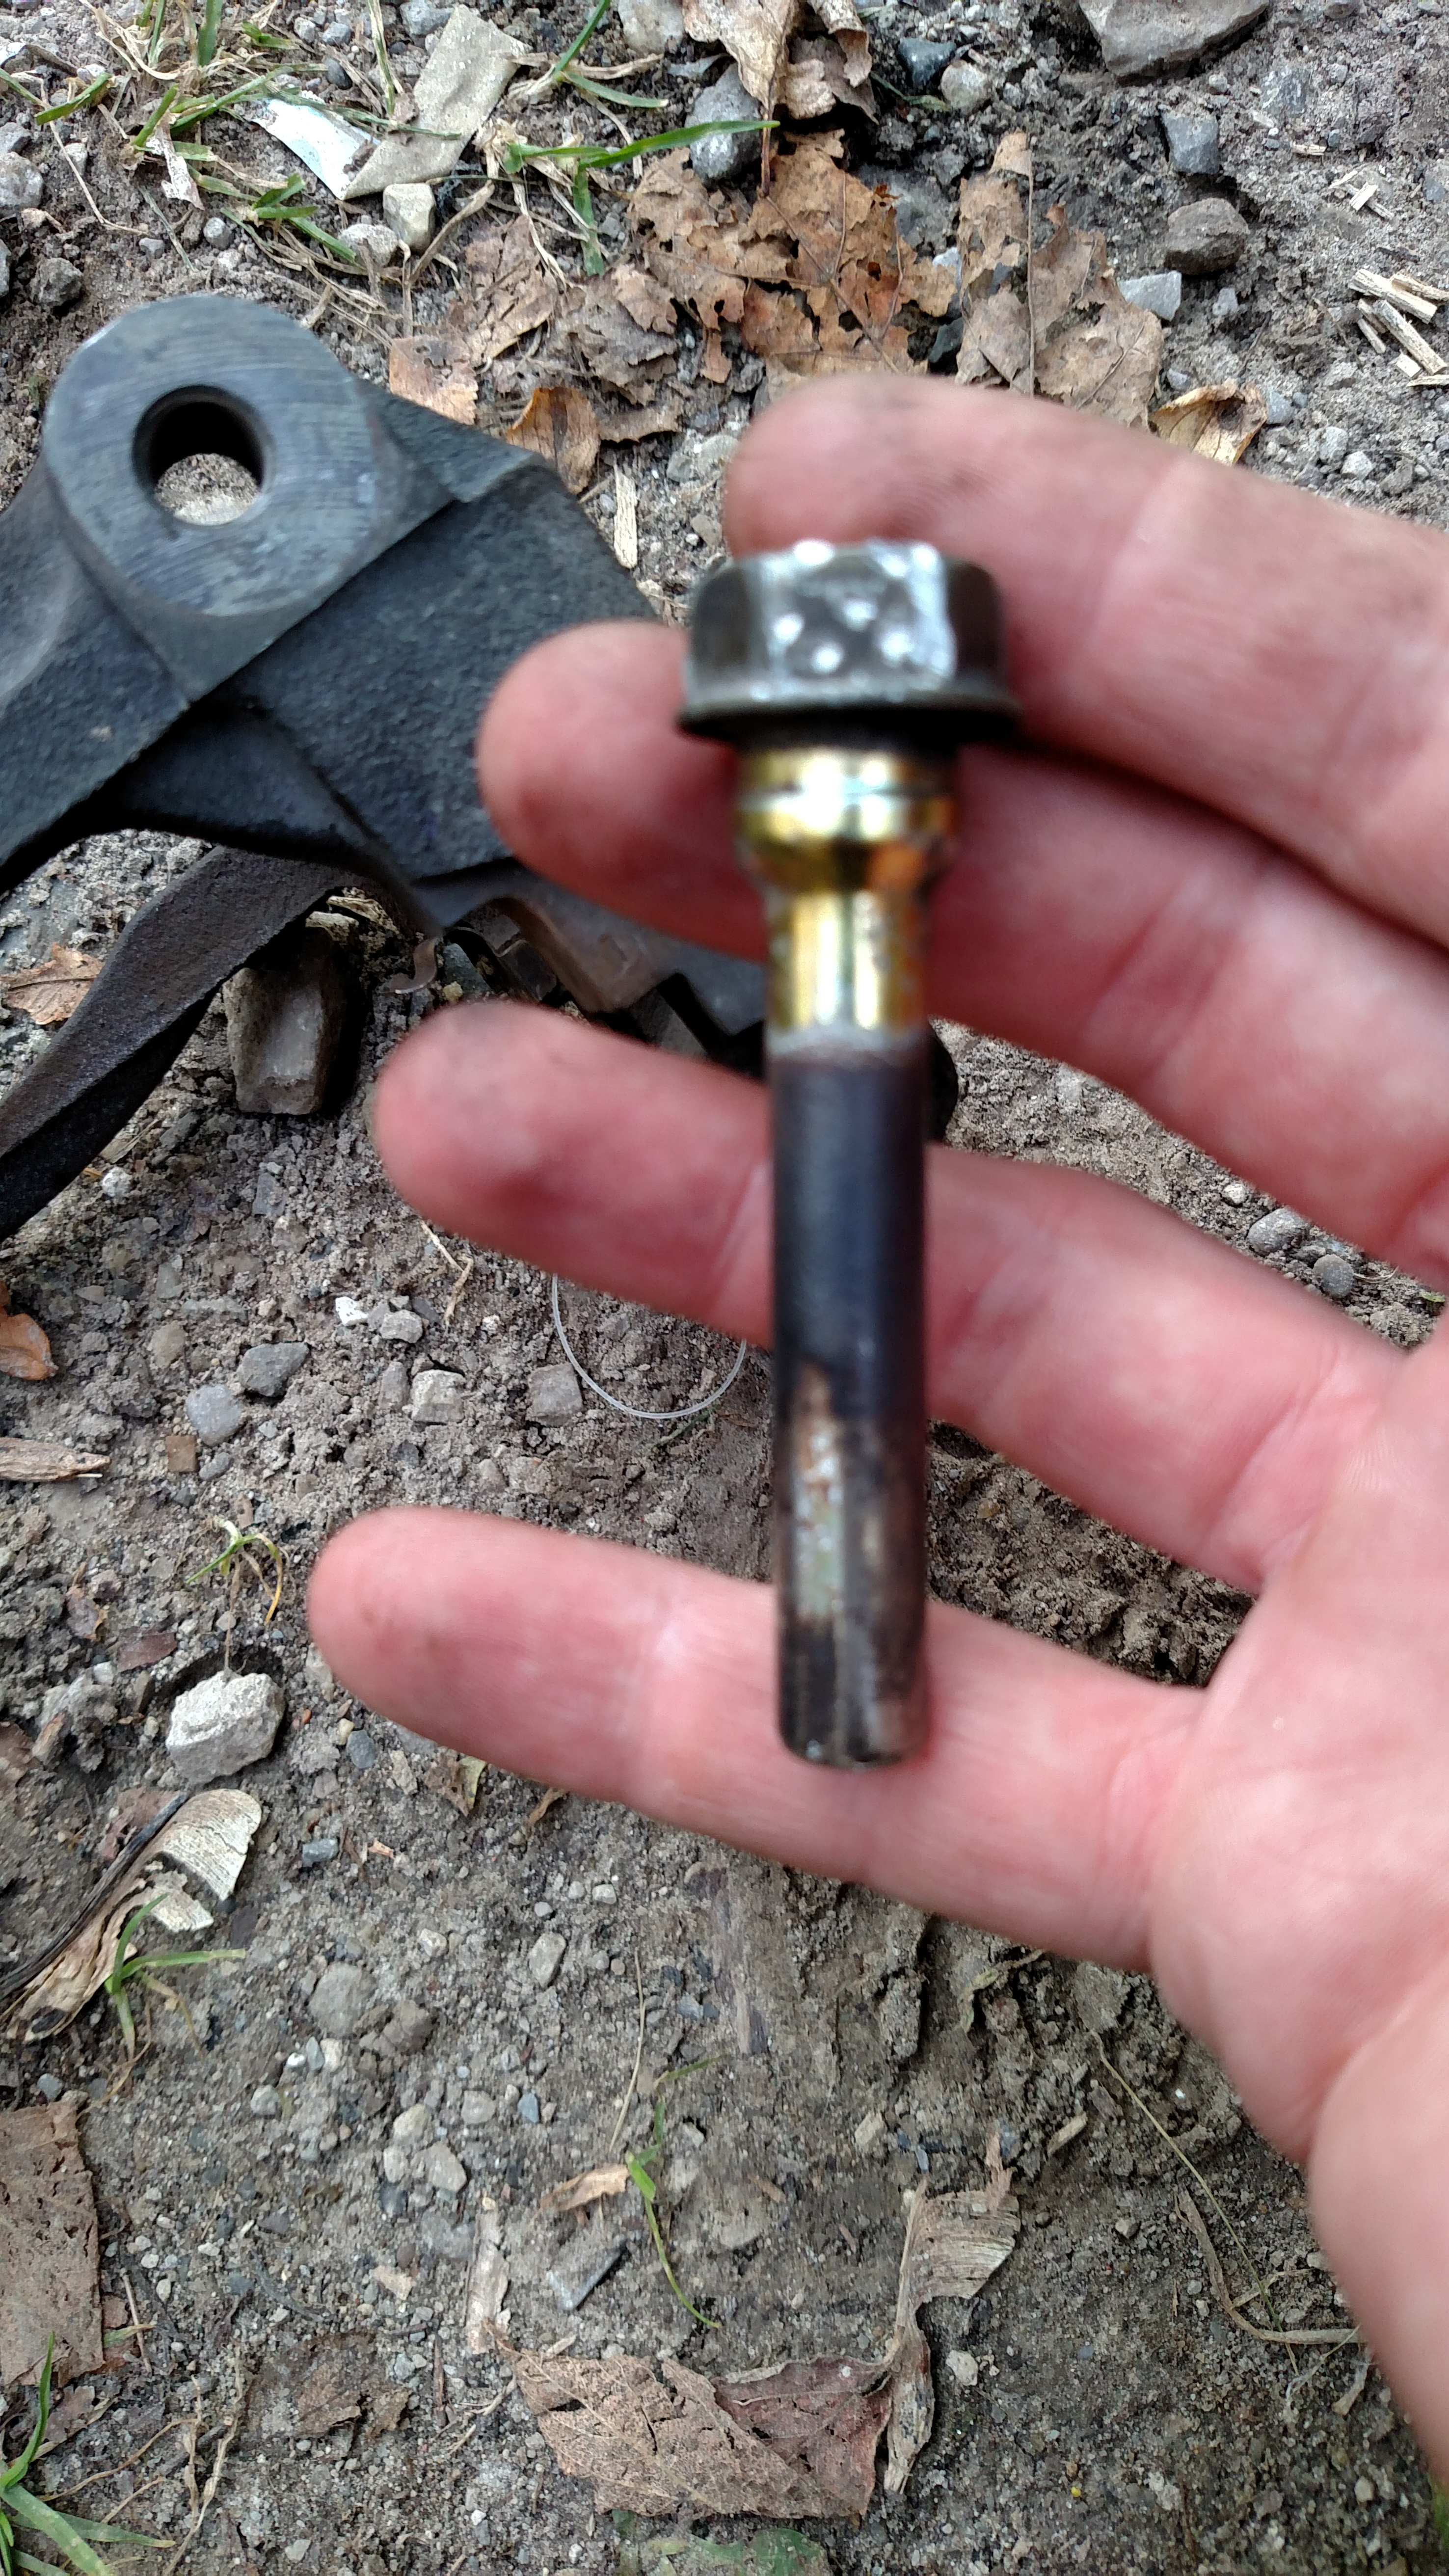
The middle pedal was pretty firm by this point, but the brakes needed a bit more work. I started to get some squealing, which disappeared when I hit the brakes. Time to change out the pads! I got some StopTech Sport pads and decided to get the brakes rebuilt just this past weekend before the season's last autocross. The rears were easy, the fronts... a bit more complicated. This was the first time I took the wheels off of it in 8 months of ownership... not proud of that. Two wheel studs broke off, and one caliper slider pin was seized.
The pins in question doesn't really look that bad, but it was tight in there like a tick. The rest of the brakes were in great shape. With no reman'd Sport calipers in town, I used valve grinding compound and the old pin to clean up the slider bore before throwing a new pin in there.
The usual shifter boots were torn. I cut a Ziploc to keep out dirt and made due for a while...
Until a MiataRoadster short shifter turned up on Craigslist. Not sure how I feel about this one... It partially blocks the AC controls, and IMO it didn't really improve the shift quality. Possibly because it was beat to **** by the previous owners - the pivot ball has clearly been damaged by dirt getting in and wearing away at it.
But it does look fantastic. It's got that classic long stick look you see in older cars, which I love.
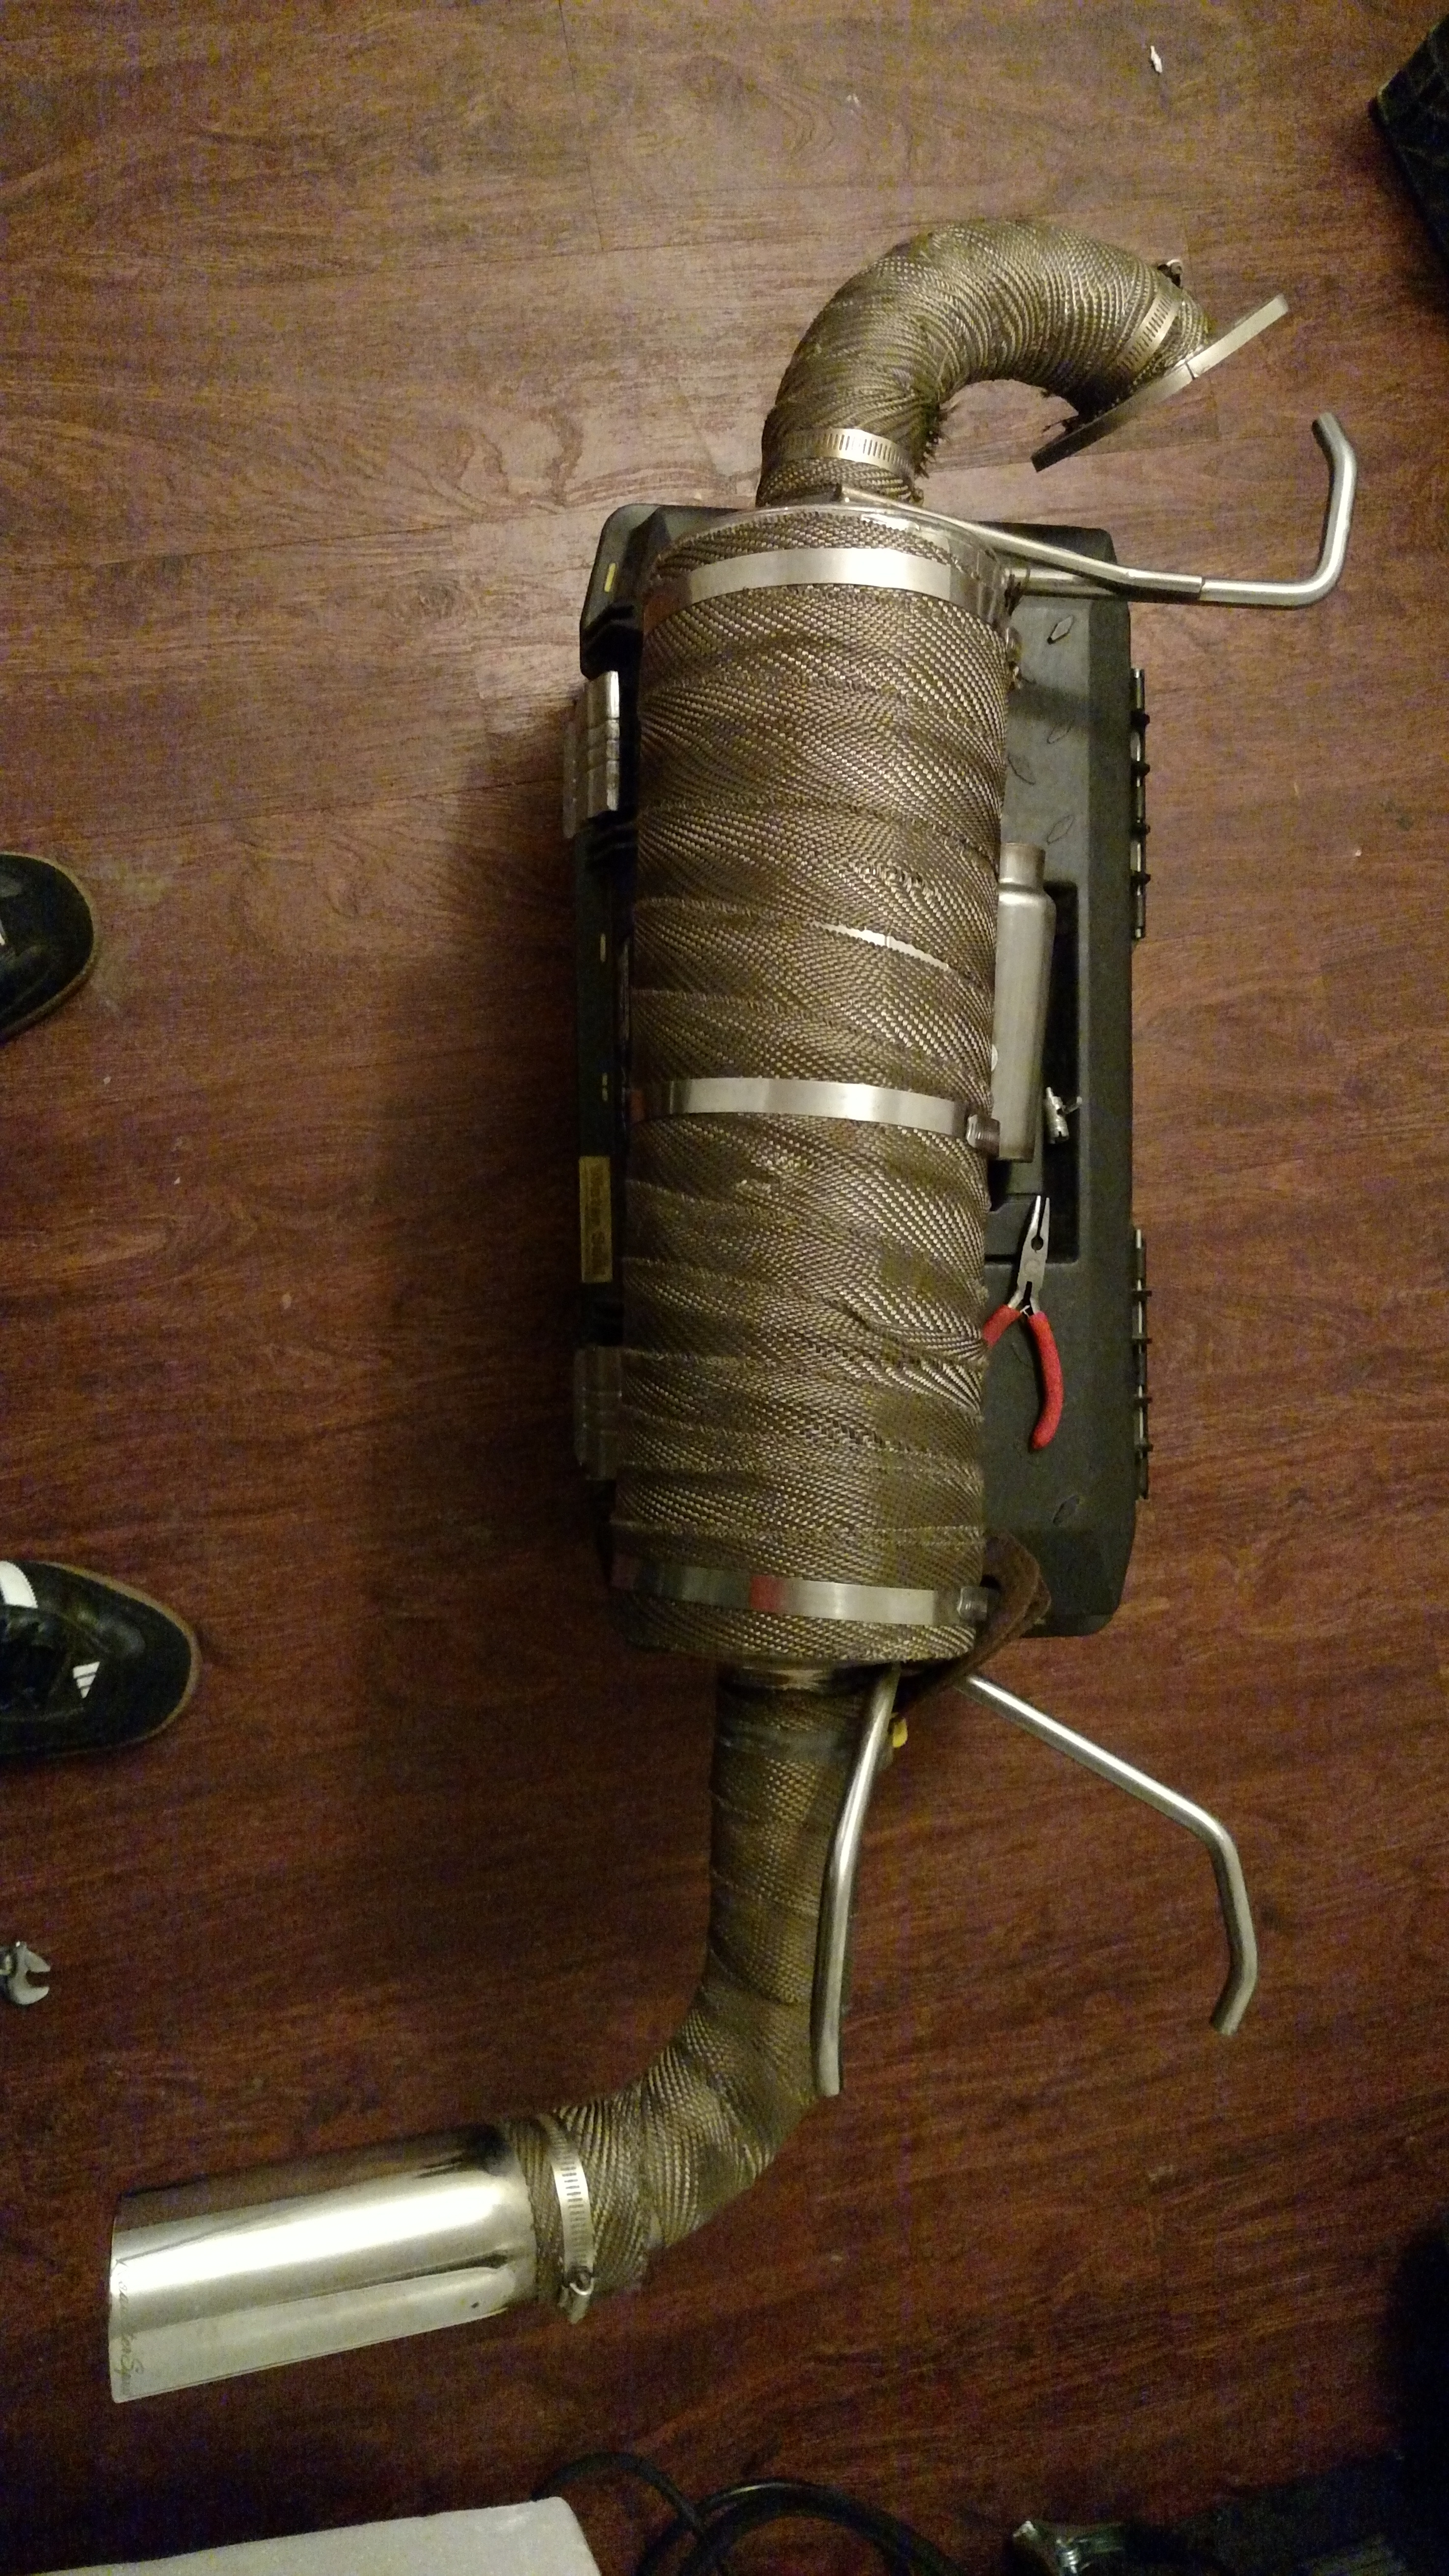
Speaking of Craigslist, I've been watching it like a hawk for deals. This barely used RoadsterSport3 exhaust was listed for half price, and the heat insulation came already installed. Again, not sure how much I like this. The tone is great at low speed, but it can be annoying on long highway drives even with the muffling tip installed.
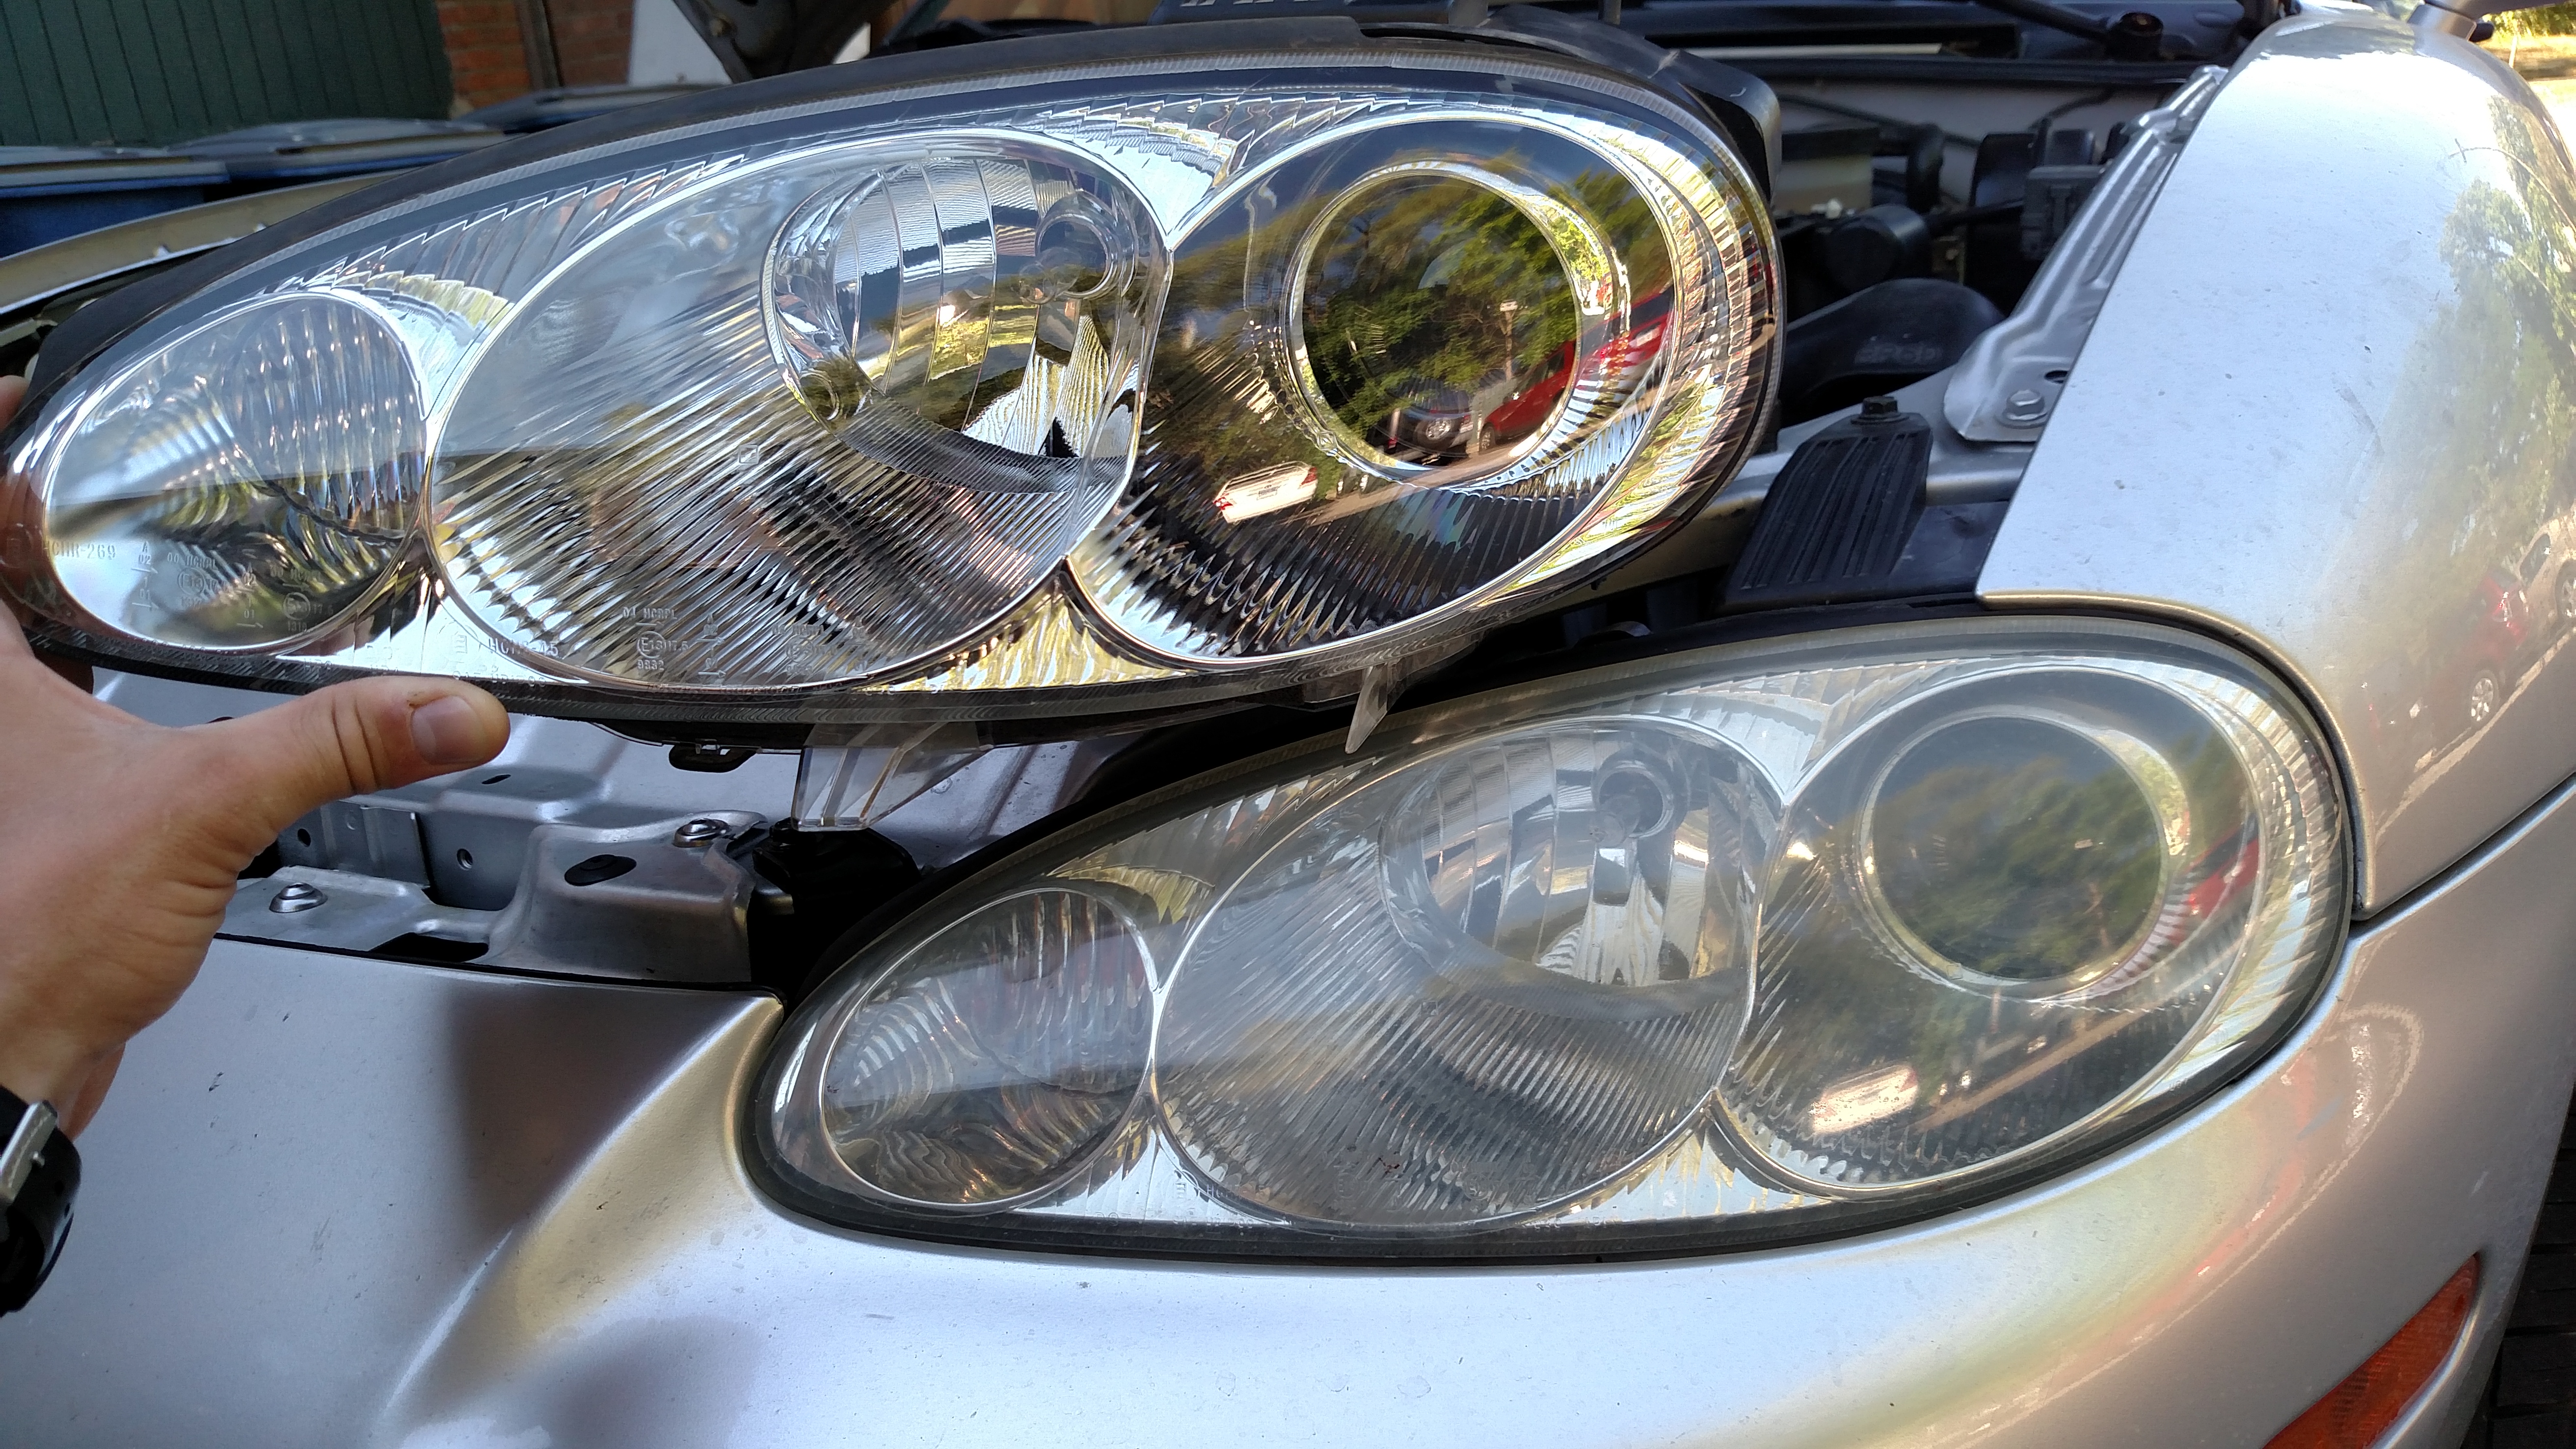
The cataract headlight look really annoys me. Fortunately, this NB2 headlight was only $20 because of some broken mounting tabs, but that's nothing a little JB Weld can't fix.
I really like being able to see at night, so I installed a Morimoto 55W 4500K HID kit from The Retrofit Source - you can see it hanging out in the engine bay shot if you look close. Over the winter I'm going to pull the headlights apart and paint the insides. The projectors have a great cut off, but there's clearly some reflection from the plastichrome.
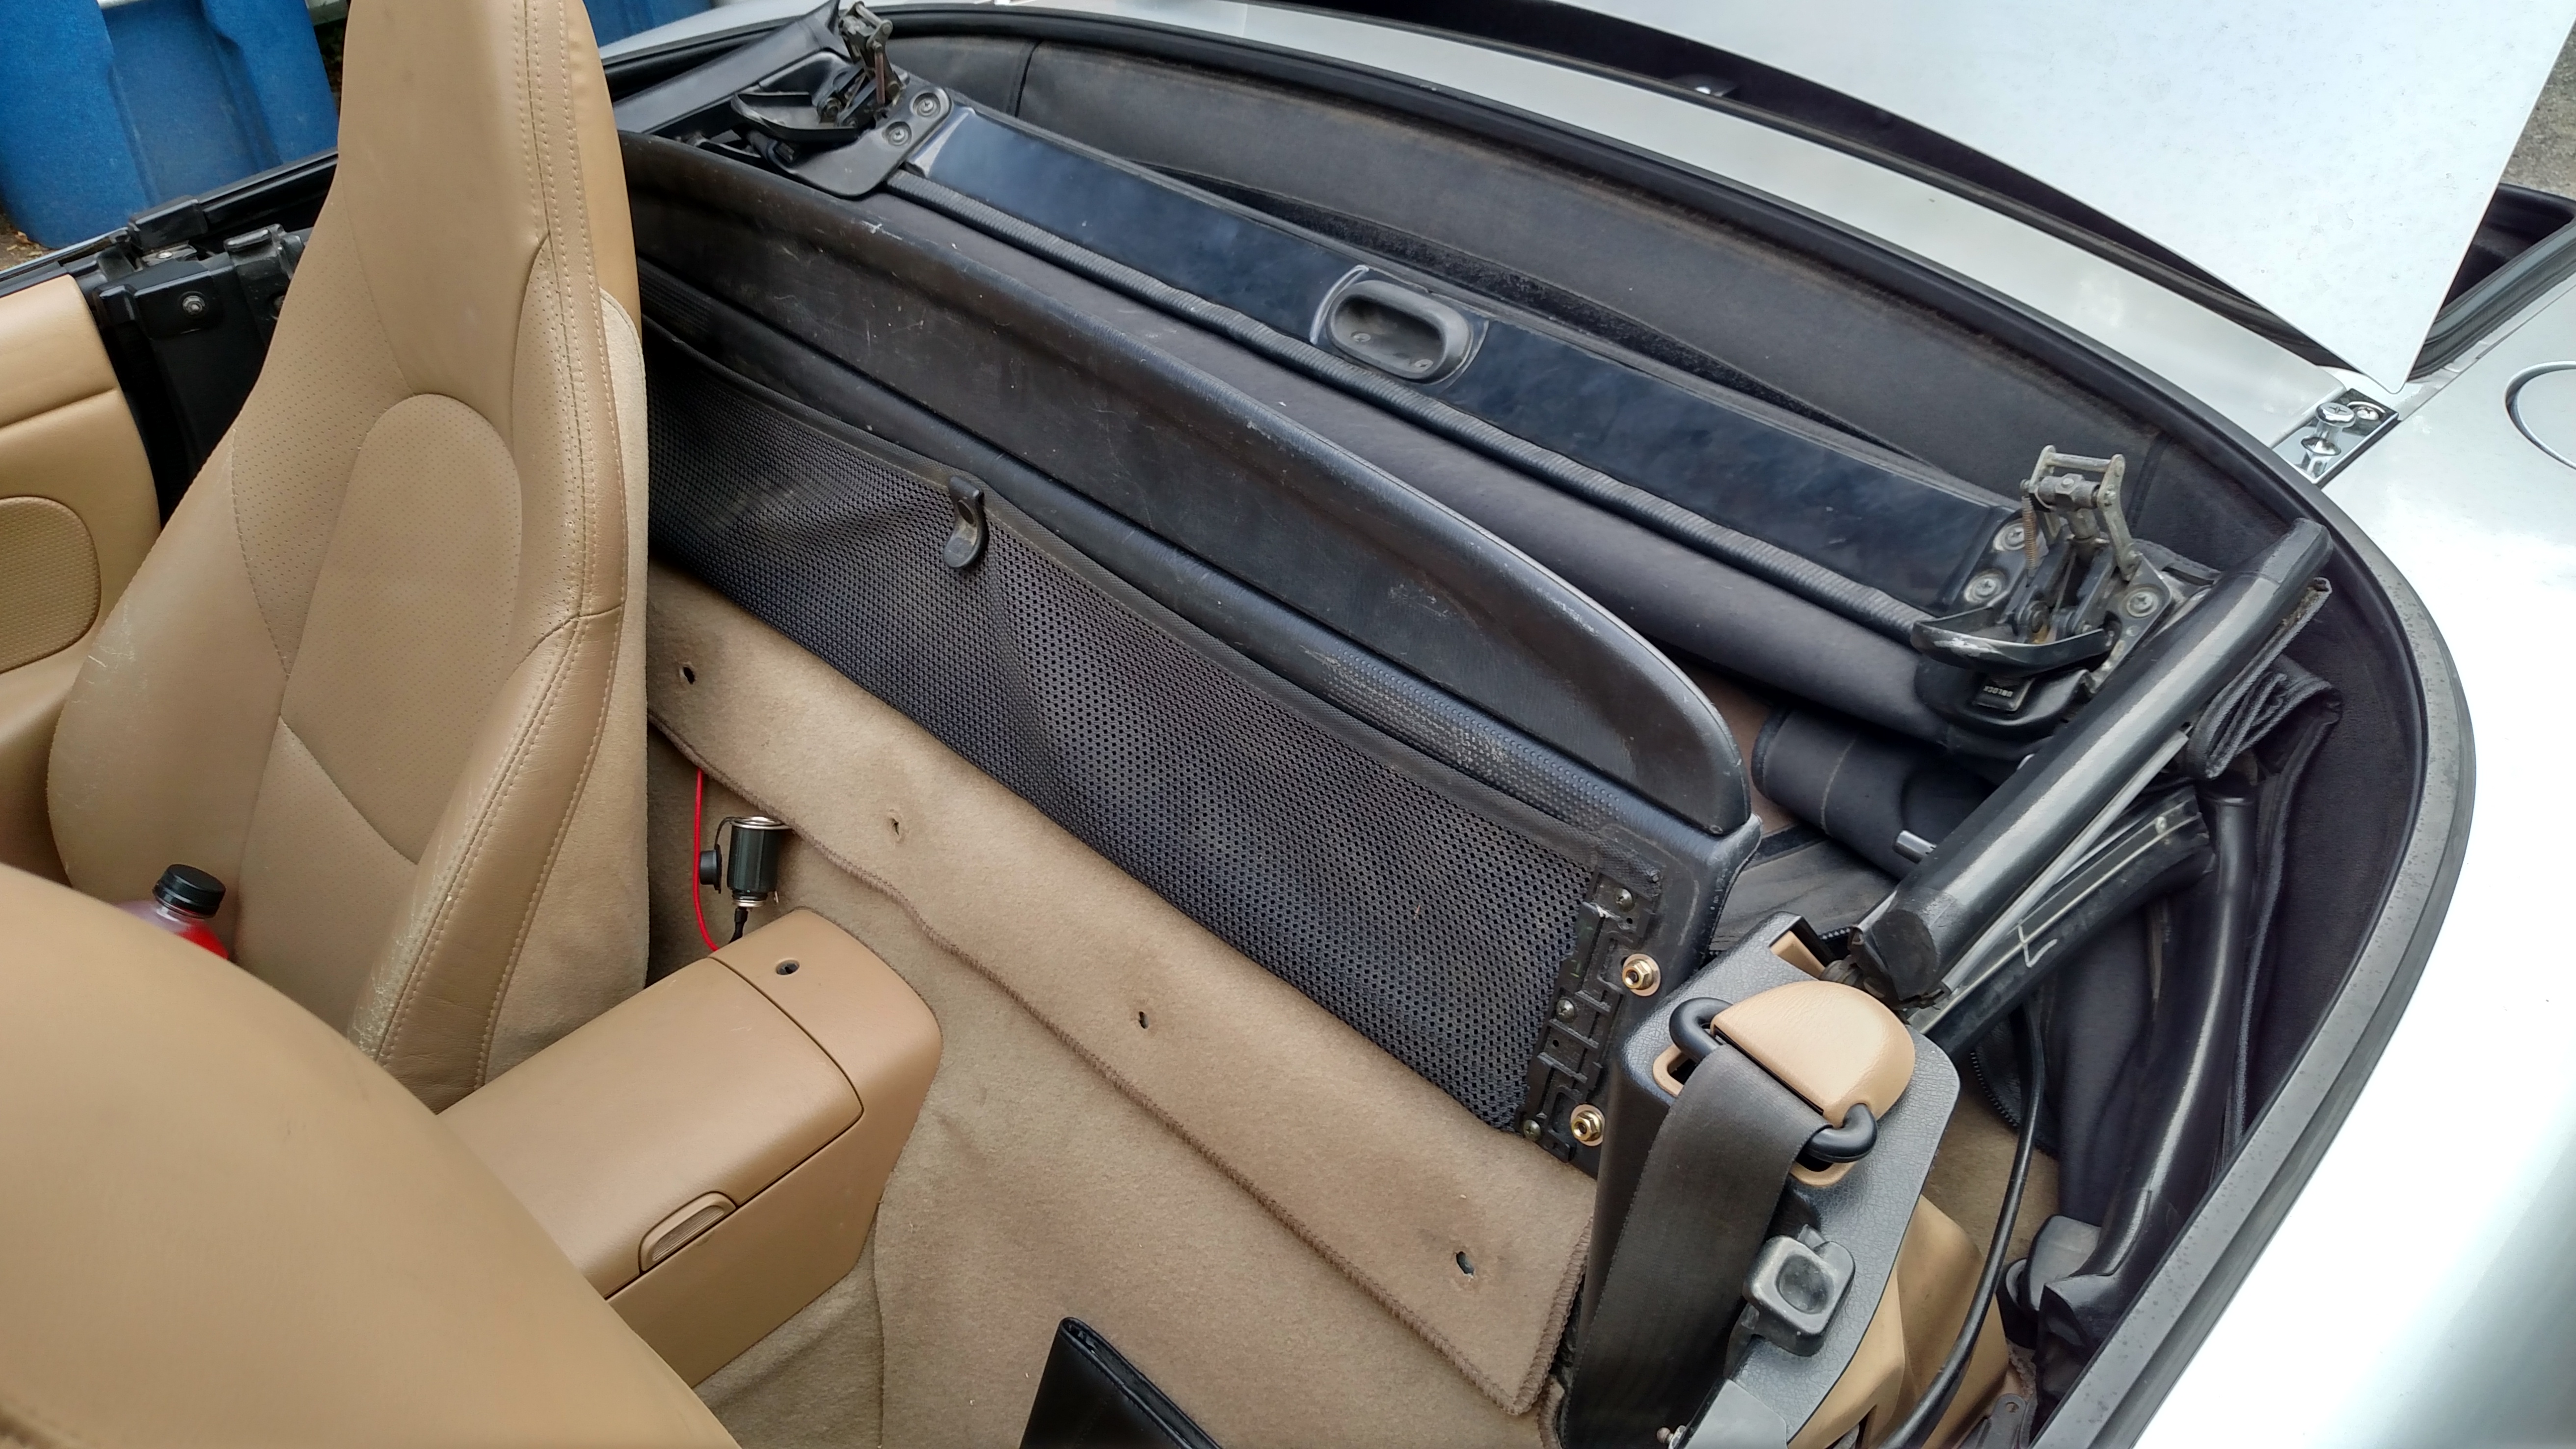
Free wind blocker! I also scored some engine mounts and a soft top frame with latches for the same price. You can see my extra 12V outlet next to the console - by far my best Miata mod in terms of effort/cost to benefit.
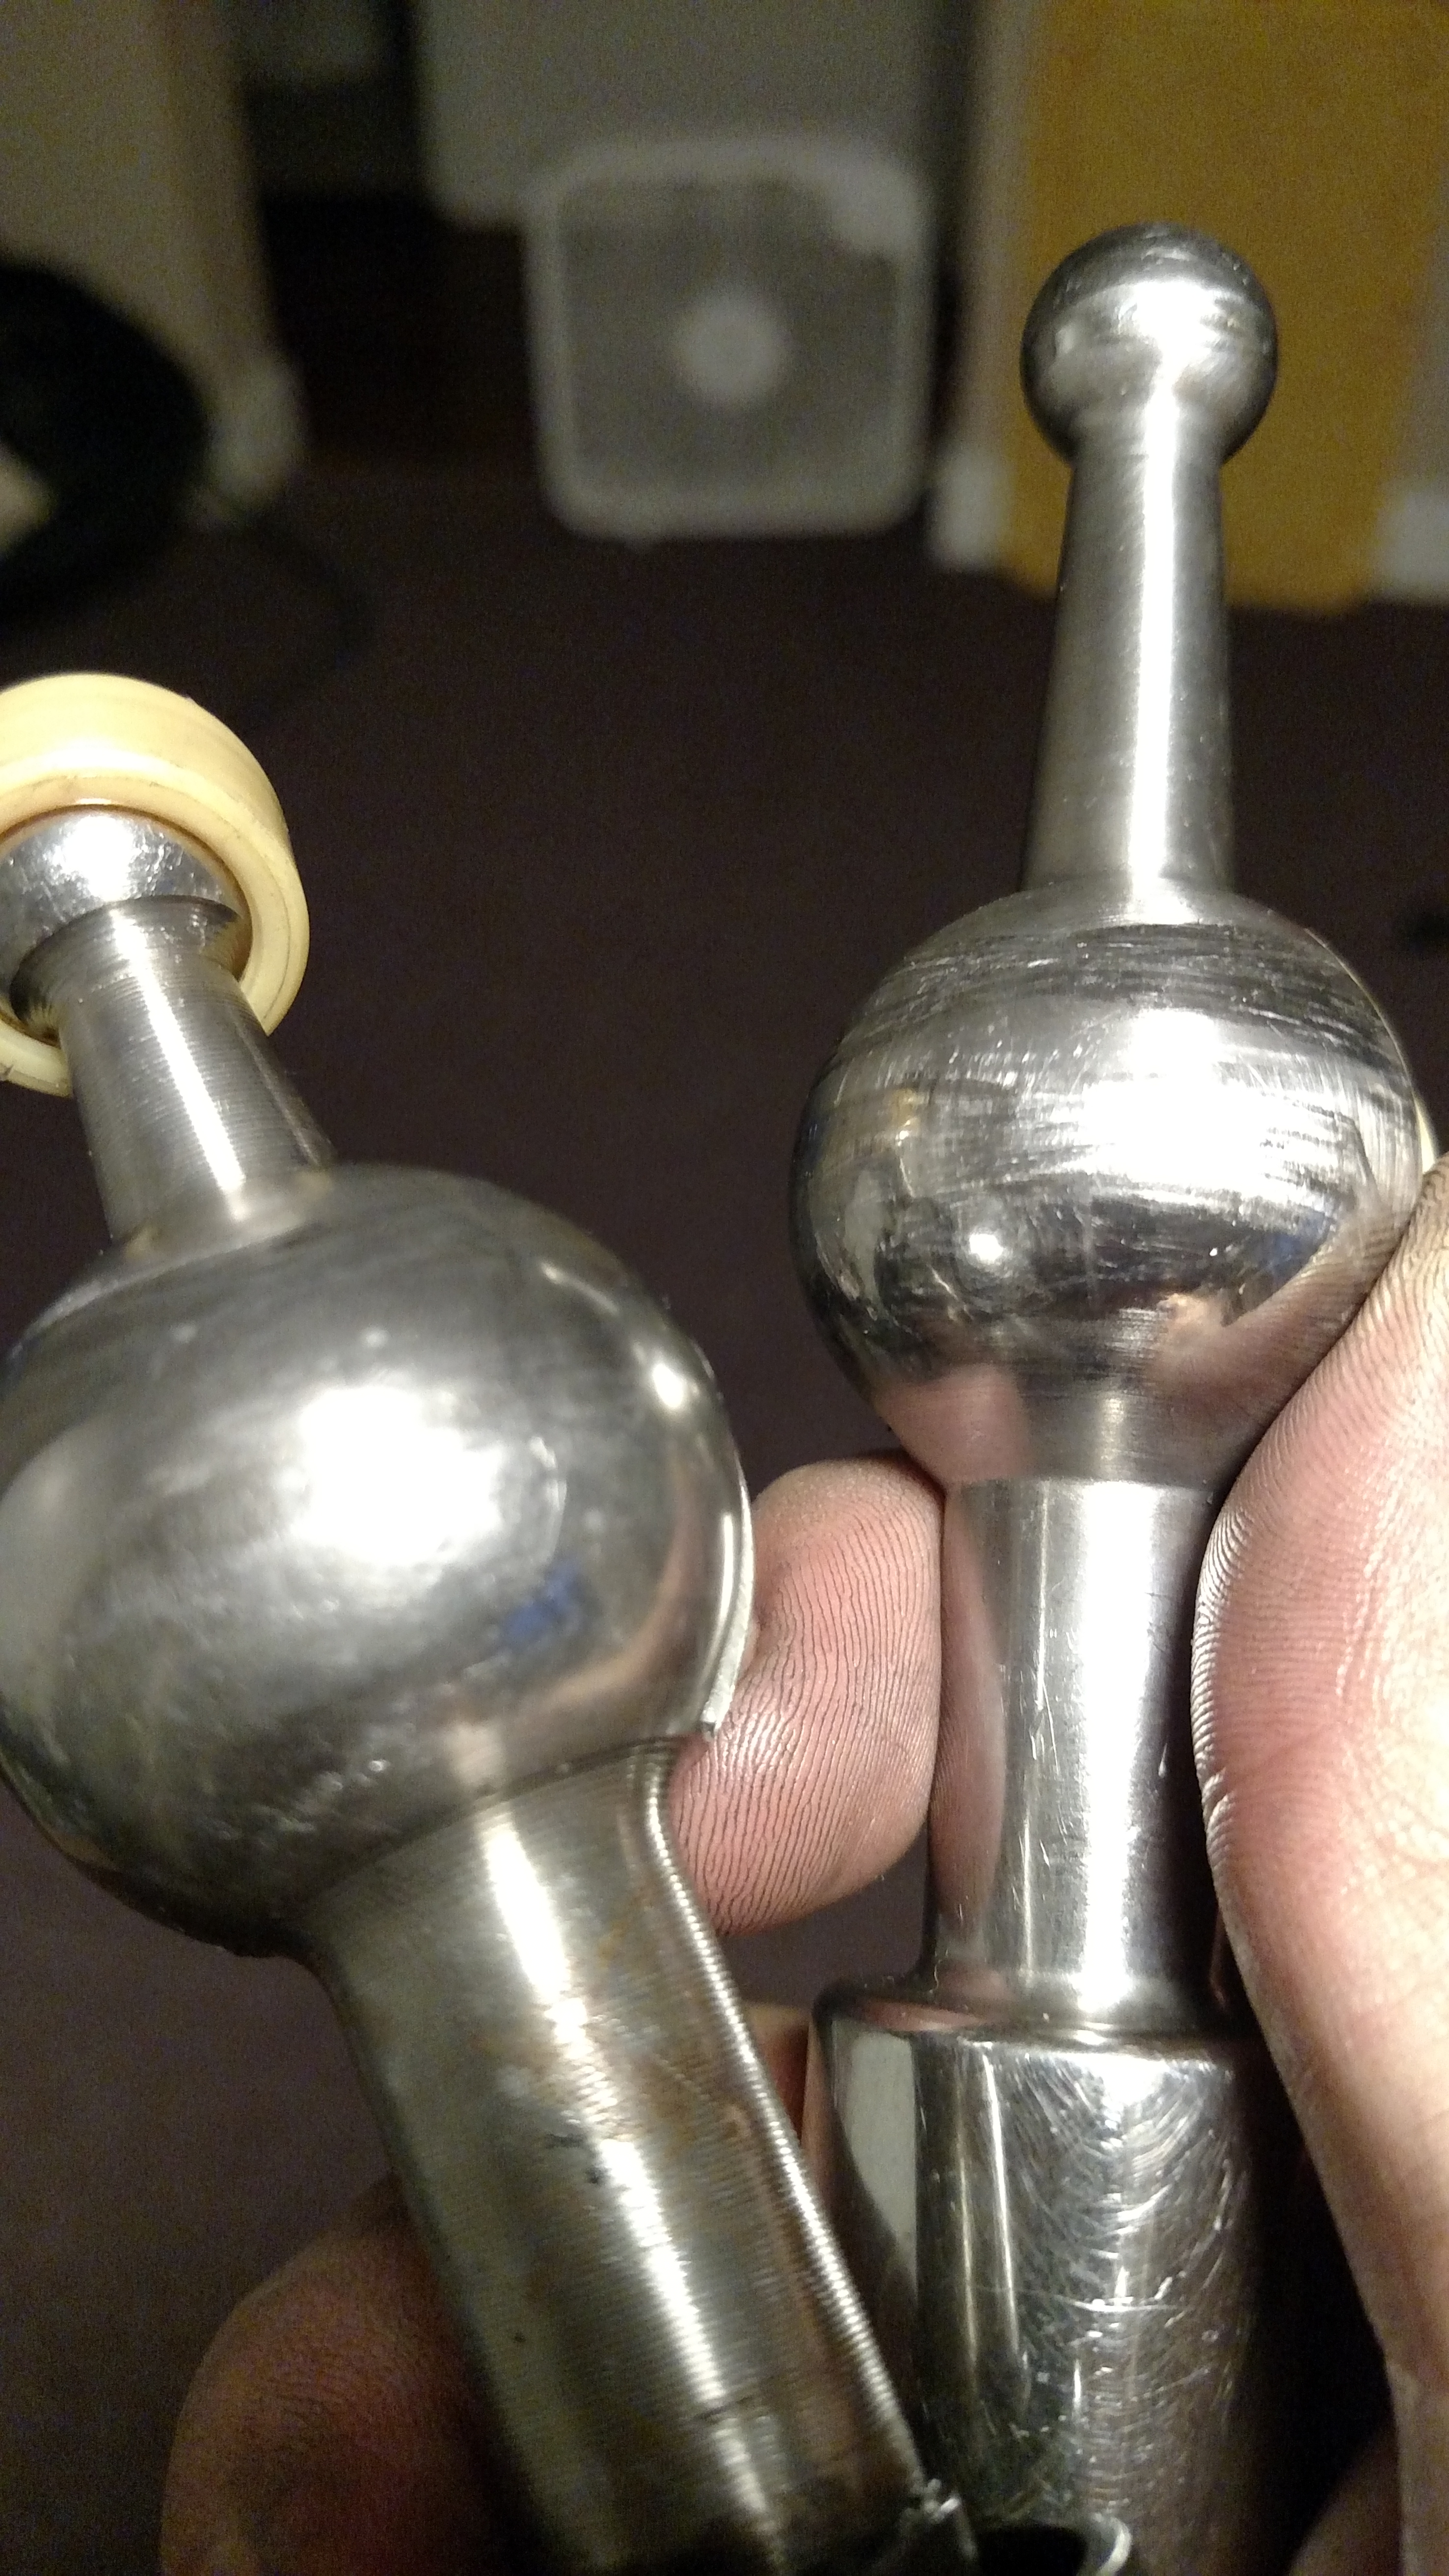
I had a brief stint with the MiataRoadster shifter, I took it out. The height just didn't work for me, so I rebuilt the stock shifter with a 5X Racing kit and am so much happier. I didn't realize how much my usual shifting technique relied on the shifter being so close to the console. I'll be posting the angled shifter for sale shortly if anyone is interested.
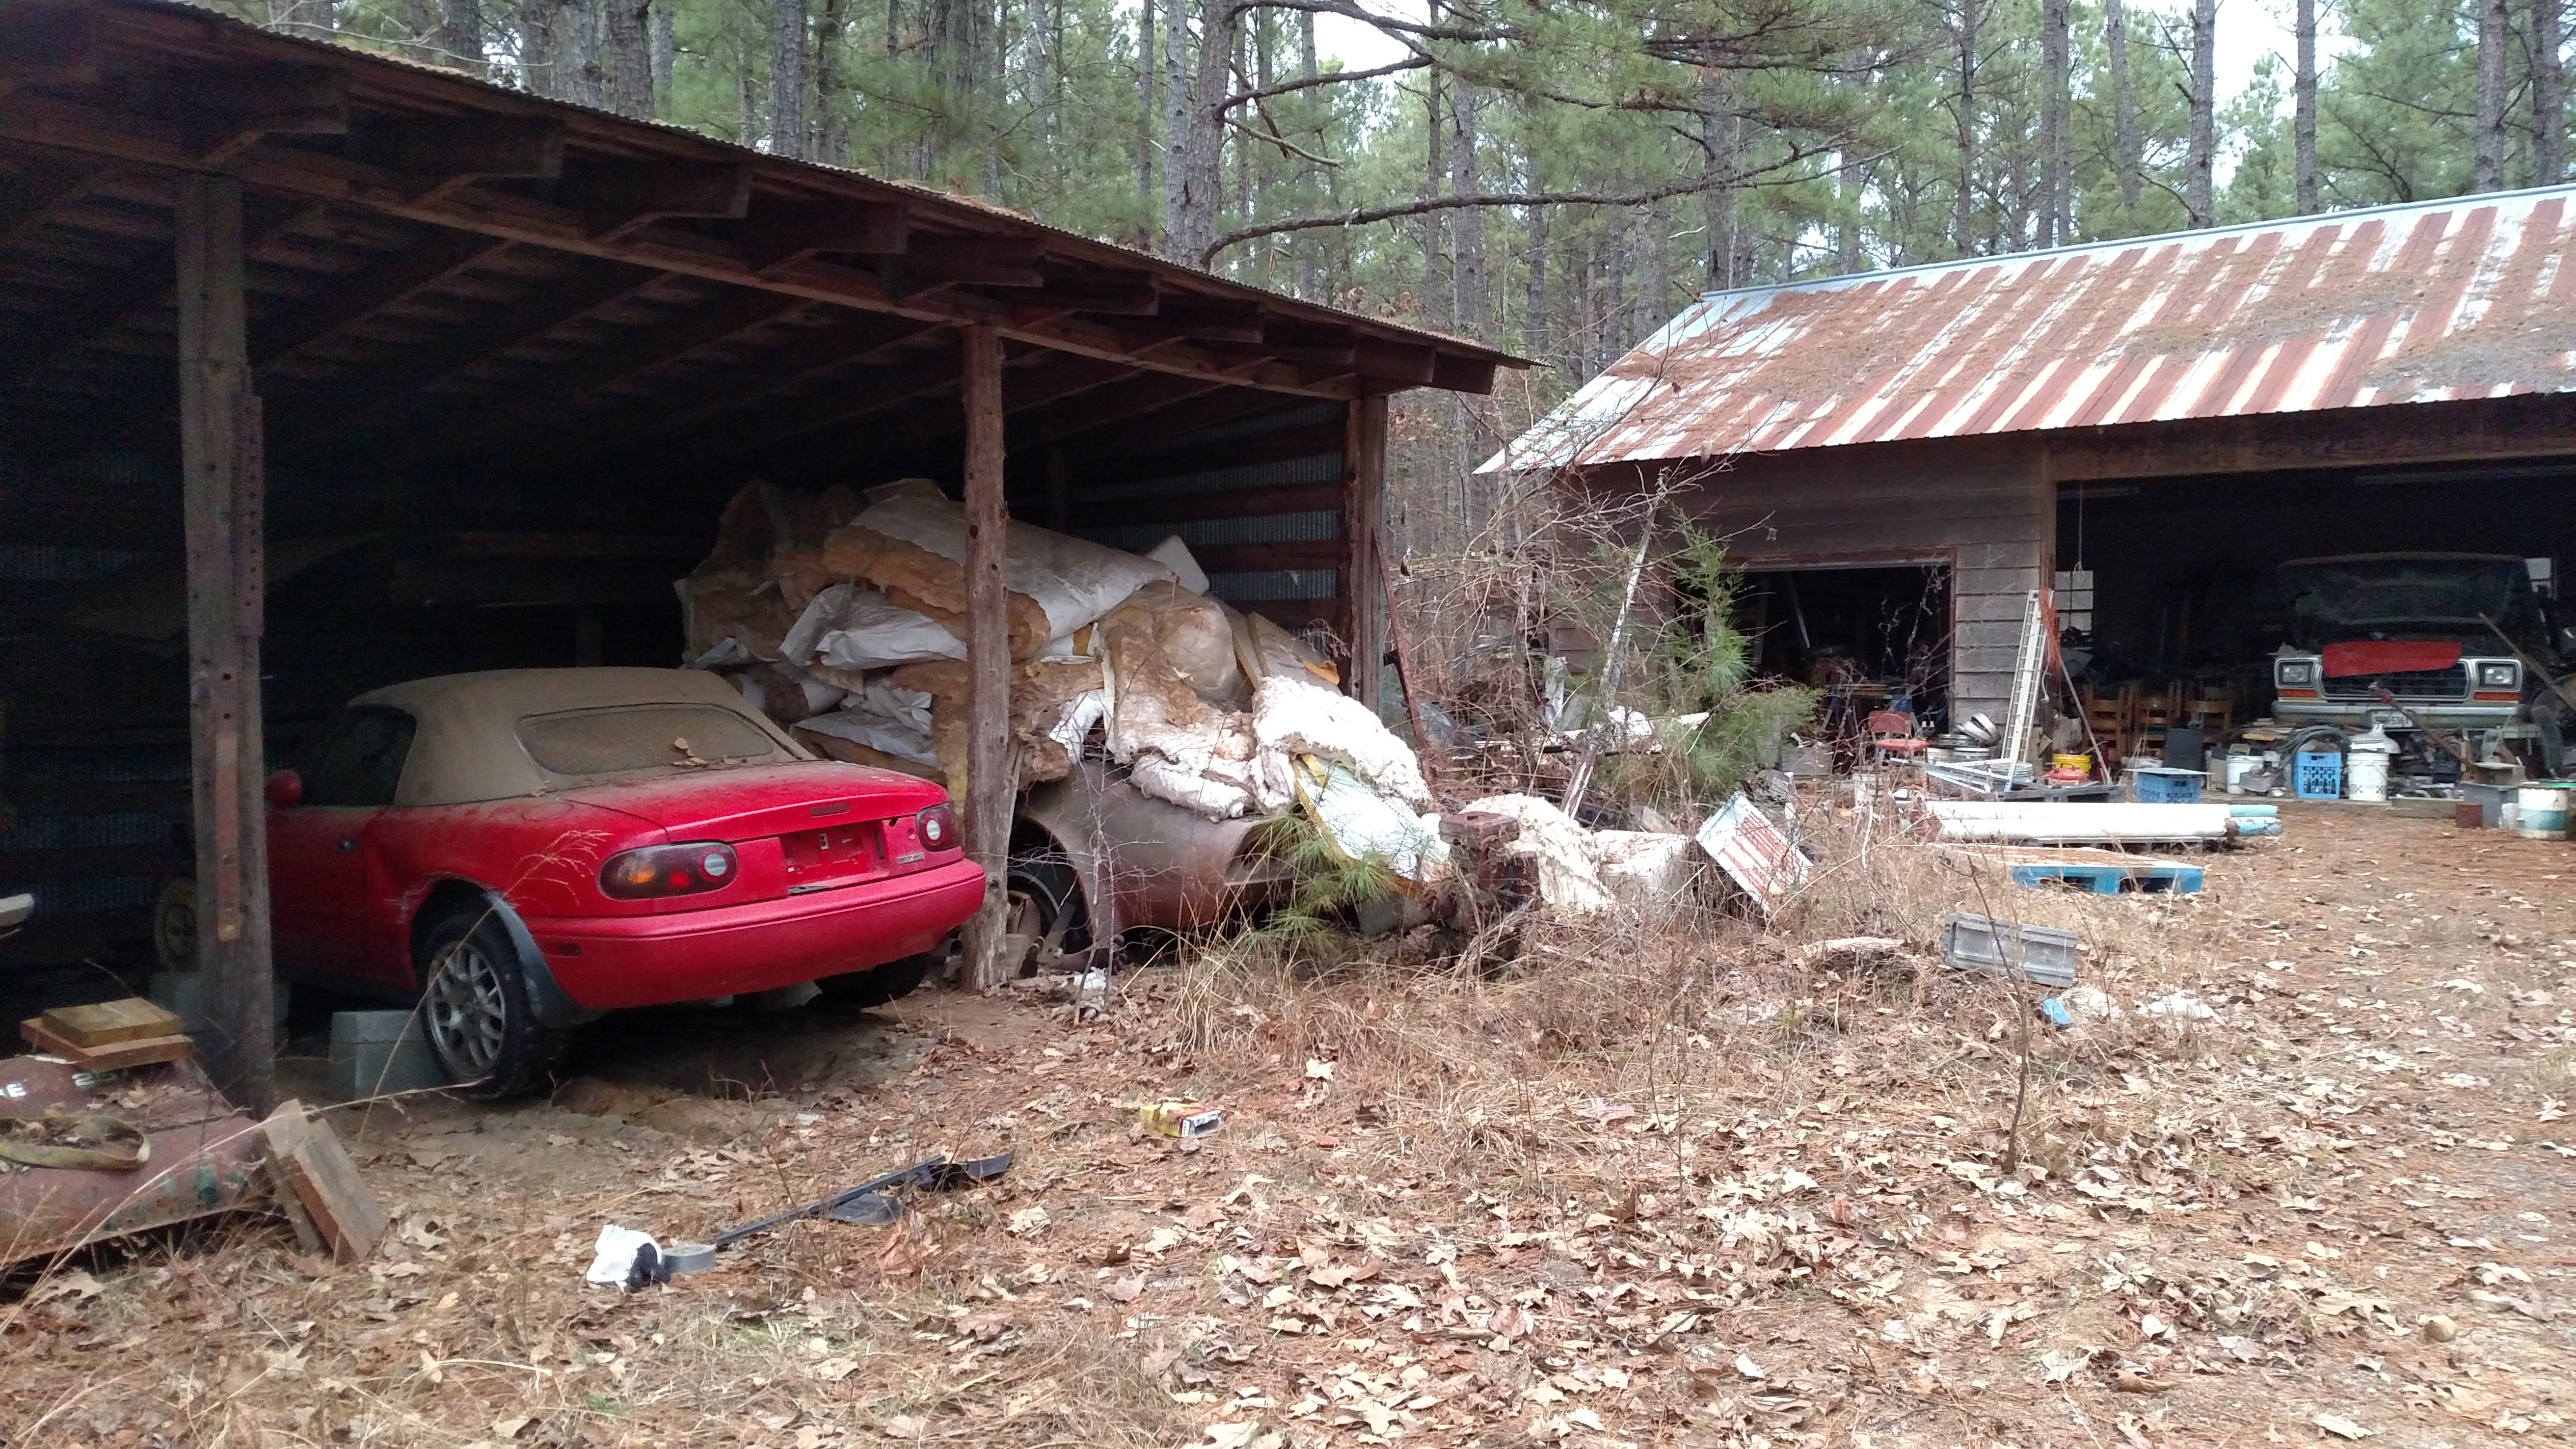
Over the holidays I was able to do a bit more parts gathering, both new and old. I returned to Roxanne's rotting carcass to do some graverobbing. My uncle practically runs his own junkyard, which has its pros and cons. This is her current resting place, propped up on cinder blocks.
I took a bunch of stuff, including the 1.6 dash, console, door card tops. But I also nabbed the oil pressure gauge and sender to swap them over. My thoroughly beat up frame rails came out too. They're going to need to be straightened out, and I need to come up with a new way of mounting the fuel lines. They were predictably damaged by the stupid way FM mounts them, but the "rock crawling" I did in Colorado probably had something to do with it too.
I HATE not having a garage. Since I don't care to work on cold metal things when it's either 40* and raining, or 10* and snowing, I won't. Apartment living in Michigan has its downsides.
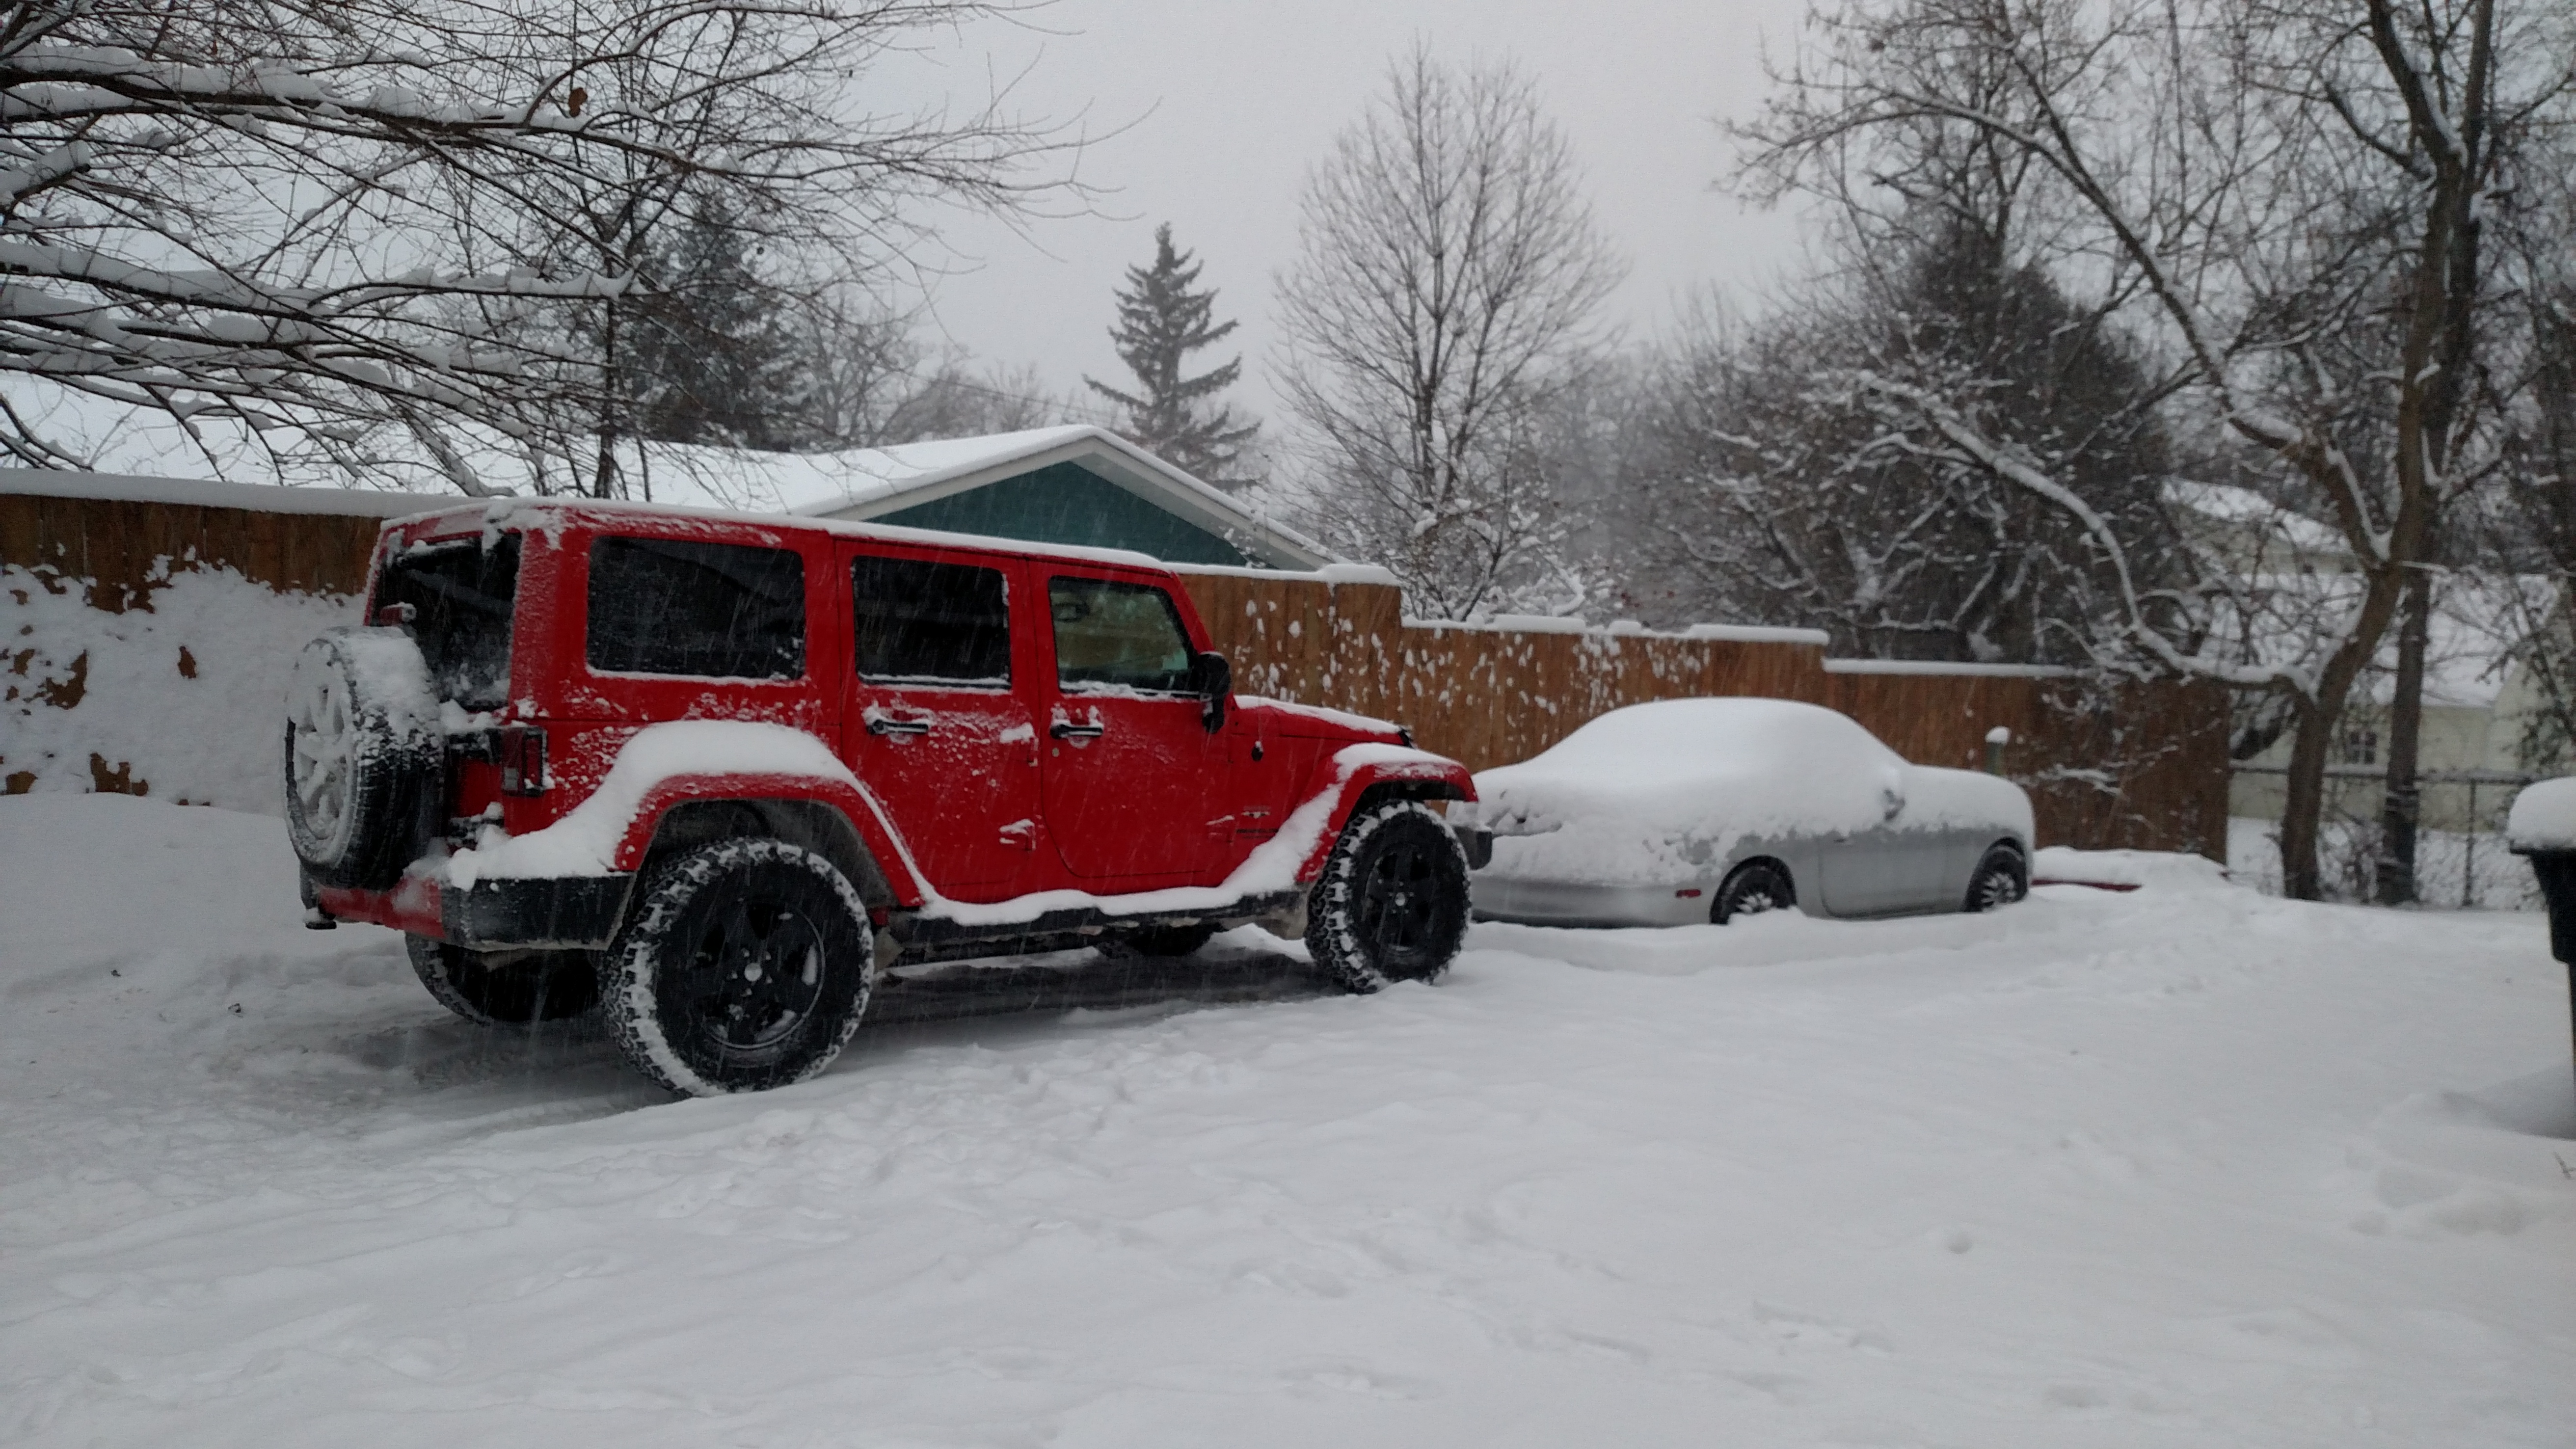
At least I have the Jeep.
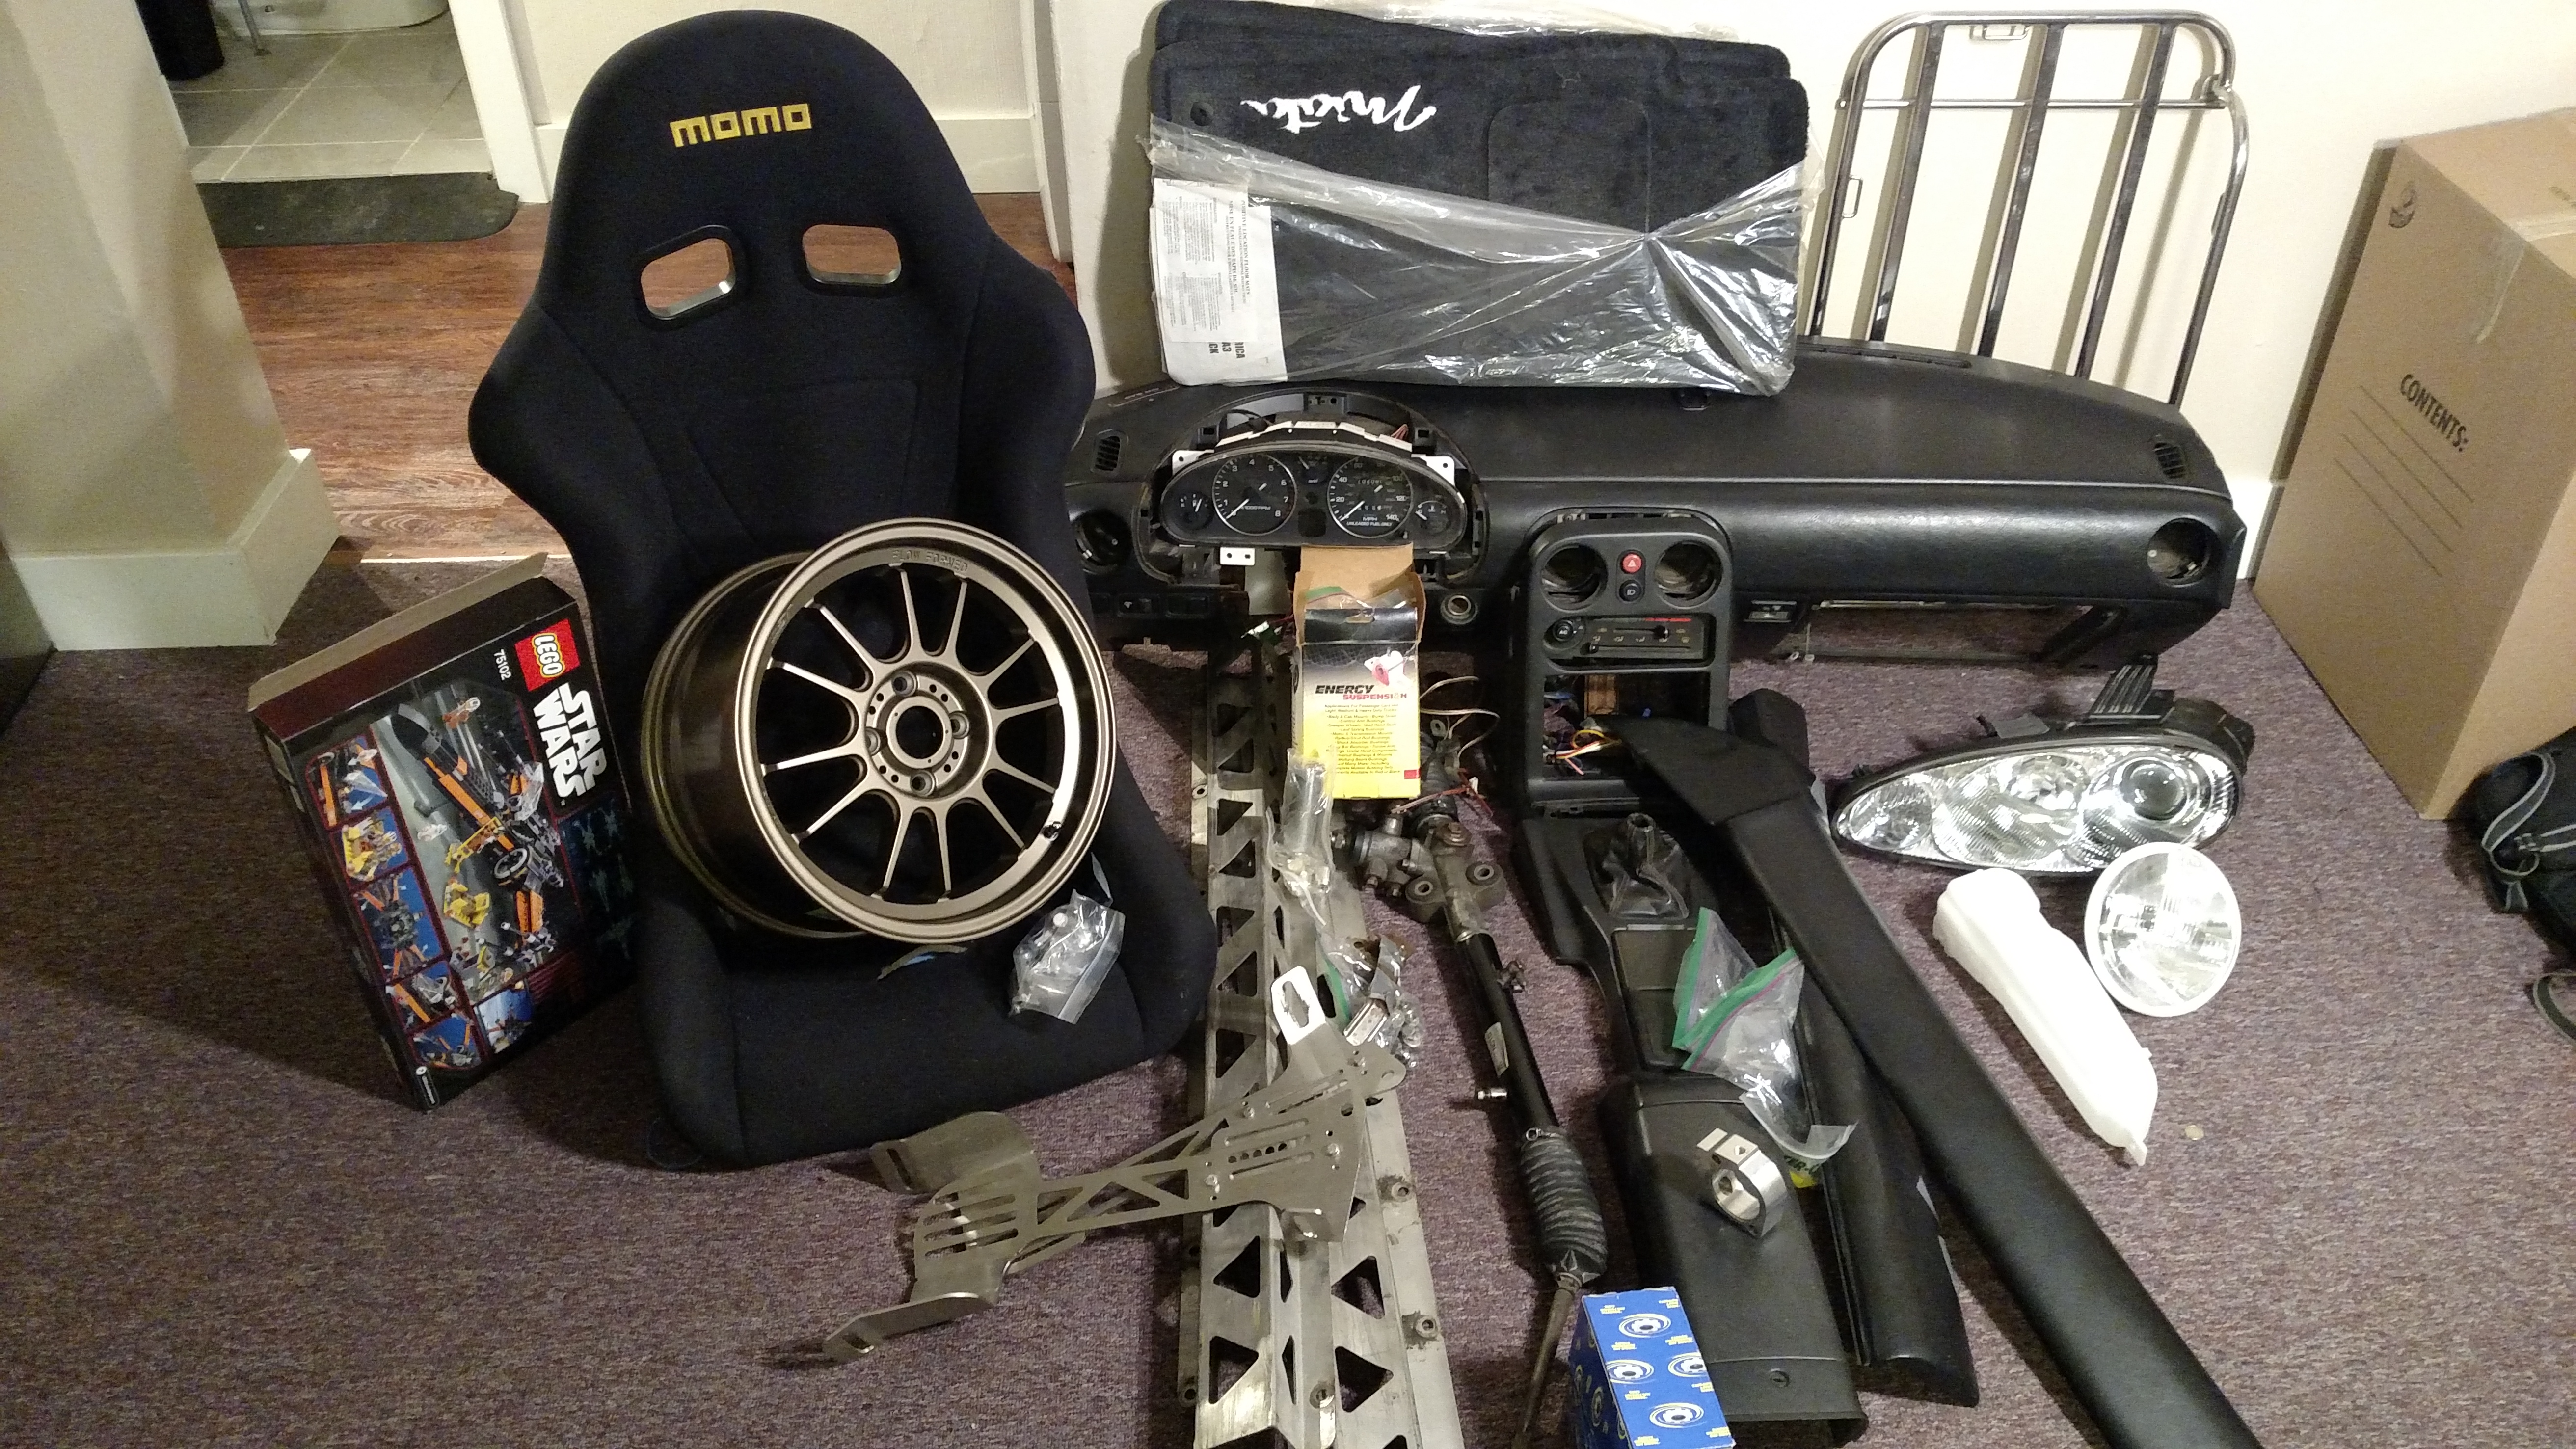
Meanwhile, the parts are piling up.
What's in there?
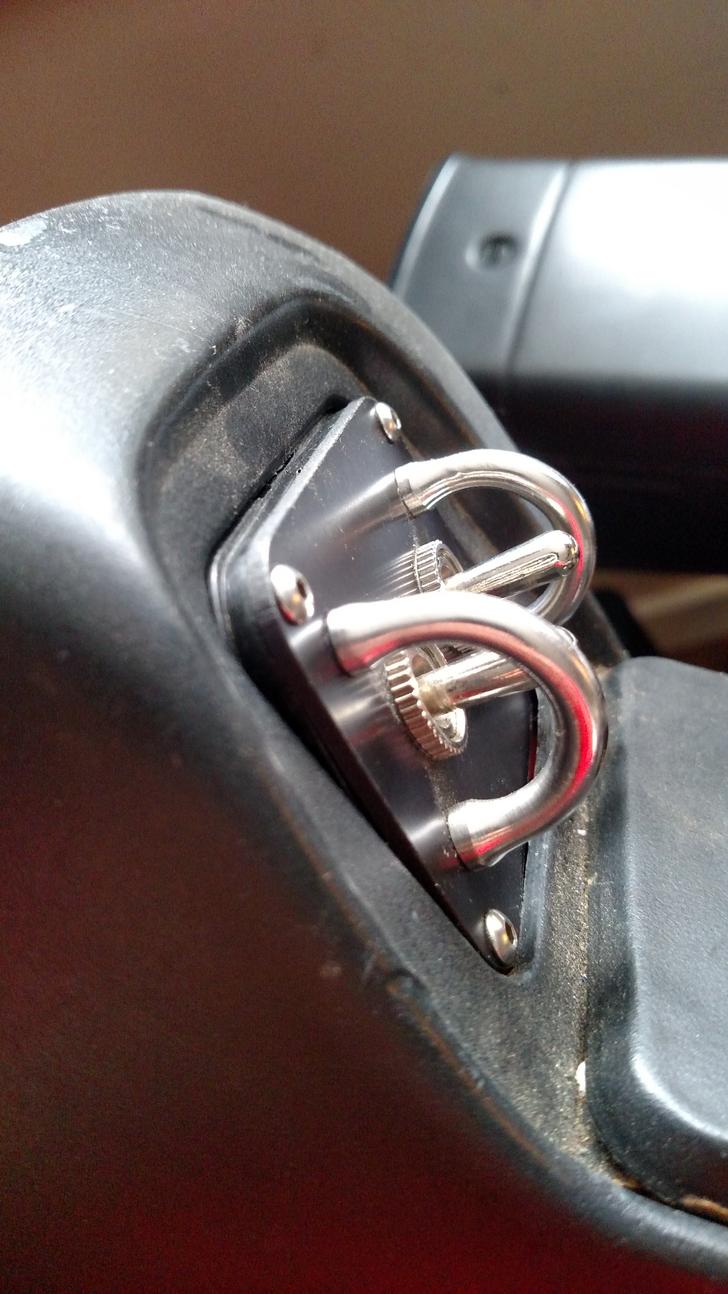
Seat - Momo Start and Garagestar Seat mounts
FM Frame Rails, thoroughly beat to ****
Depowered and Welded Steering Rack
New engine mounts
Brand new black NB floormats. Another great Craigslist deal.
Full 1.6 black interior
Poly front suspension bushings, SADfab RUCA spherical kit
the almost new NB2 drivers headlight and Cibie 7" headlights that I want to also mount
Cappuccino washer bottle
Raceland Luggage Rack
1.6 oil pressure gauge and sender
Poe's X-Wing LEGO set from The Force Awakens. Gotta have something to do inside!
The wheels are Konig Hypergram 15x7.5" +35 in bronze from Good-Win Racing. They're really light, have the right offset, look decent, and were the right price. My perfect wheel would have been the 7.5" 6UL in Nickel, but that's unobtanium vaporware. Having your business model be reliant on demand exceeding supply is going to result in lost sales, mine included.
I also picked up McGard lug nuts, hubcentric spacers, and 949 Racing valvestems. I can't wait for spring to get all of this on the car!
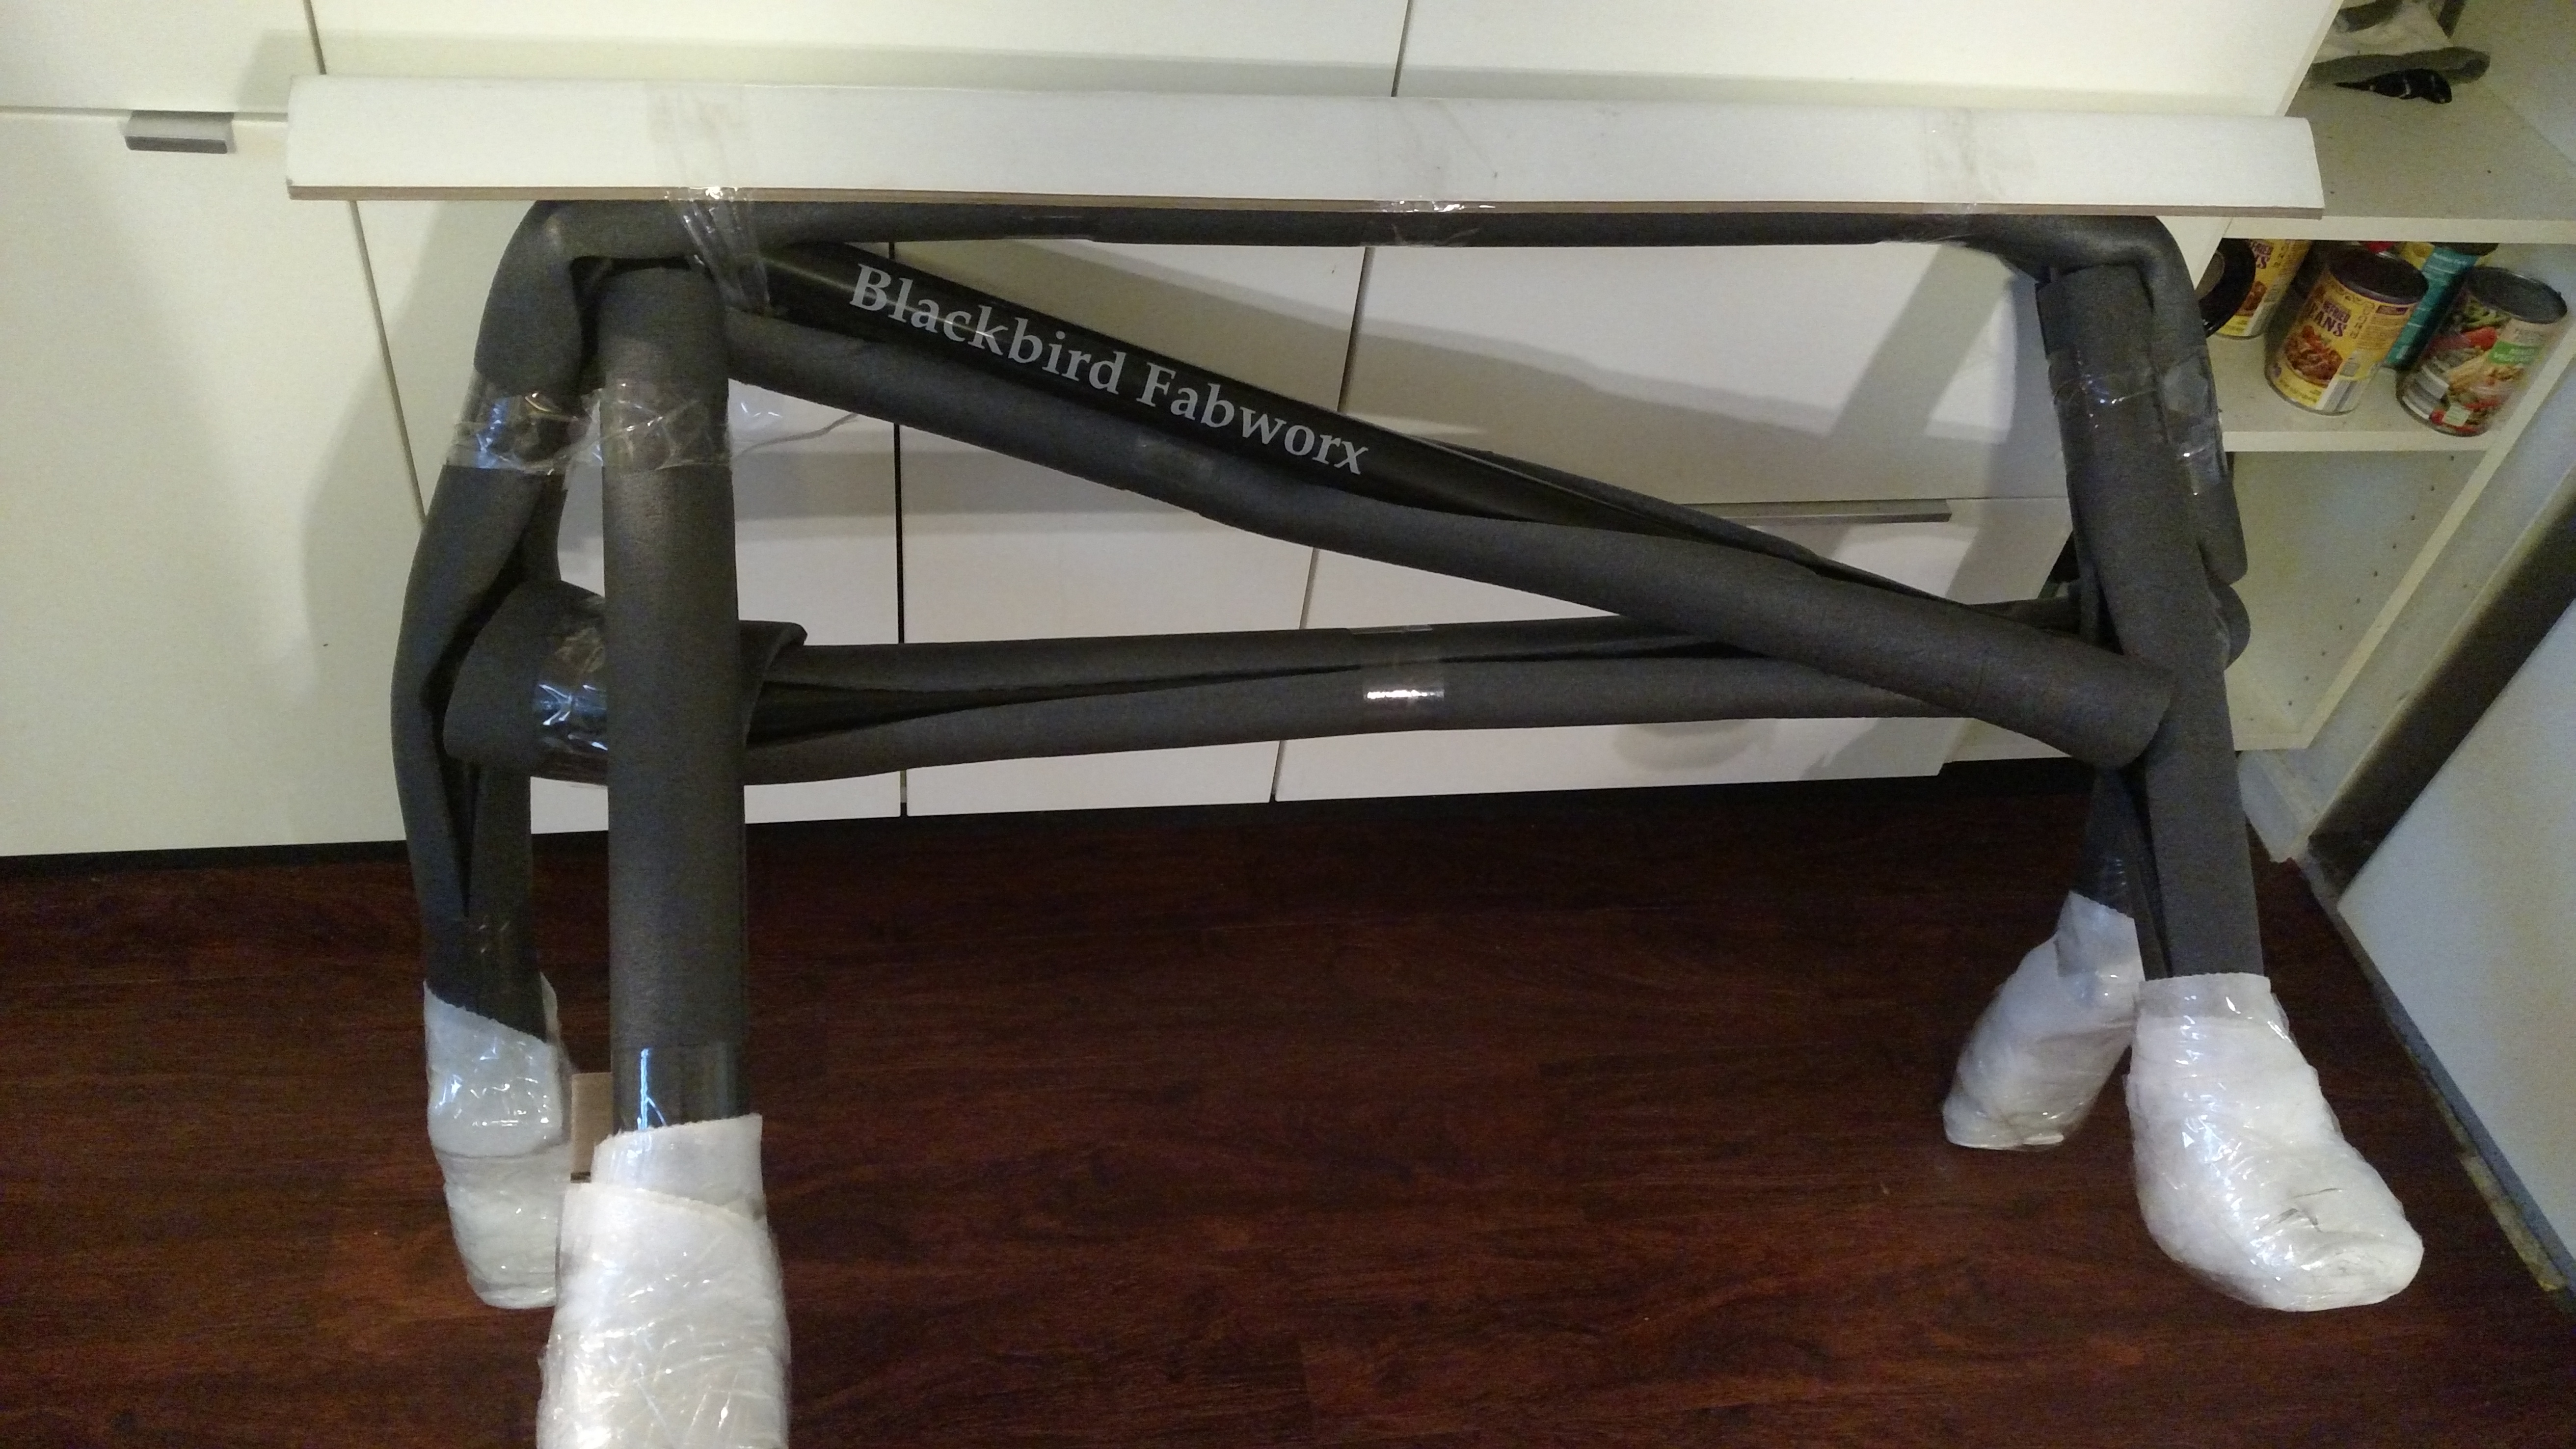
My next purchases are probably going to be a Blackbird Fabworx Single Diagonal NA roll bar, tires, and an oil cooler. After that, it's time for track days!
I had a brief stint with the MiataRoadster shifter, I took it out. The height just didn't work for me, so I rebuilt the stock shifter with a 5X Racing kit and am so much happier. I didn't realize how much my usual shifting technique relied on the shifter being so close to the console. I'll be posting the angled shifter for sale shortly if anyone is interested.
Exactly why I got my MR Shifter at stock height. I just wanted better feel, not nonsense shifting angles No Ragrets
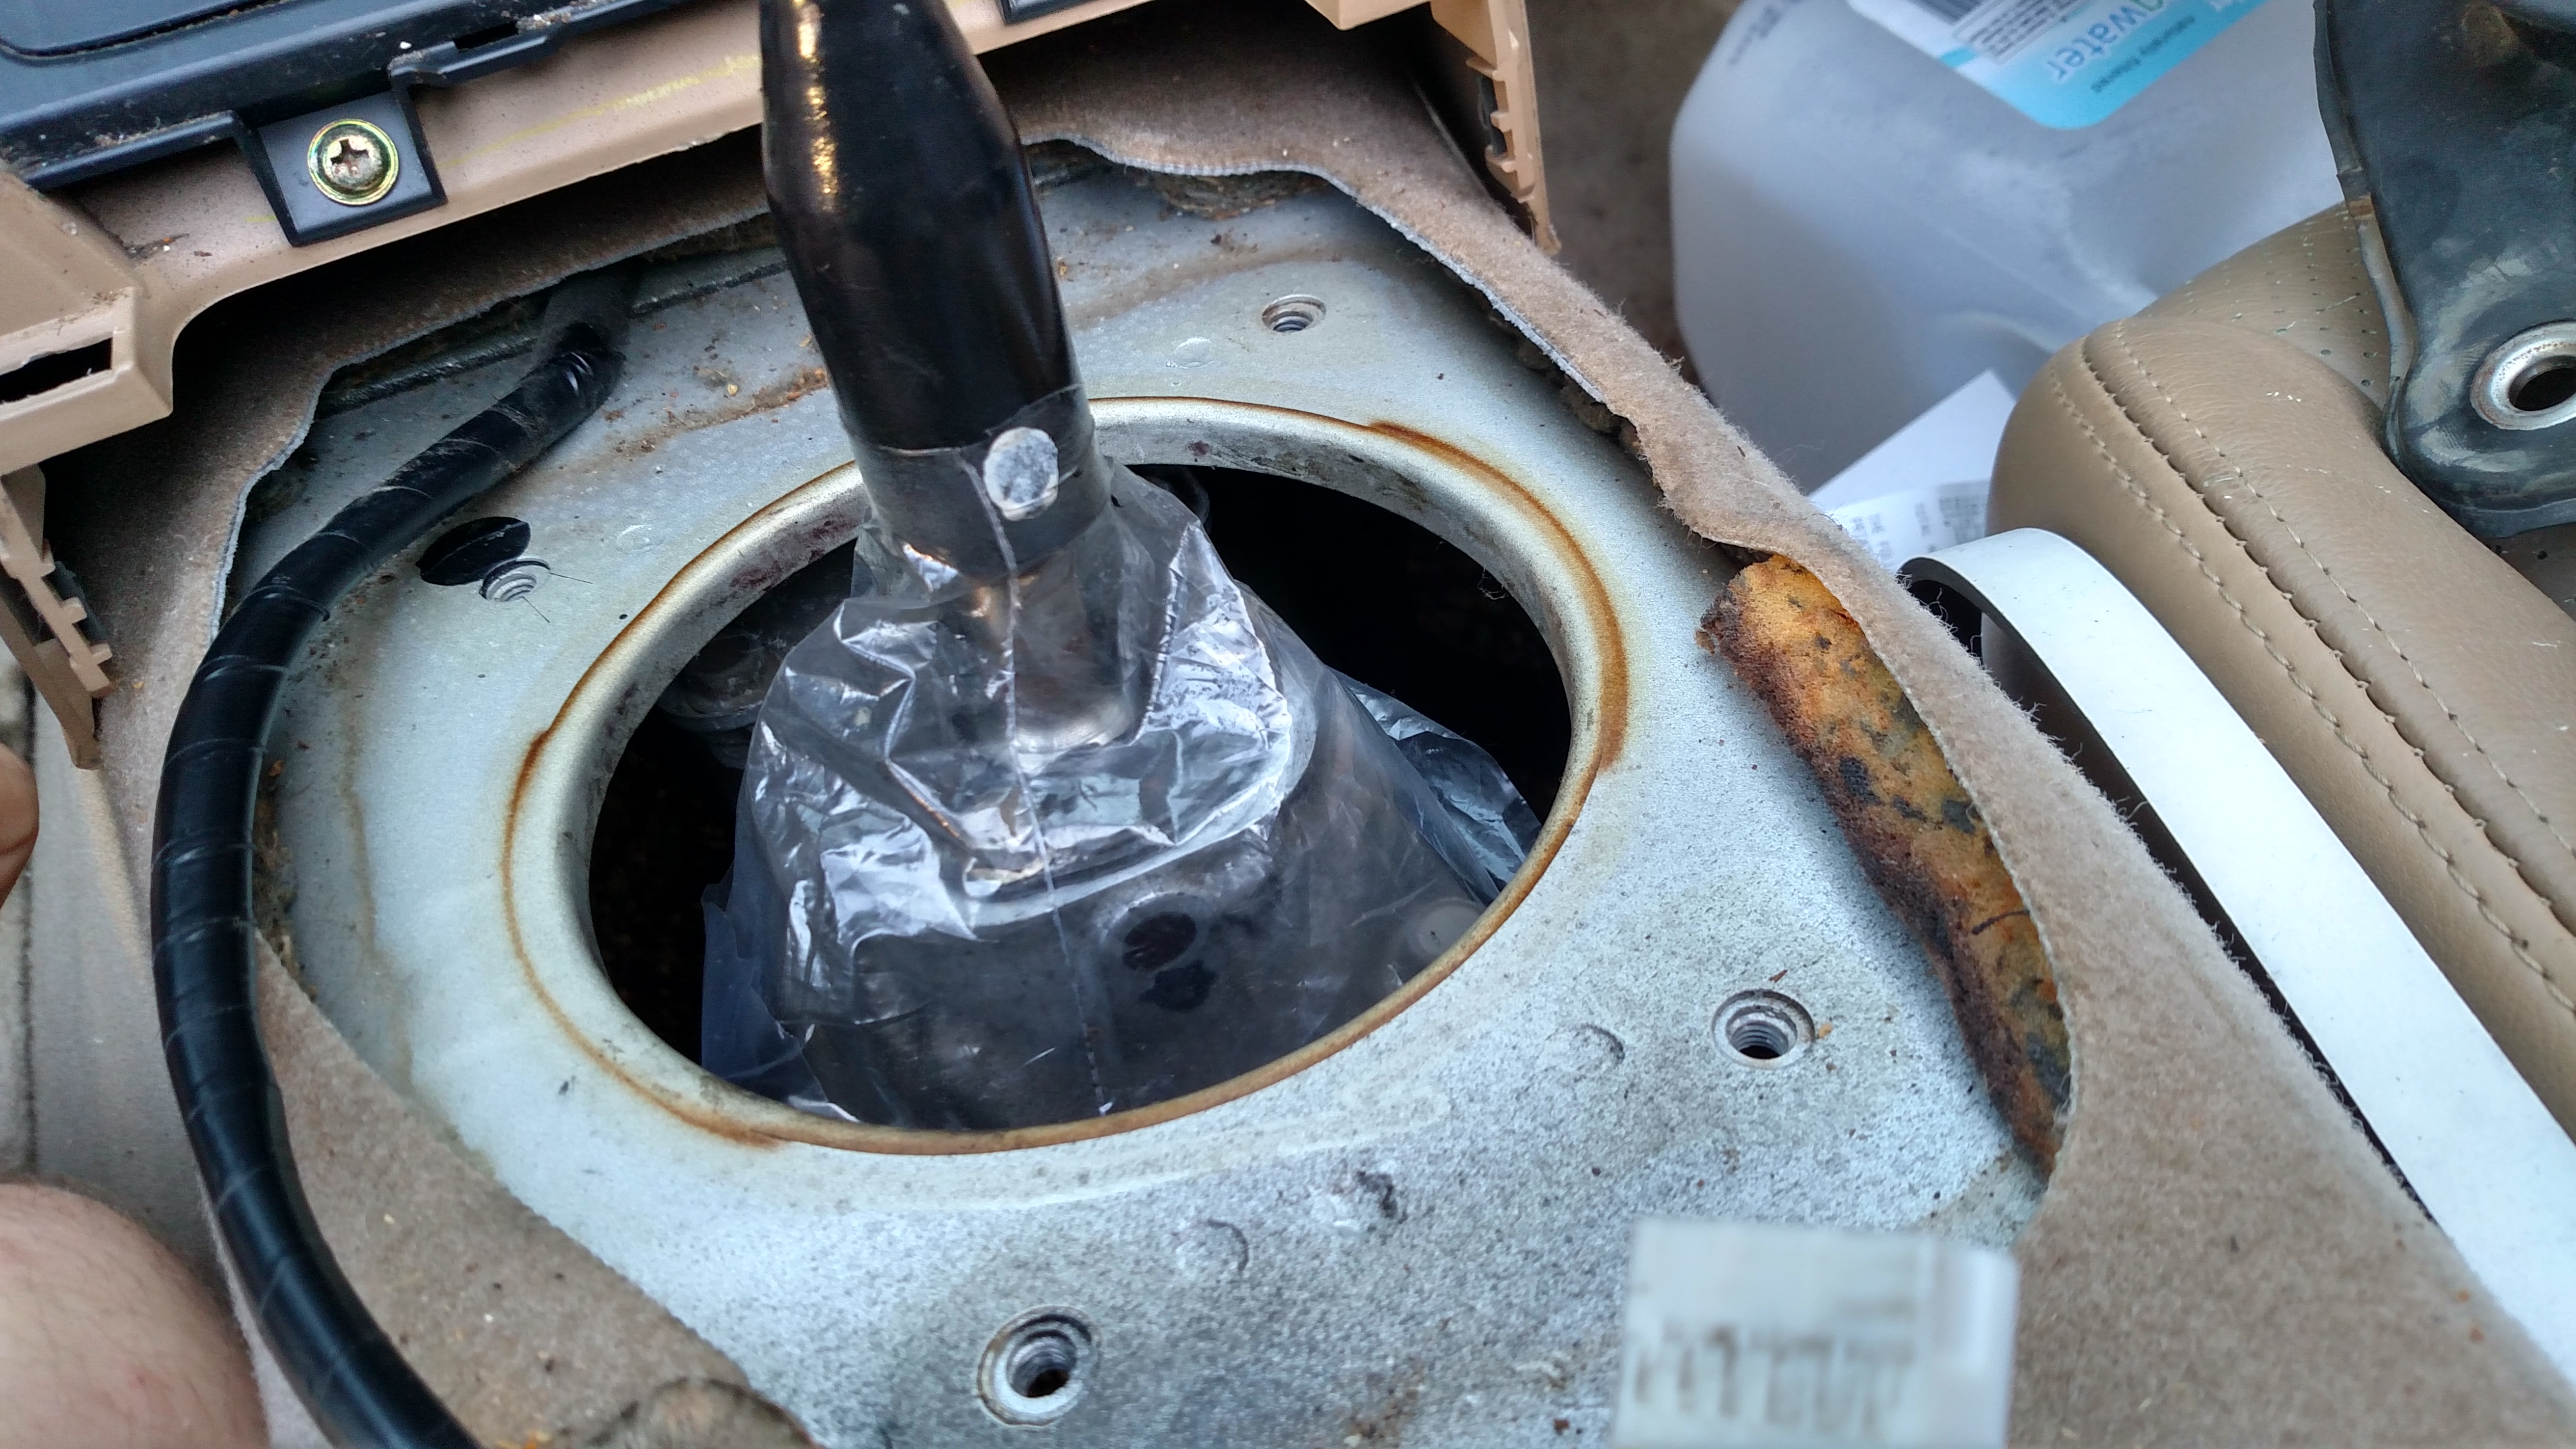
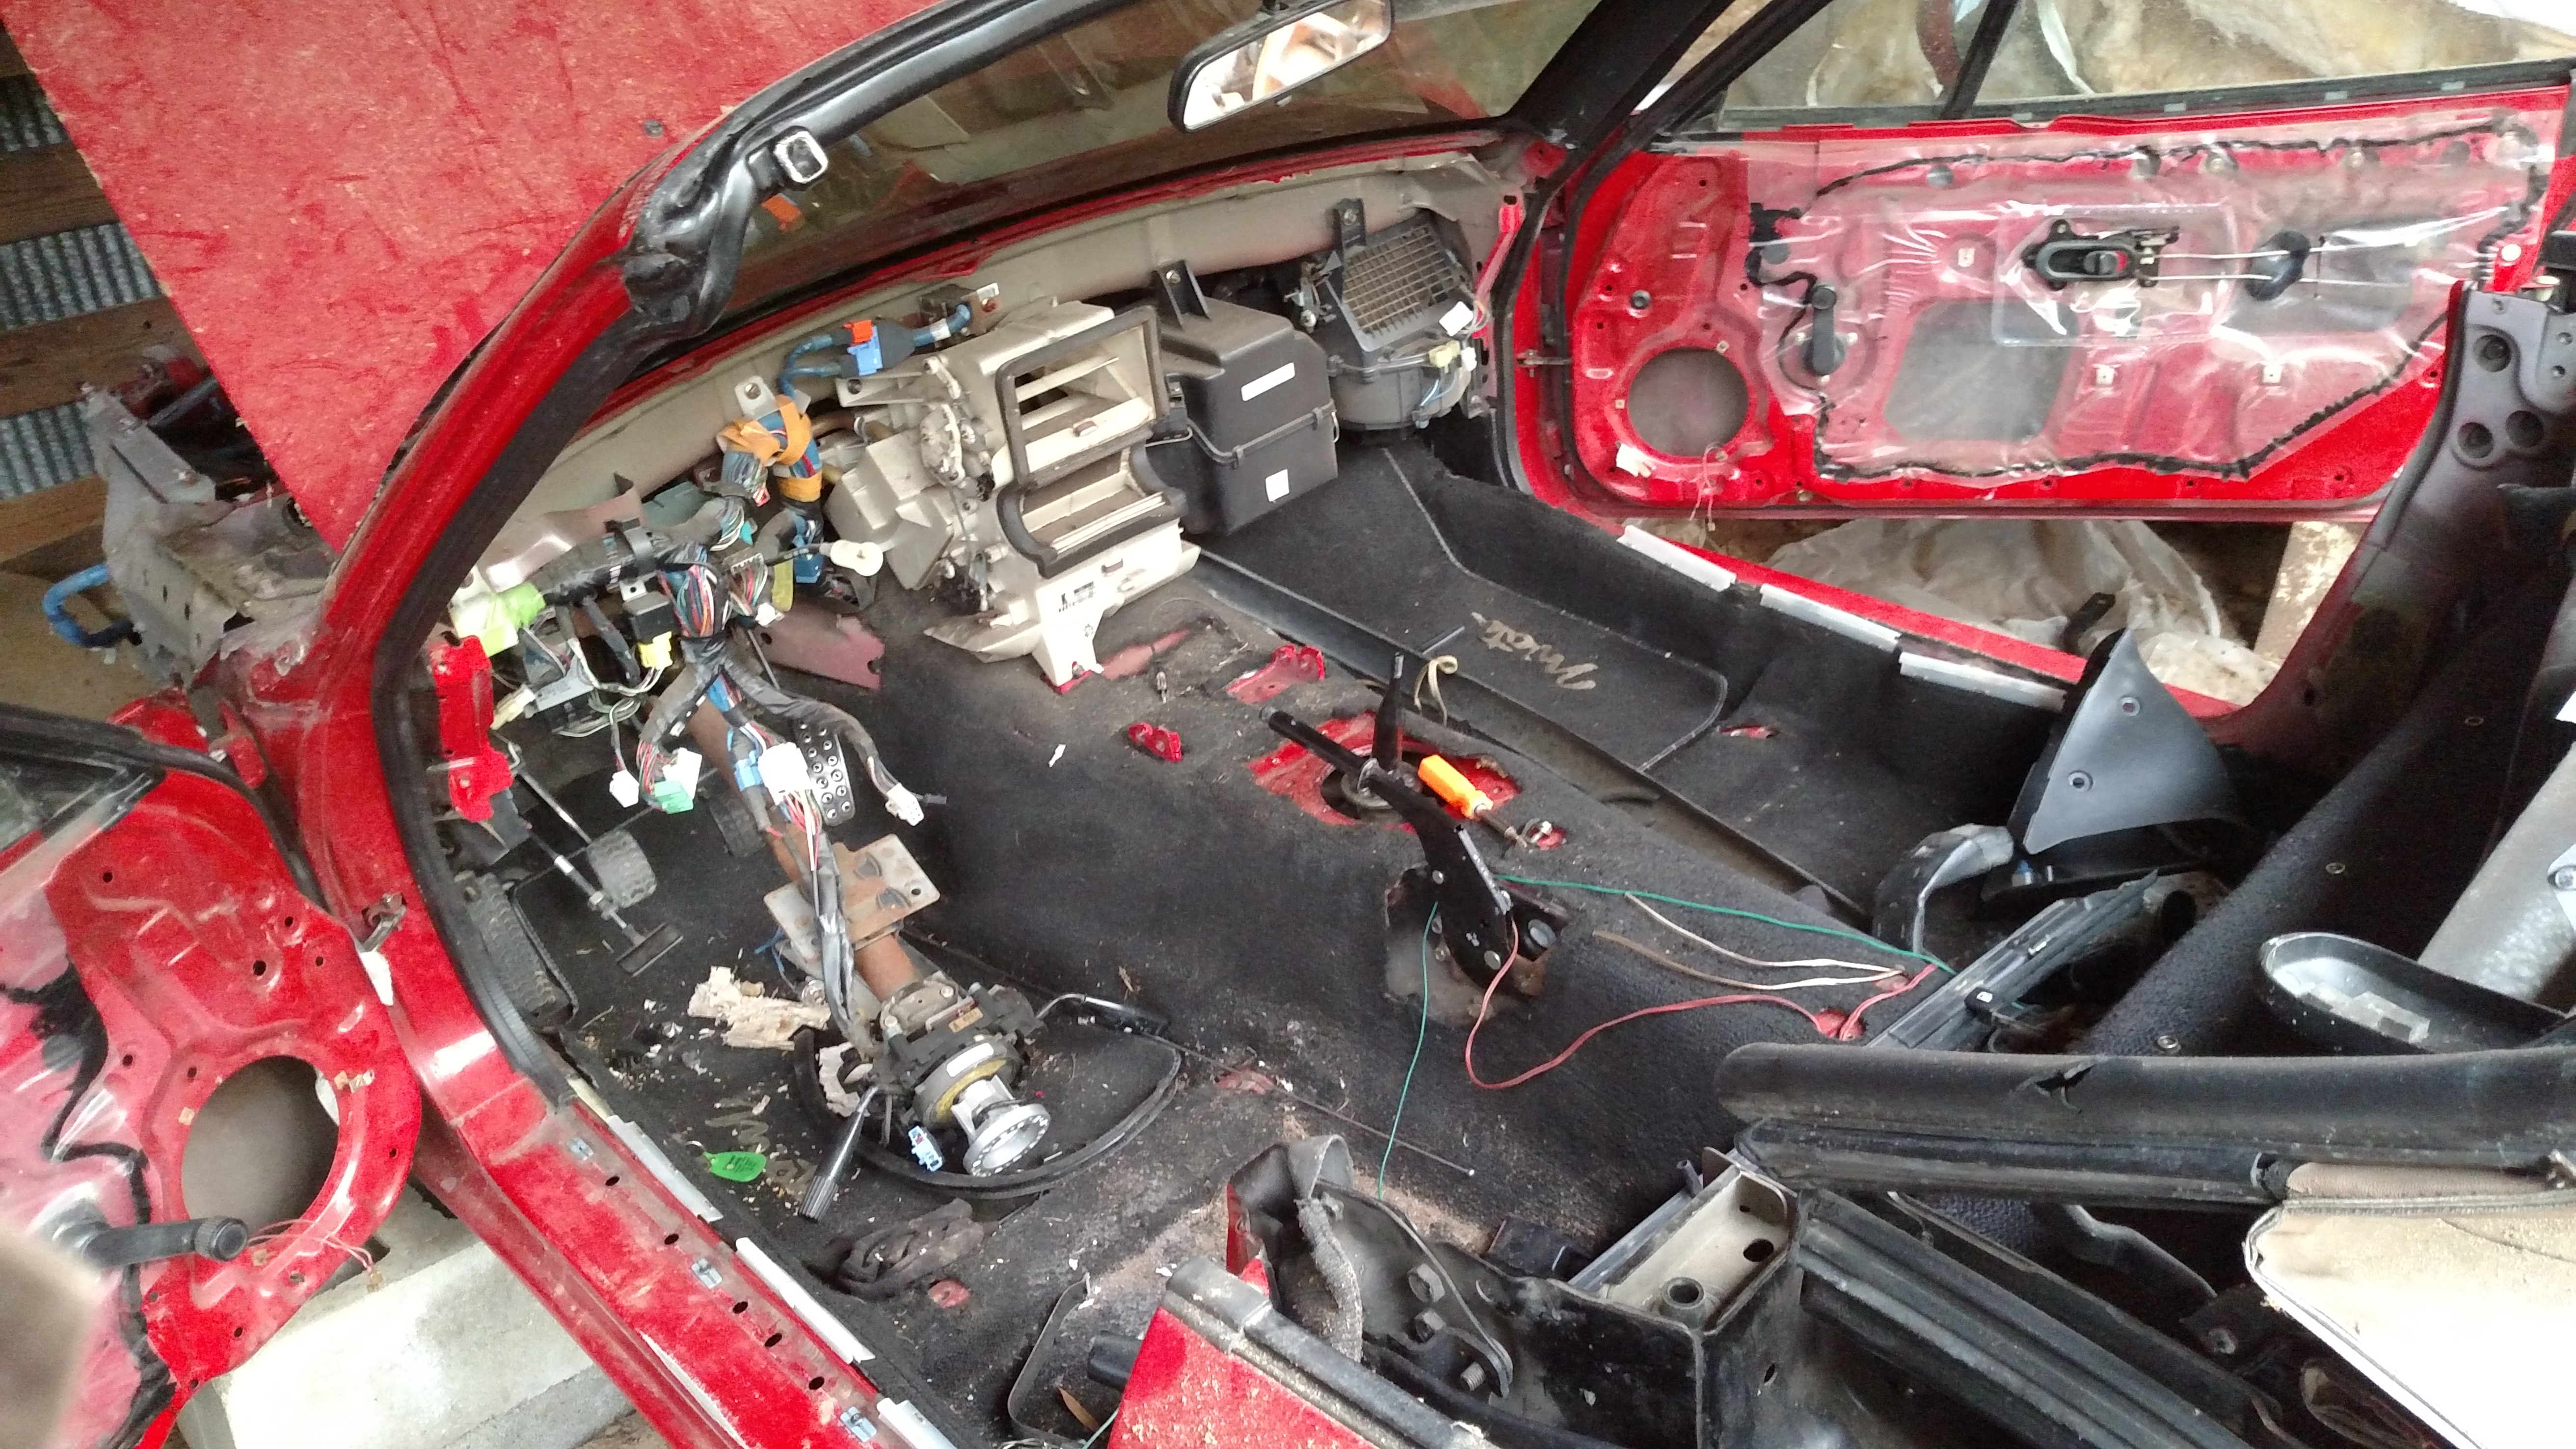
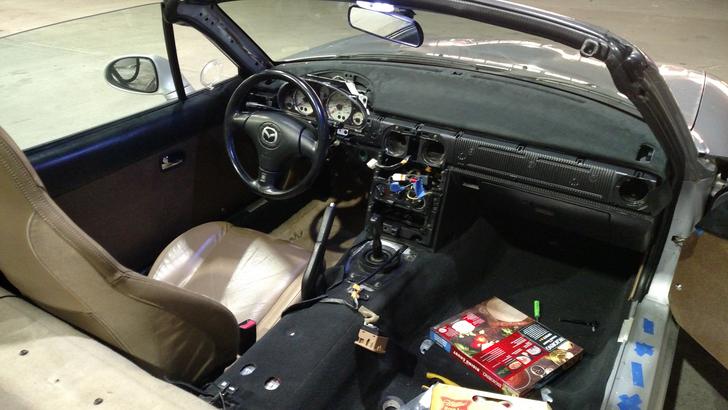
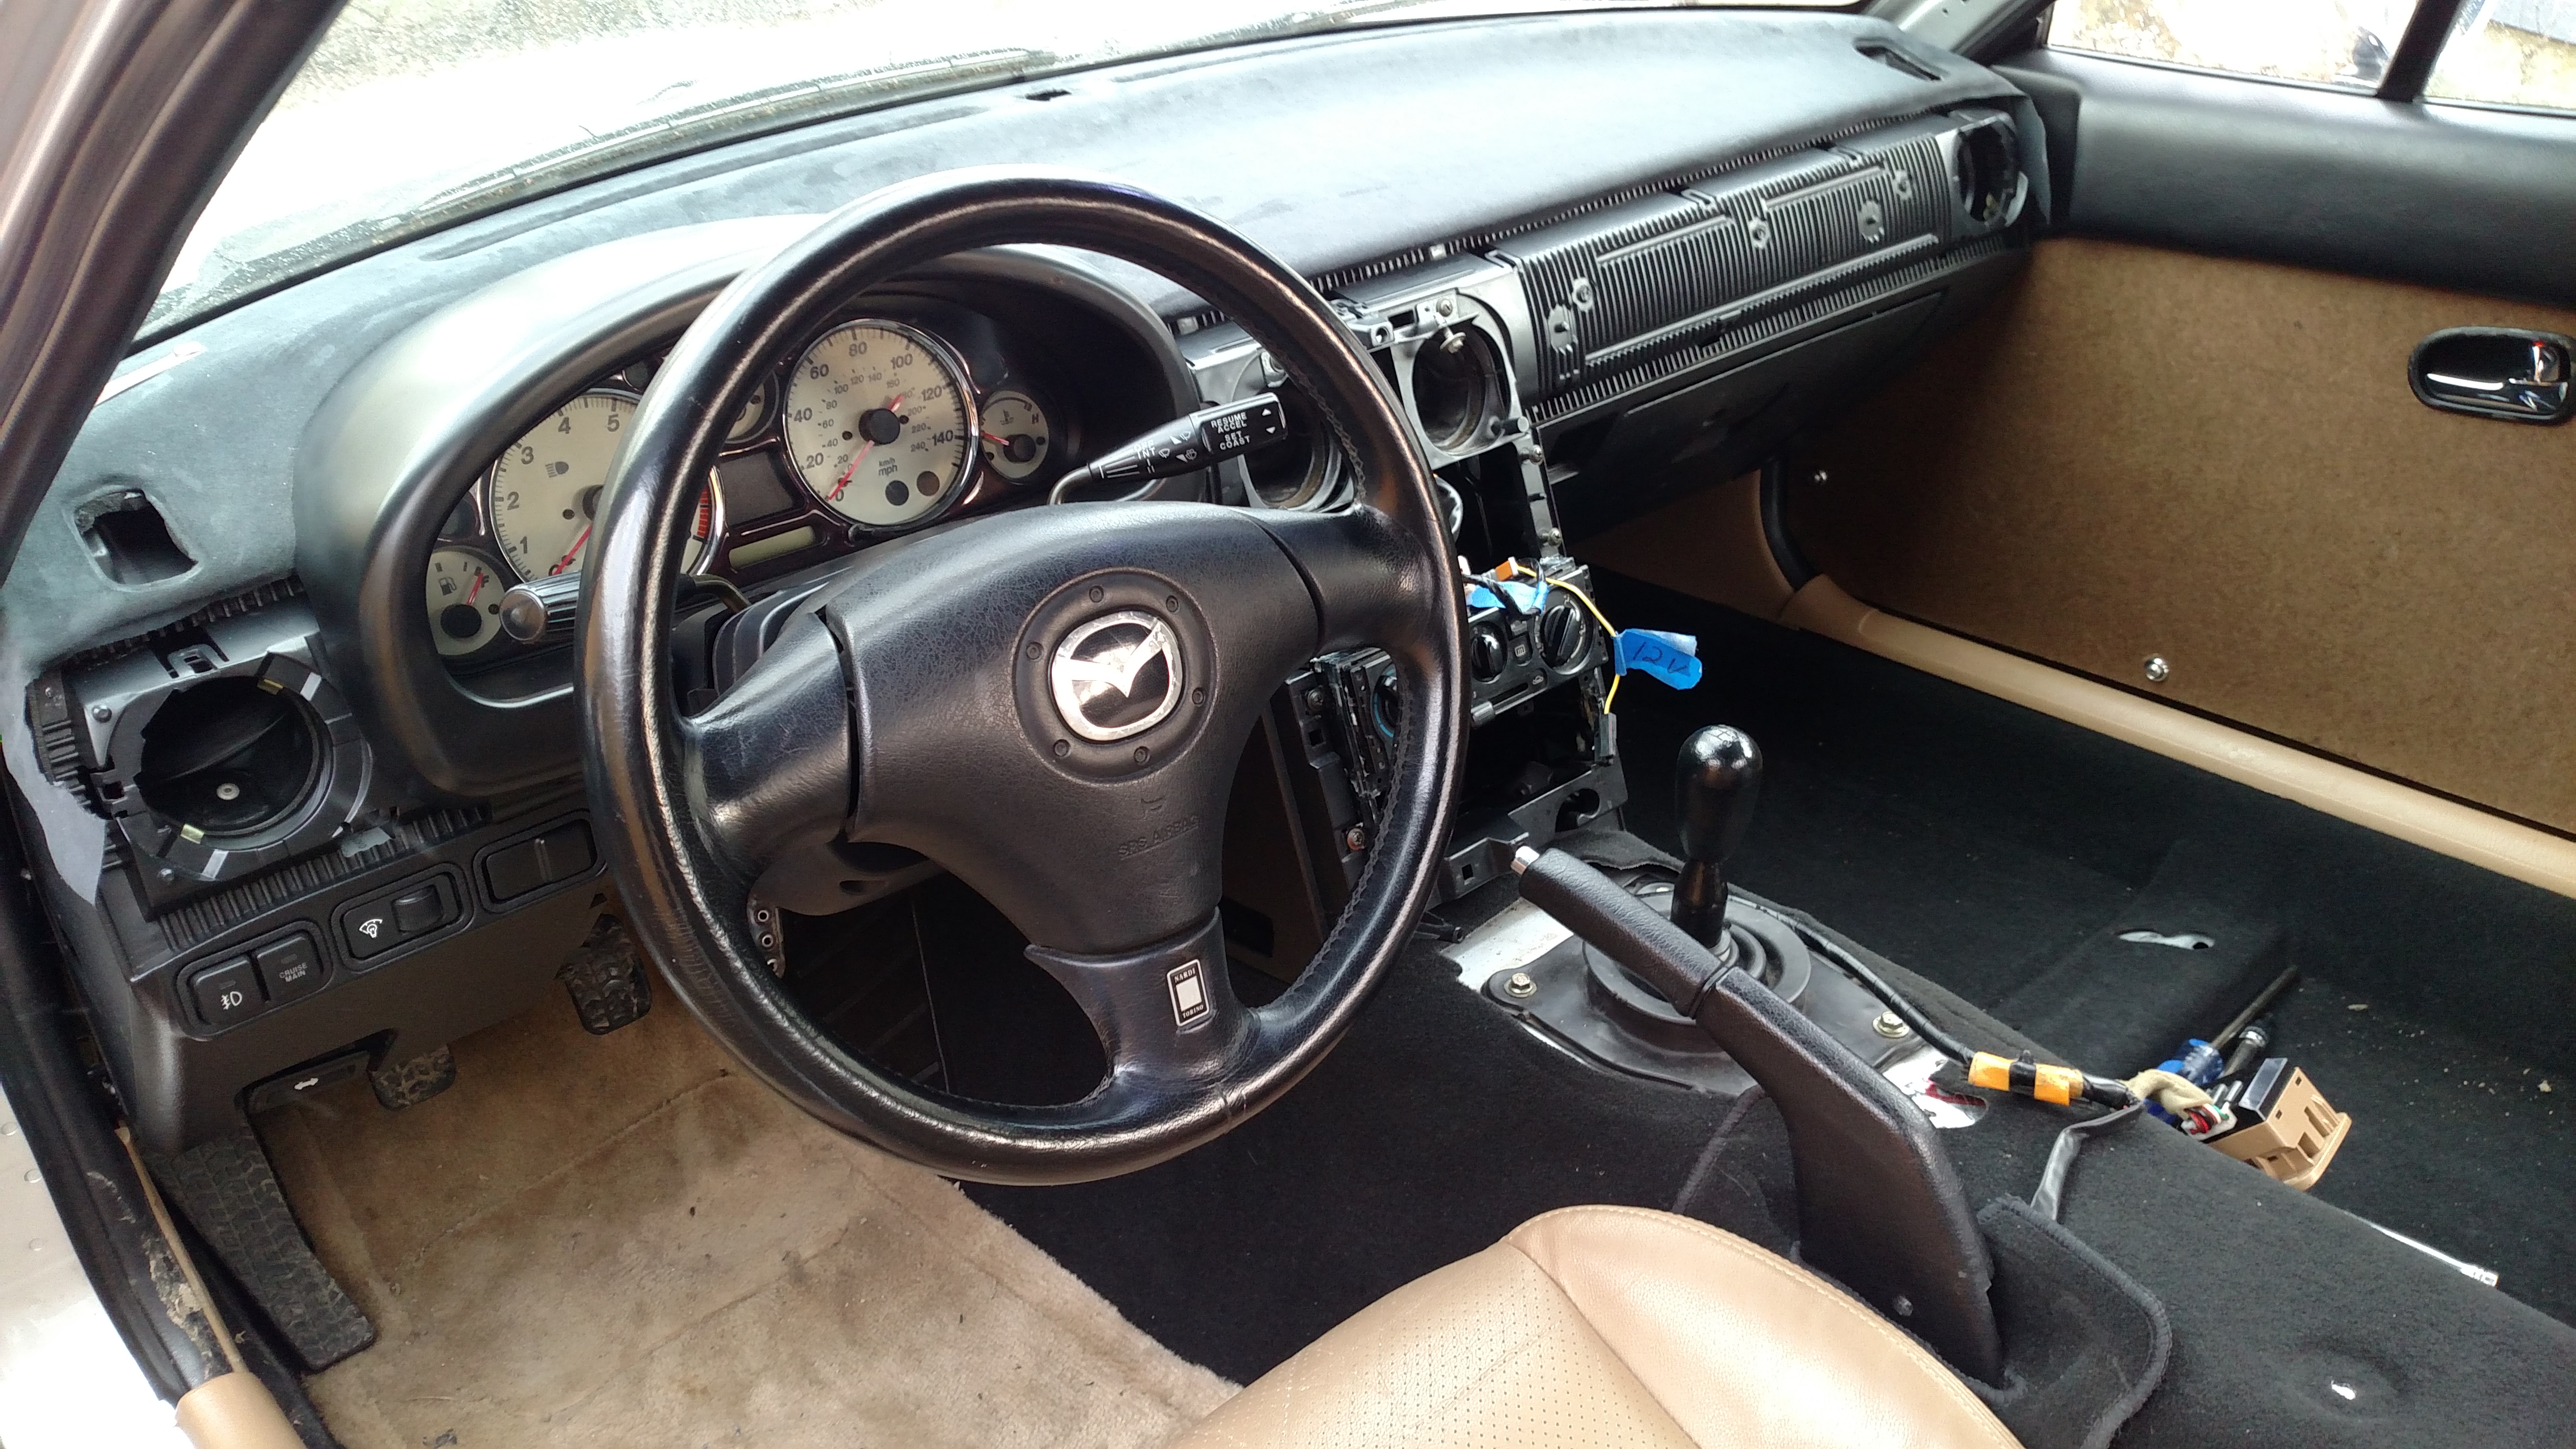
The interior is taken apart currently - the dash and dash wiring, carpet, seats, and basically whole interior are out. For some reason, I left the drivers window down, and now it won't go up. I'm not with the car right now, but it's gonna rain tomorrow and I need a quick fix that doesn't involve plastic sheeting and duct tape.
Is this a case of just needing to put the dash harness back in temporarily? Anyone ever manually raised a power window?
A tarp is more ghetto than a trash bag. But it turns out, having the ignition switch plugged in is important. Turns out I'm an idiot. I unplugged it to drop the steering column.
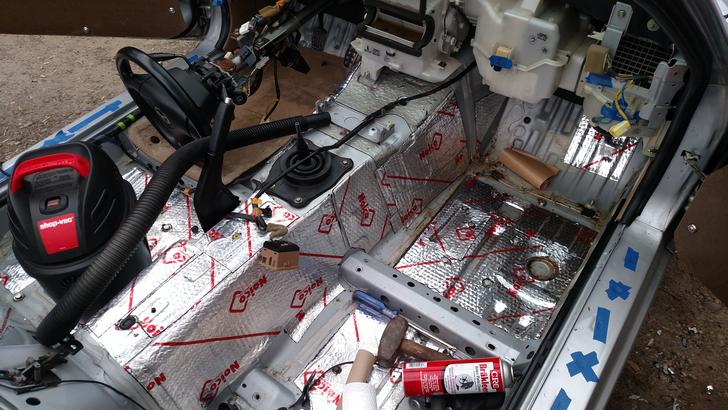
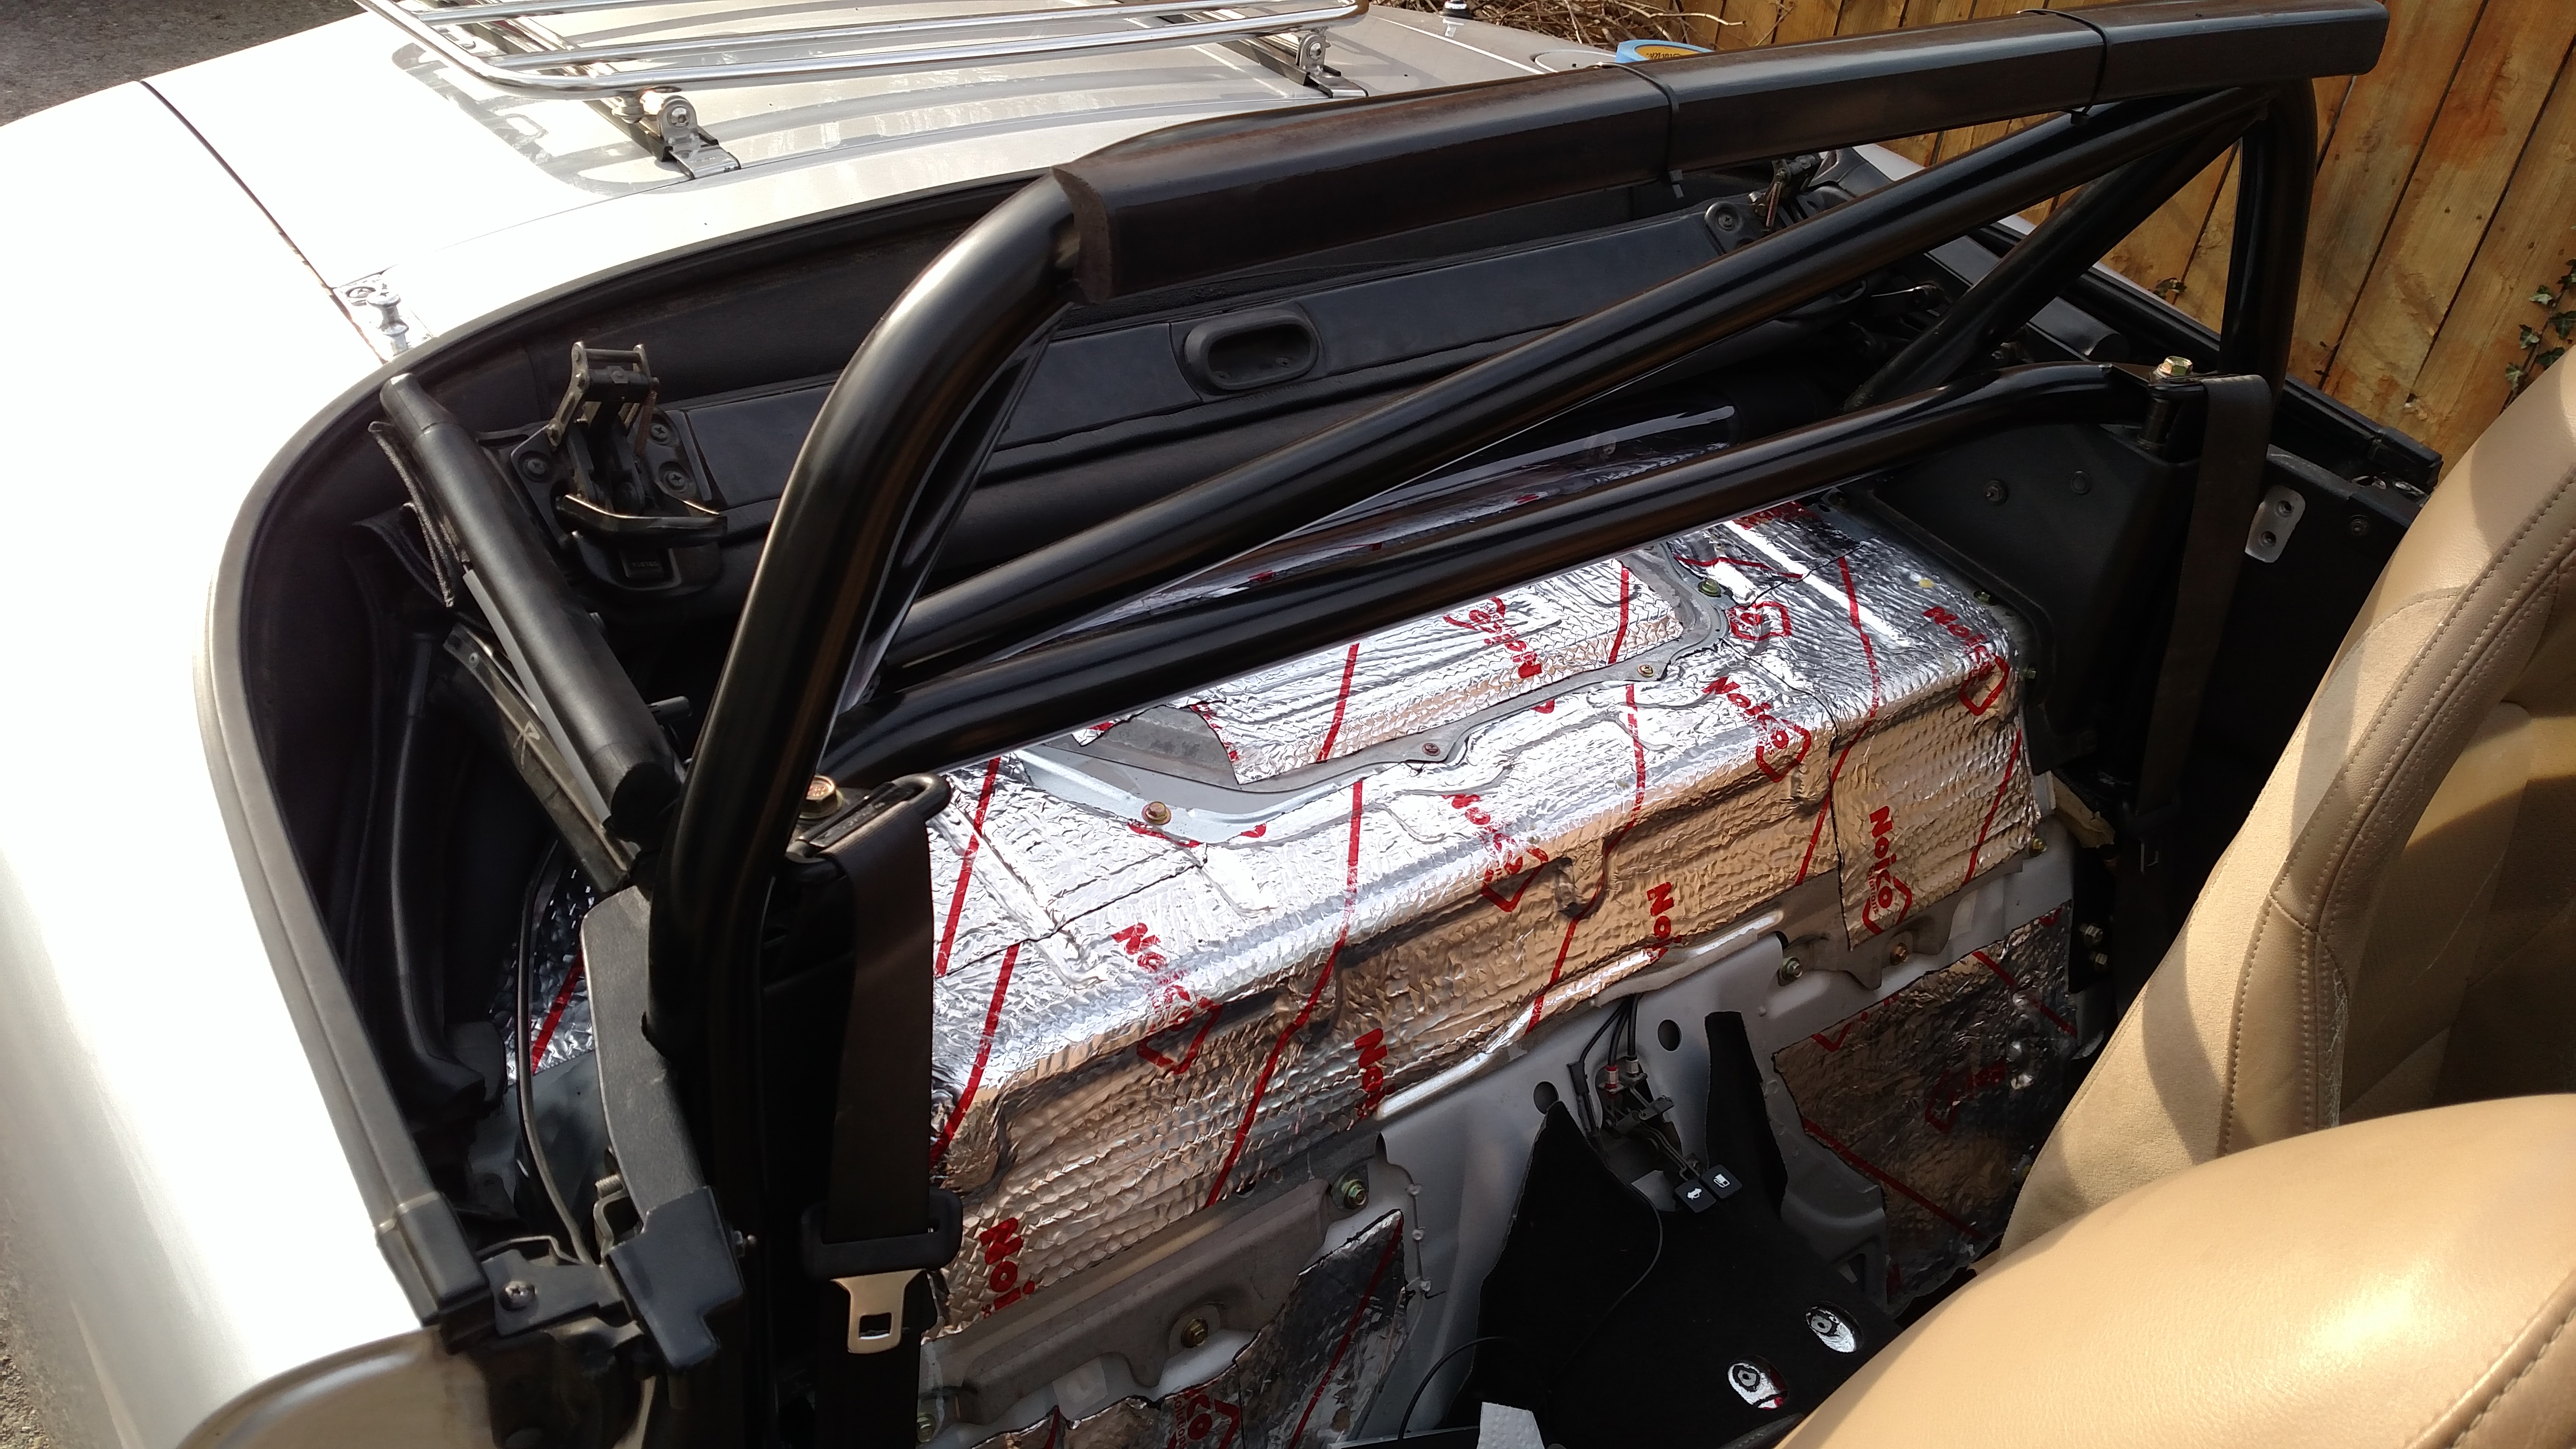
The FM frame rails are in, and I fixed their stupid mount location where they put the fuel line mounts on the lowest part of the car. They're now mounted directly to the floor pan. The interior is completely out and getting sound deadened with Noico 50mil dyanamat knockoff as the weather and work allows. It's been beautiful up here recently.
Got the interior out.
Got this bad boy test fitted.
Then took it back out for some Alcantara wrap.
Next steps are to figure out which AC controls I'm going to use. Probably gonna go with NA controls and make a jumper harness to make everything happy. I hate electrical work...
The weather was nice up here a few days back, so I planned the work, waiting for the weekend, then pounced. I pulled out the "old" dash and wasted no time in test fitting the NA's.
ohhhhhh yeaaaahhhh. This provided all the inspiration I needed to keep going.
I next got the interior stripped down, and you can see my work in progress NA style door cards. They're gonna get wrapped in something soon enough, but right now they're just bare particleboard
Then I installed some sound deadening. I used Noico 50mil sound deadening off amazon. It's not full coverage, but there are multiple layers installed in some places depending on how loud the panel reverberated when I hit it. This butyl stuff is apparently supposed to dampen panel vibrations, not be a do-all sound deadening. So I used it as such.
You can also see the frame rail bolts sticking through - they got straightened out and installed before any sound deadening.
Also, I love FM, but there is a HUGE DESIGN FLAW in the frame rails. As delivered, they want you to bolt the fuel and brake lines to the lowest point of the car, the bottom of the frame rail. I FIND THIS INCREDIBLY IDIOTIC. I bottomed out the old NA several times on my cross country trip with the metal hardlines installed as recommended, and the mounting bolts were ripped clean off. So at the very bottom of the car, all the way across the middle, the lines holding my TWO MOST CRITICAL FLUIDS TO KEEP CONTAINED were completely free floating.
I hate to write in all caps, but I feel this is a gross oversight and poor decision made in the name of installation convenience.
Yes, I was doing far from typical Miata stuff - crawling and dodging around decent sized rocks in national forests, parks, and camping sites. But if you're going to fiddle with these critical components, you need to think worst case scenarios.
If anything had have pulled them away after the mounts broke... If the lines had vibrated around and been abraded to failure... I could have watch my car burn in a puddle of its own fuel. Or gotten into an accident due to brake failure. Or get heavily injured in a accident due to brake failure, then become a well roasted kebab in my car.
Instead of following FM's instructions again, I fiddled around with the plastic and metal mounts for these lines and mounted them directly to the floor pan. I did this very close to the frame rail and floor, so they are tucked away as safely as stock, with room to vibrate and still not hit anything. FM really needs to provide a better solution to this issue.
I've gotten the floor pan, doors, rear bulkhead, and transmission tunnel all covered with sound deadening. I didn't want to further take apart the interior, so the firewall mounted stuff stayed in place.
Here we are in the process of gluing and wrapping the ultrasuede. I did it alone and a second set of hands would have made the job so much easier.
Then I moved the NB specific stuff over - The dash wiring harness was taped to the bar...
...and I decided to go with installing the NB HVAC controls in the stock radio location for now. I much prefer the NA setup, but this bolts in easily for now, requires no wiring modifications, and it slides right into a DIN slot.
With no AUX input and junky radio reception, I saw no reason to keep the Bose system at all. I think I'll replace the Bose system with two speakers and an amp to plug in my iPod. That NB dash is heavy!
Then there wasn't much else to do but install it. I referred to revlimiter's dash restoration and Jeffbucc's INCREDIBLE rebuild for a lot of ideas, inspiration, and guidance.
I sourced some black floor carpet in great condition out of a 1999. The parcel shelf carpet and rear bulkhead carpet will be out of an NA, got them for free off CL. My old cars carpet is really ratty, so I got some upgrades!
Obviously there's a lot still left to do, but they can now be taken on as small after work projects rather then roadblocks to moving forward.
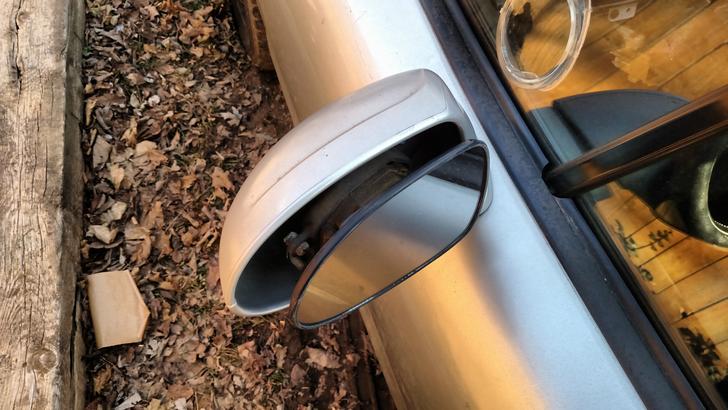
The driver side mirror cover was horribly broken and rattled all the time - super annoying! And, with the NA dash install I'd lose the location for my power mirror adjustment switch. I couldn't find a replacement mirror at a price I liked, so I decided to go aftermarket.
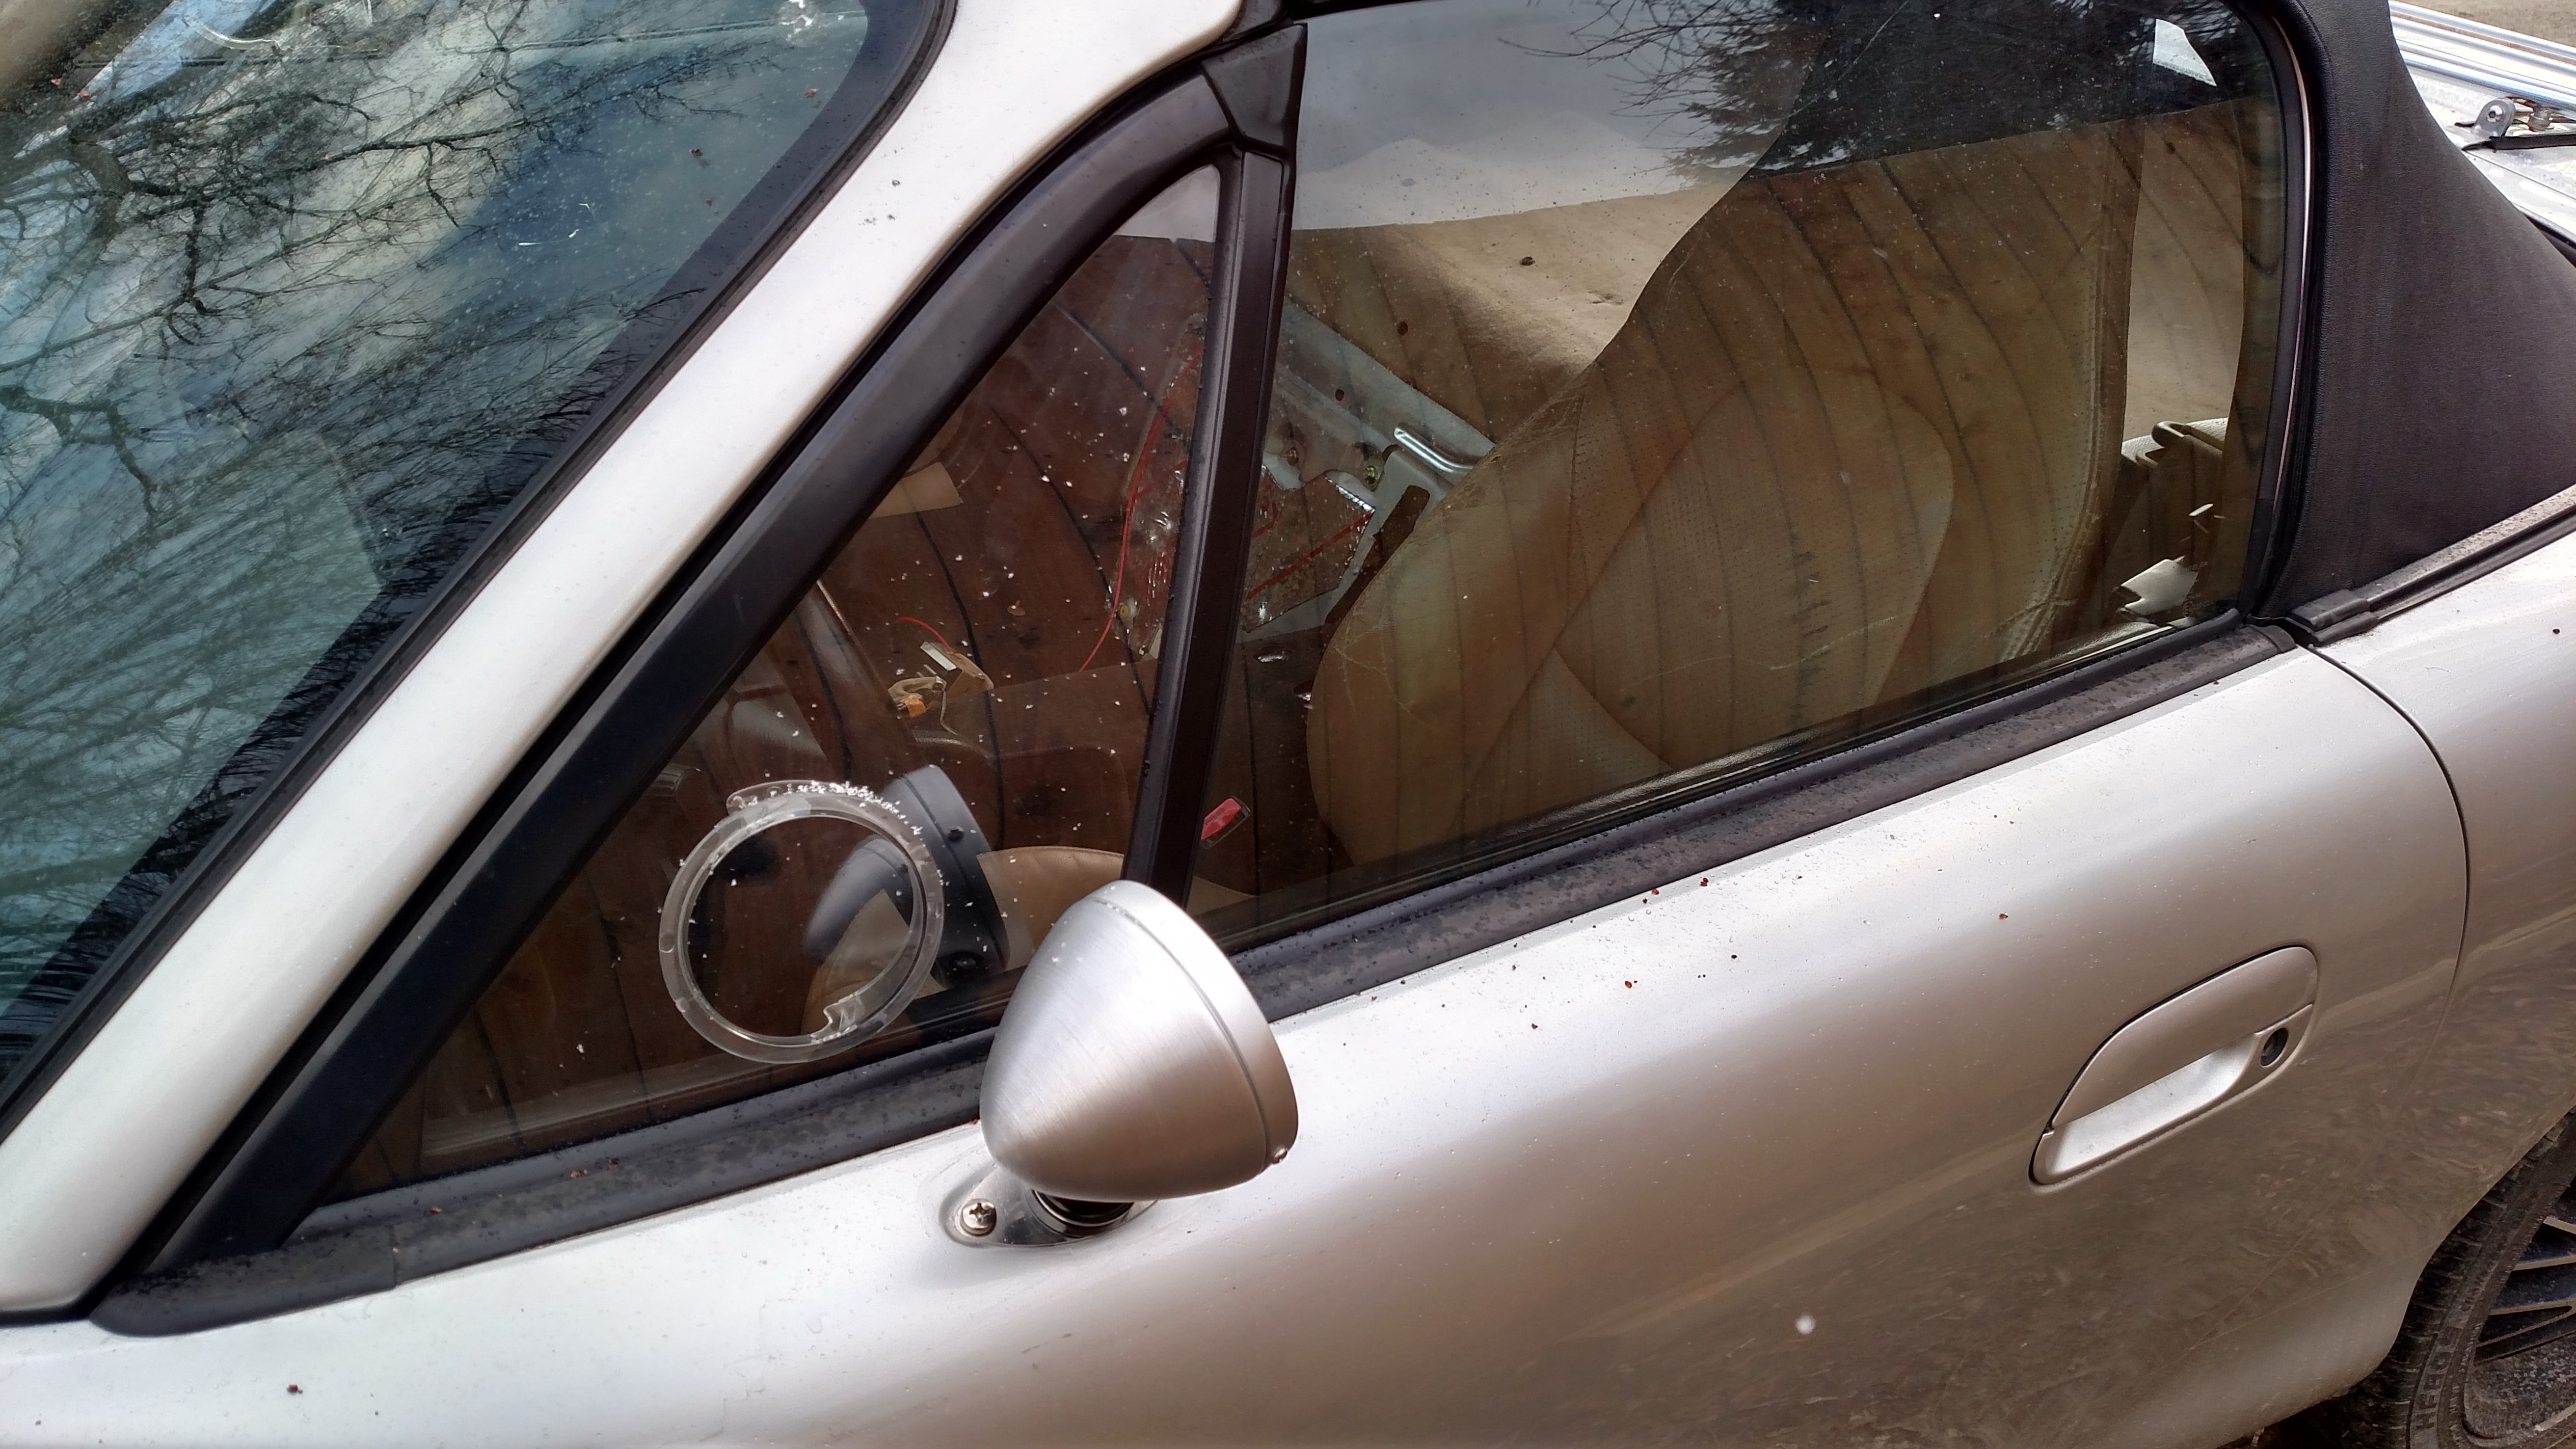
Now this is what you see when you walk up to the car. Raydyot replica mirrors from Moss, and Advance Autosports vent windows on both sides. I'm probably one of the first with the NB mirror kit installed, they weren't for sale until last week.
And once you open the door...
I've got lots more to do to finish it up, but I'm driving around with a 1.6 dash installed in an NB. No warning lights on the dash, and other than my completely absent sound system, everything works. I picked up a new Rspeed gauge hood since my old one was shattered in the accident.
In case anyone wants to follow along at home, I've had very few issues getting everything to fit.
Nonexistant wiring harness mounting points. Things like the immobilizer and keyless entry box have nowhere to hang on, so I'm slowly taping and zip-tying them in place to prevent rattles.
Some trimming needed to fit the NB gauge cluster in the NA dash. The bolt locations are identical, there is just some plastic parts that don't line up. I ended up trimming a little bit off of both.
Some trimming needed to the NA plastic steering column cover to fit to the NB column.
Neither HVAC controls will be a drop in fit. You need to either do some rewiring to adapt the NA controls to the NB wiring harness, or create a DIN slot to mount the NB controls in the radio slot on an early 1.6. Luckily my old car came with a terrible stereo installed so I already had this bracket. The slider cables are functionally identical for both. Some slight plastic trimming is required to fit the NB controls behind the 1.6 tombstone. Eventually, I'd like to try installing the NA controls, but this was the quicker option.
Window and hazard switch wiring. The wire splicing required is well documented from people doing the reverse of this swap, I just havent done it yet.
Honestly, if you don't want to do anything other than throw the dash in as is, this is a super simple project. Most of my time was spent on fixing broken bits and the alcantara wrap.
Next things are installing new motor mounts, installing fresh tires and the new wheels, maybe welding up some fender braces, and obviously finishing up the interior. I need to get some mechanical stuff done, all this interior work and appearance mods have me feeling quite the swagster. Like one of those form>function guys. Ugh. Hopefully... I'll get a rollbar ordered and be hitting the track this spring!
Well, stuff has happened. Most importantly in regards to this post, I got internet and moved to a place with a garage.
Since my old NA had manual windows, I needed to find a window switch. I came across a good deal on some RevLimiter window switches and plunked down the cash. The cast plastic bracket is clearly based on a stock part... but whatever material it was cast in warped pretty badly.
I had the block off plate from my old car, so I cut that up and replaced the RevLimiter bracket with it. After some careful trimming, they sit almost perfectly flush now. Once I get a matching pigtail to splice into the NB wire harness, I'll have a center console again.
Oooooo... Blackbird Fabworx NB Single Diagonal roll bar in satin black, grey sticker for a little less contrast.
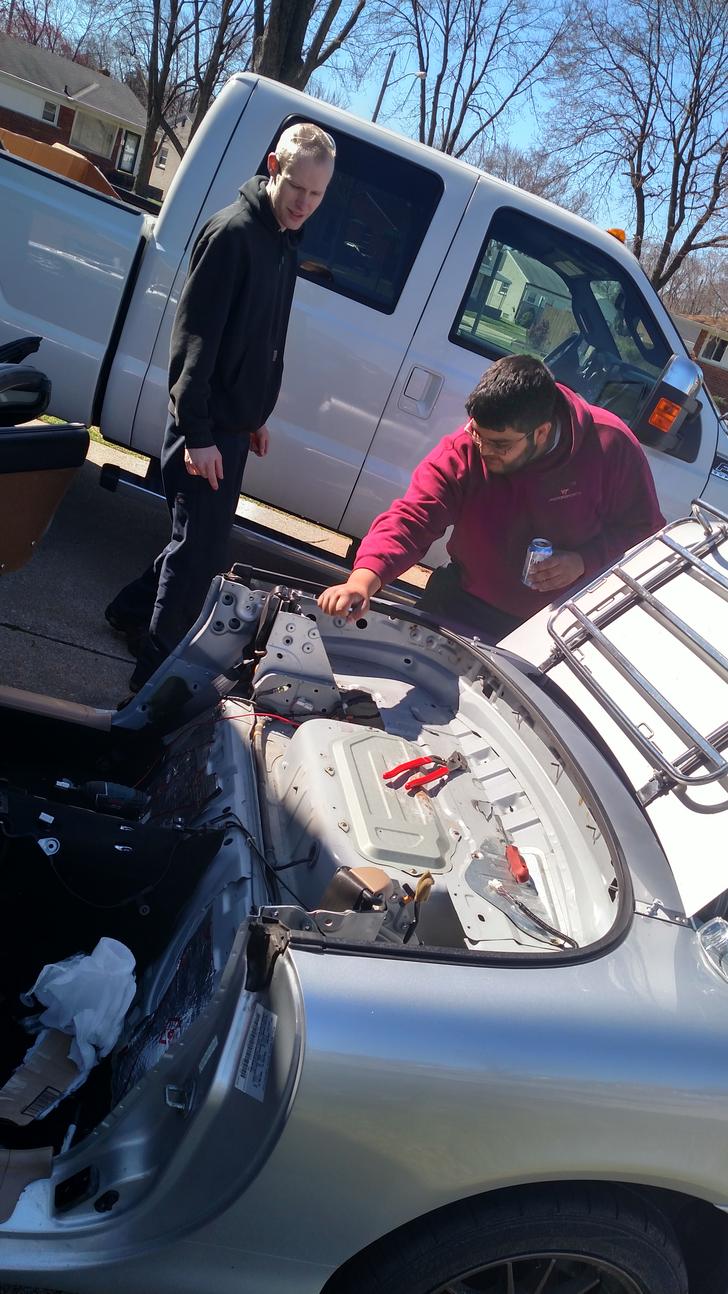
Teamwork on the install.
We put in a lot of effort to cut as little metal as possible. Keeps sound out, looks OEM. None of that "cut a 6" strip out of your car" nonsense.
Finished product! I took the time to apply sound deadening on the parcel shelf and in the trunk spare tire well. It's so much nicer on the freeway, especially with the hardtop in place. With some gasketing to cut down on air leakage, it's going to be much quieter in there. So nice.
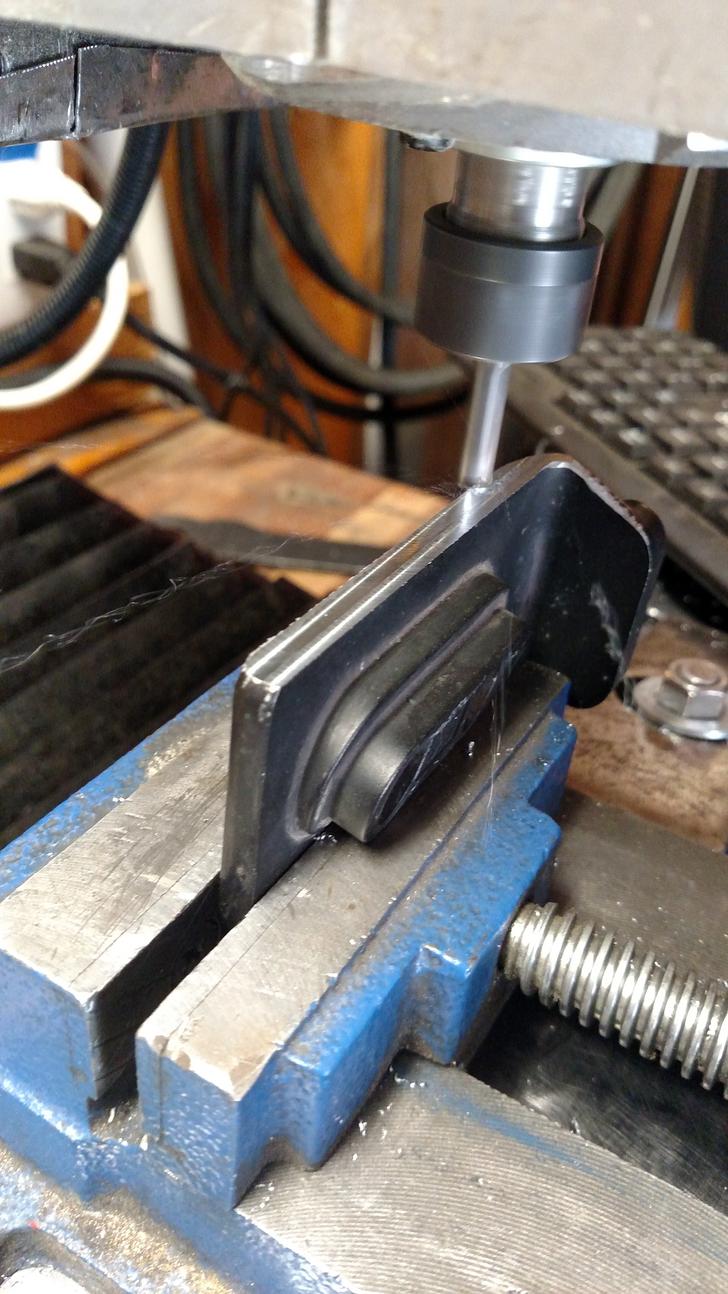
I was somewhat disappointed to find the hardtop side strikers wouldn't clear the roll bar. I got tired of toiling away with an angle grinder, so my roommate custom made a CNC to remove a bit more material. Seemed faster.
The hardtop fits now, but it's a pain in the diddly to install because the clearances are so tight to the roll bar. The roll bar is a pain - the soft top takes forever now, seatbelts don't retract as well, visibility is cut down. It looks cool though, gotta admit, and it's very well made. I'm so glad I didn't get the GT3 double diagonal, that would cut down my visibility far too much.
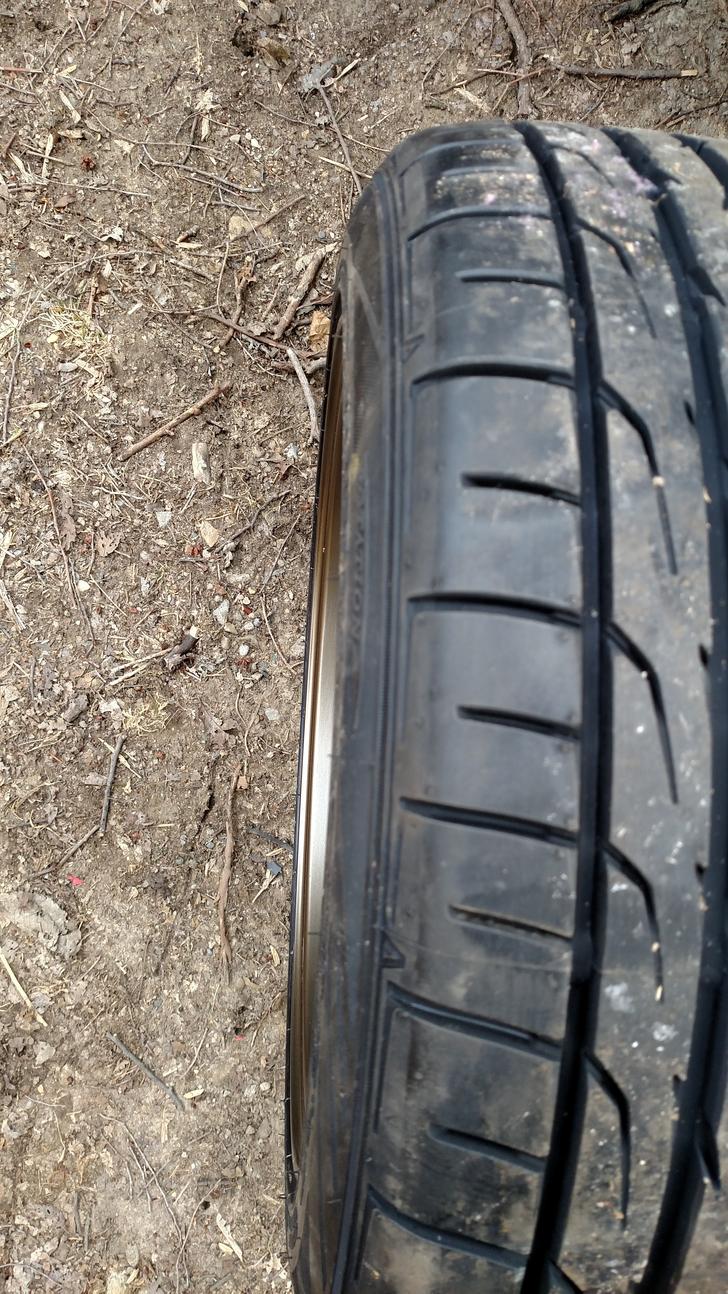
So this is what a 195/50R15 Dunlop Direzza looks like on a 7.5" wheel. I didn't think they'd have that much stretch, might have to go for 205s next time.
She's got a name now - Rosalita.
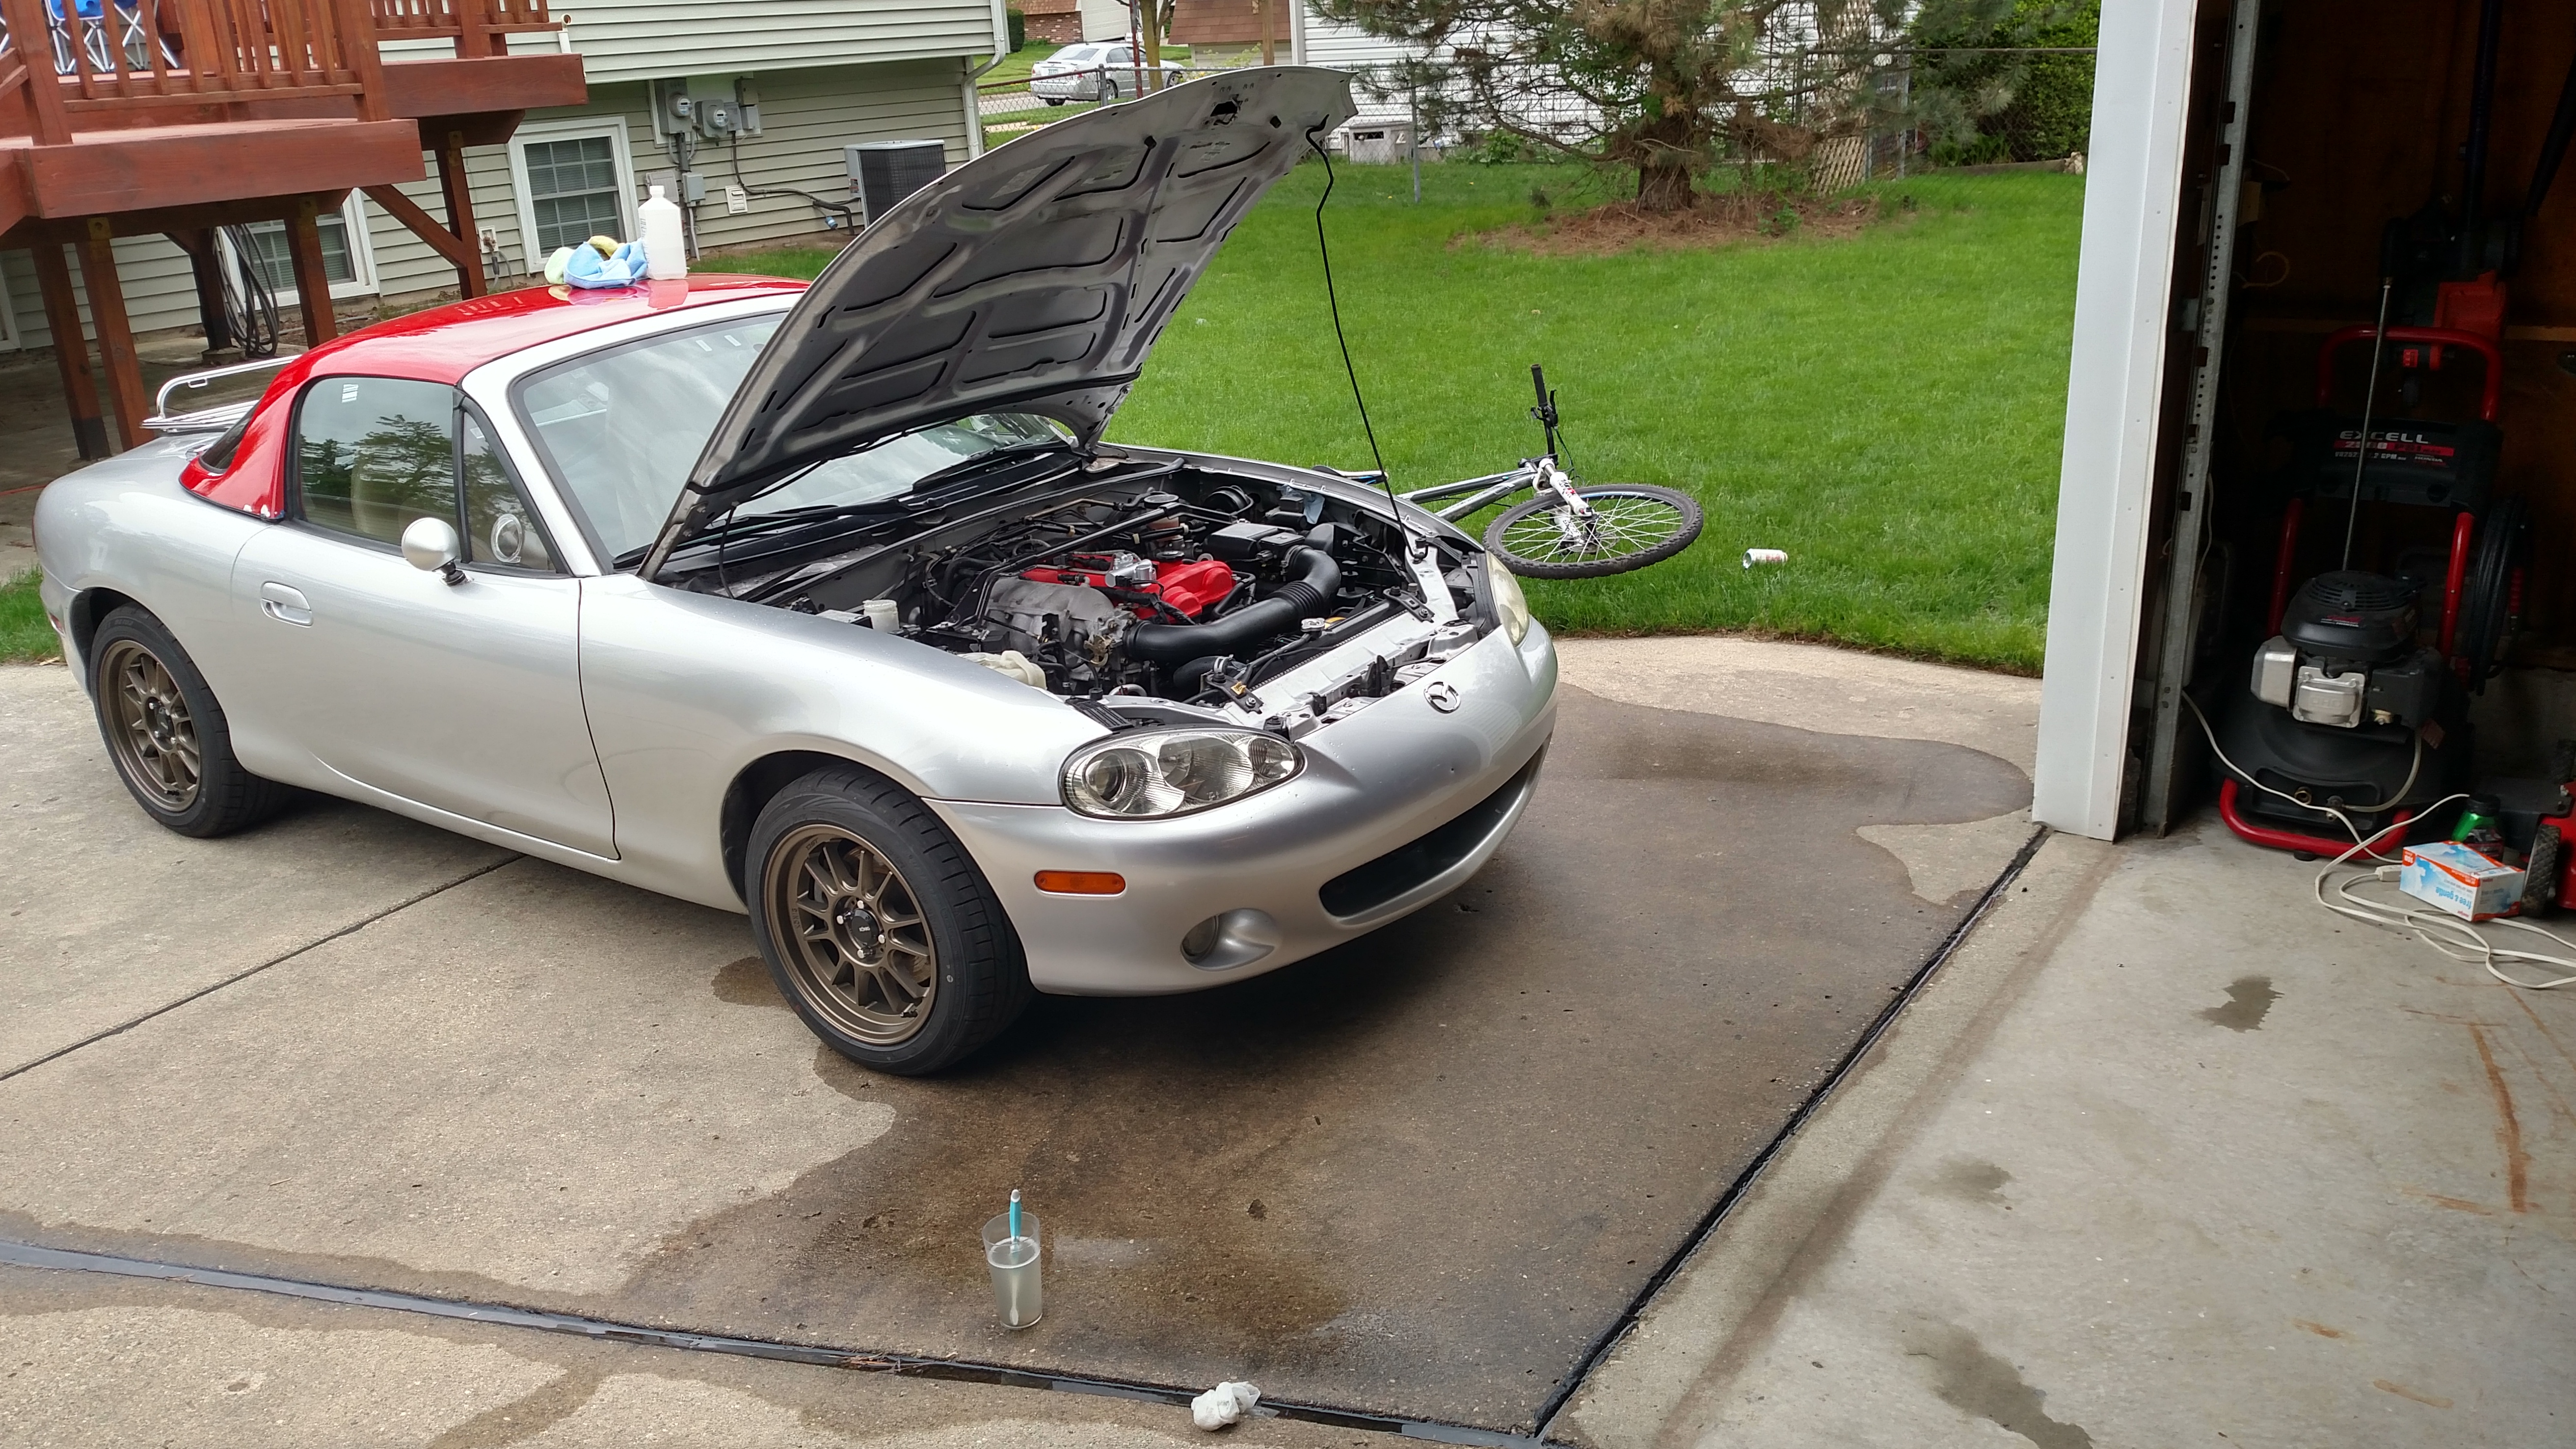
So here she sits, just outside her new home. No more gravel driveway! I celebrated by giving Rosie her first bath in the 15 months I've owned her. And with this garage thing, I can take my time polishing and waxing. It's nice.
Next steps - I replaced the motor mounts without separating the exhaust, and now it's got an absolutely awful vibration when cold at low RPM. Something is fucky in there, gotta fix that.
I am confused at your claim that the GT3 roll bar would reduce visibility. Moti made that specifically to INCREASE rear vision. I have a HD double diagonal roll bar and I have to duck my head a large amount to see out the back because they meet right in my line of sight. The GT3 meets below the line of sight because of the X shape.
I got 15x7.5" wheels because I figured I'd be able to go between 195 and 205 section tires. I think it worked out okay!
The GT3 may increase visibility over a Hard Dog style double diagonal, it's still a bar in your line of sight if you look over your shoulder. I do that a lot. A while back I almost bought a new in wrapper NA GT3 in silver. With my NA top and silver car, it would have been perfect to most people. I'm glad I ordered one that was specifically what I wanted though.
More tinkertoys off the List of Craig. That guy really helps me out. A local guy was parting out his turbo track car after three events and two blown engines. Said he was moving on to, you guessed it, a C5Z. He gave me a great deal on some stuff.
(5) 15x9 Advanti Storm S1s including one that was new in box, and lugnuts
(4) 225/45ZR15 Rival S with 7/32s tread
Racing Beat 1.125" tubular FARB and endlinks
5X Racing 14mm RARB and endlinks
36mm Koyo radiator
AEM wideband o2 sensor
Now comes the question of whether to install these things now, or just get on track ASAP. Leaning towards getting an alignment and doing the latter.
I think I did pretty well - I got it all for well below than my 50% "good deal" threshold on used parts, not including the life left in the tires.
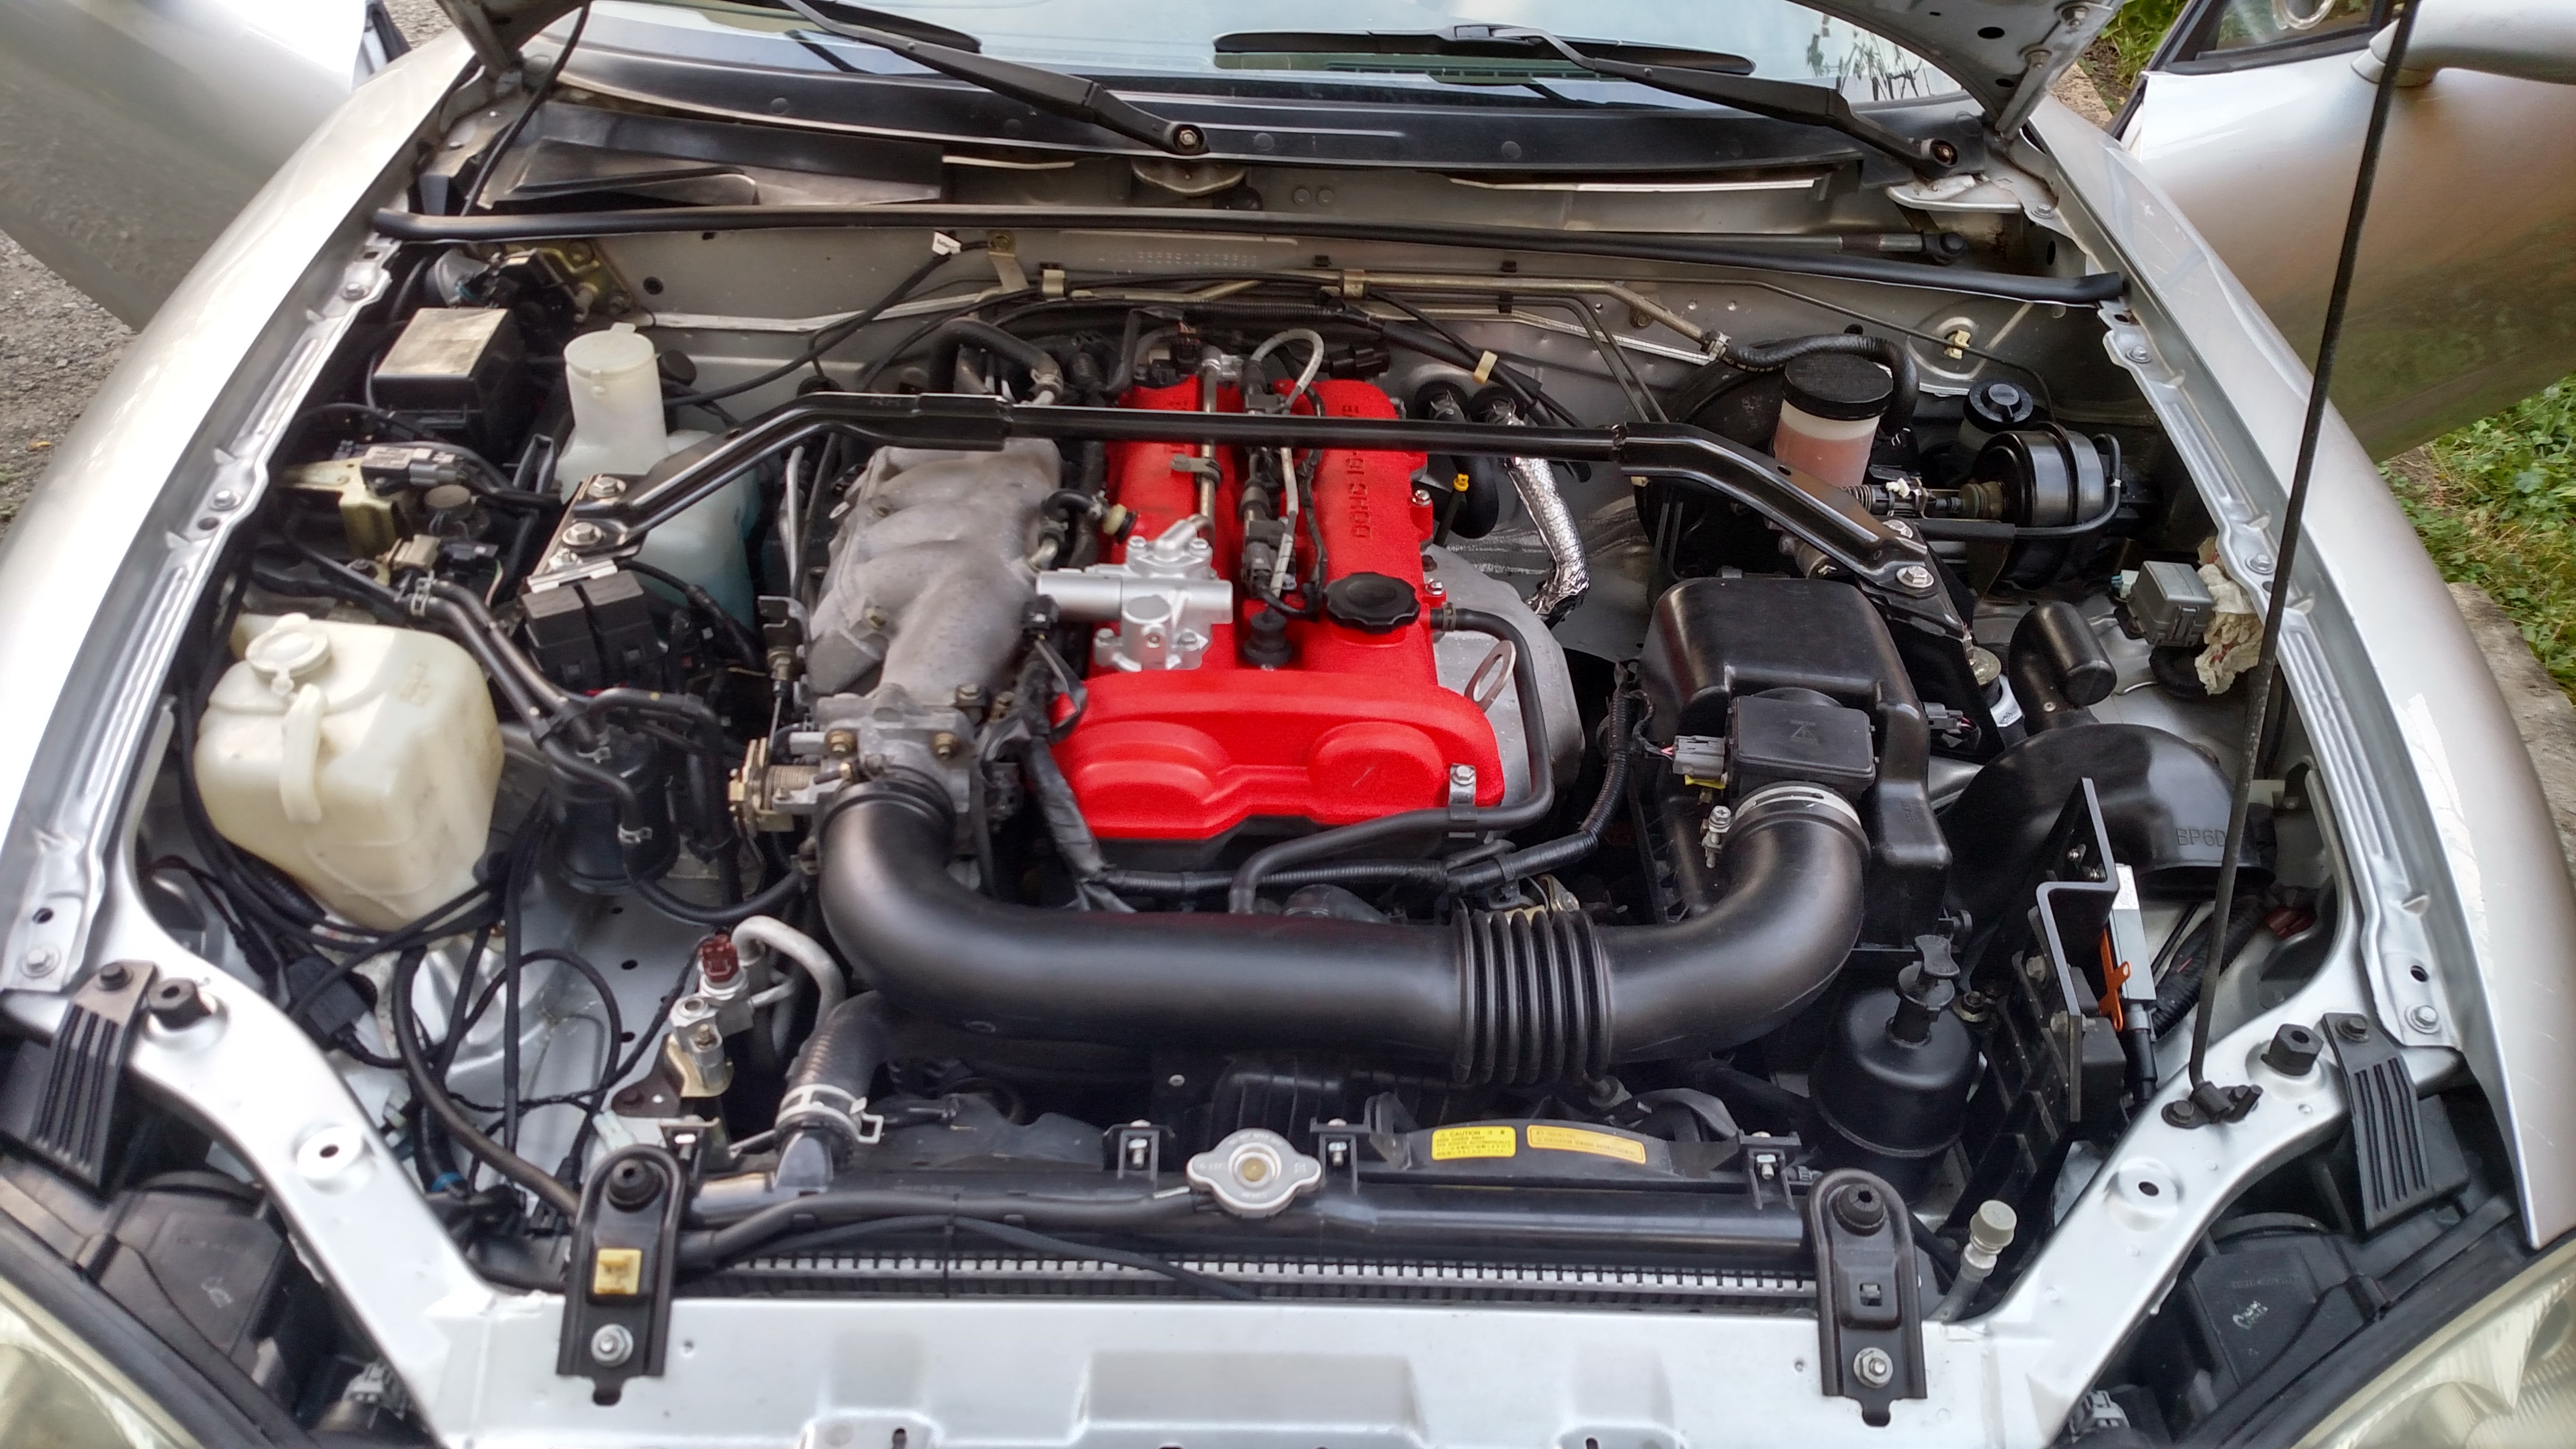
I've installed the radiator because it's a no-brainer. It seems everyone has a different experience with the Koyos. I had to bend the AC mounting brackets up top, bend an AC line on the bottom, and slot the radiator brackets on top to make it fit with no touching. Changed that dumb 180* thermostat out for a 195 and the coolant temp is rock steady now.
Also bled the brakes and clutch, changed the oil, and cleaned the engine bay real good like.
Anyone know of a good alignment shop in the Ann Arbor area? Hoping to hit the track for the first time this weekend!


 1
1