'90 Build: Not Really Faster, Just Less Slow
 06-19-2015, 04:04 PM
#61
SadFab CEO

iTrader: (3)
Join Date: Sep 2012
Location: your mom's house phoenix, AZ
Posts: 4,560
Total Cats: 1,142
<p>yea i dont get it. you shouldnt have any issues with either wire. the only time ive had the wire burn back to the tip is when the wire feed was too slow, or the mechanism wasnt feeding wire smoothly for whatever reason.</p>

Reply
 0
0

0
06-24-2015, 02:04 PM
#63
Junior Member
Thread Starter
iTrader: (1)

Join Date: Oct 2011
Location: New Hampshire
Posts: 412
Total Cats: 78
Been busy preparing for travel but I snuck in a short drive the other night after messing with my CLT-based rev limits. As soon as I pulled out of the driveway the car started stumbling all over itself and my tach kept dying. It took me longer than it probably should have to realize that I fucked up the CLT table with F units instead of C and the car was cutting spark and fuel pretty hard 
Reply
0
0
08-23-2015, 03:12 PM
#64
Junior Member
Thread Starter
iTrader: (1)
Join Date: Oct 2011
Location: New Hampshire
Posts: 412
Total Cats: 78
Progress!
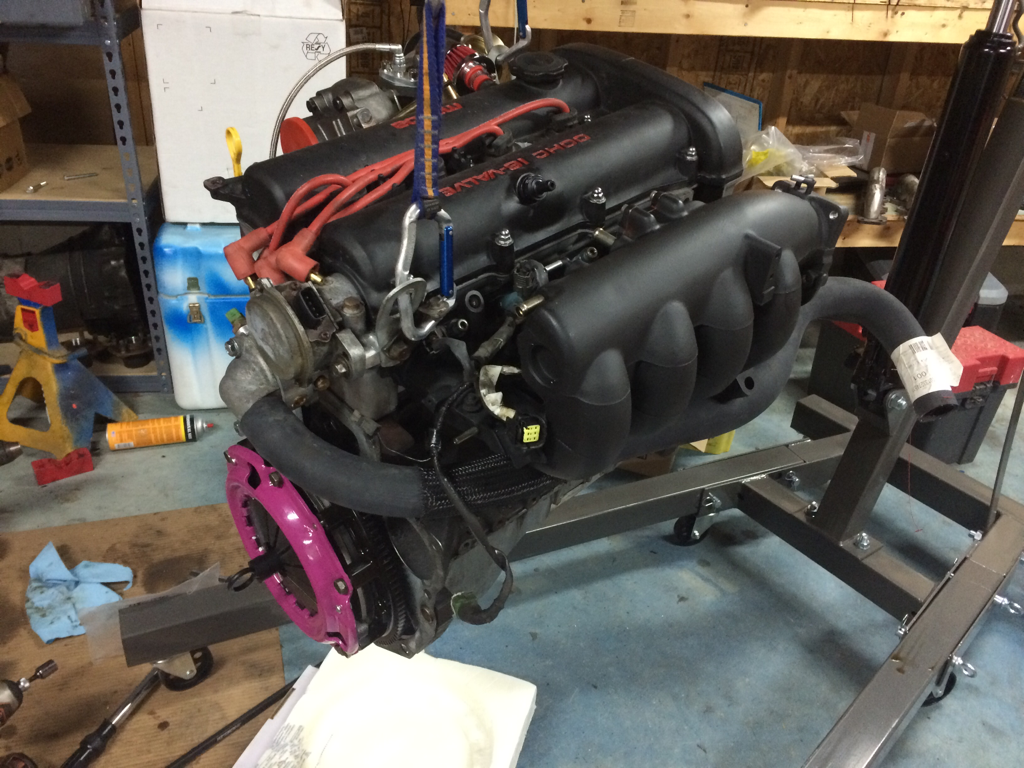
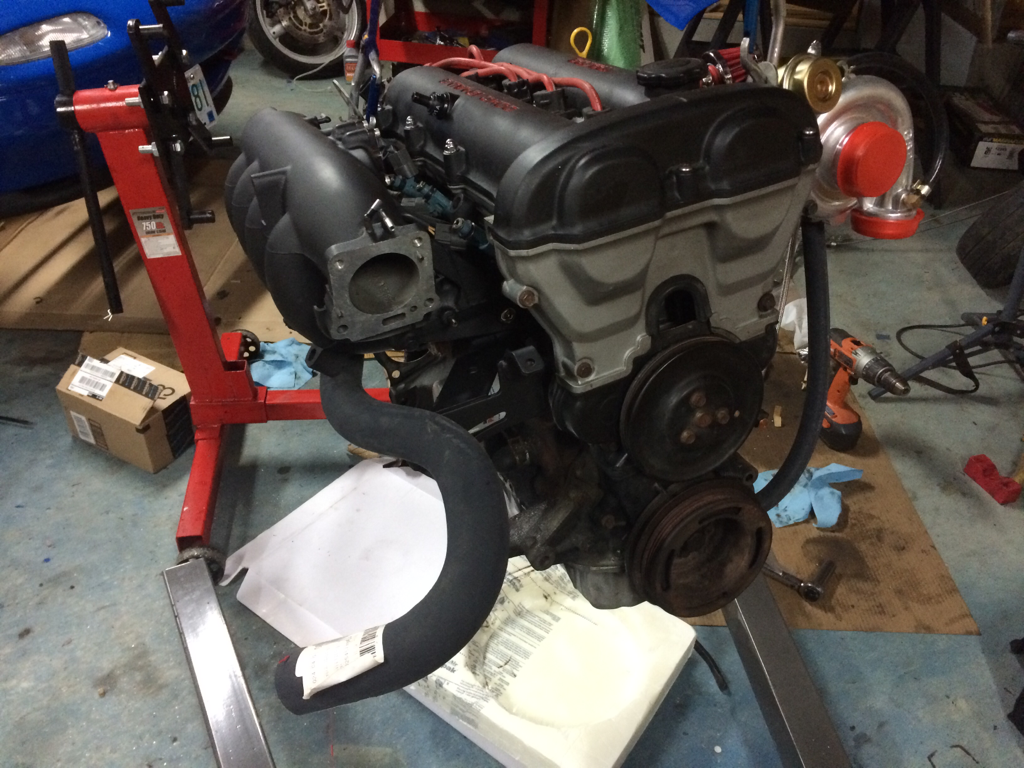
Got the motor and tranny out of my car in three hours. Not bad for my first time and I didn't even break anything.
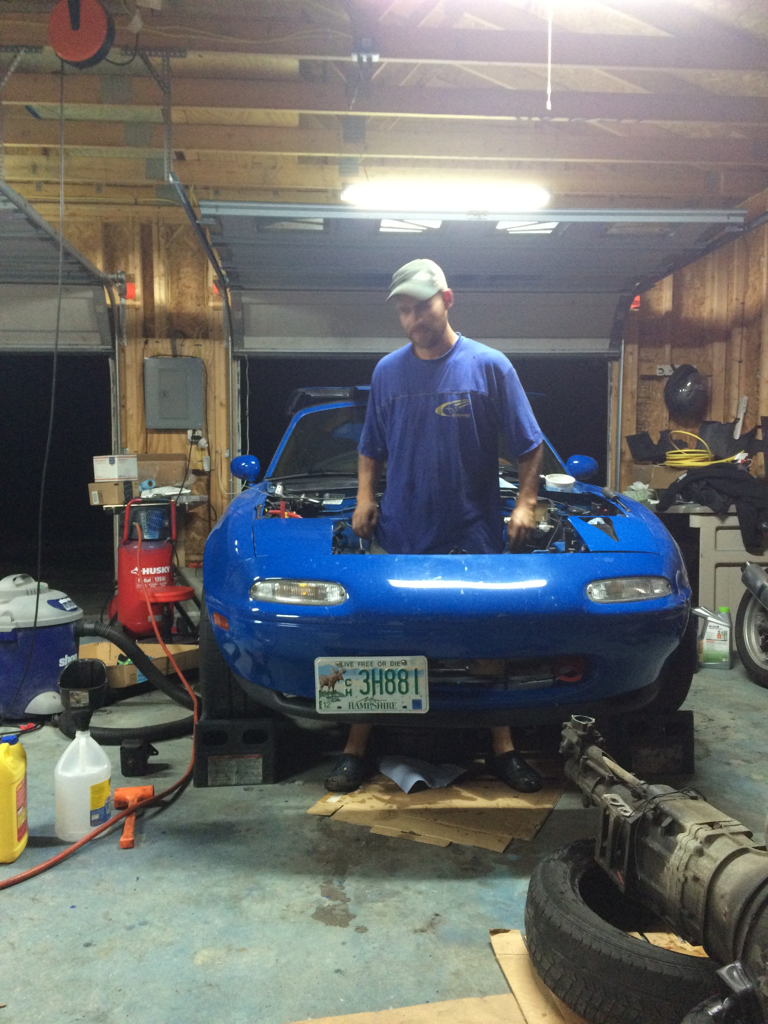
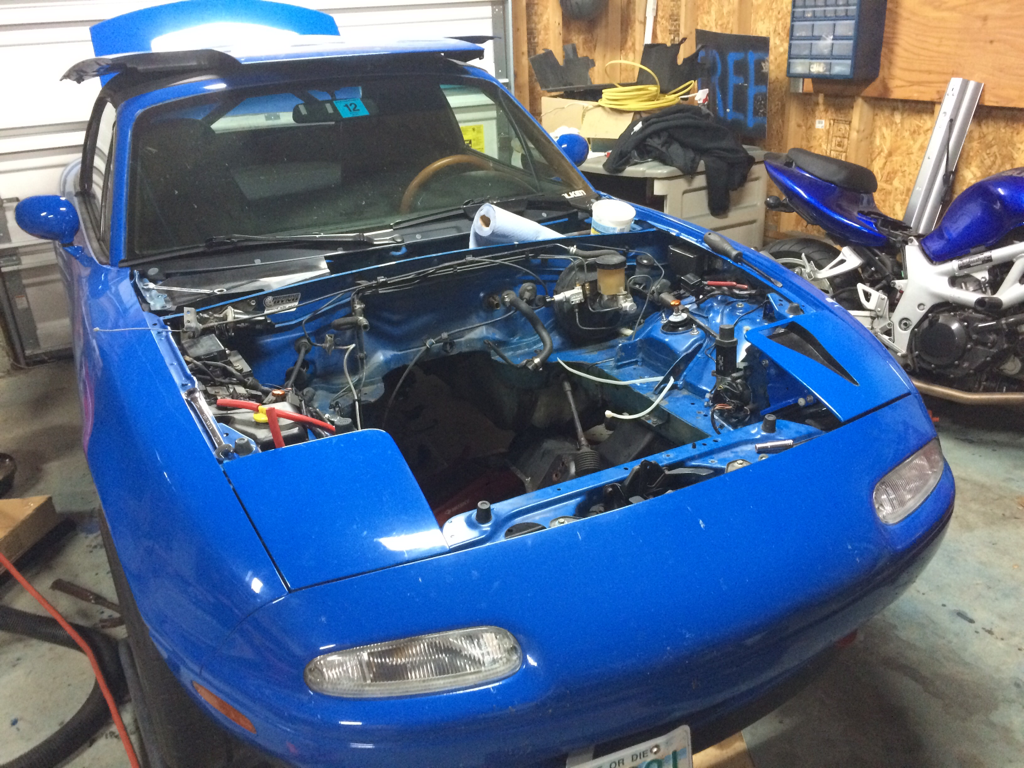
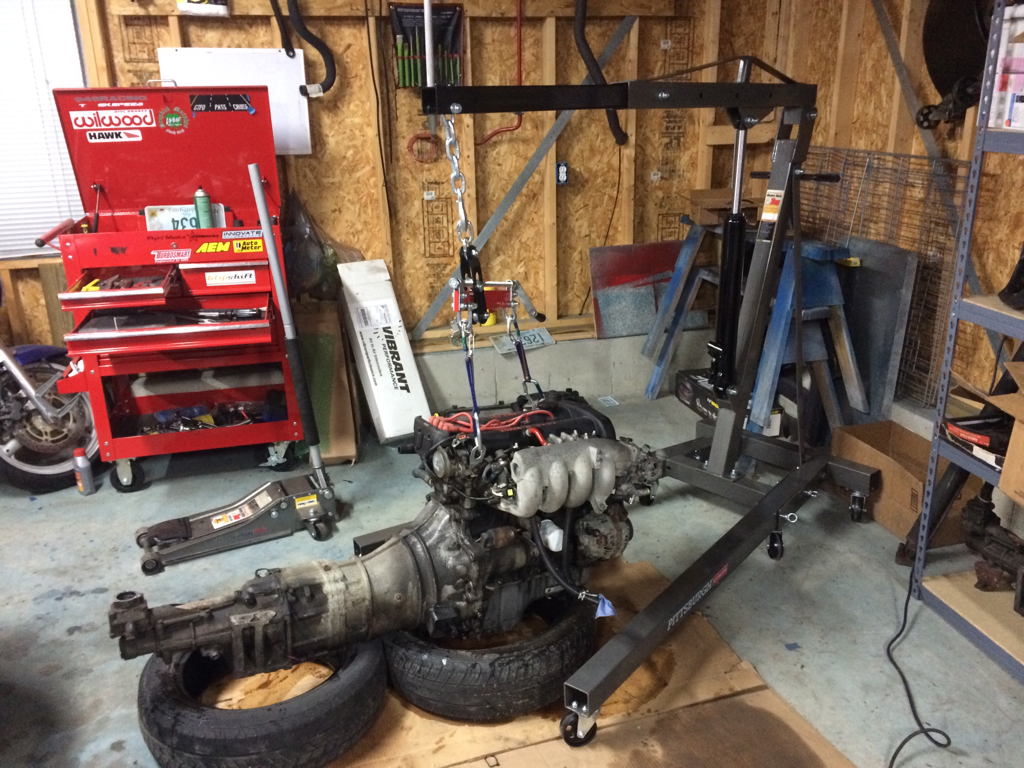
I'm really glad I got the 2-ton engine crane from Harbor Fright, rather than the 1-ton. Using a load leveler and the crane on it's longest arm setting made extraction pretty drama free. If I were to do it again I'd remove the hard vacuum line at the top of the firewall as well as the ignition coils; that would've cut down on the amount of maneuvering I had to do.
In other news I found a mysterious lawn lobster. Had it been a table scrap, I'd expect the little legs to be removed. It is a mystery.

Got the motor and tranny out of my car in three hours. Not bad for my first time and I didn't even break anything.
I'm really glad I got the 2-ton engine crane from Harbor Fright, rather than the 1-ton. Using a load leveler and the crane on it's longest arm setting made extraction pretty drama free. If I were to do it again I'd remove the hard vacuum line at the top of the firewall as well as the ignition coils; that would've cut down on the amount of maneuvering I had to do.
In other news I found a mysterious lawn lobster. Had it been a table scrap, I'd expect the little legs to be removed. It is a mystery.
Reply
0
0
08-24-2015, 05:12 AM
#66
Junior Member
Thread Starter
iTrader: (1)
Join Date: Oct 2011
Location: New Hampshire
Posts: 412
Total Cats: 78
Nice try on his part, I'm 30 miles from the ocean.
My pilot bearing is being a bitch. I spent 90 minutes last night trying to separate the motor and transmission. All the bolts are out and I've got a 1 inch gap between the two. Lots of tugging and prying and jiggling at all different angles but still no luck. I gave up in frustration before I broke anything.
My pilot bearing is being a bitch. I spent 90 minutes last night trying to separate the motor and transmission. All the bolts are out and I've got a 1 inch gap between the two. Lots of tugging and prying and jiggling at all different angles but still no luck. I gave up in frustration before I broke anything.
Reply
0
0
 08-24-2015, 08:31 PM
#68
Junior Member
Thread Starter
iTrader: (1)
Join Date: Oct 2011
Location: New Hampshire
Posts: 412
Total Cats: 78
The lobster has disappeared as mysteriously as it arrived. I think my dog brought in the woods. Or the house.
I finally managed to separate my transmission tonight. I'm not really familiar with reading flywheel and pressure plate friction surfaces, but this looks odd. The car has always been naturally aspirated and it's seen some aggressive launches, but no unusual slipping. The disc was replaced around 60k, 124k on the car now. The flywheel was left untouched, no resurfacing.
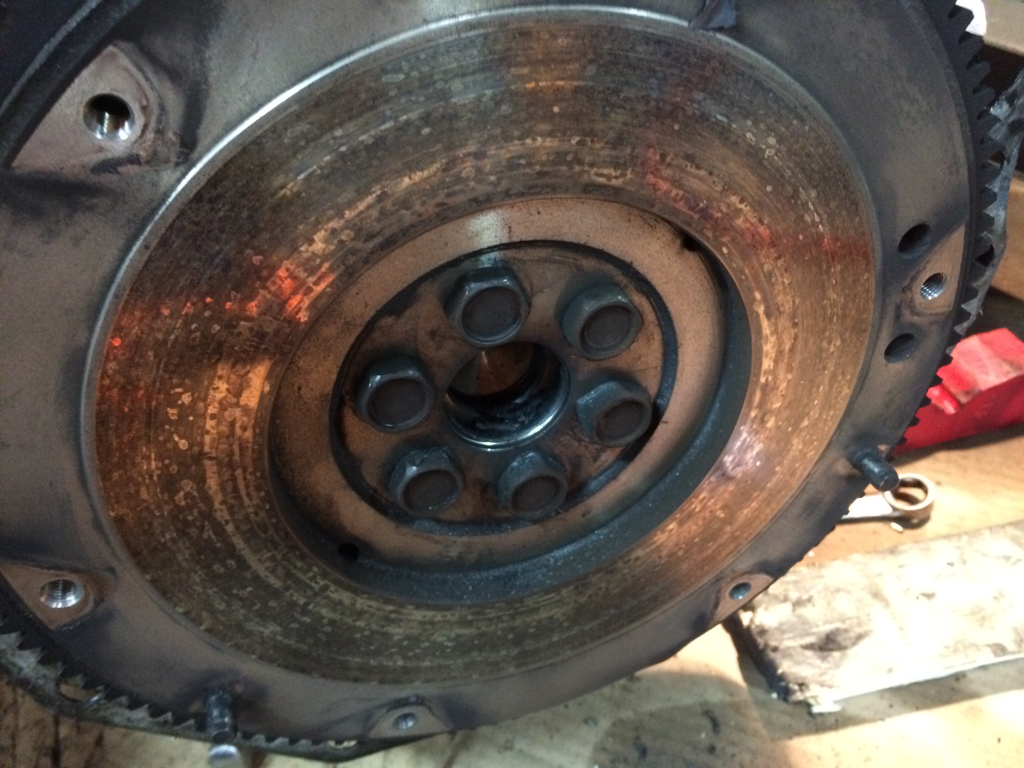
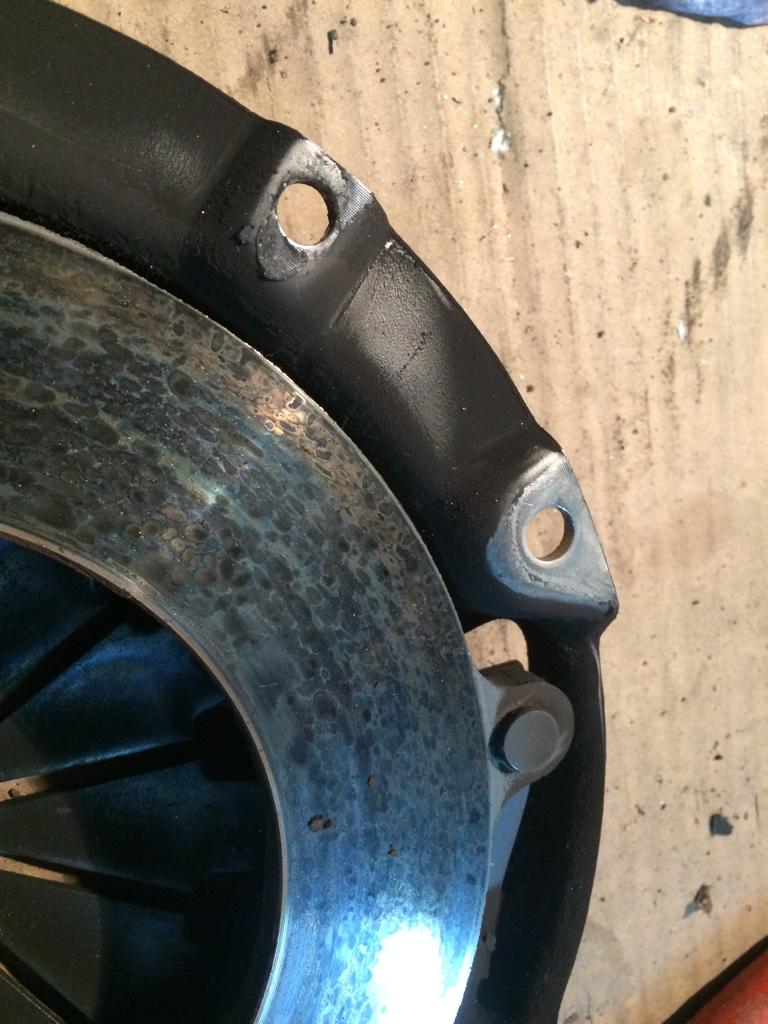
I finally managed to separate my transmission tonight. I'm not really familiar with reading flywheel and pressure plate friction surfaces, but this looks odd. The car has always been naturally aspirated and it's seen some aggressive launches, but no unusual slipping. The disc was replaced around 60k, 124k on the car now. The flywheel was left untouched, no resurfacing.
Reply
0
0
09-07-2015, 09:25 PM
#69
Junior Member
Thread Starter
iTrader: (1)
Join Date: Oct 2011
Location: New Hampshire
Posts: 412
Total Cats: 78
Since our last episode...
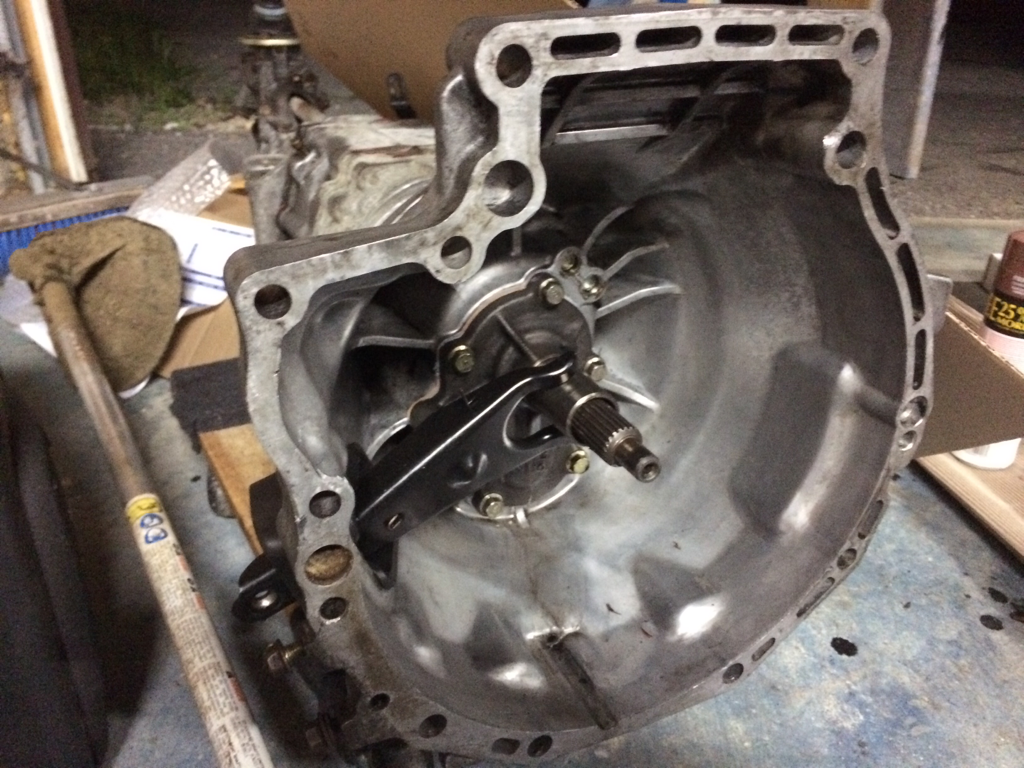
I cleaned the transmission and replaced the input and tailshaft seals:
Drilled and tapped the oil pan:
Painted the water pump outlet and turbo manifold, mounted the turbo, and rigged up oil feed and drain lines using deezum's part list (though I'm still waiting on the block fitting):https://www.miataturbo.net/build-thr...3/#post1260940:
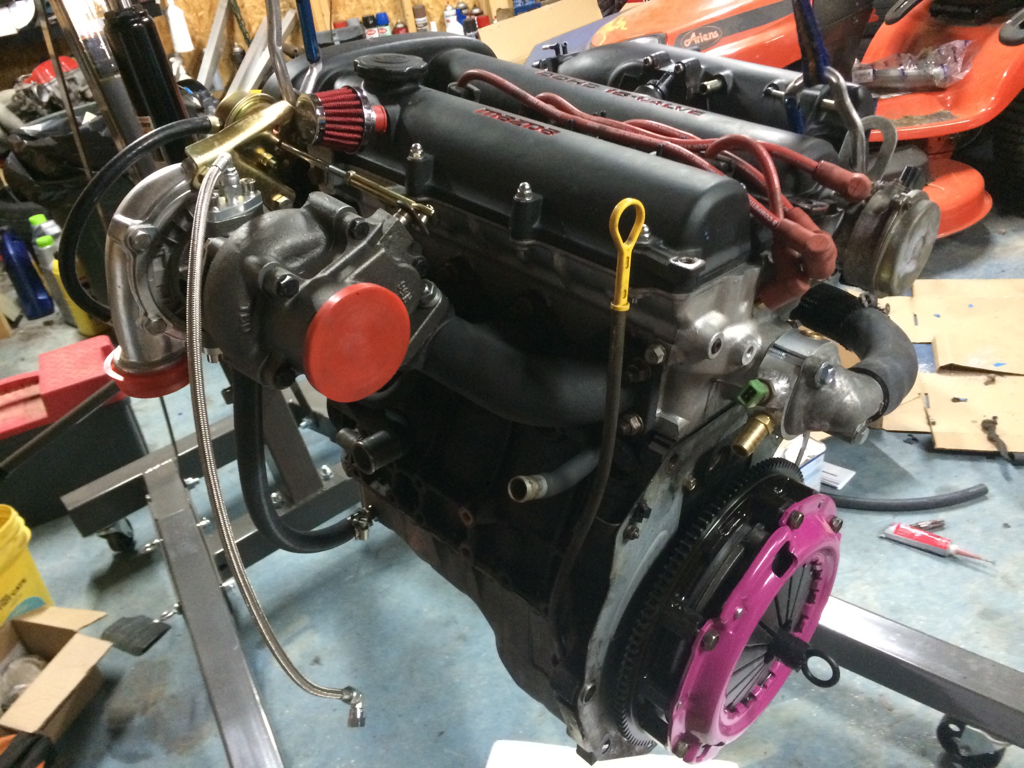
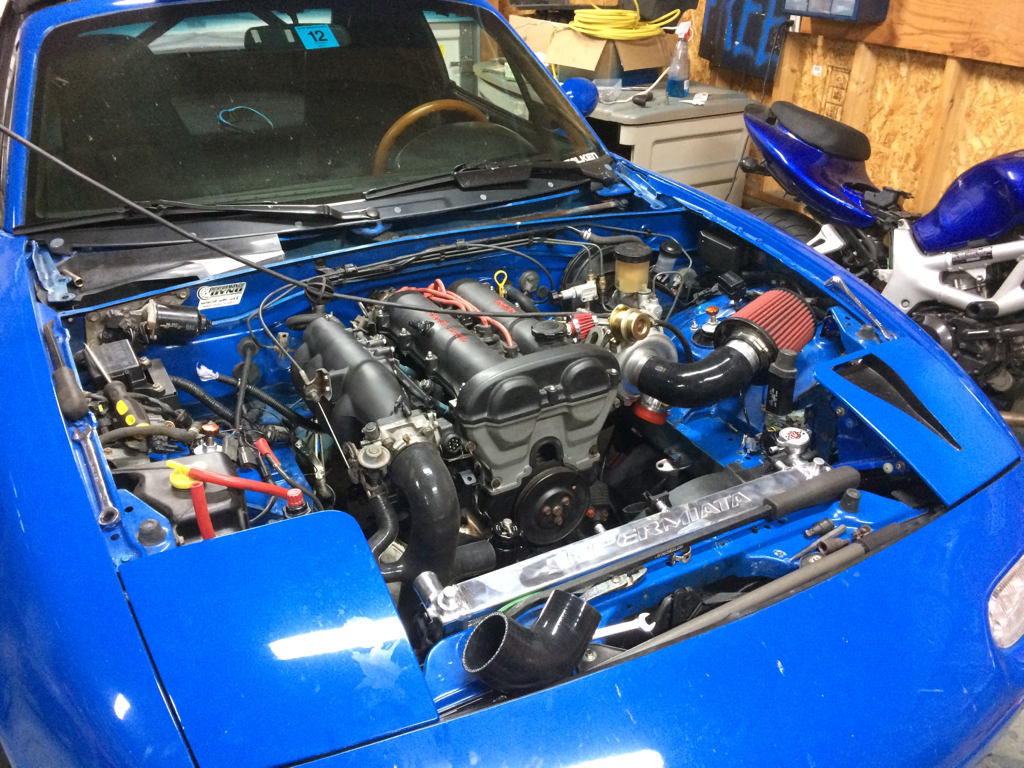
Installed an FM2 happy meal, DIY coolant reroute with self-lathed thermostat spacer and painted the intake manifold:
Deleted the front water neck and the associated stupid little coolant lines (including the one that goes from the manifold to the throttle body, which once slipped a nipple out of the throttle body, thus pissing coolant all over the place and leaving me stranded ):
):
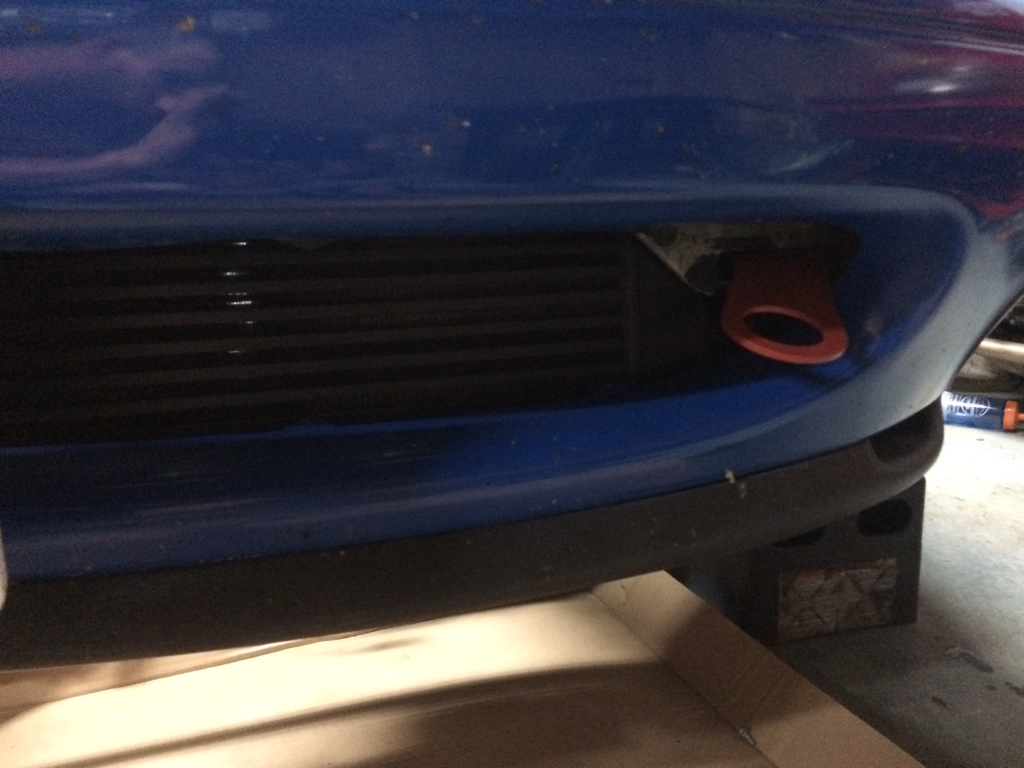
Mounted my Fab9 intercooler:
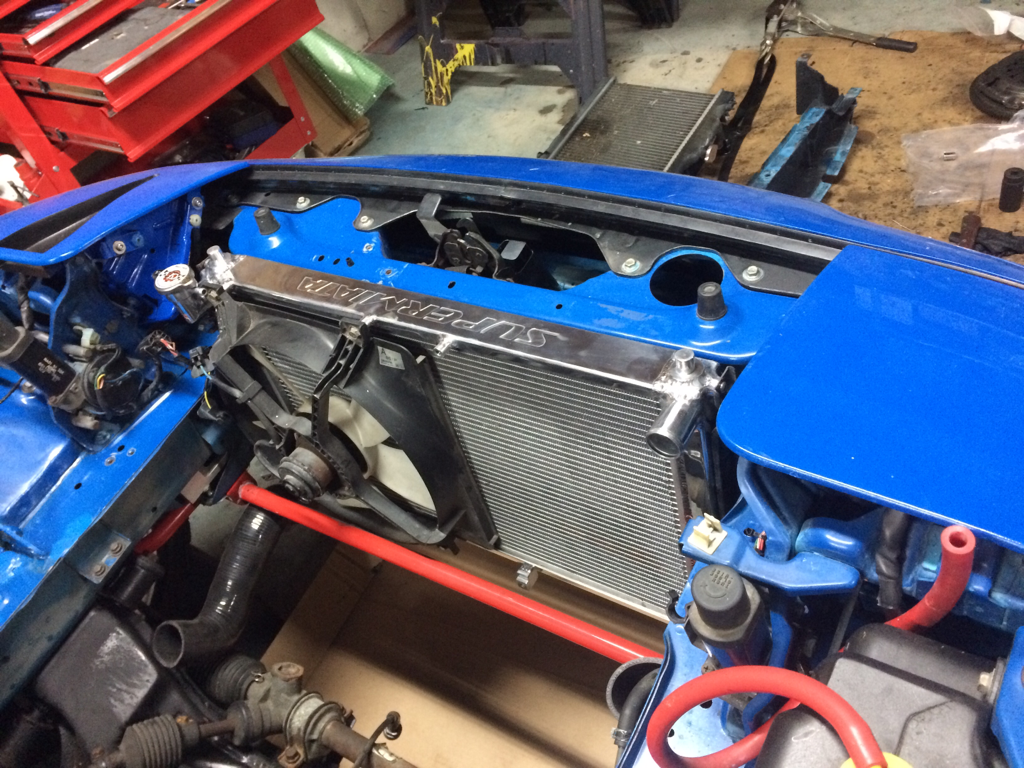
And test fit my Supermiata crossflow radiator:
Remaining tasks before I can drive the car again:
- Reinstall coil pack
- Reinstall fuel rail and injectors
- Flush motor with cheap oil (it still smells funny from the mineral spirits I used to flush the chips out of the oil pan)
- Install tranmission
- Re-install drivetrain into car
- Fab downpipe (still need to solve that welder issue, but I'll focus on that soon enough)
- Complete piping from turbo to throttle body. Most of this will be FM silicone hoses with some adaptation to the eBay turbo and manifold
I cleaned the transmission and replaced the input and tailshaft seals:
Drilled and tapped the oil pan:
Painted the water pump outlet and turbo manifold, mounted the turbo, and rigged up oil feed and drain lines using deezum's part list (though I'm still waiting on the block fitting):https://www.miataturbo.net/build-thr...3/#post1260940:
Installed an FM2 happy meal, DIY coolant reroute with self-lathed thermostat spacer and painted the intake manifold:
Deleted the front water neck and the associated stupid little coolant lines (including the one that goes from the manifold to the throttle body, which once slipped a nipple out of the throttle body, thus pissing coolant all over the place and leaving me stranded
):Mounted my Fab9 intercooler:
And test fit my Supermiata crossflow radiator:
Remaining tasks before I can drive the car again:
- Reinstall coil pack
- Reinstall fuel rail and injectors
- Flush motor with cheap oil (it still smells funny from the mineral spirits I used to flush the chips out of the oil pan)
- Install tranmission
- Re-install drivetrain into car
- Fab downpipe (still need to solve that welder issue, but I'll focus on that soon enough)
- Complete piping from turbo to throttle body. Most of this will be FM silicone hoses with some adaptation to the eBay turbo and manifold
Reply
0
0
09-14-2015, 08:20 AM
#70
Junior Member
Thread Starter
iTrader: (1)
Join Date: Oct 2011
Location: New Hampshire
Posts: 412
Total Cats: 78
I was going to go for a long run yesterday, but instead I spent all my free time on the car.
I got the motor and transmission back in place:
Drilled and tapped my Fab9 intercooler for my IAt sensor:
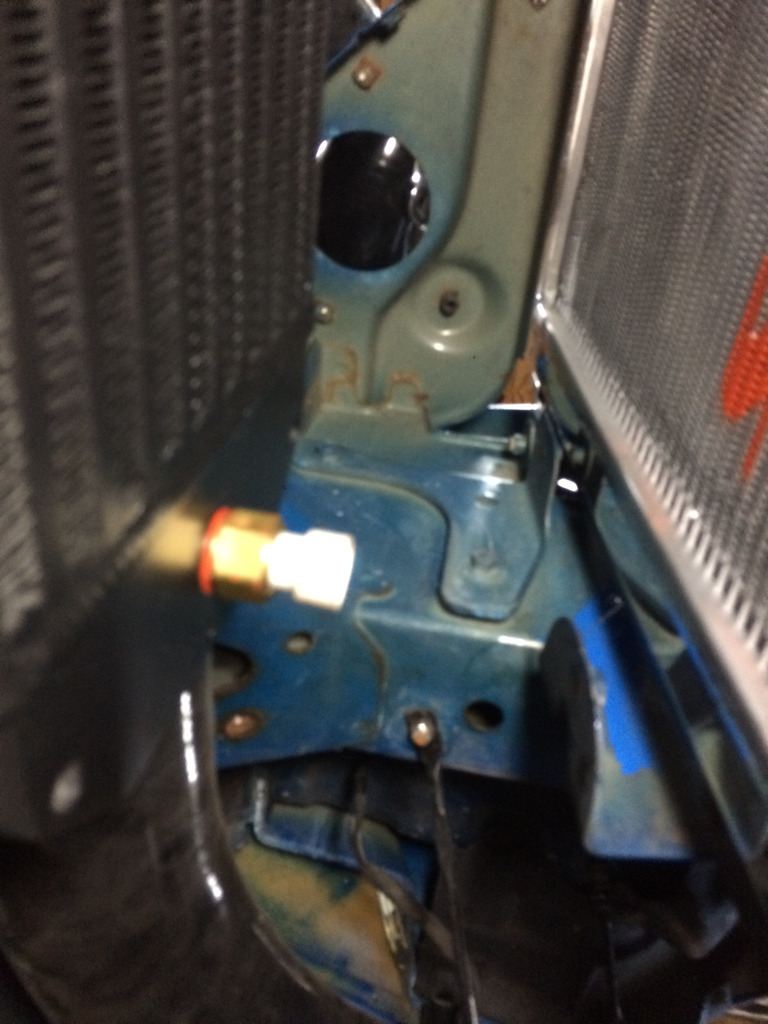
Found that my GM truck hose doesn't come anywhere near my radiator. Maybe I have it on backwards?
Found that my FM coldside pipe interferes with my sway bar:
I'm going to need a smaller air filter, it seems this one will intefere with the hood:
And an updated short-term task list:
- Connect heater hoses
- Procure and install flexible lower radiator hose
- Unfuck upper radiator hose
- Fill and burp radiator
- Connect fuel lines, various engine sensors
- Install coolant temp gauge
- Resolve intercooler piping
- Hook up BOV
- Connect WGA signal to cold side
- Fill oil and transmission fluid
- Check all fasteners
- Extend IAT wiring
- Fab downpipe
I got the motor and transmission back in place:
Drilled and tapped my Fab9 intercooler for my IAt sensor:
Found that my GM truck hose doesn't come anywhere near my radiator. Maybe I have it on backwards?
Found that my FM coldside pipe interferes with my sway bar:
I'm going to need a smaller air filter, it seems this one will intefere with the hood:
And an updated short-term task list:
- Connect heater hoses
- Procure and install flexible lower radiator hose
- Unfuck upper radiator hose
- Fill and burp radiator
- Connect fuel lines, various engine sensors
- Install coolant temp gauge
- Resolve intercooler piping
- Hook up BOV
- Connect WGA signal to cold side
- Fill oil and transmission fluid
- Check all fasteners
- Extend IAT wiring
- Fab downpipe
Reply
0
0
09-17-2015, 08:50 AM
#71
Junior Member
Thread Starter
iTrader: (1)
Join Date: Oct 2011
Location: New Hampshire
Posts: 412
Total Cats: 78
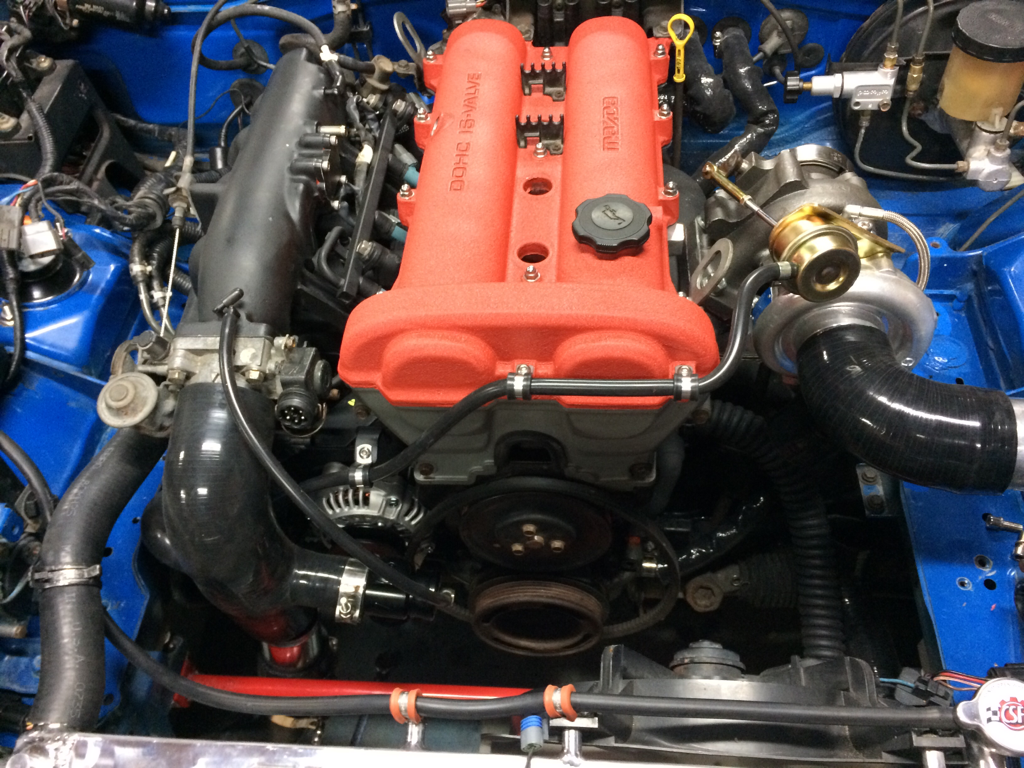
Got my coolant reroute sorted out, still need to tie the hose down so it can't touch the throttle:
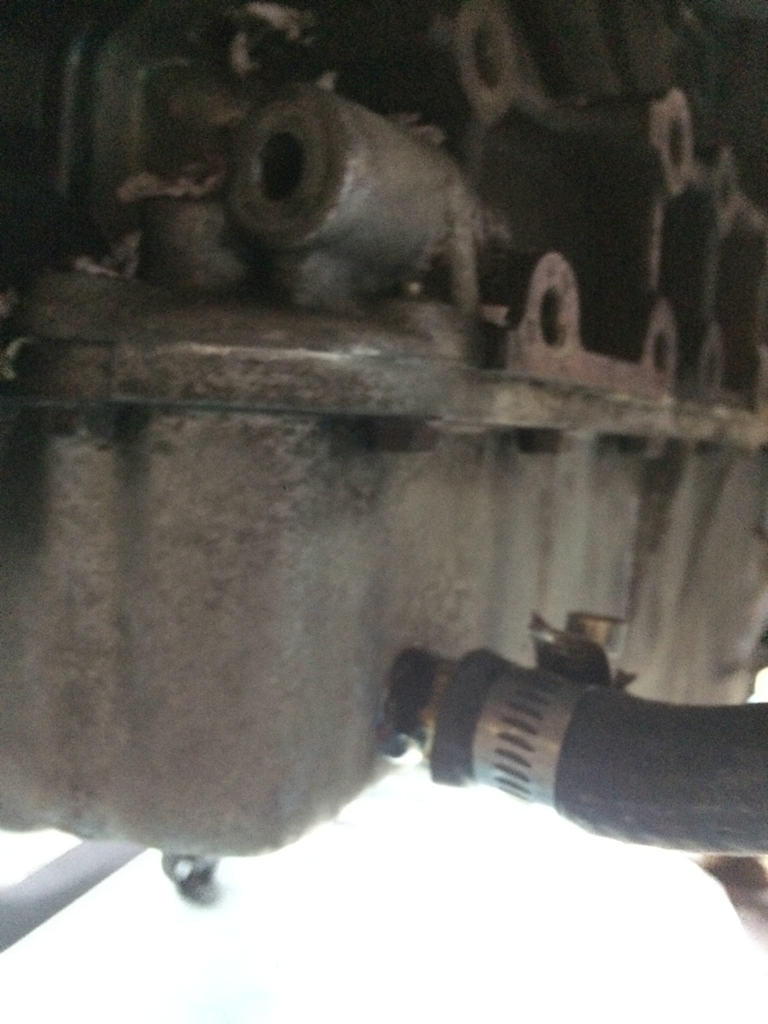
Installed a 1.25 x 20" universal flex hose for the lower radiator connection. Fits pretty well. Also fire sleeved my oil drain.

Fire sleeved my heater hoses and started playing with downpipe design. It looks like that heater hose is going to be a problem.
Installed a 1.25 x 20" universal flex hose for the lower radiator connection. Fits pretty well. Also fire sleeved my oil drain.
Fire sleeved my heater hoses and started playing with downpipe design. It looks like that heater hose is going to be a problem.
Reply
0
0
09-17-2015, 10:06 AM
#72
Senior Member

Join Date: Dec 2007
Location: ATL
Posts: 1,350
Total Cats: 128
Yeah, the stock heater hose placement leaves a lot to be desired, especially when you're trying to cram a downpipe into the same space. I did something a bit more "unique".
I brazed (as in, I took it to a shop and had it done for me) -8AN fittings onto the heater pipes and the water pump. Then I used braided lines between the water pump and the heater core, and between the heater core and the back of the head. Nothing atypical there.
What's "weird" is that the line going to the back of the head is looped up and around (instead of down near the downpipe). That gets that line away from most of the "hotness". The other line going to the water pump is routed similar to how the hardline was, and that's about as good as it gets.
One pic is worth a thousand words;
Reply
0
0
 09-17-2015, 11:34 AM
#74
Junior Member
Thread Starter
iTrader: (1)
Join Date: Oct 2011
Location: New Hampshire
Posts: 412
Total Cats: 78
Yeah, looks like that's what FM puts in the instructions for their kits. Hopefully it's enough. I'd rather avoid drastically rerouting the heater line if I don't have to.
Reply
0
0
09-21-2015, 09:56 PM
#75
Junior Member
Thread Starter
iTrader: (1)
Join Date: Oct 2011
Location: New Hampshire
Posts: 412
Total Cats: 78
Since we last left our hero...
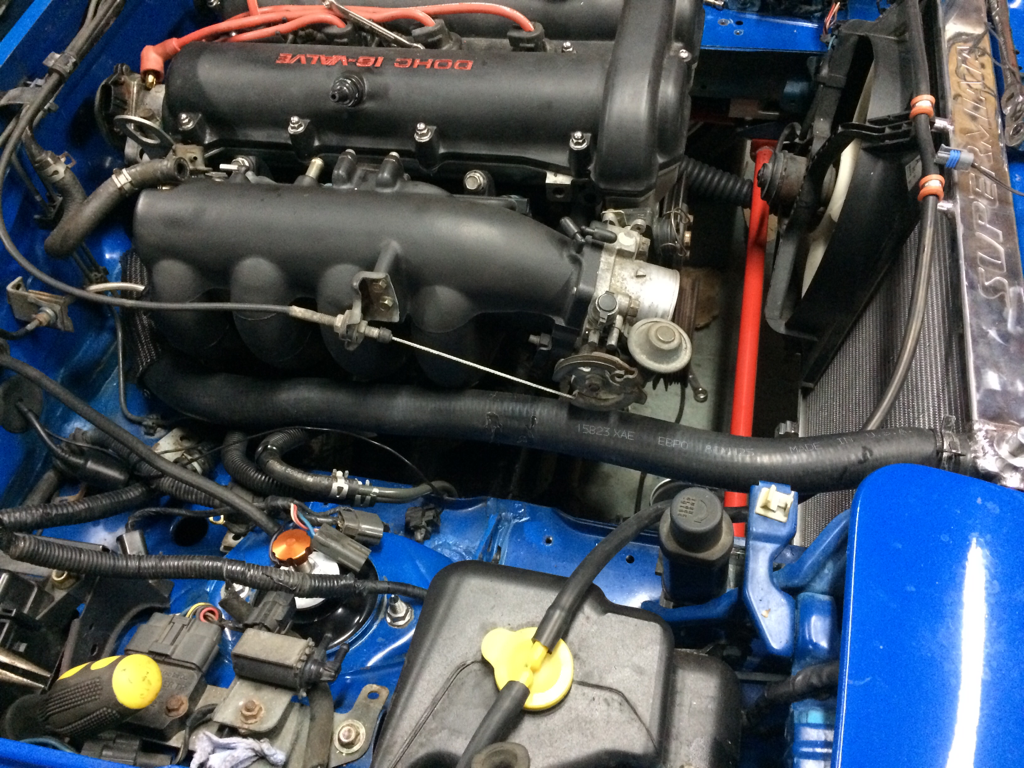
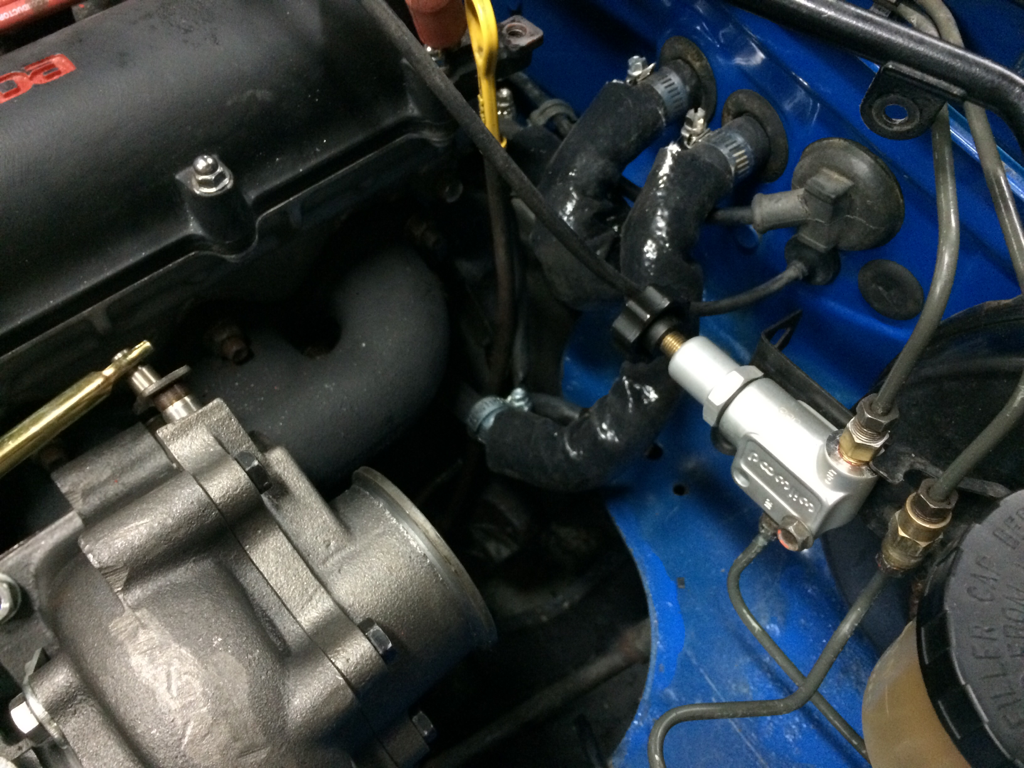
Red wrinkle-coat painted my valve cover and worked out my vacuum line routing:
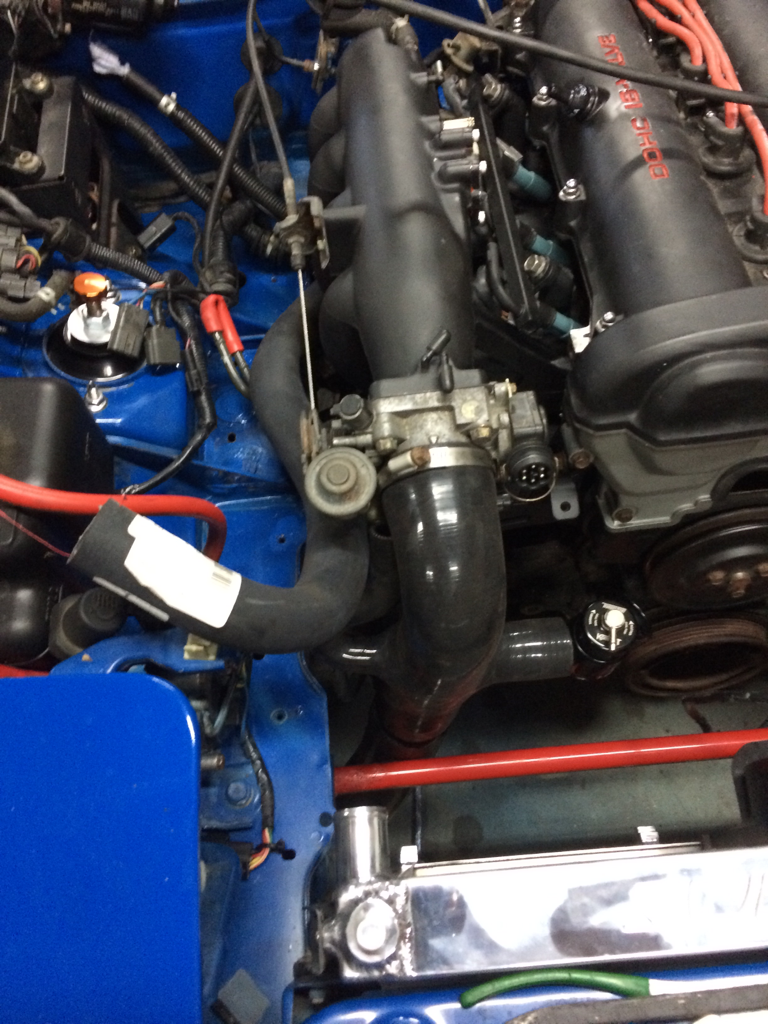
The FM silicone throttle body pipe has a convenient 3/8 NPT bung on the back that I installed a barbed elbow fitting into. This is where I'll source my wastegate boost reference. The pipe also fits right up to my IAC valve. Very much worth the money.
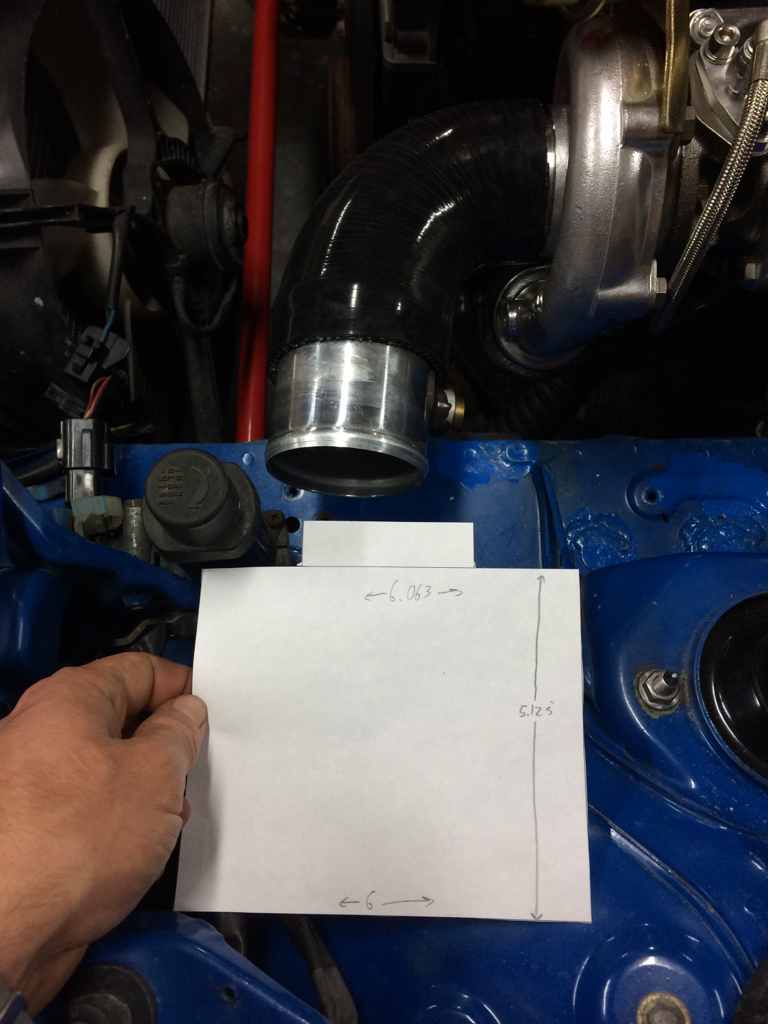
I made a rough template for my new air filter. Looks like it should fit:
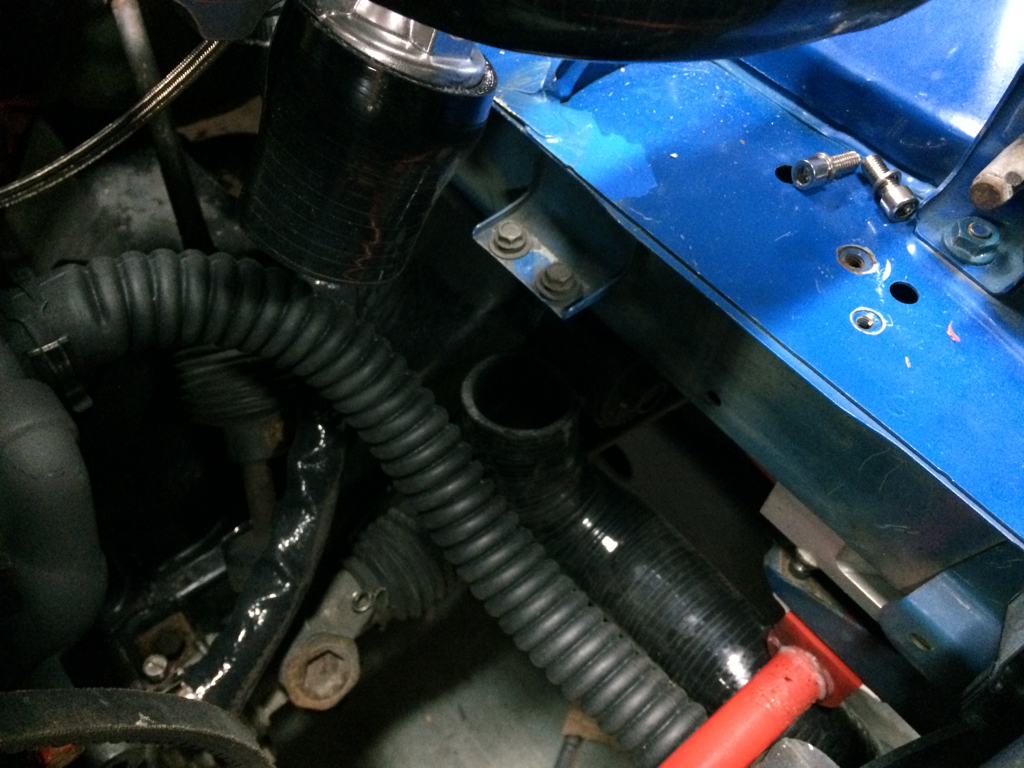
It looks like if I clock the compressor a little bit more, I can connect to my FM coldside pipe with a long aluminum pipe. I'm kinda disappointed in this part. The fit around the swaybar and radiator is poor and I'm afraid I'll kink it too much if I wrestle it too much. Granted, I'm not using an FM intercooler, but I can't see how another would really fit any better.
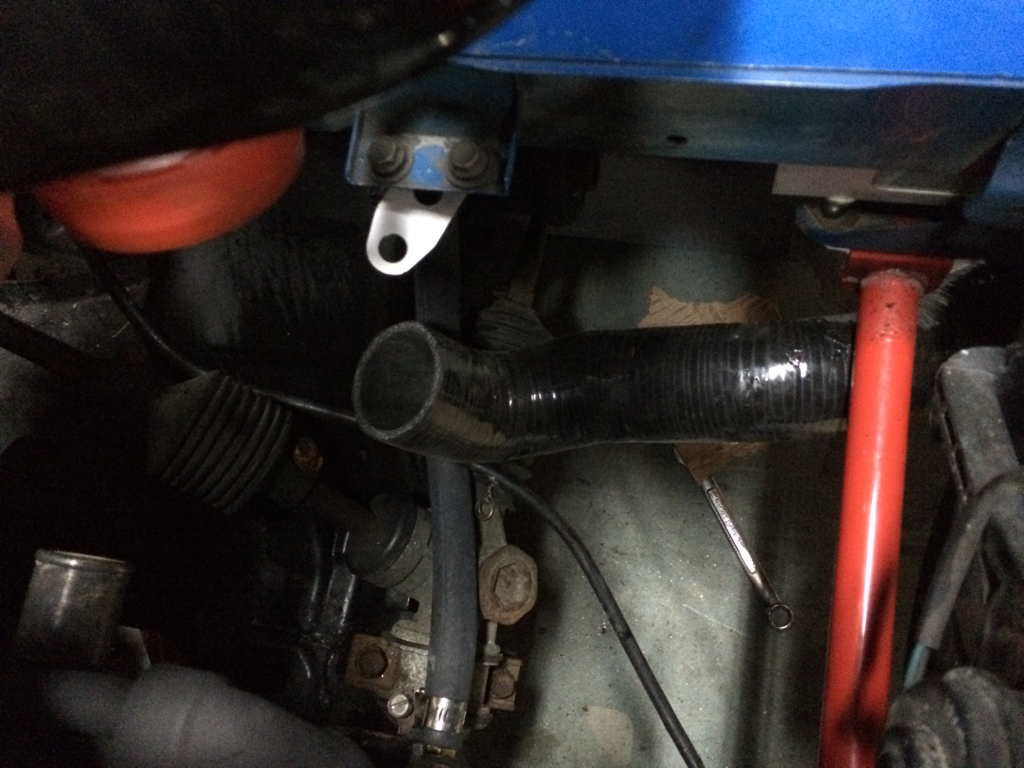
Bent my heater line out of the way of the downpipe. Now I'm up against the shelf.
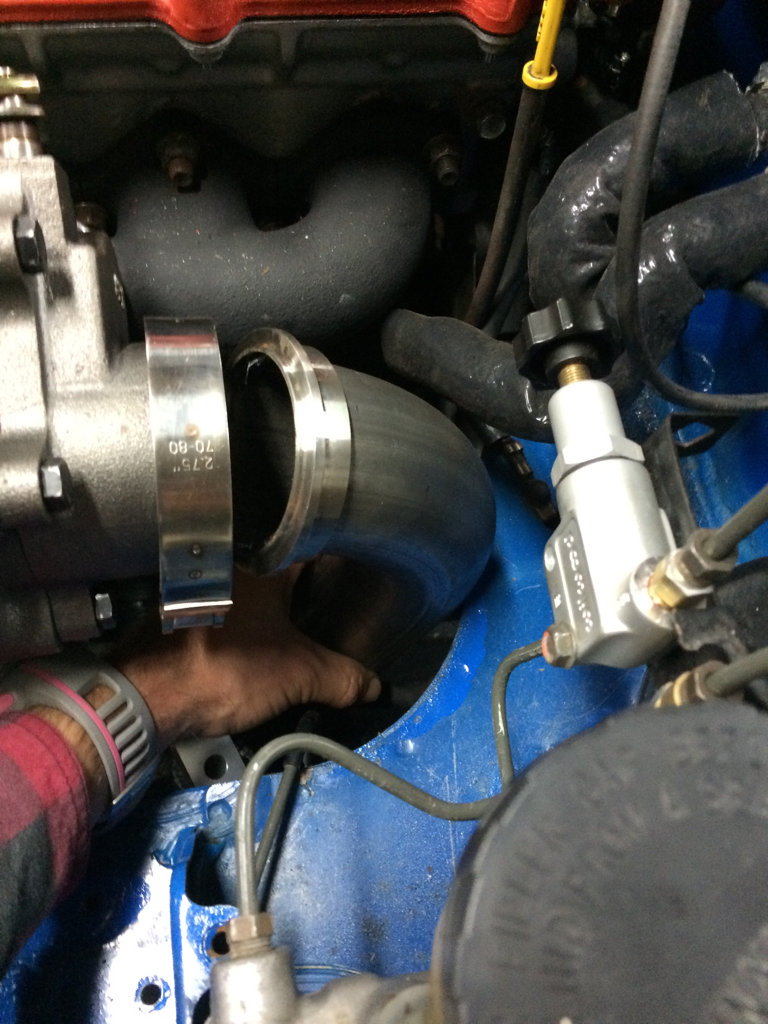
The way I see it, I have two options; buy a tighter radius bend or cut the current elbow further and risk not being able to get the V-band flange on. Am I missing something here?
And in between all that I did some trail running in the Adirondacks.
Red wrinkle-coat painted my valve cover and worked out my vacuum line routing:
The FM silicone throttle body pipe has a convenient 3/8 NPT bung on the back that I installed a barbed elbow fitting into. This is where I'll source my wastegate boost reference. The pipe also fits right up to my IAC valve. Very much worth the money.
I made a rough template for my new air filter. Looks like it should fit:
It looks like if I clock the compressor a little bit more, I can connect to my FM coldside pipe with a long aluminum pipe. I'm kinda disappointed in this part. The fit around the swaybar and radiator is poor and I'm afraid I'll kink it too much if I wrestle it too much. Granted, I'm not using an FM intercooler, but I can't see how another would really fit any better.
Bent my heater line out of the way of the downpipe. Now I'm up against the shelf.
The way I see it, I have two options; buy a tighter radius bend or cut the current elbow further and risk not being able to get the V-band flange on. Am I missing something here?
And in between all that I did some trail running in the Adirondacks.
Reply
0
0
09-24-2015, 12:33 PM
#77
Junior Member
Thread Starter
iTrader: (1)
Join Date: Oct 2011
Location: New Hampshire
Posts: 412
Total Cats: 78
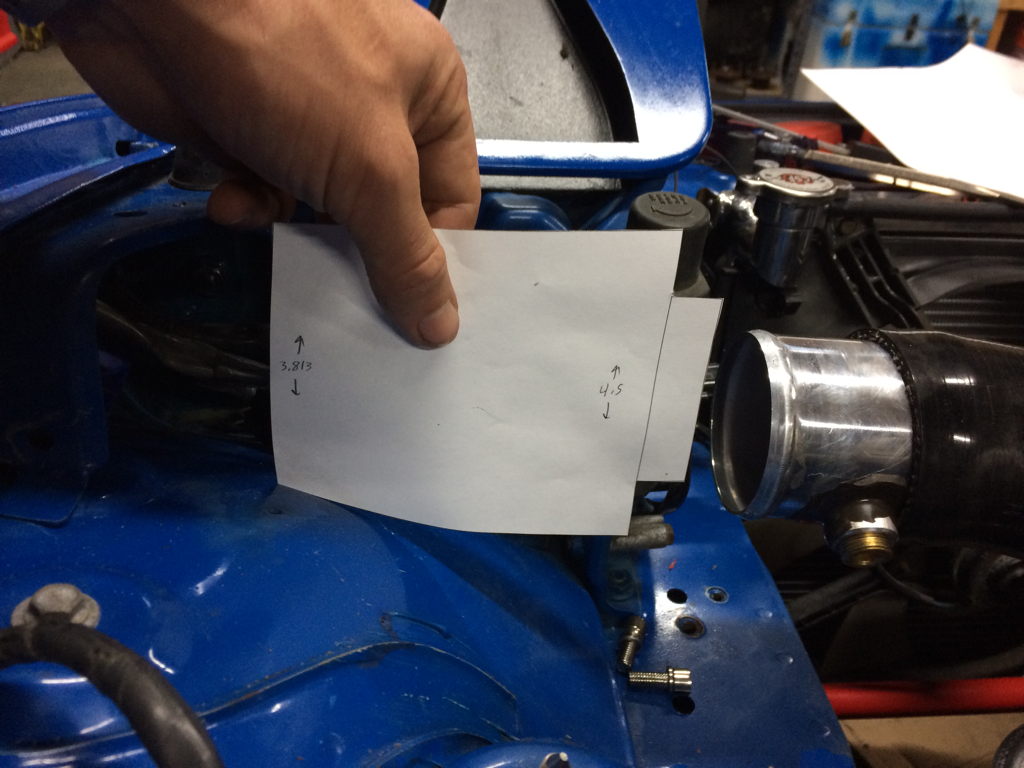
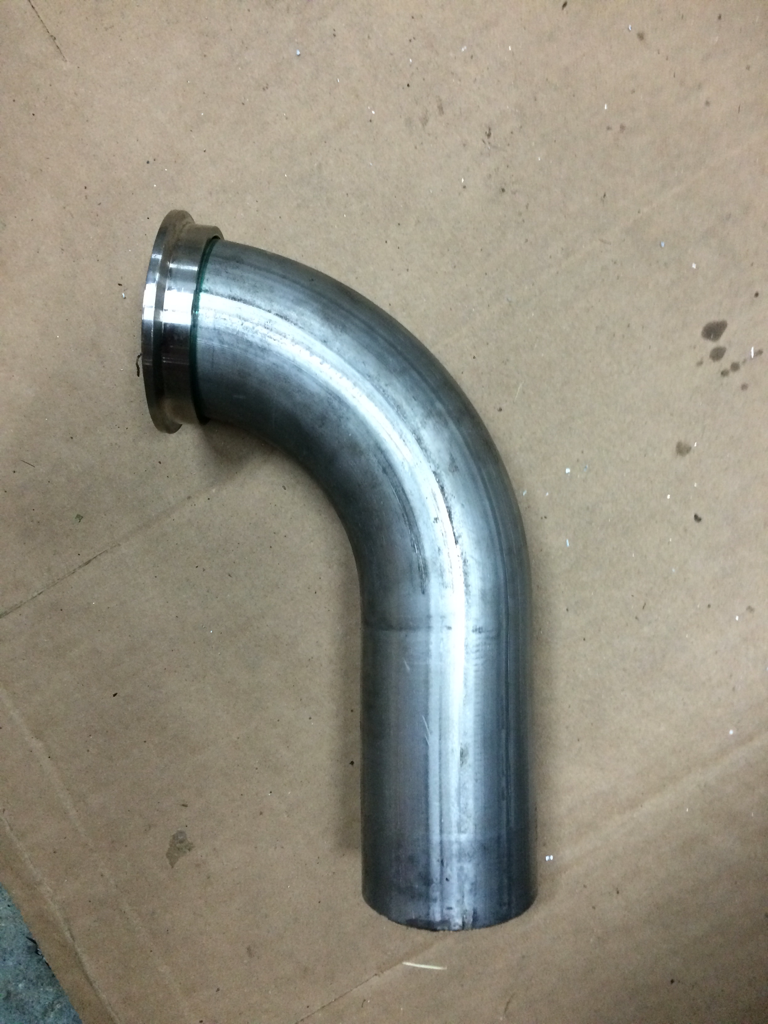
Yeah, probably the right way to do it. My current bend is 4.5" radius on center. I ordered a 2.5"R that should do the trick.
Been having a hard time working on the car because I tripped on a root while running Sunday and landed hard. I may have partially separated my shoulder.
Been having a hard time working on the car because I tripped on a root while running Sunday and landed hard. I may have partially separated my shoulder.
Reply
0
0
10-14-2015, 08:38 PM
#79
Junior Member
Thread Starter
iTrader: (1)
Join Date: Oct 2011
Location: New Hampshire
Posts: 412
Total Cats: 78
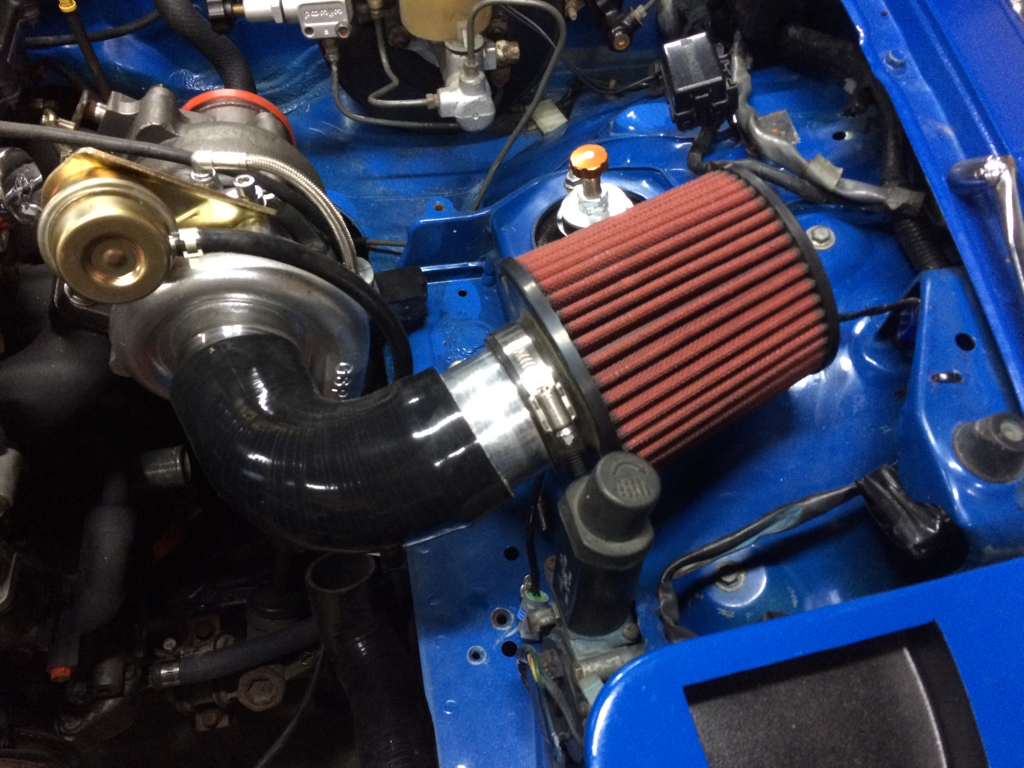
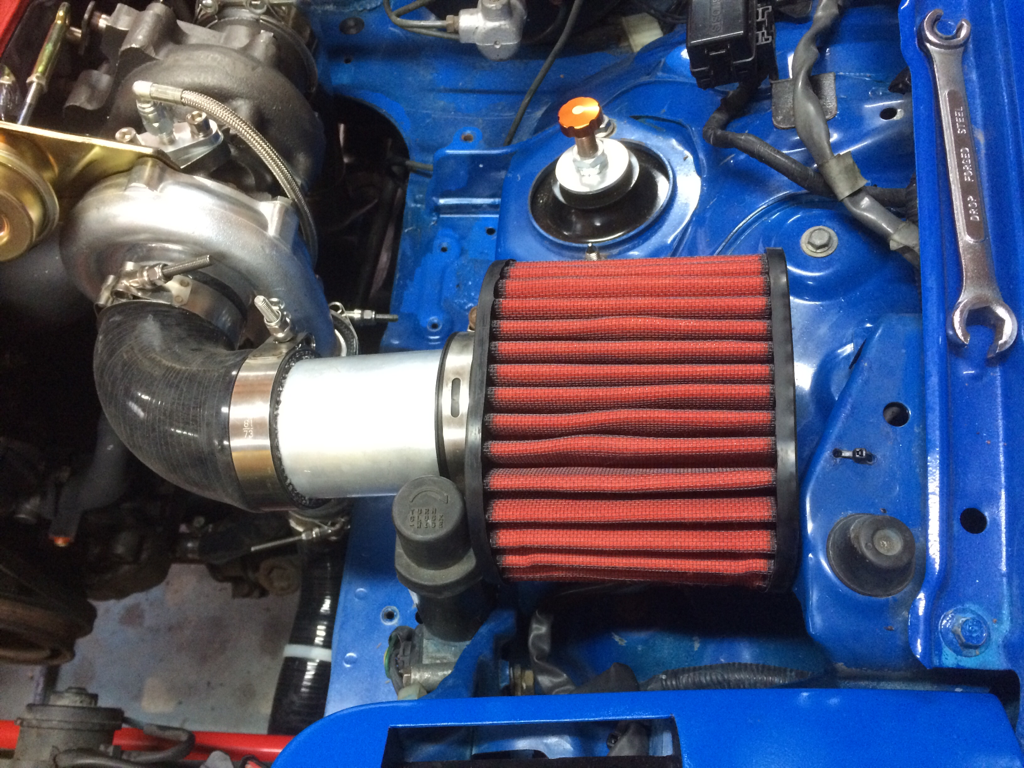
I completed my coldside turbo plumbing. It wasn't quite plug and play with the FM charge pipes, but a length of 2" pipe got me there:
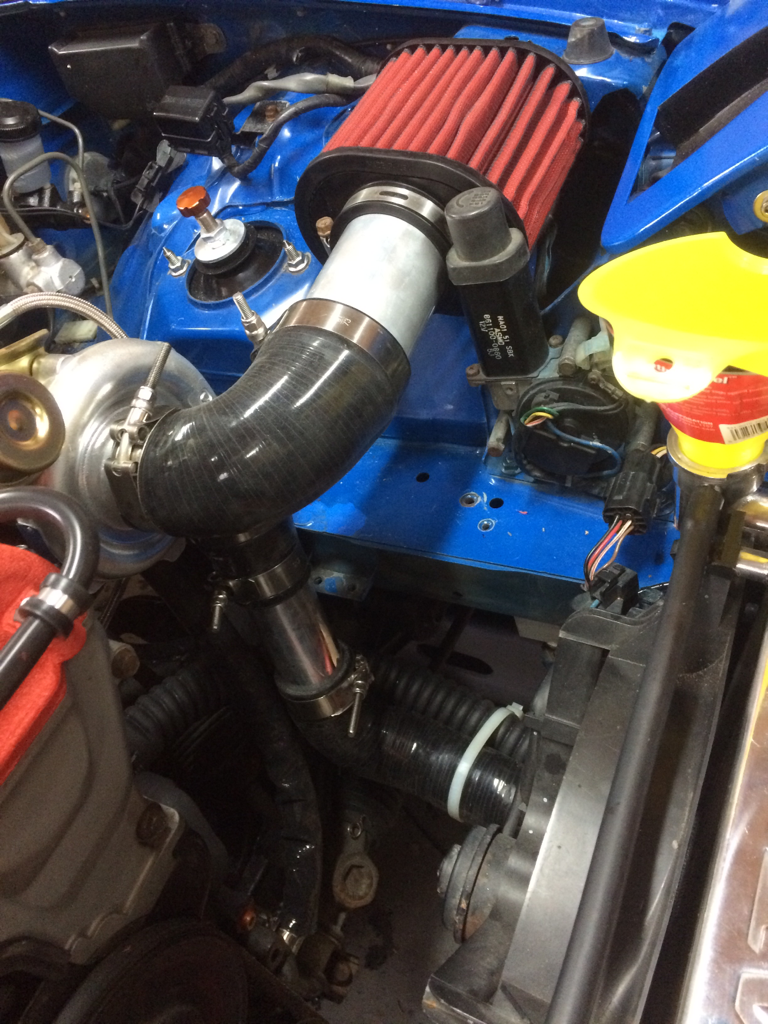
An AEM Dryflow 21-2127DK just barely fits, with a little tilt to clear the hood.
And a 2.5 inch radius bend clears the shelf for my downpipe:
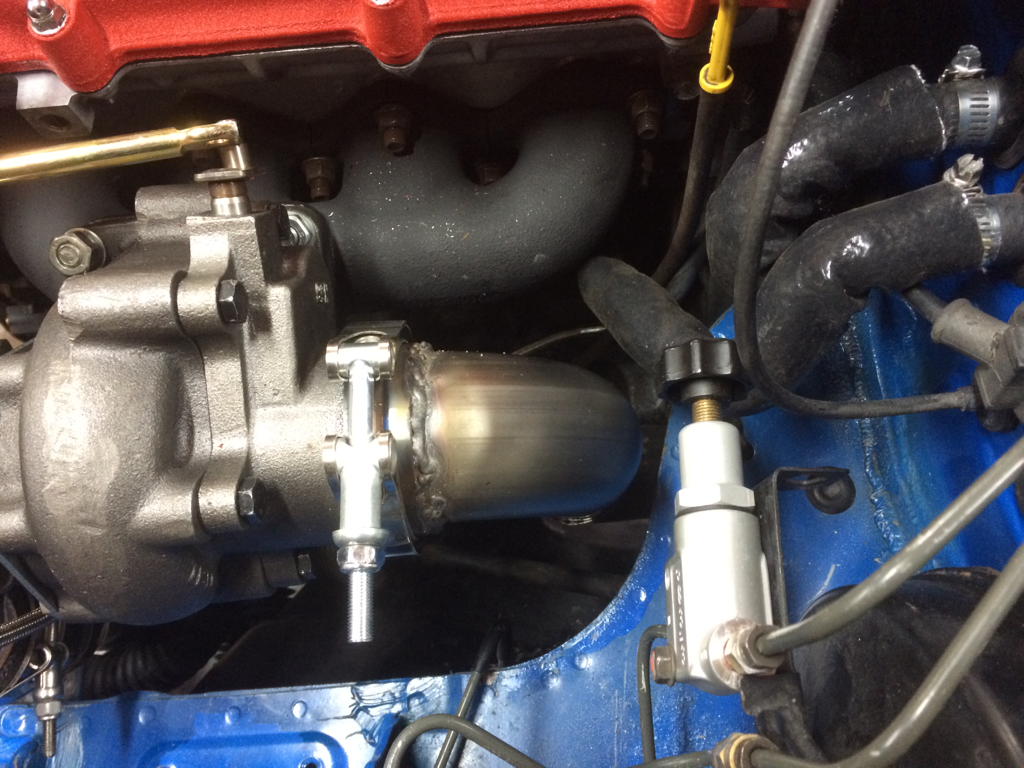
Here's the downpipe. My welds are improving, though I won't be challenging Abe any time soon:
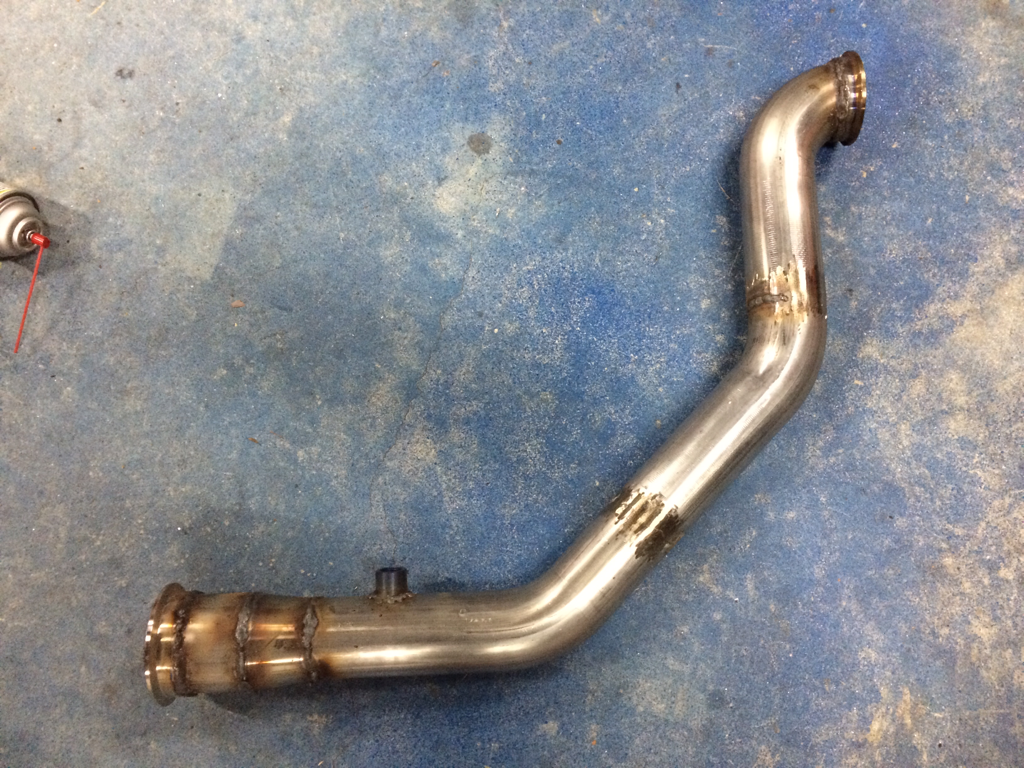
And I've accumulated all the parts I need to fab my exhaust.
Soon. Very soon.
An AEM Dryflow 21-2127DK just barely fits, with a little tilt to clear the hood.
And a 2.5 inch radius bend clears the shelf for my downpipe:
Here's the downpipe. My welds are improving, though I won't be challenging Abe any time soon:
And I've accumulated all the parts I need to fab my exhaust.
Soon. Very soon.
Reply
0
0


