
90 FE-dohc (FE3) Turbo

Thread Starter
Elite Member
iTrader: (5)
Joined: Jan 2005
Posts: 7,486
Total Cats: 372
From: Atlanta
engineering student > art school grad 
My original comment was directed at a prior post in one of the FE threads regarding the stress with so much of the engine cantilevered- not the mount's position in the car. But it was actually referencing the trans/block hardware, not the bushings as I remembered, though relevant.
My original comment was directed at a prior post in one of the FE threads regarding the stress with so much of the engine cantilevered- not the mount's position in the car. But it was actually referencing the trans/block hardware, not the bushings as I remembered, though relevant.
I dislike your mounts as much as I dislike Rob's mounts, you are canterlevering against the box (as is he!). The engine should sit neutrally on it's mounts. There are two ways to do it properly : move the motor back till it balances on the stock points (i'd take this) or move the points forward such that it is balanced where it sits. To not do this puts all of those bolts under constant stress and rather than doing their jobs holding things together, they're holding the weight of the things they're holding together aswell.
Reply
 0
0

0
Thread Starter
Elite Member
iTrader: (5)
Joined: Jan 2005
Posts: 7,486
Total Cats: 372
From: Atlanta
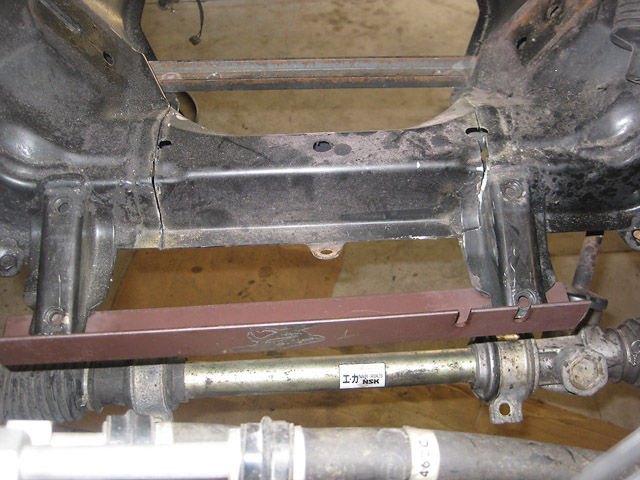
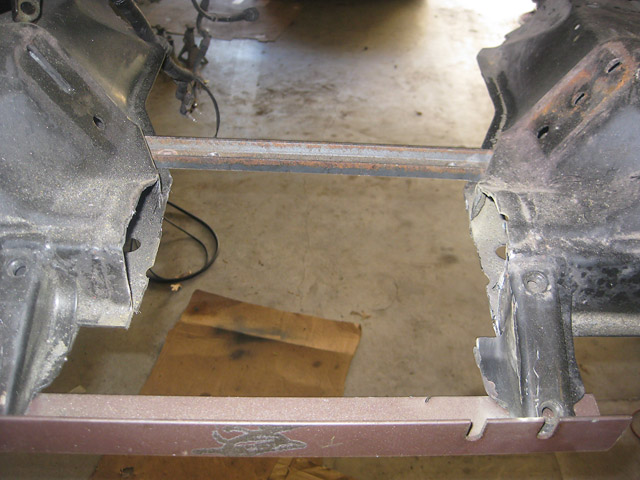
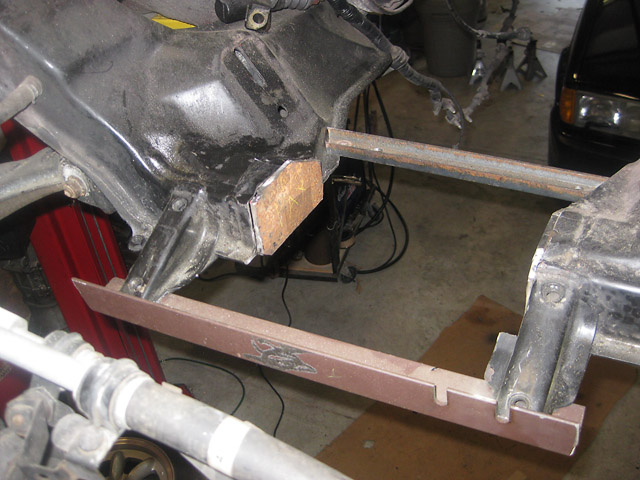
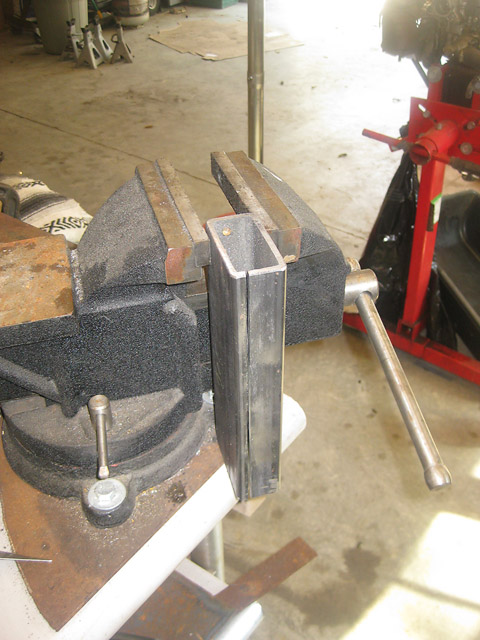
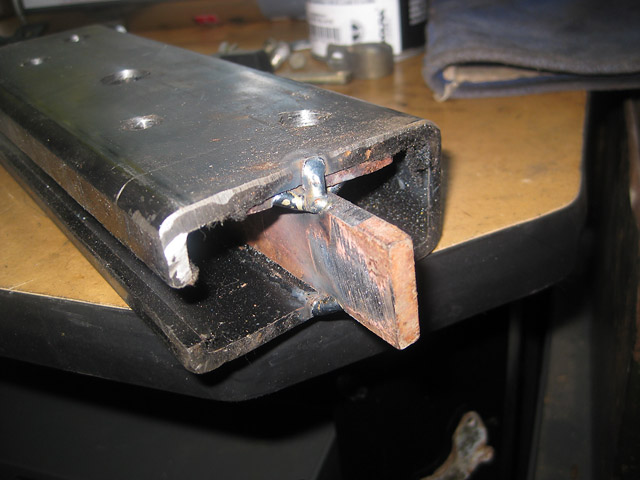
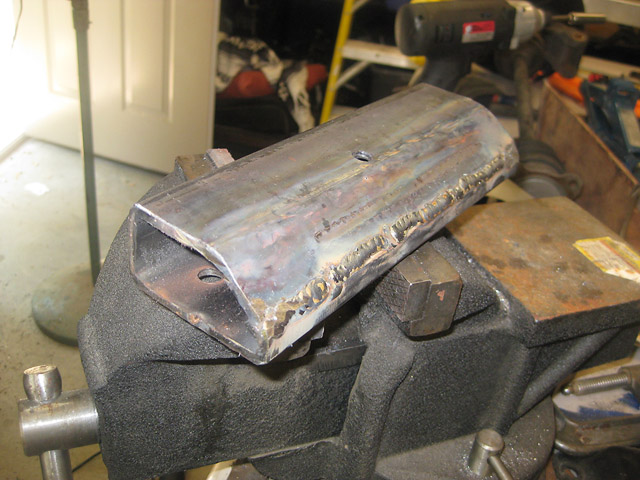
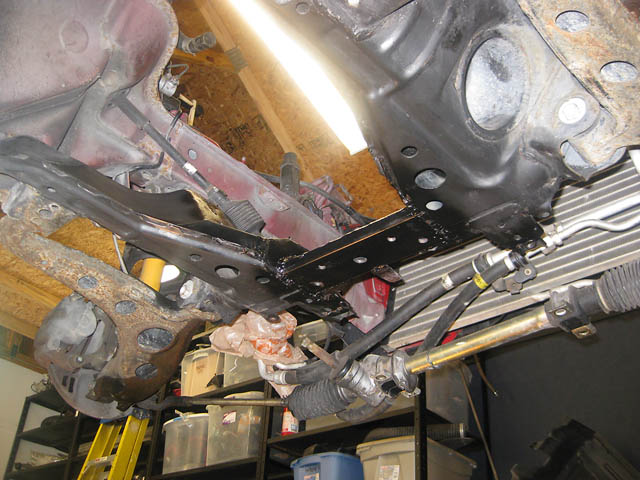
Nearly completed the subframe mod for more oil pan room. Just need to do the finish welding. Opted to replace the center piece with some 1/8" rectangle tube that I reshaped vs. sectioning the top part and welding in plated to what was left. Used some scrap to hold the frame in place for the cut.


Also made myself an SST transmission plug with my old 1.6 driveshaft
Also made myself an SST transmission plug with my old 1.6 driveshaft
Reply
0
0

Junior Member
Joined: Feb 2009
Posts: 78
Total Cats: 0
From: Madison, WI
looks good. i hope for your sake that angle iron was enough to hold the frame properly. it doesn't look too overly tacked. I have to redo my FWD subframe because it warped during cutting/welding.
id suggest test fitting it soon before you finish it-honestly welding it while bolted in place isn't a bad idea either
id suggest test fitting it soon before you finish it-honestly welding it while bolted in place isn't a bad idea either
Reply
0
0
Thread Starter
Elite Member
iTrader: (5)
Joined: Jan 2005
Posts: 7,486
Total Cats: 372
From: Atlanta
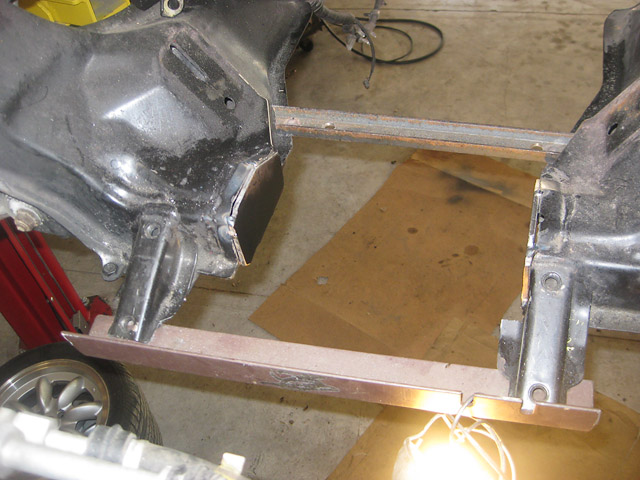
Reads like you think it's removed from the car- it's not and for that reason. Not worth building a jig when I've already got one.
The piece I cut out fit back in and the steering rack bolted into place. All the mount points are still bolting it to the car (6).
The piece I cut out fit back in and the steering rack bolted into place. All the mount points are still bolting it to the car (6).
Reply
0
0


I'm Miserable!
Joined: Feb 2010
Posts: 583
Total Cats: -1
I love projects like this one. That is an awesome subframe mod. If you have room and the interest, the rack wants to be raised vertically for lowered cars. Don't move it forward if you can avoid it as this reduces the ackermann effect, unless that is also desired.
Reply
0
0
Thread Starter
Elite Member
iTrader: (5)
Joined: Jan 2005
Posts: 7,486
Total Cats: 372
From: Atlanta
I can't raise it up because my oil pan will already be sitting just off the crank/mains, so it'll stay stock. Car doesn't sit too low- ~12-1/2" hub center to fender on 205-50-15s.
I actually measured the motor mount boss locations on the FE vs. the B6. Measuring from the center of the front boss(es) to the front most edge of the block: FE=8-5/8", B6=7-1/2". If anybody has a BP block, it would be interesting to see how it stands. In my case that's an accurate interpretation of my mounts since both mounts are position the same point from the bosses. With the new mounts I can move the engine about 1-1/2" back. IF I did that, I'd have to make concessions for the CAS since it only has about an inch to the firewall- and modify the PPF slots - and possibly trim it. Might also impact my radiator return at the back of the head.
I dislike your mounts as much as I dislike Rob's mounts, you are canterlevering against the box (as is he!).
Last edited by m2cupcar; Aug 26, 2011 at 04:53 PM.
Reply
0
0
Thread Starter
Elite Member
iTrader: (5)
Joined: Jan 2005
Posts: 7,486
Total Cats: 372
From: Atlanta
I use all Adobe stuff- illustrator for that drawing. My old pickup design ran like stock- down the middle under the mains. Both DC and Yank (FE miata builds) ran the pickup around the perimeter so it doesn't breach the "height" of the mains. That saves at least 3/4" of pan depth in the front, which means the engine can sit that much lower. I shimmed my subframe before to get the engine under the stock hood- but won't need to this time around.
Reply
0
0

Junior Member
Joined: Apr 2011
Posts: 50
Total Cats: 0
From: Lehigh Valley P.A.
Ahh man seeing all that tree carnage makes me a little nervous. Hurricane irene is making her way here and we have quite a few large trees surrounding the area. Hope everything works out for you, looks like you'll have plenty of room for projects now atleast.
Reply
0
0
Thread Starter
Elite Member
iTrader: (5)
Joined: Jan 2005
Posts: 7,486
Total Cats: 372
From: Atlanta
Still sorting through containers of parts stored from old garage. Found a rear return/mixer for my coolant reroute that's more compact than what I was using. This will further aid in making space to move the engine back some.
What I was using below. That brass piece was a post tstat feed for the heater core- which I moved up to the cylinder head and capped.
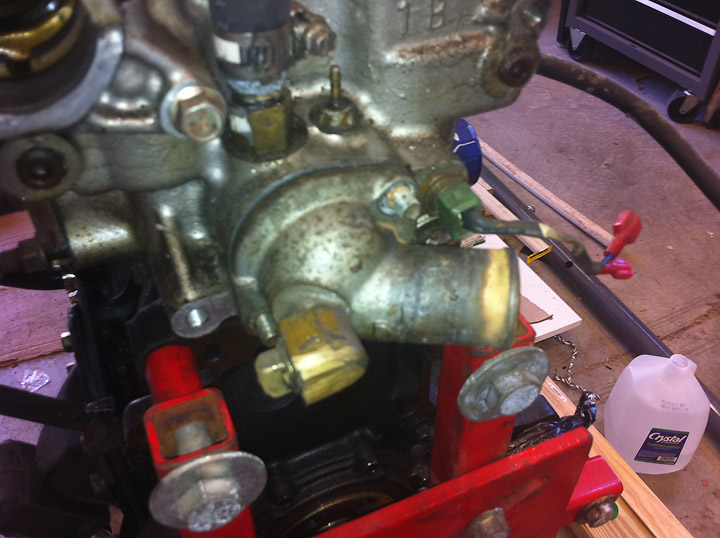
New piece- it hits the thermo-sender now, but I can actually move that 90� around the corner and out of the way since that coolant are is very large at the back.

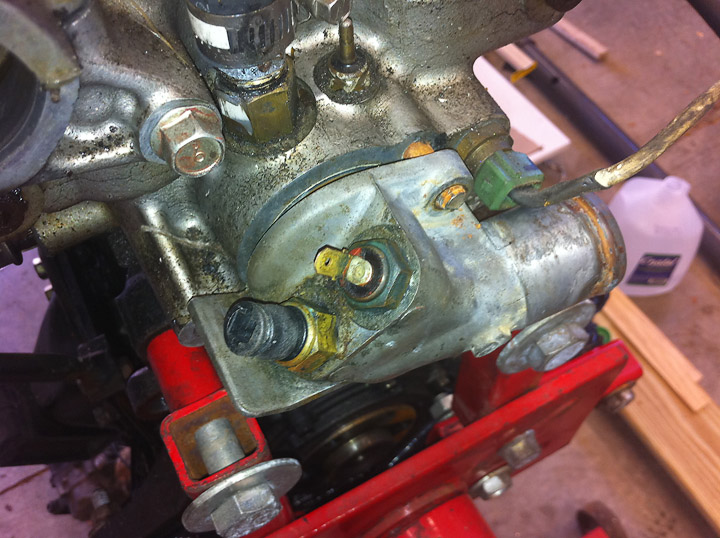
Since the engine I have is an actual Mazda engine and fwd application, it had the recess for the tstat unlike the kia sportage FE3s.

What I was using below. That brass piece was a post tstat feed for the heater core- which I moved up to the cylinder head and capped.
New piece- it hits the thermo-sender now, but I can actually move that 90� around the corner and out of the way since that coolant are is very large at the back.
Since the engine I have is an actual Mazda engine and fwd application, it had the recess for the tstat unlike the kia sportage FE3s.
Reply
0
0

Wow yeah the back of that head is completely different than that. even though its set up for fwd id say its orientation is better suited for what we're doing.
Reply
0
0

Thread Starter
Elite Member
iTrader: (5)
Joined: Jan 2005
Posts: 7,486
Total Cats: 372
From: Atlanta
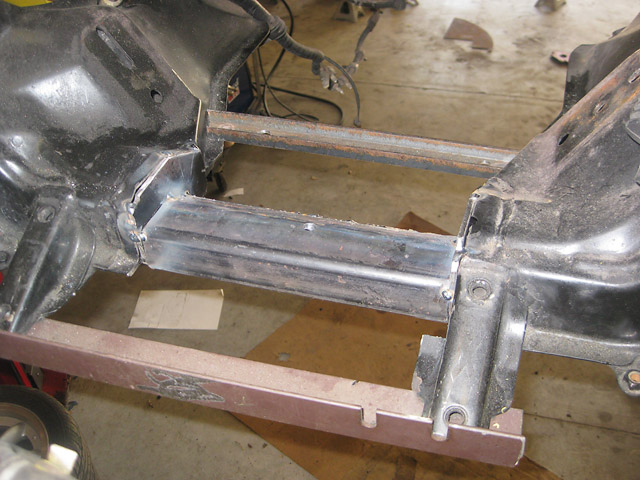
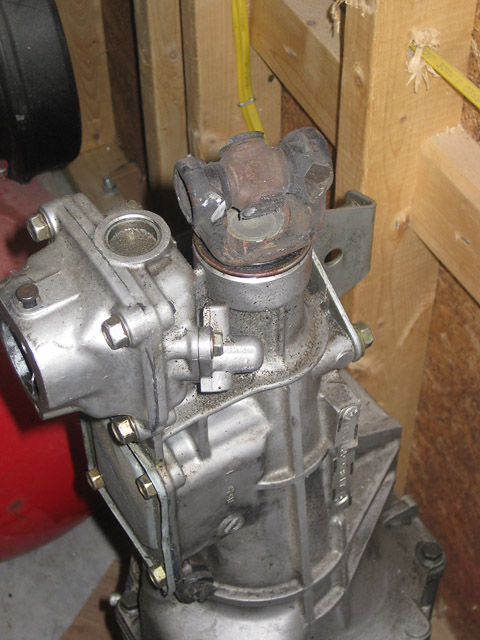
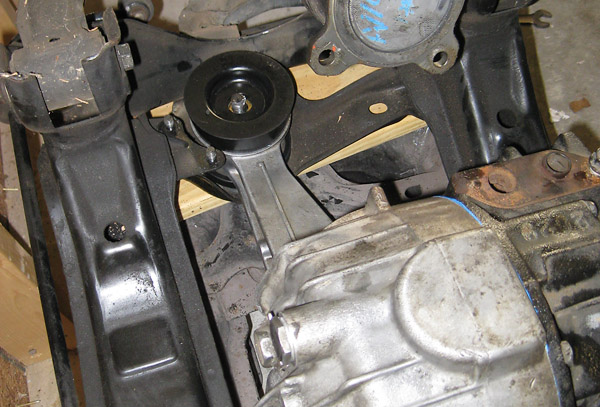
Got the poly bushings installed in the rx7 housing, bolted it up to the 3.63 torsen and installed it in the subframe. Straightened out one of the ISC shock hats that was bent from the tree hit and got the sub back into the car.

Reply
0
0


