
Basic low boost build: Noob does it all wrong.


Thread Starter
Elite Member
Joined: Oct 2013
Posts: 1,822
Total Cats: 144
From: NorthWest NJ
Good to know! Gonna have so much to read. 
I will be taking bets on if I blow something up or not. Gonna have an MS going in my car, and then my friend just got a screaming deal on a full, old school Link setup (he should actually make money upgrading from his VooDoo abd MSD to think if he sells them). So My head will be swimming with conflicting info this spring.
I will be taking bets on if I blow something up or not. Gonna have an MS going in my car, and then my friend just got a screaming deal on a full, old school Link setup (he should actually make money upgrading from his VooDoo abd MSD to think if he sells them). So My head will be swimming with conflicting info this spring.
Reply
 0
0

0
Thread Starter
Elite Member
Joined: Oct 2013
Posts: 1,822
Total Cats: 144
From: NorthWest NJ
Not in his budget at the moment. I have been in cars with the link, while not as good as an MS3, they run and drive well. Worst case we run the libk for a while (can't be worse) and upgrade down the road. For $100 for everything that he got it for, it is worth playing with.
Reply
0
0
Thread Starter
Elite Member
Joined: Oct 2013
Posts: 1,822
Total Cats: 144
From: NorthWest NJ
Could blow up three 1.6s for the cost of a new MS3x. Nevermind his may be on it's last legs anyway, since the oil was sparkly. Hopefully it was just shavings from the PO drilling and tapping the oil pan. Which is why the MS3 isn't in the budget. He has that money set aside in case he does need a new engine.
Reply
0
0
Thread Starter
Elite Member
Joined: Oct 2013
Posts: 1,822
Total Cats: 144
From: NorthWest NJ
Alright. I was hoping to get the Miata back together this weekend, but my friends sister suddenly passed away last week (at the age of 34!) and I was rather busy dealing with that mess.
On to good news though, my mom bought some new (used) couches last week, but we have yet to get rid of the current ones, so they are living in the garage. Which means there is not enough room for the van, but there is room for a Miata! Woo! Garage space for a week or so!
So today I got the new alternator in and hooked up, as well as the last of the coolant hoses changed and the radiator back in. Just need to put the crank pulley back on, belts, fill up the rad and then intake piping and it will be back on the street. Even a short winter is too longs.
The big news though, is this showed up on friday. My $450 Brain built MS3x with harness and IAT (that I will be double checking before it goes in). Was going to wait until my tax return, but for that price...
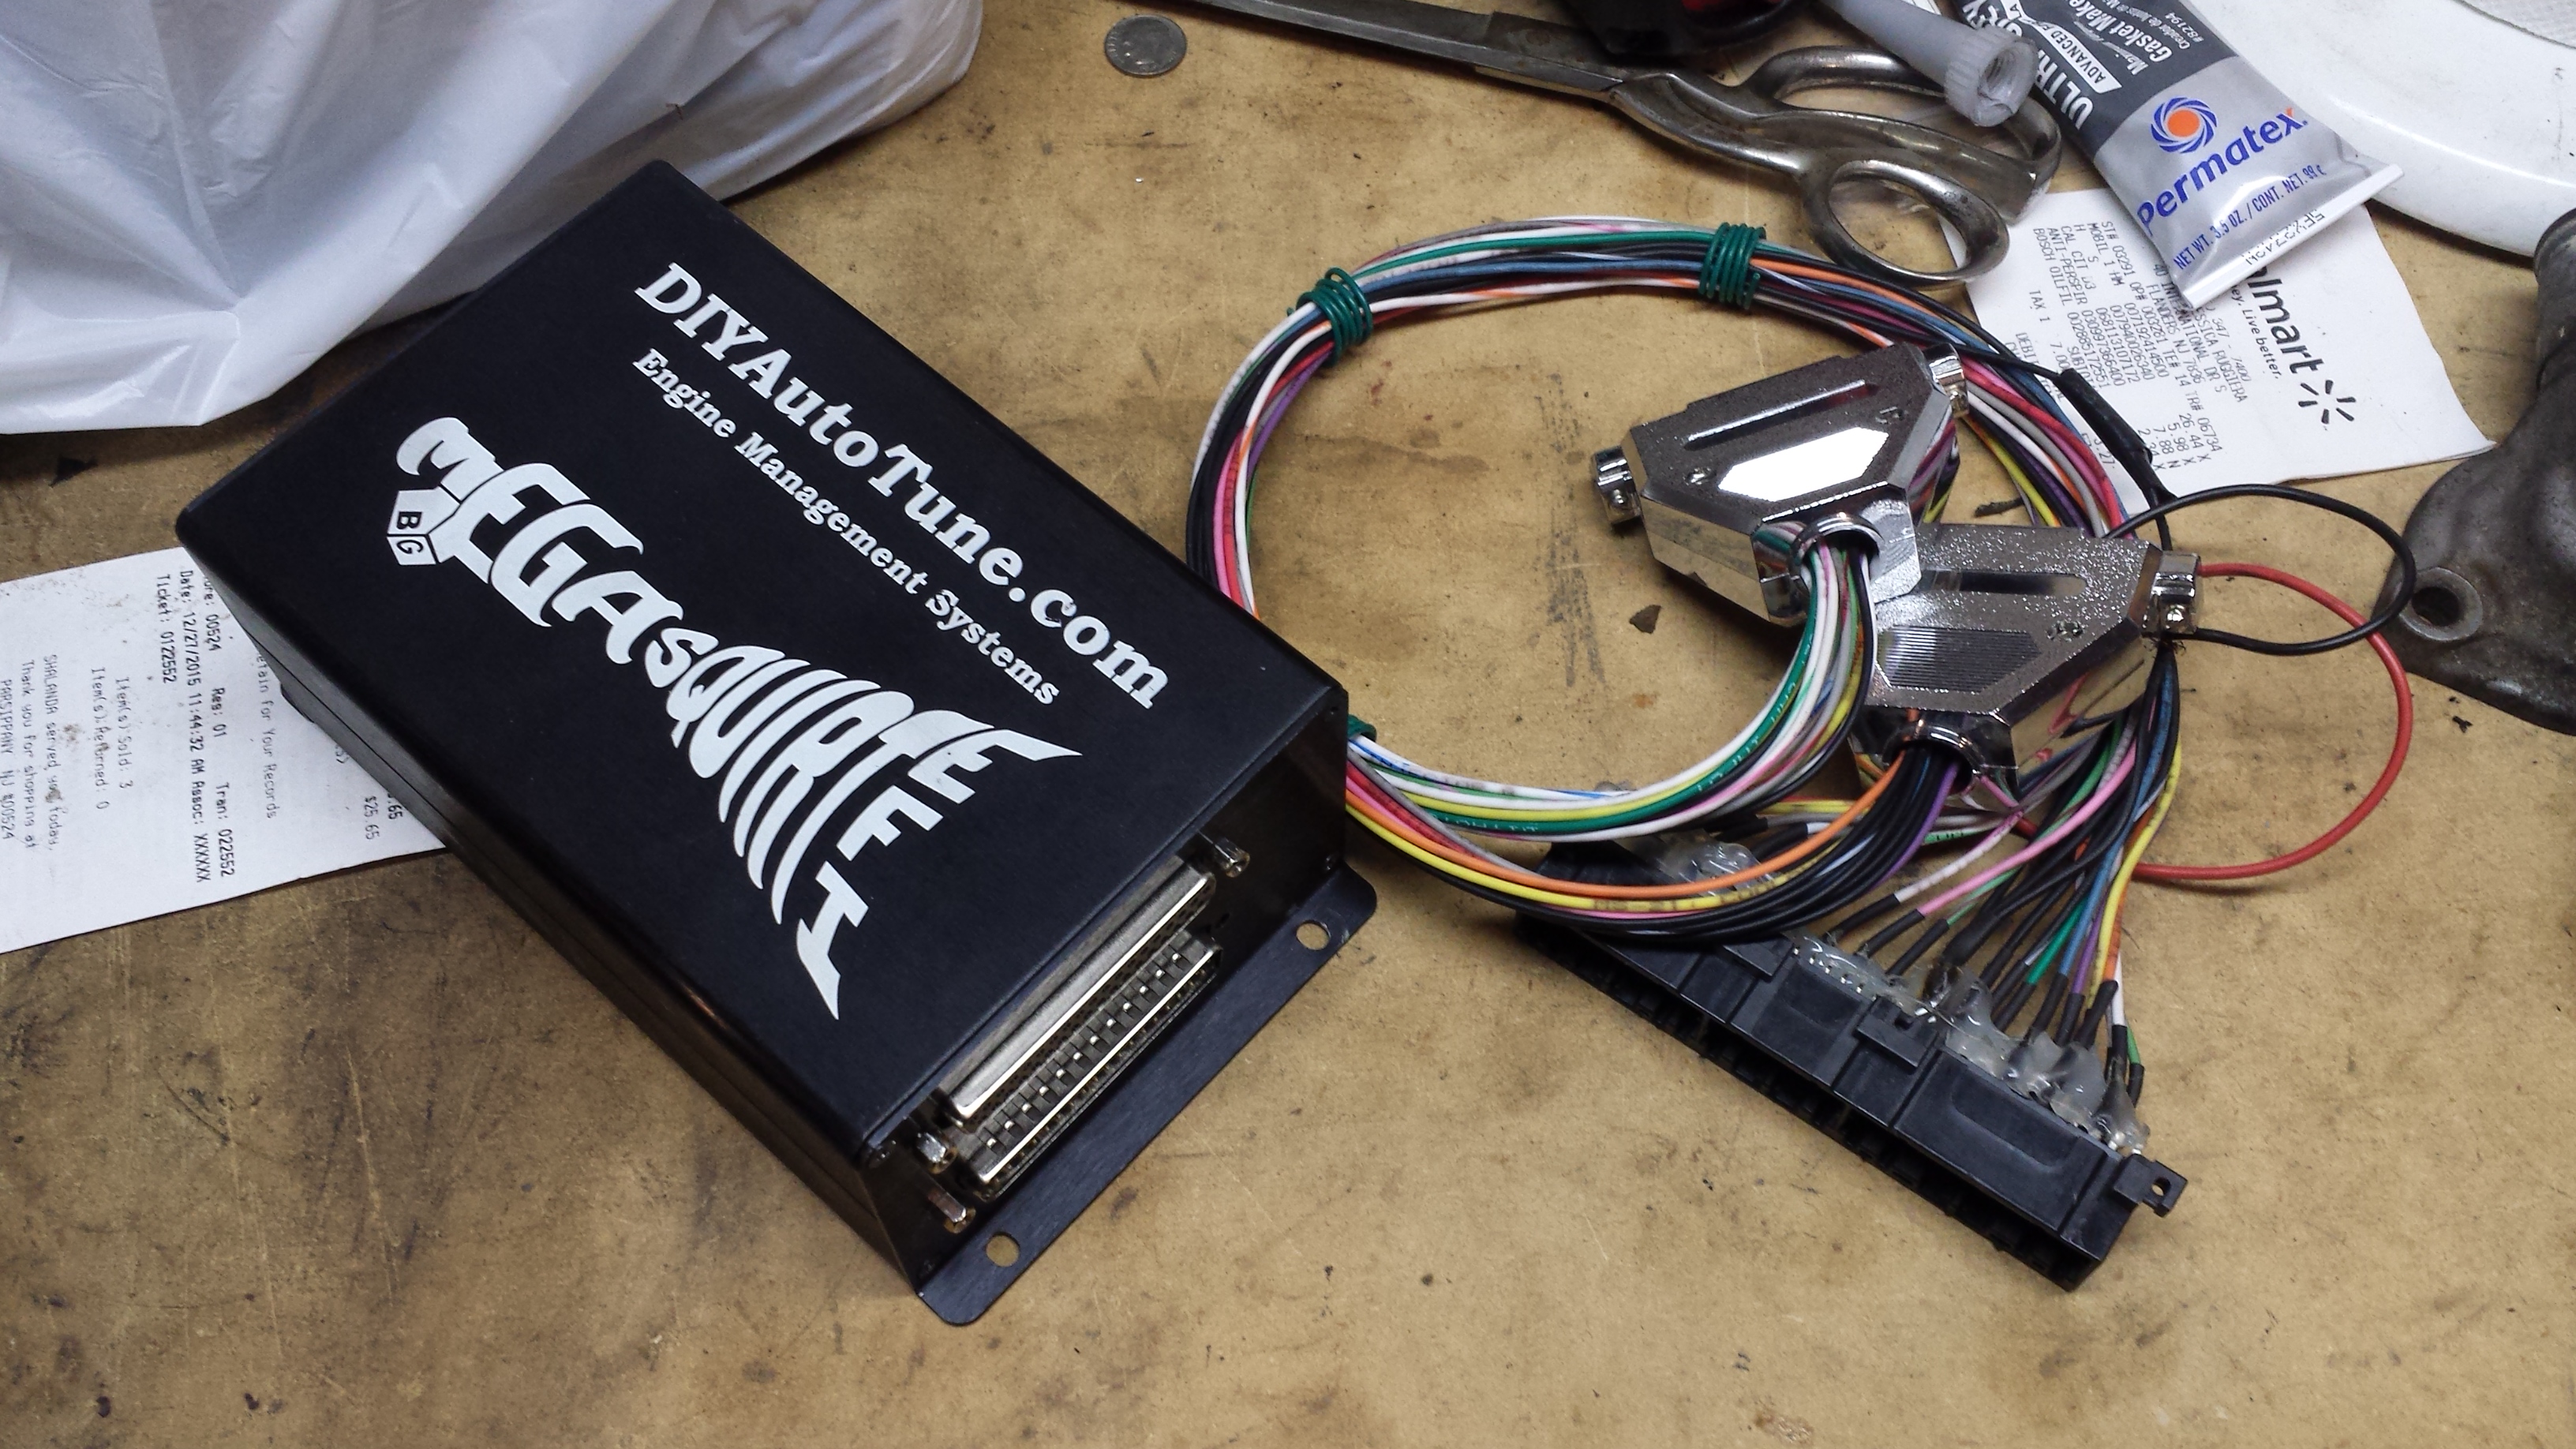
I spent last week reading through the MSExtra manuals and I think I am more or less ready to put it in once I get everything checked out and figure out an intake system. Need to order some pipe and a filter. I hear good things about AEM Dryflows.
Also need to find a base map once I figure out what firmware is on it.
On to good news though, my mom bought some new (used) couches last week, but we have yet to get rid of the current ones, so they are living in the garage. Which means there is not enough room for the van, but there is room for a Miata! Woo! Garage space for a week or so!
So today I got the new alternator in and hooked up, as well as the last of the coolant hoses changed and the radiator back in. Just need to put the crank pulley back on, belts, fill up the rad and then intake piping and it will be back on the street. Even a short winter is too longs.
The big news though, is this showed up on friday. My $450 Brain built MS3x with harness and IAT (that I will be double checking before it goes in). Was going to wait until my tax return, but for that price...
I spent last week reading through the MSExtra manuals and I think I am more or less ready to put it in once I get everything checked out and figure out an intake system. Need to order some pipe and a filter. I hear good things about AEM Dryflows.
Also need to find a base map once I figure out what firmware is on it.
Last edited by x_25; Feb 29, 2016 at 11:21 PM.
Reply
0
0
Thread Starter
Elite Member
Joined: Oct 2013
Posts: 1,822
Total Cats: 144
From: NorthWest NJ
Just signed up for my second track day. The first one was way back in 2013 in my Honda Fit, this will be my first in the Miata. It is the SCCA Tracknight event on May 3rd at Pocono. They will be running the double infield configuration. Anyone run this track and have anything I should watch out for?
I need to change the break fluid, remove some more foam from the seat to get a bit more head room, and finish futzing with the suspension. Raising the car up for a bit more bump travel for road and road course. I got away with softish springs and sitting on the bump stops for autocross, but the lot was very smooth. Don't want it jumping sideways on a course.
It was sitting at 3.75 front and 4 rear for the pinch welds. I think I will try 4.75 and 5. With Koni Yellows, 450/350 springs and 46mm FCM bump stops (I got the yellows and bump stops before I really knew what I was doing.) Does this sound like a reasonable set up?
Reply
0
0

Junior Member

Joined: May 2012
Posts: 260
Total Cats: 58
From: NYC
Just signed up for my second track day. The first one was way back in 2013 in my Honda Fit, this will be my first in the Miata. It is the SCCA Tracknight event on May 3rd at Pocono. They will be running the double infield configuration. Anyone run this track and have anything I should watch out for?
It's TNIA though, keep an eye out, watch you mirrors, learn the track. All I hear and see is bad things about those events.
Come join us at a NASA event if you want to see how DE's are supposed to work.
Reply
0
0
Thread Starter
Elite Member
Joined: Oct 2013
Posts: 1,822
Total Cats: 144
From: NorthWest NJ
I would love to come to one of the NASA ones, but that is a lota scratch for a single day for me. I will probably make one at some point though.
For TNIA, it can't be nearly as bad as my first track day at Raceway Park on their "road course". I think there were three instructors, we ran two sessions of trains and then they never talked to us again (even if it is the same, this will be better, since pocono looks like a much safer track). There was even a large pot hole on the track we had to drive around. (though it has since been re paved.) I will report back on how everything goes.
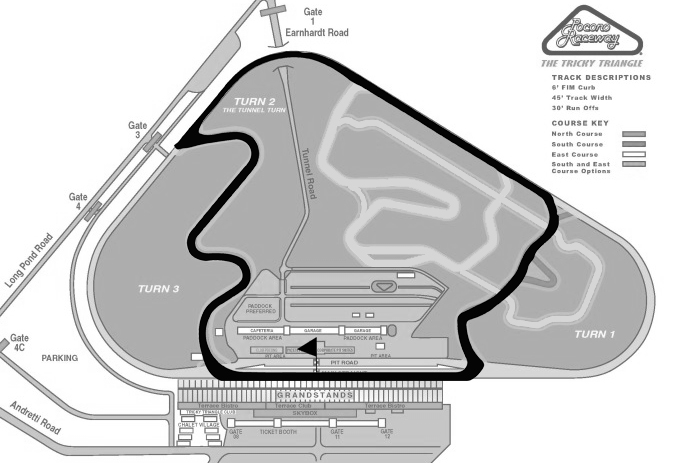
This is the configuration. It looks interesting, will probably eat my break pads though?
For TNIA, it can't be nearly as bad as my first track day at Raceway Park on their "road course". I think there were three instructors, we ran two sessions of trains and then they never talked to us again (even if it is the same, this will be better, since pocono looks like a much safer track). There was even a large pot hole on the track we had to drive around. (though it has since been re paved.) I will report back on how everything goes.
This is the configuration. It looks interesting, will probably eat my break pads though?
Reply
0
0
Junior Member
Joined: May 2012
Posts: 260
Total Cats: 58
From: NYC
IMO, it's well worth the extra scratch for more knowledgeable instructors and better driving conditions, plus you get to be surrounded by race cars and watch real races. Being an instructor for them though, I'm admittedly biased.
I haven't run that configuration. I've run it where instead of going into the infield before NASCAR T1, you just take T1. It was a no brake zone for my 150whp miata. After T2 going into breaking for devil's elbow, that's a hard brake zone, but it does get backed up with traffic in beginner groups. Ohhhh wait, just realized it's getting run clockwise, that makes all the brake zones way softer.
I haven't run that configuration. I've run it where instead of going into the infield before NASCAR T1, you just take T1. It was a no brake zone for my 150whp miata. After T2 going into breaking for devil's elbow, that's a hard brake zone, but it does get backed up with traffic in beginner groups. Ohhhh wait, just realized it's getting run clockwise, that makes all the brake zones way softer.
Reply
0
0
Thread Starter
Elite Member
Joined: Oct 2013
Posts: 1,822
Total Cats: 144
From: NorthWest NJ
Oh, I never said it wasn't worth it for the extra instruction, just that it was a lot for me at the moment. This is a more, seeing if I catch the bug, thing. Before I go with an instructor, I will need to remove a bunch of foam from the passenger seat, since that seat is almost unused and sits high (unless I get a really short instructor). Need to see if I can get some more foam out of the driver side too, I can juuuuust clear the broomstick if I scootch it forward and lean back a good bit.
I don't know if the nascar turns will be no breaking for me or not. I still have the stock 1.6, but I plan to run the Yokohama S. Drives I usually run on the street. They are a bit more forgiving than my RE-71R's are that I use for autocross.
I don't know if the nascar turns will be no breaking for me or not. I still have the stock 1.6, but I plan to run the Yokohama S. Drives I usually run on the street. They are a bit more forgiving than my RE-71R's are that I use for autocross.
Reply
0
0
Junior Member
Joined: May 2012
Posts: 260
Total Cats: 58
From: NYC
You're only taking Nascar T2 according to the map you posted, and you're taking it coming out of devil's elbow (which is a 40mph turn), so you definitely won't need to brake. I think I took that without braking coming from the other direction, so I was doing about 125mph. If you're still unboosted by then, you'll be entering it at 70mph.
TNIA doesn't require you to take an instructor with only one DE day under your belt? Funny concept.
Anyway, def make sure your safety is in line, that's always the most important thing.
TNIA doesn't require you to take an instructor with only one DE day under your belt? Funny concept.
Anyway, def make sure your safety is in line, that's always the most important thing.
Reply
0
0
Thread Starter
Elite Member
Joined: Oct 2013
Posts: 1,822
Total Cats: 144
From: NorthWest NJ
Yeah, I never had an instructor the first track day I did either. Not sure how they do it, but I will be keeping an eye out.
And yeah, I will be running the whole 85-90ish RWHP a stock 1.6 will put out. Gonna be doing a lot of point bys.
I will be running both my Blackbird Faboworx roll bar (NASA and SCCA legal. 1.75" 0.12" wall, DOM tubing, heavy sucker!) as well as the hard top (not that that will do anything safety wise.) Stock seats and 3 points though. If I decide I want to do a lot more track days, I will be ordering an aluminum seat to get my stupid torso down enough to pass the broom stick test.
Reply
0
0
Thread Starter
Elite Member
Joined: Oct 2013
Posts: 1,822
Total Cats: 144
From: NorthWest NJ
So with great trepidation, I actually checked how much shock bump travel I had before hitting the bump stops (46mm Fat Cats).
Yeah, not much... Front
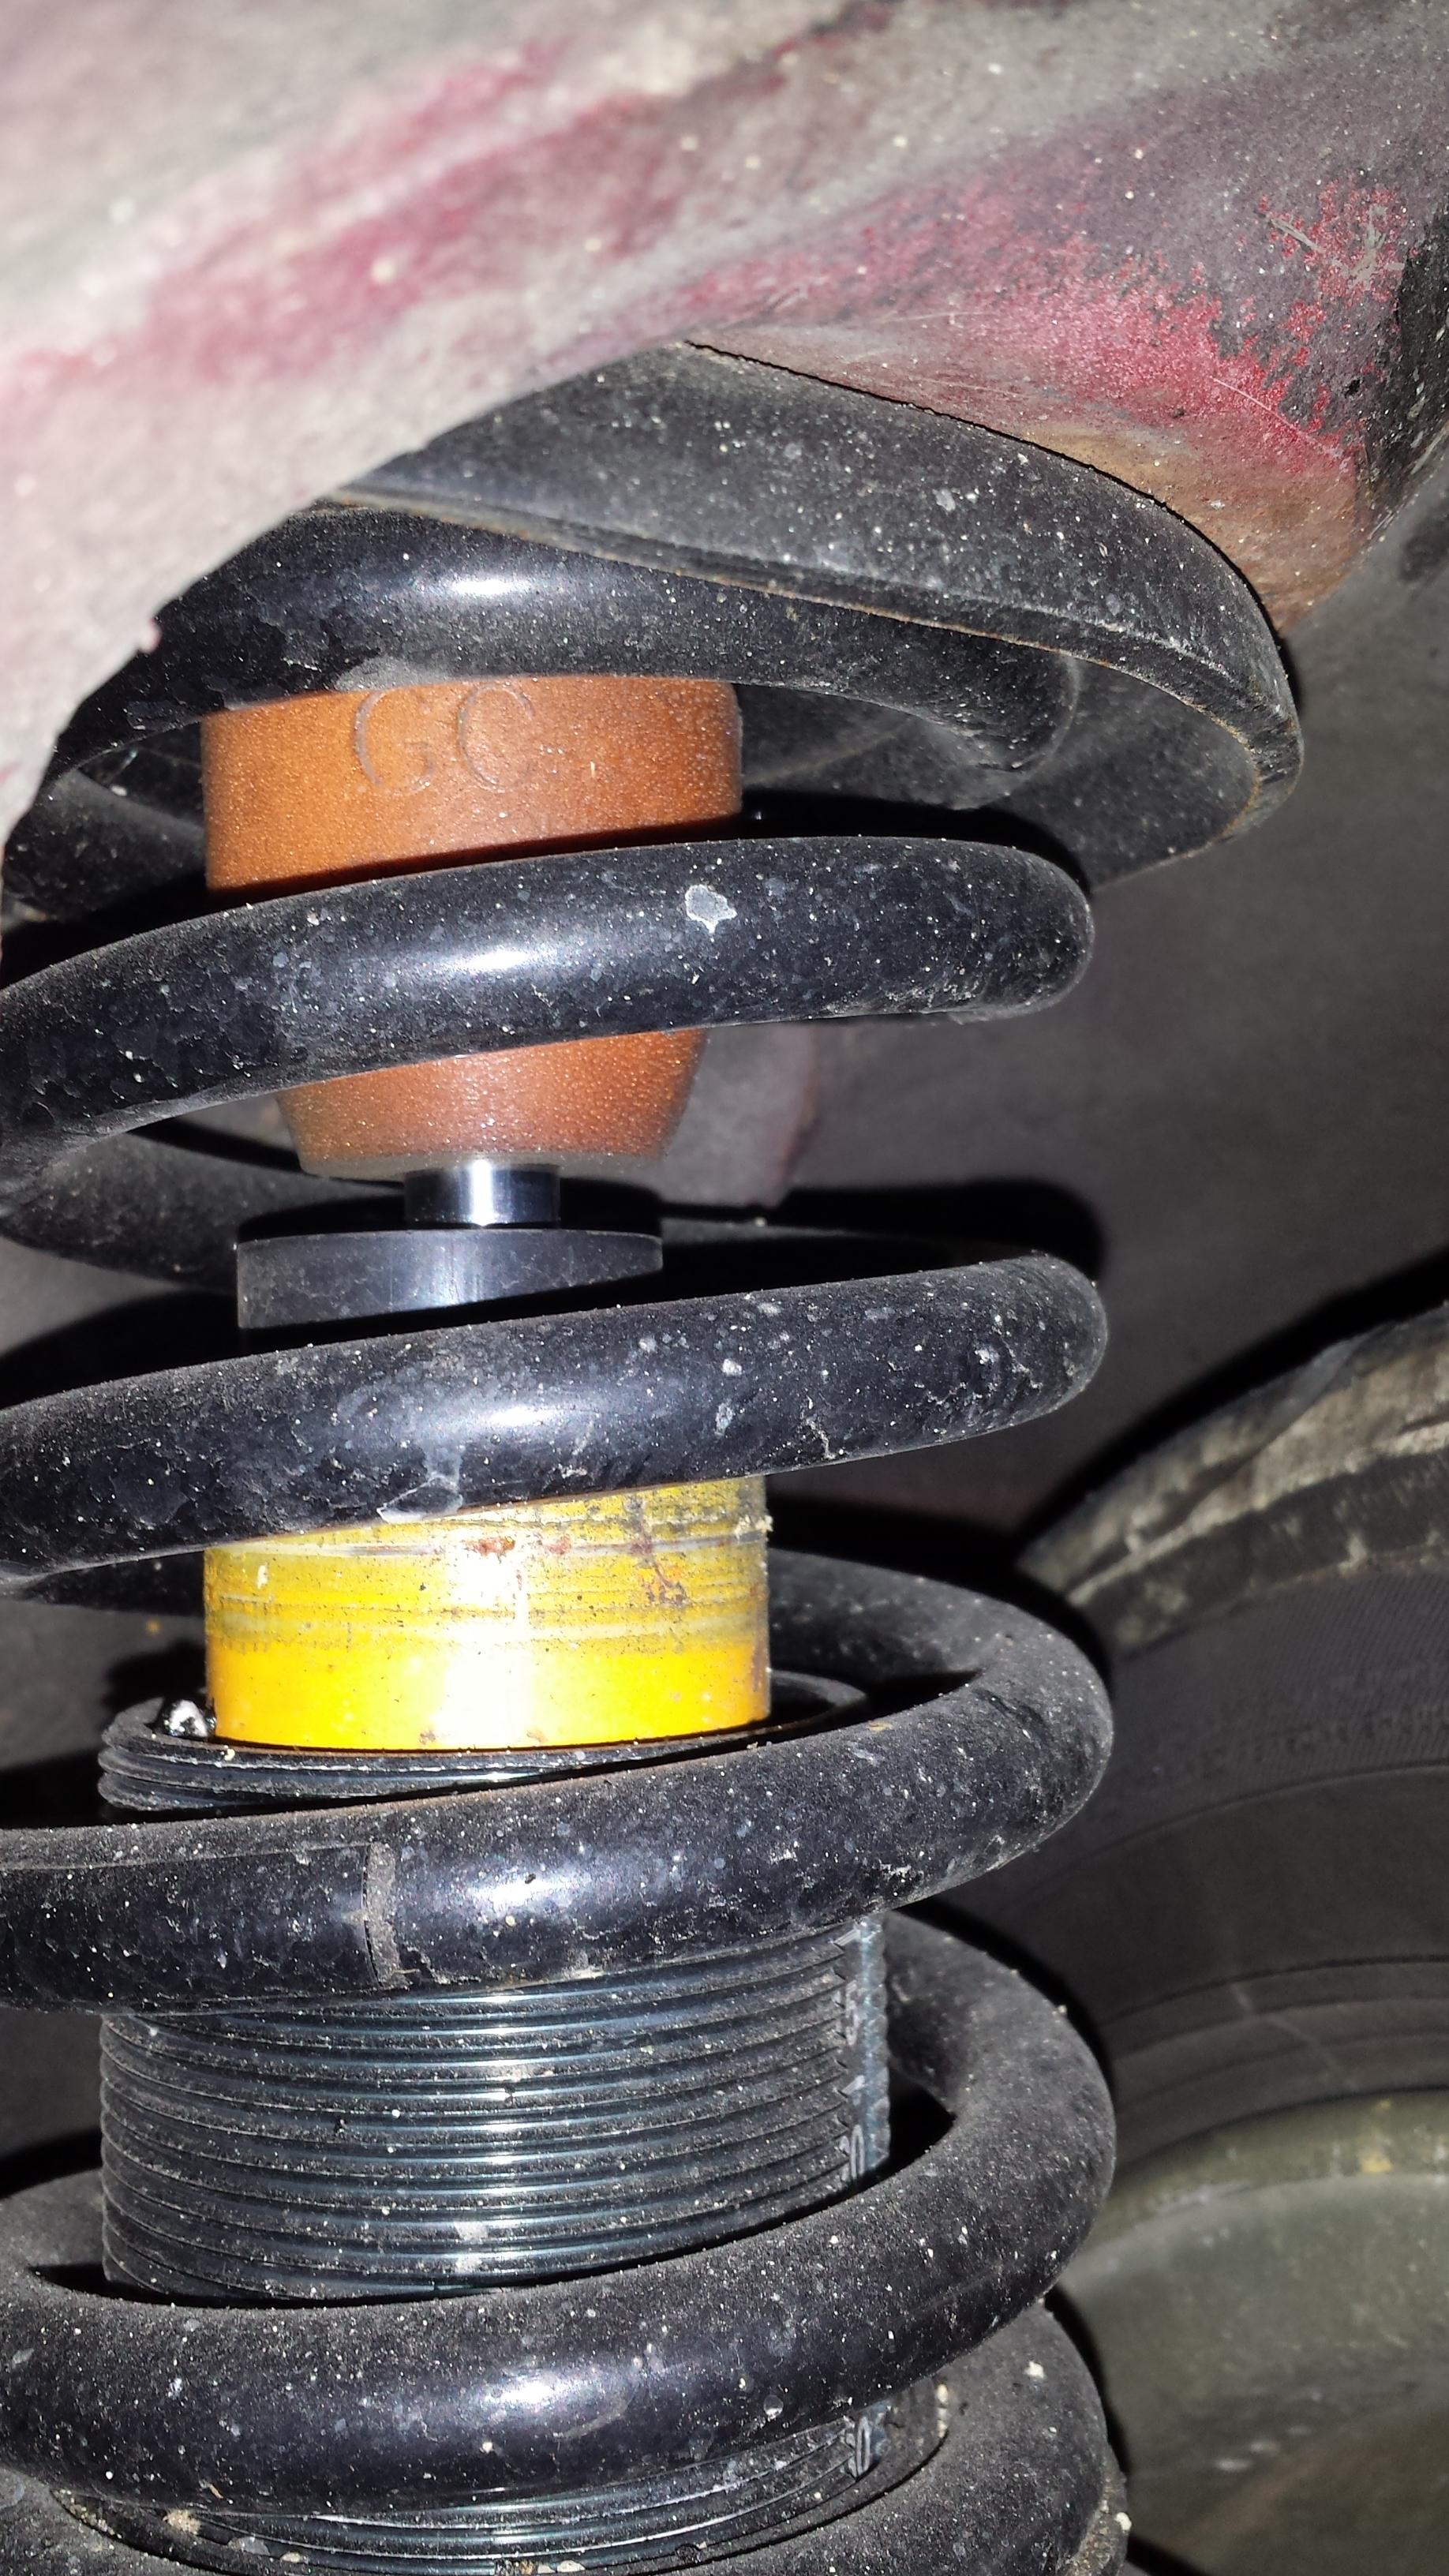
Rear
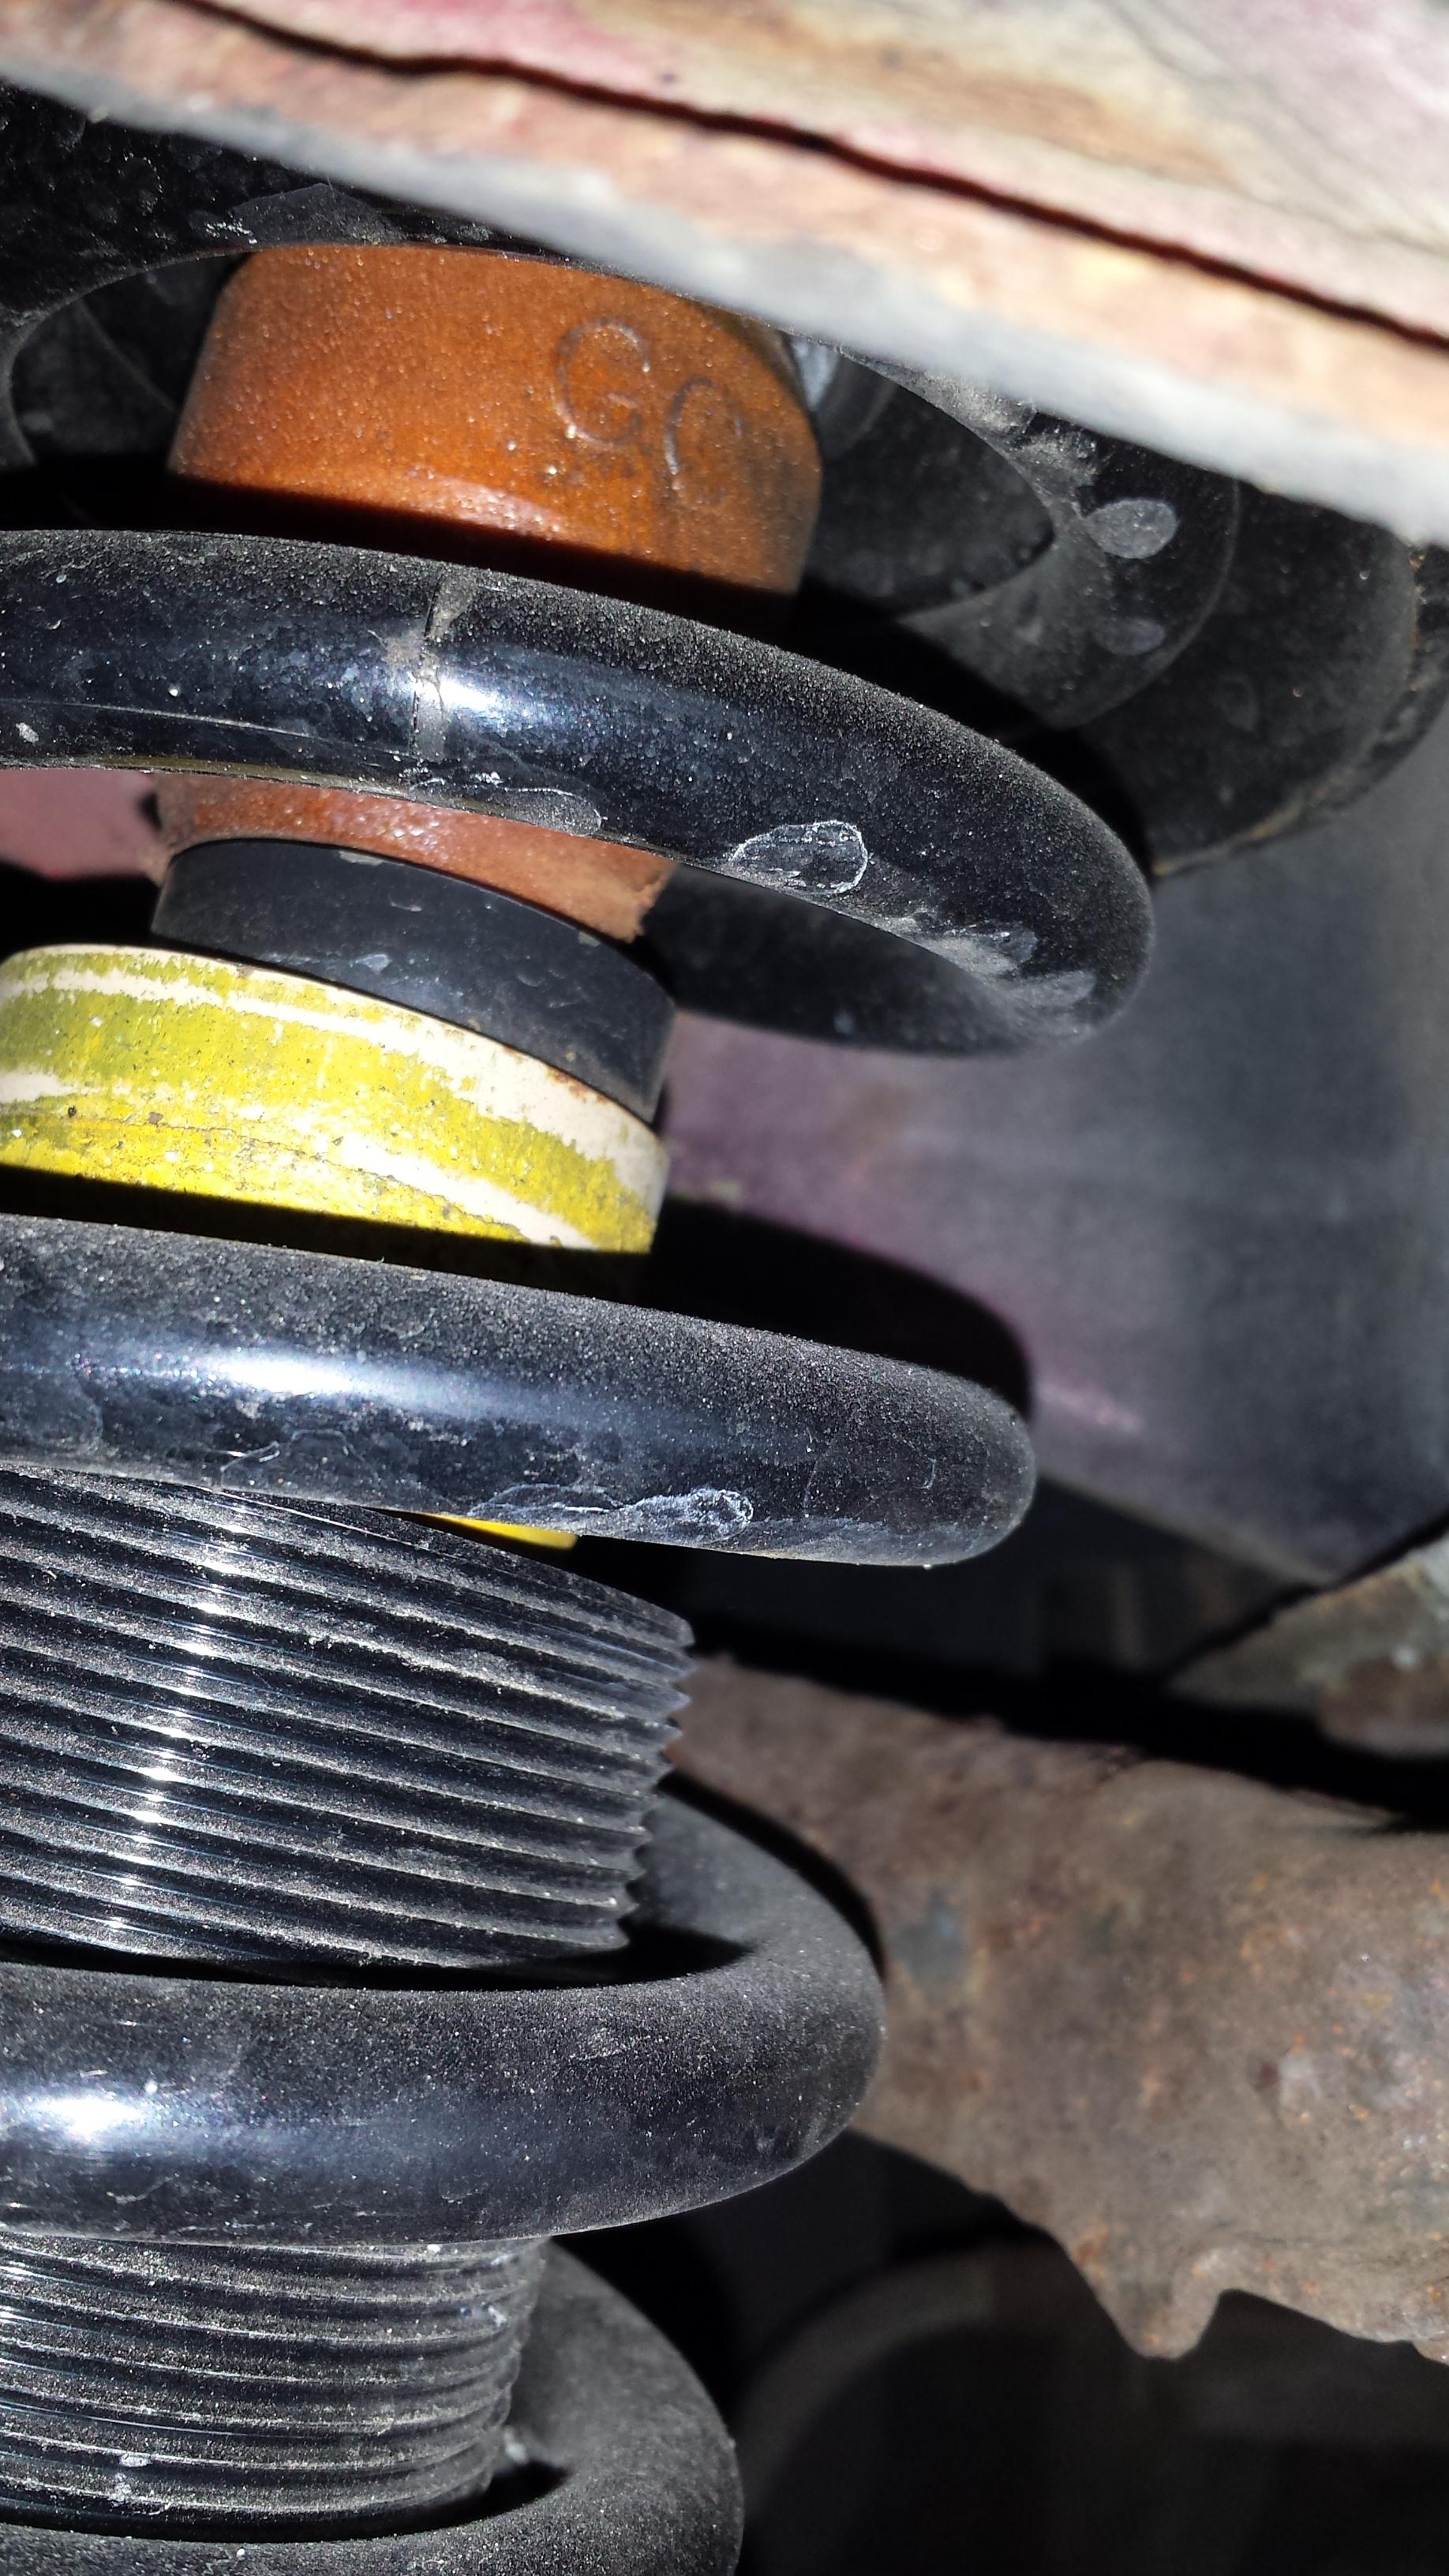
That was at 3.75/4" front/rear pinchweld height. Far too low, but it felt high compared to the saggy FM springs I had (those ran me down like 2.75/3). Raised it up to 4.75/5, I will know next week how that feels.
I also finally got the negative battery cable off the battery (it has been corroded on since the summer sometime). But the bolt snapped while doing it, so I finally decided to do the wiring upgrade for the battery and sound system I had been meaning to do. The PO installed an amp, and used a cut up, tiny jumper cable to power it (at least he fused it.) I have been meaning to fix that, and the way he mounted the amp, so I don't have to take them out for autocross or track days.
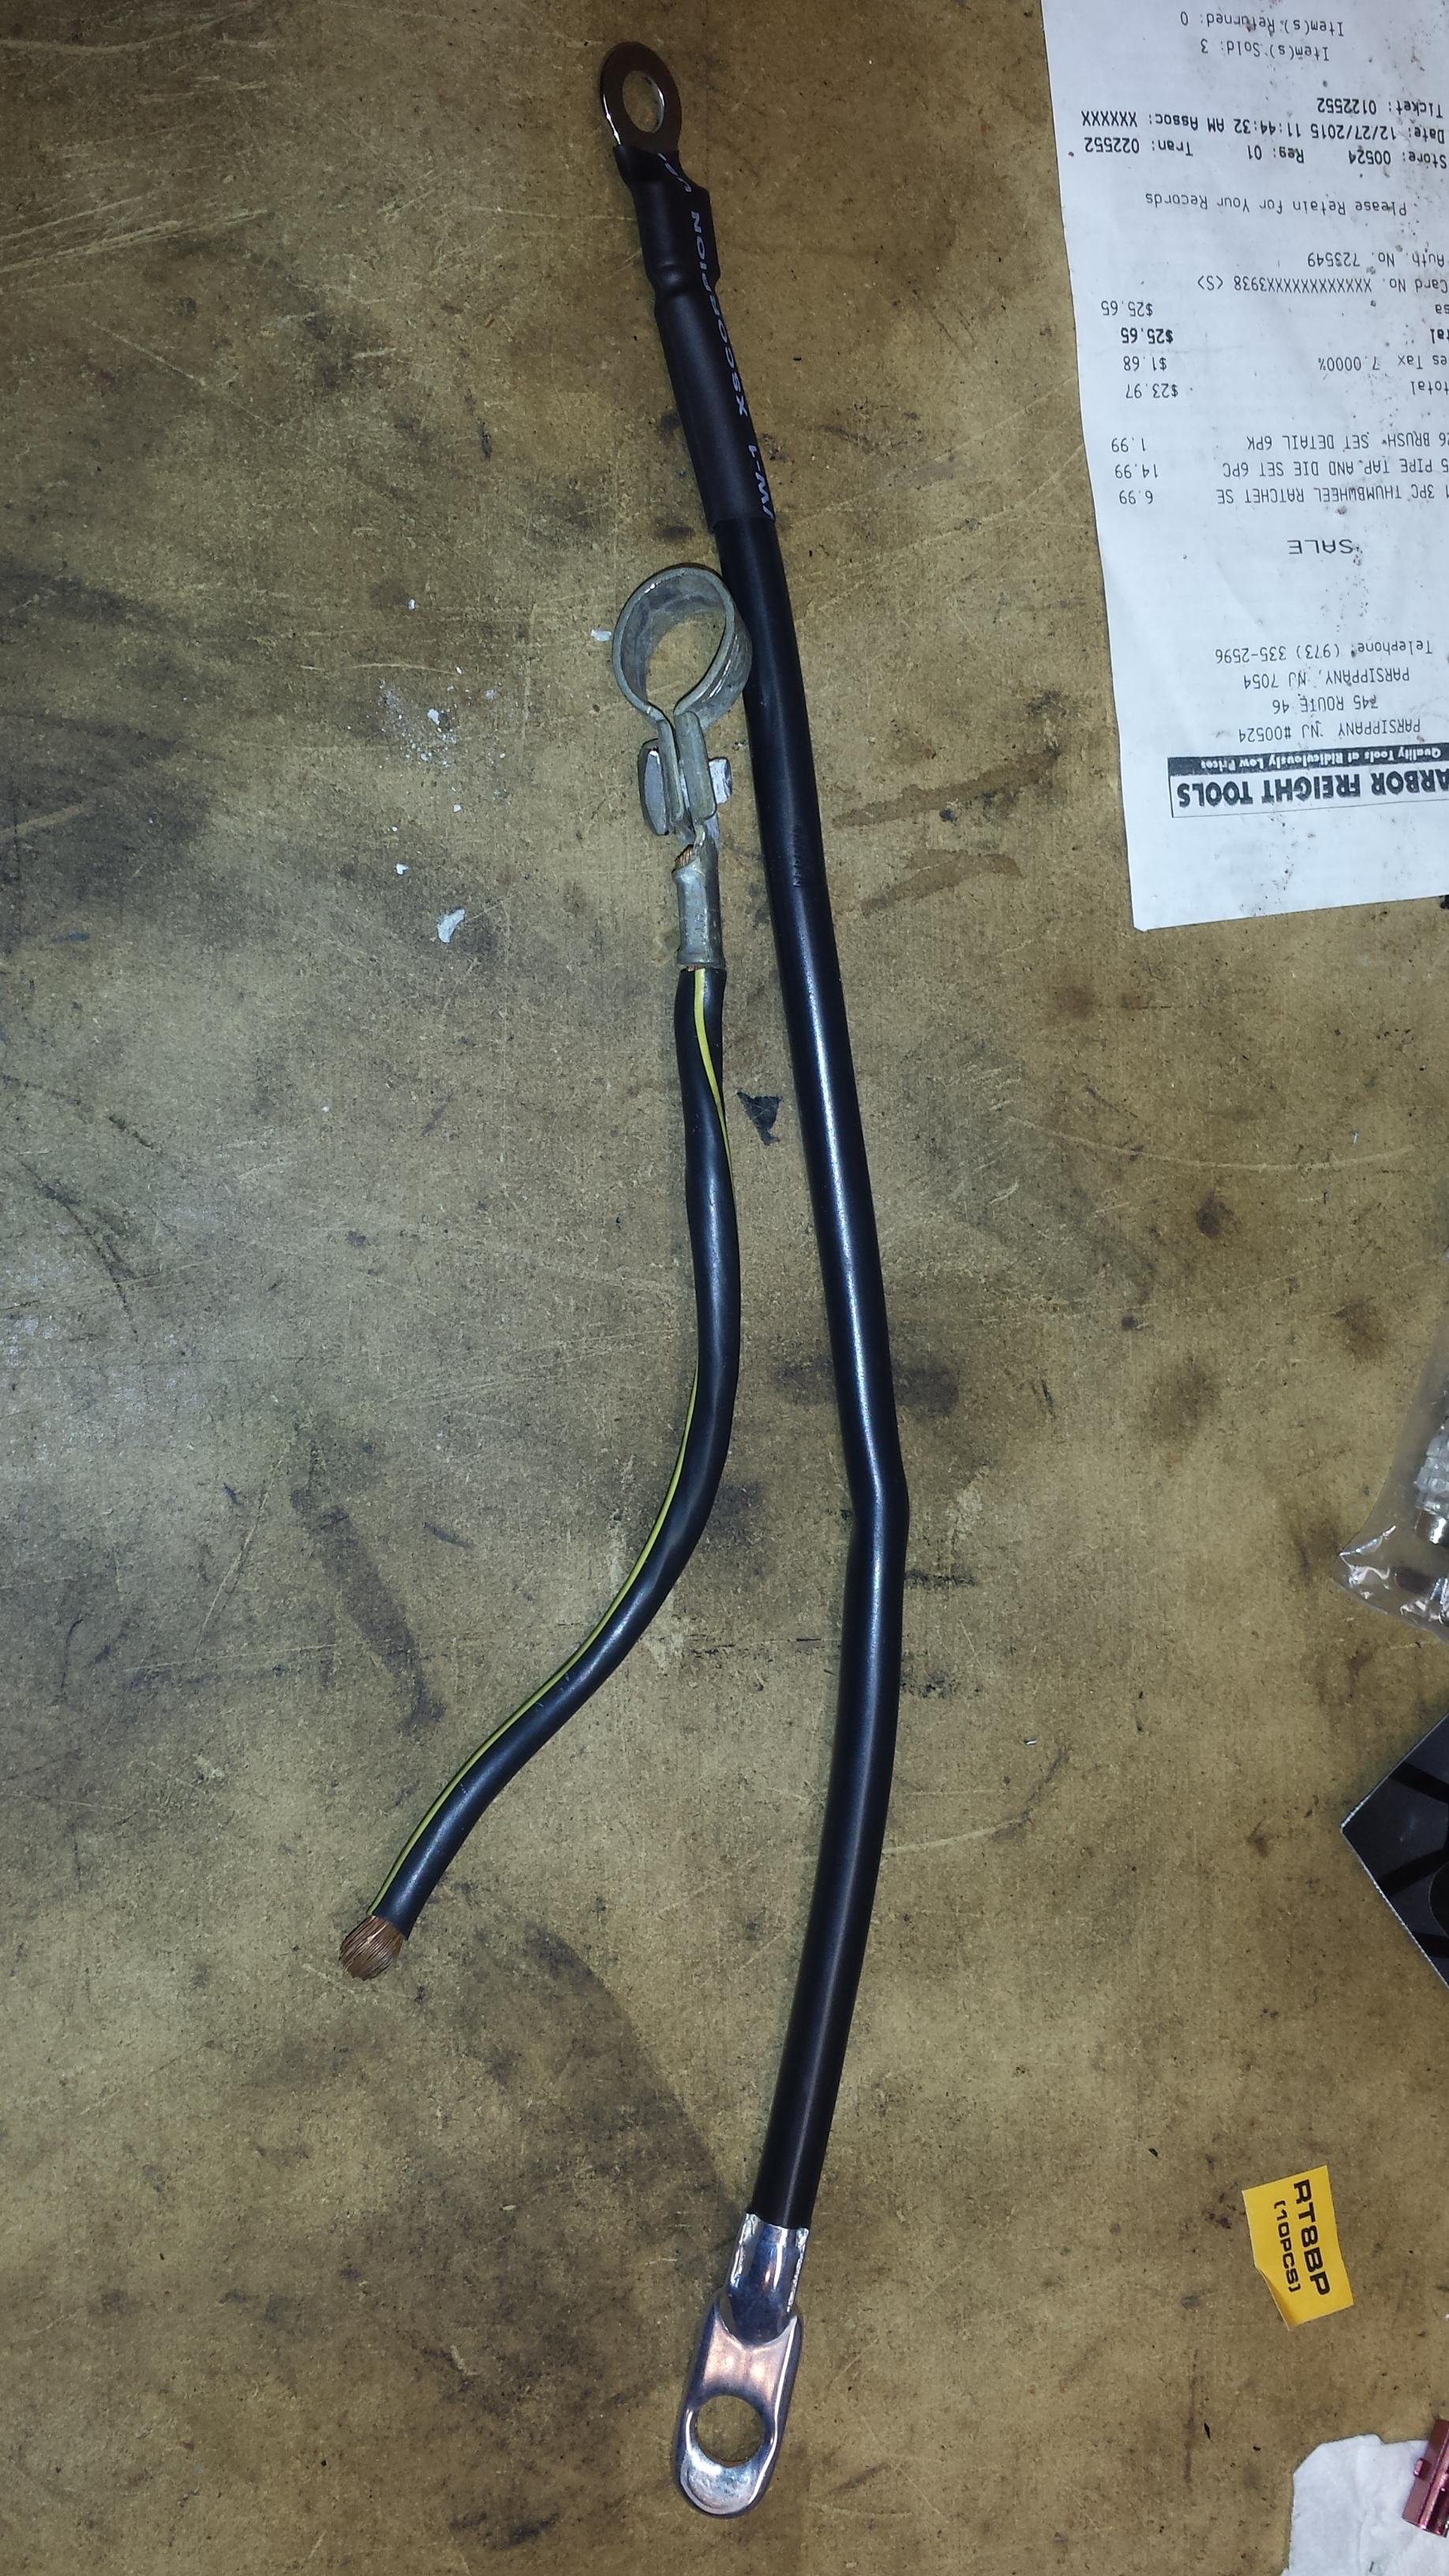
New negative cable made.
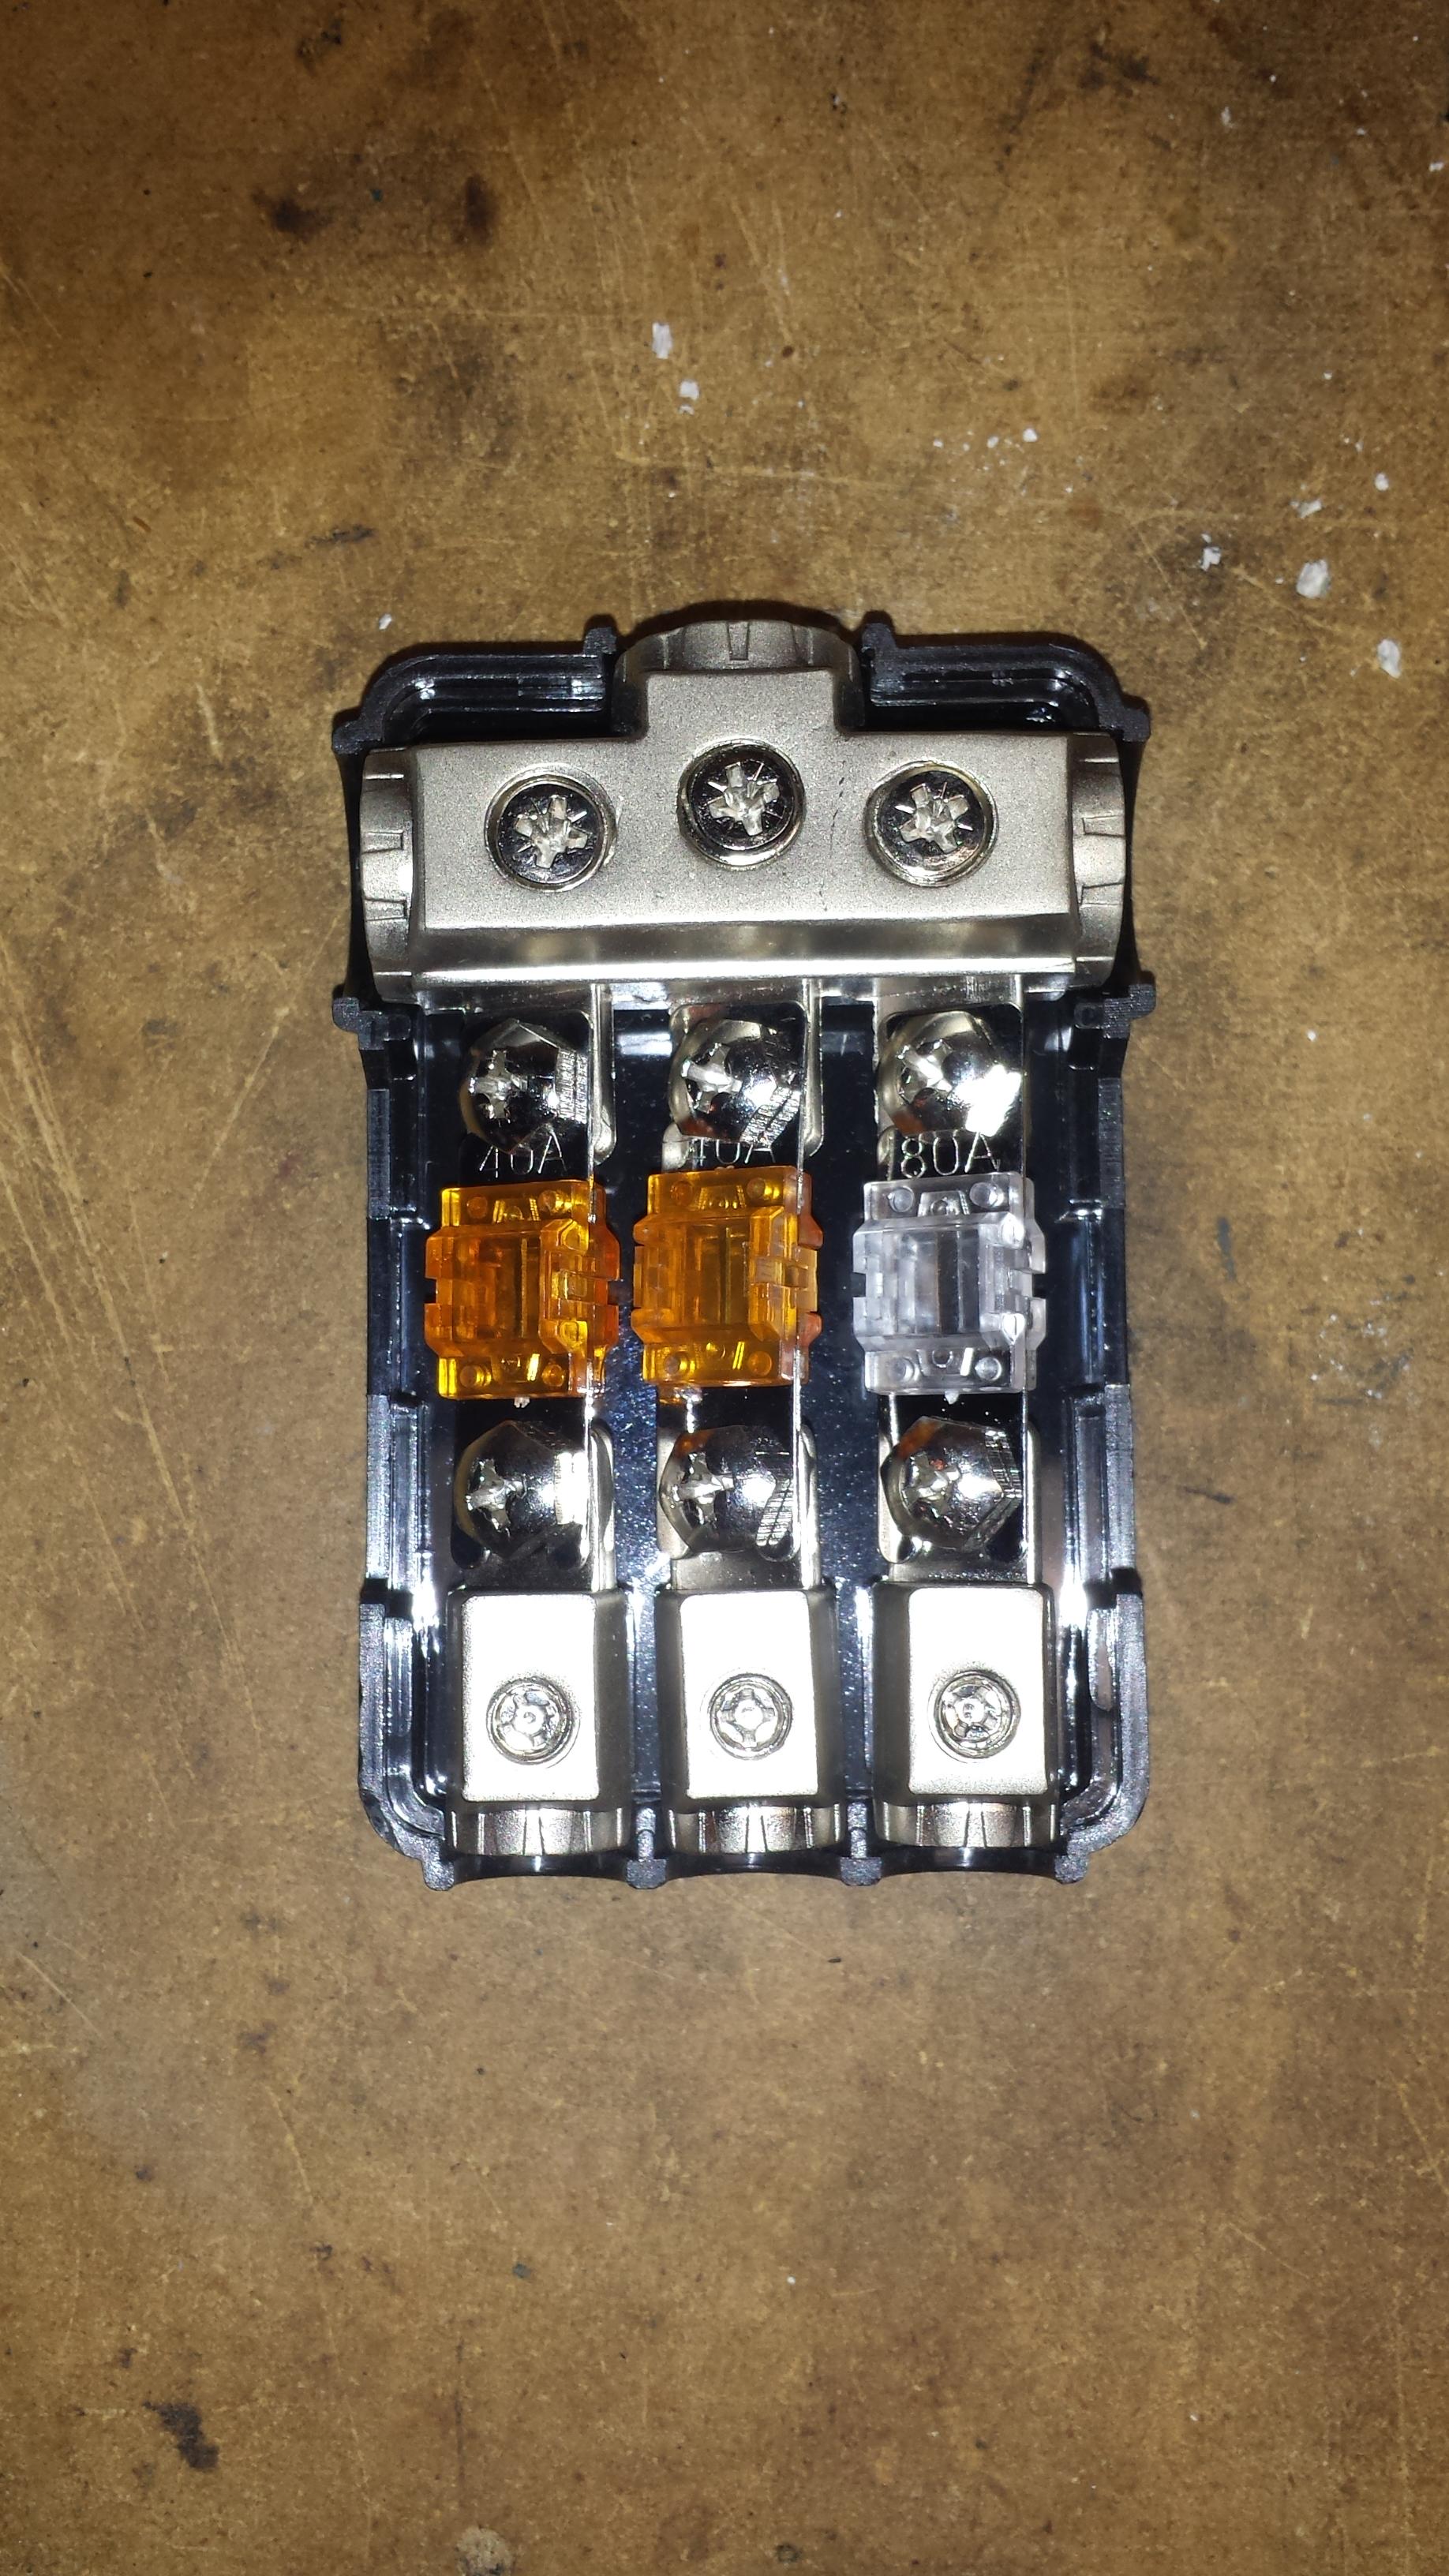
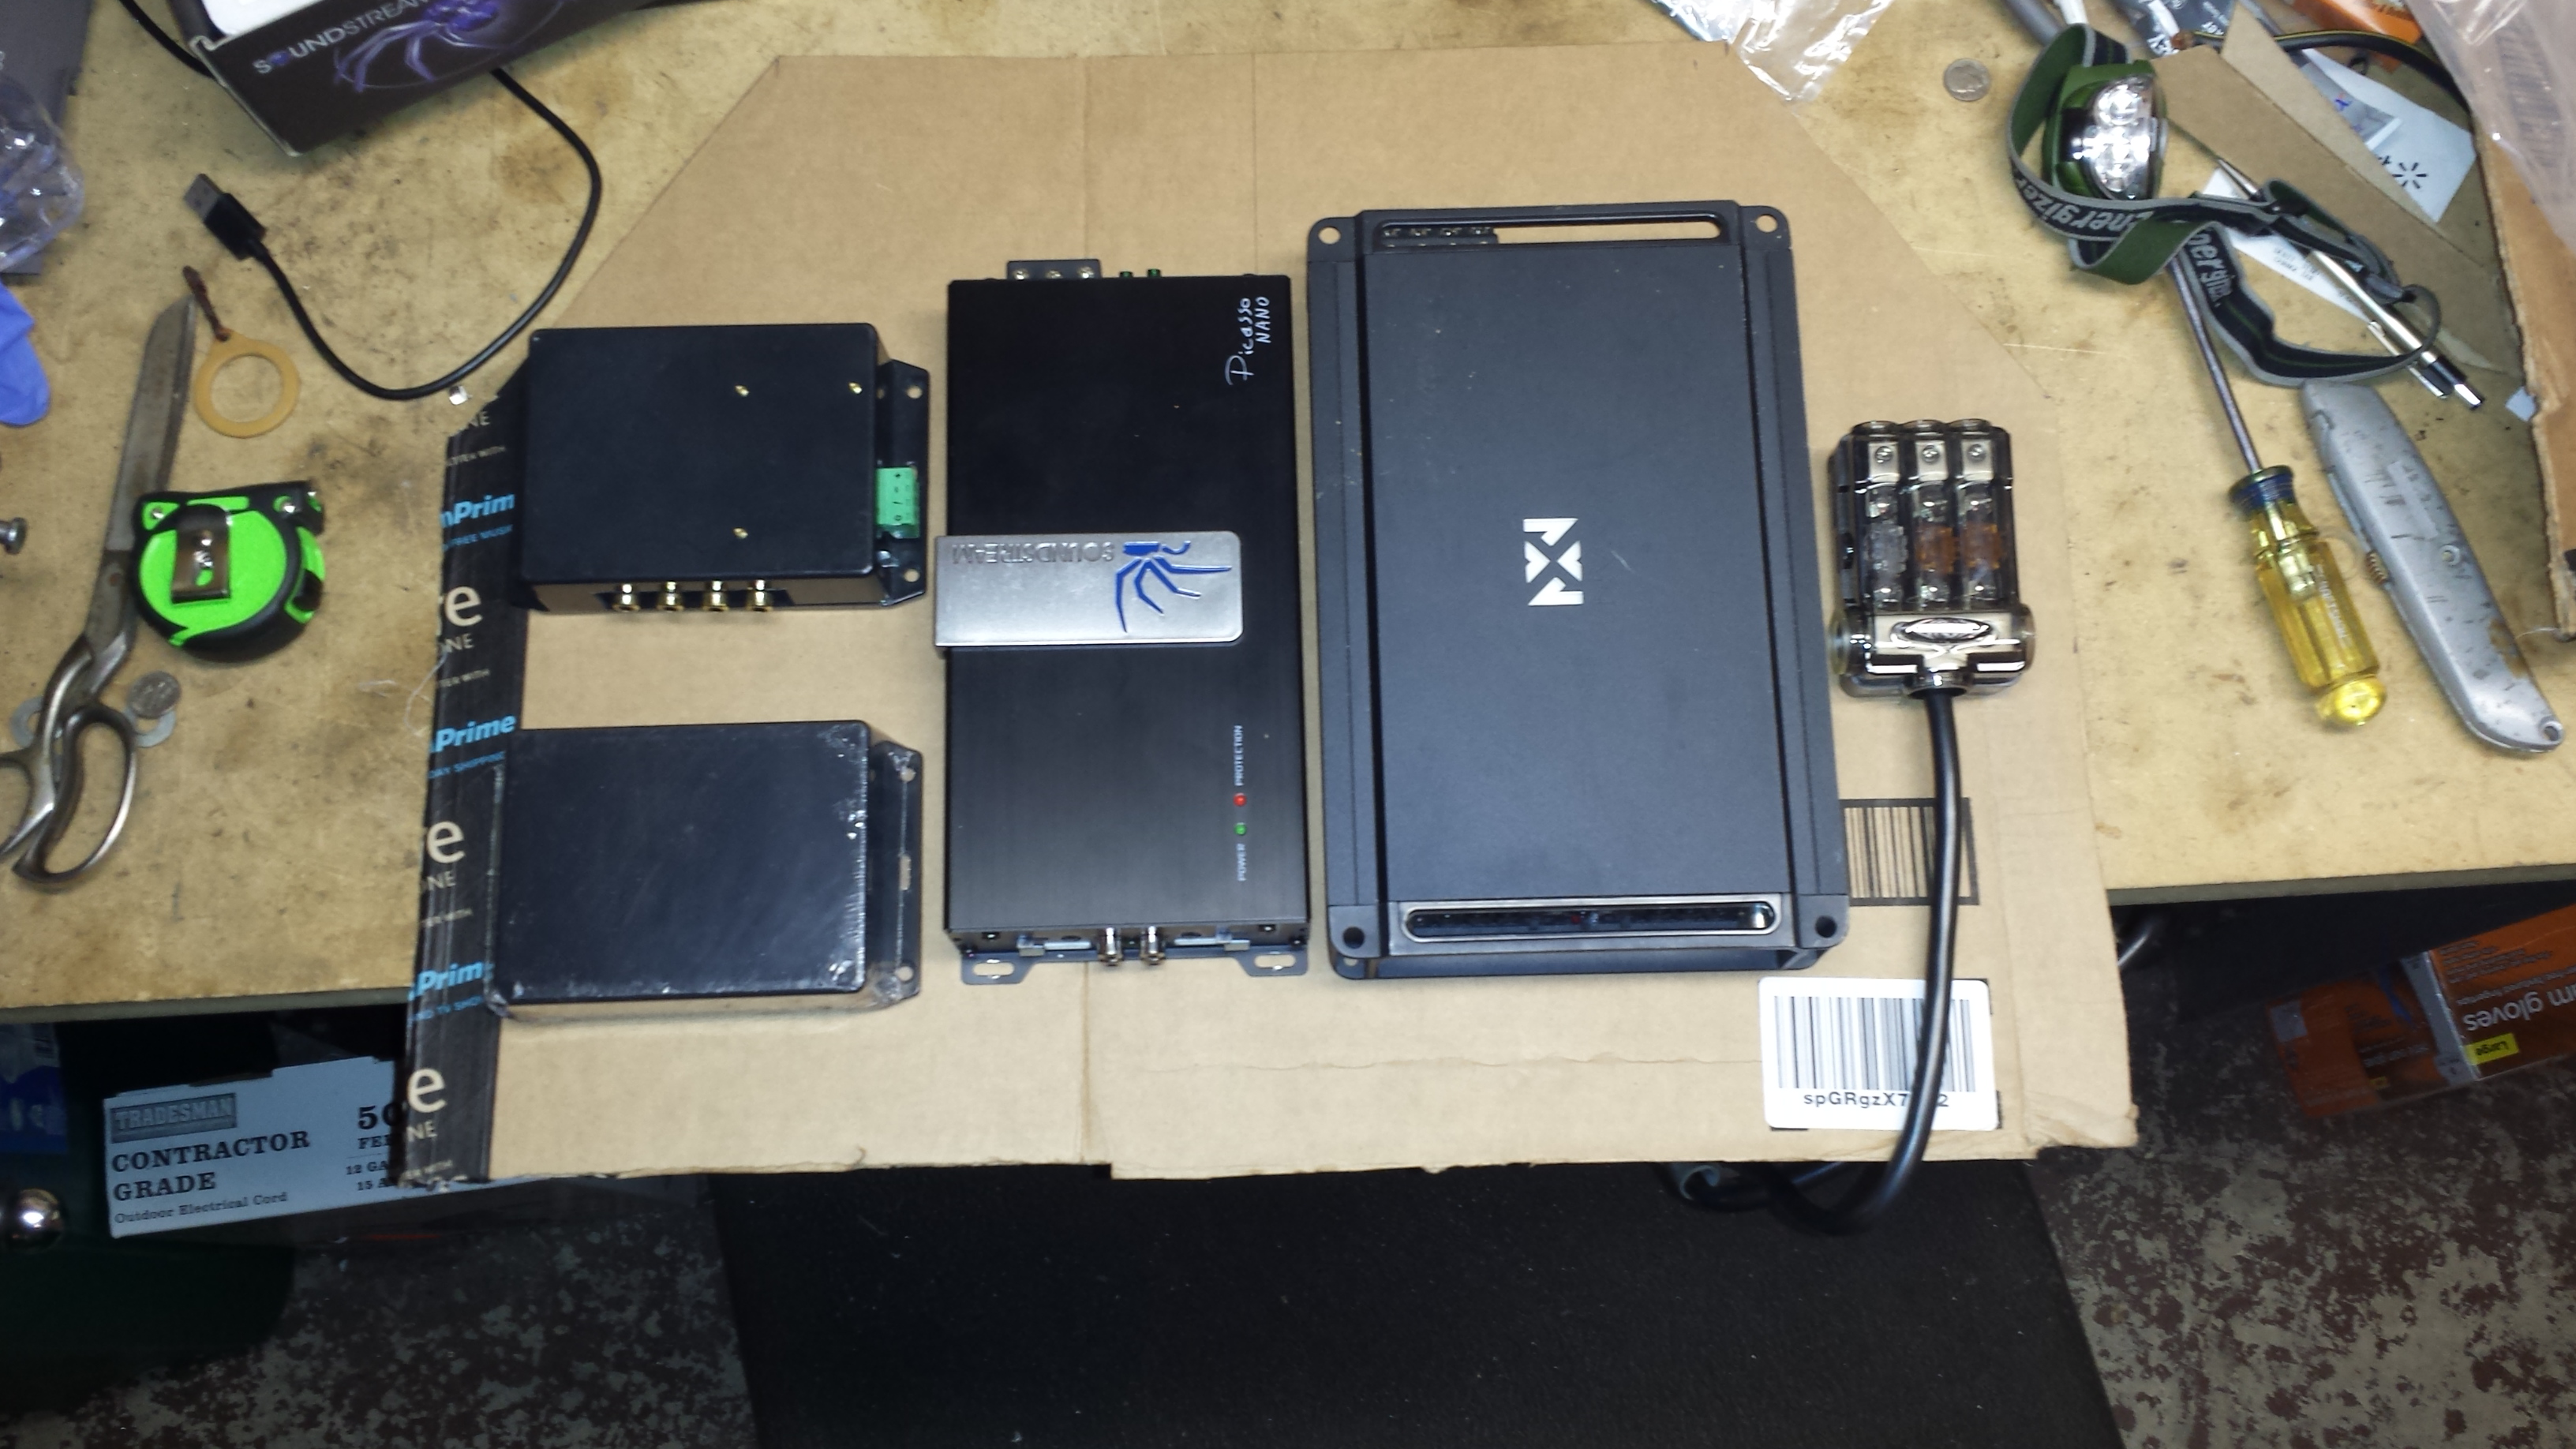
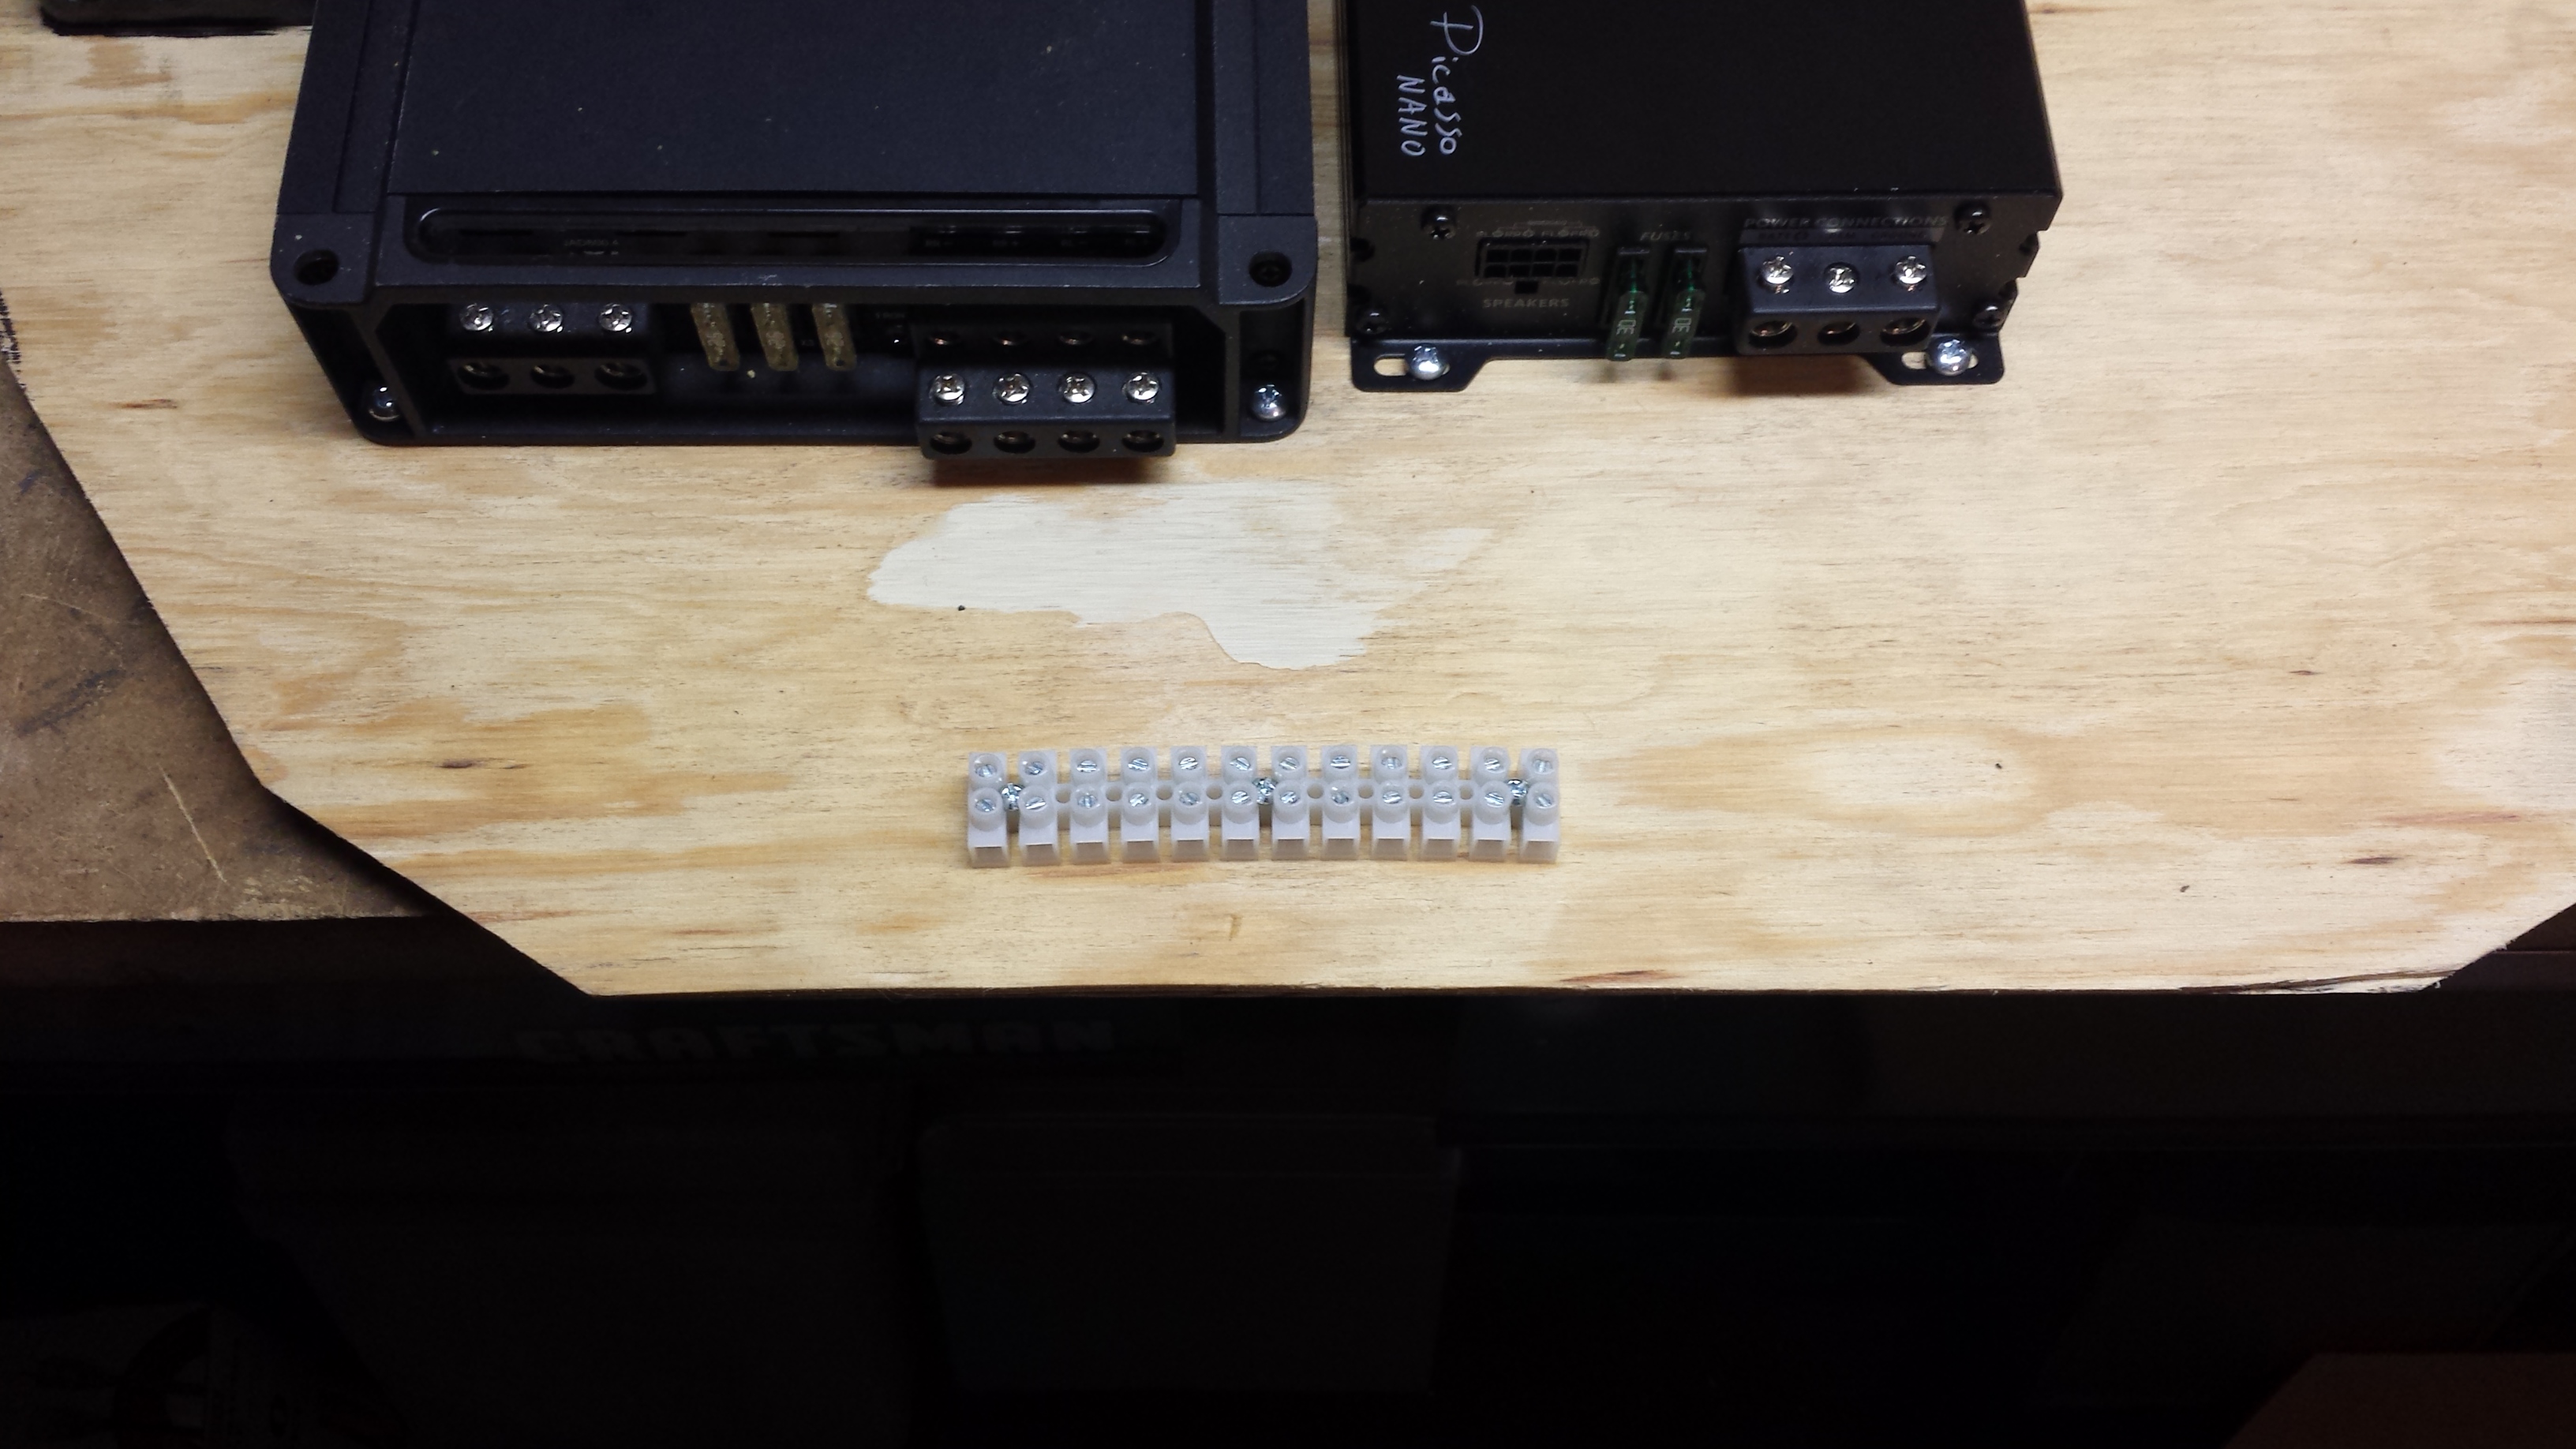
Fuse block that will be running the audio system, as well as the car. All power will pass through it and is fused. I have never liked that the main positive lead runs all the way to the front of the car before going through a fuse. It get's an 80A one here, two 40's for the two amps.
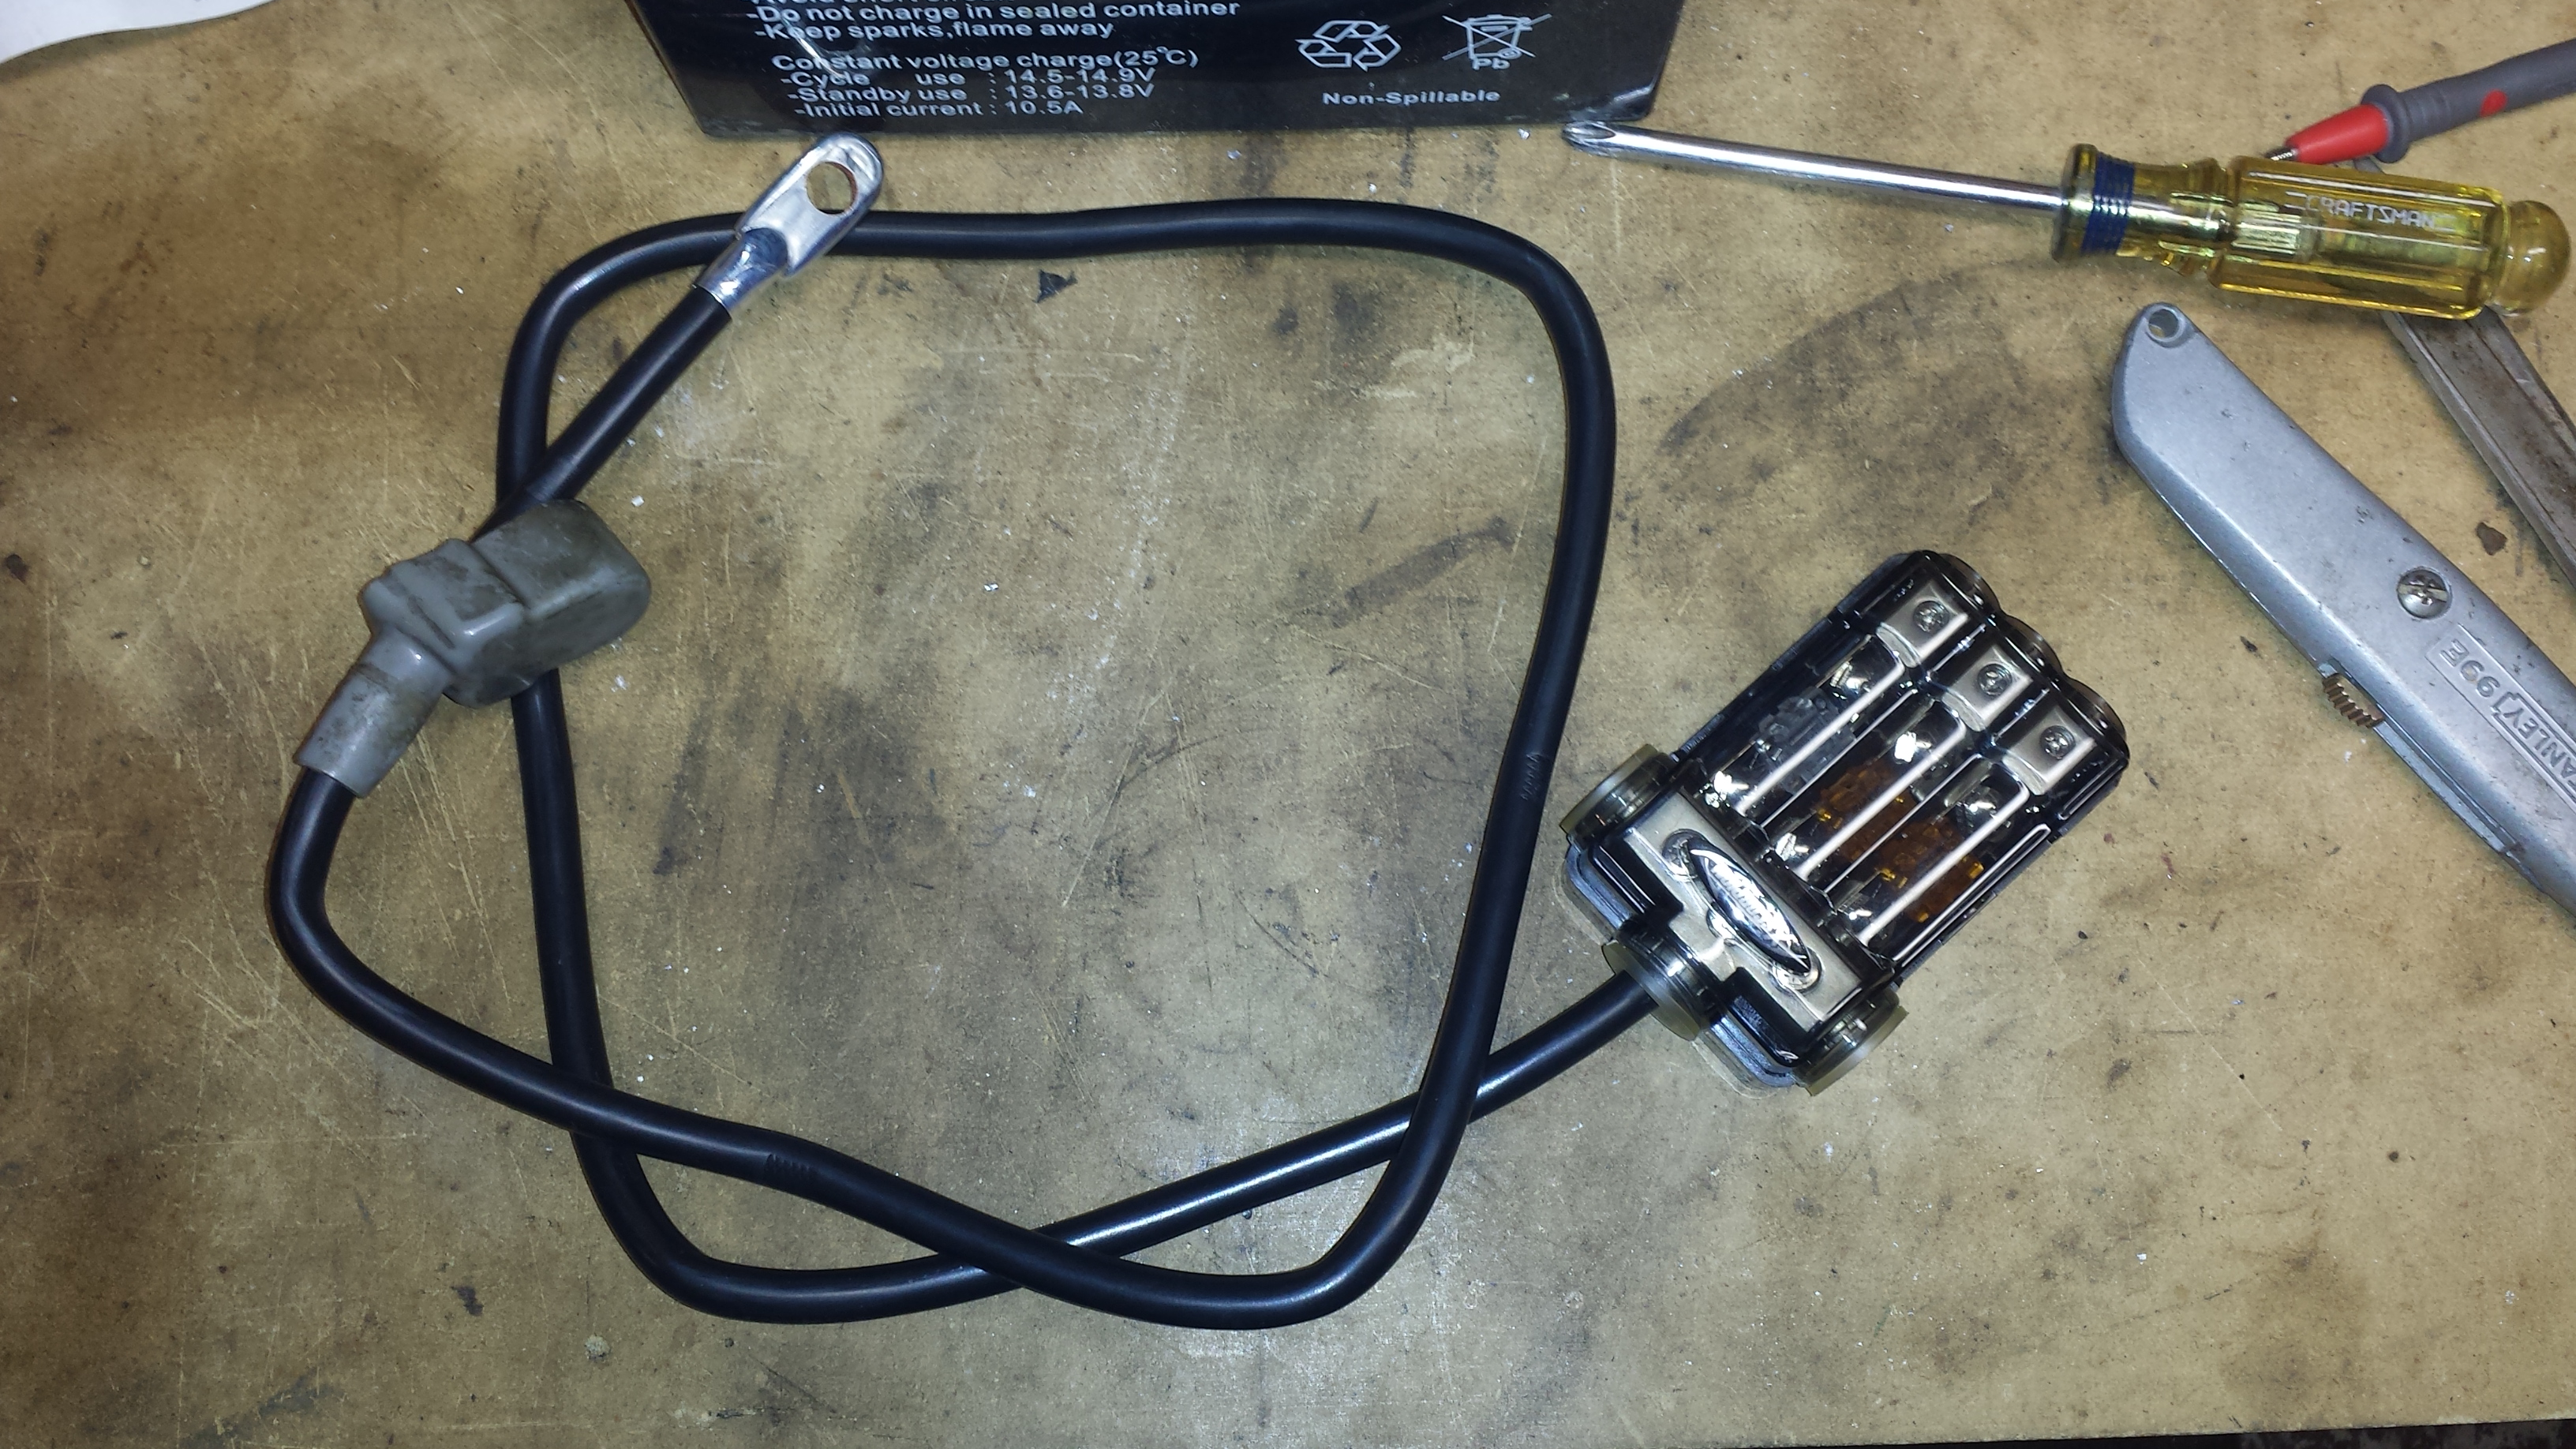
Fuse block and 4Ga positive cable. It will be trimmed to length later.
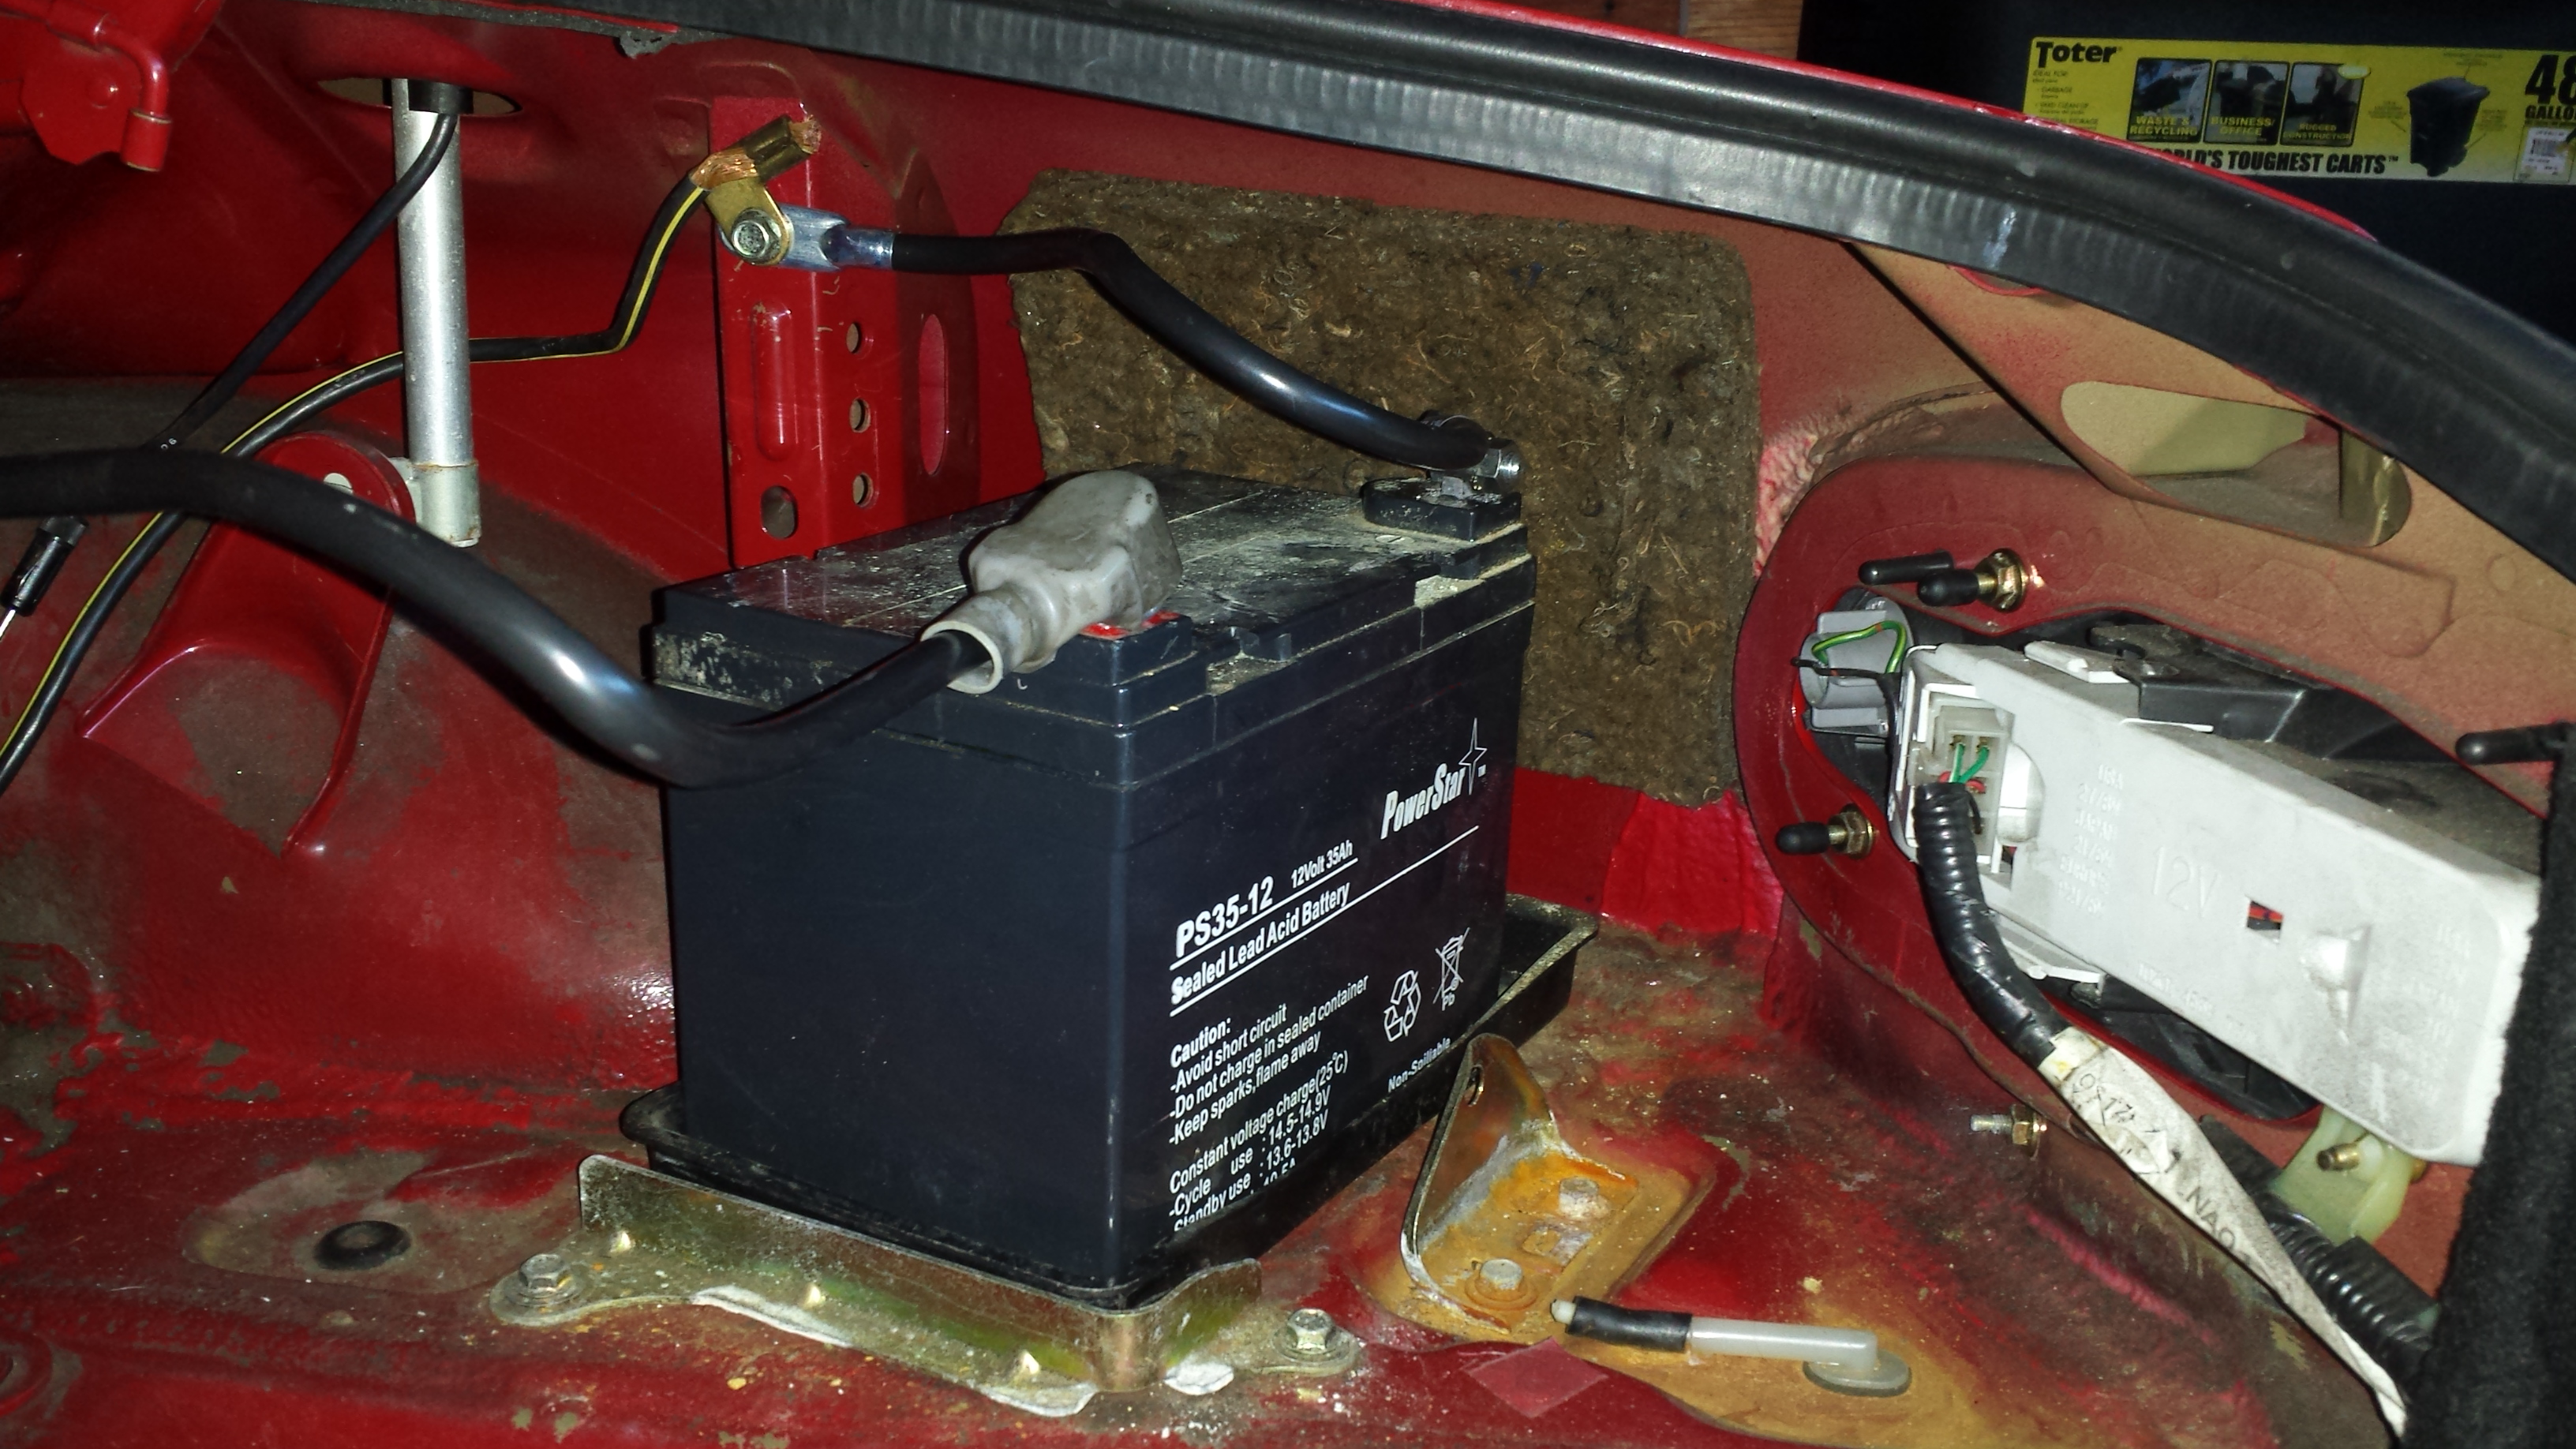
Hooked up to the battery. The PO put in a sealed lead acid from a UPS. Duno why, it works though. Unless it is below 20F, then it won't do anything.
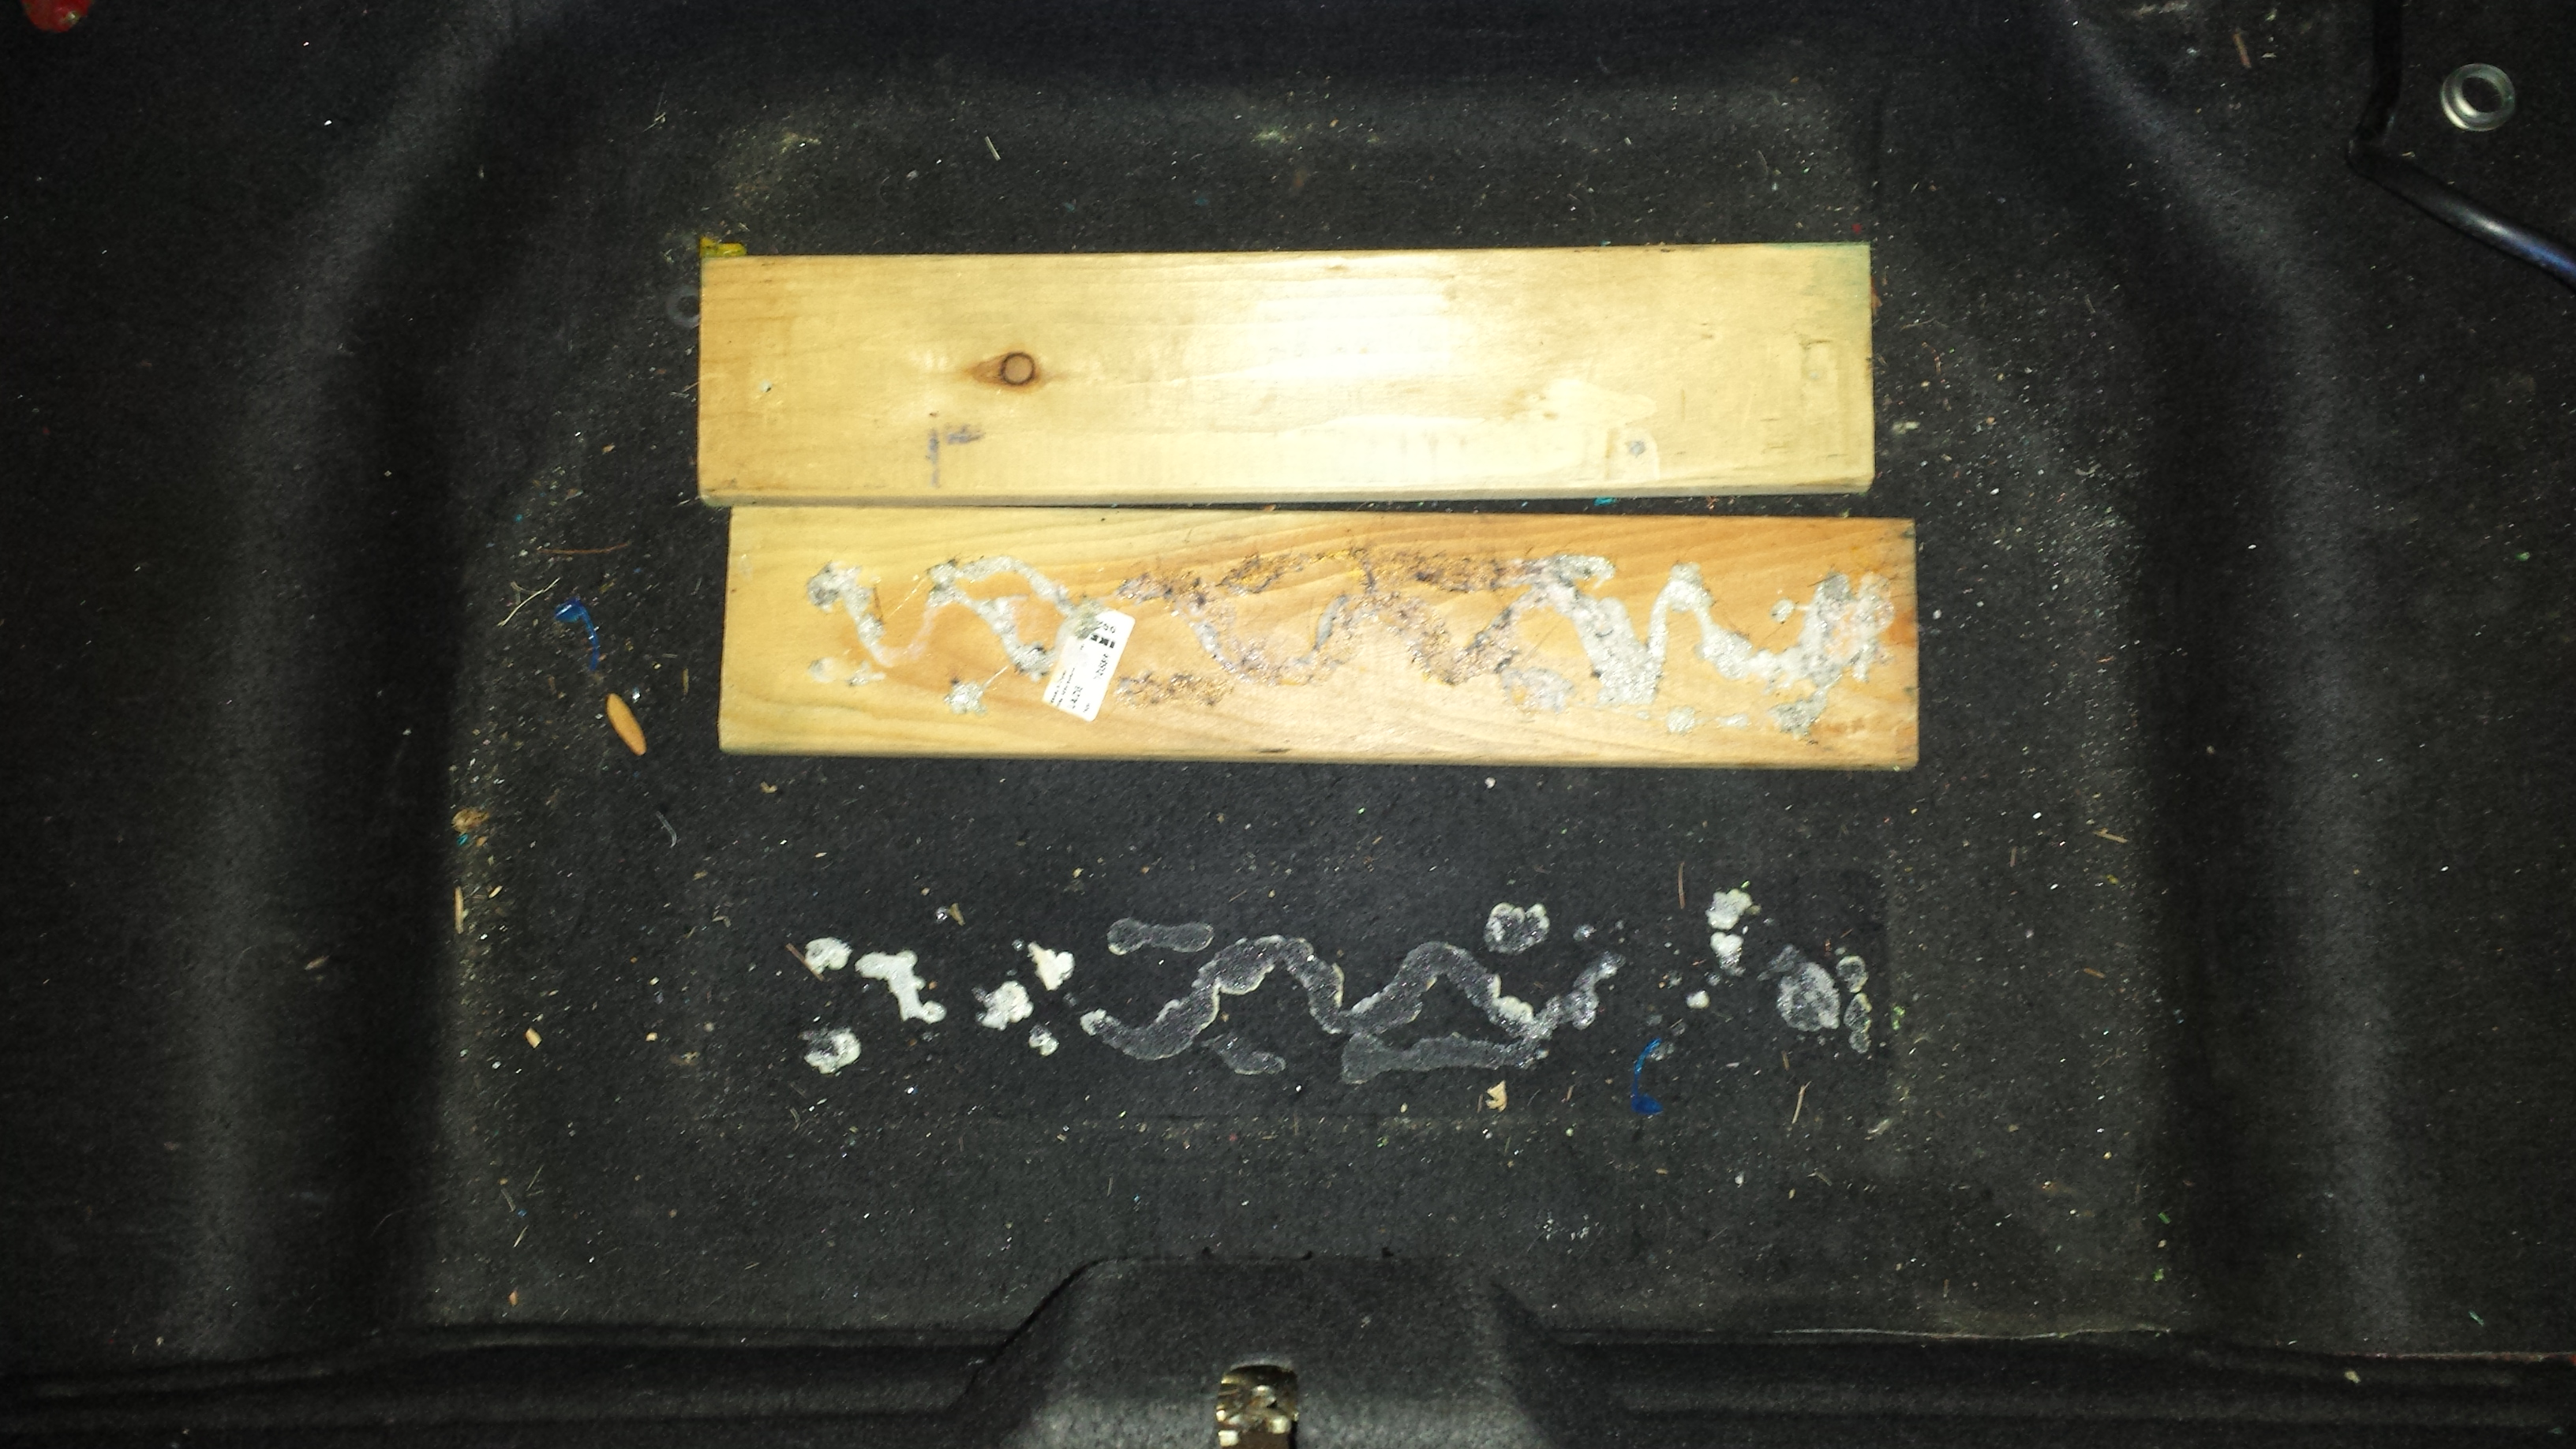
This is how the amp was originally held in. Two strips of wood glued to the carpet. Not gonna fly (well actually, it might, that's the problem.)
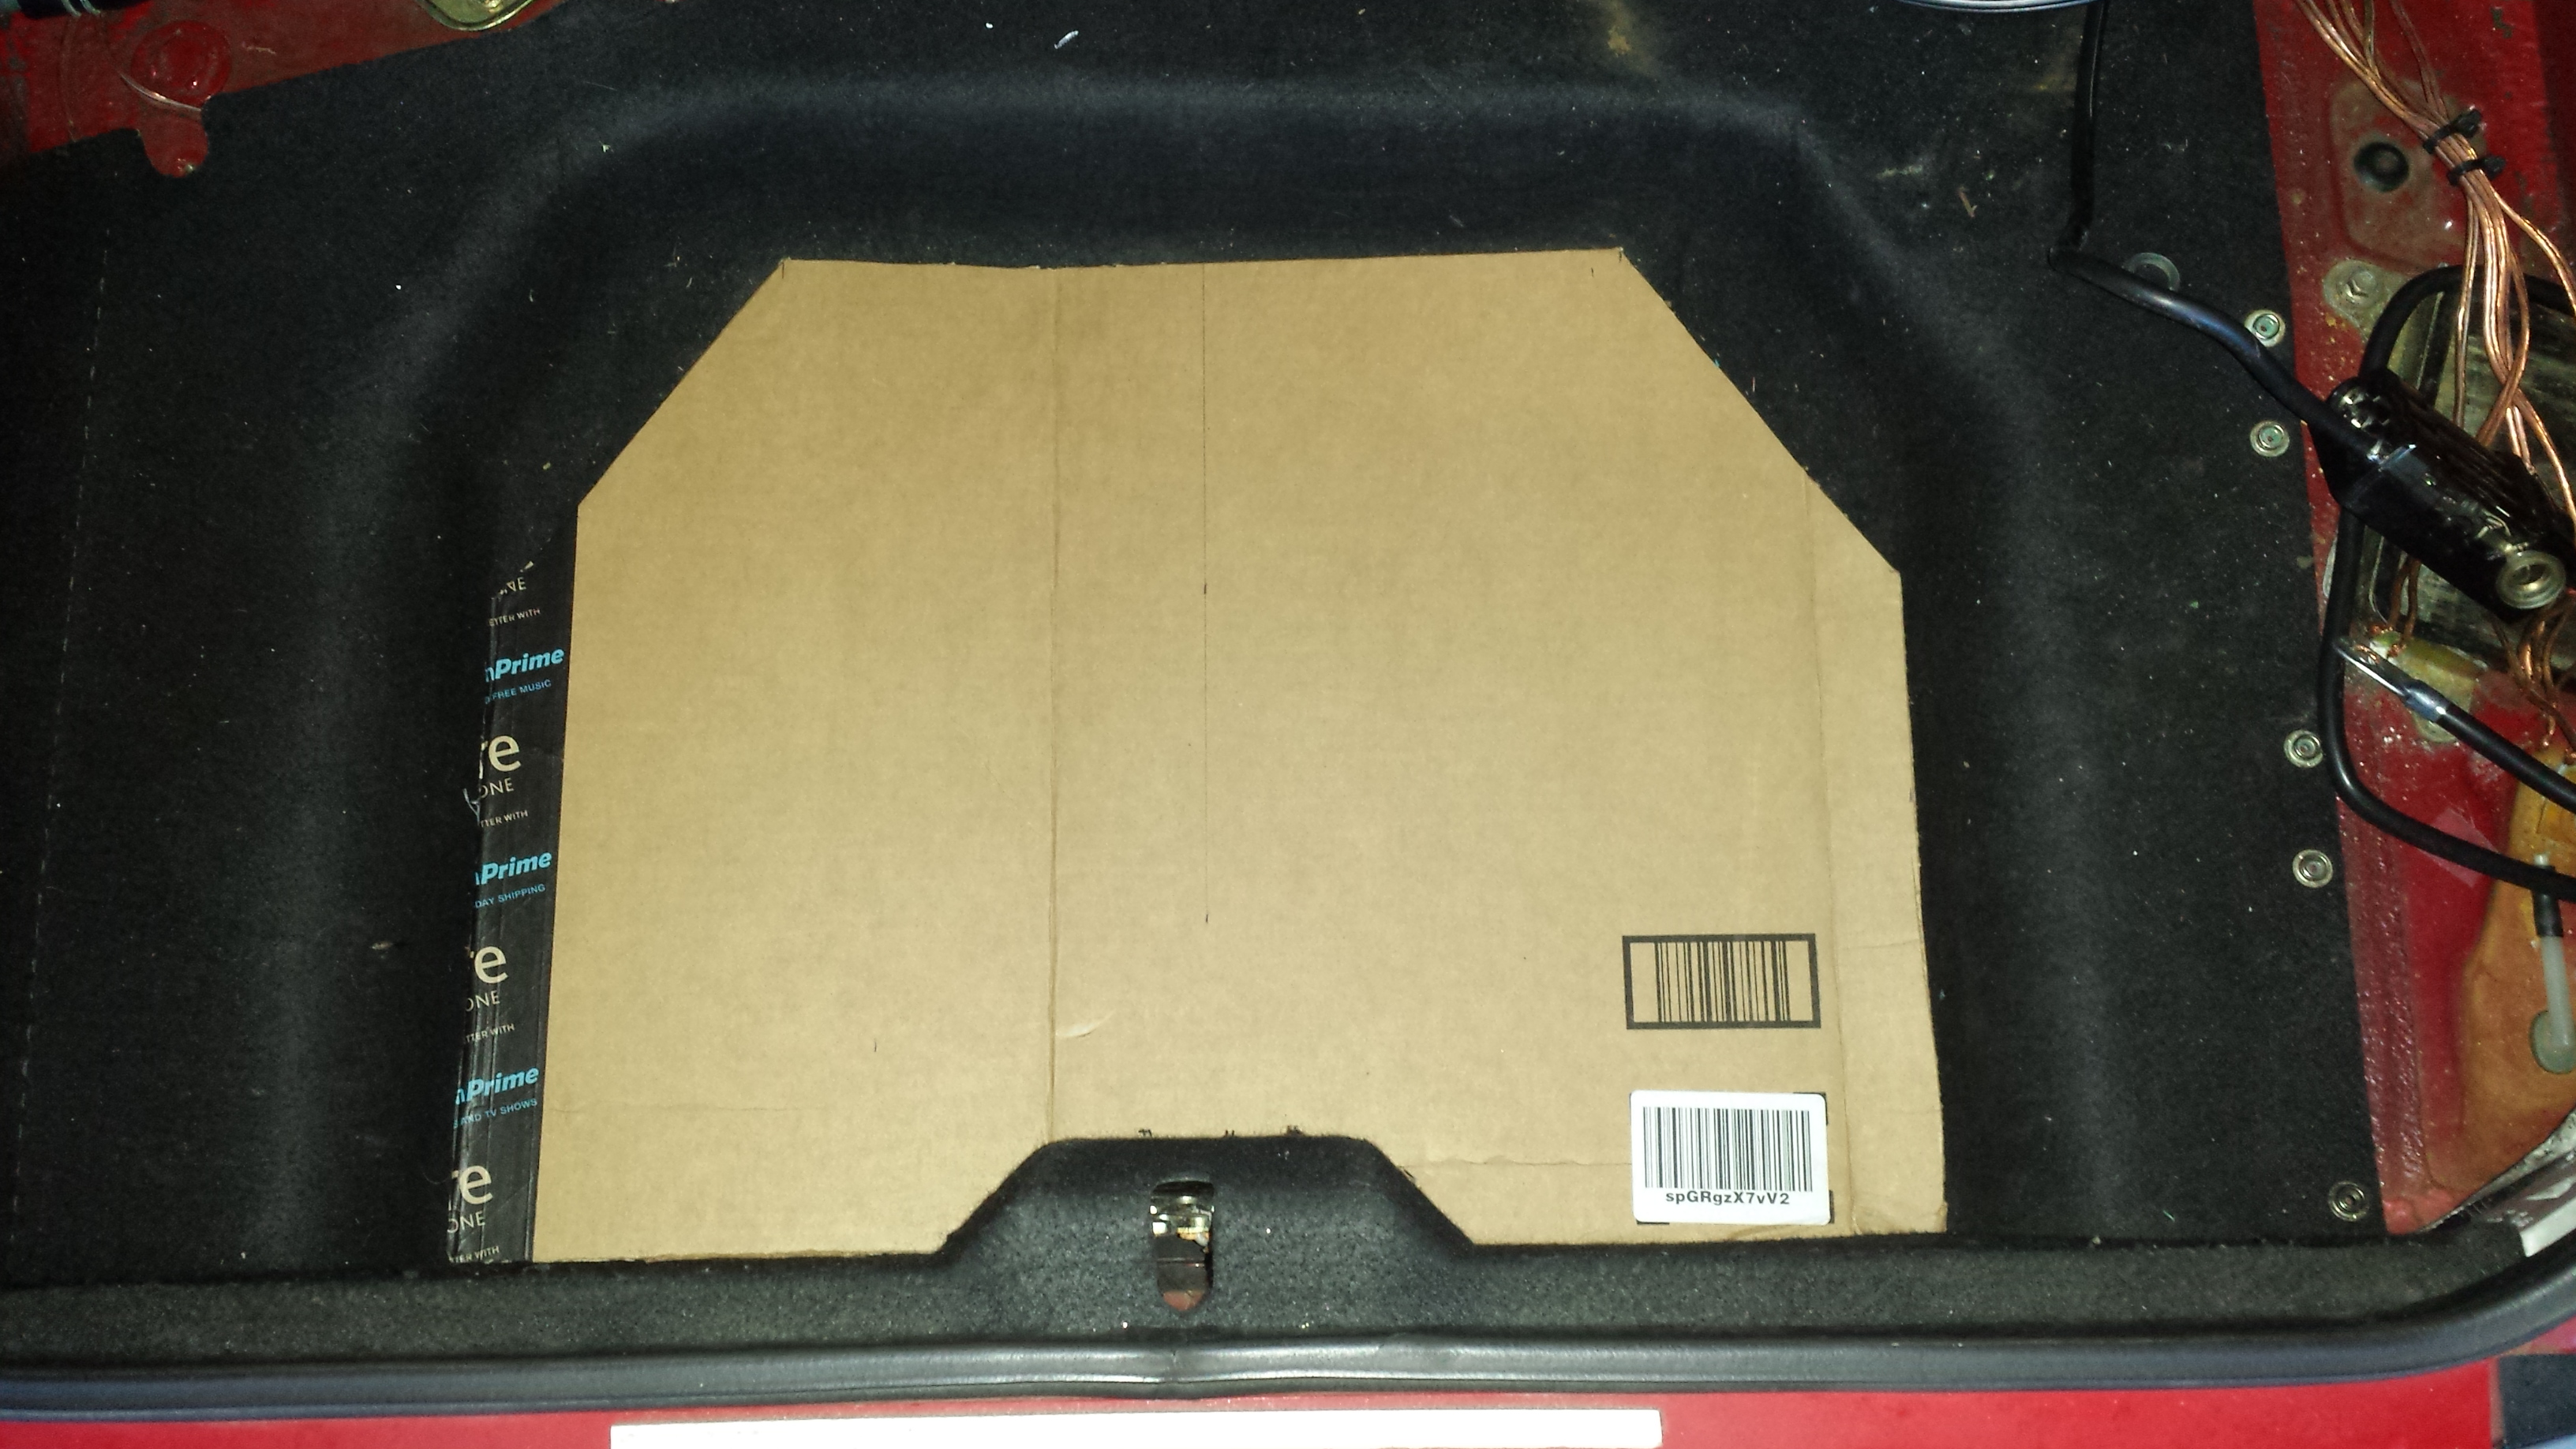
So I did some CAD (cardboard aided design) work and figured out an amp layout and such.
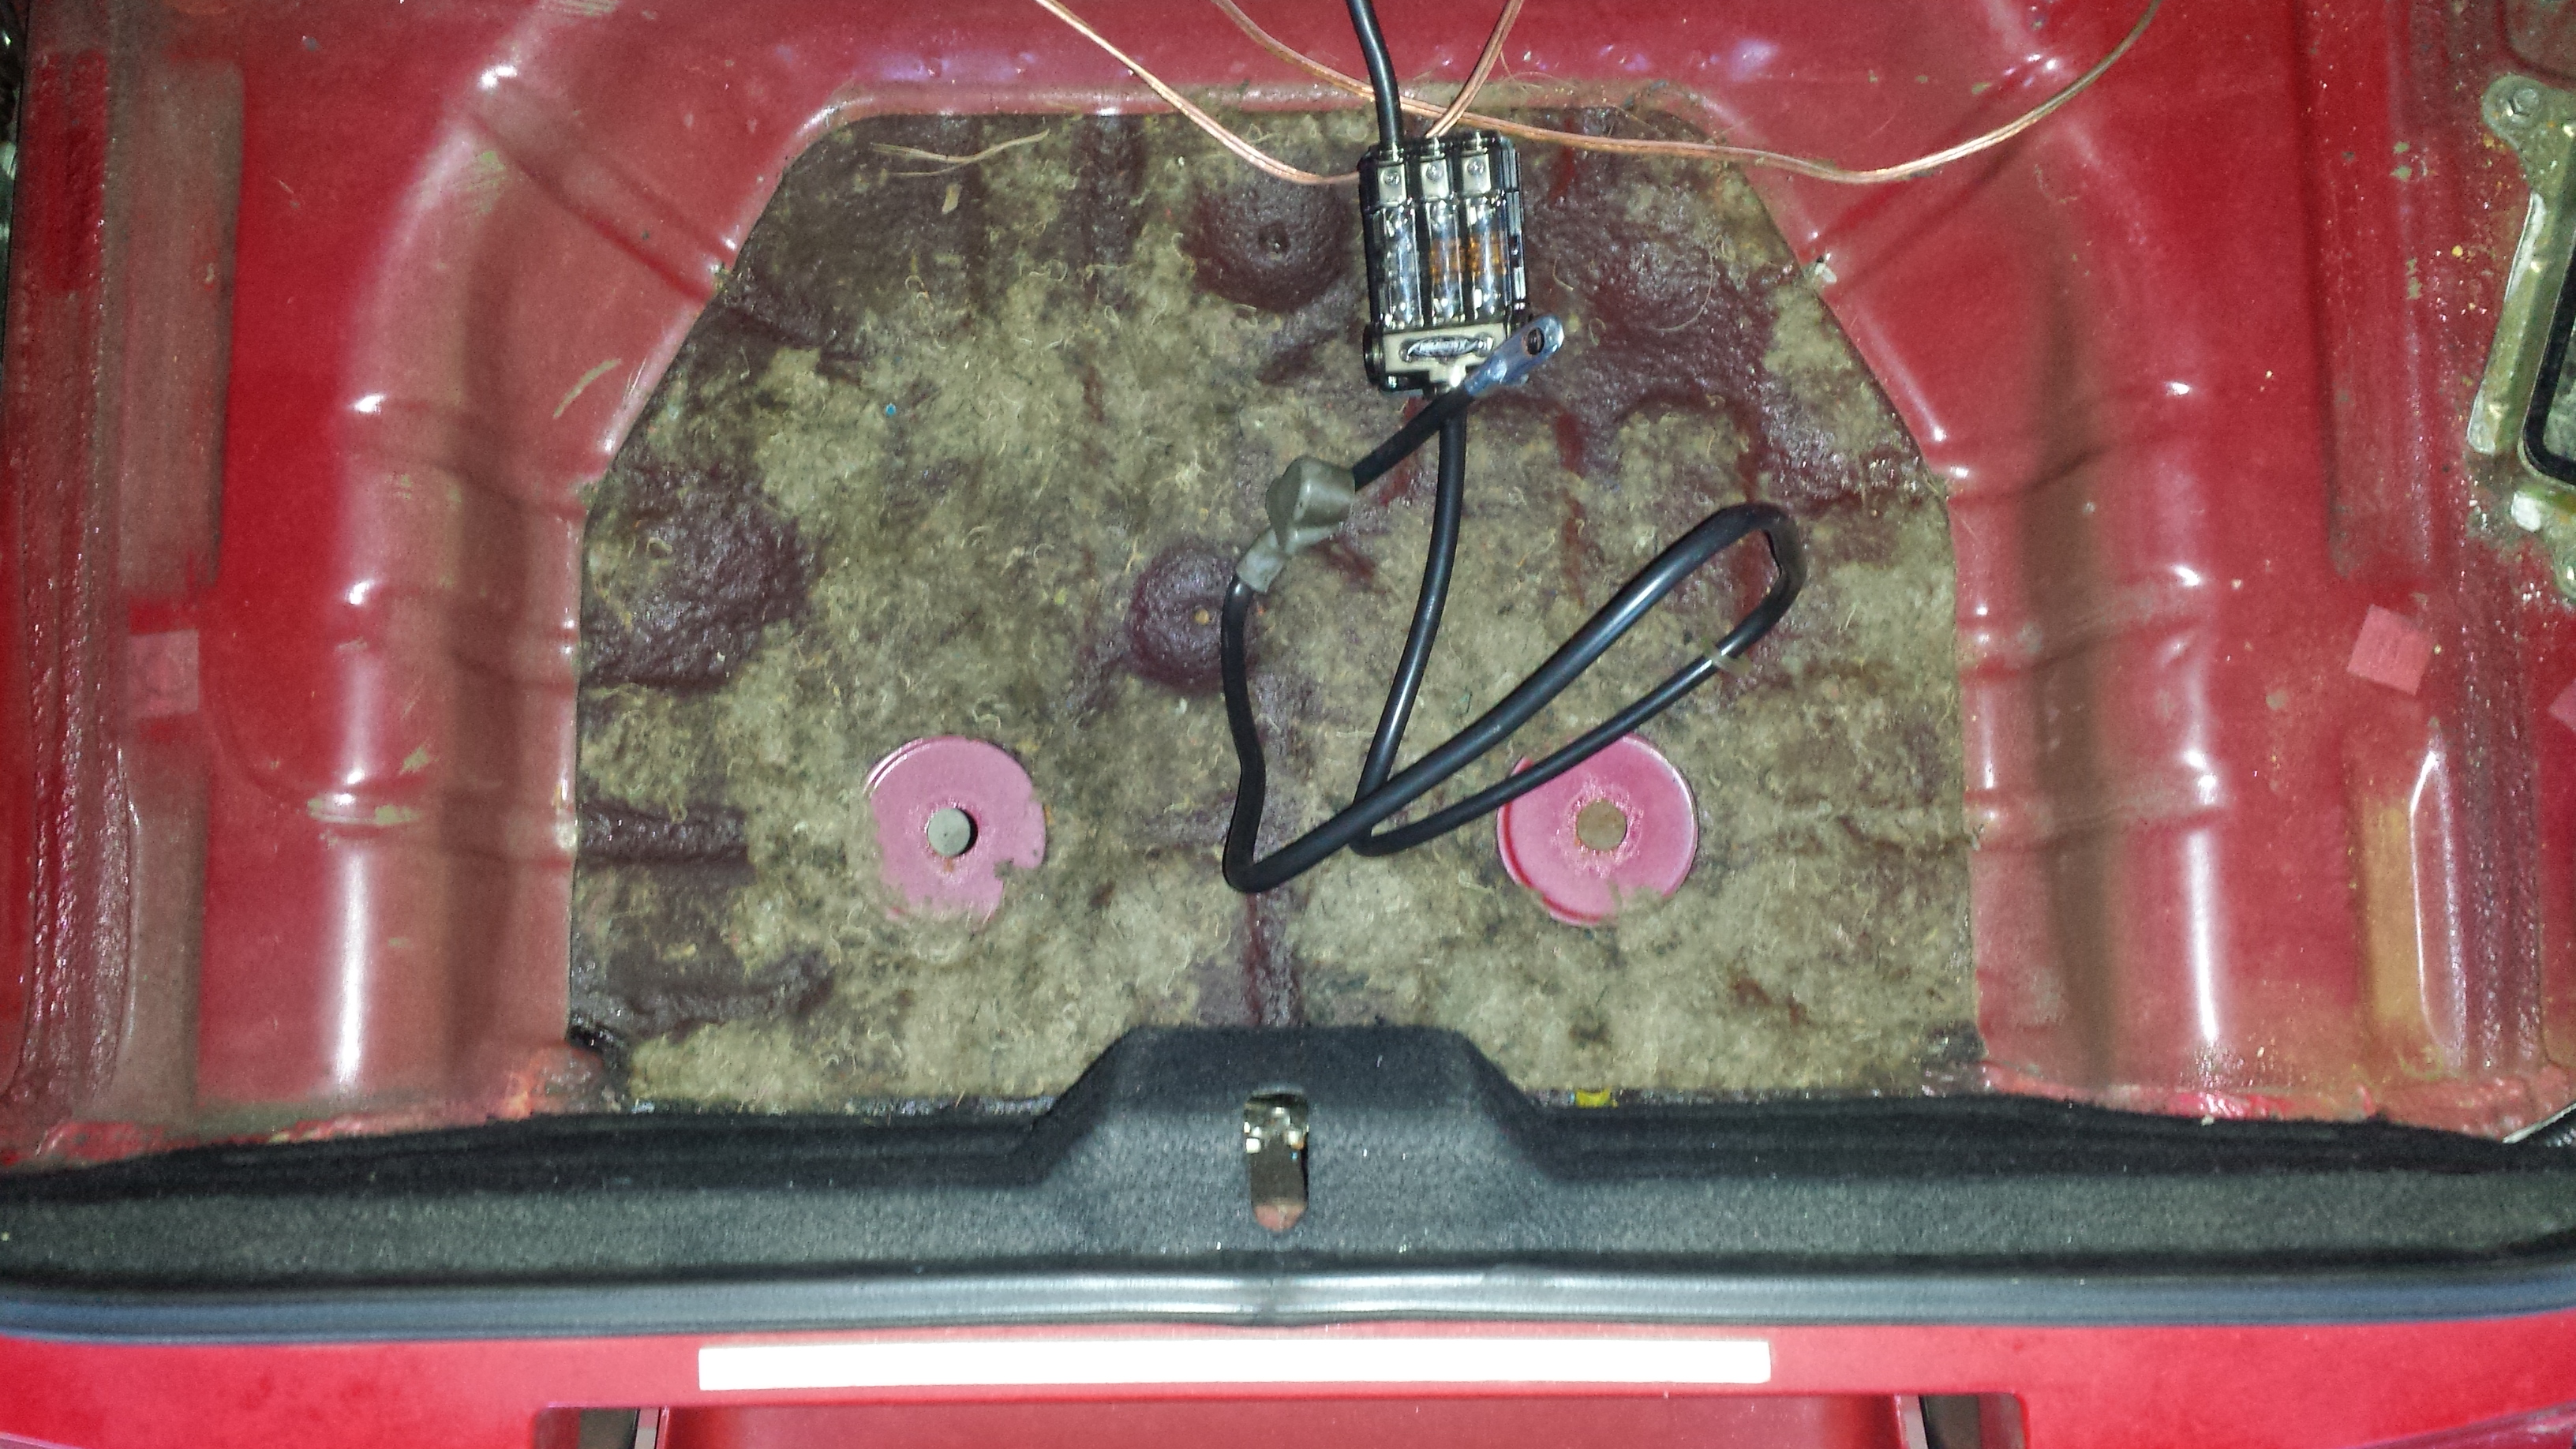
Going to bolt it through these holes.
transferred it to some 1/2" ply.
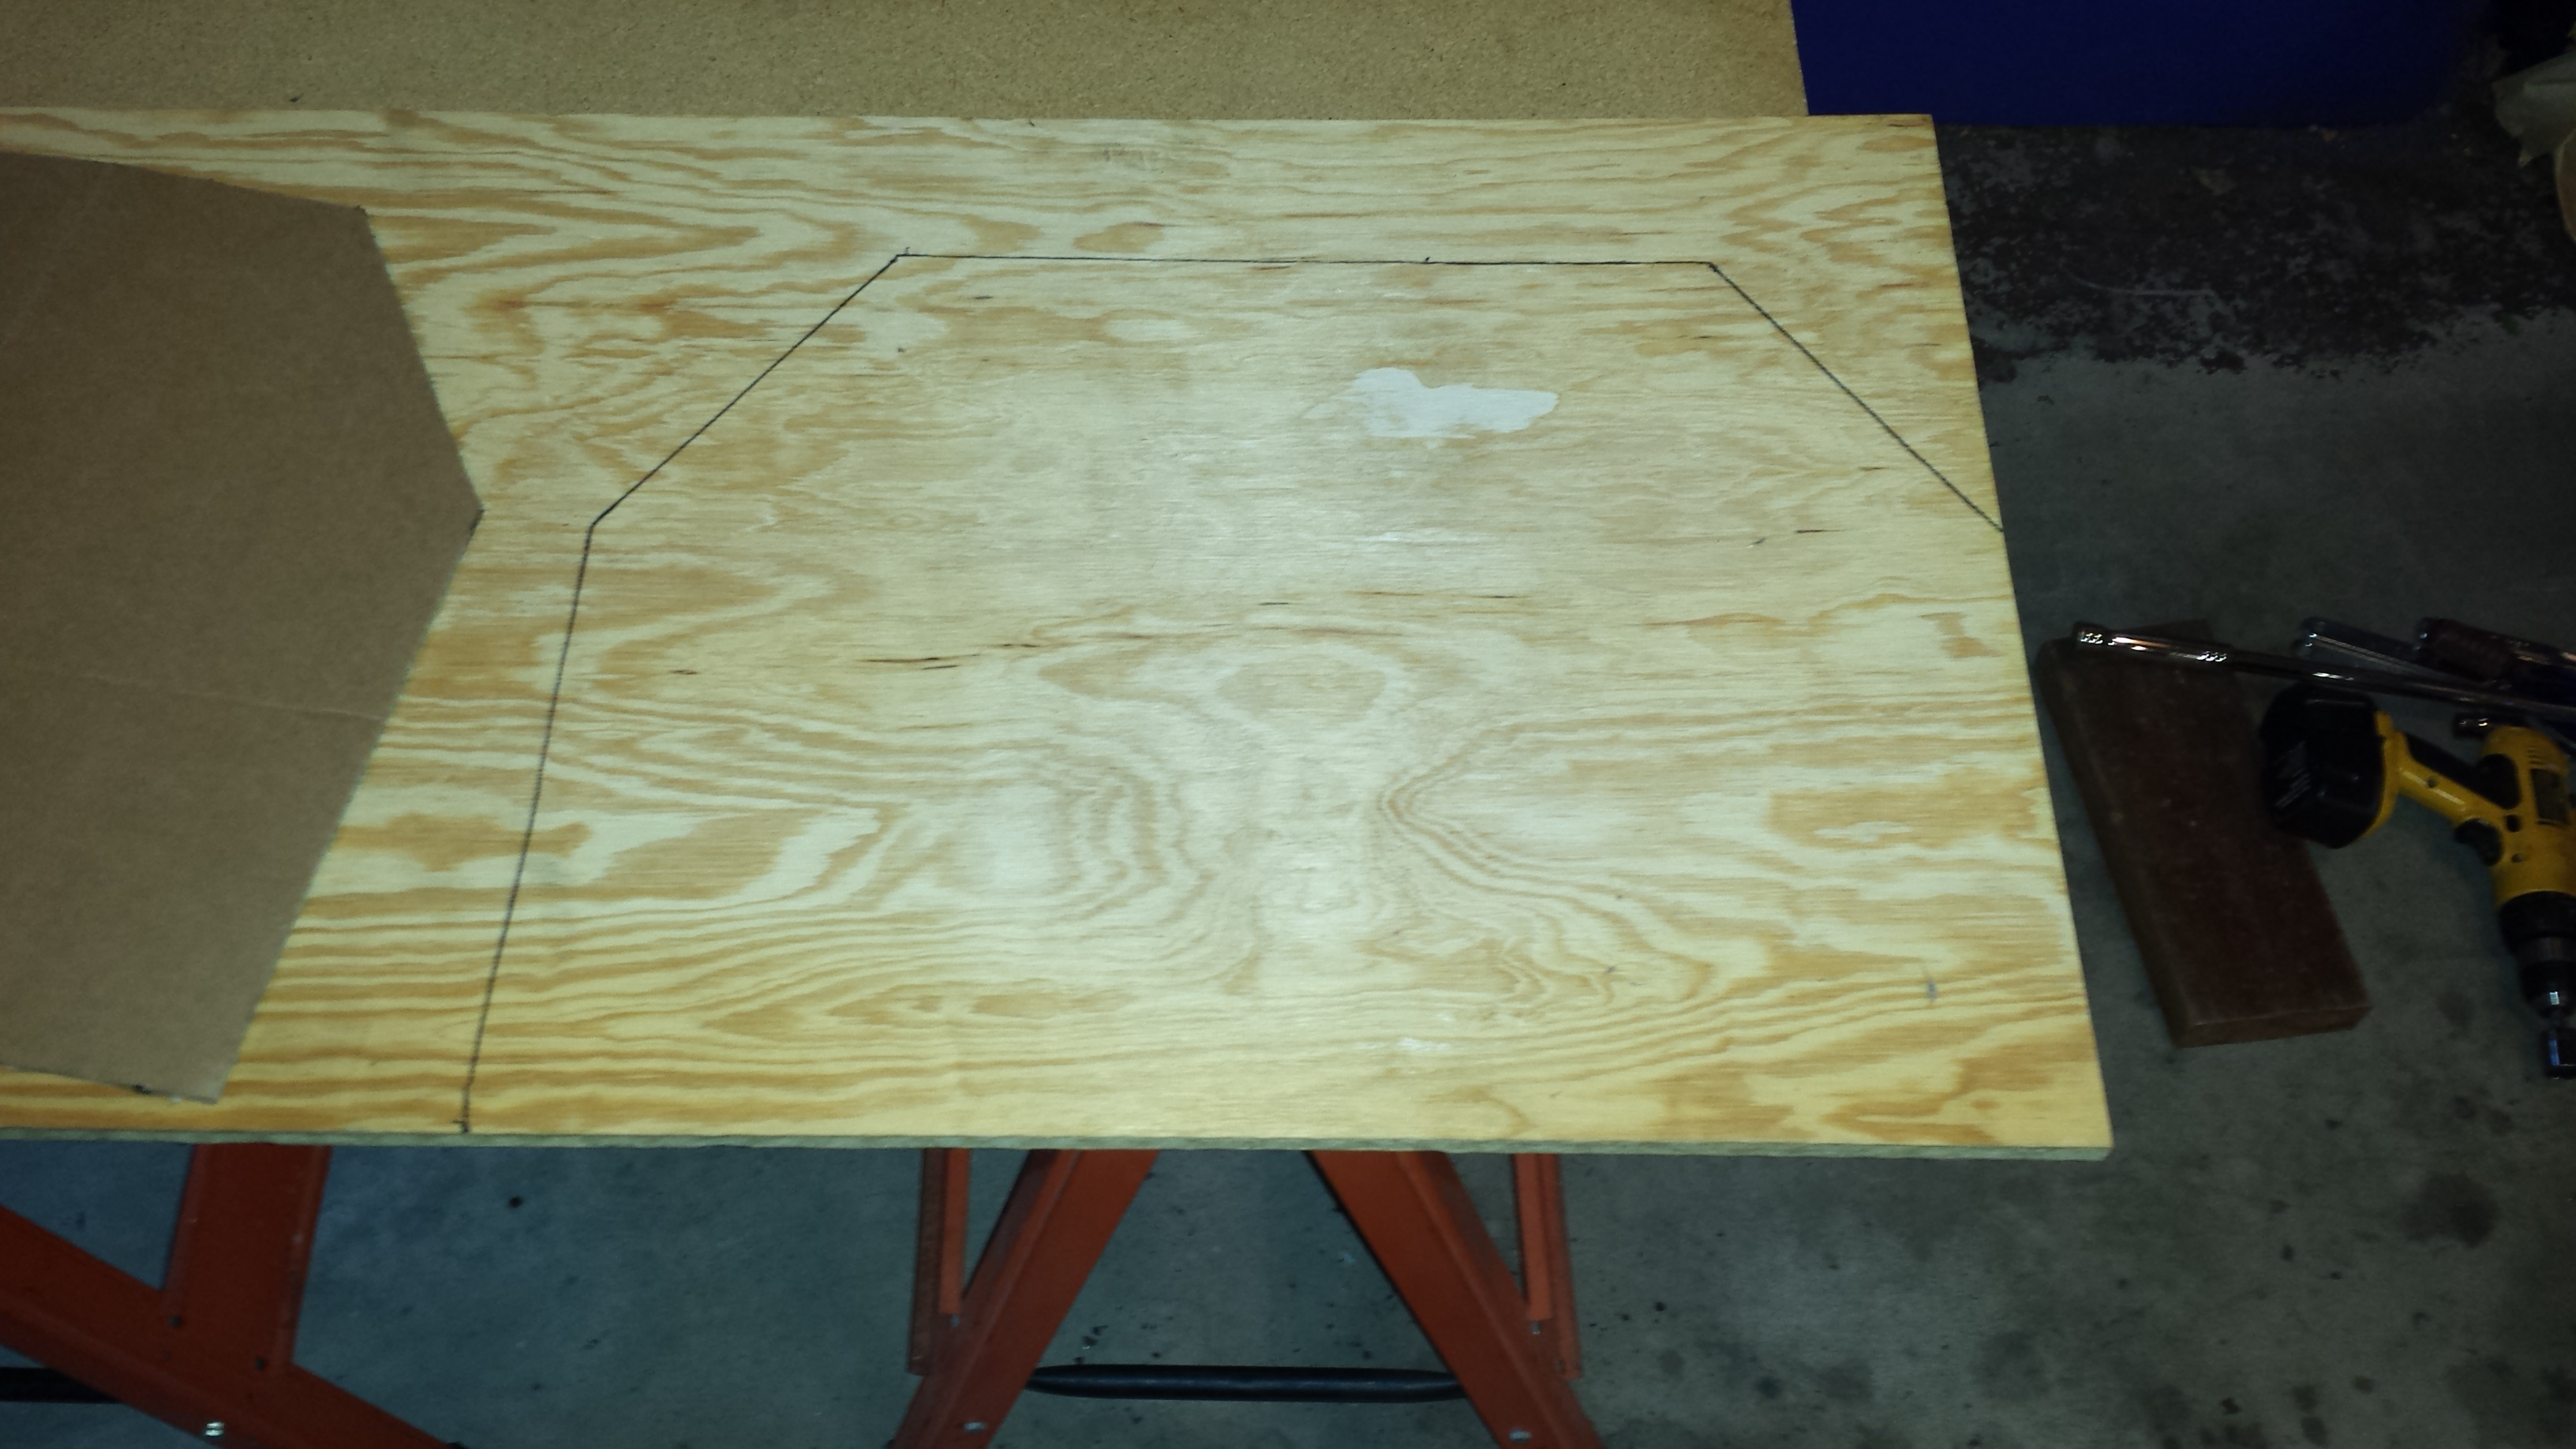
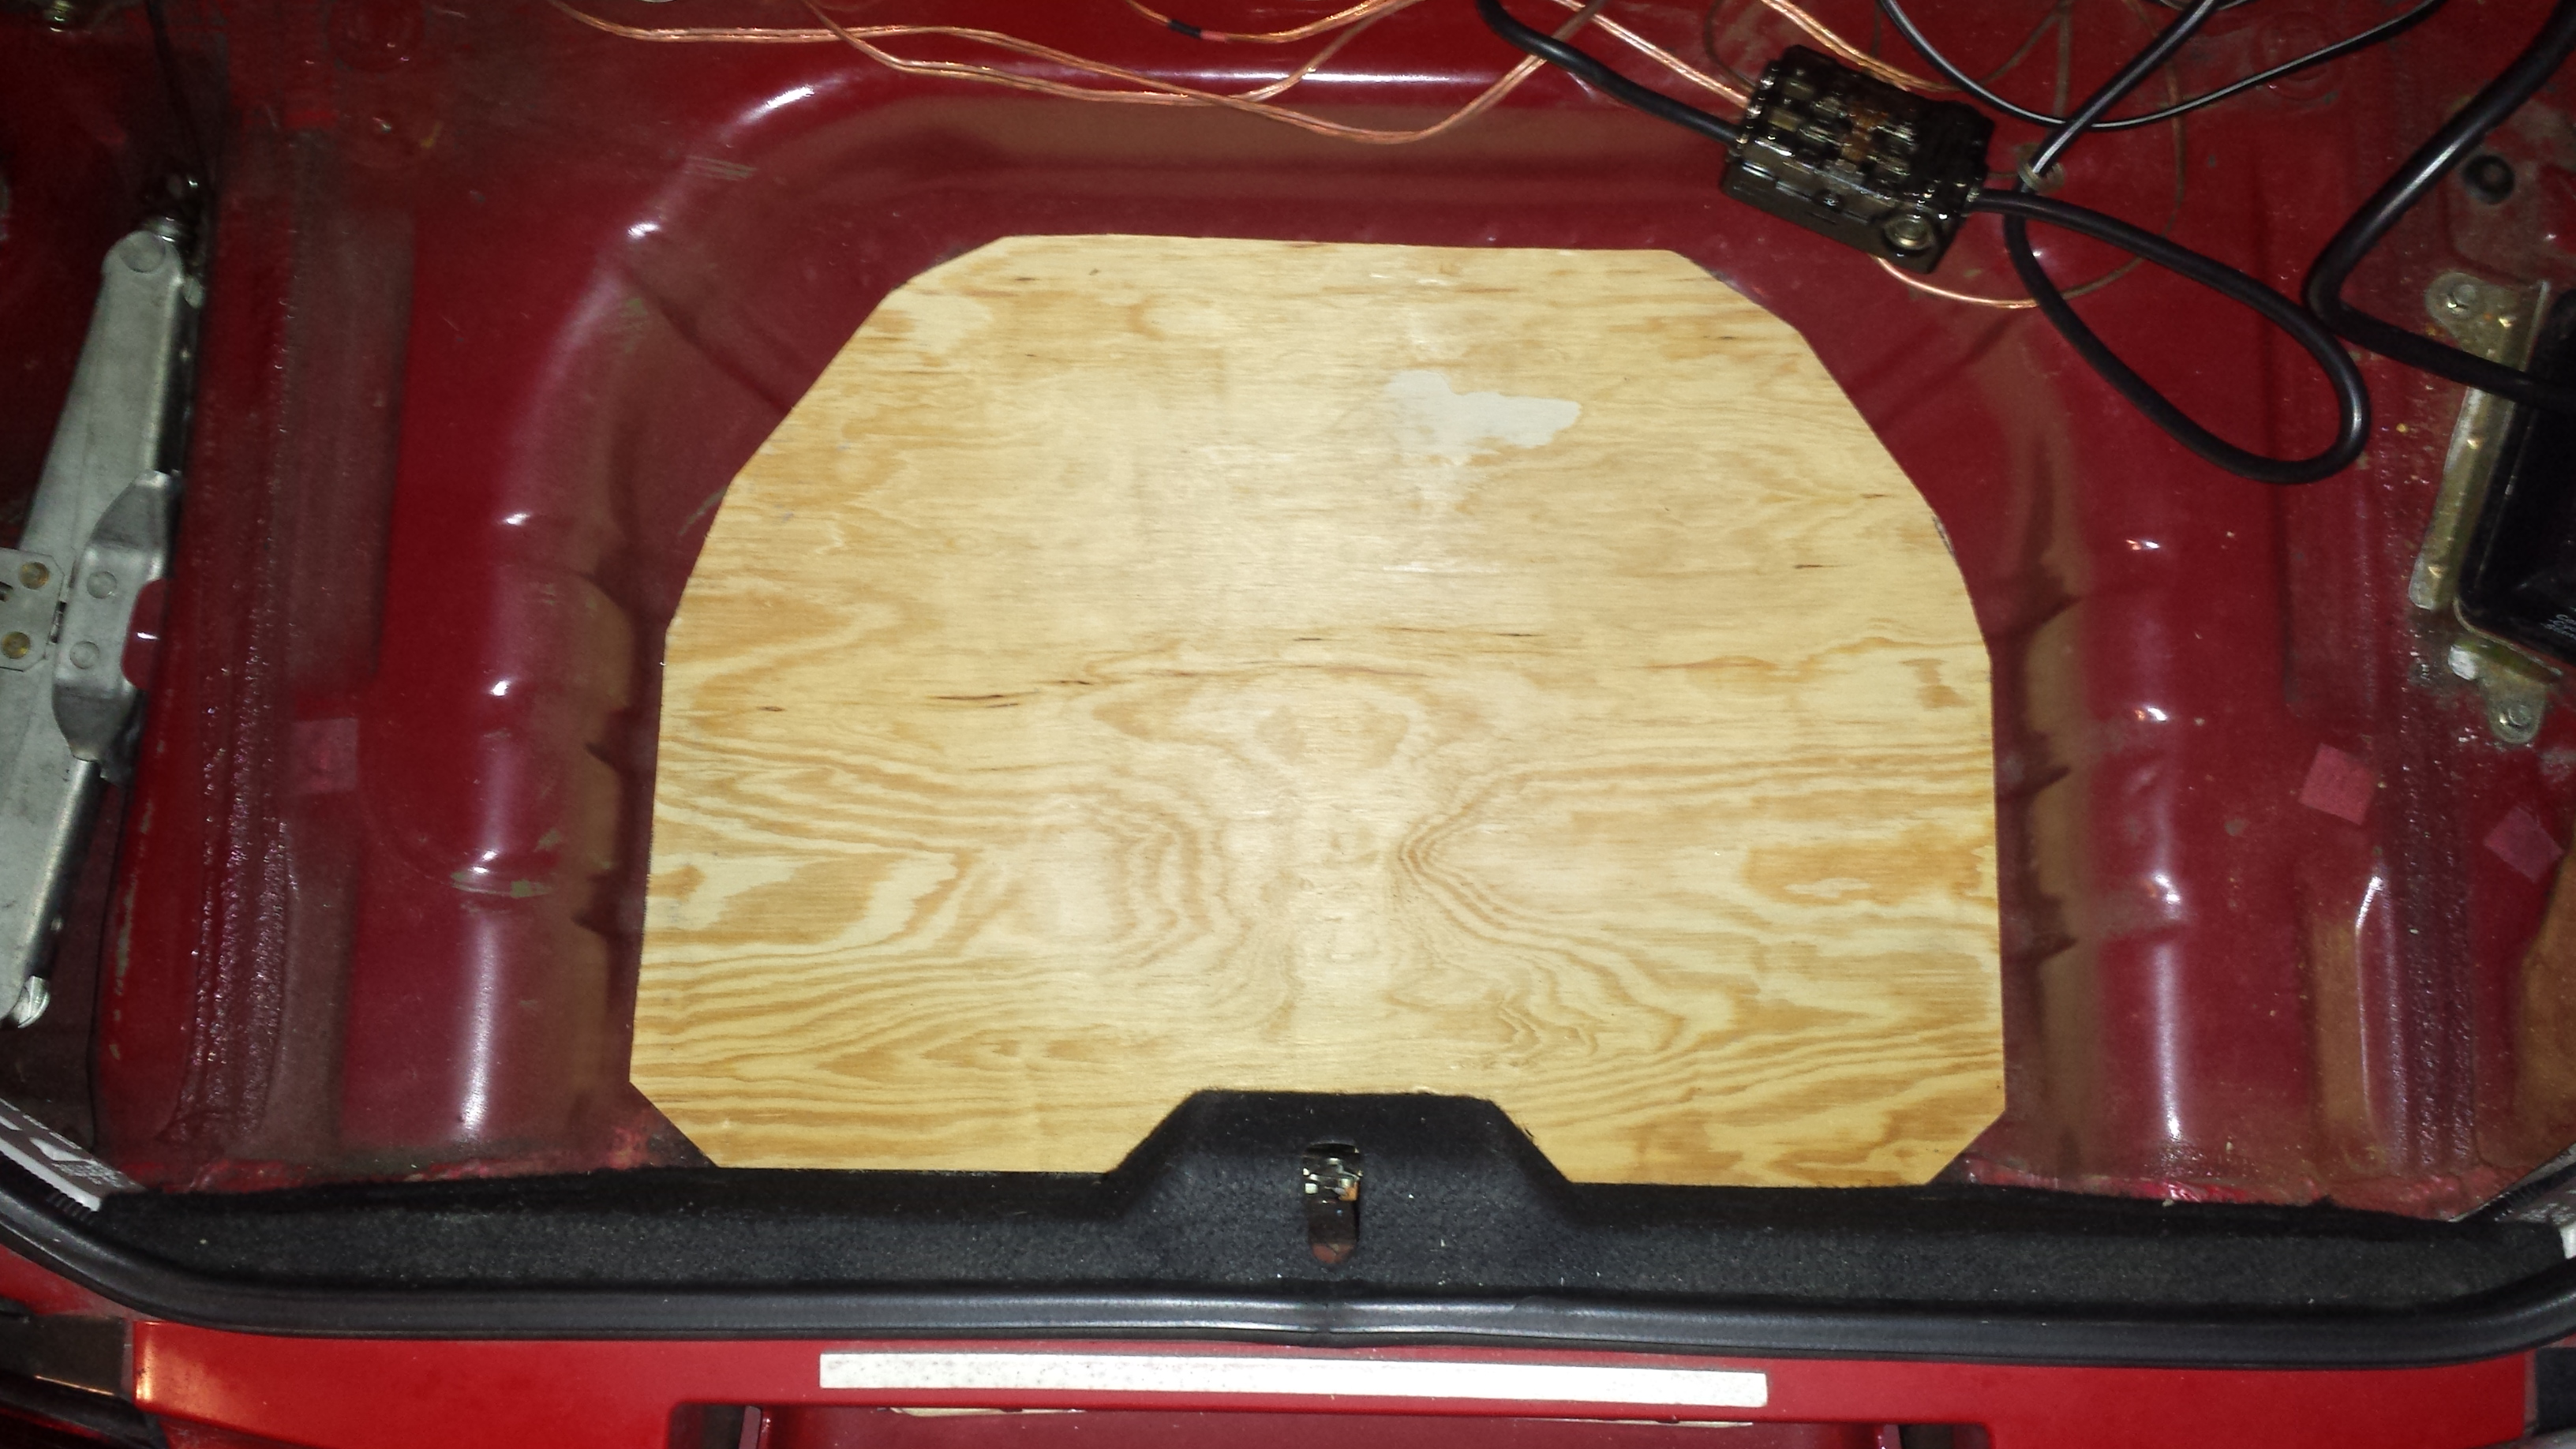
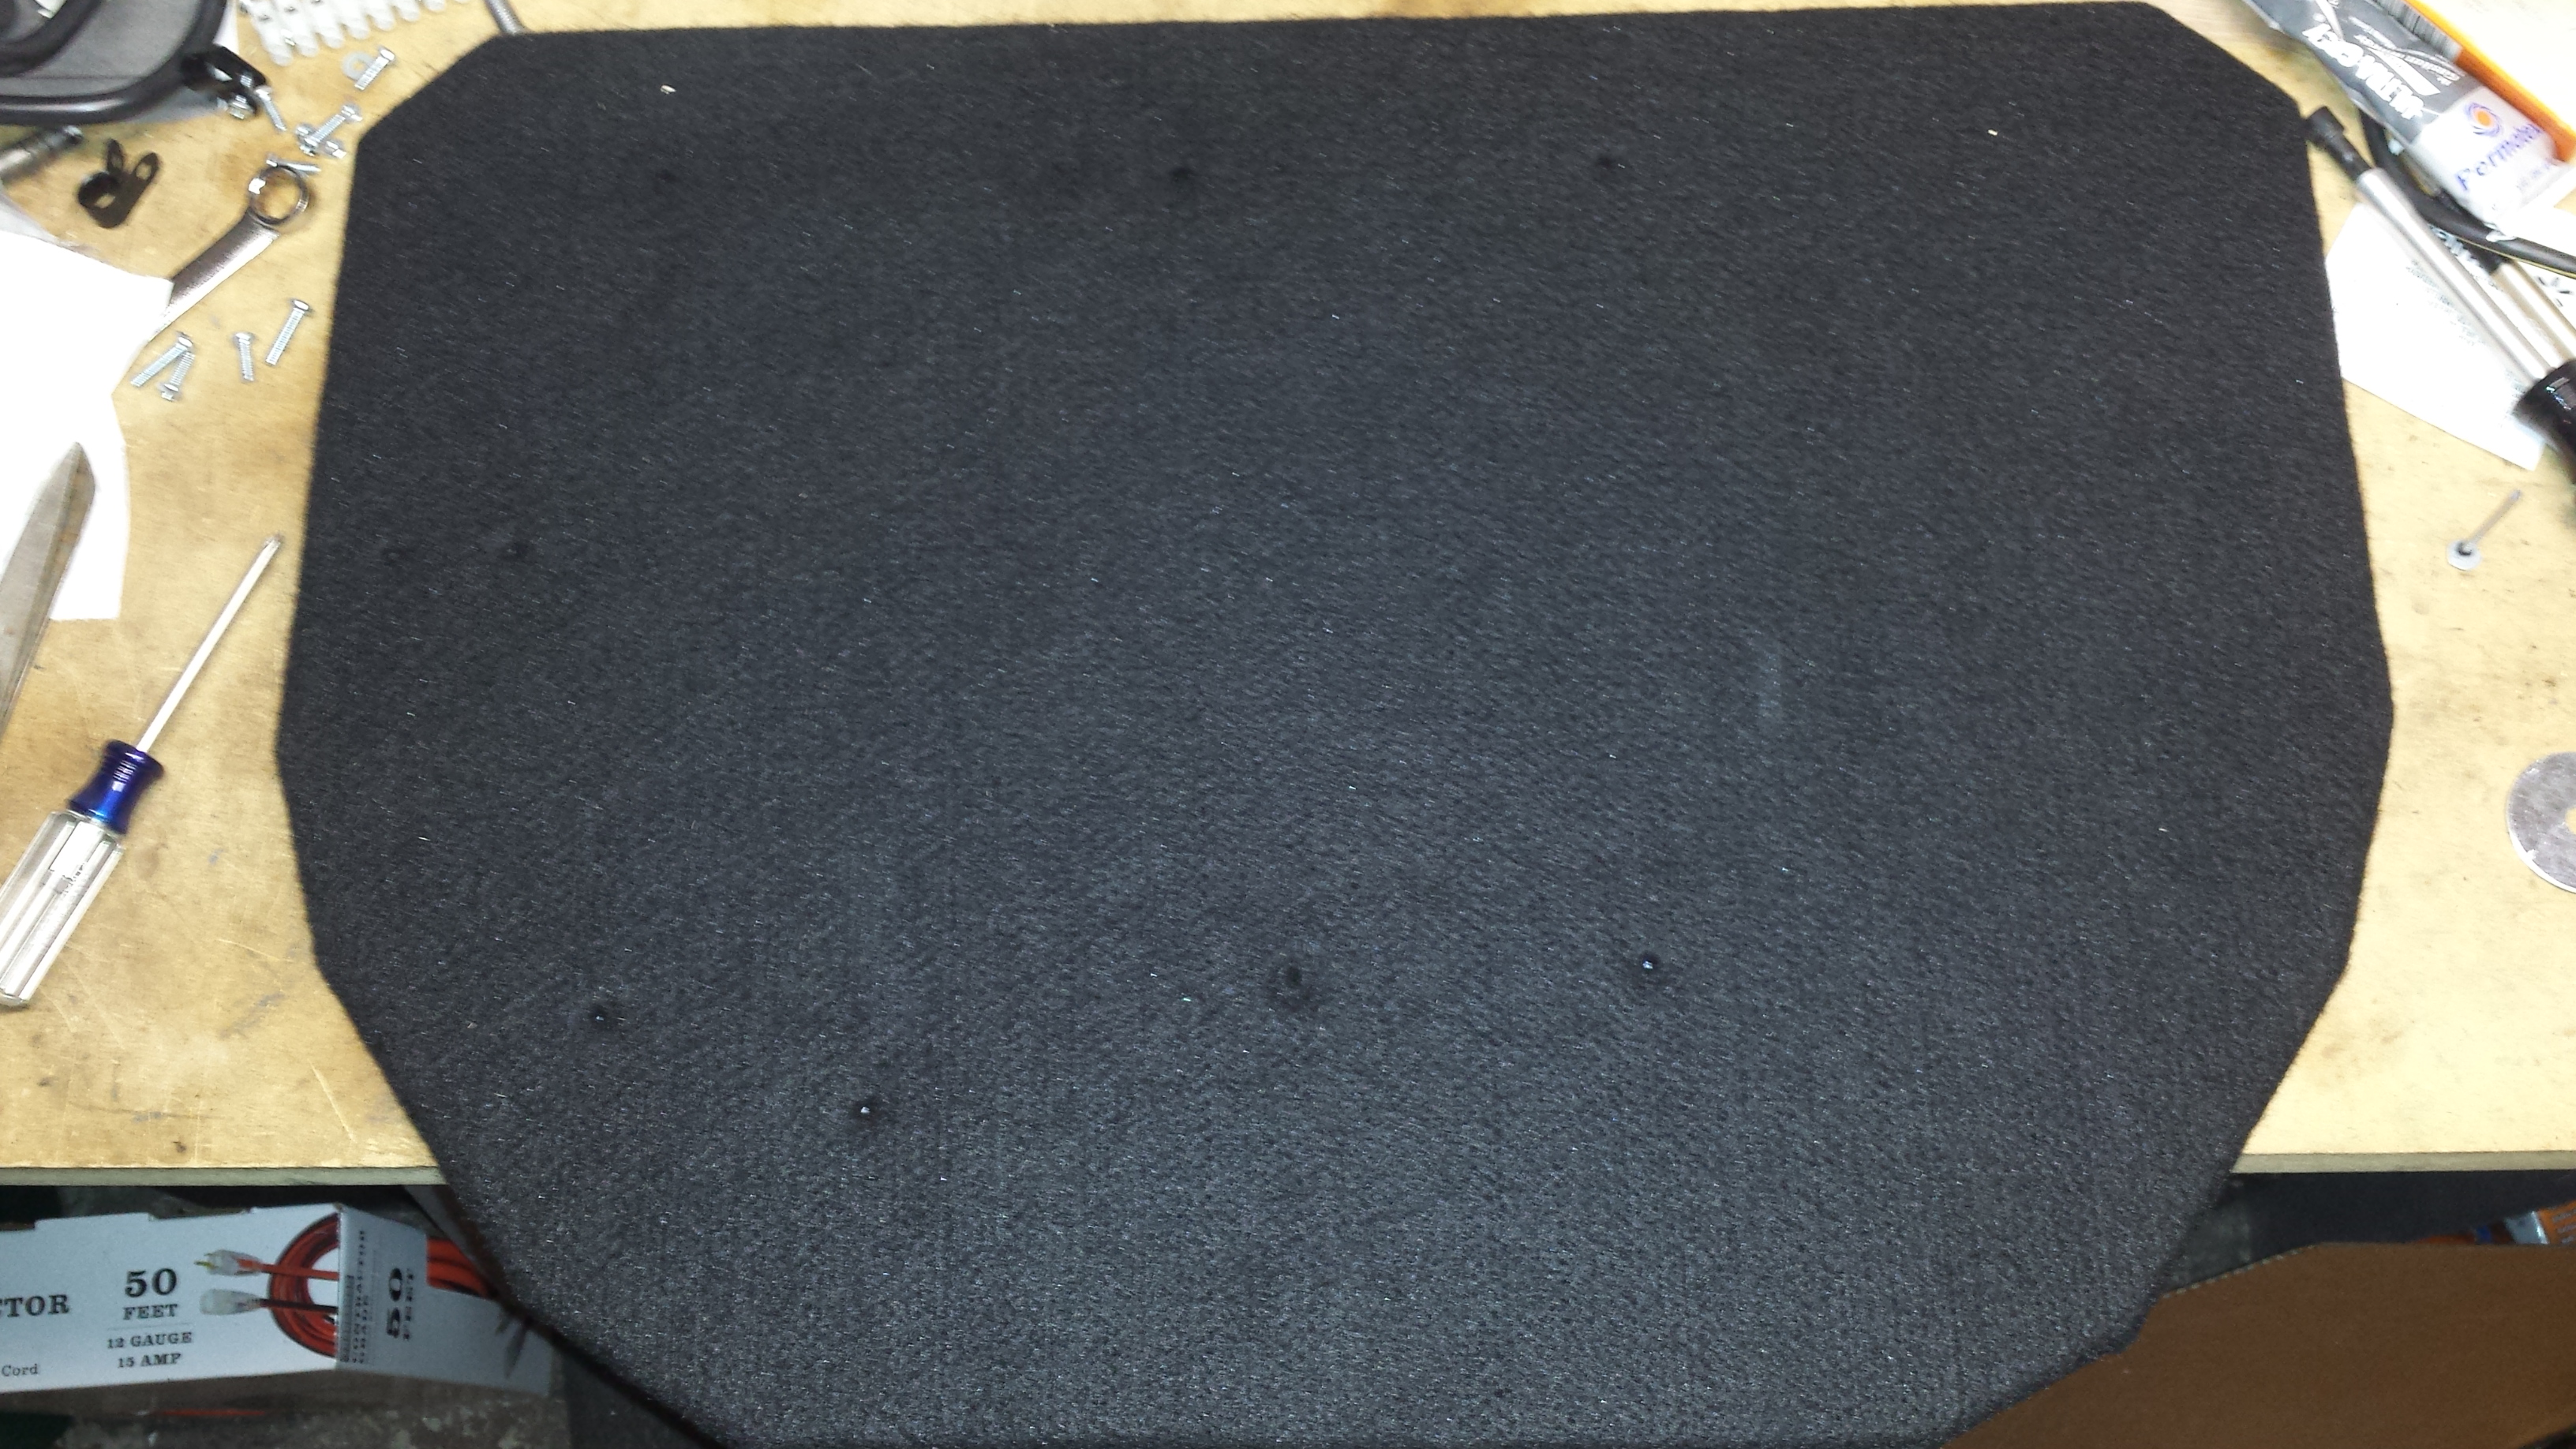
Cut it out and test fit, trimmed as needed.
Yeah, not much... Front
Rear
That was at 3.75/4" front/rear pinchweld height. Far too low, but it felt high compared to the saggy FM springs I had (those ran me down like 2.75/3). Raised it up to 4.75/5, I will know next week how that feels.
I also finally got the negative battery cable off the battery (it has been corroded on since the summer sometime). But the bolt snapped while doing it, so I finally decided to do the wiring upgrade for the battery and sound system I had been meaning to do. The PO installed an amp, and used a cut up, tiny jumper cable to power it (at least he fused it.) I have been meaning to fix that, and the way he mounted the amp, so I don't have to take them out for autocross or track days.
New negative cable made.
Fuse block that will be running the audio system, as well as the car. All power will pass through it and is fused. I have never liked that the main positive lead runs all the way to the front of the car before going through a fuse. It get's an 80A one here, two 40's for the two amps.
Fuse block and 4Ga positive cable. It will be trimmed to length later.
Hooked up to the battery. The PO put in a sealed lead acid from a UPS. Duno why, it works though. Unless it is below 20F, then it won't do anything.
This is how the amp was originally held in. Two strips of wood glued to the carpet. Not gonna fly (well actually, it might, that's the problem.)
So I did some CAD (cardboard aided design) work and figured out an amp layout and such.
Going to bolt it through these holes.
transferred it to some 1/2" ply.
Cut it out and test fit, trimmed as needed.
Reply
0
0
Thread Starter
Elite Member
Joined: Oct 2013
Posts: 1,822
Total Cats: 144
From: NorthWest NJ
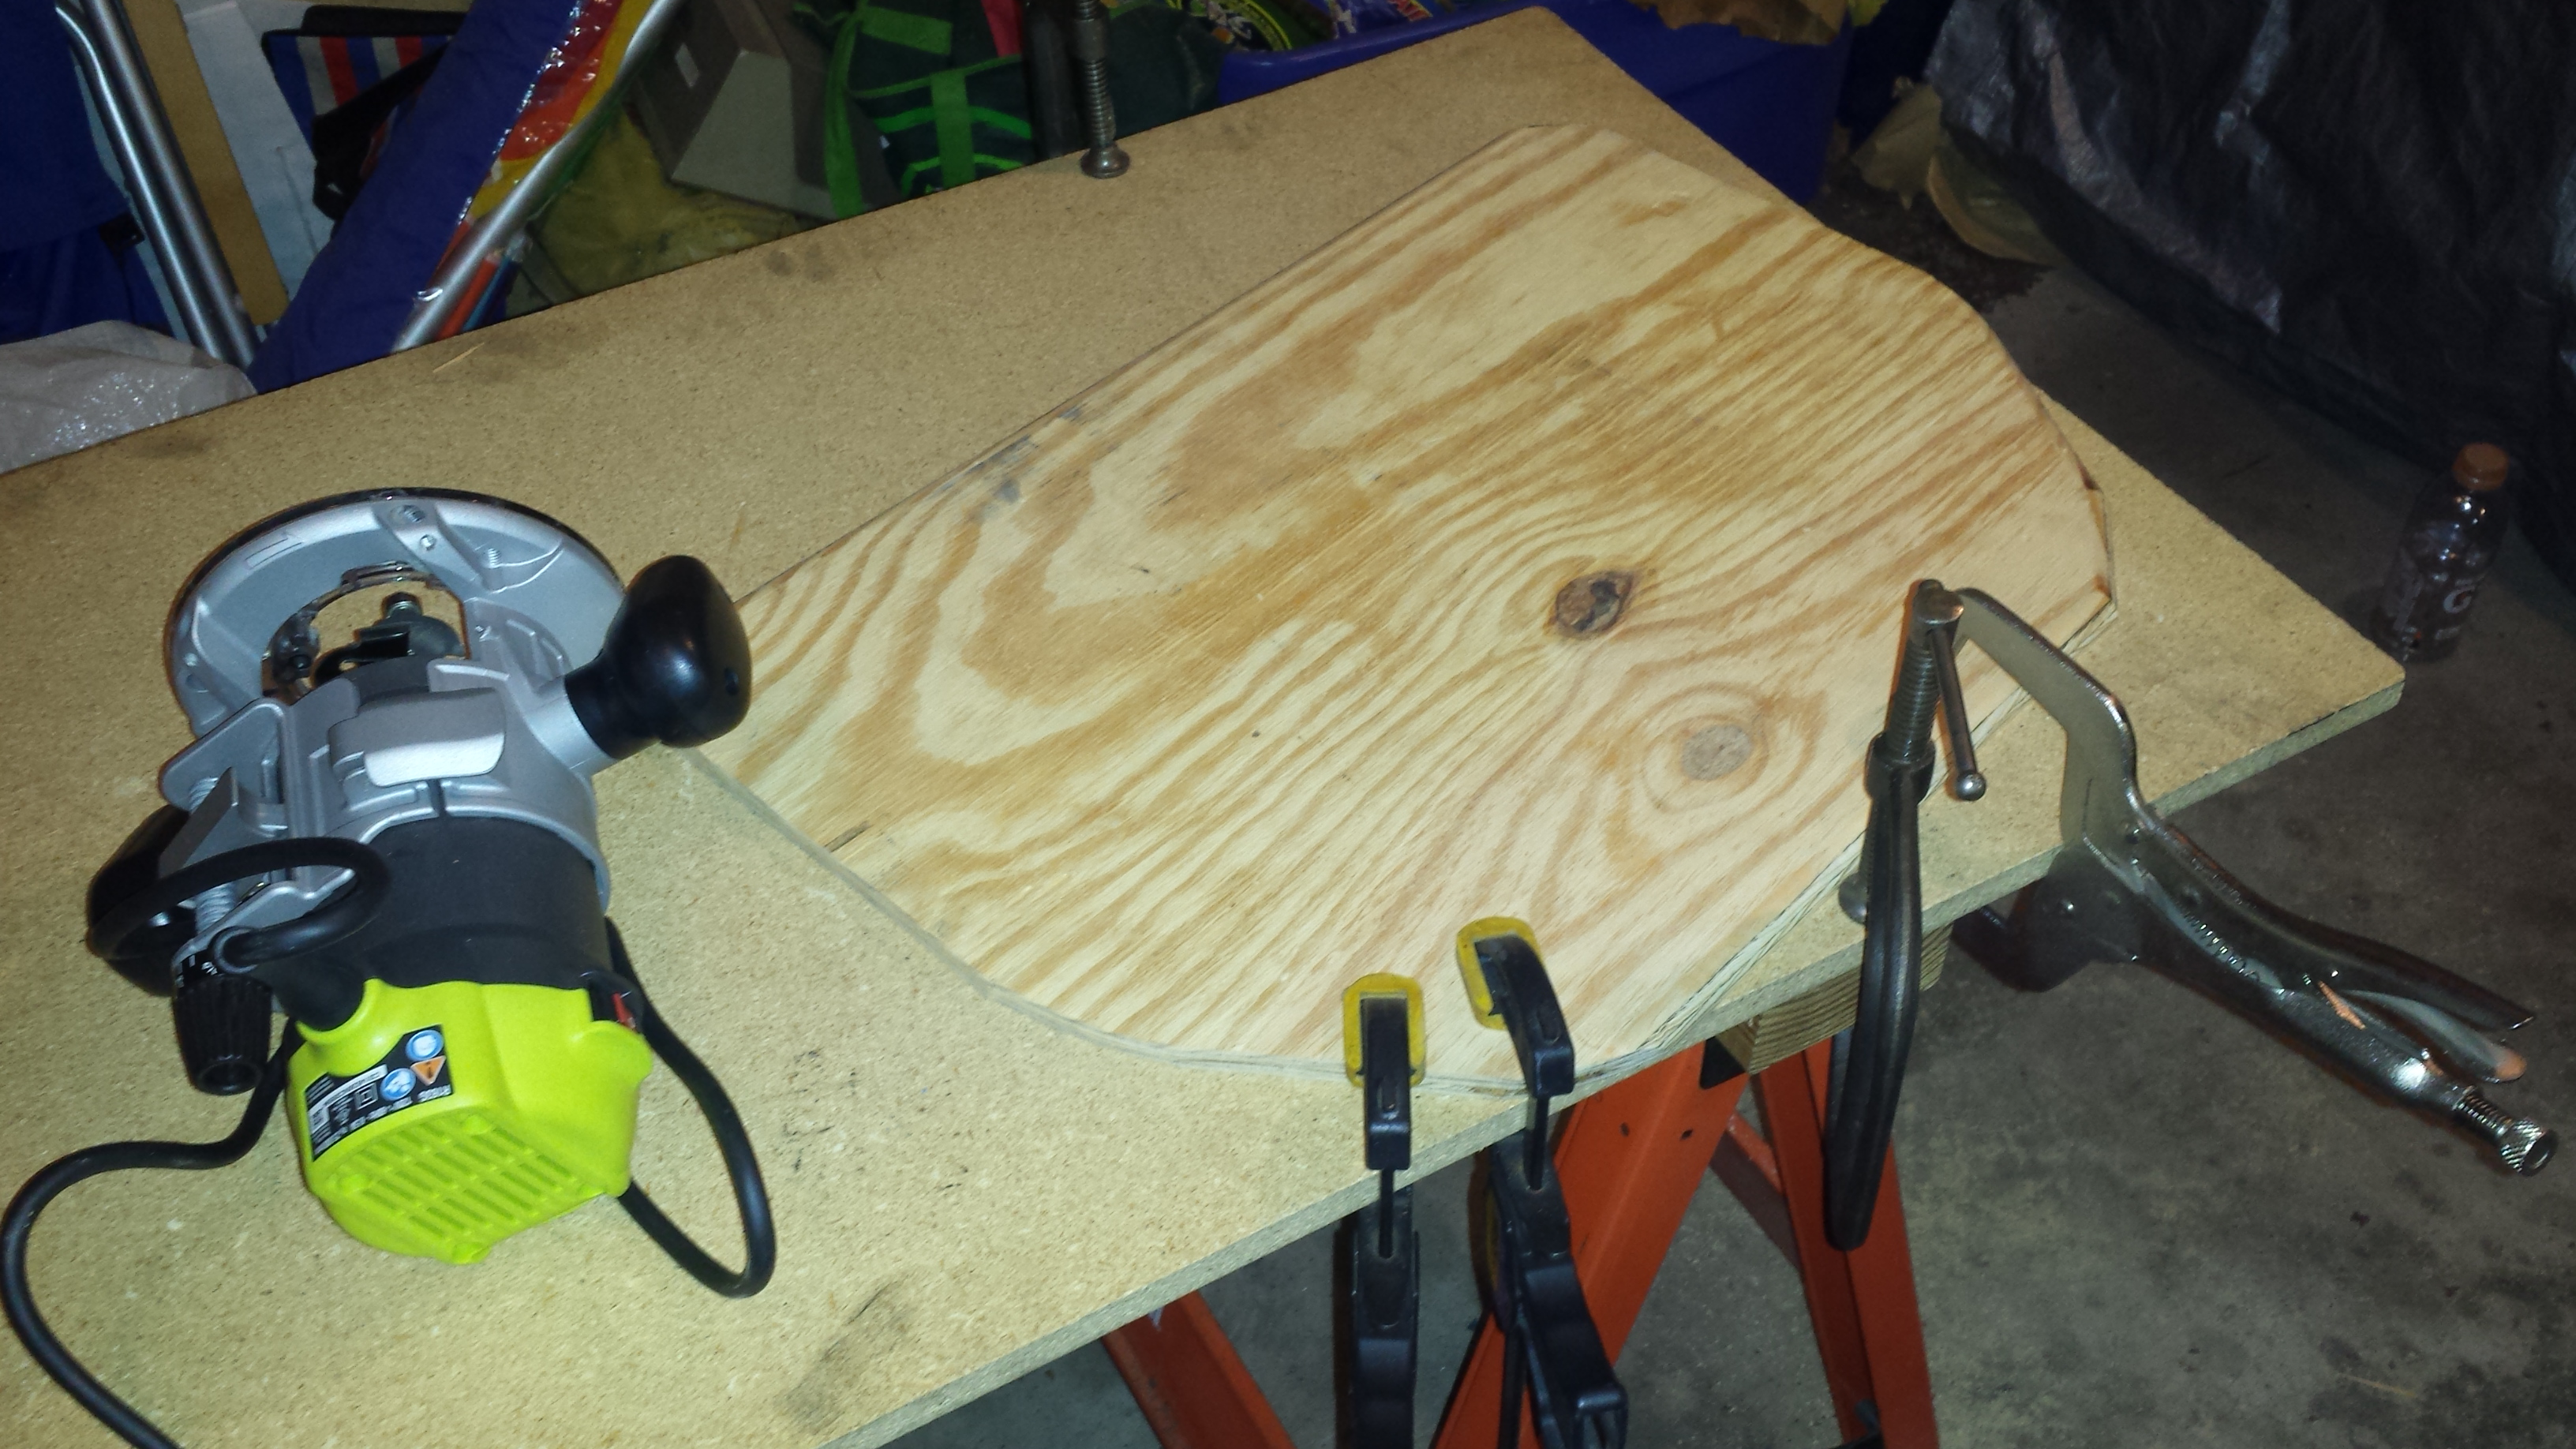
Then, I got to use my router for the first time. Doing a 1/2" round over on 1/2" ply. These things still scare the ever loving **** out of me. But I managed it without loosing any body parts.
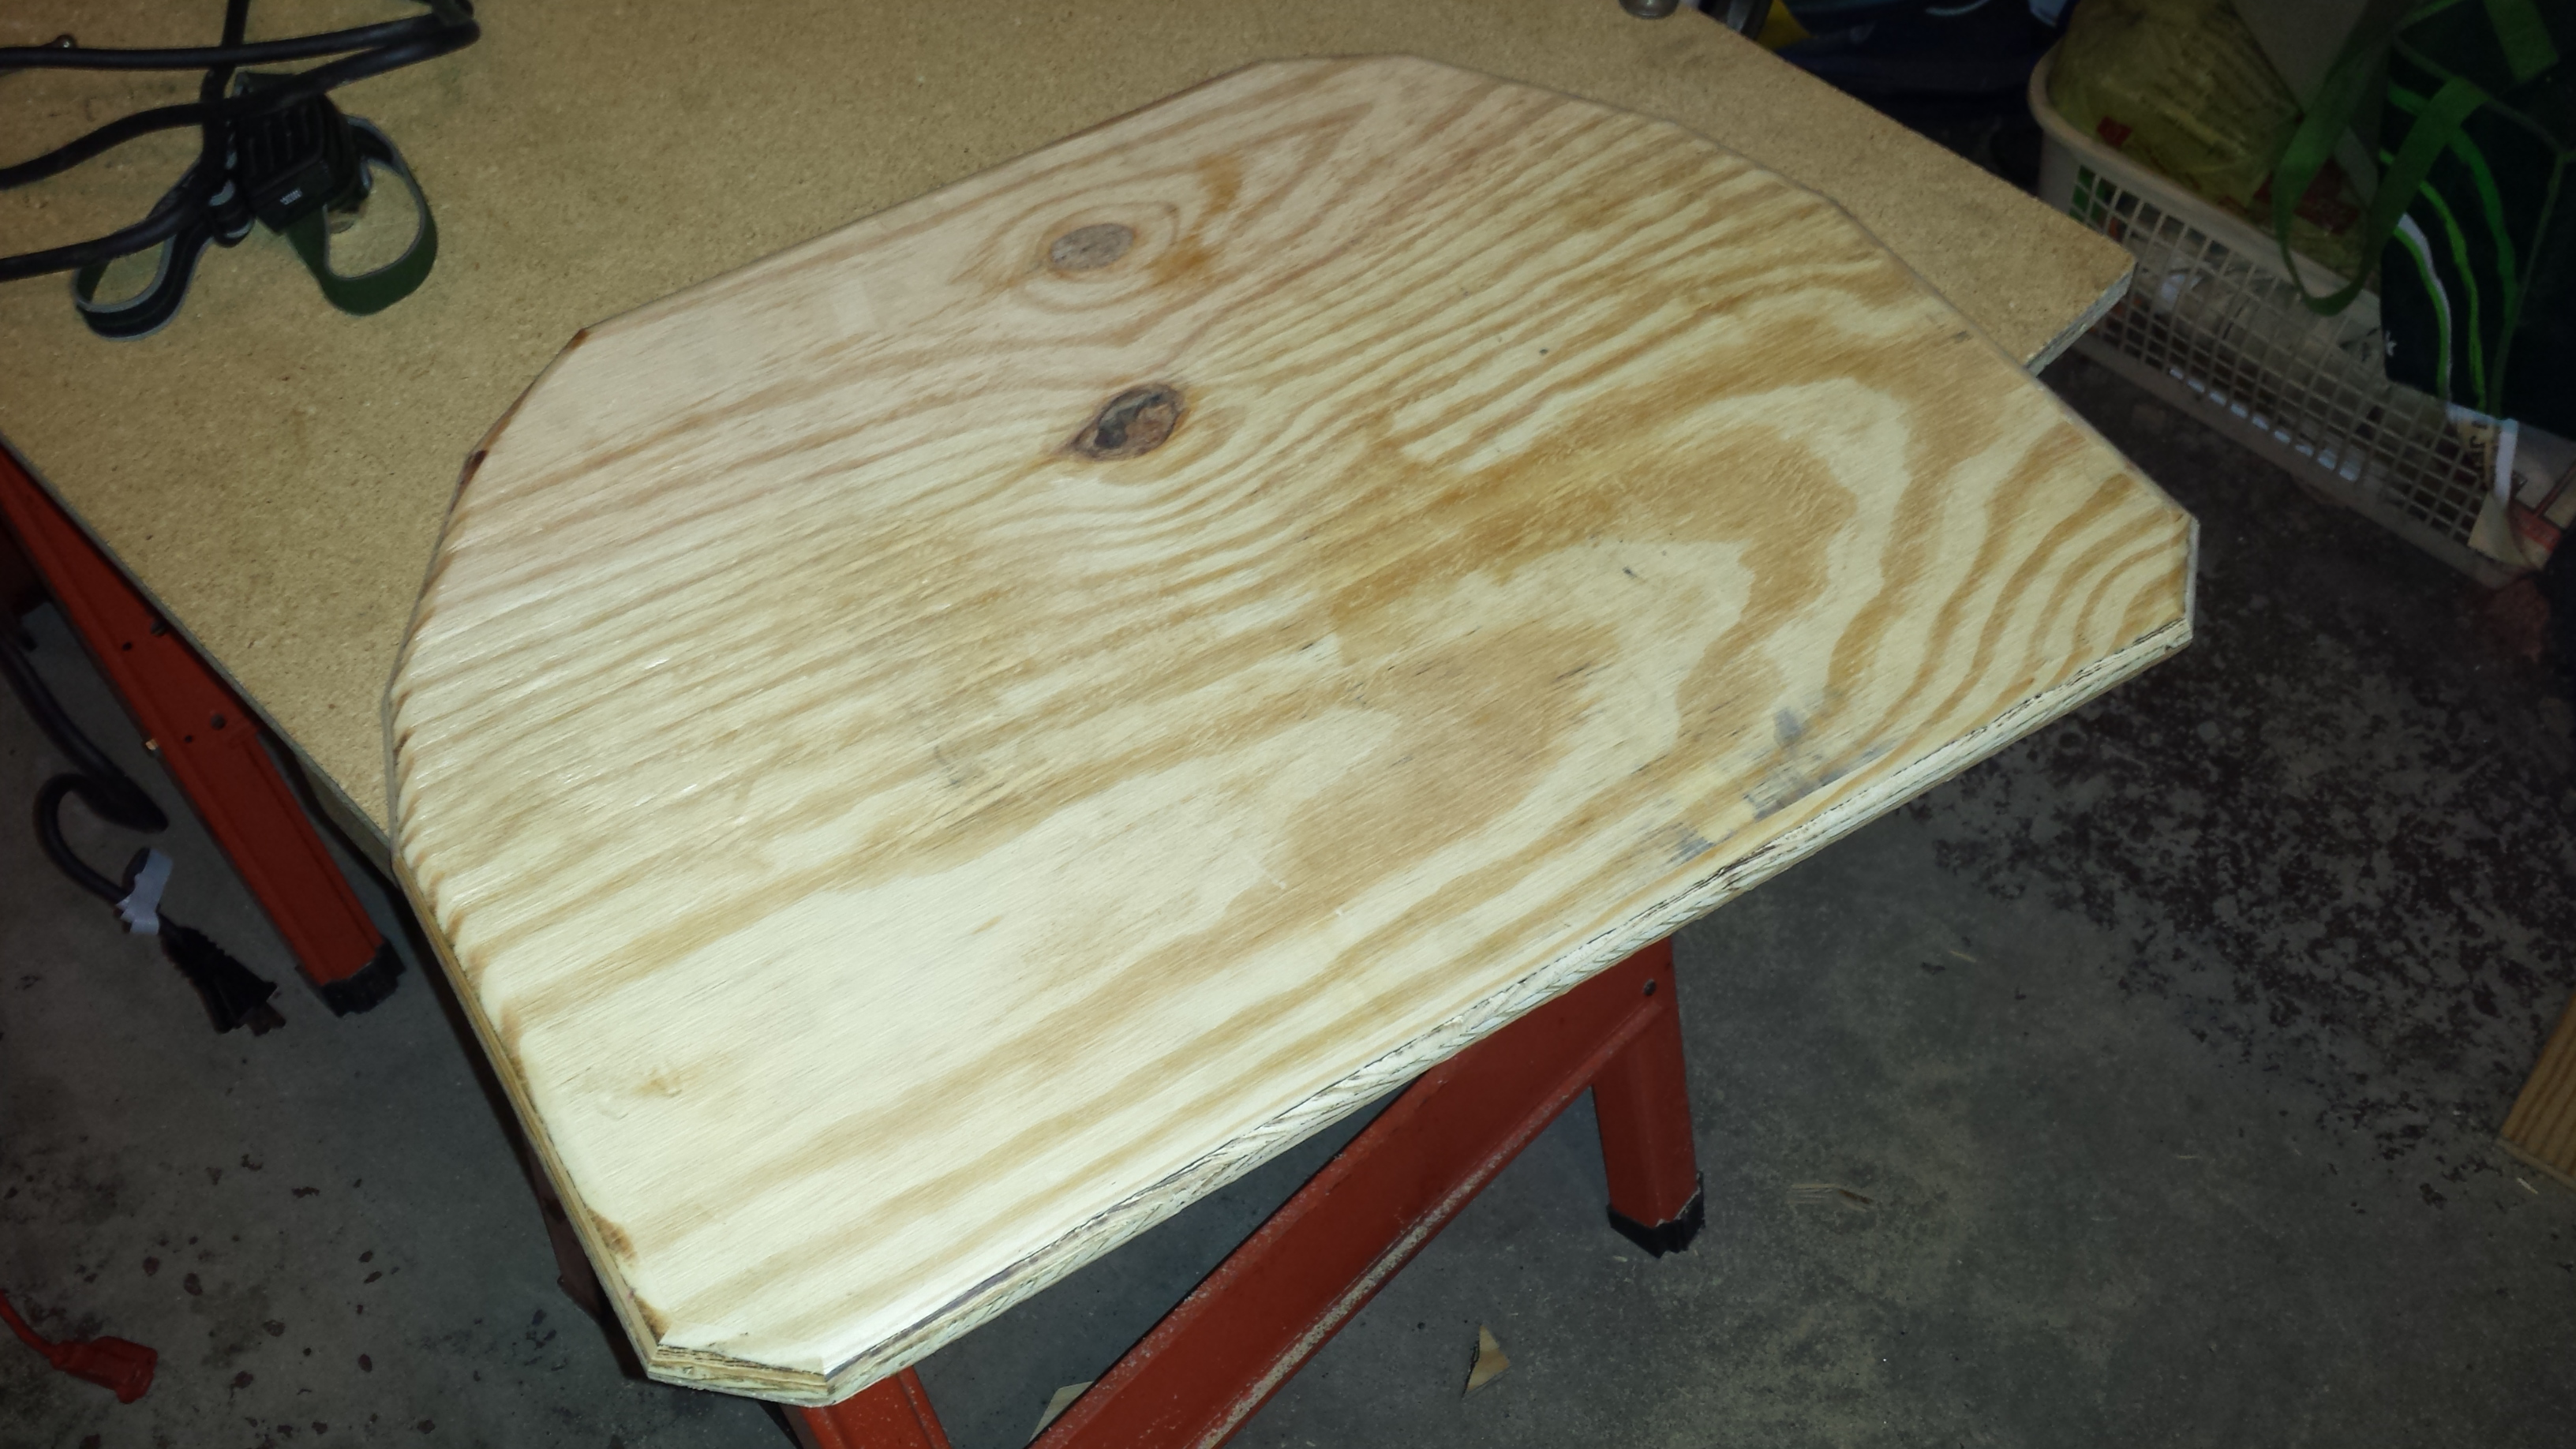
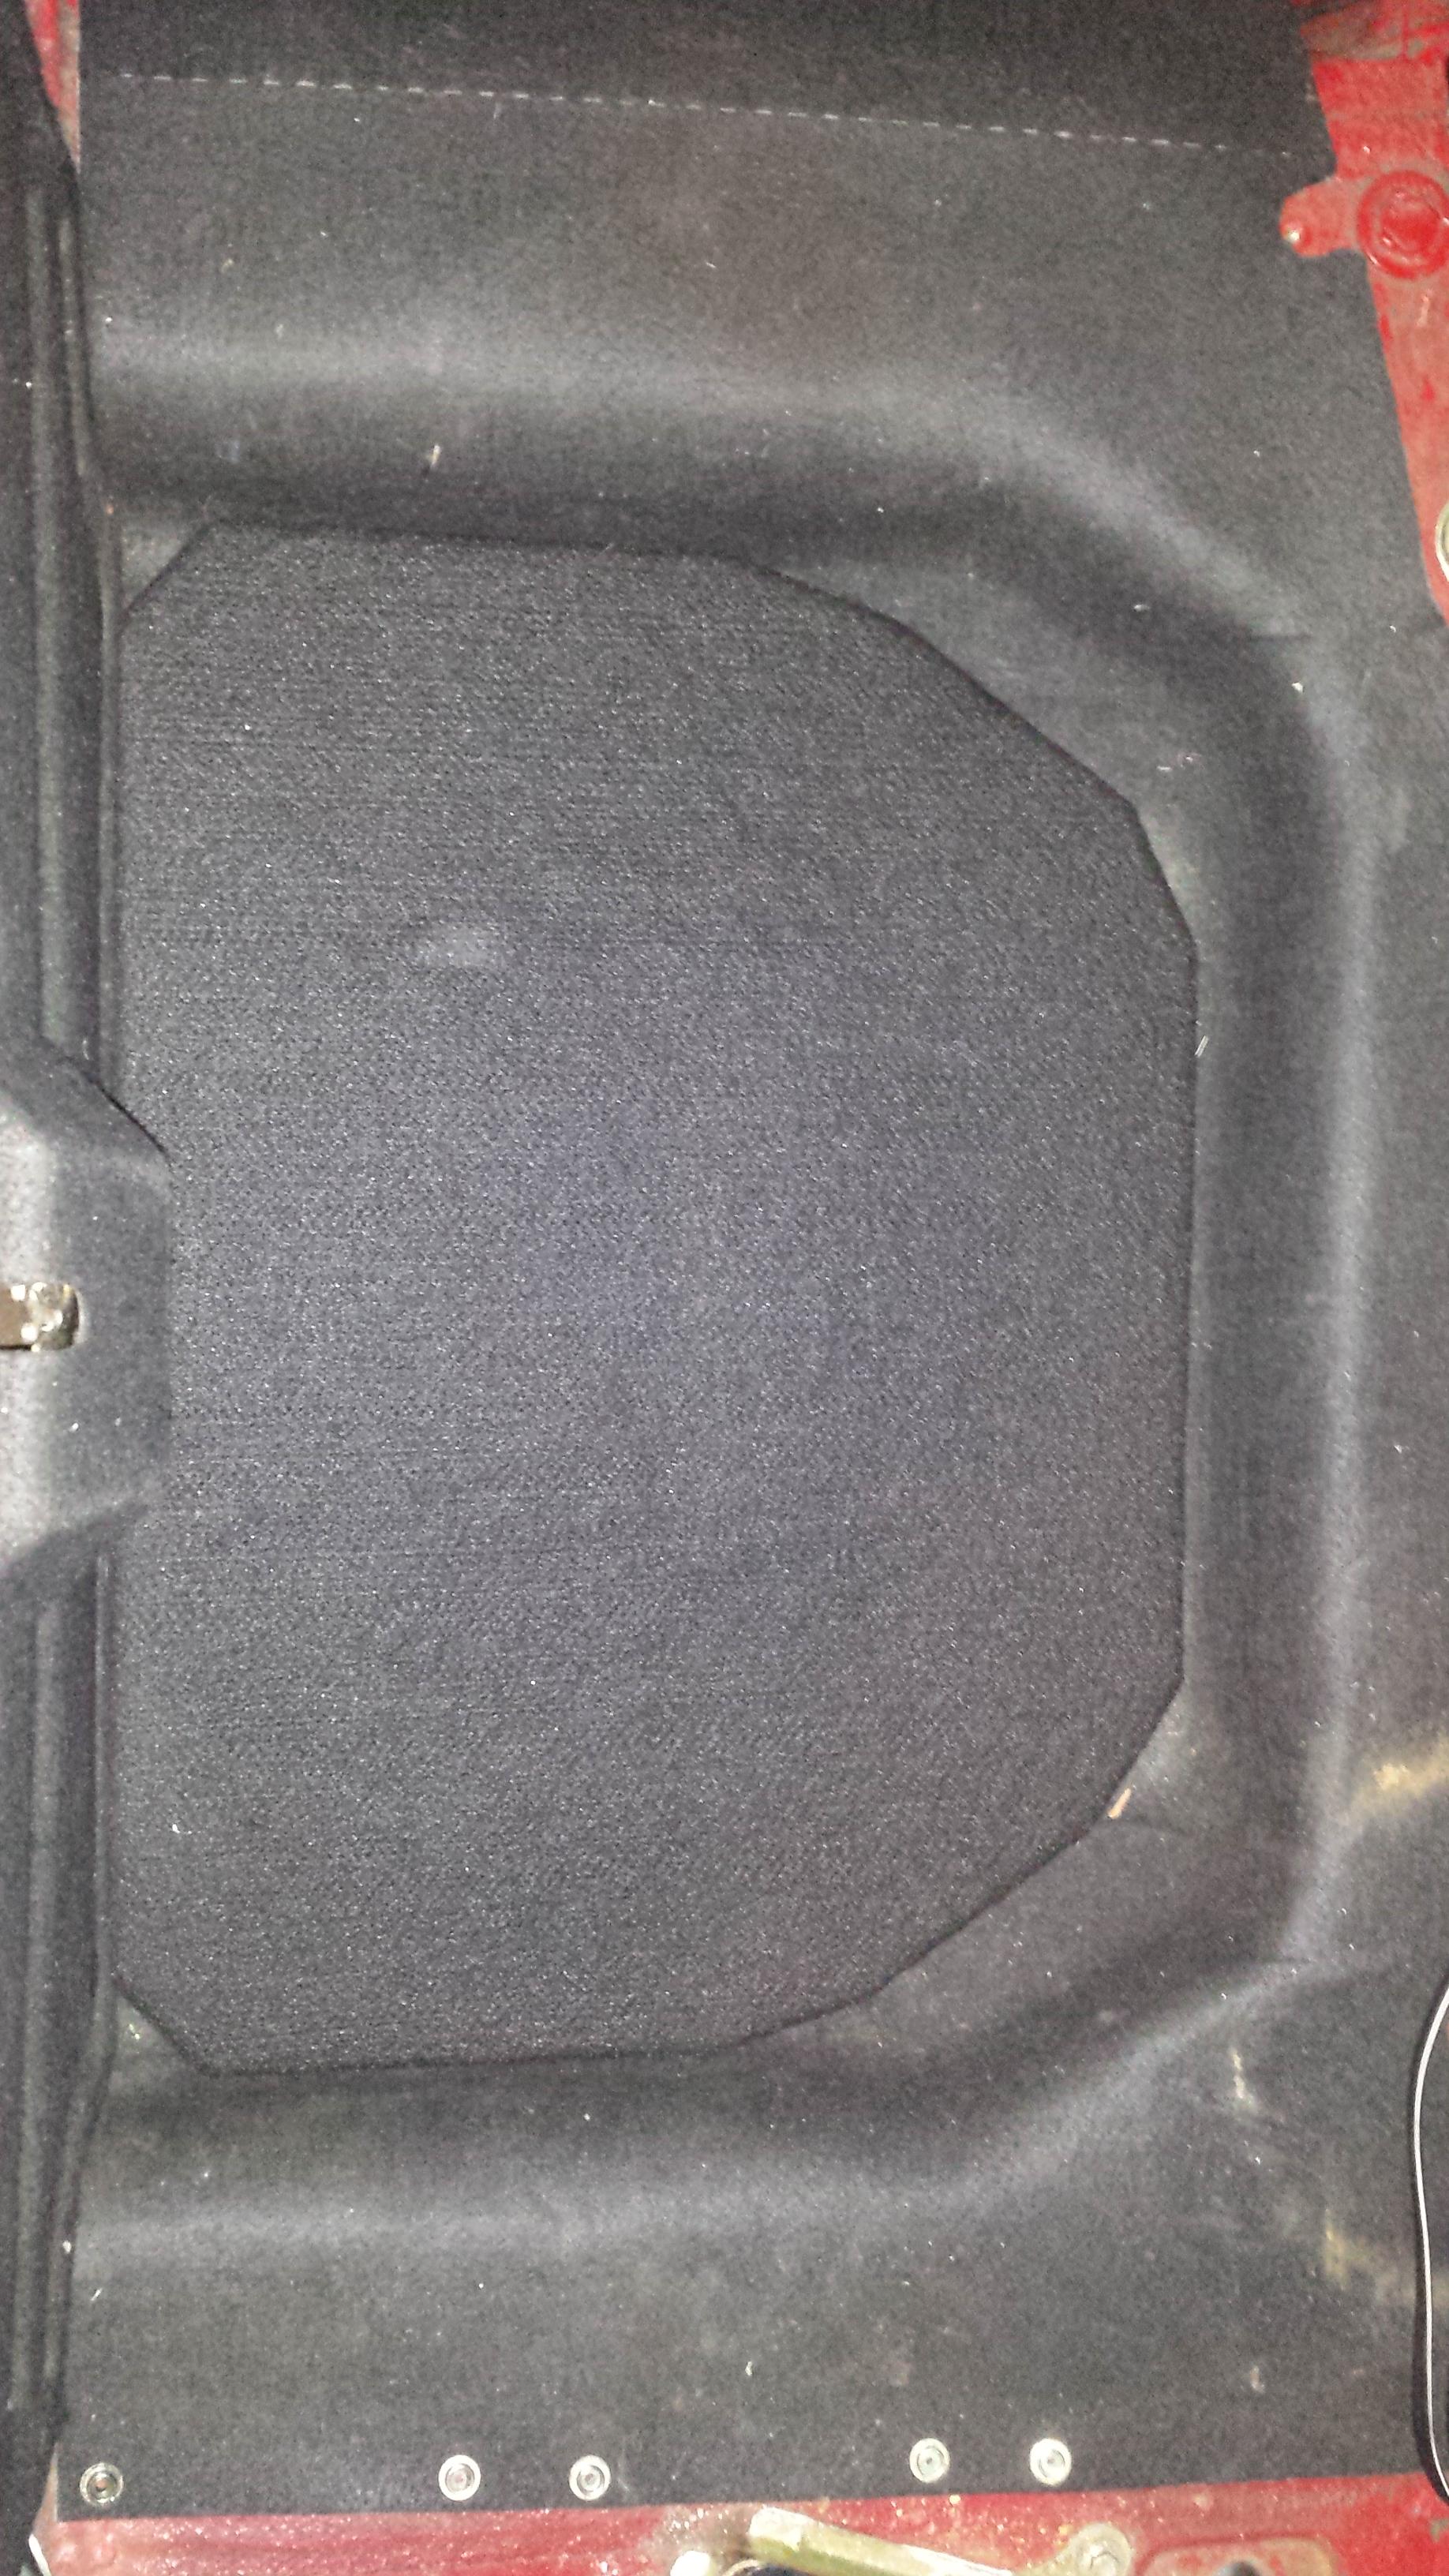
After that, it fit nice and snug in the little well thing.
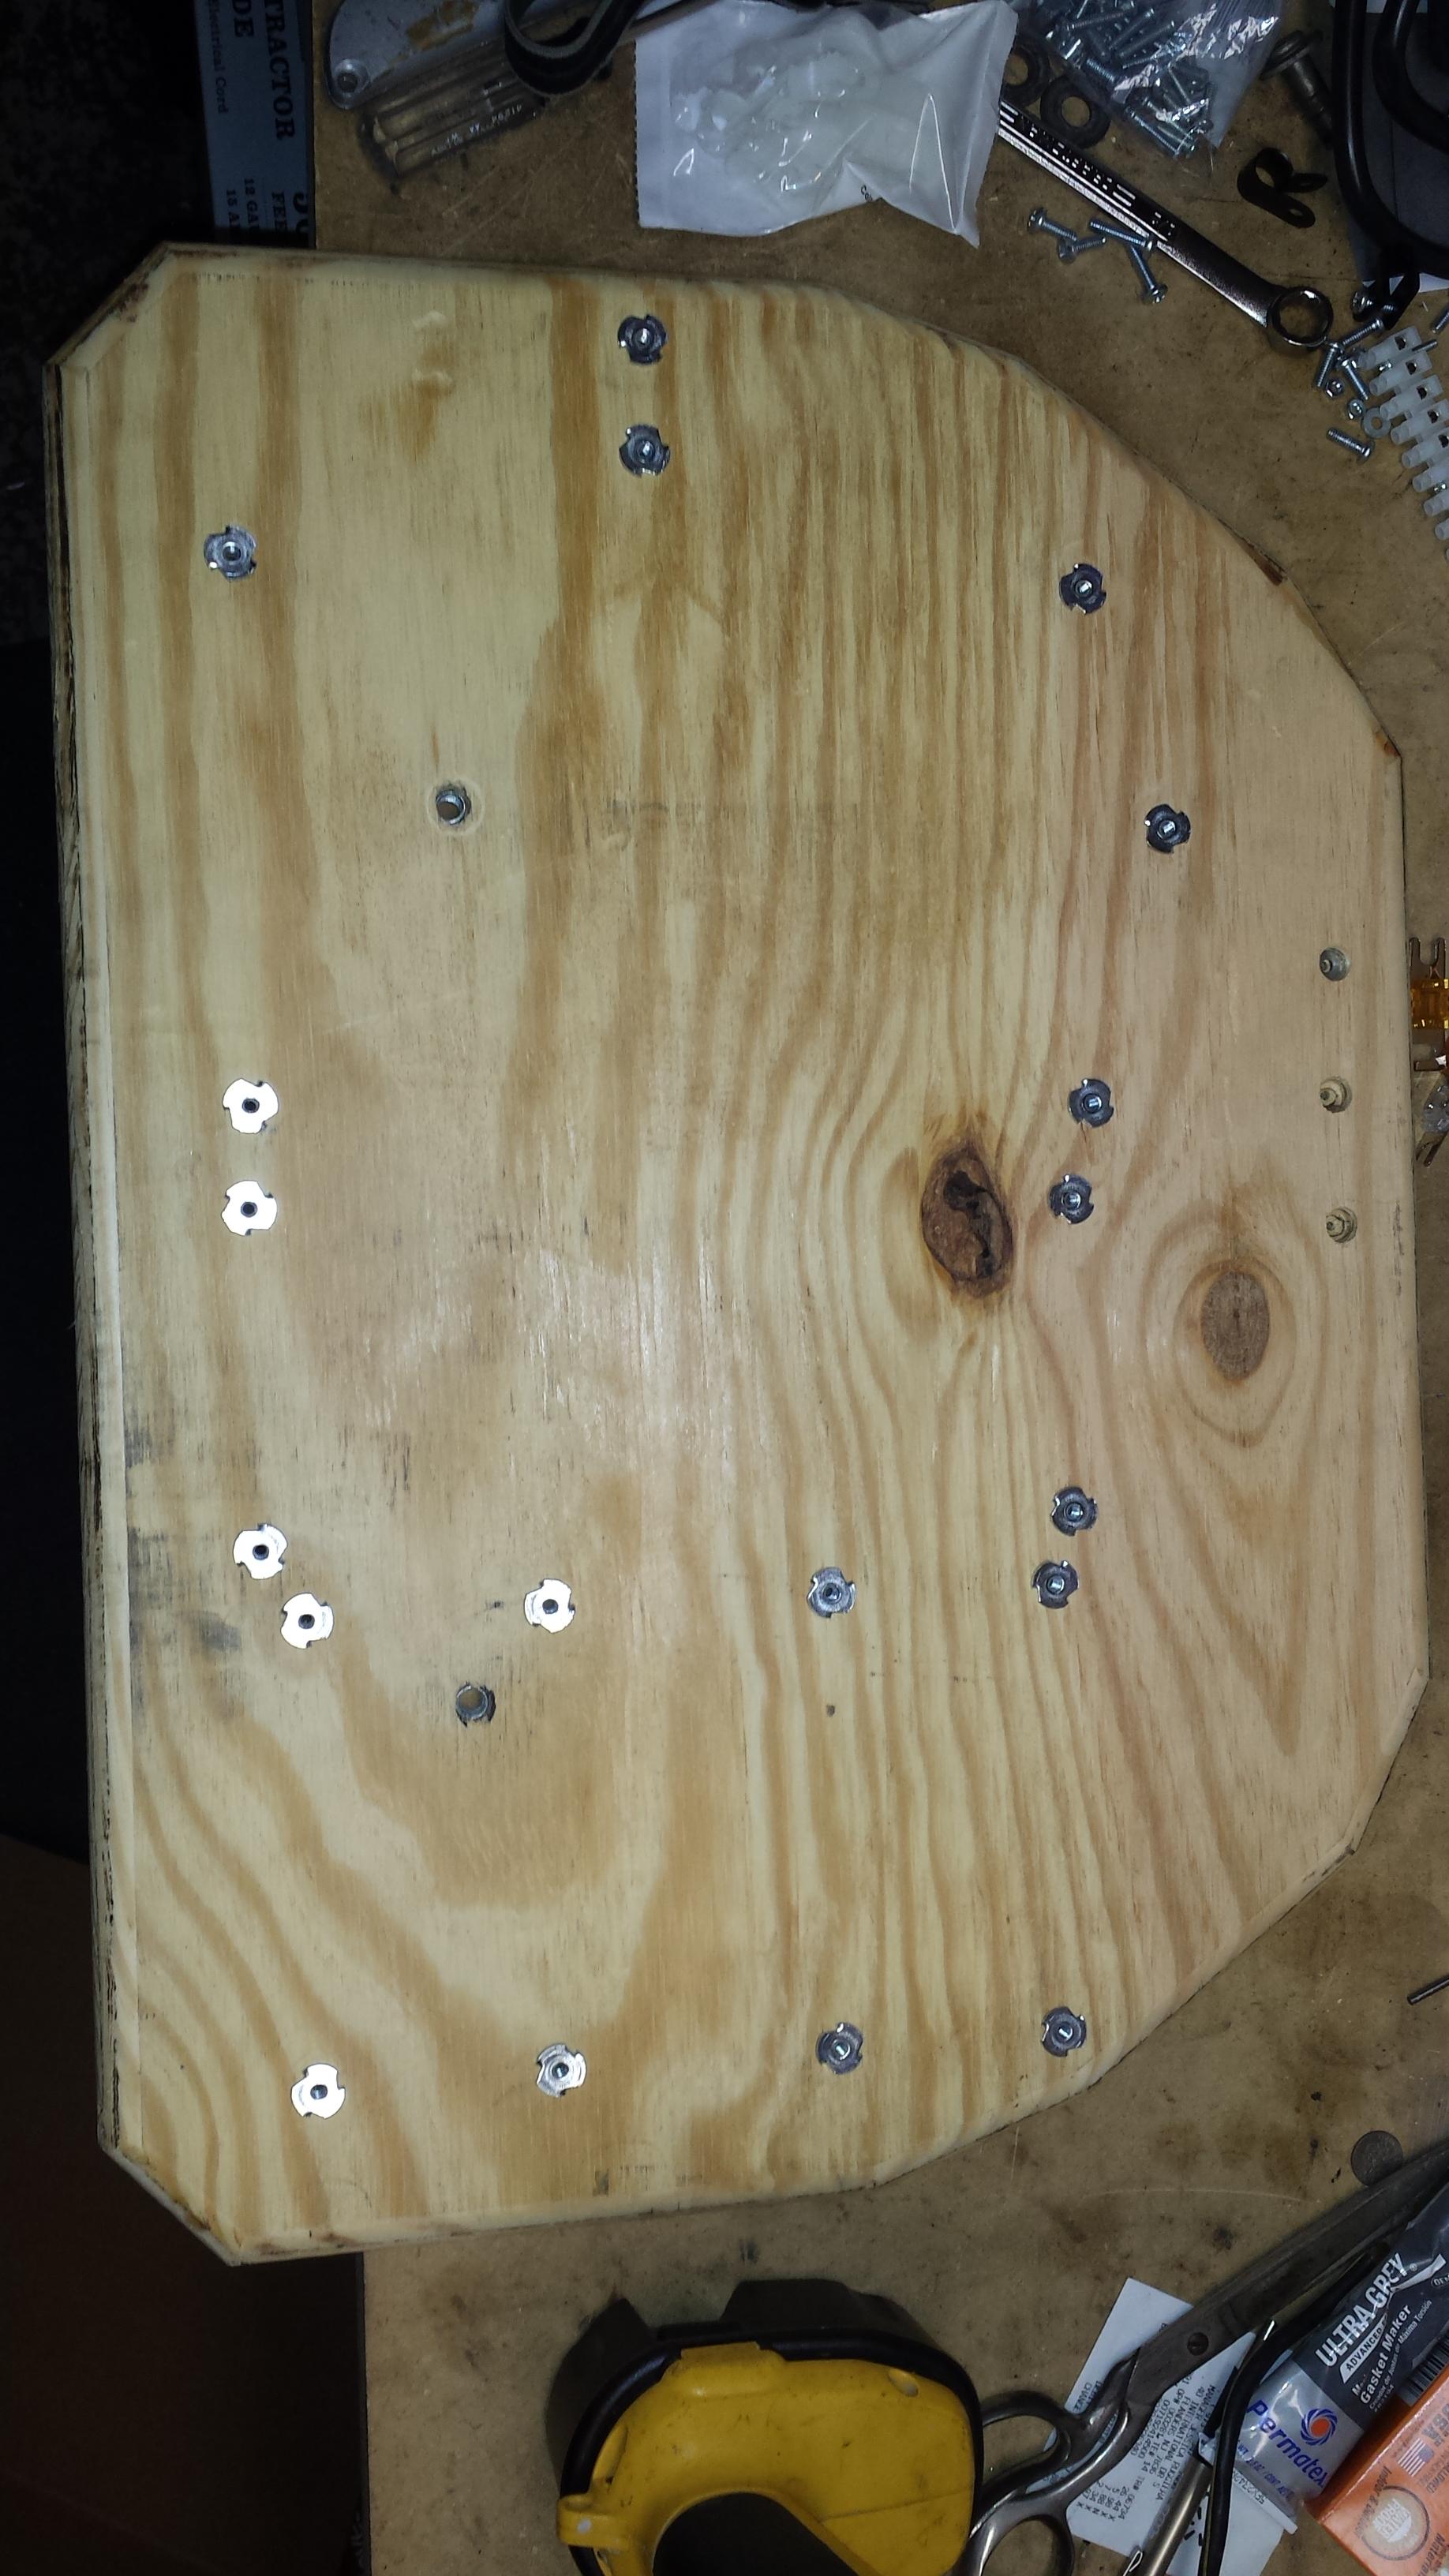
Next was to lay out and drill some holes.

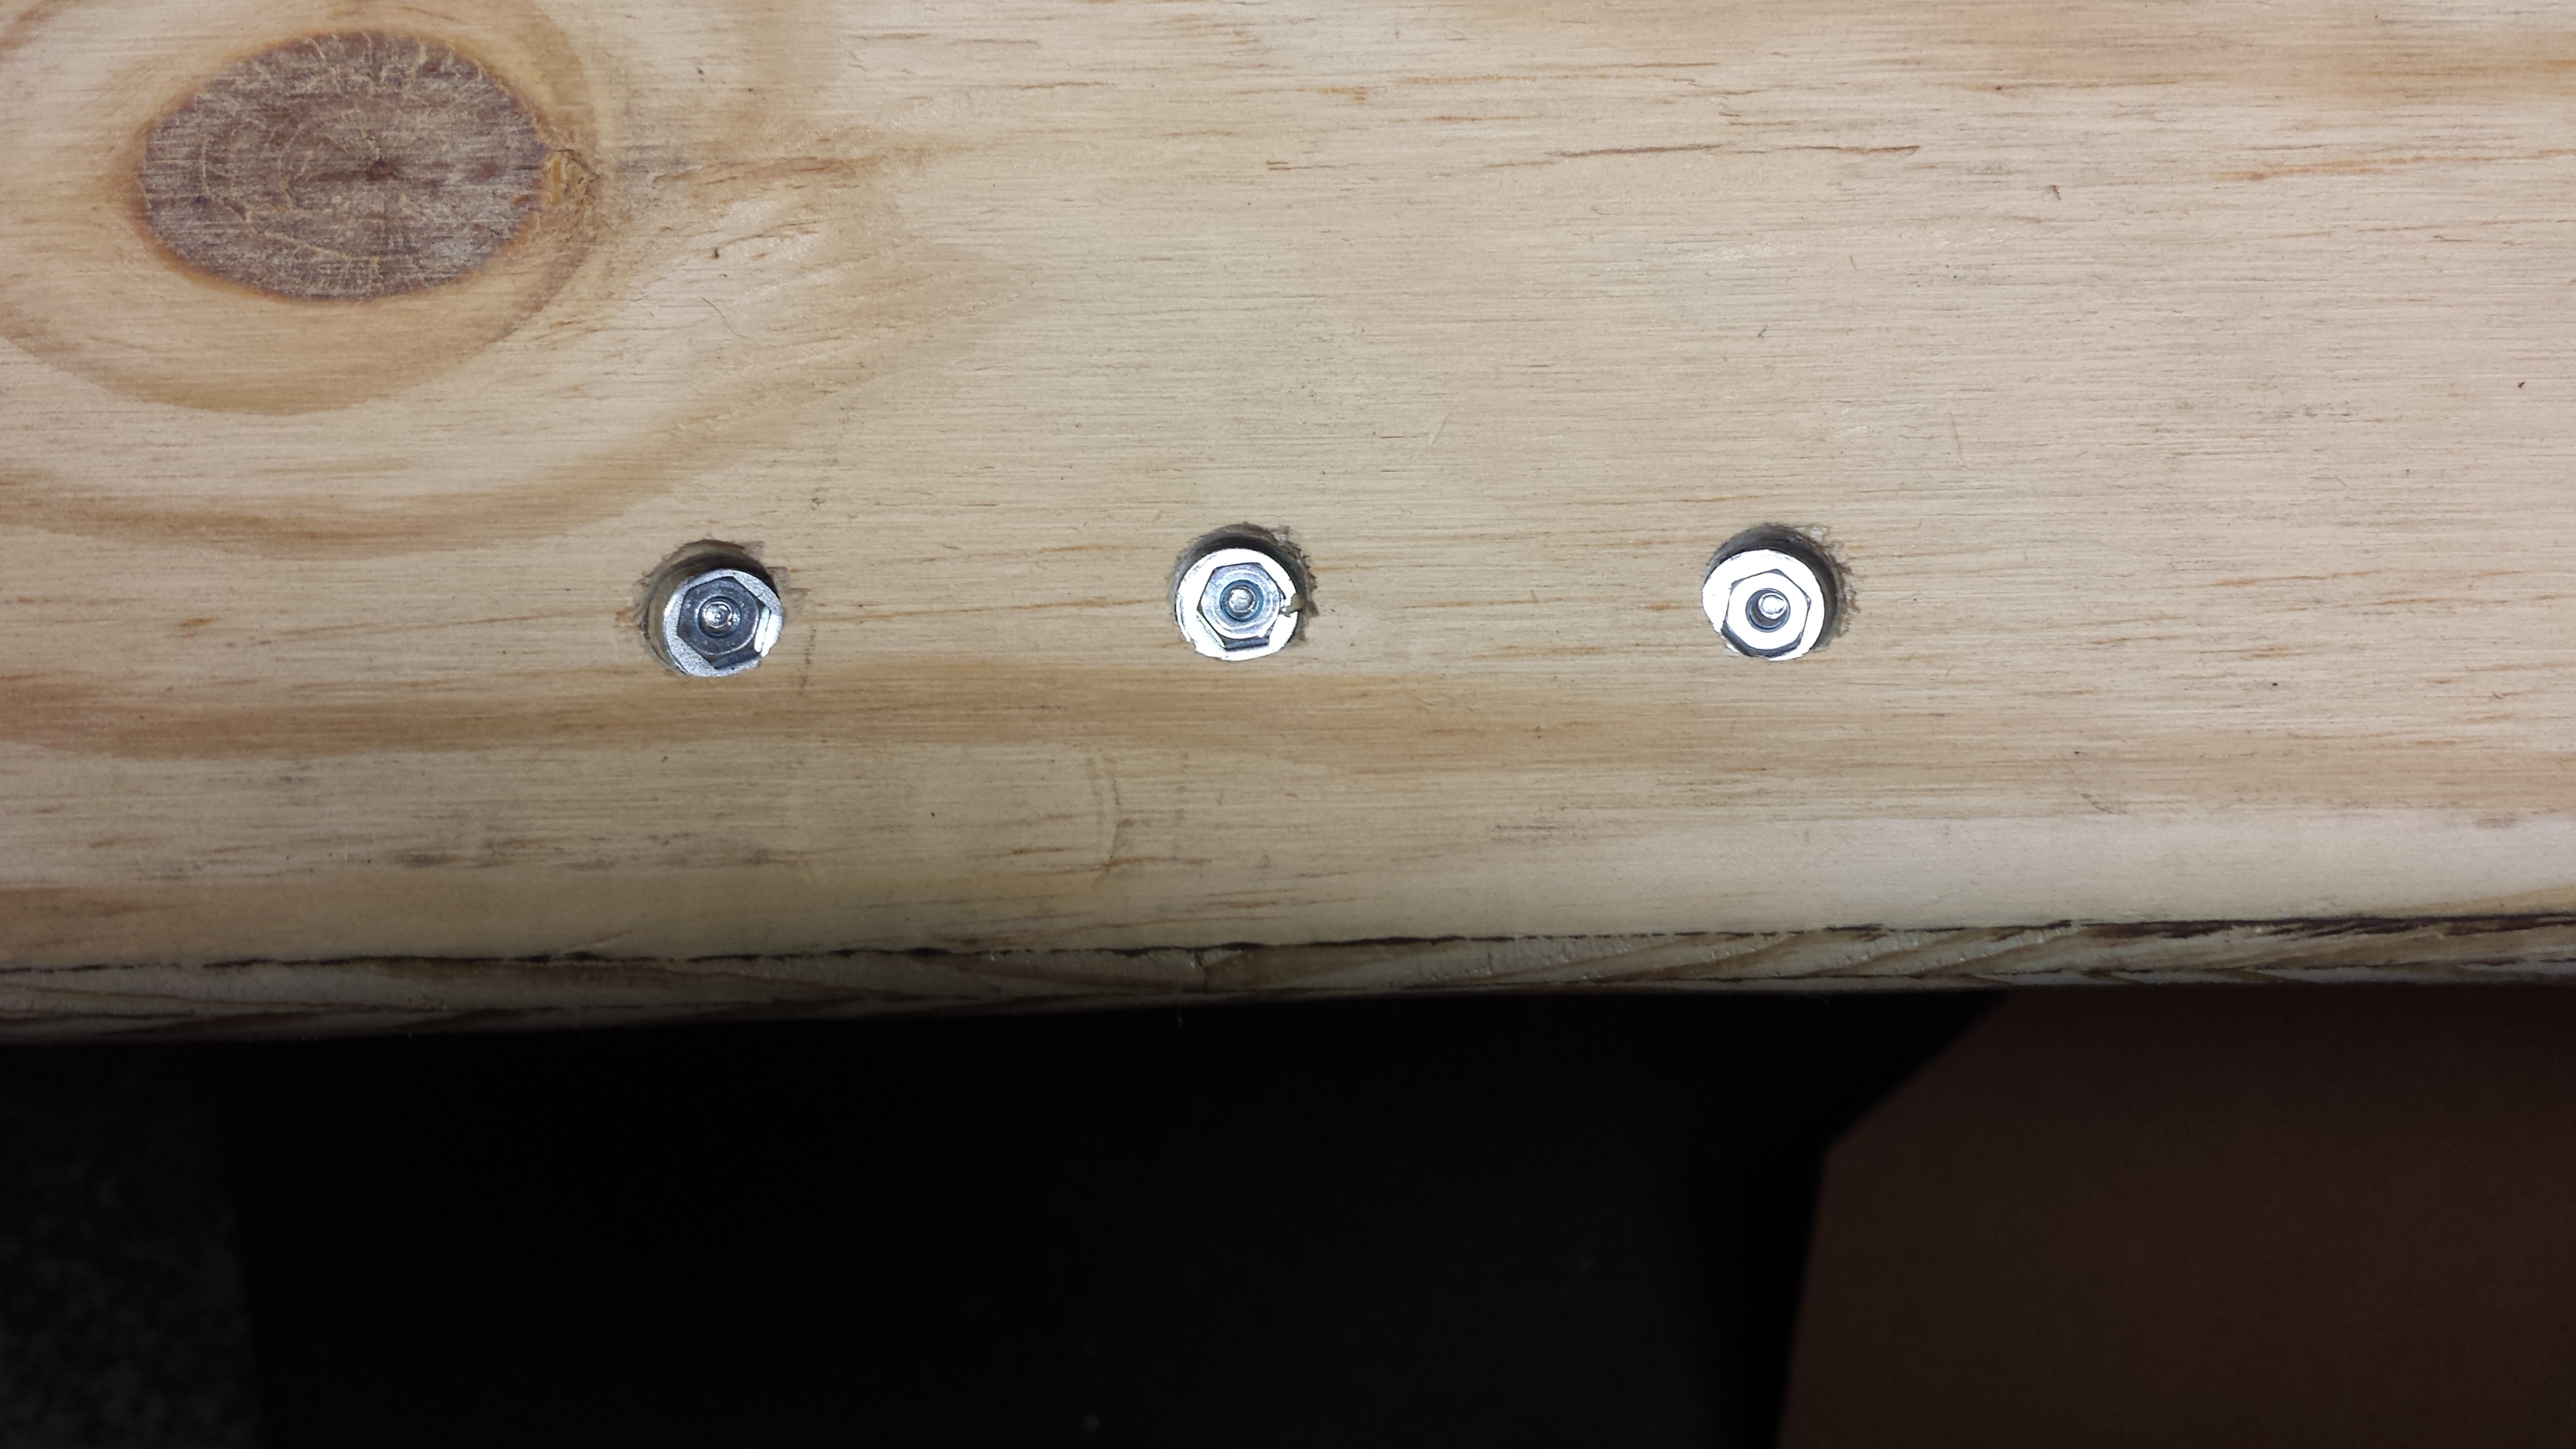
And then, to prove my insanity, and continue my tradition to over build everything, everything will be held in place by 8-32 machine screws and t-nuts.
The whole thing will be bolted down with 5/16" bolts and t-nuts (biggest t-nuts I could find locally).

I will be carpeting it before installing, so it all looks nice. Also need to do the wire layout and tie them all down nice as well.
After that, it fit nice and snug in the little well thing.
Next was to lay out and drill some holes.
And then, to prove my insanity, and continue my tradition to over build everything, everything will be held in place by 8-32 machine screws and t-nuts.
The whole thing will be bolted down with 5/16" bolts and t-nuts (biggest t-nuts I could find locally).
I will be carpeting it before installing, so it all looks nice. Also need to do the wire layout and tie them all down nice as well.
Reply
0
0
Thread Starter
Elite Member
Joined: Oct 2013
Posts: 1,822
Total Cats: 144
From: NorthWest NJ
Reply
0
0
Thread Starter
Elite Member
Joined: Oct 2013
Posts: 1,822
Total Cats: 144
From: NorthWest NJ
Picked up some #4 hardware to mount the speaker wire terminal strip. Might be a bit overkill though...
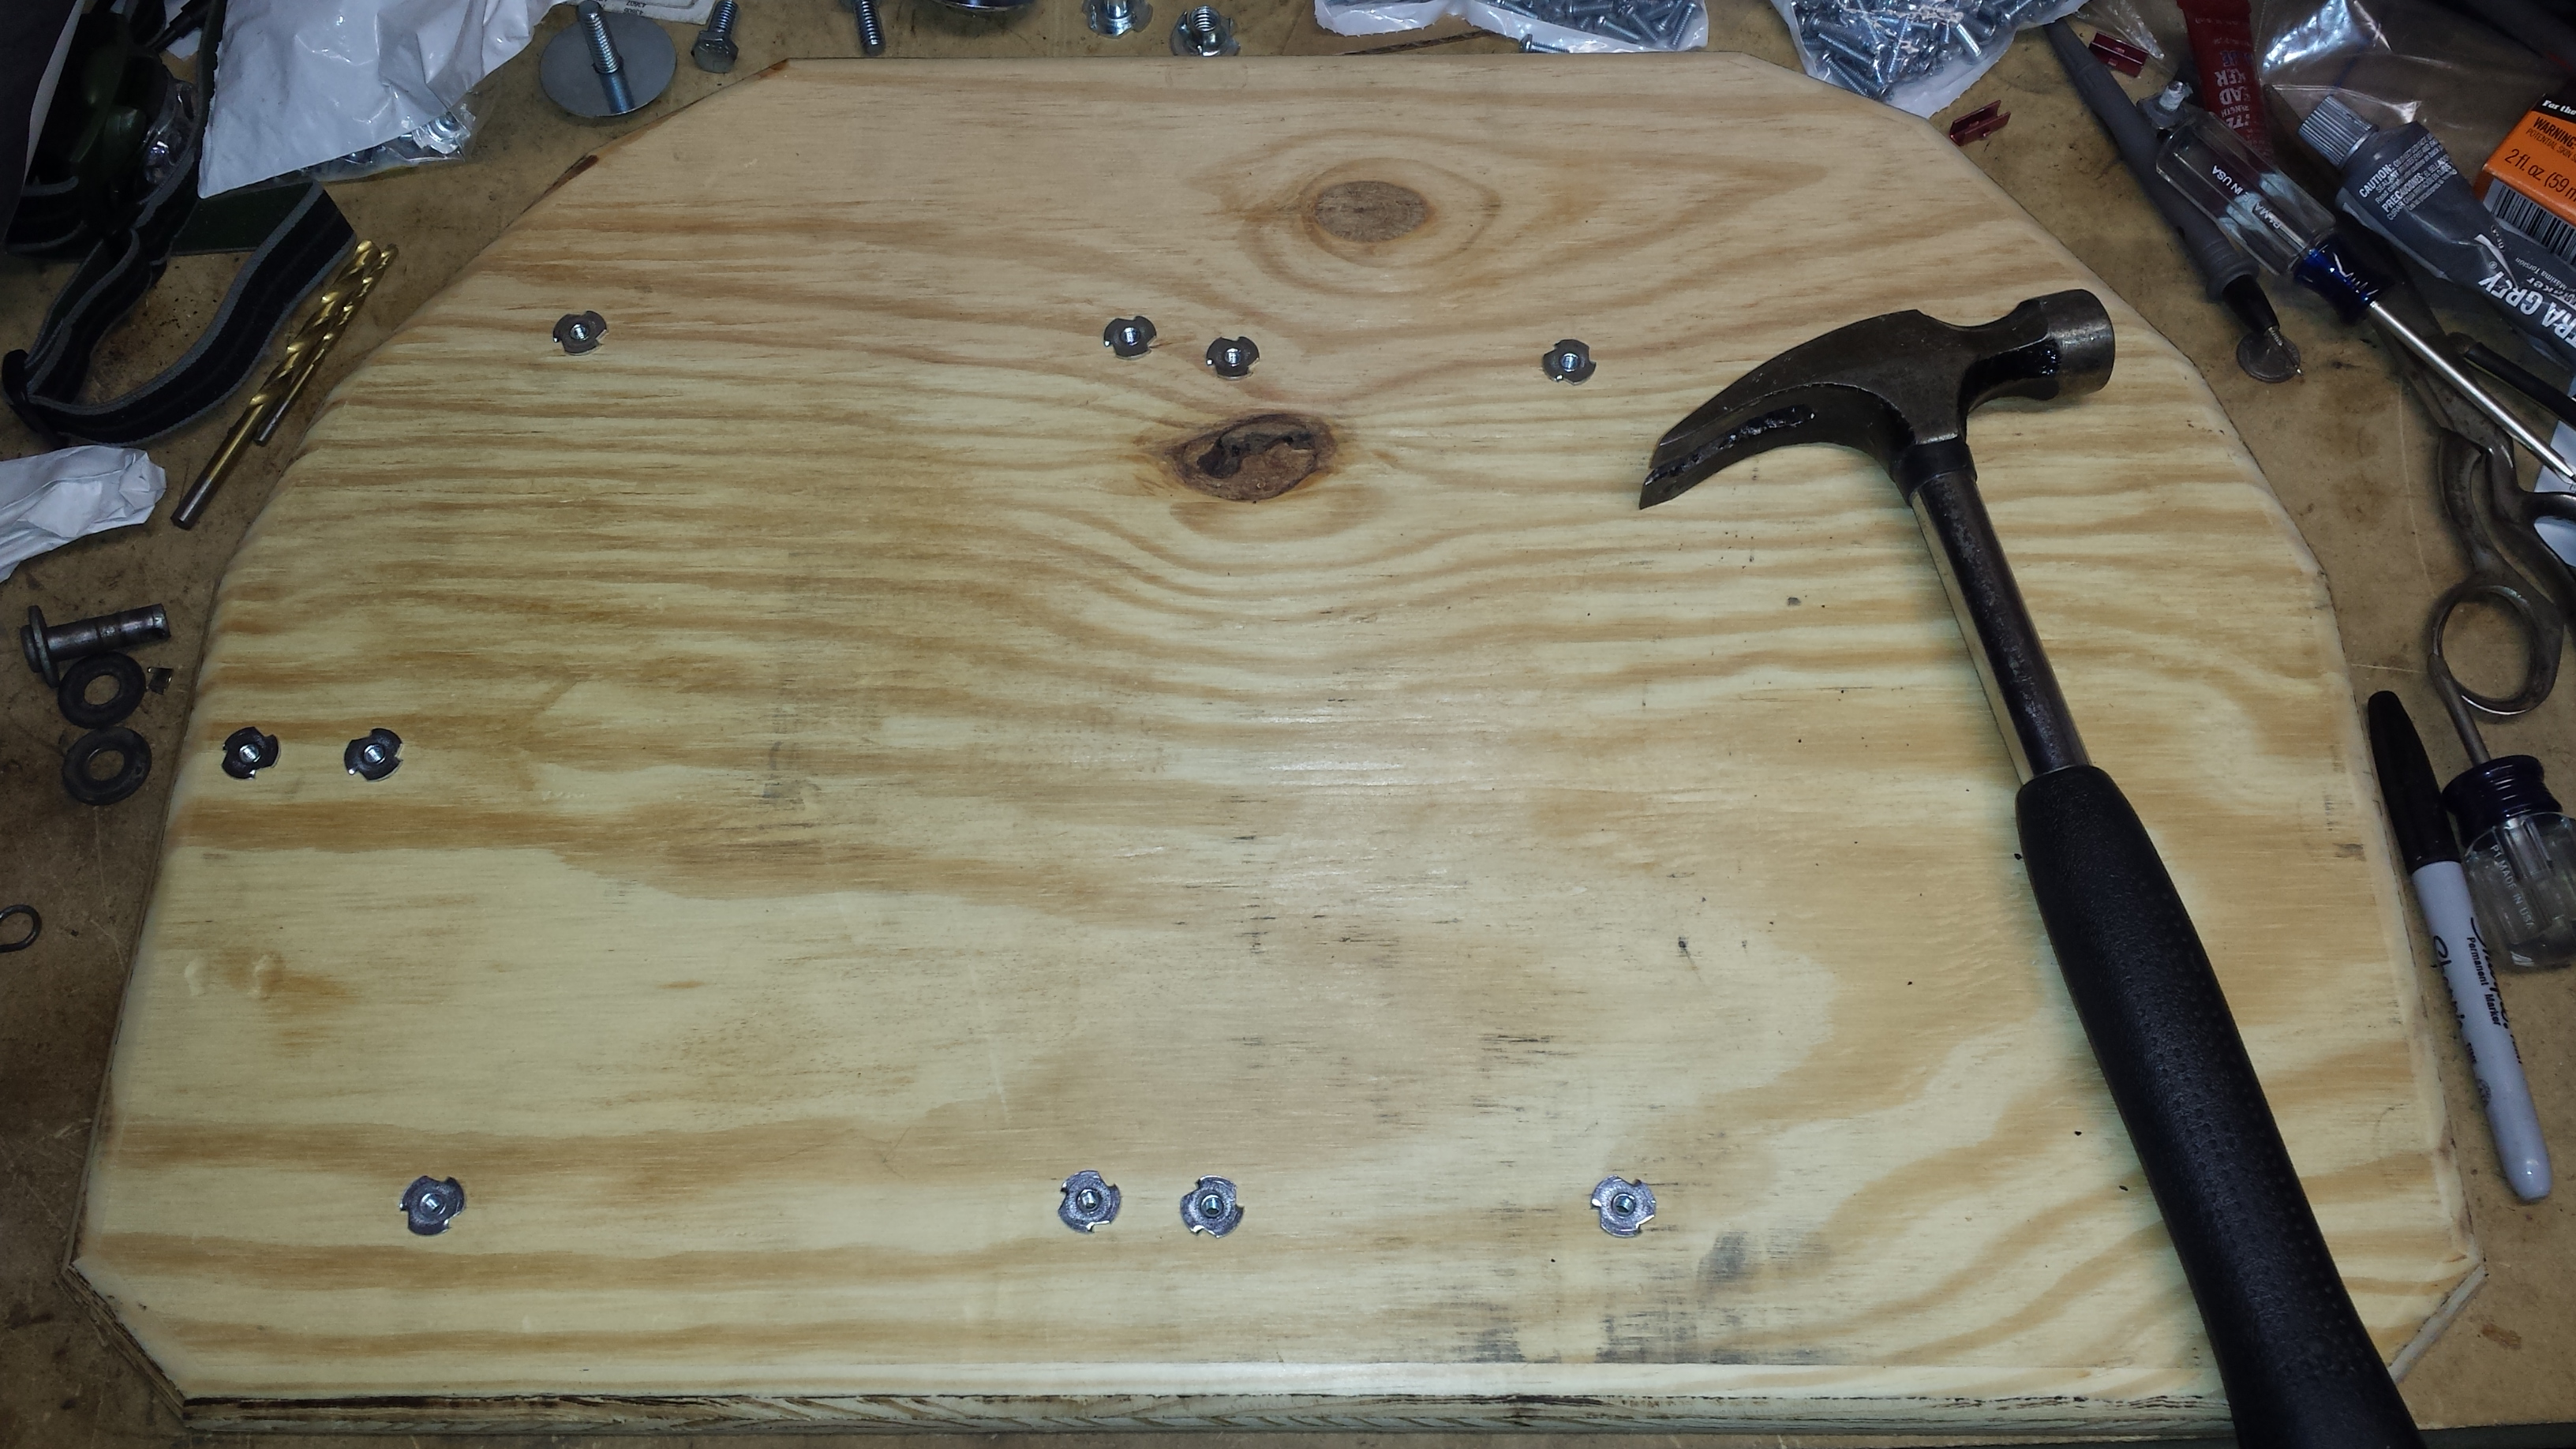
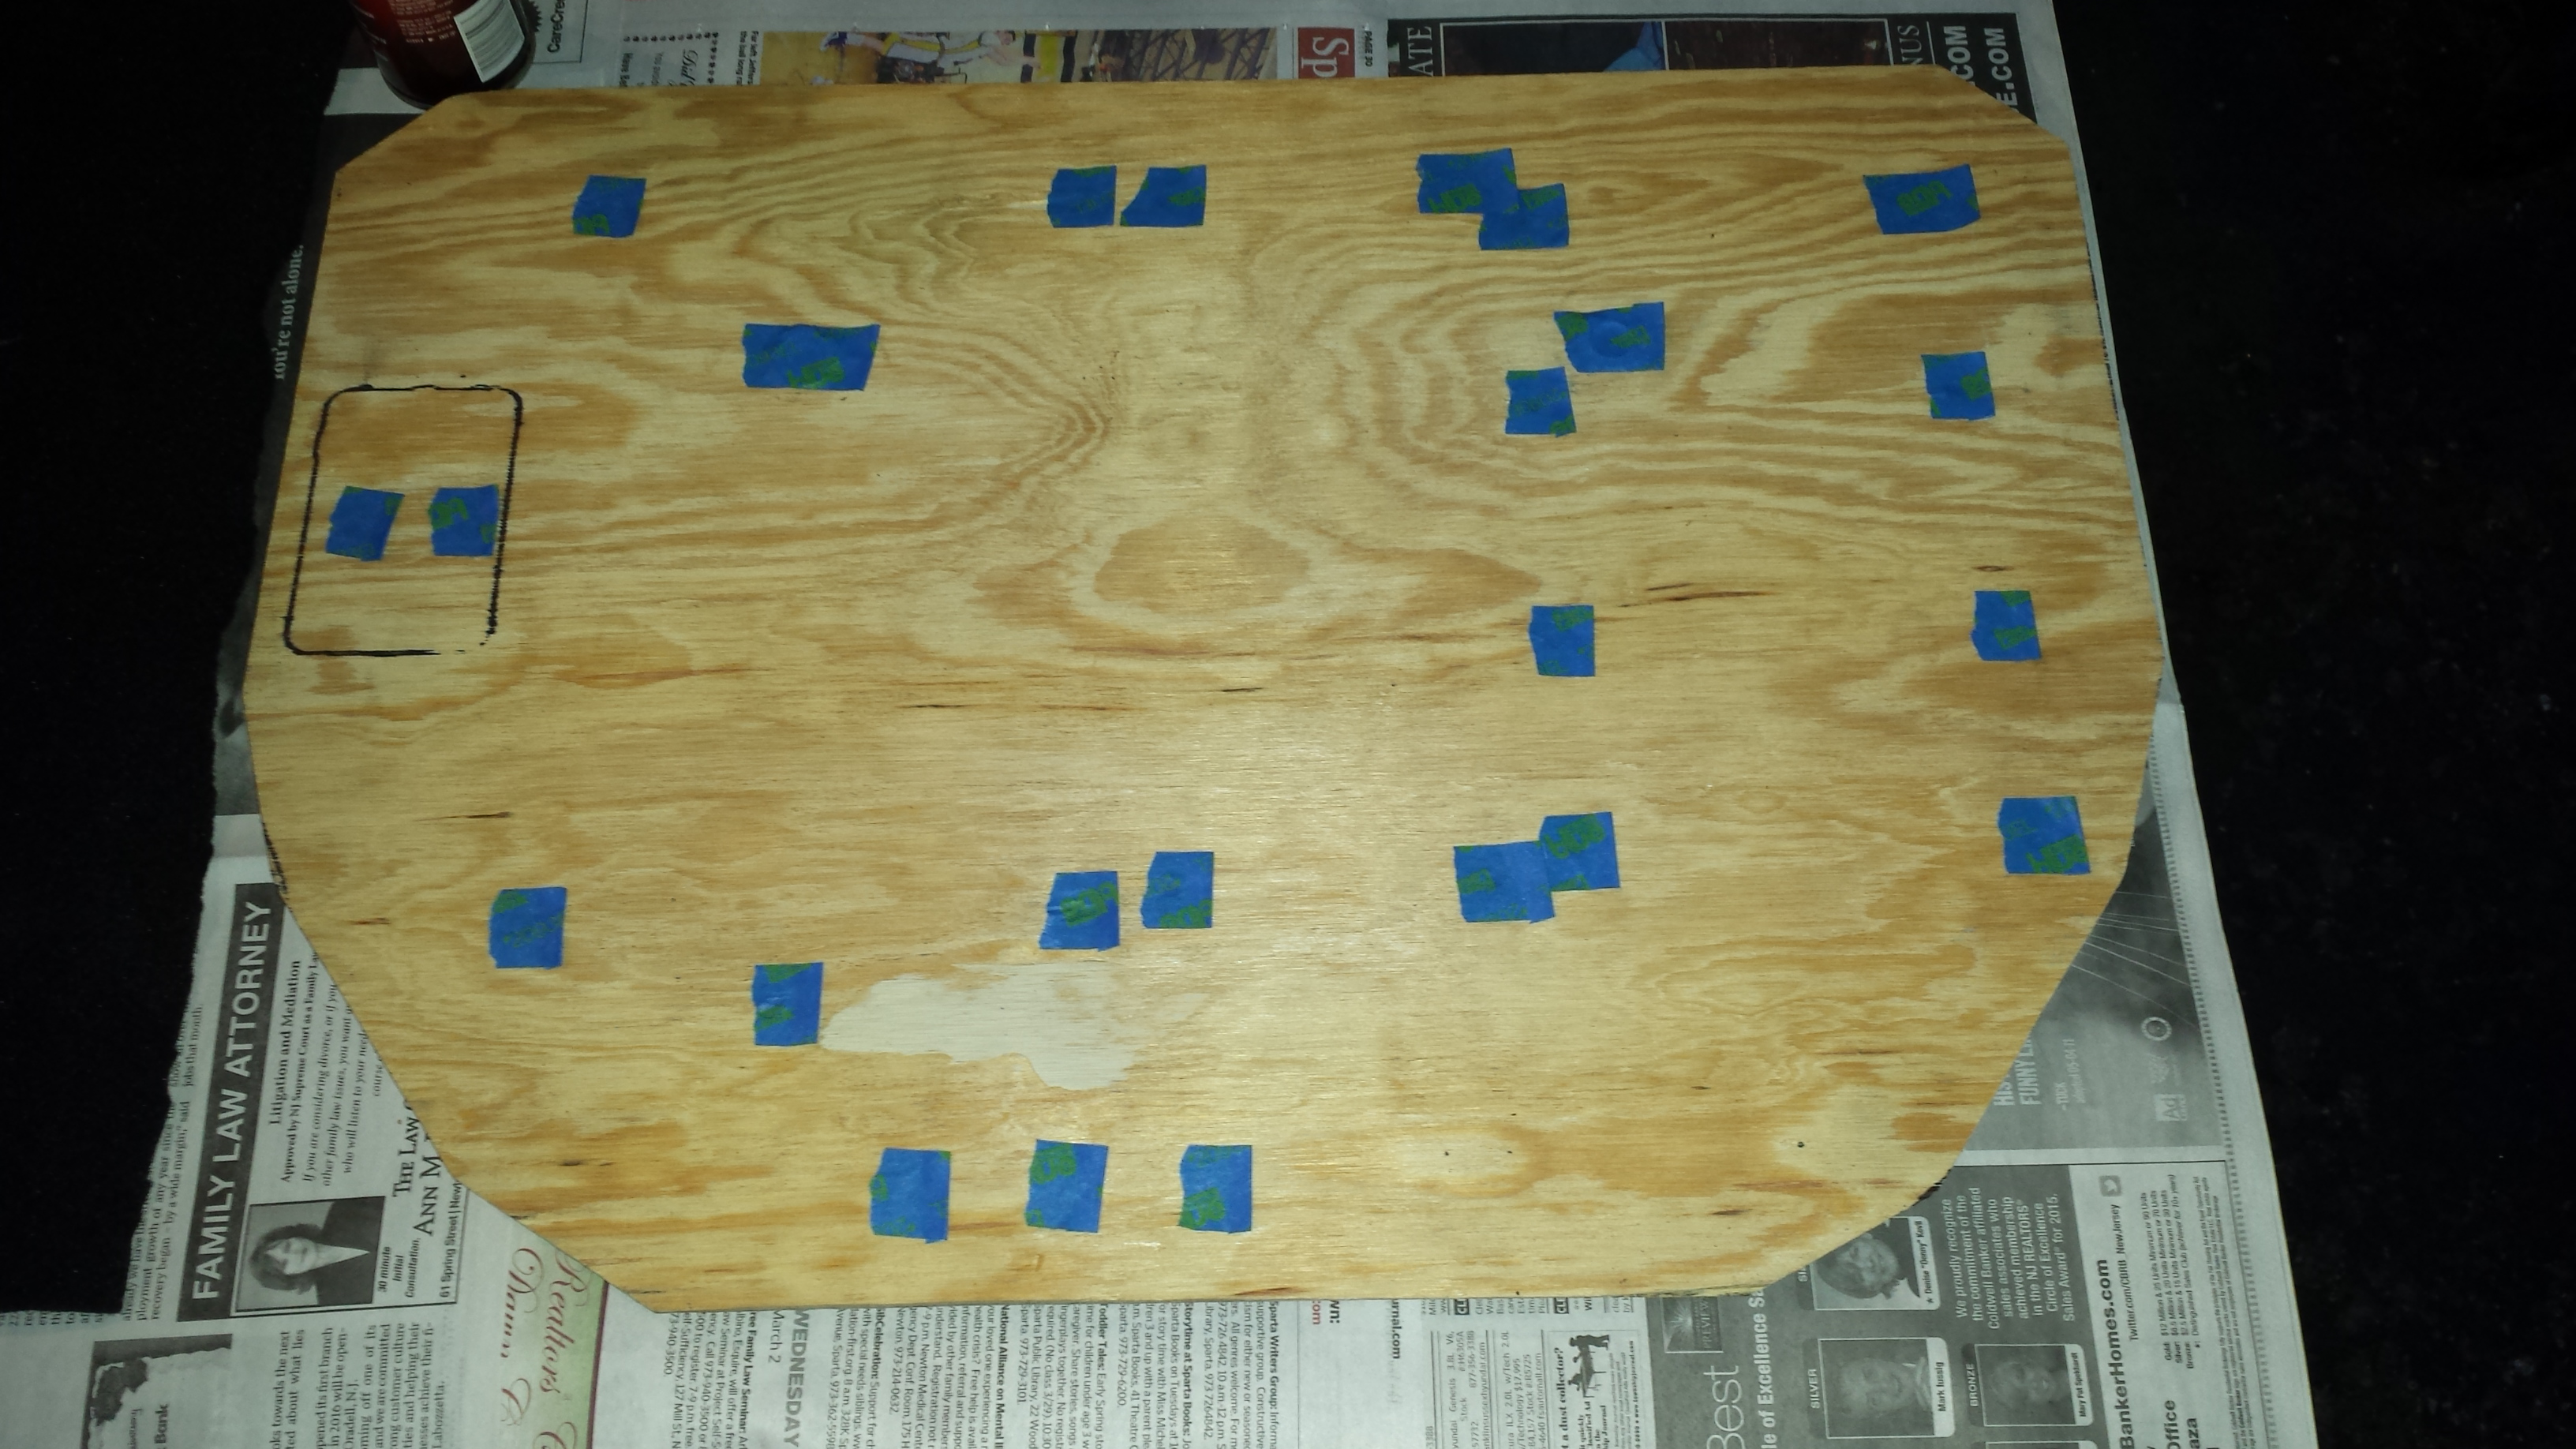
Finished layout for all the t-nuts
Spray glue for putting the carpet on.
Carpeted! Not bad for my first time doing this.
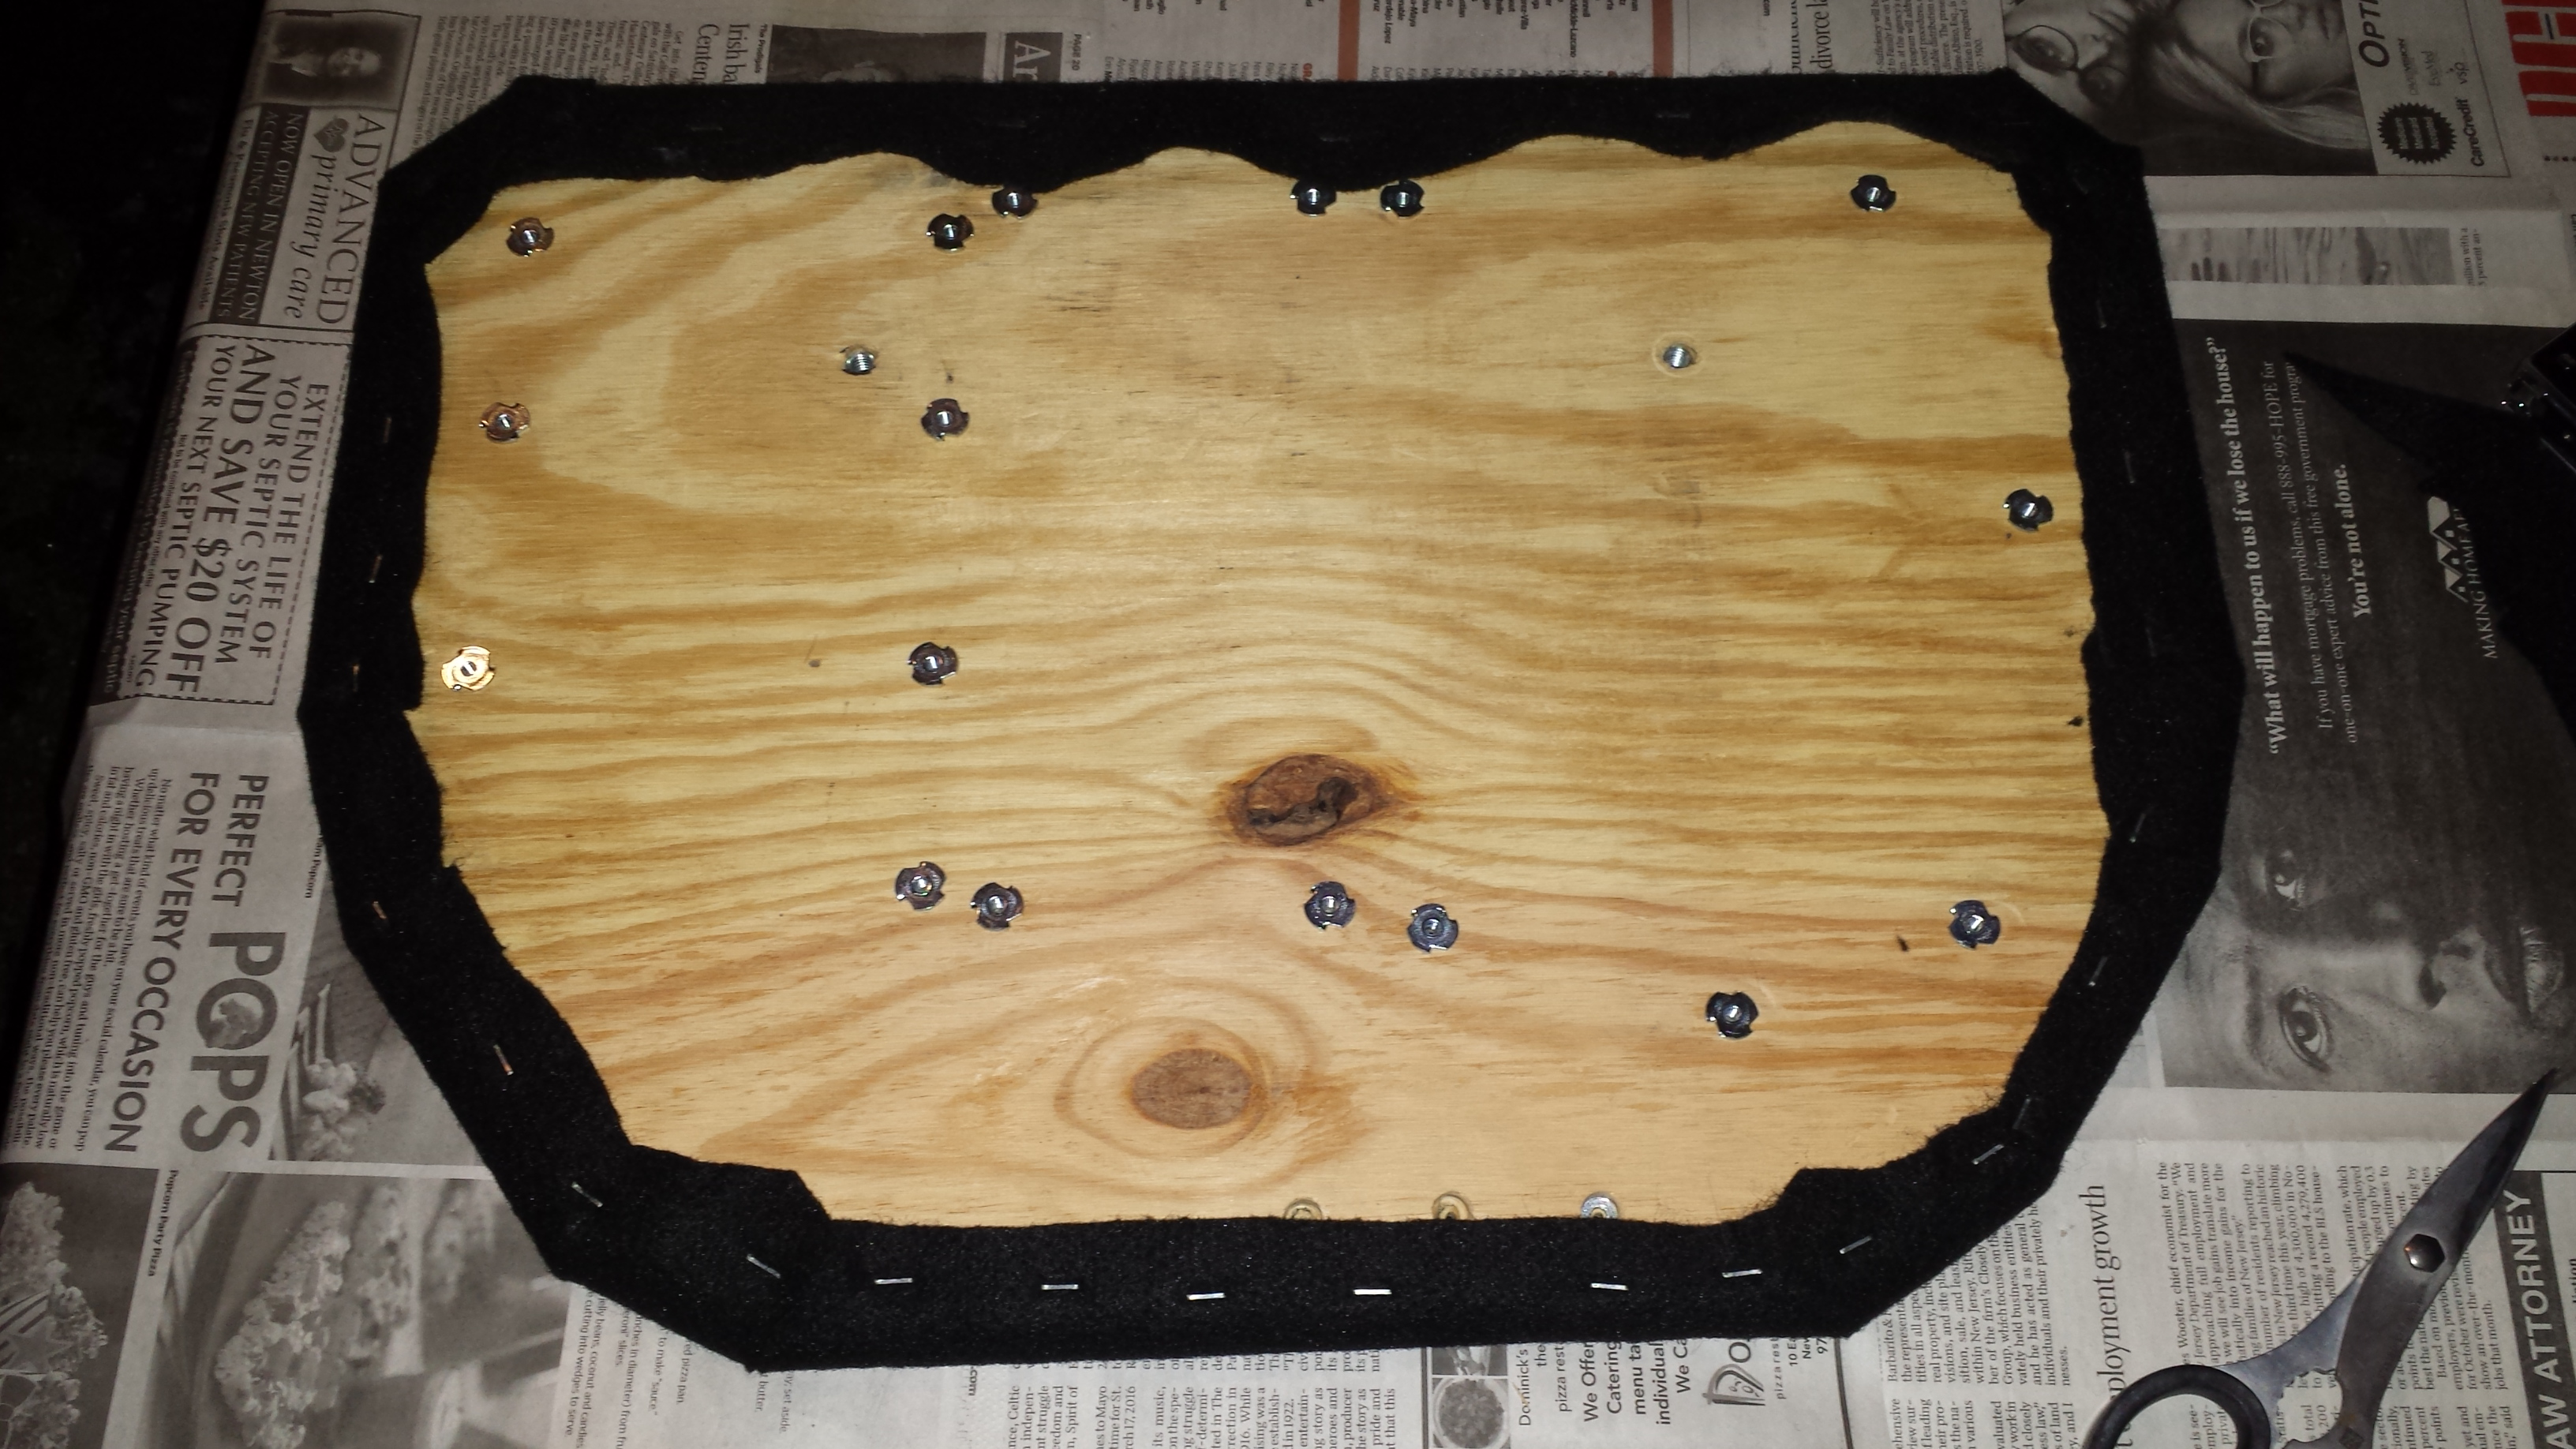

And test fit, matches fairly well.
poke holes to feed the screws through
And mount things up. Not the finished system, but I wanted to have sound for the meet tomorrow evening.
Finished layout for all the t-nuts
Spray glue for putting the carpet on.
Carpeted! Not bad for my first time doing this.
And test fit, matches fairly well.
poke holes to feed the screws through
And mount things up. Not the finished system, but I wanted to have sound for the meet tomorrow evening.
Reply
0
0
Thread Starter
Elite Member
Joined: Oct 2013
Posts: 1,822
Total Cats: 144
From: NorthWest NJ
Noticed some very, very slight play in the front driver side wheel, only when there is no weight on it. Ordered a pair of new hubs and I will research what grease to use for re-packing them.
This weekend I will check the ball joints as well. Even if it is them, I will re-pack and swap out the hubs anyway. At 140k miles, it will make me feel safer.
This weekend I will check the ball joints as well. Even if it is them, I will re-pack and swap out the hubs anyway. At 140k miles, it will make me feel safer.
Reply
0
0


