When you click on links to various merchants on this site and make a purchase, this can result in this site earning a commission. Affiliate programs and affiliations include, but are not limited to, the eBay Partner Network.
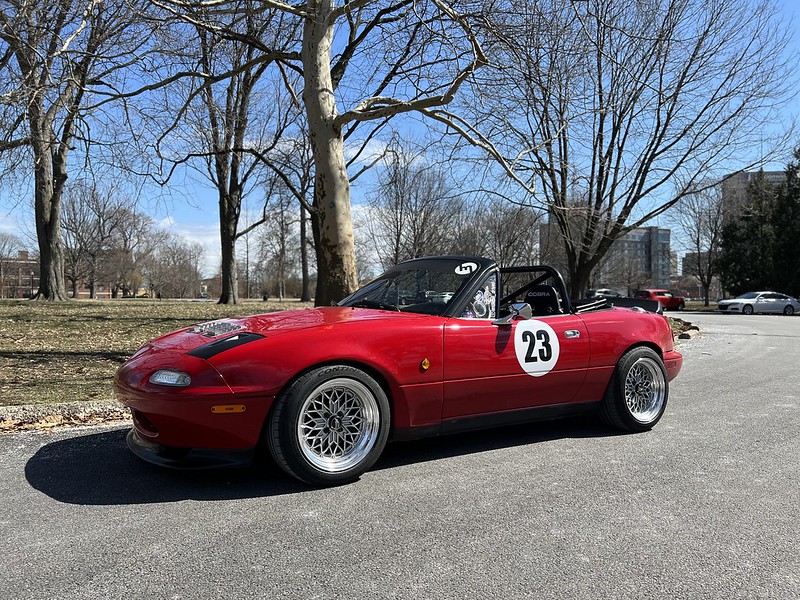
I'm on spring break, and have committed myself to getting the car ready for track season.
Below is my to-do list. I have an alignment scheduled for Saturday. Lets see how much I can get done.
There was a puddle underneath her when I went out to the garage. Brake fluid. Clutch master reservoir was bone dry. Oh well, I have new ones anyway.
P.O. Didn't use a washer. Yay, now I can add "Cleaning oil gunk" to my list.
CAS O-ring was also done for. Entire trans bellhousing is caked in oil. Good thing I bought one.
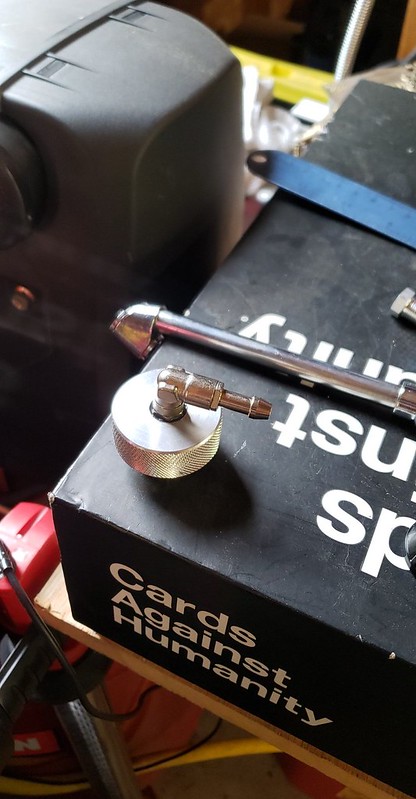
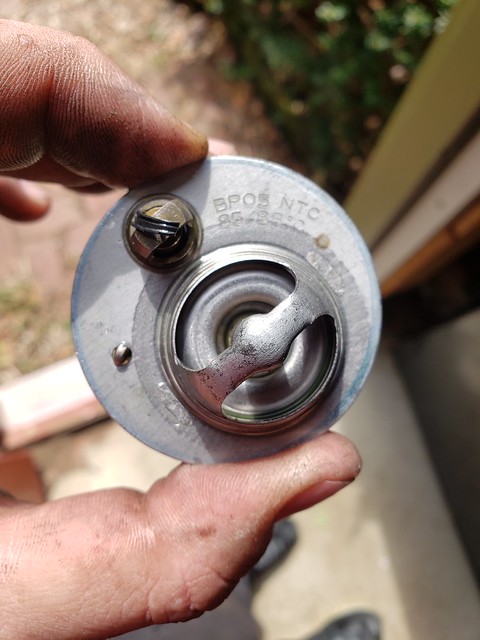
Original T-stat?
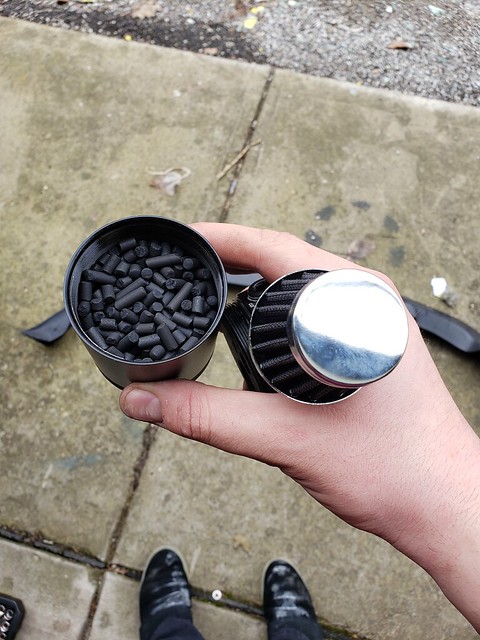
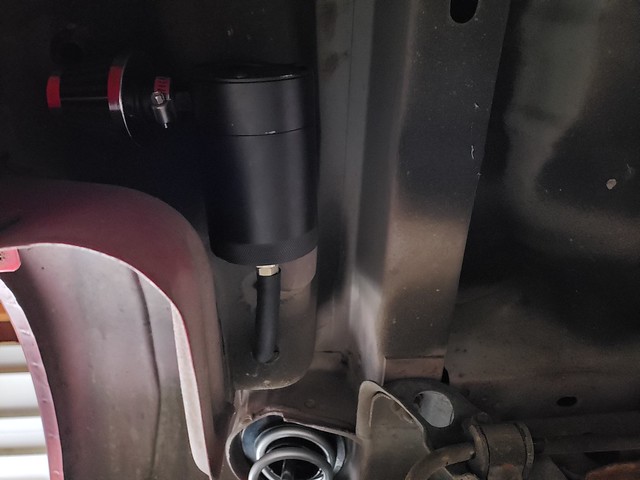
Adam over at RevLimiter posted about making his own charcoal canister to cut down on gas fumes. If you remember I took my old car down to Atlanta in May of last year. I had serious gas fume issues then but chocked it up to just being an old car with less stringent emissions control.
But, seeing as there is a way to fix it I might as well. $20 Mishimoto Compact eBay special catch can, gutted then filled with activated charcoal pellets from the local aquarium store. 3/8 NPT to 5/16 Barb on the bottom is the EVAP in, and a breather filter on top keeps any ingested air clean and tidy. The plan is to mount this under the car and run a hose from the rollover valve to the can.
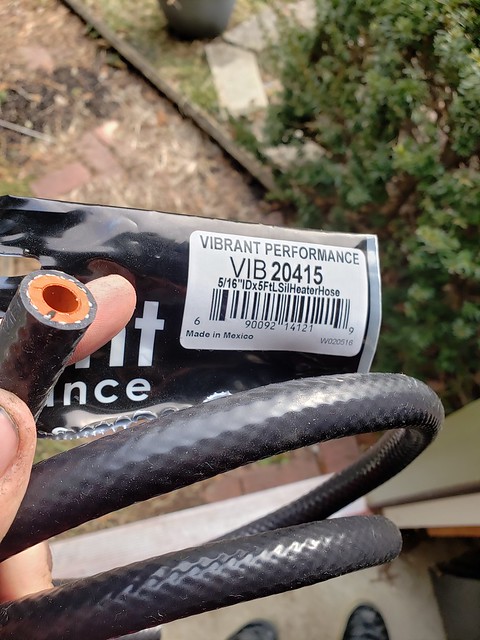
Belts, radiator, reroute, coolant hoses, etc. The usual for track-duty. The small coolant hoses are made by Vibrant, its this trick rubber lined silicone hose.
I re-did all the auxiliary coolant hoses with this stuff. Head to oil cooler, etc. 5/16 Fuel Injection hose clamps work great to keep it together.
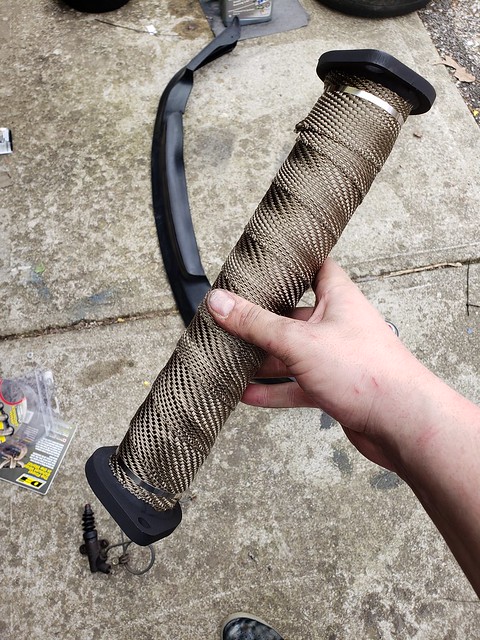
Managed to get this thing in there.
You can see EGR *barely* clears. Its a very tight, well designed piece of kit that works very well.
Found these sick T-bolt clamps on amazon for my heater hoses. I hate gear clamps and spring clamps.
Progress is a slow and cruel mistress. Life also caught me off guard.
New evap can installed. Hose goes through the fuel pump wiring grommet, around, next to the trunk latch cable, down into the jack well and through the forward most body plug. Bolted behind the fender liner to avoid direct spray. Gas fumes should be eliminated for good.
These were a much larger pain to install than expected. New SuperPro bushings are nice, stock rubber ones crumbled in my hand when I removed them.
Crossflow rad installed. Also trimmed up the engine bay a bit. Real track-ready stuff.
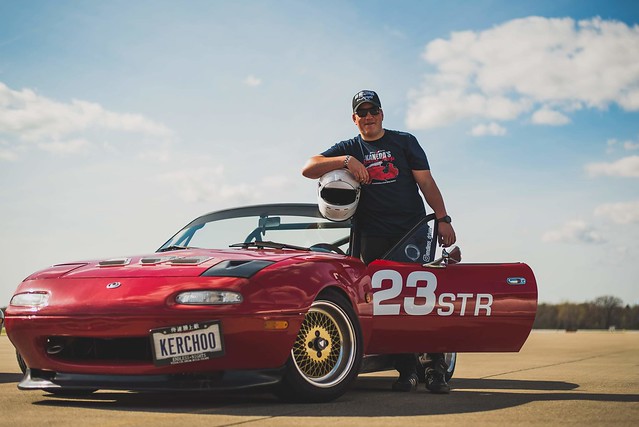
Centric Premium coated rotors, refreshed calipers, Hawk HPS pads, Techna-fit SS lines, stiff RB front bar, stock rear bar, FM endlinks, and built billies installed. Basically wrapped up the suspension and brakes. I still need to fill them with Motul DOT4 and bleed them. Numbers also came in, and I couldn't resist slapping them on.
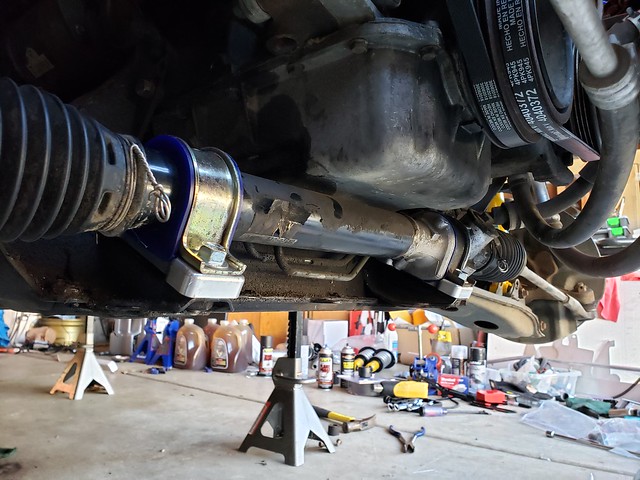
Testpipe came out nice. Since its right below the drivers seat I figured some heatwrap would be good. Too bad this pipe is for a 1.6L car... Stupid FB sellers.
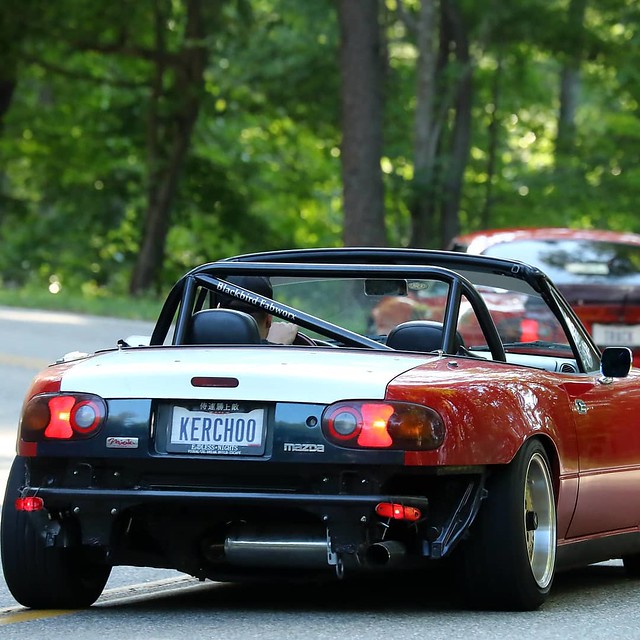
These were VERY easy to install. Line up, slap on with a rubber mallet, drill, screw and repeat. Also got the BBFW rollbar in but it was late so no photos.
Unfortunately due to life I couldn't get the car done. She'll be on jackstands for the time being until I can finish it up and tie all the loose ends.
This is the greatest invention every created. Took less than 10 minutes to bleed all 4 brakes. I also made an adapter for the clutch master out of an old master cyl cap.
Nice pedal set, makes driving a lot easier IMHO.
Seatbelt turned Rev icon. Why? I'm wiring in a Bee*R rev limiter box, and I want the icon to light up when its on to let me know I have the rev limit engaged. e-brake will engage a lower rev limit for launch control (4500 RPM or so) and the upper limit will be set however I feel.
[/url]
Sound mat cuts down on the noise from the rear of the car and the rattle trap that is the parcel shelf panel.
Hood vents in. I love seeing the heat rise out of them at stoplights.
Got her back from the alignment shop. Went with a 949 Dual Duty at 4.00" Pinch height. I tried to set some rake but the springs settled in even. So I had -3* of rear camber with the eccentrics maxed. I jacked the rear back up to 4.5" and it brought my camber back into the -2 region where it should be.
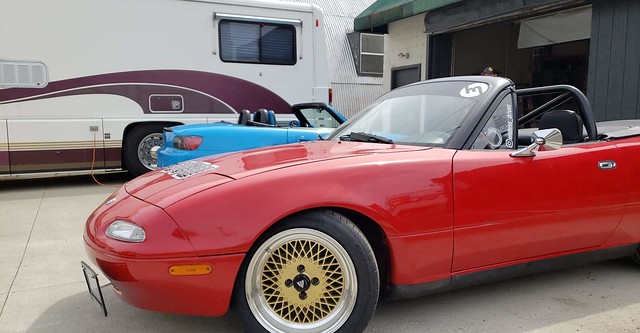
Meeting up with some friends to cruise to Cars and Coffee. The S2K is from my buddy Tim, he's a bodyman at Autobody Specialists here in CBUS. He just finished respraying the car about a week before. There is not a single defect in it.
At C&C Lennox. The MK7 GLI is owned by my friend Frankie. @iamsuperfrankie on insta. The thing puts down 400 to the front wheels.
I signed up for NWOR Auto-X @ TEA on April 28th. We'll see how she performs.
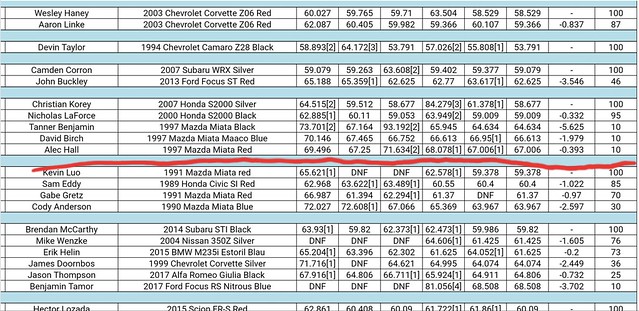
A Mutual friend co-drove my car in TSM (Street tire SSM class special to NWOR) and laid down consistent 62s runs in my car. my best was a 65.007 but I punted 2 cones unfortunately. Up to me to get my driver mod up there now.
All of us squadded up. All of us are in the Group Ohio Miata Owners. From left to right its Dave Birch (97' in STR), Steven Lynch (ES), Gabe Gretz (STS), Ryan Brown (ES, it was his first event as well), myself, then Bret Horn (He drove his MK6 GTI that day, he's turboing his 91' BRG). Kevin Luo brought his 350z (out of frame to the right) but co-drove Gabe's car that day.
It was an absolute blast. I can't wait until the next event.
I signed up for a Nelson Ledges track day August 10th, we'll see how she goes.
Take note, the billies are BOUNCY. Like Anime fan service episode bouncy. Also doesn't help that I was so low it was rebounding off the bumpstops 24/7. This will be addressed later.
Tracking was way better than punting cones or touge ricing lol.
Then, my dad expressed in interest in going to Radwood Detroit. So we went.
I touched up the back end, gave it a nice Mad Max vibe I guess.
I decided I hated how it looked. So I put the car away for the winter, up on stands preparing for another spring break refresh.
Well as it turns out, Corona basically gave me infinite spring break lol. I decided to use the time to round out the car and improve the garage a fair amount. You'll see this later.
I found a SCREAMING deal on my dream wheels.
And then I went on a Clout Crusade.
Wheel woolie on a drill makes quick work of dusty mesh wheels.
Back to actual car progress.
Step one was to make a space more conducive to actual work. That meant organized storage, lights, accessible power. Wrenching by candlelight was getting old fast.
Step two was address suspension.
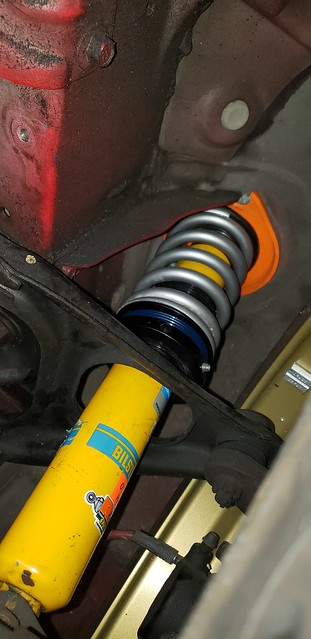
My front sway was much too stiff for what I was using the car for, so I stepped down one level from RB. My FM endlinks were also too long and I hated how the lower rubber bushing bound up. The billies also desperately needed a revalve and some tenders in the front.
Built my own end-links from stuff from QS components. Ended up at like $80 for all 4? Somewhere in that ballpark.
Billies got revalved by RAM engineering in Michigan, and I got some Hyperco 25# tenders. I was checking clearances and such here, but the tenders and guides rattled on the sleeves. I flipped them next time around.
I had to cut and modify the new links, but everything fit up nicely and worked through the active suspension travel range. It binds at full droop in the front, but I hope to never see that, and it frees up once you compress the suspension a bit.
Step 3 was get the rear end sorted.
Bumper cut, get the LED ring tails back together,and then off to paint to match.
While the panels are getting painted, I needed to finish up some odds and ends on the car. Hopefully make a dent in my parts stash.
CAD Certified template
Then to metal
Paint and then into the car.
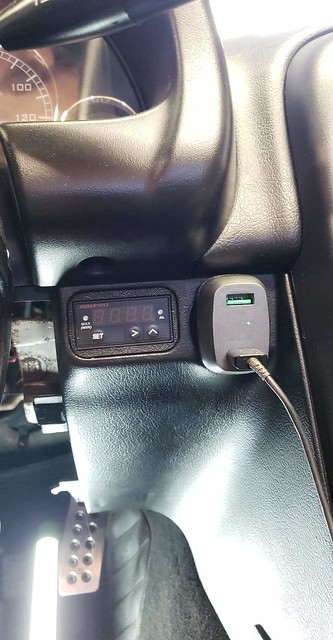
Did one of these Auber gauge things for water temp. On the first test drive though she read 300 when OBD said 195... May need to adjust some things.
Nice clean look, amber LED color matches gauges and radio.
I 3D printed the adapter from ABS Plastic.
The workhorse machine. If built billies are Miata Turbo "Zyduhs" Then I guess this you can call it the Miata Turbo "Proo-suh eye-tree mahk tree"
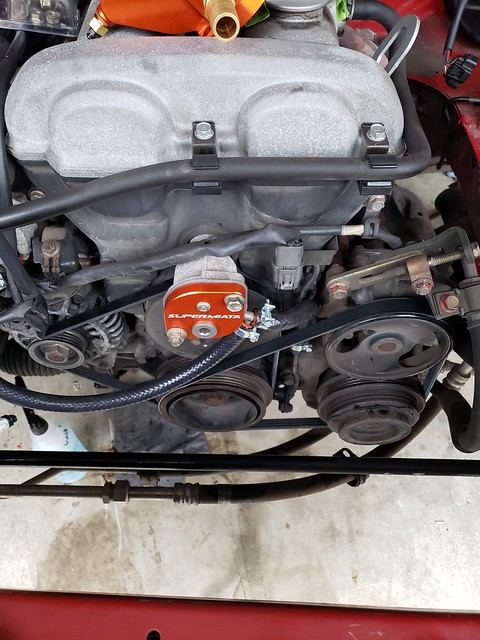
Moved to a Toyota COP setup. Made my own harness from the guide on Miata Turbo. Figured it would be better if I'm tracking to have easily accessed coils and plugs, unlike the Fab9 setup.
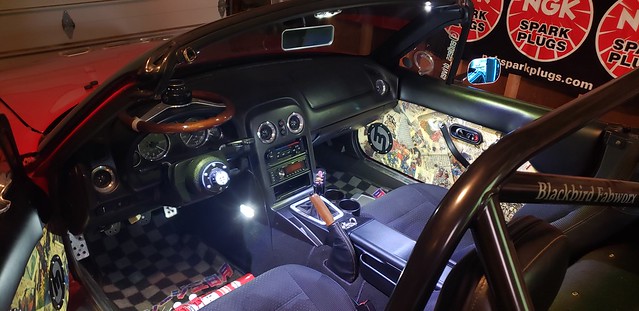
I needed more interior lighting. So I went to LEDs in the visor plates and knee lights in the dash plates.
Next step was making the car a bit more plush. Vibration Dampening, MLV.
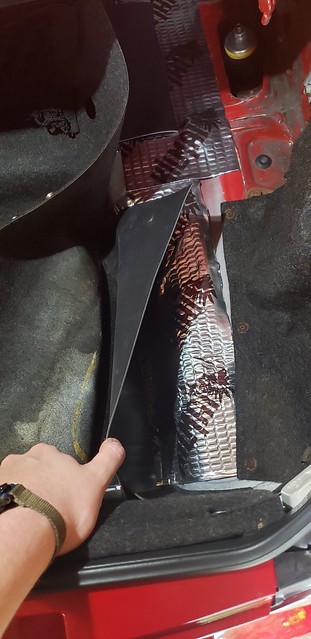
If you remember I did this on the finish panel last year, but this time I did the rest of the interior, door skins, deck lid and trunk.
This is the trunk, but same idea applies to the rest of the car. Tap the panel to see how it rings, apply mat until you get a dead thump. Then lay down the MLV over the whole thing.
I also added acoustic foam to the tunnels under the parcel panel just in front of the rear shock mounts. I swapped my jank Pioneer 4 way speakers for some nice Kicker 2 ways. This also let me take the spacers off my speaker grills and run them flush to the door card. I was tired of catching my shoes on them lol.
Almost there.
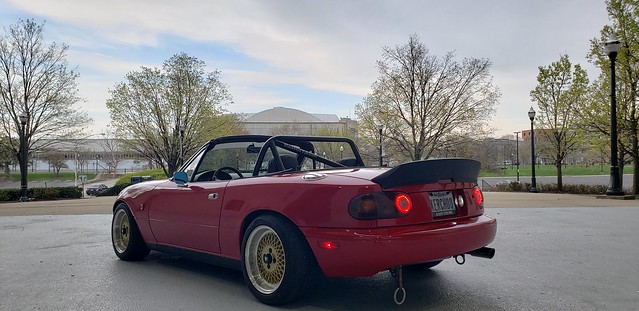
Polished and ceramic coated my glass. Makes a huge difference.
I'm happy with it. Also a good throwback to when I took similar photos with my first Miata.
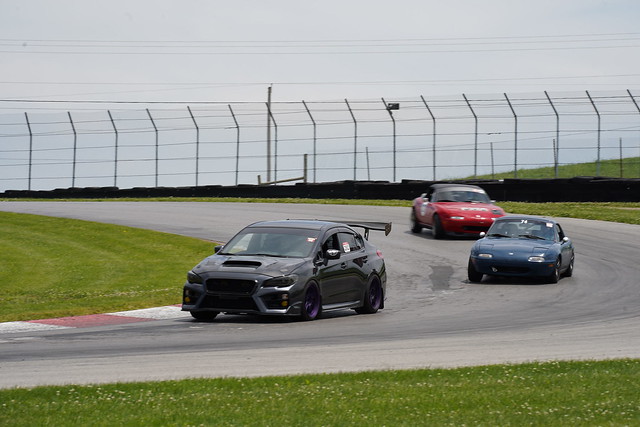
Went to Mid Ohio with Autointerests for the weekend.
My boy Dave in the blue #74. We were trading places the whole session as each of us were faster in different spots. Stupid Subaru was holding us up.
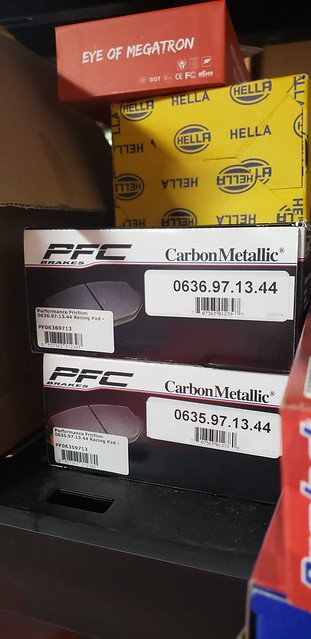
For the weekend I put on a set of PFC 97 pads. The HPSs were not cutting it lol. It felt so nice to have a consistent and confident brake pedal turn after turn after turn. Especially diving into T7 at 100+mph
Brake caliper bolt fell off on Saturday and caused issues but I got it fixed up enough for Sunday. Only other casualties were super dusty wheels and a cap popped off one of my shocks.
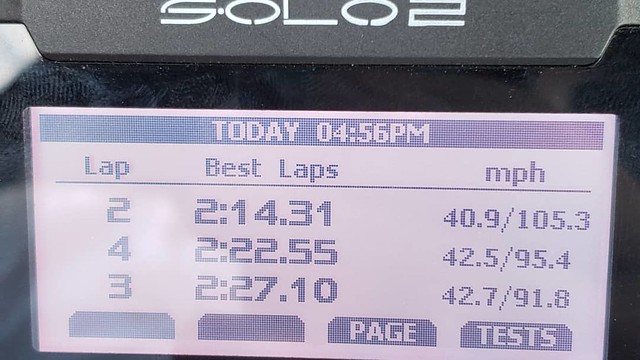
I ran a 2.00.93 as my PB that day, could have gone sub 2 but traffic in later sessions held me up.
1. Clean glass with favorite glass cleaner, then clay bar, then glass cleaner again.
2. Polish using forced rotation DA, I used the Flex XC3401VRG with a microfiber cutting pad and 3M glass compound. This removed light scratches. This is really really aggressive though, if you just want a good deep clean you can use any DA polisher with a Rupes Yellow or Chem Guys orange pad and a basic compound (Jax Wax #2, Optimum Hypercompound, Meguiars M105) and that will remove a lot of haze and road film.
3. Coat according to instructions. The Jax Wax is a 2 stage process.
For my plastic soft top window I used a Rupes black pad and M205 on the flex. The goal is more to generate heat and let the vinyl self-heal than it is to remove material. I used the same glass coating however it will only last a few months on the soft top window.
Nelson Ledges was a success. Got down into the 1:25s, I would knock this down to a low 23 at a later track day in August.
Side note: The PFCs shed an insane amount of dust and demolish rotors. My poor Glowstars...
Next was NASA @ Pitt Race
Had to help a friend get their car together in time for race weekend...
COP Kit fixing the classic NB1 ignition issues.
Nasa @ Pitt was fun, first weekend on Gloc R10/R8s. I couldn't stand the PFC dust. Lead-Follow instruction sucked, couldn't push at all.
Was in the high 2:20s all weekend.
Took a break from tracking to go to MATG with my friends.
I had another Nelson Ledges event after, but no photos or data. Borrowed a friend's AIM, managed to get down into the 23s. Probably more out there, track is so sketchy I'm hesitant to push.
Lastly, Carfest @ Pitt Race.
Whole gang getting seat time.
PB was a 2:14! Whats crazy is I was stuck in the mid 2:16s all day, then I just went out in open session, track felt like it had decent grip so I decided to push a bit. Didn't expect to set a new PB by a fair margin lol.
Offseason I decided to get into iRacing. I got a G27, but the 270mm wheel felt very unnatural. 3D printer to the rescue!
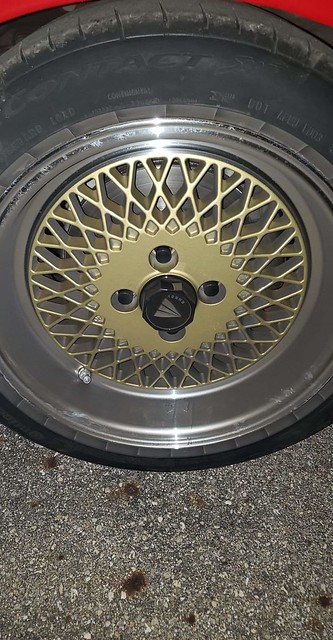
Picked these up from Tarmac88, figured it was time for more track focused wheels/ tires.
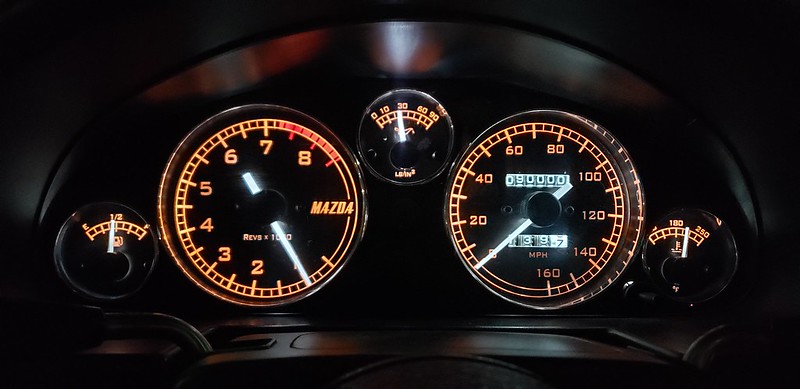
Hit 90k driving it to/from work
Then I put it away for the winter, then school started, then it started getting warm and I forgot how much fun the car was. I also procrastinated a ton of maintence lol.
Fixed the circuit sports coolant tank and its **** design. Now I don't spill coolant in left turns.
That should be one piece. Replaced it with a Mazdacomp on the drivers side, OEM on passenger.
Car Make Corns heatshield decided to just not hold together at the weld. Washer + hammer made it at least not rattle
VC Gasket, painted VC, new PCV, fresh coils, re-did the coil harness, new plugs and all driveline fluids.
While I had the VC off and plugs out I played with my Boroscope. Order of 1 to 4
Dunno what I'm looking at to be honest. But I don't see chips or cracks or the usual signs of detonation on the edges of the piston though.
Stage one of this project.
Finally getting some proper safety back in the car too.
Cobra Monaco Pro 40th Anniversary editions, Schroth Enduro harnesses and I'll be wearing an SHR Flex HANS.
All just in time for Kmiata Day. I fit and clear broomstick, however my 6'6" instructor was never clearing broomstick unfortunately.
Squadded up
I did go 4 off and blew off my front lip. New one was required.
I gotta say this IKON MOTORSPORTS rep GV from Amazon is the best RepGV i've ever fitted. Actually perfect, no crease or short end like the others. Also seemed more flexible and smoother/ shinier than usual.
And got these on after the track day. Definitely a difference, most noticeable in high frequency bumps and potholes. Front end rattles a lot less and theres more of a "thunk" than a rattle or shake when hitting bumps now.
Recently got into Drones too, so the Miata took a bit of a backseat to that as I started in the hobby and did my best to learn.
Only 4 months since my last update? Seems longer but a lot happened.
Was at a track day at Nelson Ledges and had some... issues.
Car was burning a lot of oil, but I assumed this was valve stem seals as it was intermittent and only on accelerating from a stop or at the bottom of a hill. I got everything to swap them, but wanted to "limp" it through the track day. I also got TB/WP and front end seals to do as they've probably never been changed before.
Second session out I lost my oil cap. I chalked this up to BP vibrations and me just not tightening it. Was quite scary seeing oil spray on my windshield through the hood vents lol. Was pretty bummed as I've had that cap since 2016, bought it before I even got a Miata. Was signed by Mad Mike at FDATL 2016. Little did I know this was a precursor to some more serious issues.
Then, lap after a PB i'm backing off a bit. Coming out of carousel I floor it and there's nothing. Not the usual Miata 0 power, but genuinely no acceleration. Look behind me and see a massive cloud of smoke. ****.
Put it in neutral an coasted to the pits. Car died on track but was able to restart it and limp it to my spot. Was misfiring badly, and didn't get better after I swapped plugs. Friend had a compression tester...
Thats cylinder 3. Lmao. Full results were 120-60-0-120
Definitely a different feeling than when my crunched first NA came off the flatbed. I was able to drive it into my garage though, albeit smoking up my entire neighborhood.
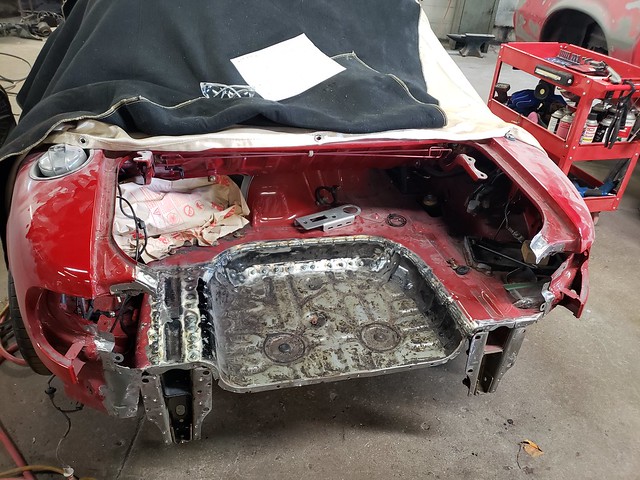
First signs from the teardown were... Interesting.
F. Thats cylinder 2 lol, made 60psi with a hole in the piston.
Gnarly.
My moneys on an injector clogging and the cylinder leaning out and exploding.
Up and out.
Lined up a VVT dropout with equal miles to my chassis. So my ODO is correct... Perfect coincidence. But, I also scored a BP4W head and had a local head shop completely refresh it.
Luckily I had TB/WP and a bunch of seals ready to go already. Just needed a few odds and ends and I could re-seal the whole motor.
Coming together.
Also pulled my diff to do poly bushings, come to find out i've been whipping an open diff this whole time. Theres another excuse for being slow lol.
Found a 4.3 Torsen locally rebuilt by Miata Boxes. Put it in my spare RX7 housing with poly bushings. Should make a good difference.
Had the VC, Squaretop and header coated. Header was coated with Cerakote, should improve its durability and reduce how hot the bay gets.
Wouldn't be a "me" project without some pointless personal touch items. Got these from Alethia Motorsports.
No project is complete without a good wash and wax.
And she's all buttoned up.
I'm still driving it around and finding/ solving little issues, but she's 99% there.
The 1% turned out to be the fact I forgot to tighten the lower alternator bolt:
Took it on a drone trip to a local park.
I put about 2 gas tanks through it around town with 0 issues, put it away sometime in November.
Then, here in Ohio we had a weird singular warm Wednesday in February so I took her out for a good evening drive:
Came home to a puddle of coolant right under the weep hole of the trans... Considering I run 70/30 and we had a couple really cold days I jumped to freeze plug at the back of the head. AKA engine out again.
I did diagnosis the right way though. Turns out the lower bolt on the reroute got loose and the reroute was leaking onto the trans. Fixed in an afternoon. Then took her back out for some photos
I had a week between the end of the semester and when I start another summer Co-op. So I did what I do best; grind away at a major project(s) for 10hrs a day for a week making an absolute mess along the way and testing how many cups of coffee I can consume without ill effect.
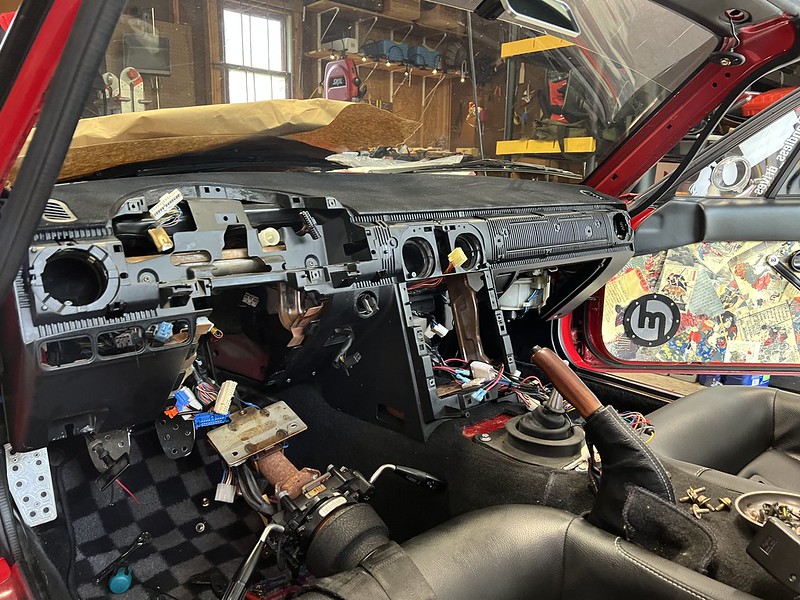
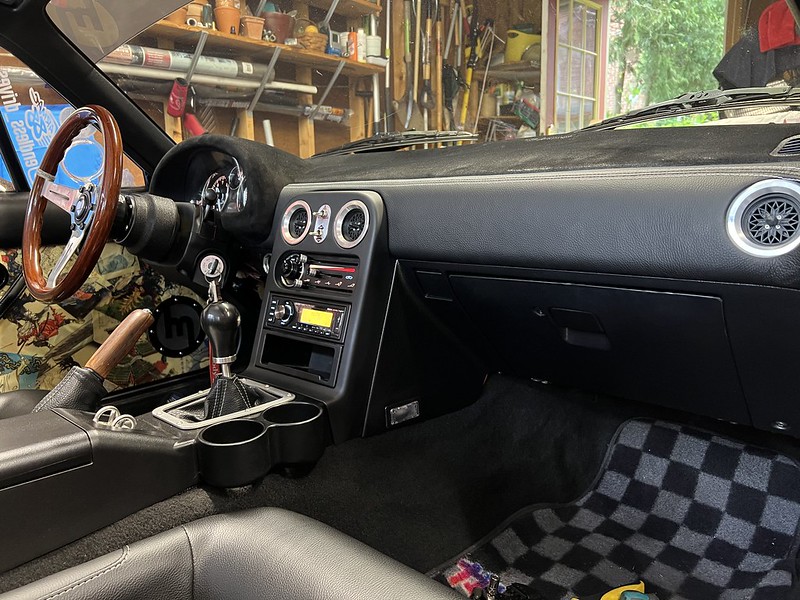
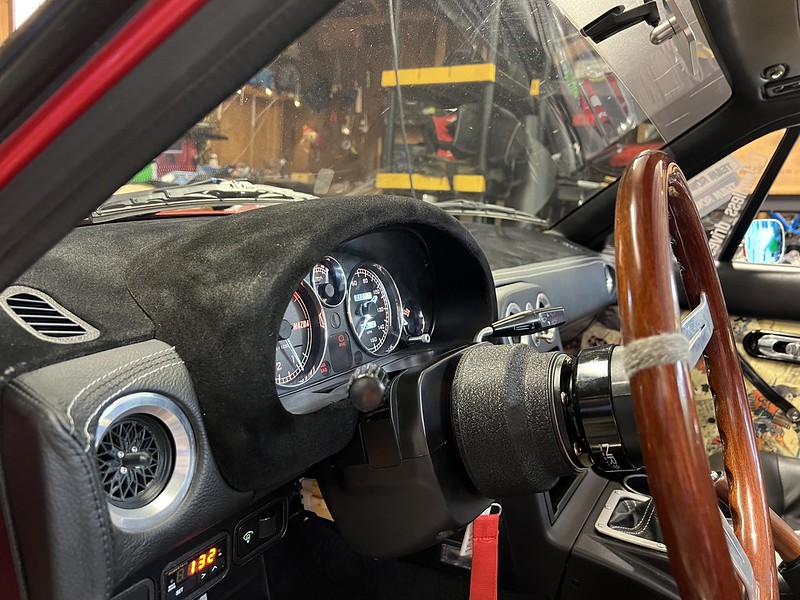
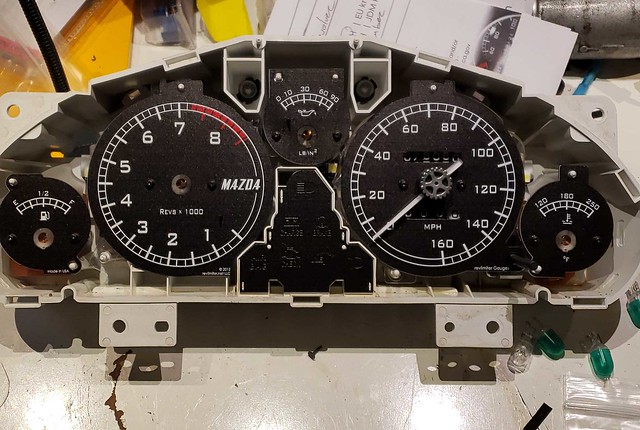
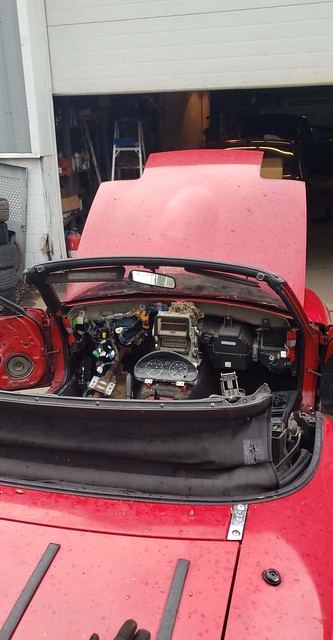
This time its FINALLY time to swap the dashboard. As simple as "swap" sounds, there's of course so much more to this.
Step 1: old dash out (the easiest part)
Step 2: Dash in right?
Wasn't that easy
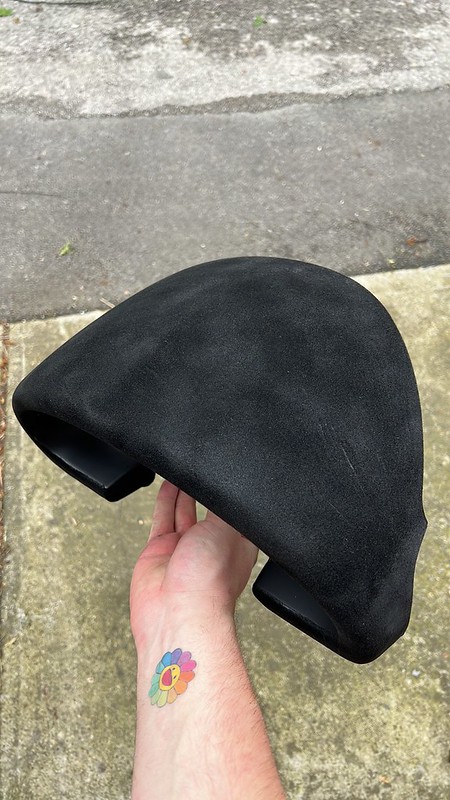
After flocking I noticed some pegs were broken and made an effort to fix them
Speaking of flock, they still look great even after a year of sitting in the garage
Also had to fix a crack in the glovebox
Thats plastic weld I swear
The dash pull revealed that I was missing the HVAC clamps and I was probably losing a lot of air to it just blasting around the passenger footwell.
Nothing duct tape cant fix. I ordered some clamps and they arrived just in time to install before I put the dash in.
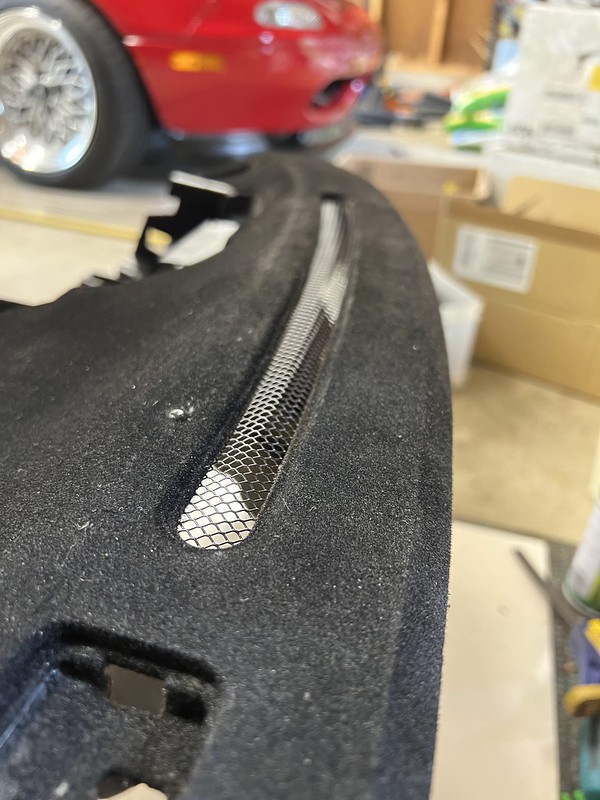
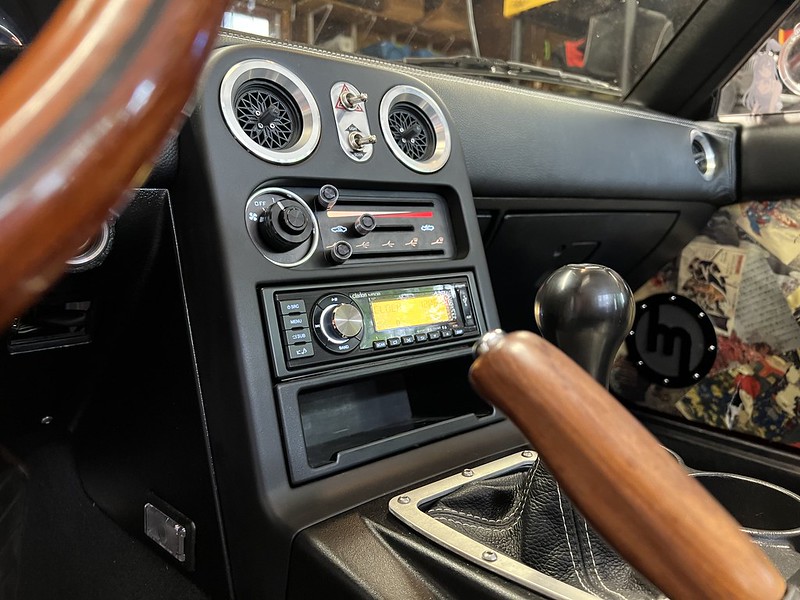
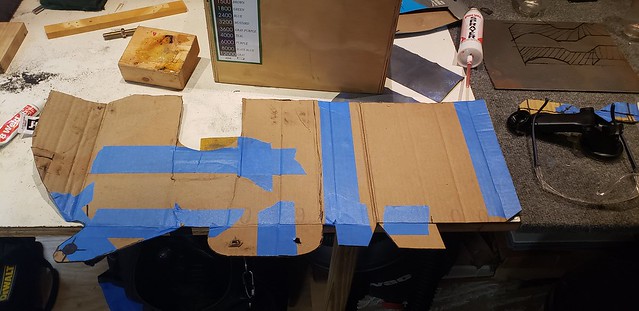
Stealing an idea from Adam/ Revlimiter I also wanted to use mesh to protect the defrost vents.
Wonder how well this will stay in place when driving...
Nice.
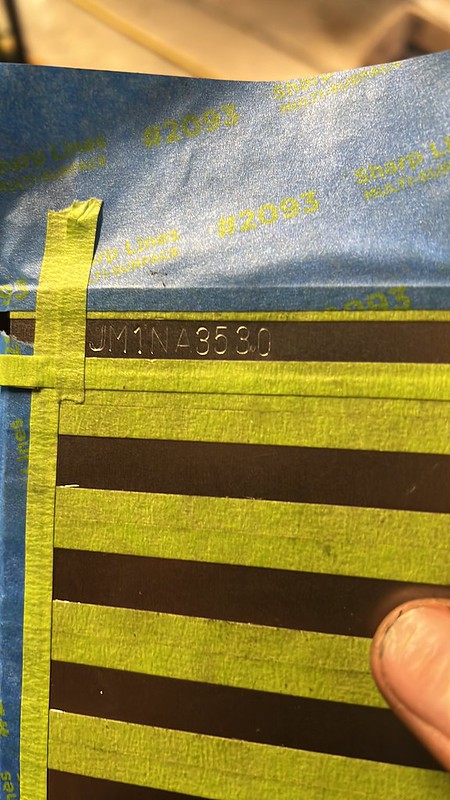
Since my original VIN tag says AIRBAG but I have no airbags, and I wanted to do something special.
Hand-stamped vin plate. Thats all the internet will see of this though. You'll have to see it in person for the end results.
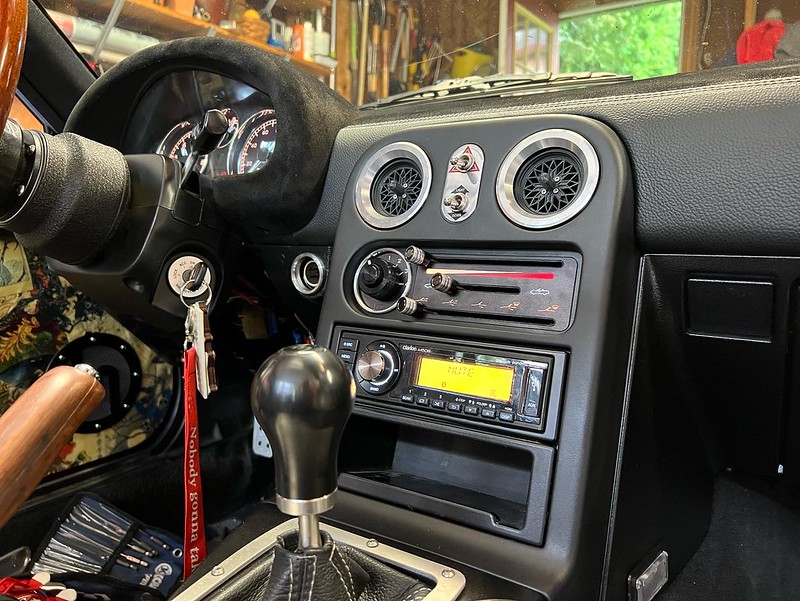
I bought a used RevLimiter switch panel and sanded/polished the backing plate.
Also, since the NA8 glovebox lock mechanism is totally different to the NA6 version I had to manually re-pin the lock cylinder of the NA6 mech to work with my key. That was annoyingly tedious.
Refurbed the knee panel, this thing was super crusty before. Wire wheel and paint go a long way.
I then decided to try my hand at Auto Upholstery. I bought pre-made leather pieces from RedLine leather about 5 years ago a month after I got my first Miata. Yes, I was planning this swap from day 1.
Corner piece turned out quite nice I think.
Trying to keep the seam straight across the pad, and level.
The shakey midnight mockup pic lol.
HVAC mockup
I bought this fancy Retrosound hideaway antenna about the same time I bought the leather bits for the first Miata. The mega plan. Funny, I wanted a Retrosound radio back then but changed my mind.
Its powered/ amplified? Basically its an active antenna and can get pretty good reception even inside a dash. I stuck it to the underside of the top.
Enough messing about with accessories, its real install time.
 03-10-2019, 09:47 PM


 0
0


 [/url]
 [/url]

 [/url]


 [/url]