
Build Thread (FE3, RX7 TII, EFR 6258, MS3)


Well here we go. Ive been collecting parts over the last year and I picked up an '86 BMW E30 last week to drive around while i'm doing my swap so i'm ready to get started.
A huge thanks goes out to m2cupcar for all the advice and direction he's given me so far. I'm going to need some help from you guys on this build as i'm new to turbo builds, megasquirt, and tuning.
As of right now I plan on doing all of the fabrication and install myself then get the car tuned by someone that knows what their doing naturally aspirated till its broken in. At that time ill slap on the Borg Warner and from what I've read it should be somewhat easy to adjust the tune myself.
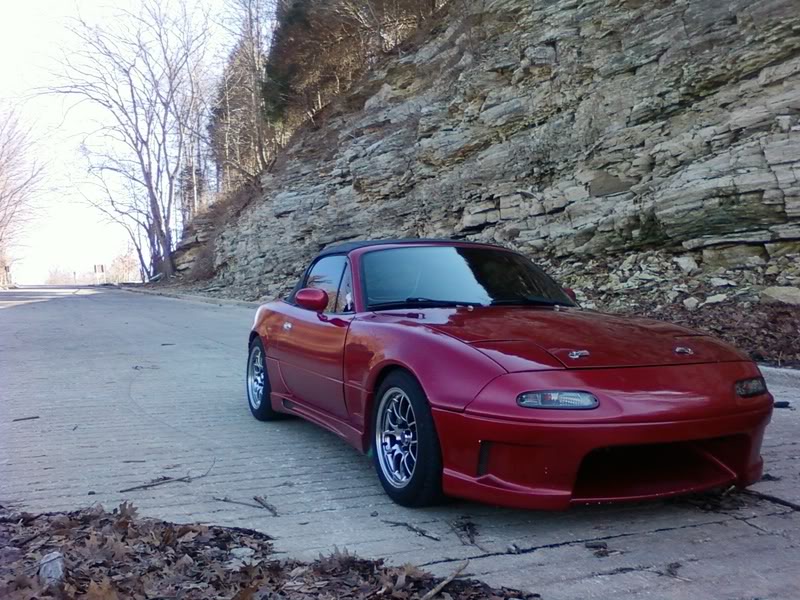
Here is the car im starting from.
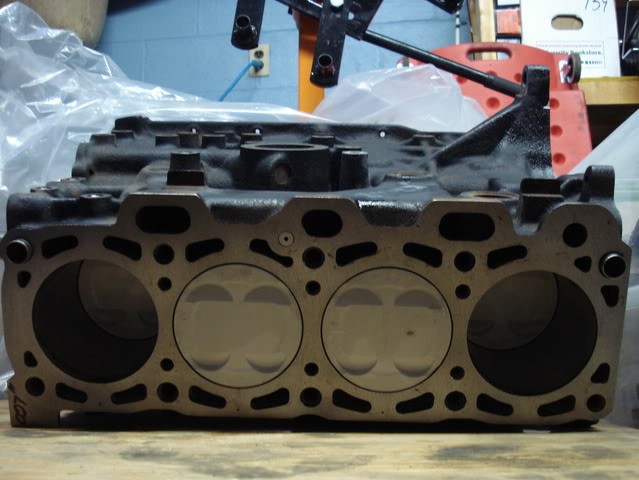
The assembled short block and a few other components i had them take care of took about 6 months to get back from the machine shop.

Calico Coatings coated pistons. Ceramic tops and Mahle skirts.
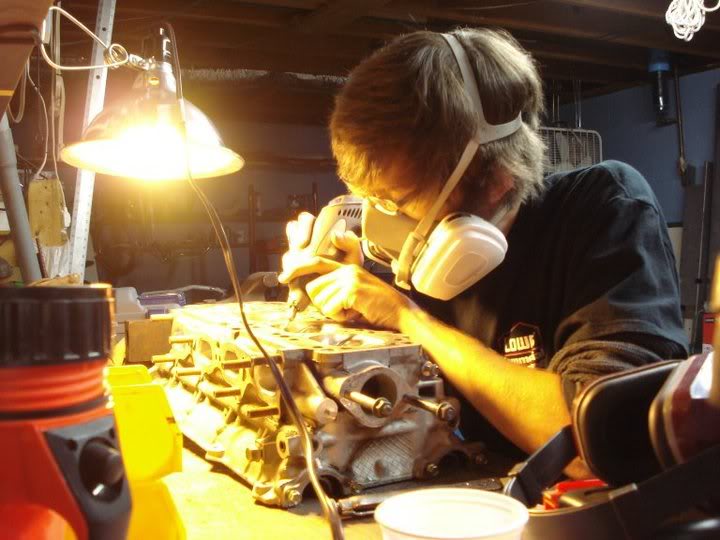
I brought the head to the machine shop after i ported and polished the intake and exhaust ports. I when ahead and smoothed out the combustion chamber while i was at it.
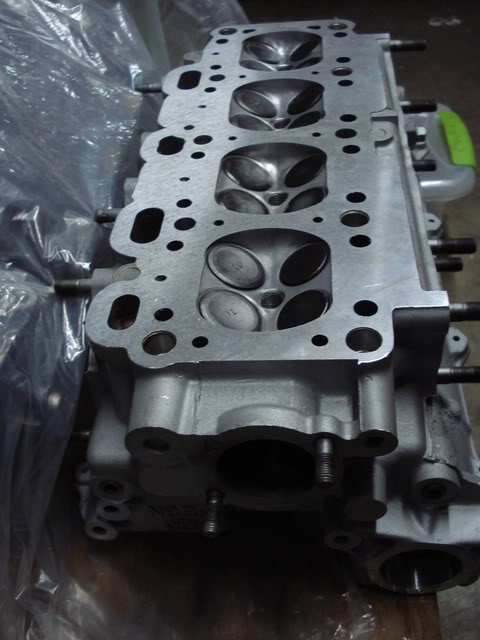
And heres the finished product.
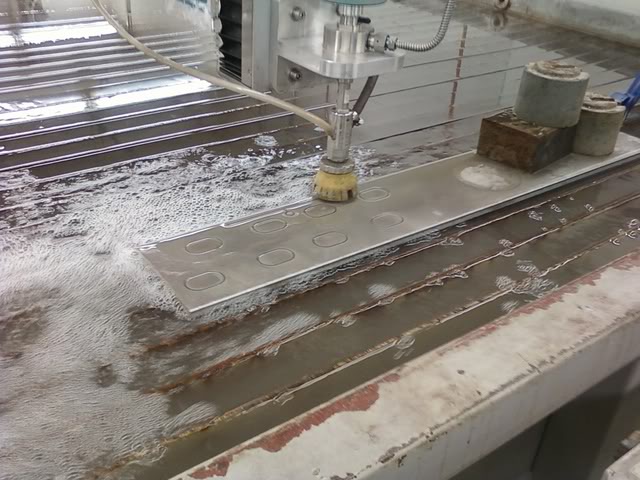
Im a Mechanical engineering student at Western Kentucky University so i had access to some nice tools. I water jet cut some exhaust manifold flanges and other t3 and waste gate flanges that im not going to end up using because i ended up going with the EFR turbo which uses a T25 flange. If anyone needs some T3 flanges hit me up and ill sell them for cheap! .5" 304 stainless. the second exhaust flange was traded to m2cupcar for his ebay intercooler which can be seen toward the beginning of his thread. I also bought the PRC dual pass radiator and the bracket he made for the radiator as well.
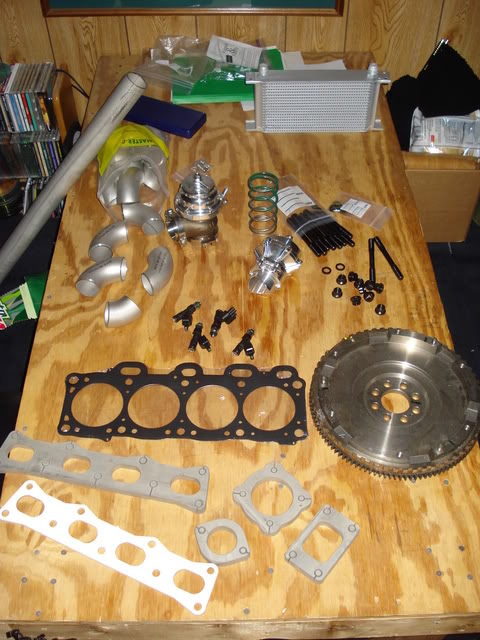
Collecting parts. I picked up a bunch of 304 stainless butt weld fittings and schedule 10 pipe for the collector from mcmaster. MLS head gasket from gaskets to go. (currently working with them to send another 1mm to add to the gasket for additional piston to head clearance. ARP head studs, ID1000 injectors, Oil cooler, Tial bov and waste gate (prob wont use), Misc flanges.
A huge thanks goes out to m2cupcar for all the advice and direction he's given me so far. I'm going to need some help from you guys on this build as i'm new to turbo builds, megasquirt, and tuning.
As of right now I plan on doing all of the fabrication and install myself then get the car tuned by someone that knows what their doing naturally aspirated till its broken in. At that time ill slap on the Borg Warner and from what I've read it should be somewhat easy to adjust the tune myself.
Here is the car im starting from.
The assembled short block and a few other components i had them take care of took about 6 months to get back from the machine shop.
Calico Coatings coated pistons. Ceramic tops and Mahle skirts.
I brought the head to the machine shop after i ported and polished the intake and exhaust ports. I when ahead and smoothed out the combustion chamber while i was at it.
And heres the finished product.
Im a Mechanical engineering student at Western Kentucky University so i had access to some nice tools. I water jet cut some exhaust manifold flanges and other t3 and waste gate flanges that im not going to end up using because i ended up going with the EFR turbo which uses a T25 flange. If anyone needs some T3 flanges hit me up and ill sell them for cheap! .5" 304 stainless. the second exhaust flange was traded to m2cupcar for his ebay intercooler which can be seen toward the beginning of his thread. I also bought the PRC dual pass radiator and the bracket he made for the radiator as well.
Collecting parts. I picked up a bunch of 304 stainless butt weld fittings and schedule 10 pipe for the collector from mcmaster. MLS head gasket from gaskets to go. (currently working with them to send another 1mm to add to the gasket for additional piston to head clearance. ARP head studs, ID1000 injectors, Oil cooler, Tial bov and waste gate (prob wont use), Misc flanges.
Reply
 0
0

0
List of current parts purchased. ill try to keep this up to date.
Engine FE3
RX-7 Rear differential
RX-7 rear axles
RX-7 Transmission and Trans seals/gaskets
Megasquirt 3x with mods
Turbo Borg Warner EFR 6758 (originally EFR 6258)
Turbo exhaust manifold materials
Intake manifold Materials
Intercooler
Oil Cooler
Injectors Injector Dynamics 1000cc
Modified turbine housing for gt30 v-band flange
PRC dual pass radiator
Fan Spal 16" with DIY furnace sheet metal shroud.
MLS Head Gasket
Throttle body 60mm Ford Mustang
Turbosmart 4 port boost control solenoid
Turbosmart dual port wastegate actuator for EFR turbo
LC1 Wideband with analog gauge
Deatschwerks 340 fuel pump
Fuel lab 525 fuel pressure regulator
Flex fuel sensor
Clutchmasters HD pressure plate
Clutchmasters Custom Clutch disk
flywheel Stock Kia Sportage
throw out bearing RX-7 TII
Pilot bearing Kia Sportage
fuel rail Stock Kia Sportage
Aluminum Adapter Plate for transmission to engine
ARP Headstuds, Nuts, and washers
**Update 5/31/11 Fidanza adjustable cam gears
**Update 7/5/11 Mocal sandwich plate W/Tsat. (M20x1.5)
**Update 2015 Dry sump Armstrong Race Engineering
**Update 2015 H22 high compression pistons and Pauter custom long rod (combustion chamber clearancing required.) ~ 10.5:1
**Update 2015 COMP Cams: Honda/Acura B-Series DOHC Valve Spring Set
** Update 2017 data aquisition. Megasquirt knock mod, Tiny IOX + sensors.
Last edited by yank; Jul 12, 2017 at 03:25 AM.
Reply
0
0


As of right now the car is up on jack stands and the front body panels have been pulled. the goal for Memorial day is to have the diff, trans and engine pulled from the car. Ill bring my camera tomorrow and snap some more pics of my progress.
My current goal for this build is 300 hp or 15 psi whatever i see first. Im pretty confident i can make the power under 15 psi..
My current goal for this build is 300 hp or 15 psi whatever i see first. Im pretty confident i can make the power under 15 psi..
Reply
1
1


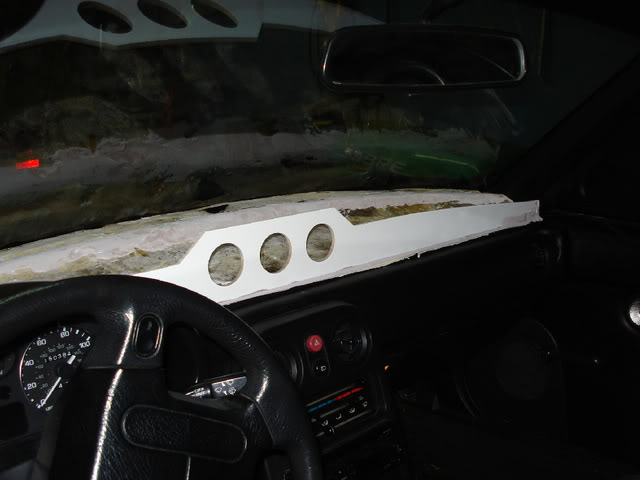
Heres another project im going to try to incorporate. Im going to try to get it covered by some black vinyl that matches the interior. The design is inspired by the Mustang Super Snakes cluster.
Thanks for the support guys!
Reply
0
0
Ive been making some progress in the last few days. the new fuel pump has been installed after a trip to autozone for a fresh fuel pump o-ring.
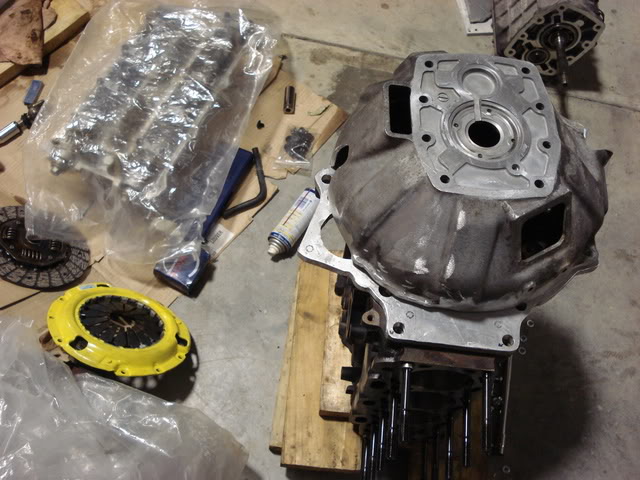
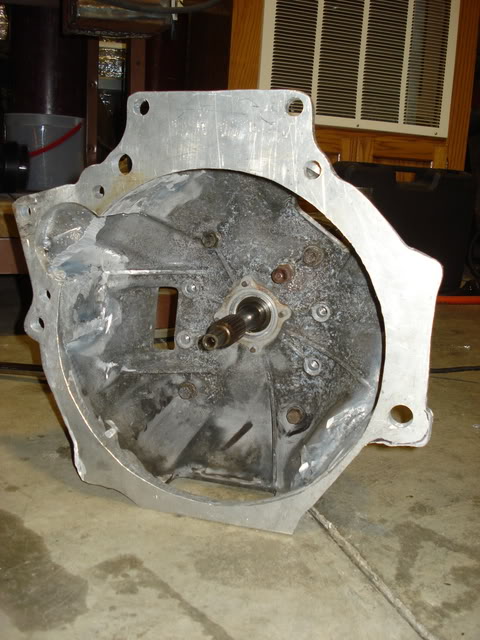
Yesterday and today my focus was on the transmission adapter plate. Ive decided to go a different route than some of the other guys that have done the TII swap by welding the plate to the bell housing and essentially making a new flange for the trans. Its been a pain but so far pretty straight forward. lots of checking and double checking to make sure the input shaft is going far enough into the clutch disk/pilot bearing. i used alot of modeling clay to let me know where i was and how deep the shaft was going into the clutch disk. I ended up taking off 3/8" off the face of the bell housing to make up for the thickness of the adapter plate. I could have gotten by with taking another 1/16" but what i got gets me close enough.
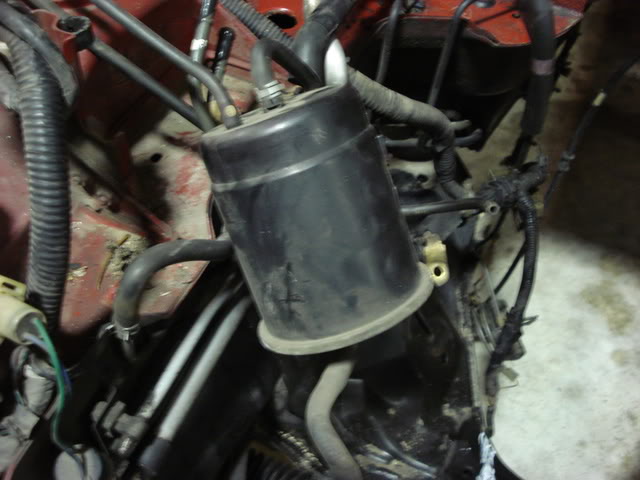
Made a little progress in the engine bay as well. I know alot of guys delete or tuck this canister but i dont even know what its called to search for a solution. what do people usually do to get rid of this?
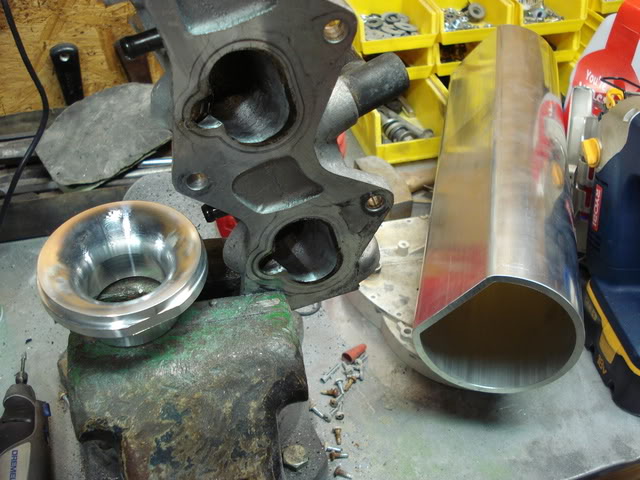
started cleaning up the inside of the intake manifold flange a bit as well. more porting and polishing... i thought i was done when i finished the head..
Yesterday and today my focus was on the transmission adapter plate. Ive decided to go a different route than some of the other guys that have done the TII swap by welding the plate to the bell housing and essentially making a new flange for the trans. Its been a pain but so far pretty straight forward. lots of checking and double checking to make sure the input shaft is going far enough into the clutch disk/pilot bearing. i used alot of modeling clay to let me know where i was and how deep the shaft was going into the clutch disk. I ended up taking off 3/8" off the face of the bell housing to make up for the thickness of the adapter plate. I could have gotten by with taking another 1/16" but what i got gets me close enough.
Made a little progress in the engine bay as well. I know alot of guys delete or tuck this canister but i dont even know what its called to search for a solution. what do people usually do to get rid of this?
started cleaning up the inside of the intake manifold flange a bit as well. more porting and polishing... i thought i was done when i finished the head..
Reply
0
0

Last edited by 9671111; Feb 28, 2020 at 01:39 AM.
Reply
0
0
He's got some pretty nice DIY stuff. Im going to modify the shape some based on the results of THIS thread.
Reply
0
0
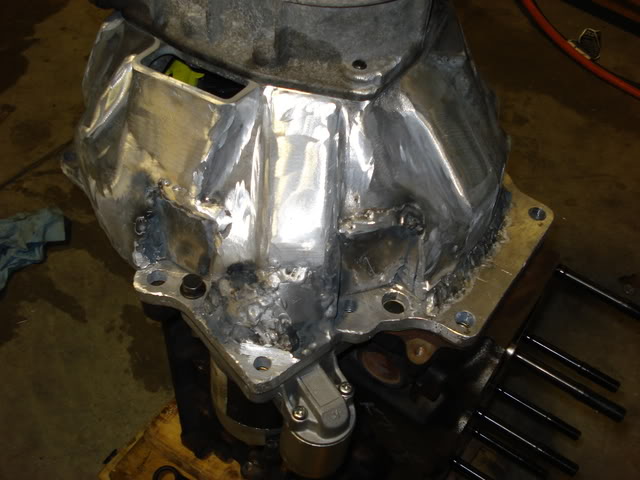
Uncharted territory charted. Got the adapter plate welded to the bellhousing and it drops right into place. super stoked about finishing this step.
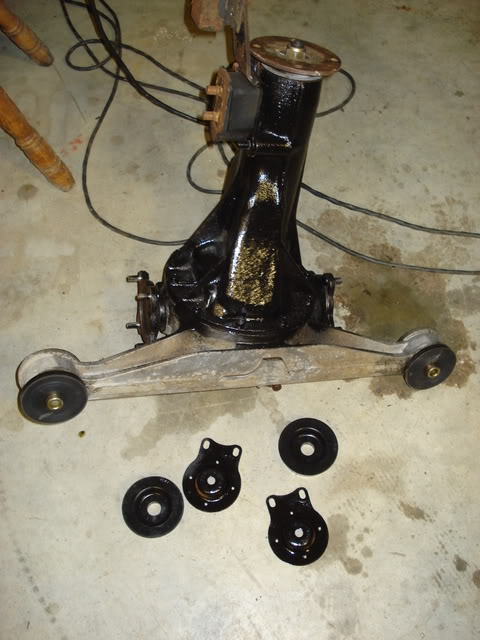
Had some help pressing out the stock diff mounts in the RX-7 diff. FYI the best way to remove the rubber on the lower diff mounts. (saw tooth lookin ones) is to set them on fire and work on something else for 15 minutes. repaint and you're good to go. the heat until gummy and scrape method is pointless.
Had some help pressing out the stock diff mounts in the RX-7 diff. FYI the best way to remove the rubber on the lower diff mounts. (saw tooth lookin ones) is to set them on fire and work on something else for 15 minutes. repaint and you're good to go. the heat until gummy and scrape method is pointless.
Reply
0
0


I used an air hammer with a flat punch, 30 seconds on each one pushed it out.
Any thoughts on making like 2-3 extra TII brackets for the few that might want to bolt them in? Spacer and steel bits to use the TII mount on as well.
Any thoughts on making like 2-3 extra TII brackets for the few that might want to bolt them in? Spacer and steel bits to use the TII mount on as well.
Reply
0
0
I'm having some problems getting the stock axles out of the car.. So i moved onto cutting down the front sub frame. This should gain me some more clearance and capacity that i can add to the oil pan. Reinforcing the cut sub frame with 12ga steel. Ill post some pics up when i get finished.
When i modify the oil pan im going to use some 16ga stainless steel. Do i need to coat the inside of the pan with anything? i think its got some black coating currently but id hate to paint it with something and then find my oil filter clogged by paint chips later..
Reply
0
0
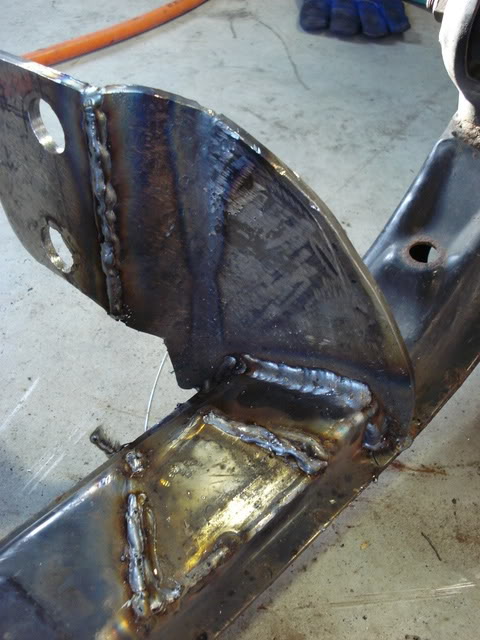
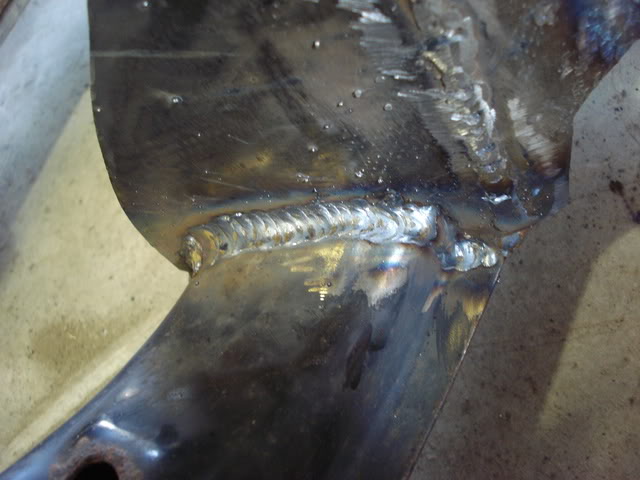
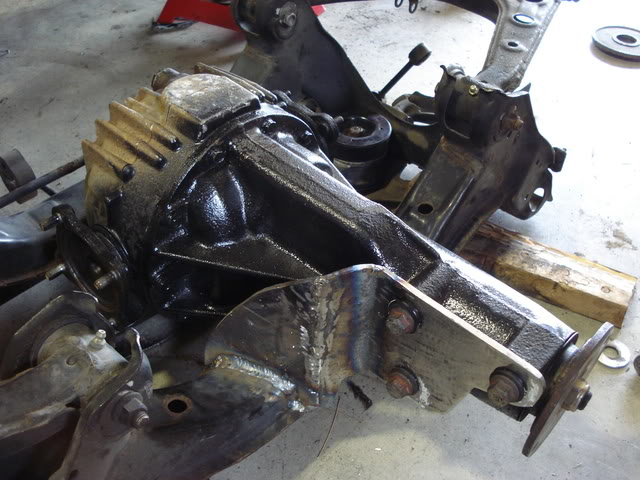
I got the rear diff mounts sorted out this last weekend. Im pretty happy how it turned out. Some of the welds weren't super important so i let my friend with no welding experience go to work.
Differences from my mount and MightyMouses' Mine must sit a little higher so i notched out the rear sub-frame. I also added some bushings to the diff nose mounts. I had sway bar bushings left over from my master poly bushing set so i cut them in half and pressed them into a 1" hole i drilled in the 3/8" plate. Hopefully it will help out a bit with the NVH. FYI The bushings that are pressed into the yolk of the diff are the same diameter as the ones in the miata diff.
Reply
0
0


