
Building a built build


Thread Starter

Joined: Jun 2009
Posts: 3,227
Total Cats: 1,707
From: Istanbul, Turkey
14 psi on stock internals.
Merciless detonation for weeks on end, before I had the sense to start tuning the car.
AS low as 9 AFR before I had the sense to LEARN how to tune the car.
Two episodes of almost destructive overheating spells due to a burst hose, and then, a stuck fan.
Oil consumption - to the tune of a quart in maybe 500 miles, or less.
The shame of smoke on acceleration, and the lingering clouds on cold start-ups.
Oh, and, great power. 180 psi across all cylinders, quite a few expensive car owners admiring a thirteen year old Miata, trying hard to not look envious.
That's pretty much the background on my car, in a nutshell.
So, I decided it was enough punishment for the stock internals. Had a nice talk with my wife, made my plans and started collecting parts, tools and the necessary bits for a complete rebuild before the engine let go.
Engines have way of letting go at the most inconvenient time, such as at those times when you have no time, or worse, no money for a job of this magnitude.
Call it proactive, preventive maintenance.
First order of business would be a full on assault on the electrons.
So, I pestered Dimitris till he succumbed to my countless emails and phone calls, and my efforts paid off in the form of a package I received at my doorstep one winter day.
That's how I tackled a steep learning curve, equipped with a keyboard, and a direct line to mt.net, and an MS in my backpack.
I fiddled with it till the car ran great, and to a point where I felt comfortable with playing around with the settings on the MS. Just removing the intimidation factor from the equation.
Dimitris is a great guy. Period.
OK, this is a build thread. Let's get on with that.
My plan was to tear the engine apart during Ramadan - the holy month for muslims during when they fast, and do not do much work because a) they are all high and mighty, selflessly displaying their devotion to Allah, b) they are starving in the gazillion degree summer heat and have no energy to even lift a finger, and, c) they are far too busy making arrangements for the all important "iftar", the first meal at sunset, to make sure they are seen with the right people, and consequently our own business has a chance to take a break.
I need to stop writing long sentences.
So, I sent all the parts to a friend in AK. Individual shipments would be far too expensive.
Since I had the luxury of having time, I had a chance to get great deals on most of the stuff I had to buy. (Thanks, Sam - Renown)
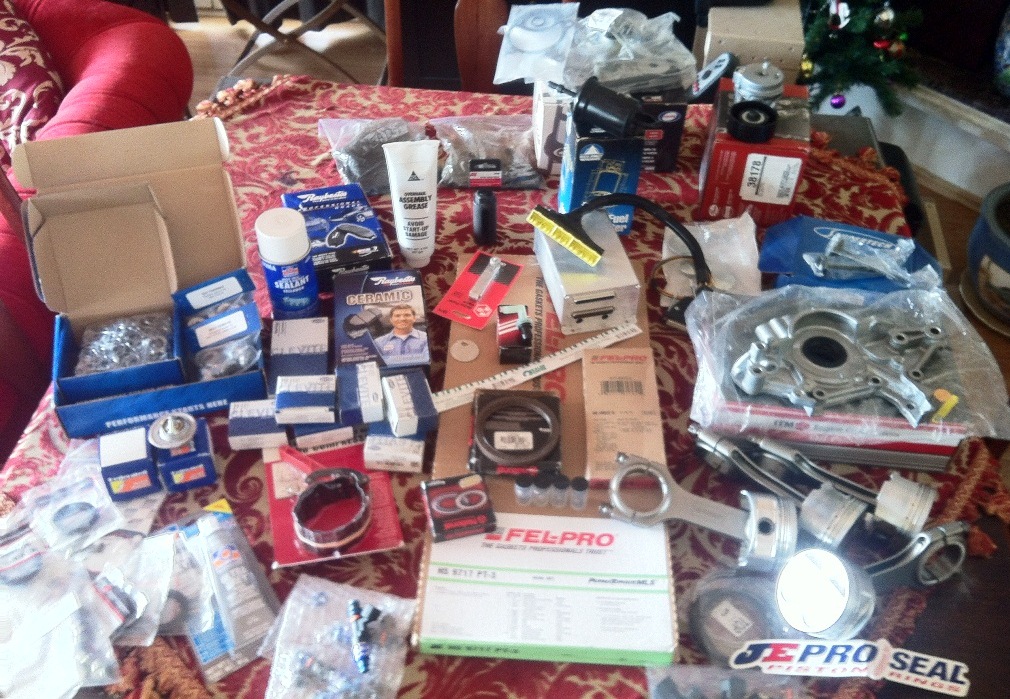
So, I bought a set of 84mm 9.00:1 JE forged pistons, Mtuned rods, ARP everything, 650cc EV14 injectors, Clevite this, Fel-Pro that, the works.
When the list was complete, my friend sent it over to Turkey via military transport. For free. In your face, UPS...
So, here's my loot (like you guys have never seen this stuff before)
Merciless detonation for weeks on end, before I had the sense to start tuning the car.
AS low as 9 AFR before I had the sense to LEARN how to tune the car.
Two episodes of almost destructive overheating spells due to a burst hose, and then, a stuck fan.
Oil consumption - to the tune of a quart in maybe 500 miles, or less.
The shame of smoke on acceleration, and the lingering clouds on cold start-ups.
Oh, and, great power. 180 psi across all cylinders, quite a few expensive car owners admiring a thirteen year old Miata, trying hard to not look envious.
That's pretty much the background on my car, in a nutshell.
So, I decided it was enough punishment for the stock internals. Had a nice talk with my wife, made my plans and started collecting parts, tools and the necessary bits for a complete rebuild before the engine let go.
Engines have way of letting go at the most inconvenient time, such as at those times when you have no time, or worse, no money for a job of this magnitude.
Call it proactive, preventive maintenance.
First order of business would be a full on assault on the electrons.
So, I pestered Dimitris till he succumbed to my countless emails and phone calls, and my efforts paid off in the form of a package I received at my doorstep one winter day.
That's how I tackled a steep learning curve, equipped with a keyboard, and a direct line to mt.net, and an MS in my backpack.
I fiddled with it till the car ran great, and to a point where I felt comfortable with playing around with the settings on the MS. Just removing the intimidation factor from the equation.
Dimitris is a great guy. Period.
OK, this is a build thread. Let's get on with that.
My plan was to tear the engine apart during Ramadan - the holy month for muslims during when they fast, and do not do much work because a) they are all high and mighty, selflessly displaying their devotion to Allah, b) they are starving in the gazillion degree summer heat and have no energy to even lift a finger, and, c) they are far too busy making arrangements for the all important "iftar", the first meal at sunset, to make sure they are seen with the right people, and consequently our own business has a chance to take a break.
I need to stop writing long sentences.
So, I sent all the parts to a friend in AK. Individual shipments would be far too expensive.
Since I had the luxury of having time, I had a chance to get great deals on most of the stuff I had to buy. (Thanks, Sam - Renown)
So, I bought a set of 84mm 9.00:1 JE forged pistons, Mtuned rods, ARP everything, 650cc EV14 injectors, Clevite this, Fel-Pro that, the works.
When the list was complete, my friend sent it over to Turkey via military transport. For free. In your face, UPS...
So, here's my loot (like you guys have never seen this stuff before)
Reply
 0
0

0
Thread Starter
Joined: Jun 2009
Posts: 3,227
Total Cats: 1,707
From: Istanbul, Turkey
Sometime before Ramadan, in early June I had an opportunity to start on the rebuild, and I took it.
The plan was doing everything at home, in the parking lot. It's a private parking lot, at the end of a dead end street, and it's the sort of a place where you can leave a suitcase of cash for a week, and no one will touch it. Out of the way. Five ferocious dogs guarding the place. Nice porch to work on the engine.
Did not happen.
The owner of a Mazda service facility - very nice guy, and a long time friend - heard of my project and called me. He said he felt offended - Turks can be that way - that I had not considered his place for my project. I told him I did not want to invade his place. He really got offended. It came to "my place is your place". I had no choice.
So, I packed up and drove over to his place.
He said I was not a customer, and I should proceed as I wished, using whatever I needed.
Three lifts. Jacks, compressor, tools, equipment galore. I obliged.
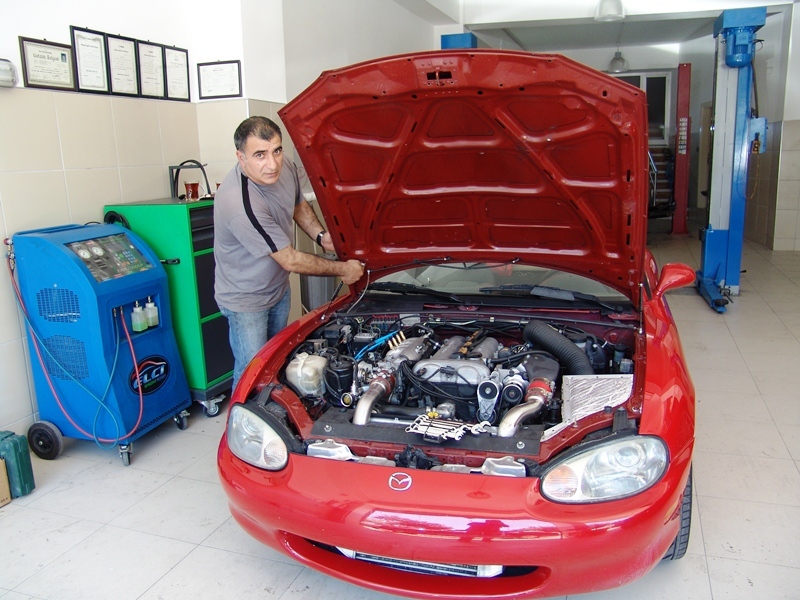
His name is Taber Ayaz. Very cool guy. He helped me a great deal throughout the project.
And, this is him removing the first nut of the whole project:
The plan was doing everything at home, in the parking lot. It's a private parking lot, at the end of a dead end street, and it's the sort of a place where you can leave a suitcase of cash for a week, and no one will touch it. Out of the way. Five ferocious dogs guarding the place. Nice porch to work on the engine.
Did not happen.
The owner of a Mazda service facility - very nice guy, and a long time friend - heard of my project and called me. He said he felt offended - Turks can be that way - that I had not considered his place for my project. I told him I did not want to invade his place. He really got offended. It came to "my place is your place". I had no choice.
So, I packed up and drove over to his place.
He said I was not a customer, and I should proceed as I wished, using whatever I needed.
Three lifts. Jacks, compressor, tools, equipment galore. I obliged.
His name is Taber Ayaz. Very cool guy. He helped me a great deal throughout the project.
And, this is him removing the first nut of the whole project:
Reply
0
0
Thread Starter
Joined: Jun 2009
Posts: 3,227
Total Cats: 1,707
From: Istanbul, Turkey
I should get on with the pics, or it did not happen...
You need to start removing everything around the engine first.
So, the supercharger (I know, blasphemy) came out first.

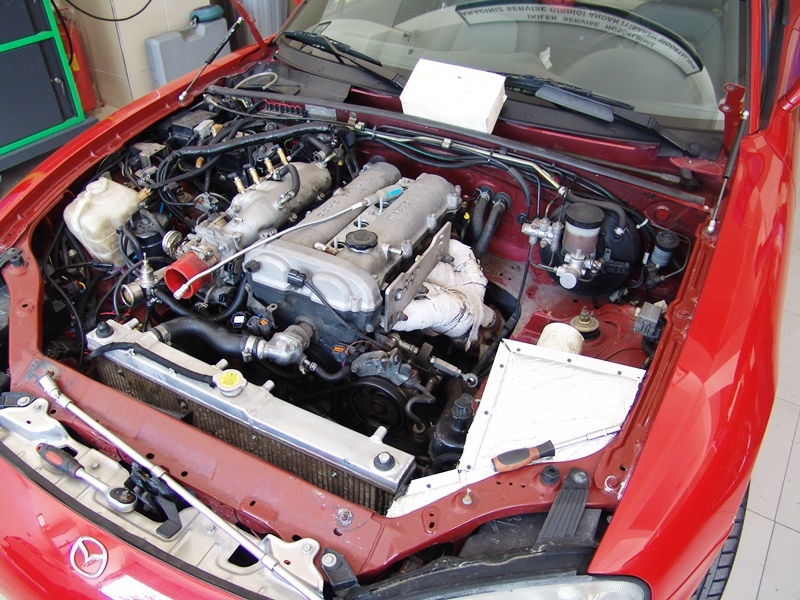
And, there it is.
Turbo owners, please feel free to avert your eyes, and remove your children from the room..

You need to start removing everything around the engine first.
So, the supercharger (I know, blasphemy) came out first.
And, there it is.
Turbo owners, please feel free to avert your eyes, and remove your children from the room..
Reply
0
0
Thread Starter
Joined: Jun 2009
Posts: 3,227
Total Cats: 1,707
From: Istanbul, Turkey
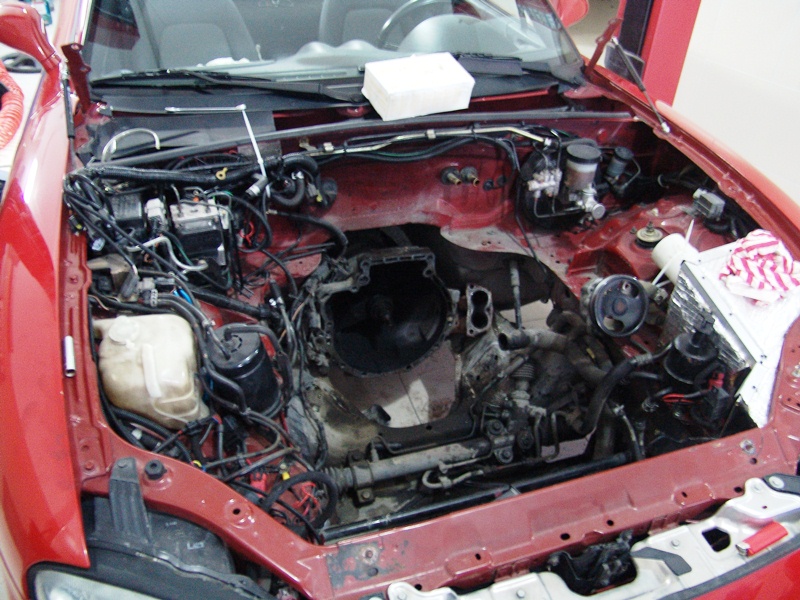
Then, after a couple of hours dotted with tea breaks, it was time to remove the engine from the car for the first time since some guy in Hiroshima put it in there.
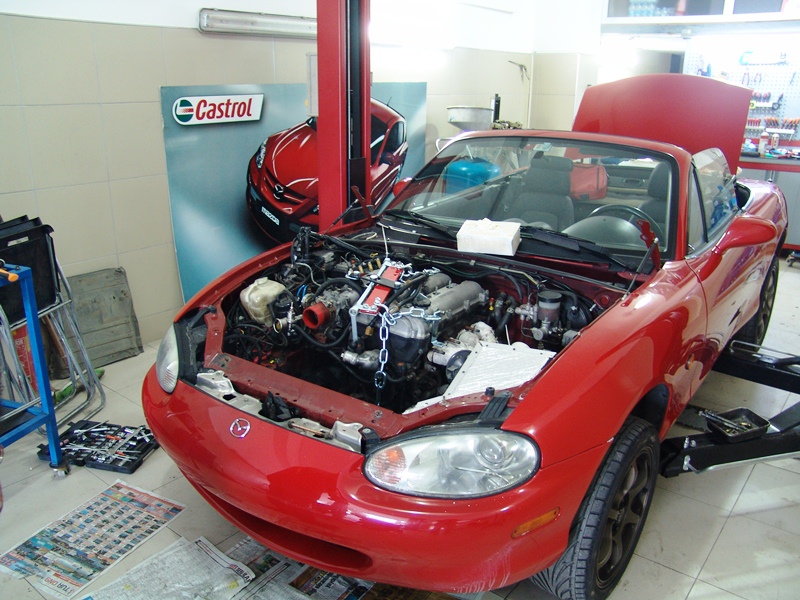
And it was pretty dirty in there
And it was pretty dirty in there
Reply
0
0
Thread Starter
Joined: Jun 2009
Posts: 3,227
Total Cats: 1,707
From: Istanbul, Turkey
There was good and bad news...
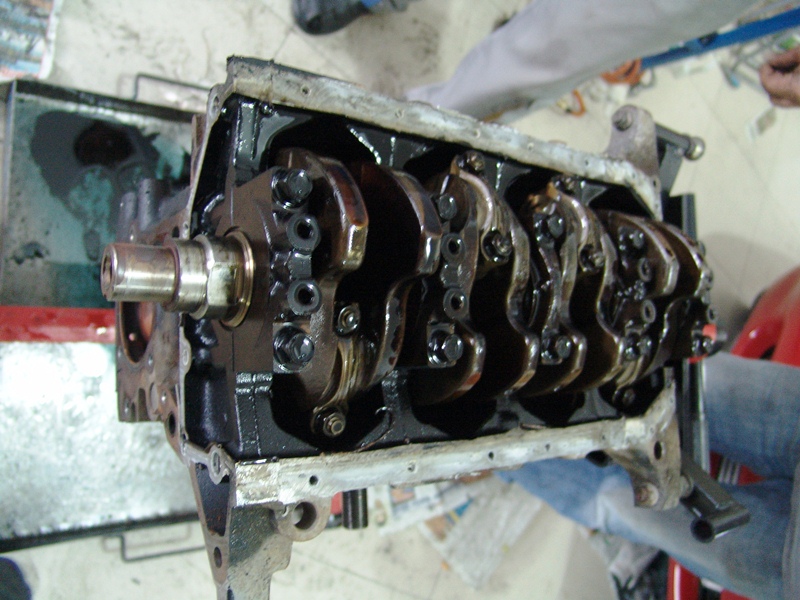
Good news was the fact that the crank, bearings, the cylinder head, all the moving parts were in great shape.
The bearings looked brand new even.
Not bad for 180,000 Km, and 13 years.
Good news was the fact that the crank, bearings, the cylinder head, all the moving parts were in great shape.
The bearings looked brand new even.
Not bad for 180,000 Km, and 13 years.
Reply
0
0
Thread Starter
Joined: Jun 2009
Posts: 3,227
Total Cats: 1,707
From: Istanbul, Turkey
Bad news was the clutch itself.
Do not buy Spec clutches. This stage 2.5 was used for just about 10K miles. With proper break-in. No abuse, no hard launches.
I was very upset. I even said the f word. To the clutch, I mean.
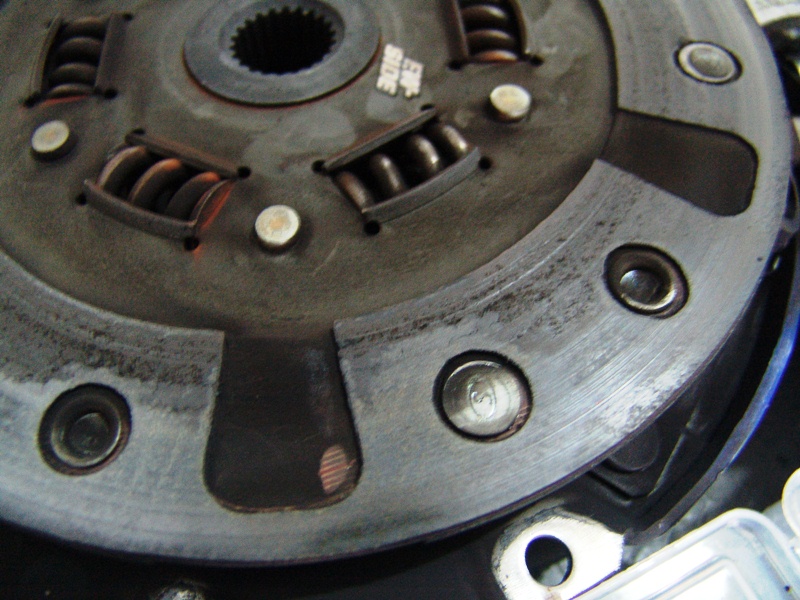
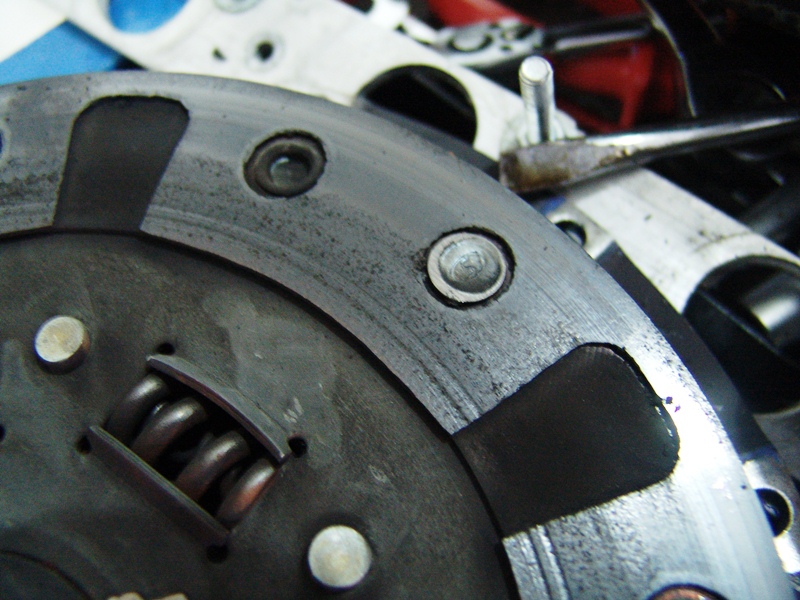
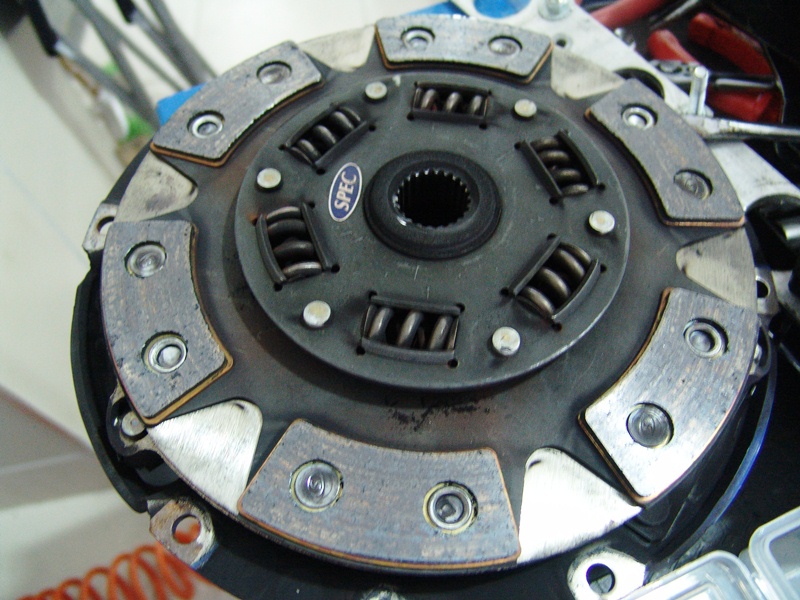
And, yes, the flywheel was machined at the time, too.
Do not buy Spec clutches. This stage 2.5 was used for just about 10K miles. With proper break-in. No abuse, no hard launches.
I was very upset. I even said the f word. To the clutch, I mean.
And, yes, the flywheel was machined at the time, too.
Reply
0
0
Thread Starter
Joined: Jun 2009
Posts: 3,227
Total Cats: 1,707
From: Istanbul, Turkey
Oh, and the knock sensor was dead, too.
I got on the phone to get me a clutch and a knock sensor.
(Again, thank you Dimitris)
So anyway, I tore the engine apart. No surprises.
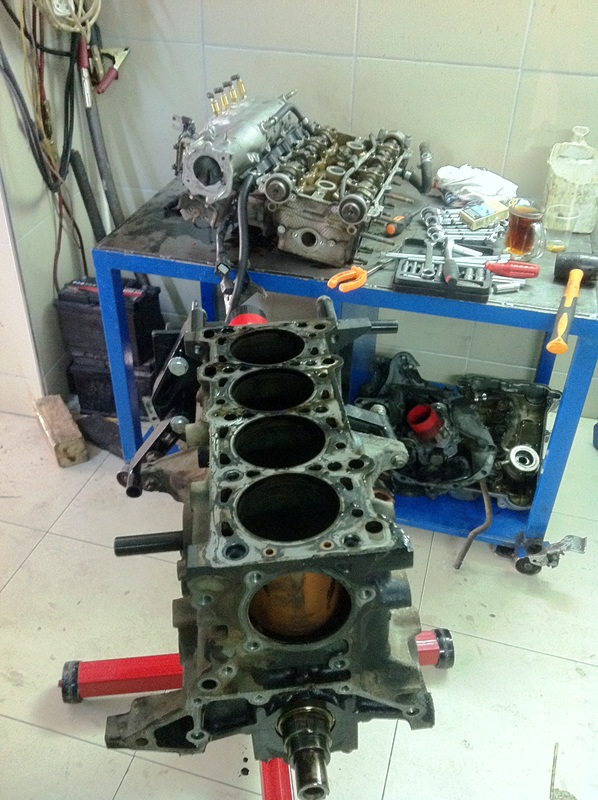
And then, I cleaned the block as best as I could.
I bet the guys at the machine shop appreciated that. And it made me feel better.
Another good thing was the still intact cross hatching on the cylinder walls (those iPhones take pretty good pictures, I guess)
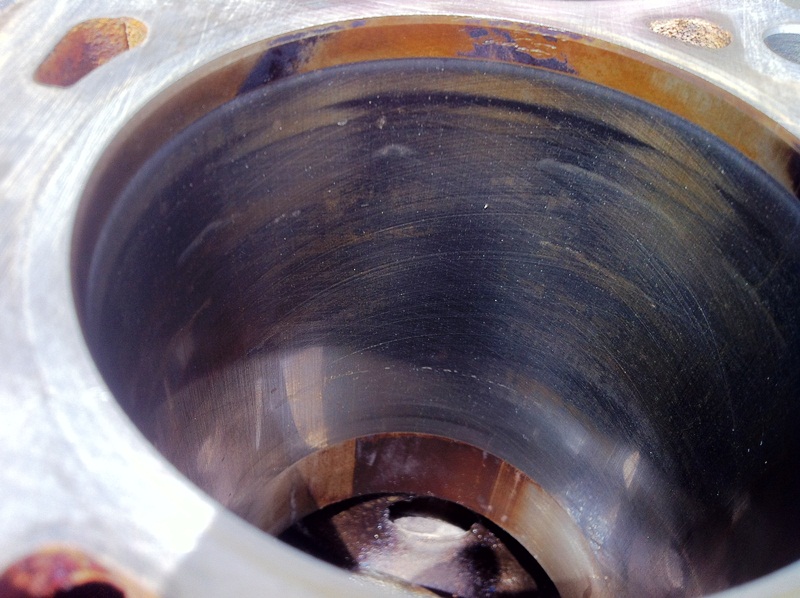

There's water spots in there from pressure washing, but you get the idea.
I got on the phone to get me a clutch and a knock sensor.
(Again, thank you Dimitris)
So anyway, I tore the engine apart. No surprises.
And then, I cleaned the block as best as I could.
I bet the guys at the machine shop appreciated that. And it made me feel better.
Another good thing was the still intact cross hatching on the cylinder walls (those iPhones take pretty good pictures, I guess)
There's water spots in there from pressure washing, but you get the idea.
Reply
0
0
Thread Starter
Joined: Jun 2009
Posts: 3,227
Total Cats: 1,707
From: Istanbul, Turkey
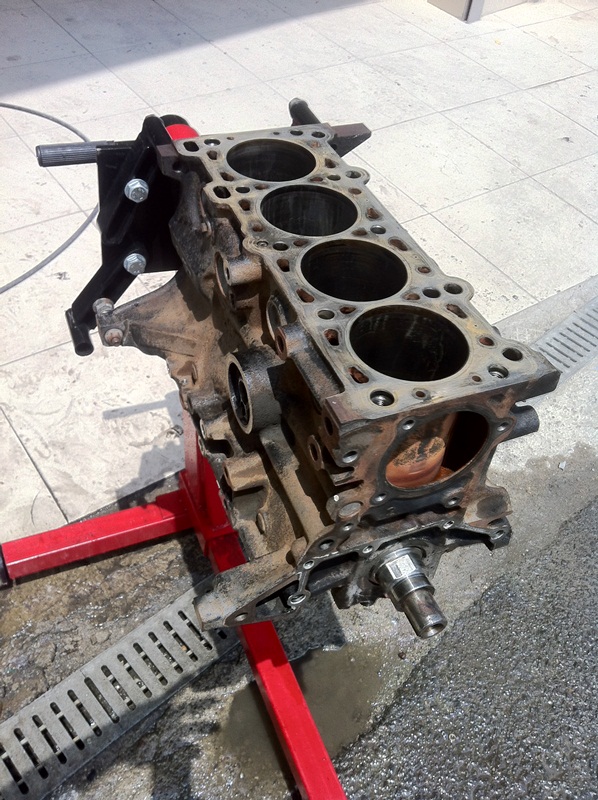
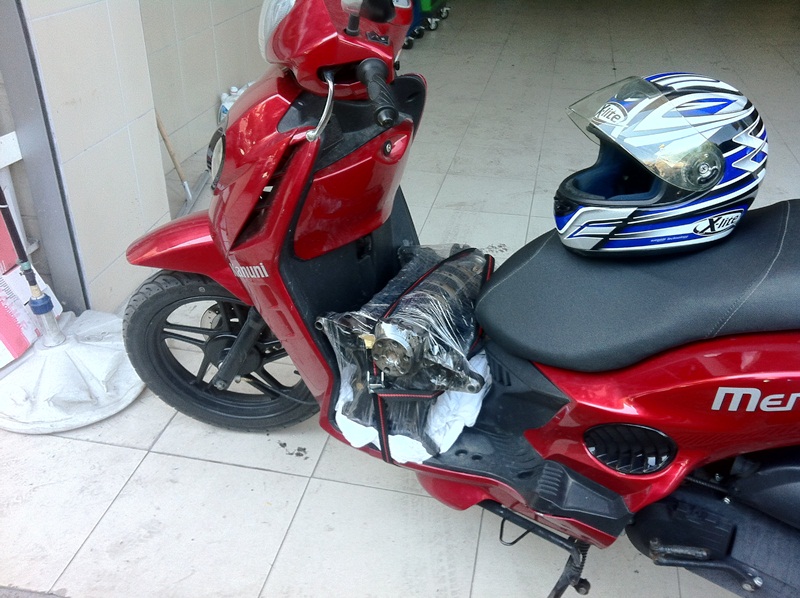
Since I did not have a car to take the block to the machine shop, I strapped it on my scooter, and took it across the bridge (20+ miles on the freeway) to this one place I had picked after a lengthy investigation. They did a great job, and bored the block out to accept 84mm pistons, line bored it, leveled the deck (was off just a tiny bit) and checked everything over.
I paid them about $190 for their trouble.

I paid them about $190 for their trouble.
Reply
0
0
Thread Starter
Joined: Jun 2009
Posts: 3,227
Total Cats: 1,707
From: Istanbul, Turkey
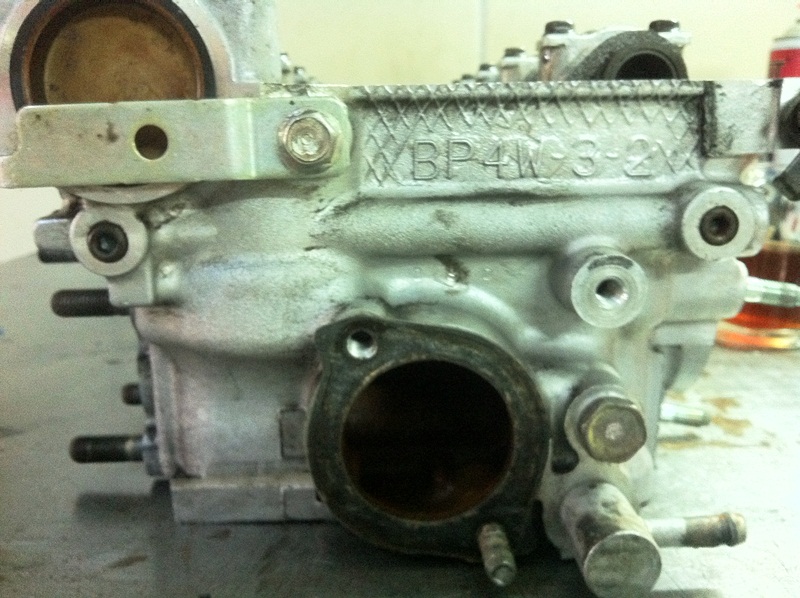
The cylinder head was a whole different story.
I bought Supertech everything for the head, and wanted a competent machine shop to surface it, install new valve guides in it, and check it over for cracks, etc (remember the two overheating episodes)
It turned out to be a massive, all encompassing surgery.
I found this guy who is an automotive engineer, and his specialty is flow. The real deal.
He kept the head for 10 days, working on two flow benches back and forth, and doing his magic on the head.
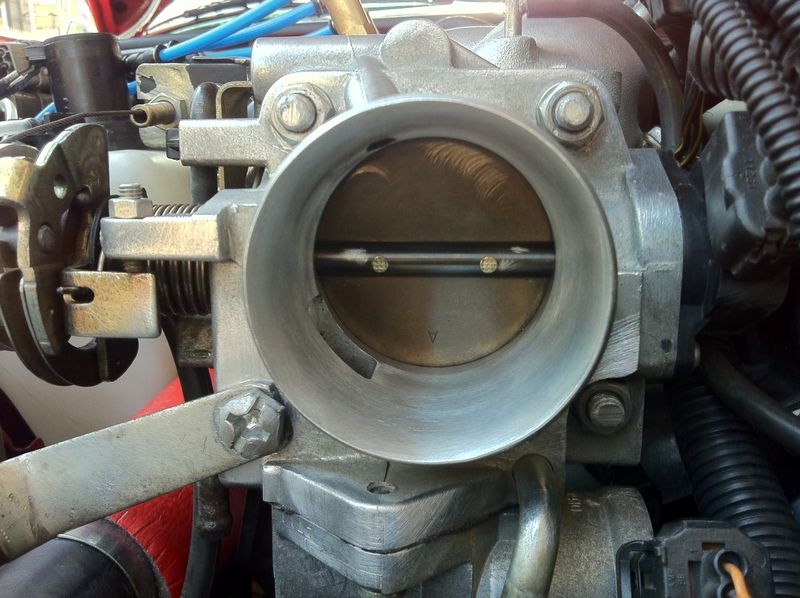
He ported the intake and exhaust side, the intake manifold, and the throttle body, optimizing flow.
He removed about 650 grams of aluminum from the cylinder head only.
The net gain is +40 CFM flow per port.
(I had the car set up for 14.8-15 AFR on cruise at moderate load, and during the first drive after the first crank - with no adjustment on AFR or timing tables - the AFR was lingering right at 18. That much more flow...)
Here are the intake ports
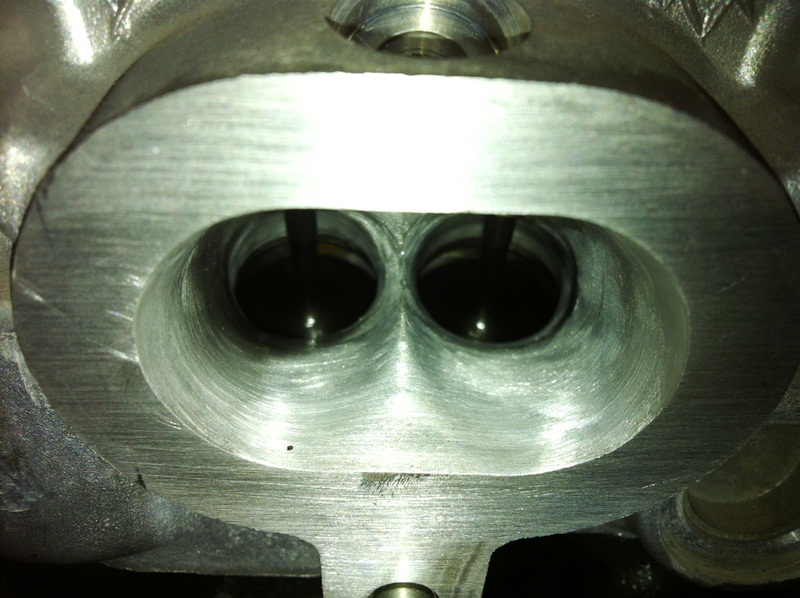
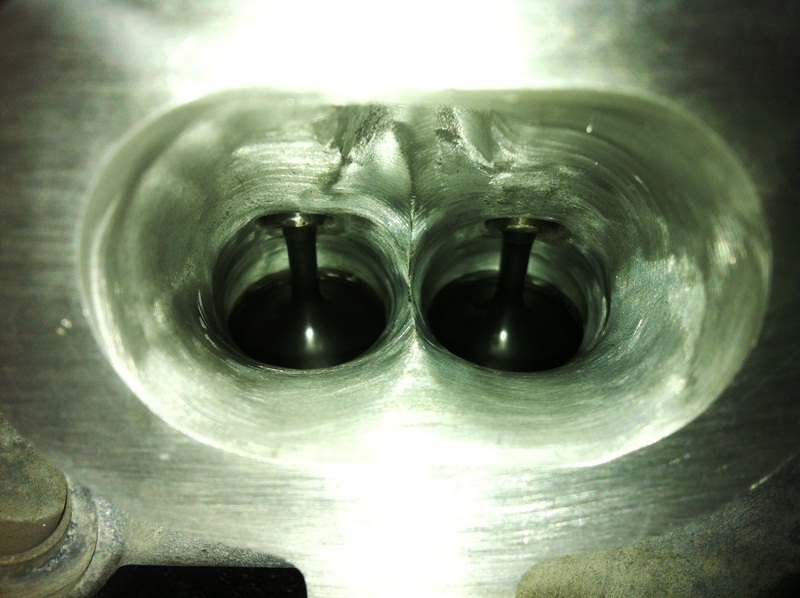
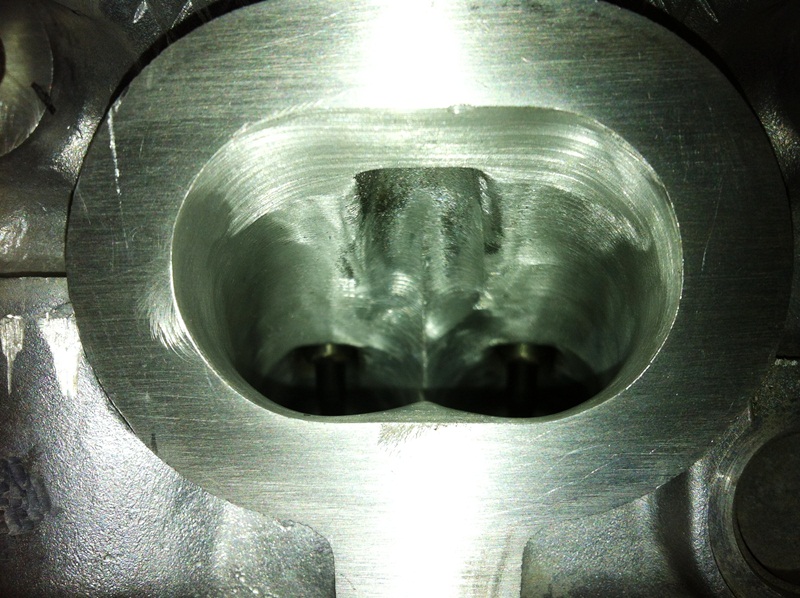
The car feels very, very different - in a great way - now.
Like 14-16 inches of vacuum at 4000 rpm on steady cruise.
I bought Supertech everything for the head, and wanted a competent machine shop to surface it, install new valve guides in it, and check it over for cracks, etc (remember the two overheating episodes)
It turned out to be a massive, all encompassing surgery.
I found this guy who is an automotive engineer, and his specialty is flow. The real deal.
He kept the head for 10 days, working on two flow benches back and forth, and doing his magic on the head.
He ported the intake and exhaust side, the intake manifold, and the throttle body, optimizing flow.
He removed about 650 grams of aluminum from the cylinder head only.
The net gain is +40 CFM flow per port.
(I had the car set up for 14.8-15 AFR on cruise at moderate load, and during the first drive after the first crank - with no adjustment on AFR or timing tables - the AFR was lingering right at 18. That much more flow...)
Here are the intake ports
The car feels very, very different - in a great way - now.
Like 14-16 inches of vacuum at 4000 rpm on steady cruise.
Last edited by Godless Commie; Jul 24, 2012 at 09:43 PM.
Reply
0
0
Wait, did you bore the block WITHOUT having the pistons?
I thought for correct piston-to-wall clearances you had to measure the pistons then bore. I had to bring pistons to machine shop and the block was bored for THOSE pistons exactly.
I thought for correct piston-to-wall clearances you had to measure the pistons then bore. I had to bring pistons to machine shop and the block was bored for THOSE pistons exactly.
Reply
0
0


Thread Starter
Joined: Jun 2009
Posts: 3,227
Total Cats: 1,707
From: Istanbul, Turkey
Reply
0
0
Thread Starter
Joined: Jun 2009
Posts: 3,227
Total Cats: 1,707
From: Istanbul, Turkey
So, where was I..
OK, machine shop stuff...
I have an idea.
Since I am posting this thread a bit after the fact, I feel like I should concentrate on one subject at a time, rather than a chronological rundown of the events.
It should make it easier to follow, and make more sense, I guess.
Having said that, let's move on to the
COOLANT REROUTE
I knew I would have to wait for the reroute project till the engine was out of the car.
So I made some plans, took action as soon as the engine was in full daylight.
First order of business was to find a water neck.
Screw Kia. I stuck with Mazda, an 323 Lantis with a BP motor, in this case.
I just went to a parts store and asked the friendly guy behind the counter to put all the water necks he has on the counter, and proceeded to pick the best of the litter. That's how I ended up with the Lantis water neck.
But first, I needed an adapter. I took everything apart at the back of the head
Reply
0
0
Thread Starter
Joined: Jun 2009
Posts: 3,227
Total Cats: 1,707
From: Istanbul, Turkey
After measuring everything, I went to the nearby machine shop. The col guy operating the lathe ordered tea for both of us, and I explained what I wanted - with uber technical sketches on a paper napkin.
We started producing large amounts of shaved aluminum.
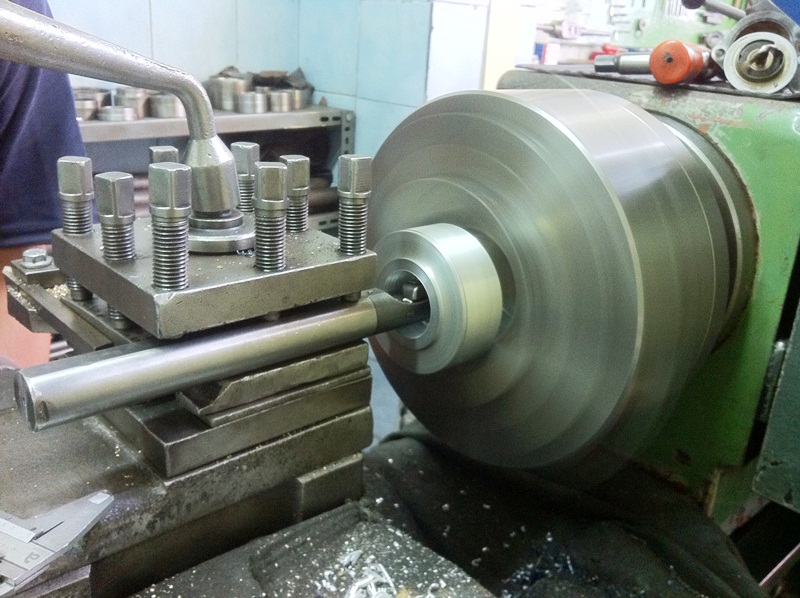
The result was, well, shaved...
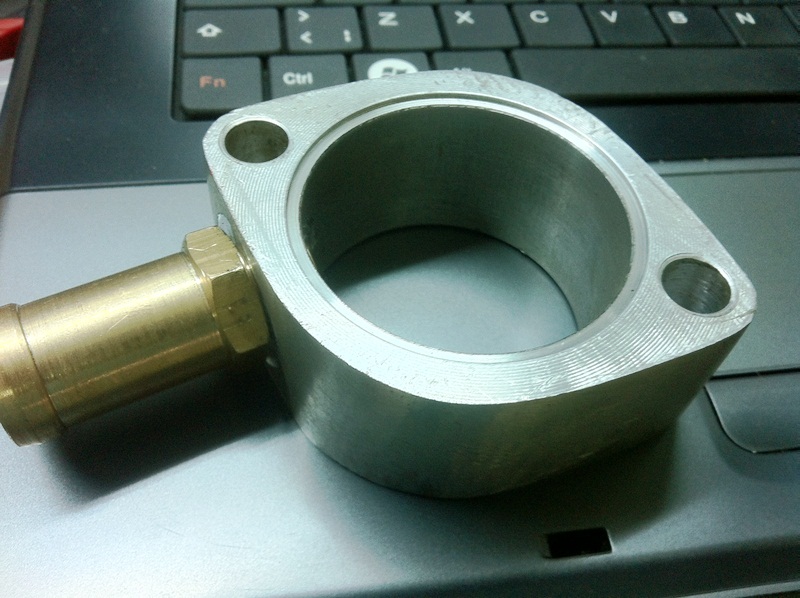
The brass nipple is the pre-thermostat heater outlet.
We started producing large amounts of shaved aluminum.
The result was, well, shaved...
The brass nipple is the pre-thermostat heater outlet.
Reply
0
0
Thread Starter
Joined: Jun 2009
Posts: 3,227
Total Cats: 1,707
From: Istanbul, Turkey
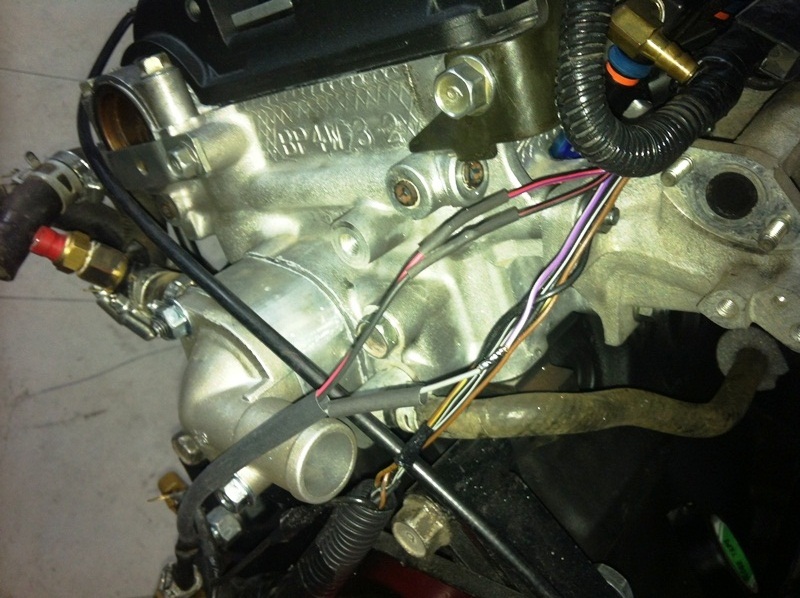
Next item on the agenda was finding a new home for the temp sender/sensor (I still don't know what it is).
Really, is it a sensor, or a sender?
I noticed a purposeless plug on the head, not too far from the water outlet.
Hmmmm.

And I am pointing right at the hole, once occupied by the said plug in this pic.

I drilled the hole with a bigger bit, and tapped it to accept the sensorder. All I had to do was lengthen the wiring just a bit to reach to the new location.
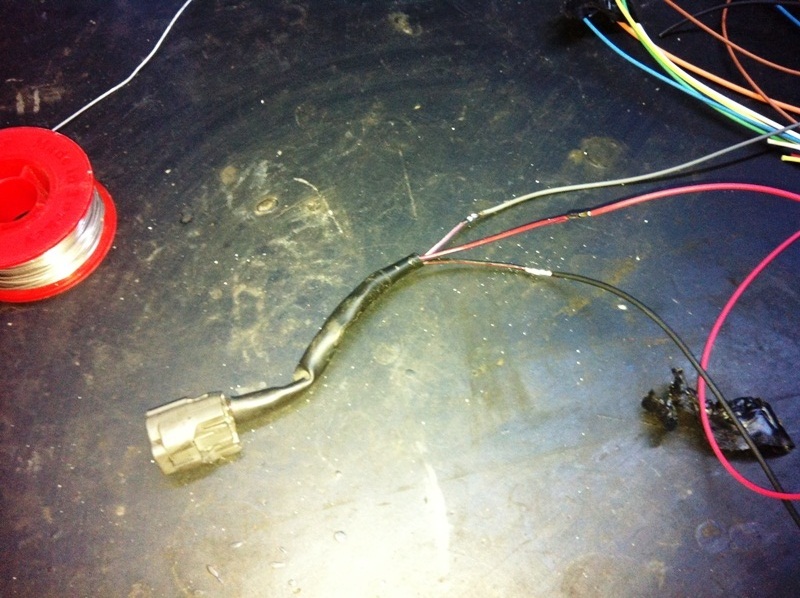
Here is the sensor in its new location:

Really, is it a sensor, or a sender?
I noticed a purposeless plug on the head, not too far from the water outlet.
Hmmmm.
And I am pointing right at the hole, once occupied by the said plug in this pic.
I drilled the hole with a bigger bit, and tapped it to accept the sensorder. All I had to do was lengthen the wiring just a bit to reach to the new location.
Here is the sensor in its new location:
Reply
0
0


