Building a built build


Thread Starter

Joined: Jun 2009
Posts: 3,227
Total Cats: 1,707
From: Istanbul, Turkey
With that sorted out, I got a couple of new studs to mount the adapter and the water neck to the head. Two studs, one 70 mm, and one 100 mm fit perfectly.
Here is the new thermostat:
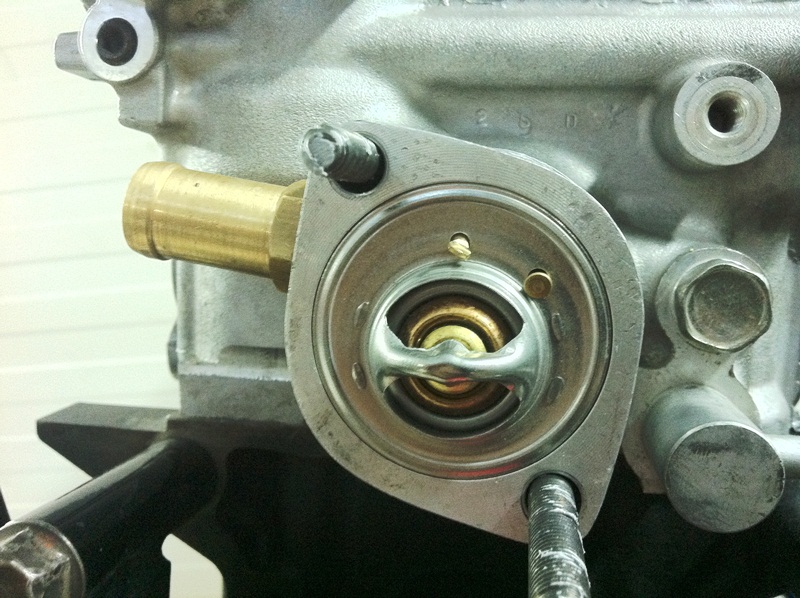
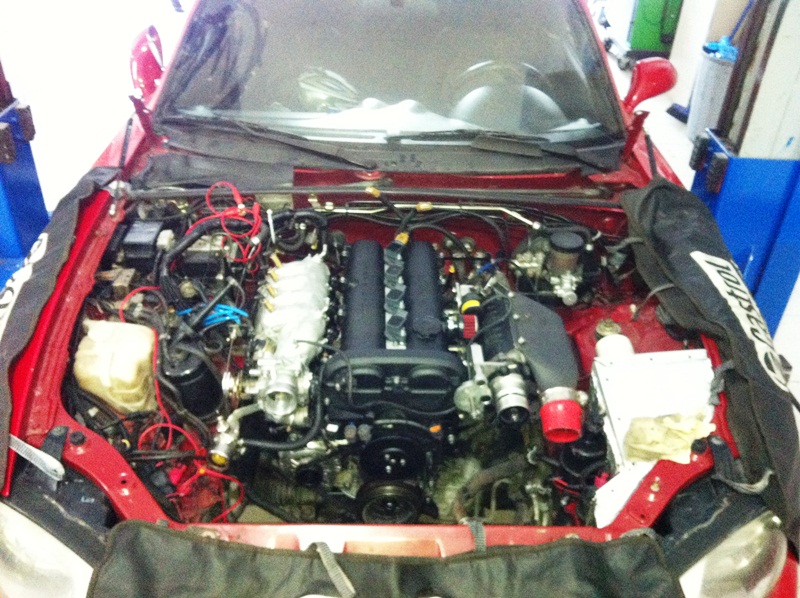
and everything buttoned up
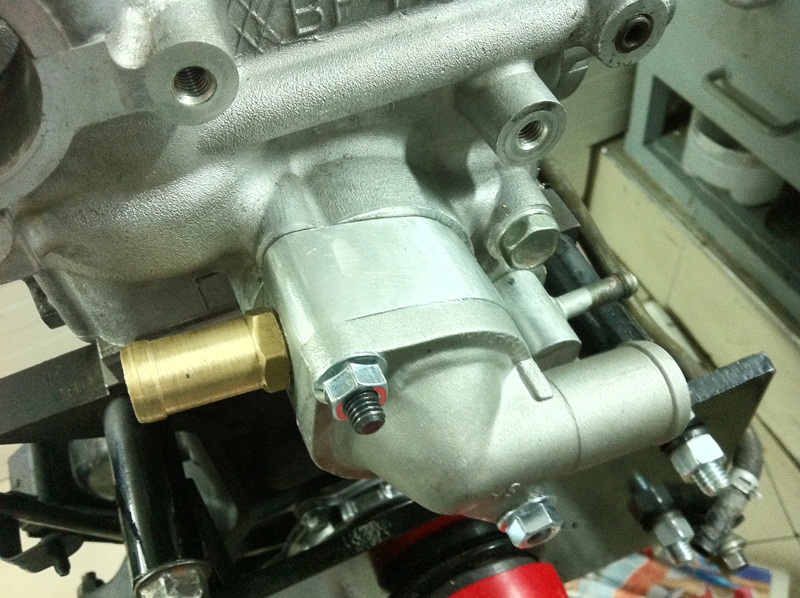
Heater hose lined up perfectly. I am an eyeballing god.
There was still the matter of finding a proper radiator hose....
Here is the new thermostat:
and everything buttoned up
Heater hose lined up perfectly. I am an eyeballing god.
There was still the matter of finding a proper radiator hose....
Reply
 0
0

0
Thread Starter
Joined: Jun 2009
Posts: 3,227
Total Cats: 1,707
From: Istanbul, Turkey
Another parts store owner agreed to let me loose in the radiator hose section.
I -again - eyeballed three different hoses and bought them.
I also bought a 1 meter length of 32mm OD aluminum piping.
(you do get the idea)
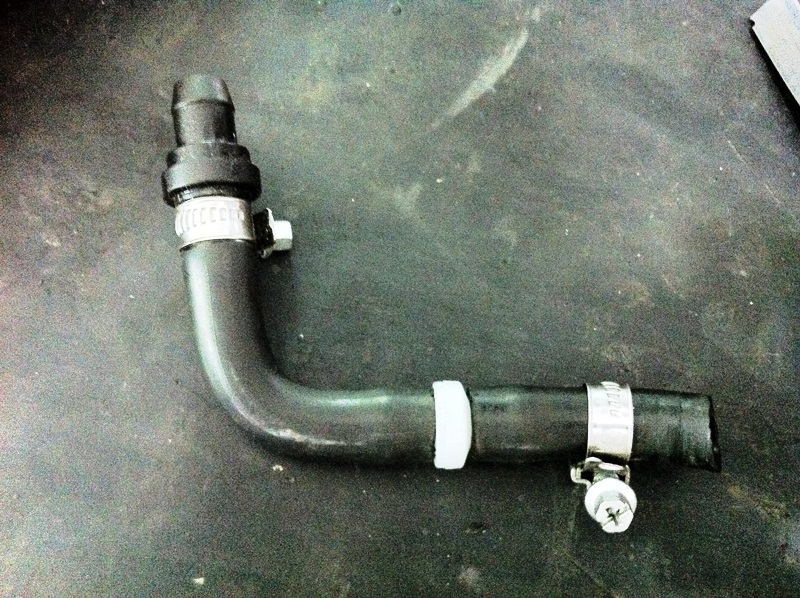
I spent enough time for two cups of tea and a couple of cigarettes to sort the shape of the radiator hose.
The result looked like a reject from the Klingon alphabet.
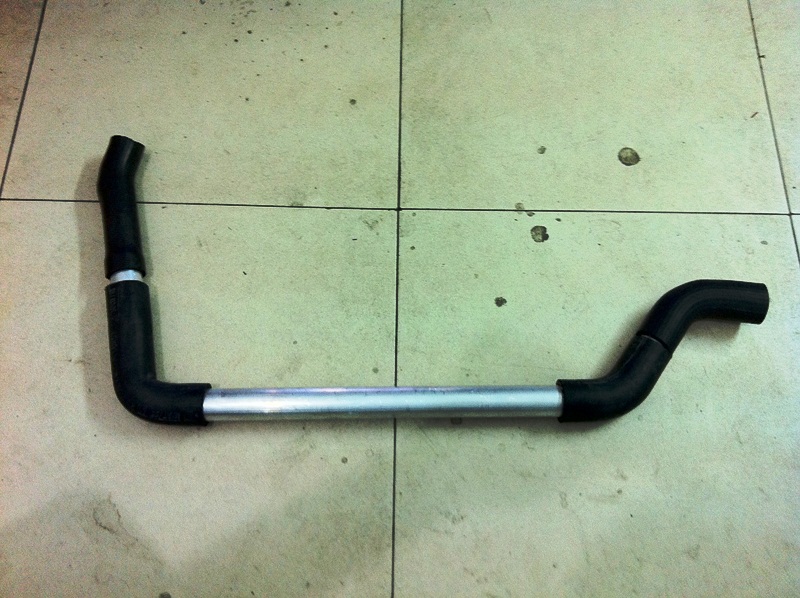
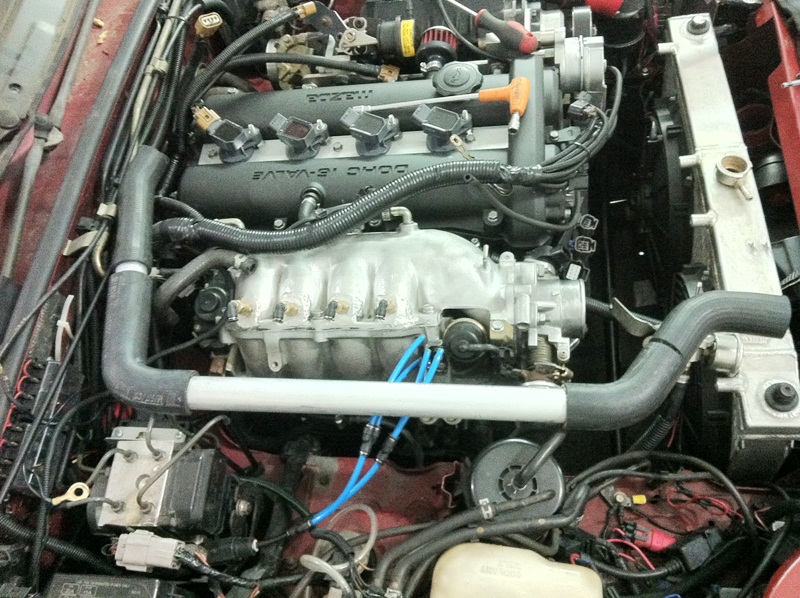
And, this is the rough fitment stage
I -again - eyeballed three different hoses and bought them.
I also bought a 1 meter length of 32mm OD aluminum piping.
(you do get the idea)
I spent enough time for two cups of tea and a couple of cigarettes to sort the shape of the radiator hose.
The result looked like a reject from the Klingon alphabet.
And, this is the rough fitment stage
Reply
0
0
Thread Starter
Joined: Jun 2009
Posts: 3,227
Total Cats: 1,707
From: Istanbul, Turkey
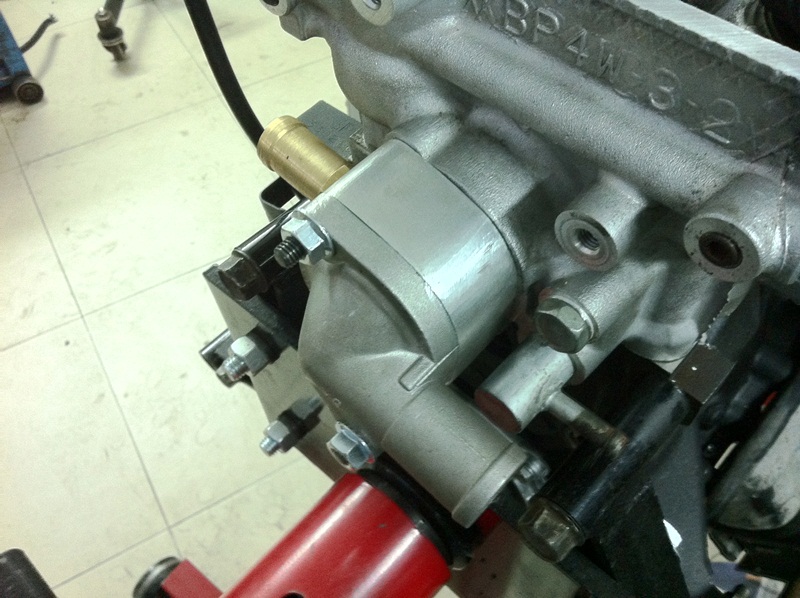
As it is painfully evident in the above picture, the heater hose plumbing was practically hugging the intake manifold with all the warmth and heat it could deliver.
That called for some color matched insulation...
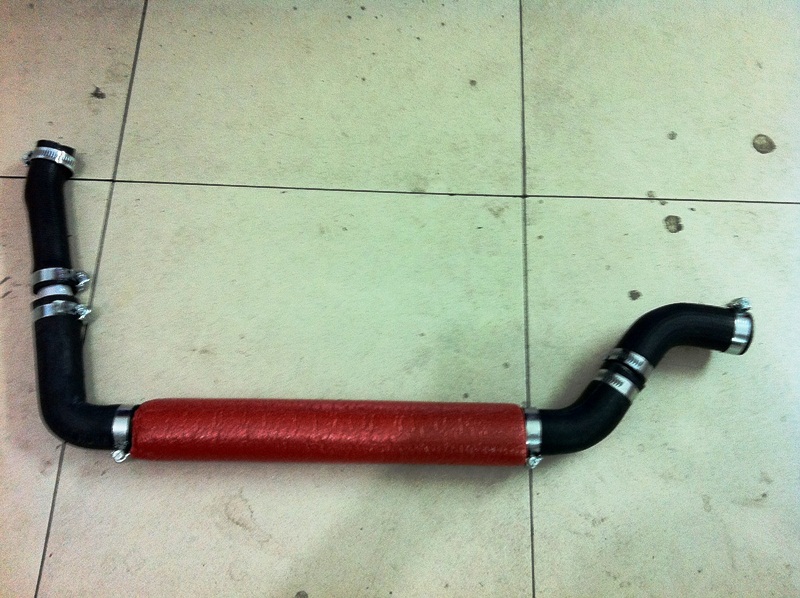
Again, a dress rehearsal:
The insulating sleeve cost me something like 75 cents at the hardware store. (We have Bauhaus here, kinda like Hopme Depot)
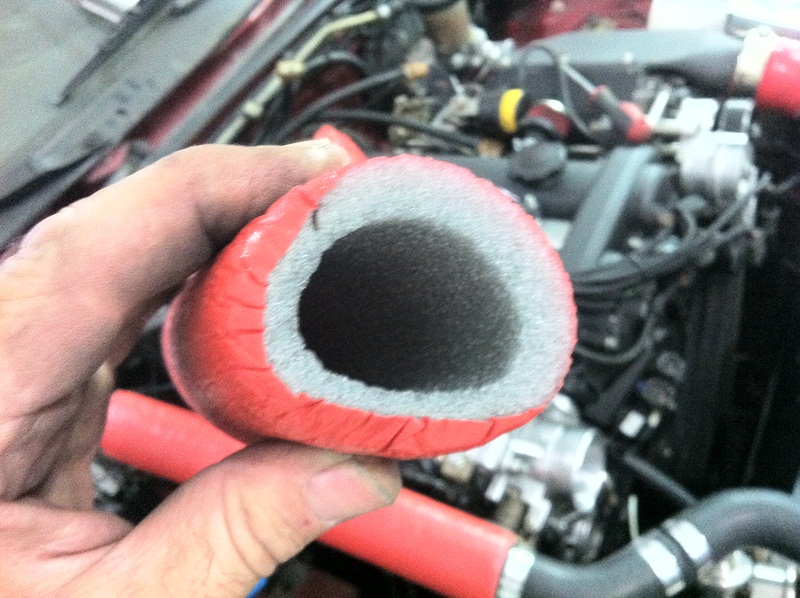
I dipped it in boiling water for a while to see if it would be OK at high heat. The thing did not complain at all.
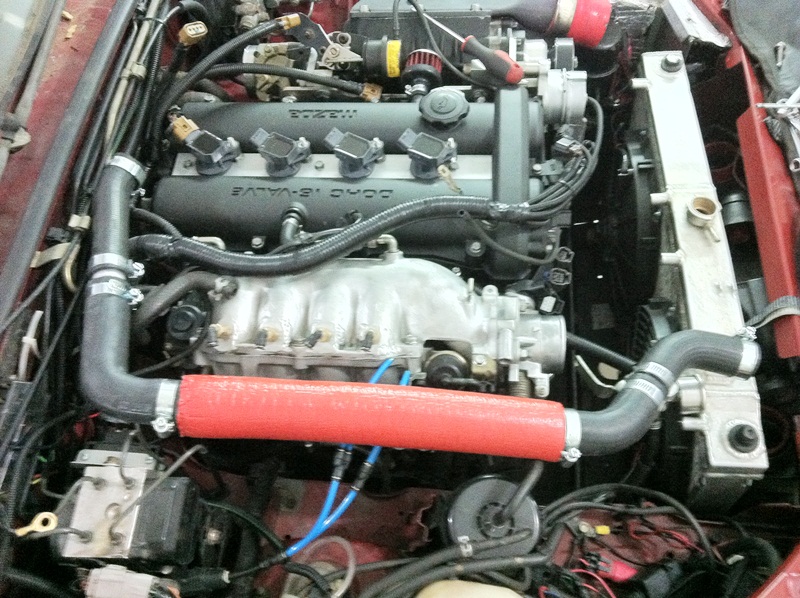
And, it works like a charm.
I must be the only guy with 8 clamps on a single radiator hose.
(I counted a total of 43 clamps on the engine. A 4 cylinder, 43 clamp engine...)
And yes, I forgot to tighten one of them. Number 4 on the upper rad hose, counting from the radiator. It reminded me in the form of a series of blue drips after the initial test drive.
All in all, the reroute is a success. I am consistently seeing 10 degrees (C) less on the gauge during these hot summer days. (Around 32C, 90F)
My LCD gauge setup says 84 to 89C on the road. Mostly mid 80s.
That called for some color matched insulation...
Again, a dress rehearsal:
The insulating sleeve cost me something like 75 cents at the hardware store. (We have Bauhaus here, kinda like Hopme Depot)
I dipped it in boiling water for a while to see if it would be OK at high heat. The thing did not complain at all.
And, it works like a charm.
I must be the only guy with 8 clamps on a single radiator hose.
(I counted a total of 43 clamps on the engine. A 4 cylinder, 43 clamp engine...)
And yes, I forgot to tighten one of them. Number 4 on the upper rad hose, counting from the radiator. It reminded me in the form of a series of blue drips after the initial test drive.
All in all, the reroute is a success. I am consistently seeing 10 degrees (C) less on the gauge during these hot summer days. (Around 32C, 90F)
My LCD gauge setup says 84 to 89C on the road. Mostly mid 80s.
Reply
0
0
Thread Starter
Joined: Jun 2009
Posts: 3,227
Total Cats: 1,707
From: Istanbul, Turkey
Almost forgot..
There's the front water outlet to deal with.
I bought a 32mm plug for that.
There's the hole left over after removing the stock water outlet, the plug I bought, with some ultra grey silicone, and my finger, again.. (My finger will be famous on the internet..)
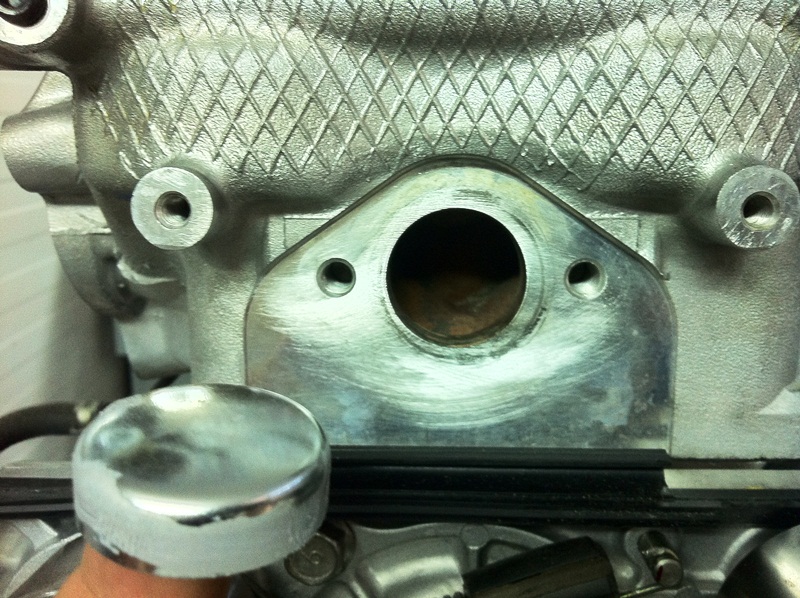
It's halfway in...
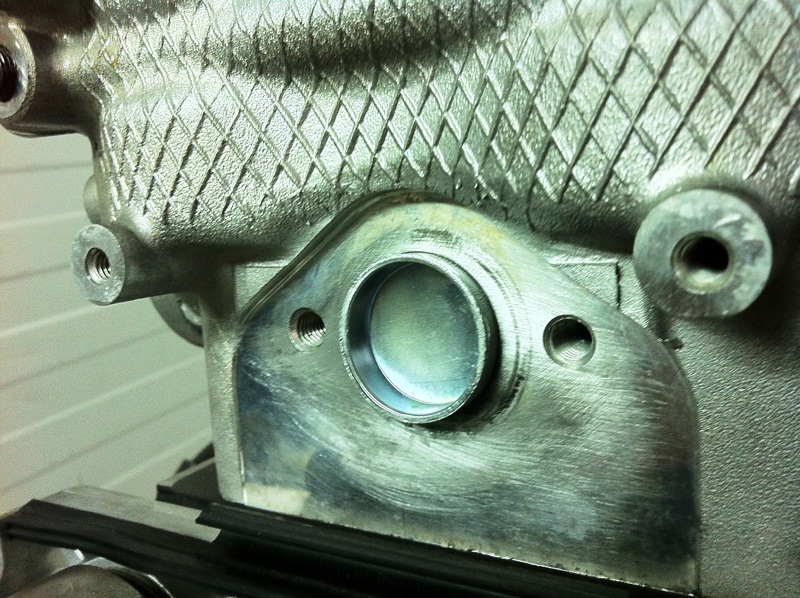
And there is some added protection to seal the deal.
Final look:
There's the front water outlet to deal with.
I bought a 32mm plug for that.
There's the hole left over after removing the stock water outlet, the plug I bought, with some ultra grey silicone, and my finger, again.. (My finger will be famous on the internet..)
It's halfway in...
And there is some added protection to seal the deal.
Final look:
Reply
0
0
Thread Starter
Joined: Jun 2009
Posts: 3,227
Total Cats: 1,707
From: Istanbul, Turkey
That was the reroute..
While I was waiting for the machine shop to do its thing, I took to some other stuff..
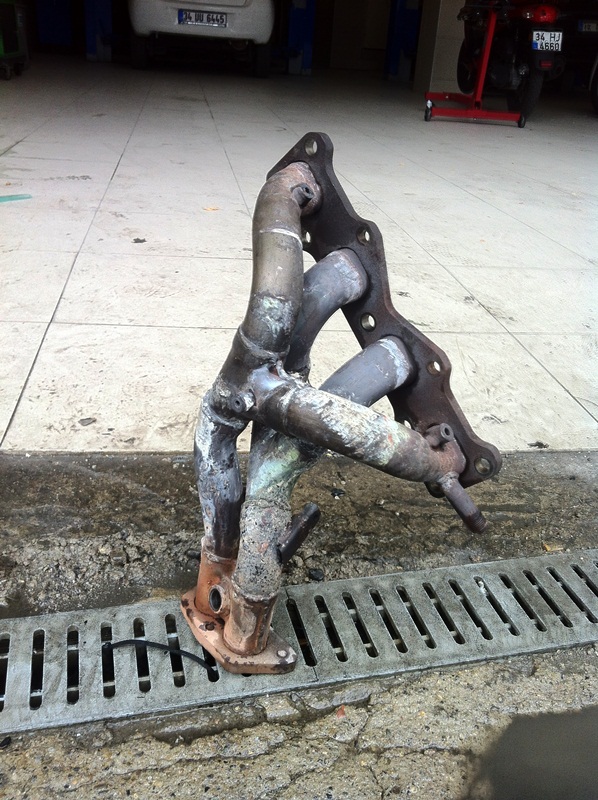
The exhaust manifold, for instance..
I had wrapped the header using some exotic stuff a couple years ago. That was done with the engine, header in the car, and looked kinda botched.
I had also heard horror stories about the negative effects of wrapping an exhaust system, in the form of rotting, rust, etc.
So, I unraveled the wraps with some trepidation.
And, everything was just peachy.
Except for some discoloration from the funky stuff I had used.
I promptly cleaned it:
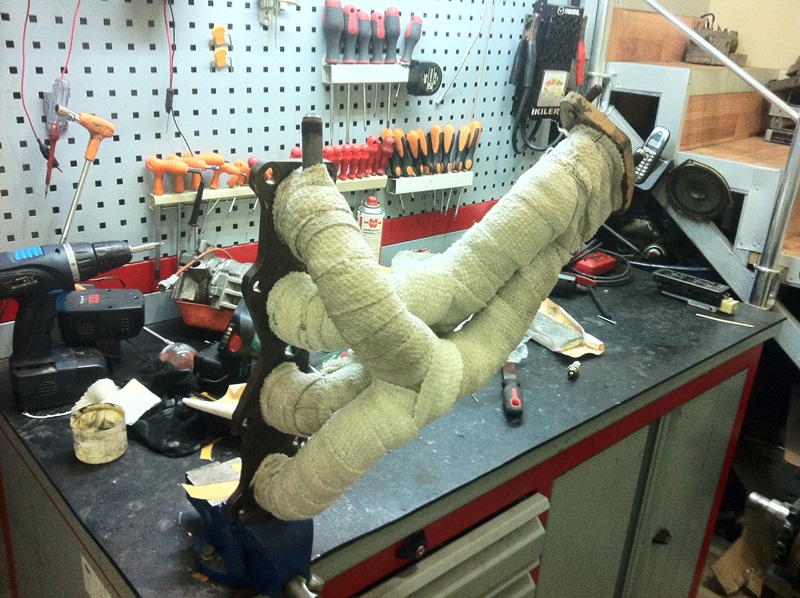
Then I lopped off the heat shield mounting standoffs and brackets to make life easier on myself, and wrapped it using ceramic wrap.
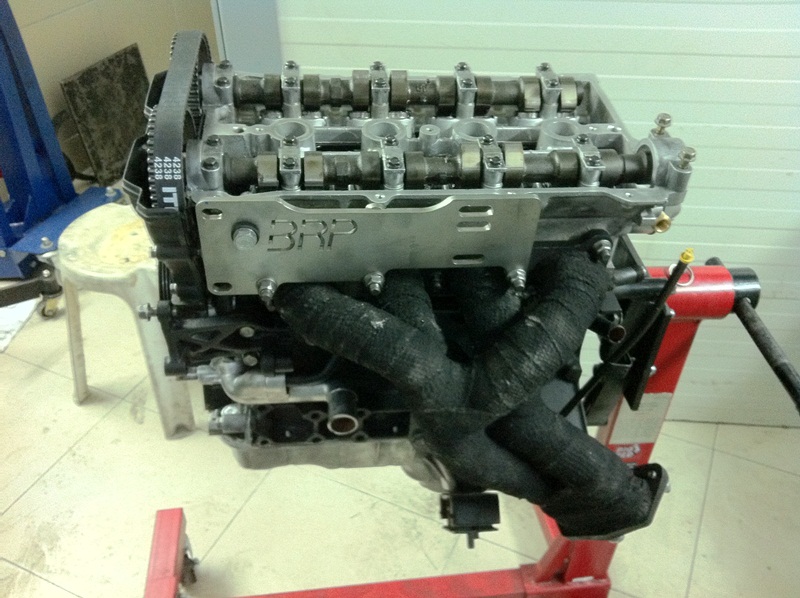
And, heat resistant black paint made it "invisible"...
While I was waiting for the machine shop to do its thing, I took to some other stuff..
The exhaust manifold, for instance..
I had wrapped the header using some exotic stuff a couple years ago. That was done with the engine, header in the car, and looked kinda botched.
I had also heard horror stories about the negative effects of wrapping an exhaust system, in the form of rotting, rust, etc.
So, I unraveled the wraps with some trepidation.
And, everything was just peachy.
Except for some discoloration from the funky stuff I had used.
I promptly cleaned it:
Then I lopped off the heat shield mounting standoffs and brackets to make life easier on myself, and wrapped it using ceramic wrap.
And, heat resistant black paint made it "invisible"...
Reply
0
0
Thread Starter
Joined: Jun 2009
Posts: 3,227
Total Cats: 1,707
From: Istanbul, Turkey
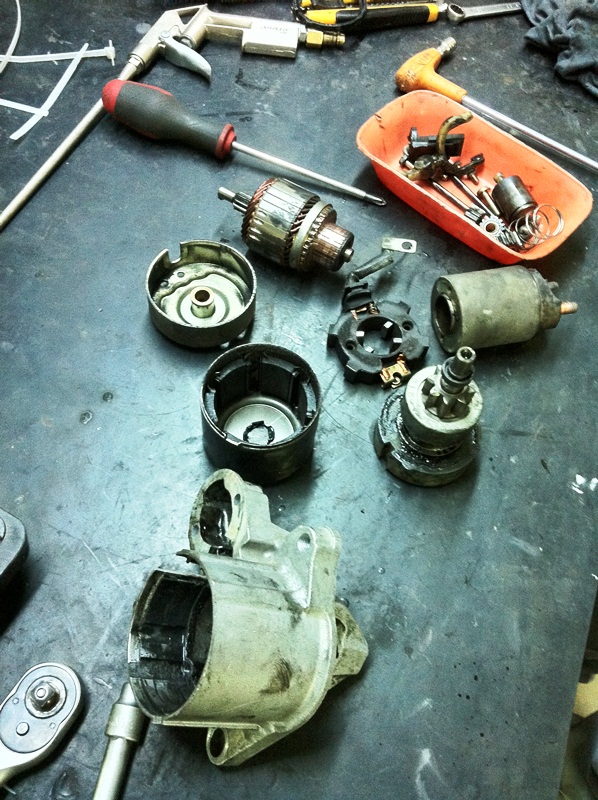
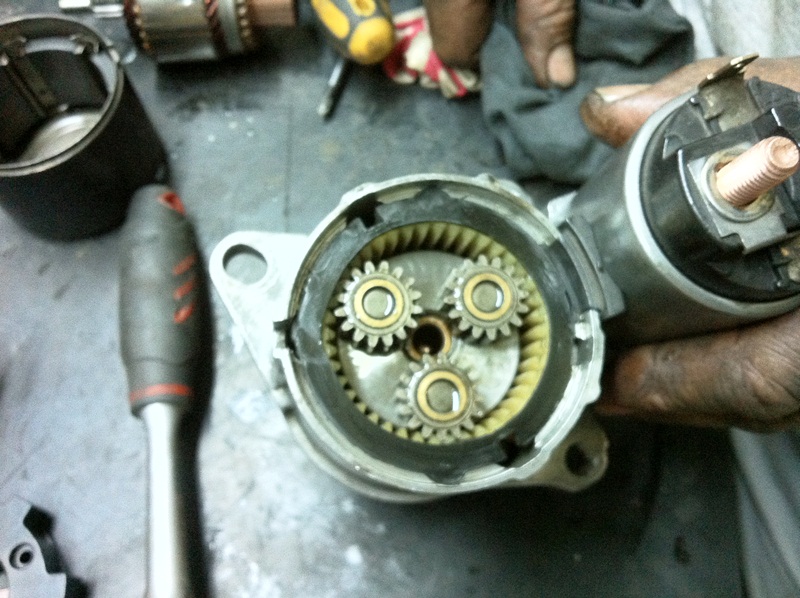
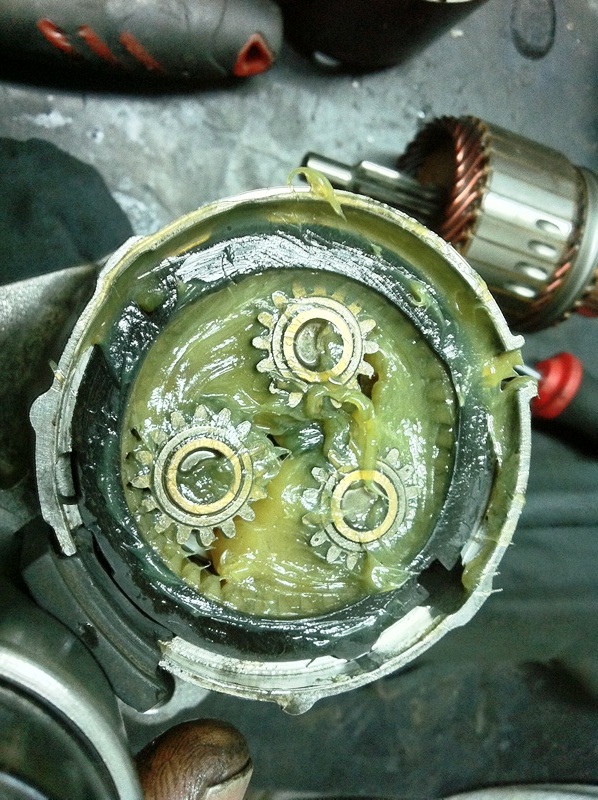
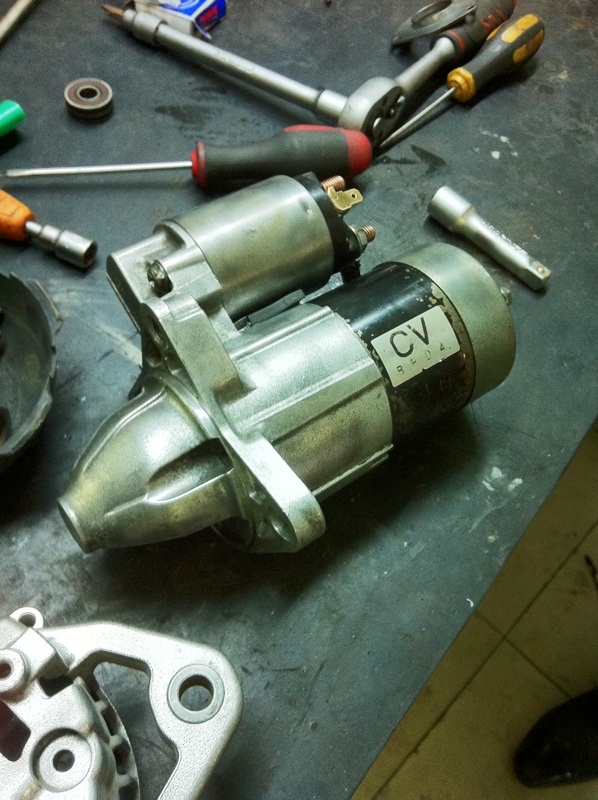
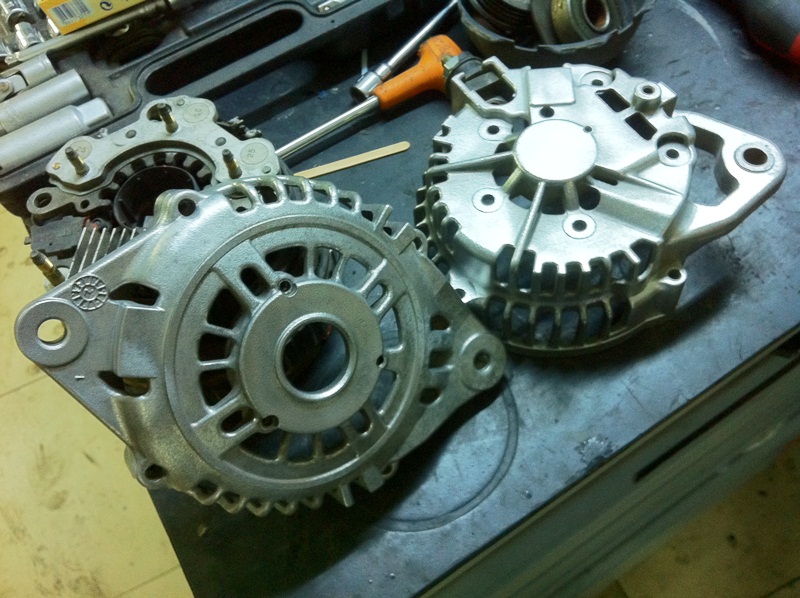
I did not forget about the starter and the alternator. They need love, too.
New brushes, new bearings, a thorough cleaning, and some TLC gave them a new lease on life.
(THAT sounded like the lifetime channel. I gotta finish this post and get some sleep. There are two instances when I don't sound like myself: when I first get up, and at such times when I am tired and sleepy. It has been a long day.)
Anyway, I present you the innards of the starter motor, and the alternator:
Reply
0
0

Thread Starter
Joined: Jun 2009
Posts: 3,227
Total Cats: 1,707
From: Istanbul, Turkey
Whoa, almost a month since my last post on this thread... I need to get on with this thing.
So, since I said one subject at a time, let's get into the oil trap..
After some reading (mostly here) I decided it would be best to change the way the engine is breathing. I mean, I no longer have a MAF, so, I don't need a closed circuit anymore, right?
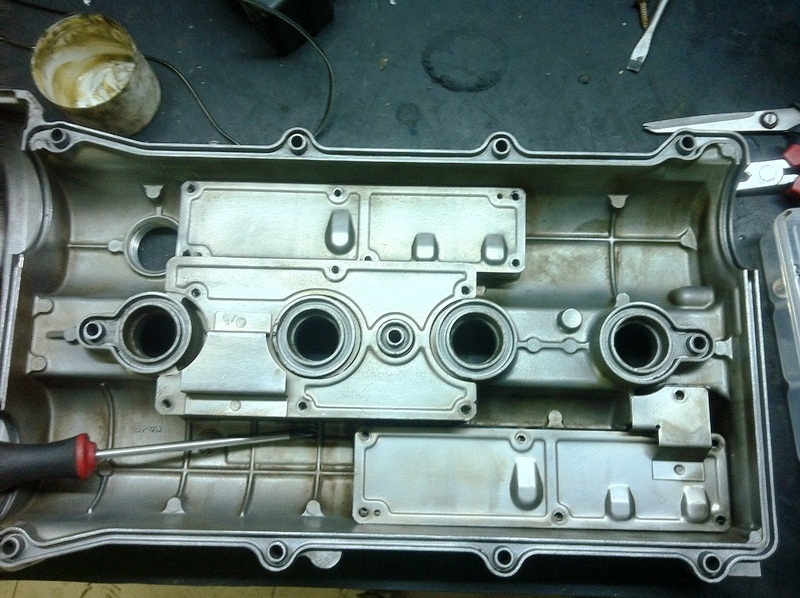
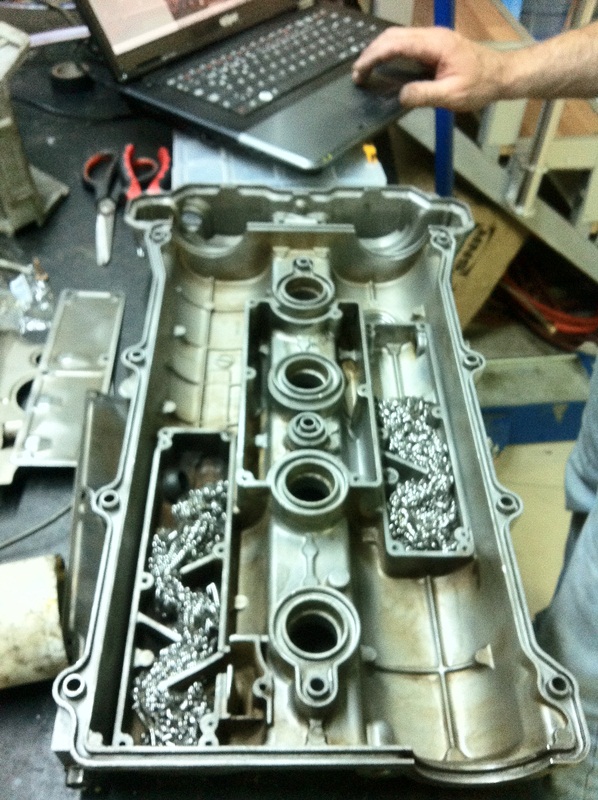
First order of business would be to modify the valve cover. Some say it is an immensely successful method to contain the oil vapors in the actual valve cover itself, and there are those who argue against it because it would not be cool enough there for the vapors to condense, but I just opted for the "steel wool" method, anyway. It is, after all, reversible.
I started by removing the covers and cleaning the passages inside the valve cover.
So, since I said one subject at a time, let's get into the oil trap..
After some reading (mostly here) I decided it would be best to change the way the engine is breathing. I mean, I no longer have a MAF, so, I don't need a closed circuit anymore, right?
First order of business would be to modify the valve cover. Some say it is an immensely successful method to contain the oil vapors in the actual valve cover itself, and there are those who argue against it because it would not be cool enough there for the vapors to condense, but I just opted for the "steel wool" method, anyway. It is, after all, reversible.
I started by removing the covers and cleaning the passages inside the valve cover.
Reply
0
0
Thread Starter
Joined: Jun 2009
Posts: 3,227
Total Cats: 1,707
From: Istanbul, Turkey
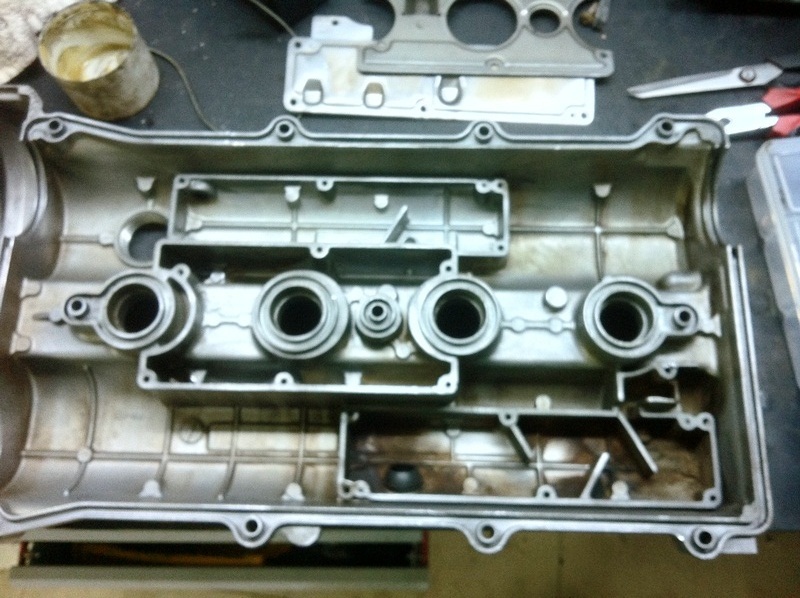
Then I drilled a small hole for the oil to drip back into the engine

And then came the steel wool
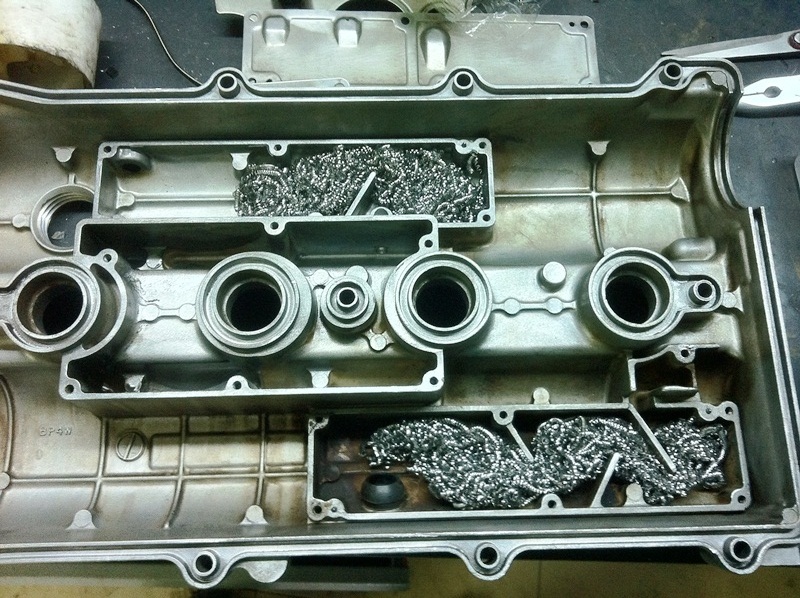
I took this pic before I wiped all the excess silicone
And then came the steel wool
I took this pic before I wiped all the excess silicone
Reply
0
0
Thread Starter
Joined: Jun 2009
Posts: 3,227
Total Cats: 1,707
From: Istanbul, Turkey
The next step was installing a checkvalve into the PCV hose, for obvious reasons.
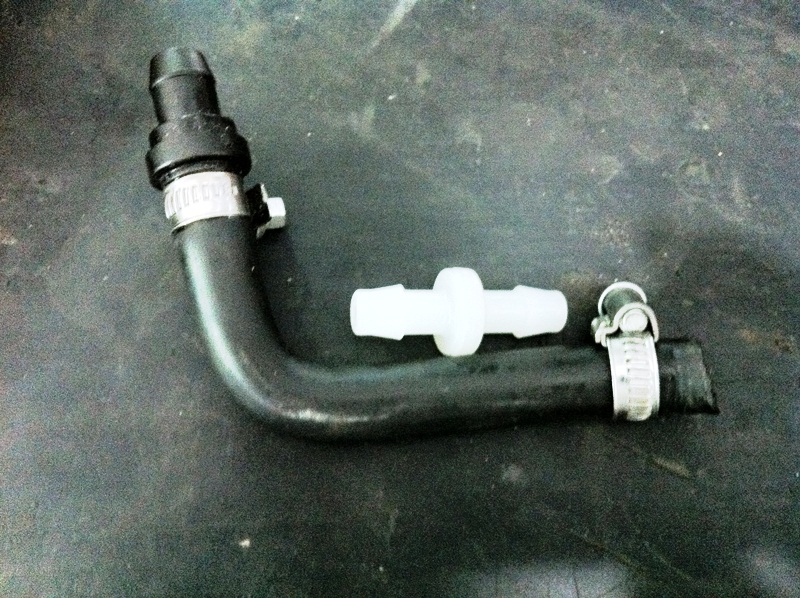
This pic is here to show you guys I can cut a hose all by myself:
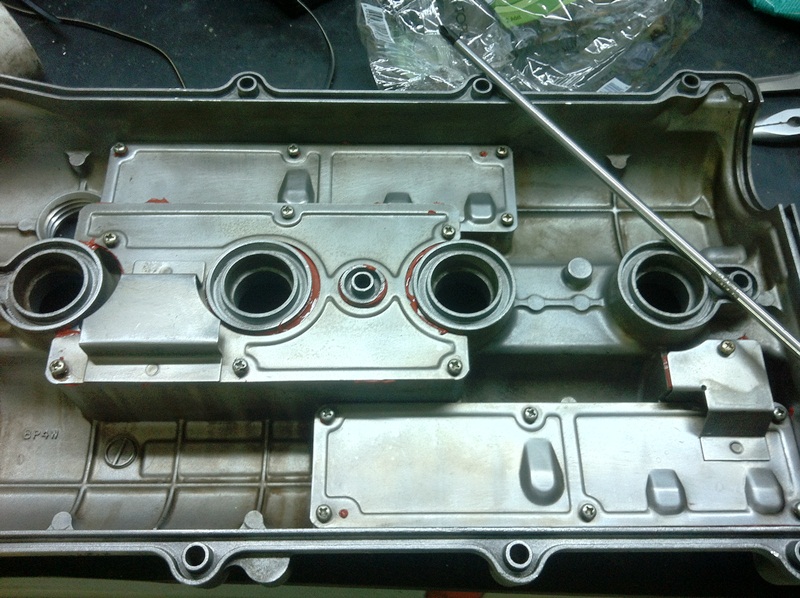
Then I vented the other side of the valve cover to the great outdoors, with a breather filter, and blocked the port on the SC throttle body. No more oil vapor in the intake tract.
(You can see it on the driver's side of the valve cover, sorry it's a shatty pic)
The results are nothing less than stellar so far. About 5000 Km, and not a drop of oil lost.
This pic is here to show you guys I can cut a hose all by myself:
Then I vented the other side of the valve cover to the great outdoors, with a breather filter, and blocked the port on the SC throttle body. No more oil vapor in the intake tract.
(You can see it on the driver's side of the valve cover, sorry it's a shatty pic)
The results are nothing less than stellar so far. About 5000 Km, and not a drop of oil lost.
Reply
0
0
Thread Starter
Joined: Jun 2009
Posts: 3,227
Total Cats: 1,707
From: Istanbul, Turkey
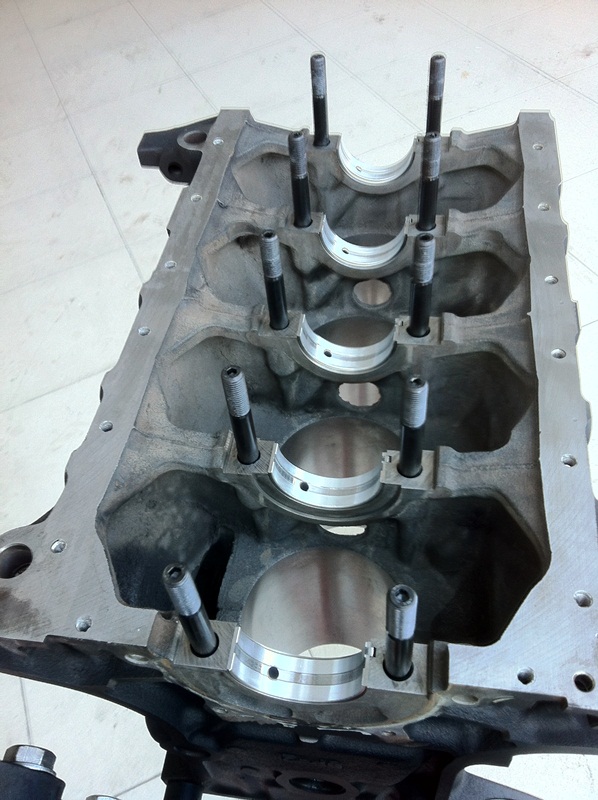
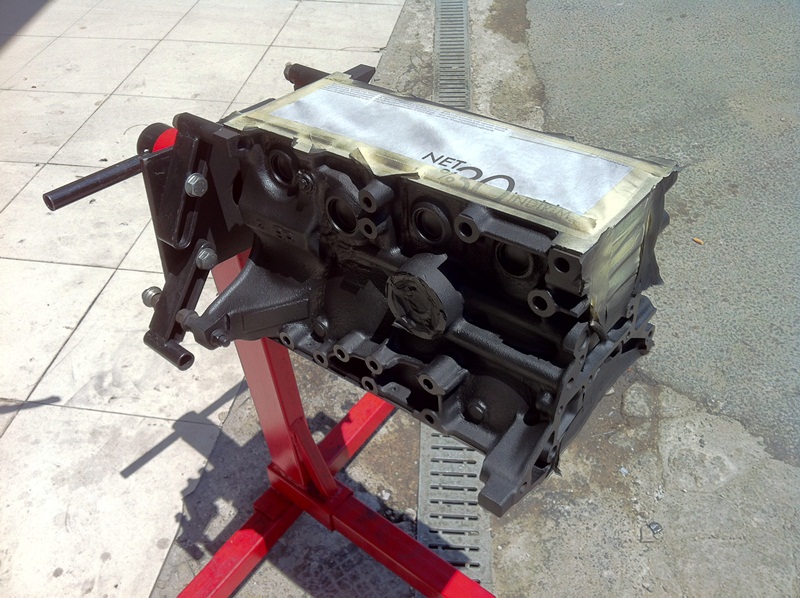
OK, let's get on with the actual engine:
I received the bored, honed, decked and checked block from the machine shop, and proceeded to prepare it for painting.
I know the crank is installed while I am wirebrushing the block, but that crank, journals and all surfaces were subjected to about four rounds of paranoid cleaning (including high pressure gasoline blasting) before I started final assembly)
I even rubbed the counterweights on the crank with gasoline soaked steel wool till it was as clean and shiny as it was on the day it was machined at the factory. Removing all the crap makes for a better - and cleaner running engine.
The result was not bad
Reply
0
0
Thread Starter
Joined: Jun 2009
Posts: 3,227
Total Cats: 1,707
From: Istanbul, Turkey
At some point during disassembling the engine, I called and spoke to BogusSVO to get some ideas. His contribution to this forum goes without saying.
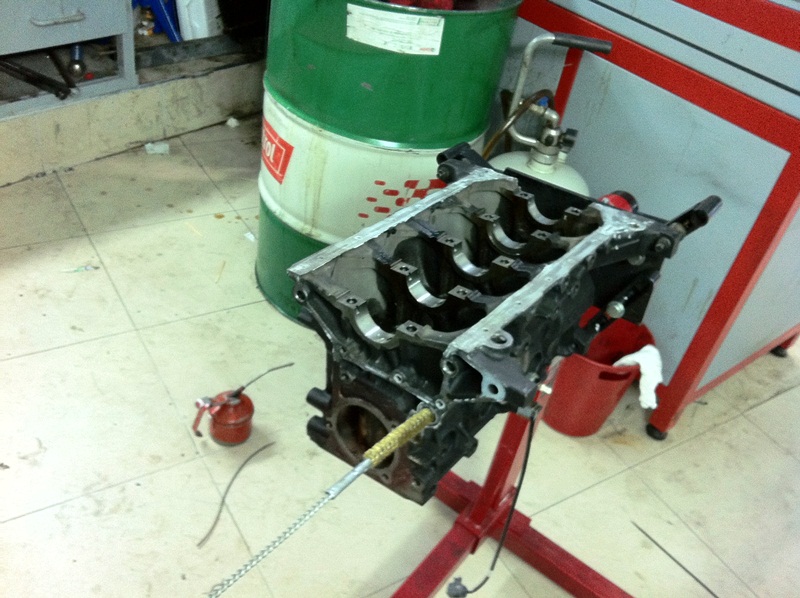
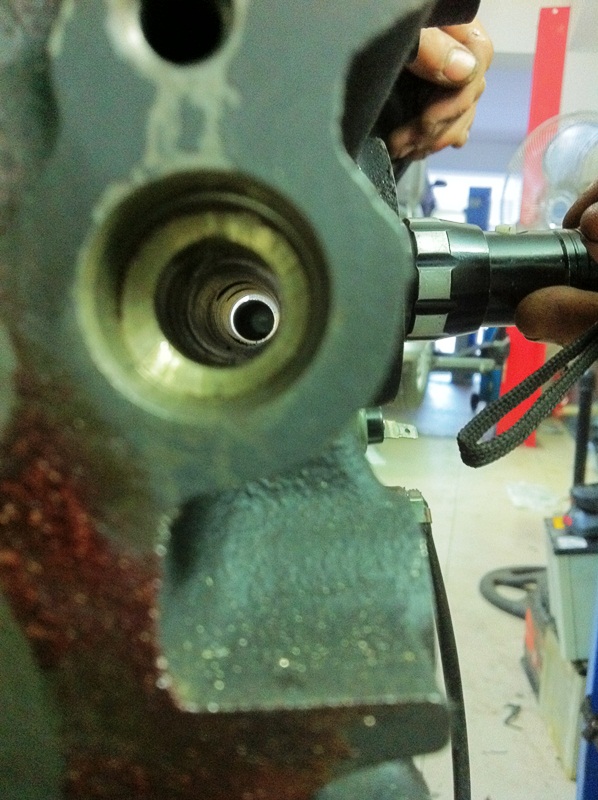
He advised I should REALLY clean the block, meaning, I should pop the plugs on the oil gallery and go at it..
That seemed like a good idea, so I went at it.
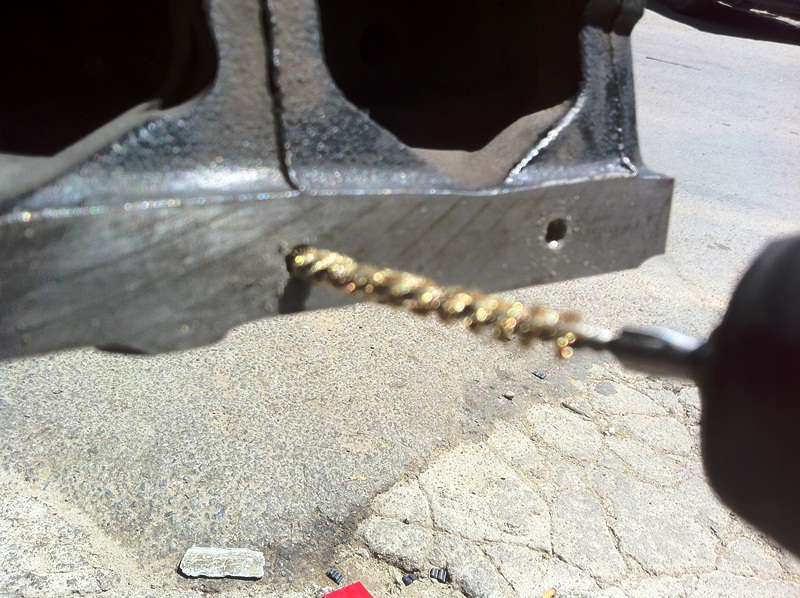
I drilled one of the factory installed brass plugs, threaded a hole in it, screwed a bolt in there and used a sliding hammer to convince the plug out. The other one was easy: a long steel bar, and a hammer popped it out.
He advised I should REALLY clean the block, meaning, I should pop the plugs on the oil gallery and go at it..
That seemed like a good idea, so I went at it.
I drilled one of the factory installed brass plugs, threaded a hole in it, screwed a bolt in there and used a sliding hammer to convince the plug out. The other one was easy: a long steel bar, and a hammer popped it out.
Reply
0
0
Thread Starter
Joined: Jun 2009
Posts: 3,227
Total Cats: 1,707
From: Istanbul, Turkey
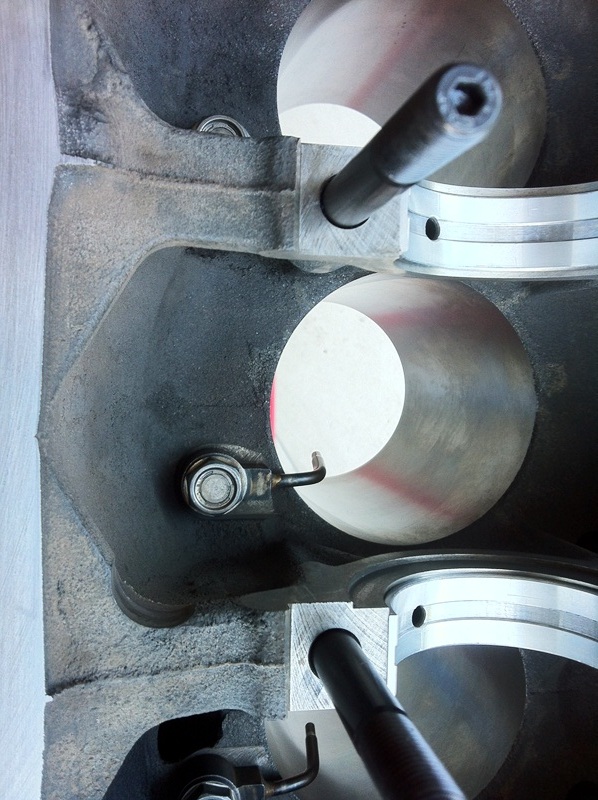
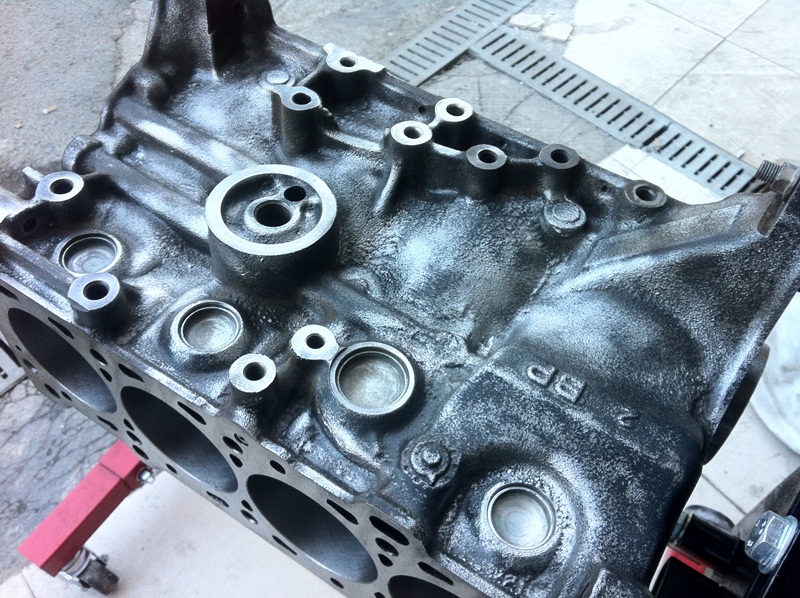
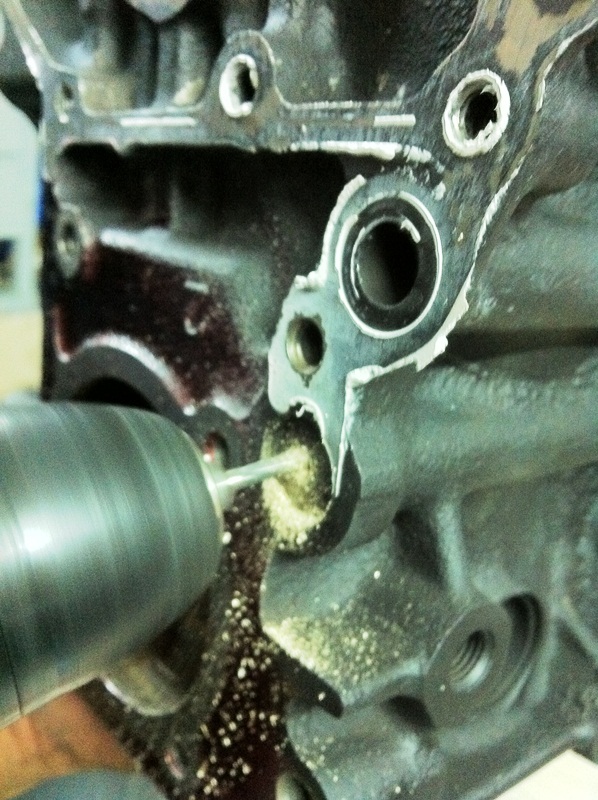
I used a drill and a soft wire brush with a long extension to clean all the oil passages:
Squeaky clean:
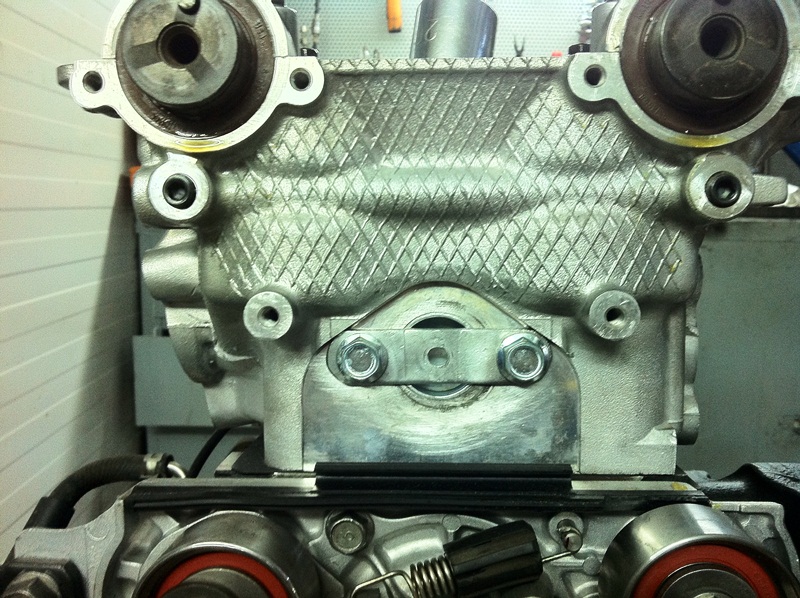
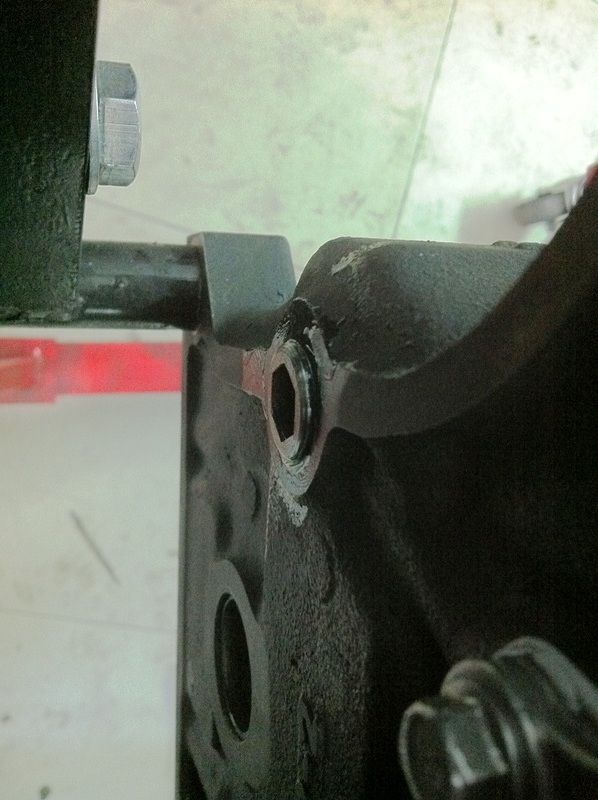
The solution for plugging the main oil gallery was threading the openings, and using threaded plugs, with locktite and liberal amounts of grey silicone:

This pic was taken before I tightened the plug. I did not leave it loose like that.
Squeaky clean:
The solution for plugging the main oil gallery was threading the openings, and using threaded plugs, with locktite and liberal amounts of grey silicone:
This pic was taken before I tightened the plug. I did not leave it loose like that.
Reply
0
0
Thread Starter
Joined: Jun 2009
Posts: 3,227
Total Cats: 1,707
From: Istanbul, Turkey
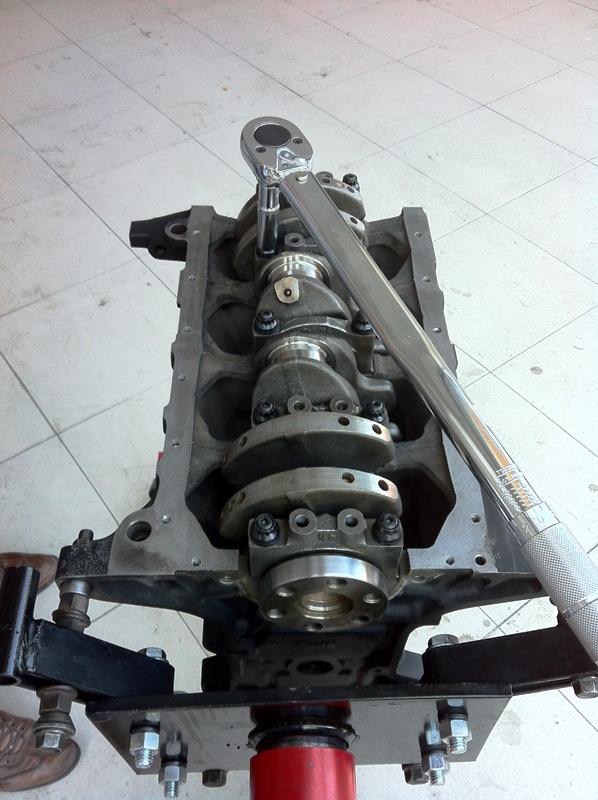
So it was time to assemble the engine...
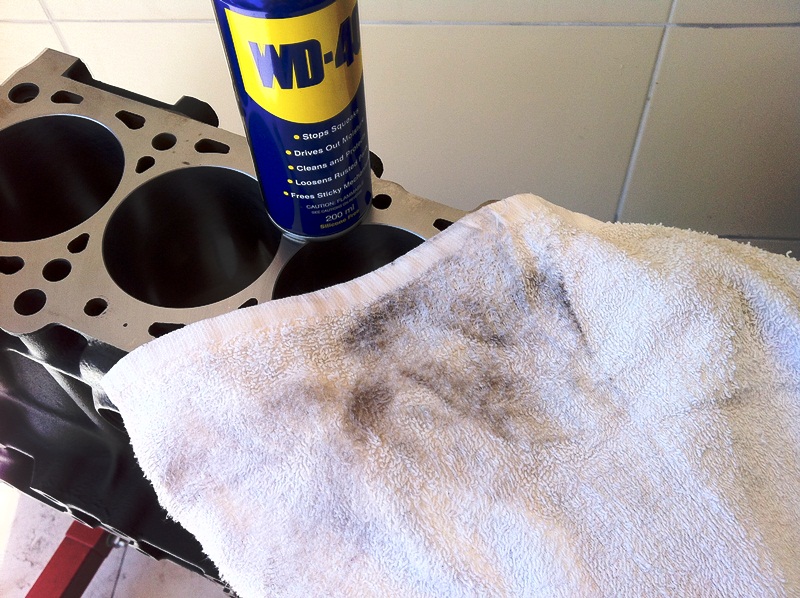
After about four rounds of cleaning, I did the WD-40 thing BogusSVO had described in one of his threads.
Here is how much crap is left on the cylinder walls, no matter how much you bust your ***.
That was a perfectly clean, brand new cotton rag, BTW.
I went three rounds with that, too.
After about four rounds of cleaning, I did the WD-40 thing BogusSVO had described in one of his threads.
Here is how much crap is left on the cylinder walls, no matter how much you bust your ***.
That was a perfectly clean, brand new cotton rag, BTW.
I went three rounds with that, too.
Reply
0
0
Thread Starter
Joined: Jun 2009
Posts: 3,227
Total Cats: 1,707
From: Istanbul, Turkey
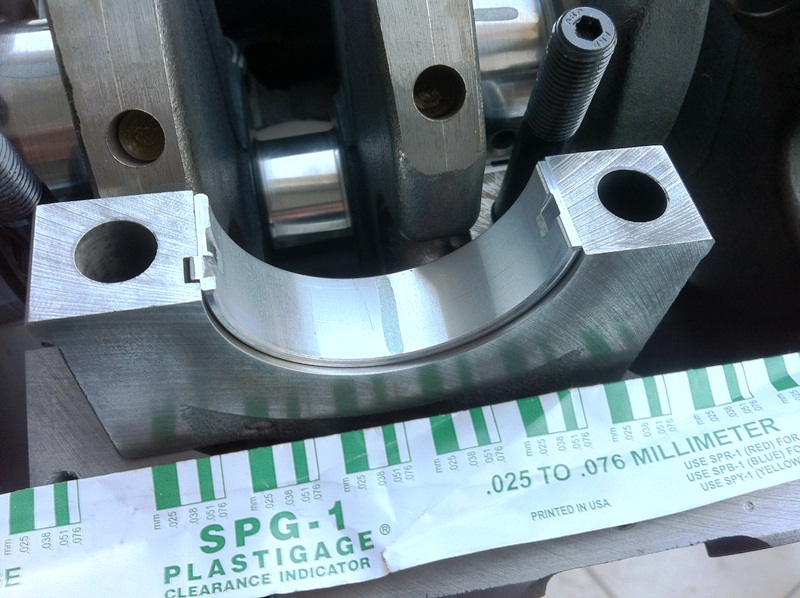
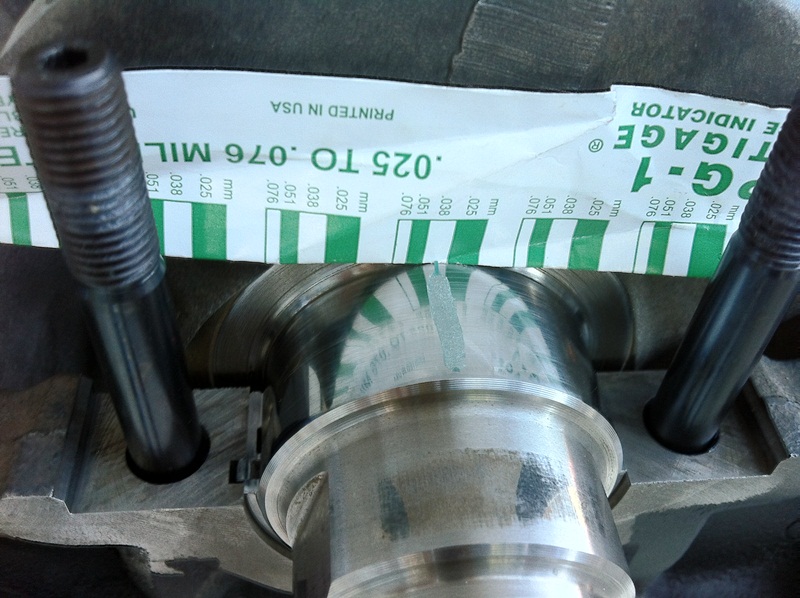
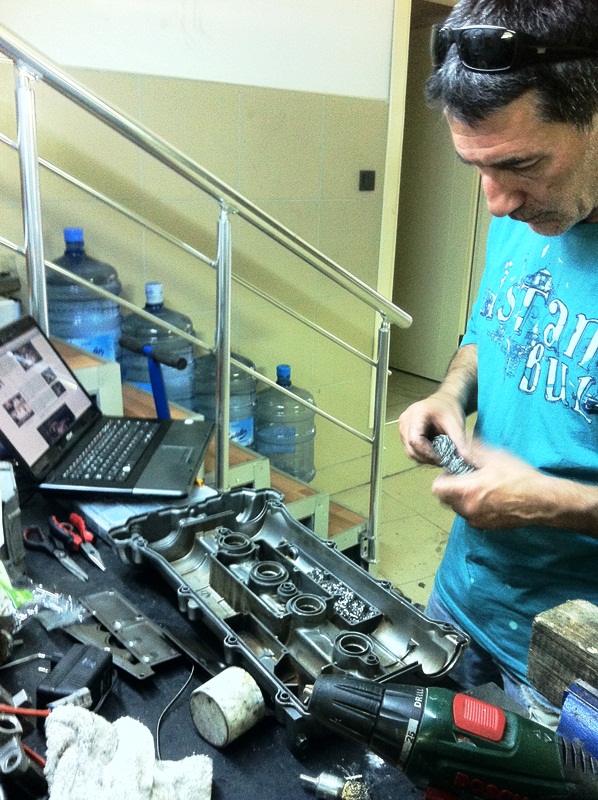
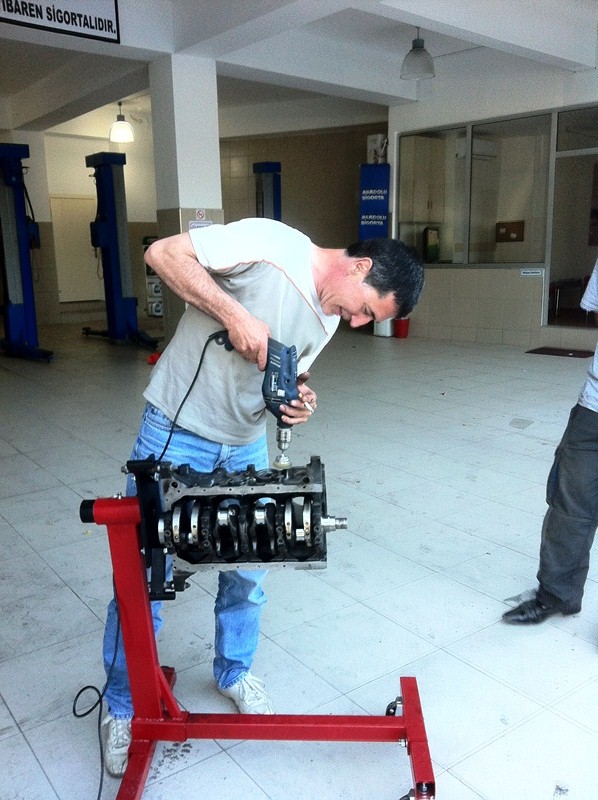
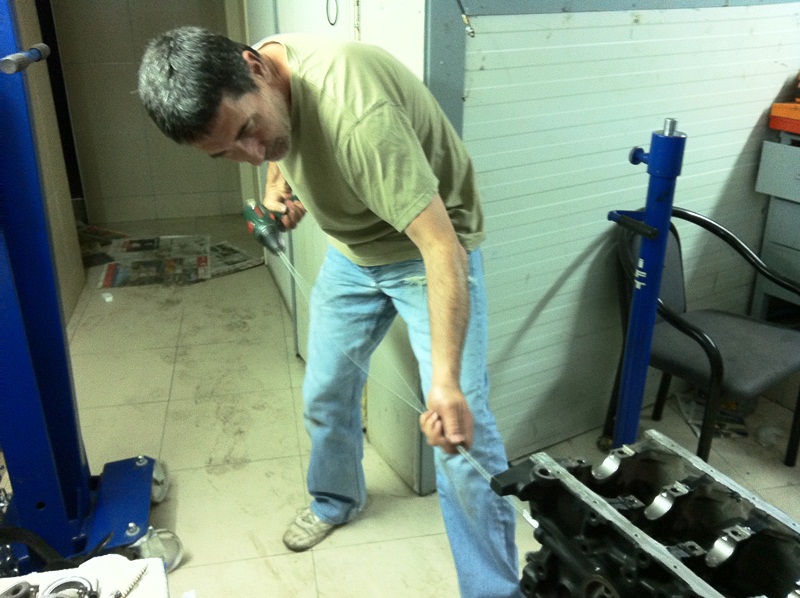
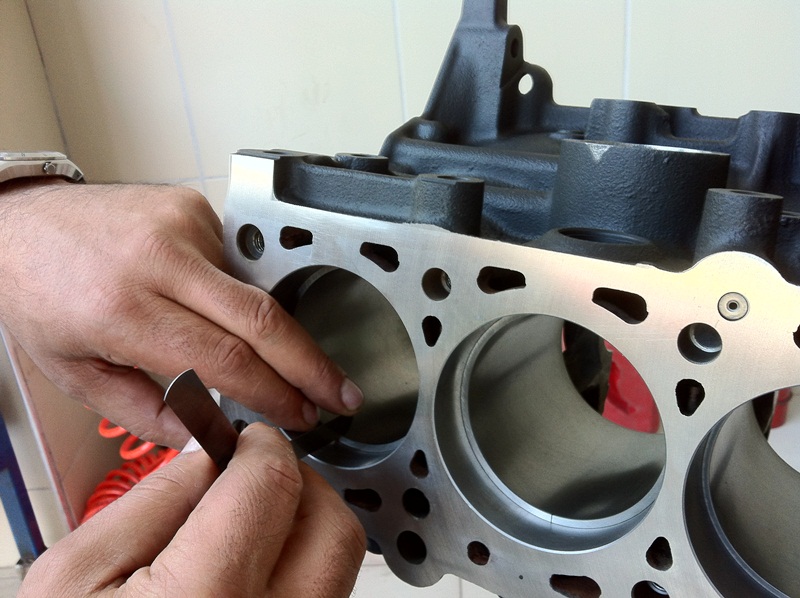
No grinding was needed for the rings. All ring gaps were perfectly to spec. I used JE's spec sheet for that.
(That's the owner of the shop double checking while I take a picture)
(That's the owner of the shop double checking while I take a picture)
Reply
0
0