
electroCrunch's 99 NB - streetable track toy


Thread Starter
Junior Member
Joined: Mar 2016
Posts: 113
Total Cats: 55
From: Phoenix AZ
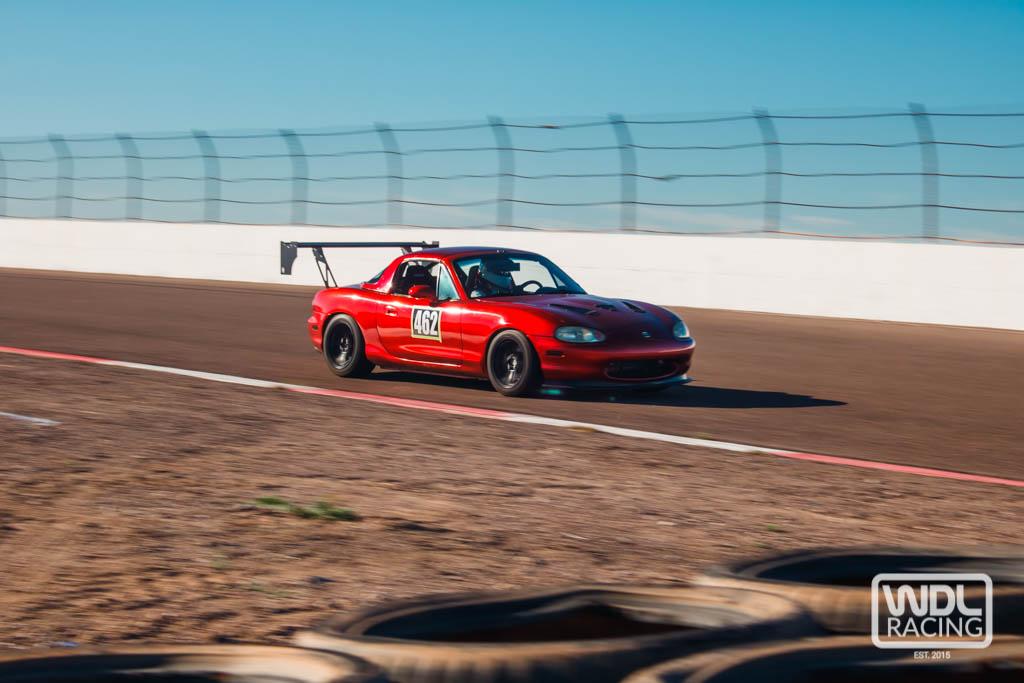
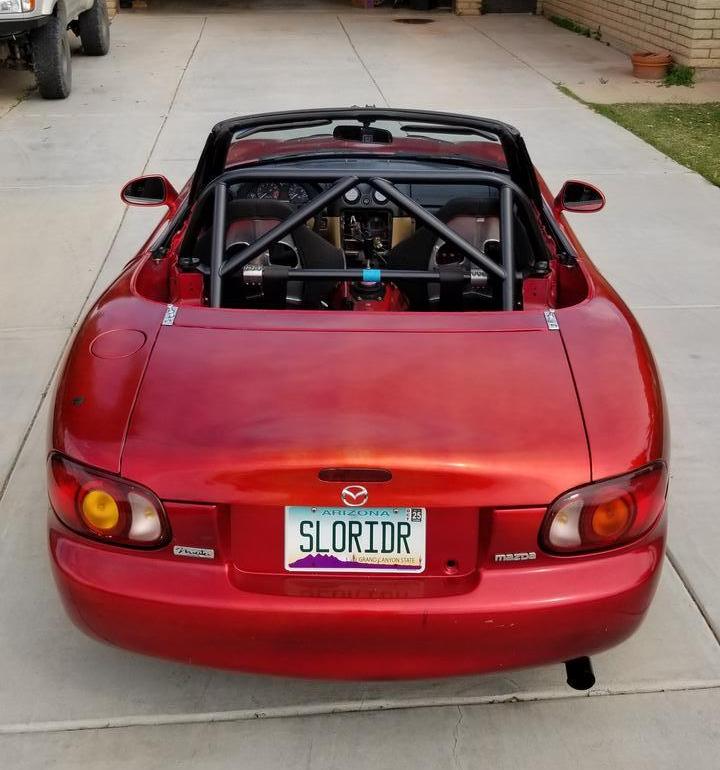
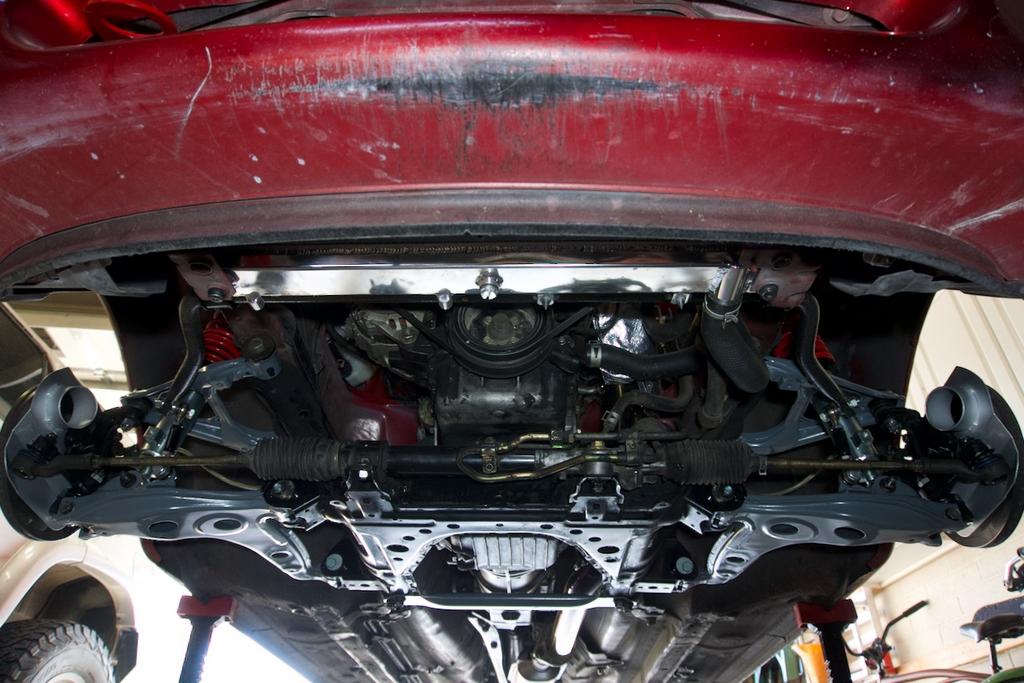
Hi, I'm James. I bought my 1999 NB in 2014 to replace an even slower VW GTI and get serious about my track time. It had approximately 17X,XXX miles on it and had a hard top, Torsen II LSD, and an AZ-only history with no rust. Other than that, it was kind of a beater that some shade tree mechanic tried to make into a wanna be viper lol. But the platform was solid and that's what I was looking for at that point.
My goals with the car have shifted over time. I’ve arrived at wanting this to be a streetable project/toy car, that I can take to the track on a regular basis and perform reliably and consistently in order to time myself and continue to grow and develop my skills. I may even participate in Time Attack for the tracks that are convenient for me to attend.
A maintained build thread has helped me keep track of everything done with my other project car (4Runner), so hoping this will do the same here to act as an archive and may even help another noob in the future. I have another build thread on the other popular miata forum, but I can't update/edit the first post to keep it cleanly updated, so here I am at the superior forum now.
I likely missed a few things below with the build and will be adding as new work is done and parts installed. I have a lot of parts on the shelf still, including some fun interior bits to make it more street friendly.:
Current photo as of 3/13/2022:
Wheels & Tires:
Street:
Suspension:
Brakes:
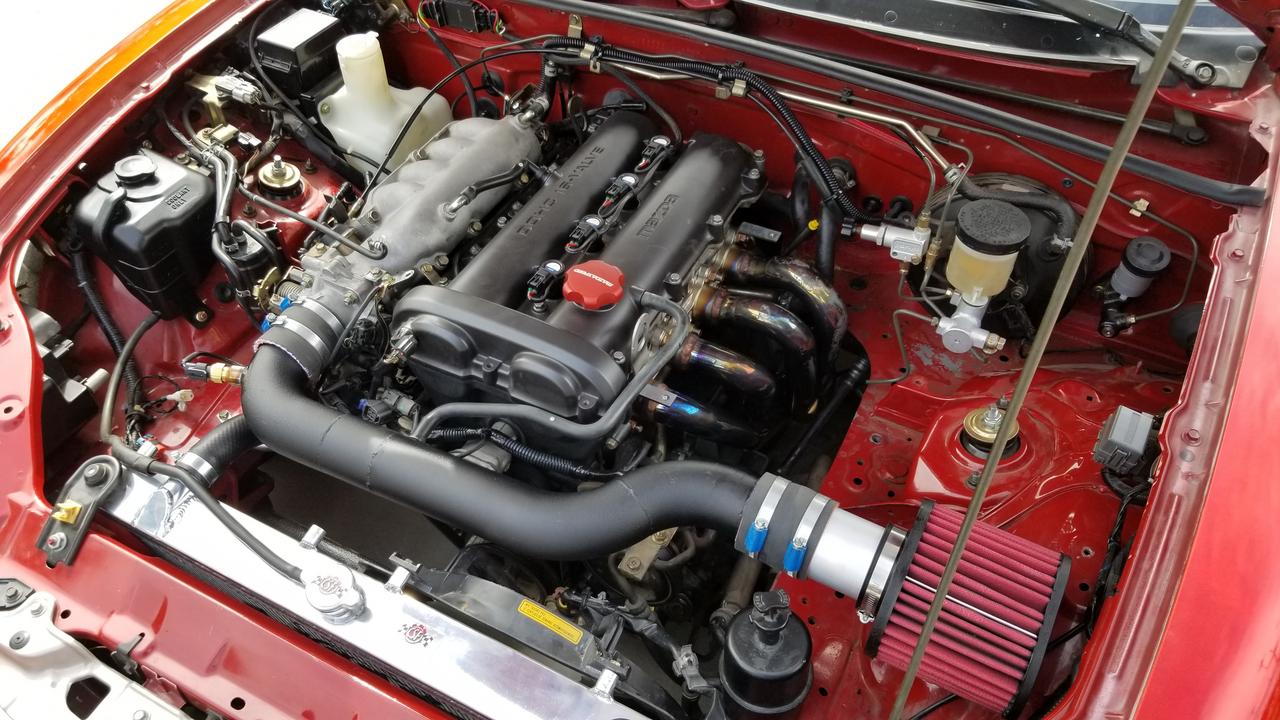
Engine: mileage @ ~17X,xxx miles (unverified lol)
Transmission: @ ~17Xk (unverified lol)
Chassis:
Drivetrain:
Exterior:
Aerodynamics:
Interior:
Electrical:
Lighting:
Deletes:
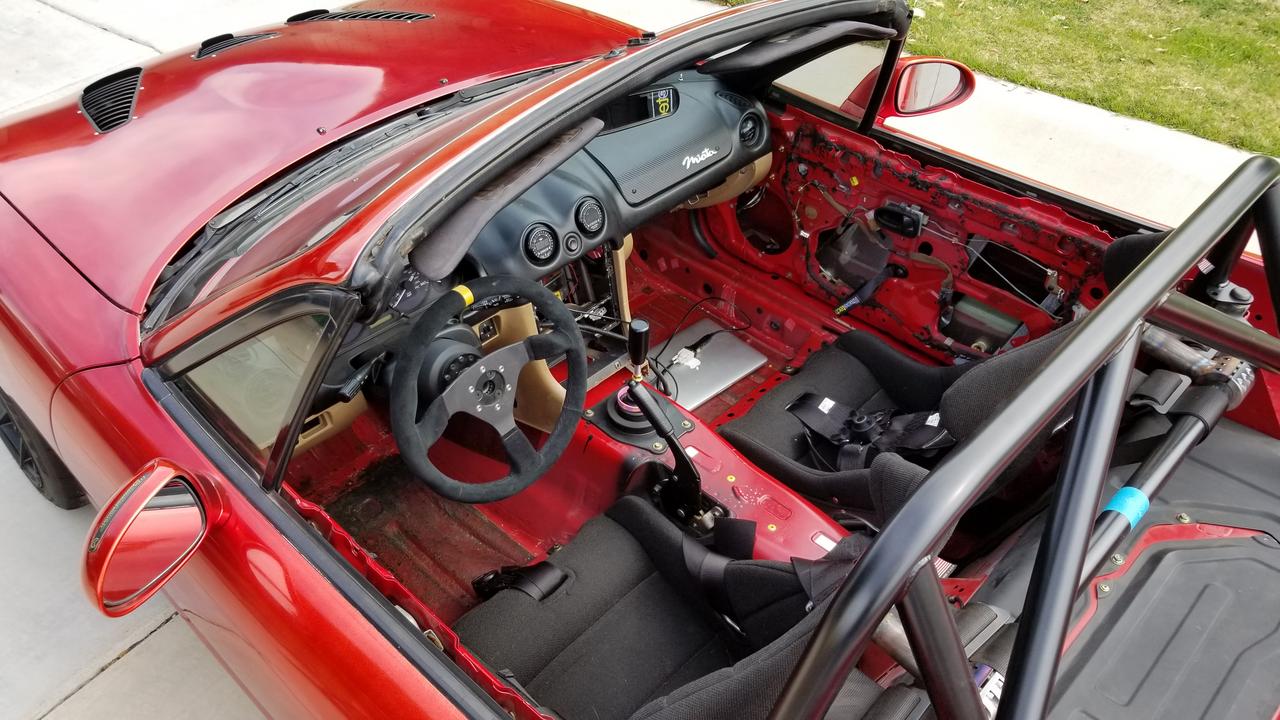
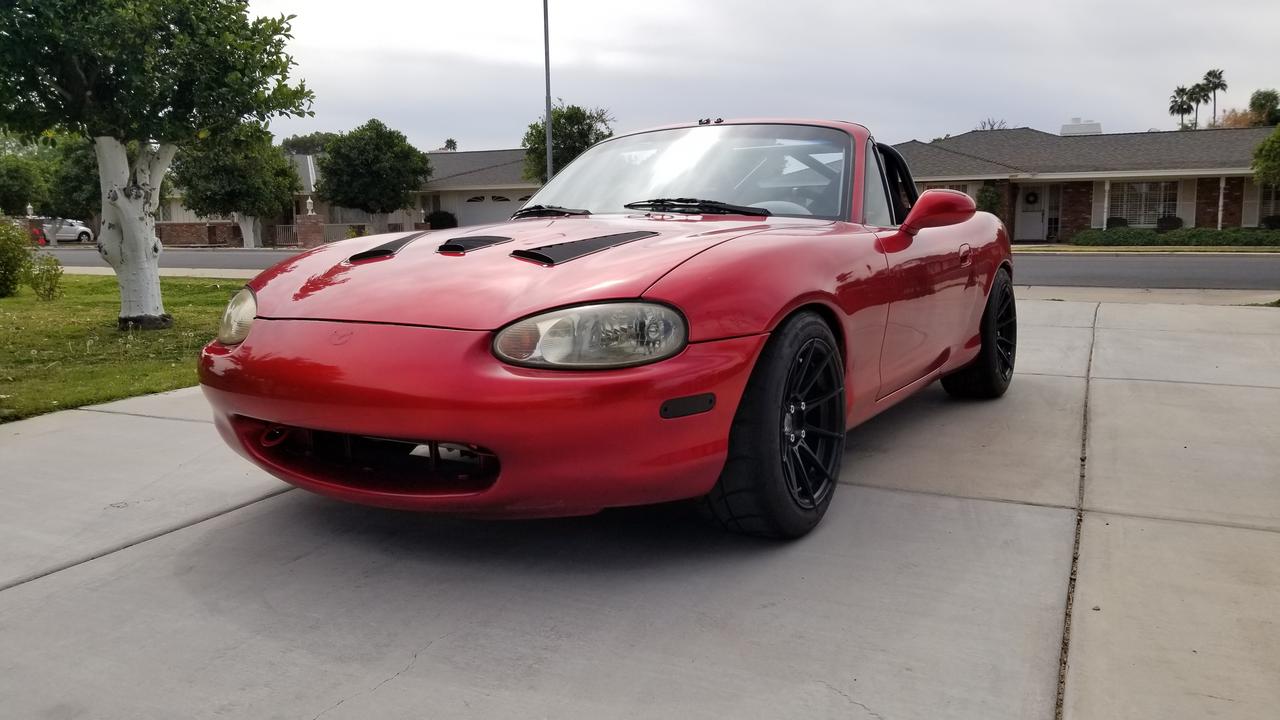
(*older photos below at time of the original post March 2021)


My goals with the car have shifted over time. I’ve arrived at wanting this to be a streetable project/toy car, that I can take to the track on a regular basis and perform reliably and consistently in order to time myself and continue to grow and develop my skills. I may even participate in Time Attack for the tracks that are convenient for me to attend.
A maintained build thread has helped me keep track of everything done with my other project car (4Runner), so hoping this will do the same here to act as an archive and may even help another noob in the future. I have another build thread on the other popular miata forum, but I can't update/edit the first post to keep it cleanly updated, so here I am at the superior forum now.
I likely missed a few things below with the build and will be adding as new work is done and parts installed. I have a lot of parts on the shelf still, including some fun interior bits to make it more street friendly.:
Current photo as of 3/13/2022:
Wheels & Tires:
Street:
- Advanti Racing Storm S1, Black: 15x9, +35 offset
- 949 Racing Forged alloy lugs, Silver
- Nitto NT01: 225/45R15
+3mm spacers (4 corners)
- Advanti Racing Storm S1, Dark Gray: 15x9, +35 offset
- 949 Racing Forged alloy lugs, Black
- Nankang AR-1's: 225/45R15
+3mm spacers (4 corners)
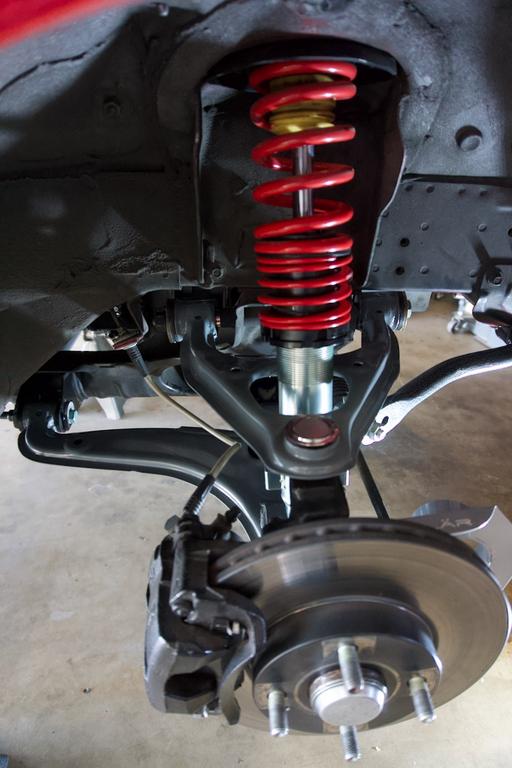
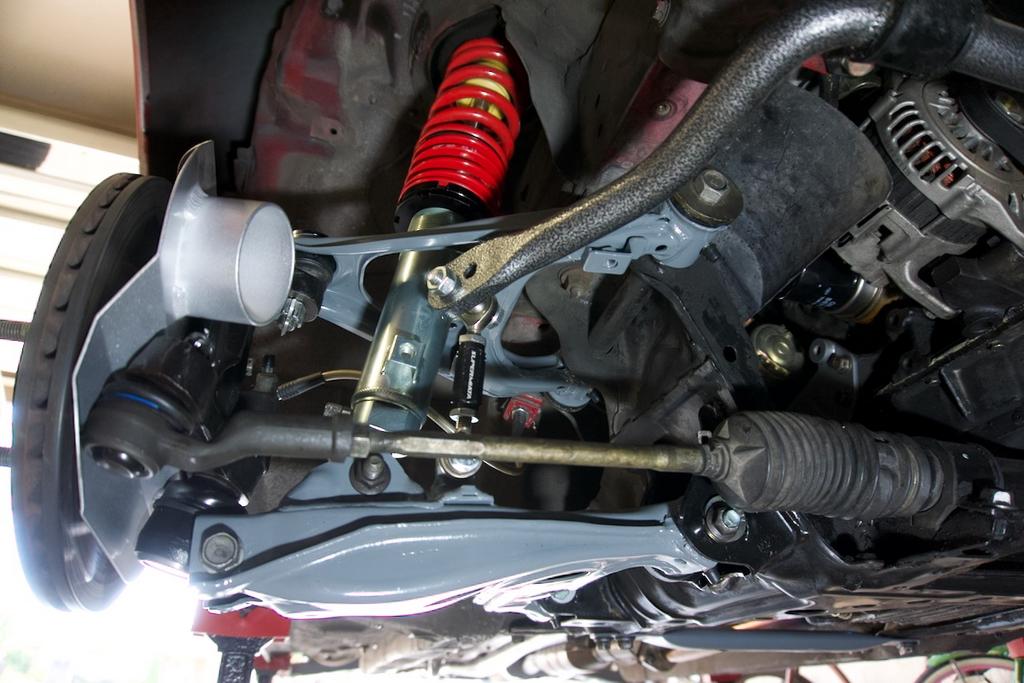
Suspension:
- Coilovers: FM V-Maxx XXtreme, TRACK
- Sway bars: FM front & rear adjustable bars
- Sway end links: Front 949 adjustable heim joint, Rear FM adjustable (booted version)
- AWR Heavy Duty Swap Bar Mounts
- Control arms: OEM rebuilt with Energy Suspension polyurethane bushings, grease zerks installed at all pivot joints
- SuperMiata Extended Lower Ball Joints
Brakes:
- Rotors:
- Front: Centric blank "ND Brembo" 11"
- Rear: Centric premium blank 10.9" "sport" rotor (via GWR caliper adapter bracket)
- Calipers:
- Front: Wilwood Dynalite
- Rear: Reman Centric NB1
- Pads:
- Front - G-Loc R8
- Rear - G-Loc R8
- Lines: Front: SuperMiata stainless steel braided, Rear: Technafit stainless steel braided
- Wilwood bias proportioning valve
- Singular Motorsports 2.5" brake shield (+ ducting/inlet kit waiting to be installed)
Engine: mileage @ ~17X,xxx miles (unverified lol)
- ECU: MS3Pro_Plug-n-Play (mounted with Singular Motorsports ECU bracket)
- Internals: OEM original unopened motor
- BP5A intake camshaft
- Mounts: AWR - poly 70 durometer
- Air intake: BEGI Cool Air Intake + DIY heatshield
- Filter: AEM 21-2127DK Universal DryFlow
- Exhaust:
- Header: Racing Beat 4:1, stainless wideband O2 bung welded @ 22 inches from collector
- Midpipe: Racing Beat - Miata Race Connecting Pipe
- Muffler: Racing Beat - Single Tip Miata Exhaust
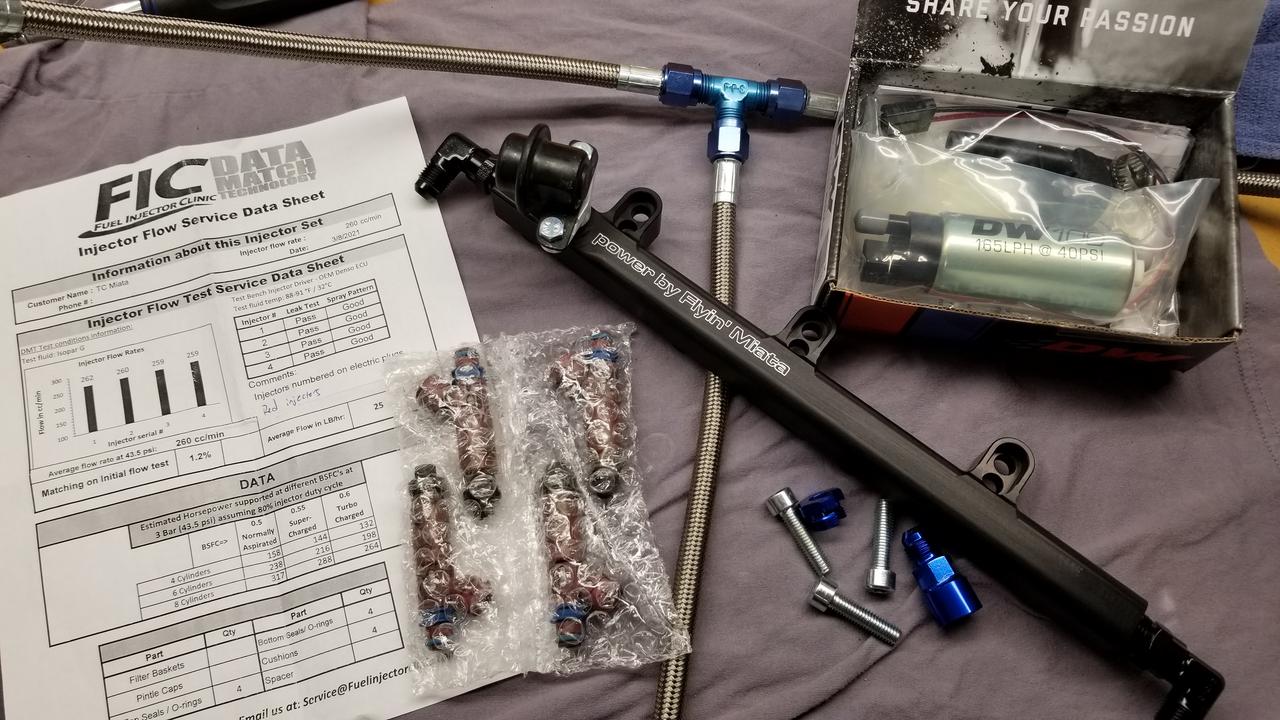
- Fuel injectors: OEM - Fuel Injectors Clinic flow/tested/matched 99 NB injectors
- Fuel pump: DW 100 (165LPH @ 40psi, ~120 LPH @ 60psi)
- Ignition: FlowForce "R8" (Bosch) Coil-On-Plug kit
- Sensors:
- Innovate MTX-L Wideband O2 sensor, gauge
- Innovate MTX-D 3913 Oil temp/pressure sensor, gauge
- GM IAT sensor, open element
- GlowShift sandwich plate oil filter adapter (for sensors)
- Cooling:
- CSF Miata 42mm Two Row Radiator
- Supermiata Max coolant reroute
- Supermiata 36-2 trigger wheel
Transmission: @ ~17Xk (unverified lol)
- OEM 5-speed original
- Cobalt Sport Shifter Kit
- Beatrush shifter collar
- resealed w/ OEM seals
- OEM shift boots (replaced)
- Exedy Clutch Master Cylinder & braided lines
- FM Clutch/Flywheel Happy Meal:
- FM Level 1 Clutch (@ 318 ft. lbs.)
- 10.3 lb. flywheel
- Heavy duty release bearing
Chassis:
- Steering: Depowered (properly) original rack (FM method + welded in put shaft)
- Energy Suspension polyurethane bushings
- OTRE: Supermiata forged
Drivetrain:
- Differential: Torsen II, new OEM seals + OEM breather
- GarageStar delrin diff mount
- Axles: CARMAX (new)
Exterior:
- Singular Motorsports hood louvers
- OEM (
Fiberglass?)hard top
Aerodynamics:
- Nine Live Racing 64" Big ****
- CFD V2 endplates
- LRB Full Aero Under-tray
- Ikon Morsports Bumper Lip
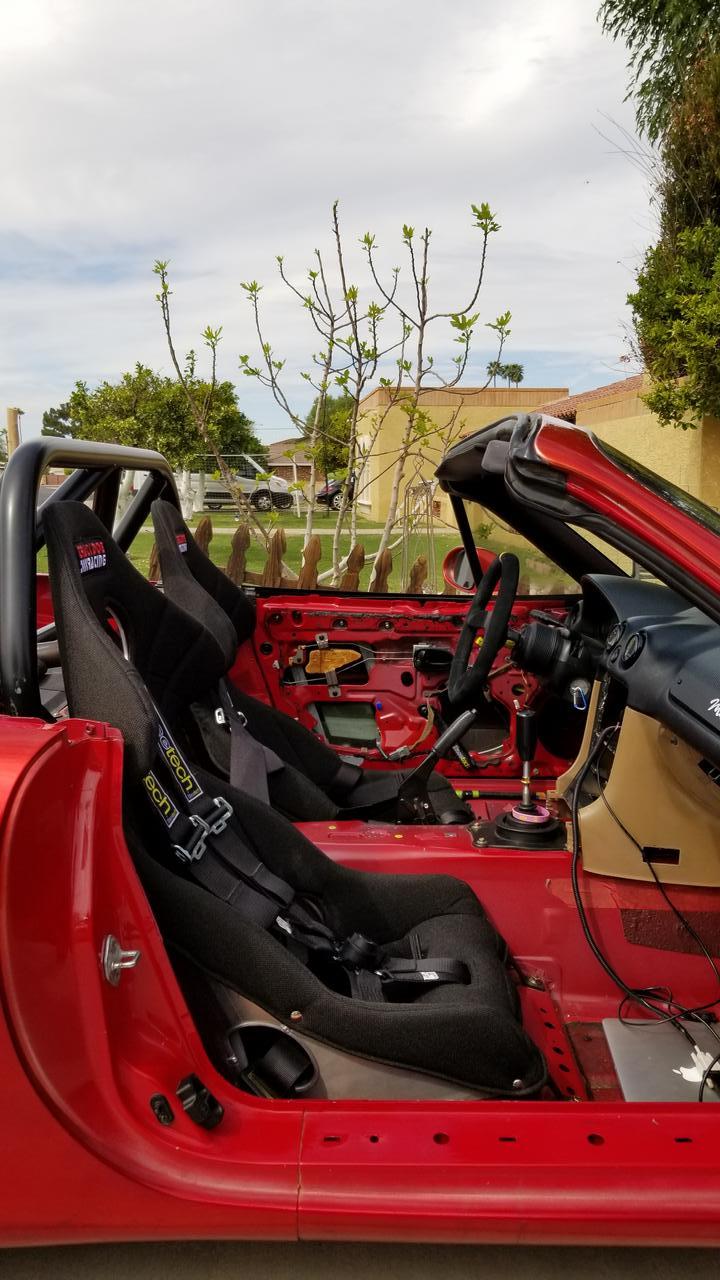
Interior:
- Seats:
- Driver - UltraShield Rally Sport 15" with TDR Specs
- Passenger - UltraShield Rally Sport 16" with TDR Specs
- Seat Rails: Driver - TDR LOW, Passenger - TDR
- Harness: Racetech Pro 6-point
- Roll bar: Hard Dog M2 Hard Core Hardtop w/ DOUBLE Diagonal
- Harness bar: Hard Dog
- Steering wheel: Racetech Flat Suede 350mm (I love this wheel)
- Works Bell 75mm hub adapter
- Quick release: LTB Bolt-On QR1
- Doors:
- LRB aluminum door cards
- FM solid door bushings
- Racetech door pulls
- Center dash display & gauges:
- 7 inch touchscreen
- Raspberry Pi 4 - 8GB, RaspberryPi OS
- TunerStudio (Linux)
- AIM Solo 2 (hardwired)
- GoPro Hero4 (hardwired via switched female USB-A)
Electrical:
- Starter battery: Westco 12V31M Miata Battery
- 12v 20a fused accessory circuit
- 5v 10a fused dedicated circuit
Lighting:
- OEM headlight housing, LED 6000k 40wx2 @ 2000lx2 (high beam)
- LEDs: Alla Lighting - turn signal, driving, tail, brake, reverse, overhead-dome
Deletes:
- Air Conditioning system
- A/C engine fan
- Air bags: driver + passenger
- Trunk lock
- EGR
- MAF
- OEM interior (keeping OEM dash area)
- Radio, amplifier, speakers (Bose system)
- Narrowband OE sensors
- Power Steering
(*older photos below at time of the original post March 2021)
Last edited by electroCrunch; Mar 24, 2022 at 04:18 PM.
Reply
 2
2

2


Noice.
I would consider ditching the Fab 9 cop kit and going with LS coils or Smart Coils though, I used mine for one track day before they started to melt and act up and I just threw them away. Fab 9 was also no help, they just ghost you as soon as it sounds like you're not spending more money with them.
I would consider ditching the Fab 9 cop kit and going with LS coils or Smart Coils though, I used mine for one track day before they started to melt and act up and I just threw them away. Fab 9 was also no help, they just ghost you as soon as it sounds like you're not spending more money with them.
Reply
1
1
Thread Starter
Junior Member
Joined: Mar 2016
Posts: 113
Total Cats: 55
From: Phoenix AZ
Noice.
I would consider ditching the Fab 9 cop kit and going with LS coils or Smart Coils though, I used mine for one track day before they started to melt and act up and I just threw them away. Fab 9 was also no help, they just ghost you as soon as it sounds like you're not spending more money with them.
I would consider ditching the Fab 9 cop kit and going with LS coils or Smart Coils though, I used mine for one track day before they started to melt and act up and I just threw them away. Fab 9 was also no help, they just ghost you as soon as it sounds like you're not spending more money with them.
Oh man, I was just lurking through your build thread and saw your poor experience with the kit. I'm disappointed to hear of that and regret my purchase. I don't race my miata, but I do have about maybe 12-ish HPDE sessions on them and they haven't failed yet in any noticeable way. I heard Fab9 had different versions of this, but no idea which is which or if it evens matters.
I pulled the coils/plugs a couple months ago to check compression (~170 psi on each cylinder, not bad for an old motor) and noticed the o-ring was starting to melt into the shaft of the coils (some coils worse than others). It wan't too bad, but I could start to see deforming of the coil itself where it met the o-ring. It's too much deterioration for the limited hours/miles they've been in use. I think I'm going to ride these out since I have another set of plugs on the shelf for them, and then after that I'll have to figure something else out. I just hate spending money on basically the same thing again. I'm also the only breadwinner in the family so budgeting this hobby is real for me at this point in life
 . I bought the kit to replace a OEM coil pack that died on track thinking it would be a good replacement for my stock ECU at the time (now I'm on MS so more options), but I'm definitely not confident about relying on them.
I bought some silicone o-rings I'm going to try (instead of the rubber) to see if that helps add some life, maybe a slightly thinner diameter ring won't put so much pressure on the coil itself. I was thinking a super thin layer of aluminum tape wrapped around the coil and between the o-ring might help distribute the heat slightly better too, but that's a long shot. But long term goal will be to go a different route now that these seem to be questionable. The FlowForce LS coil kit looks awfully tempting.
Reply
0
0
Thread Starter
Junior Member
Joined: Mar 2016
Posts: 113
Total Cats: 55
From: Phoenix AZ
I'm working on getting these goodies installed, but am hitting some likely noob-related roadblocks.
The drama...
I bought this fuel rail back when I was a total noob and didn't realize this would do me little to no good at my power levels. But it blings. So in 2016 I bought it, and installed it, and damn things leaked like real bad, including the predrilled hole to accept a damper (I know it's the crappy rail's fault because the replaced fuel damper is brand new OEM). So I threw it in the parts bin, and then I got a recall notice email from FM saying these things rupture and leak. LOL. So they sent me a replacement and I never ever installed it. Fast forward to now and I was going to install the new-to-me FIC injectors, and decided to give the new fuel rail a try. Mistakes.
NEW replacement unit LEFT, original faulty unit RIGHT
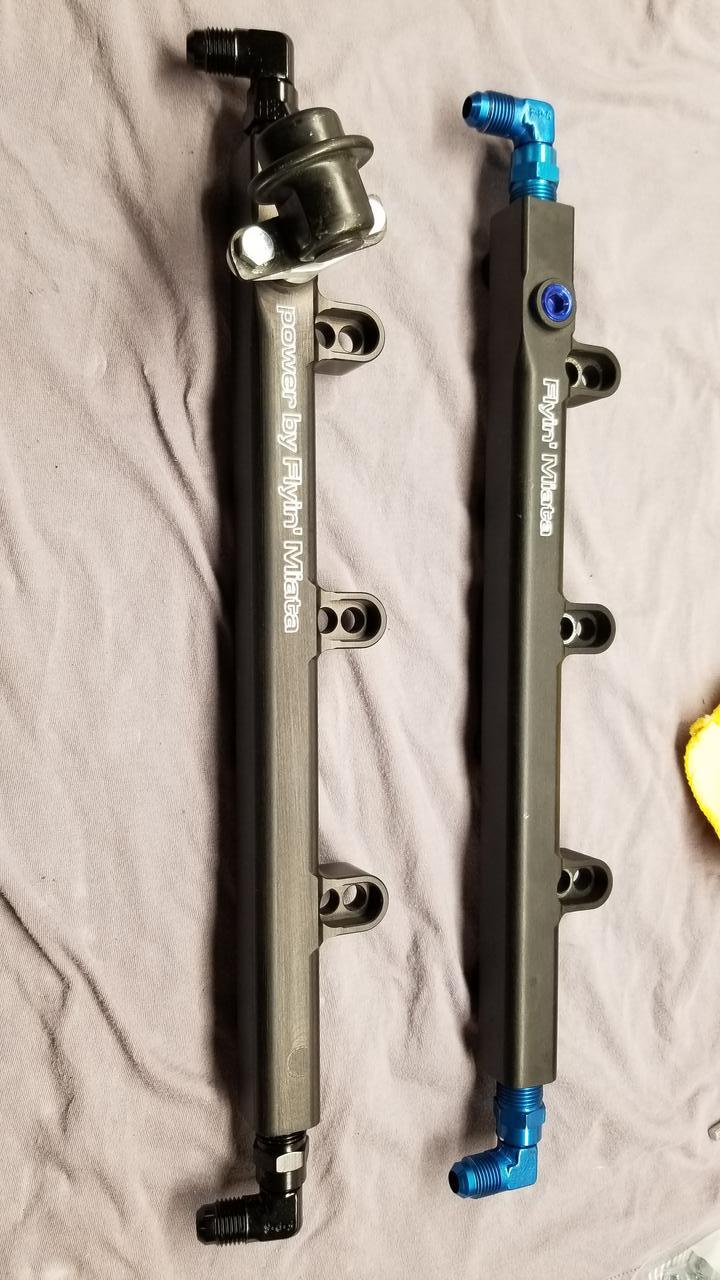
I'm currently plugging leak after leak with the rail. The inserts for the injectors/o-rings seems out of spec, in that 2 of the 4 ports damaged the new injector o-rings, which I had to get replacements for. After that was fixed, now the damper NPT threads leaked, so I had to get it bubba tight to seal (seemed too tight for aluminum, but oh well). Now, the 90 degree elbows are the source of the leaks, so I've cleaned those threads up and reapplied a ton of thread paste to compensate, and are now curing whilst Bubba tight. Will check for leaks after 48 hours of cure time to be safe. If I continue to have issues, I'll uninstall and turn this thing into a lamp or something more functional.
It does look cool though
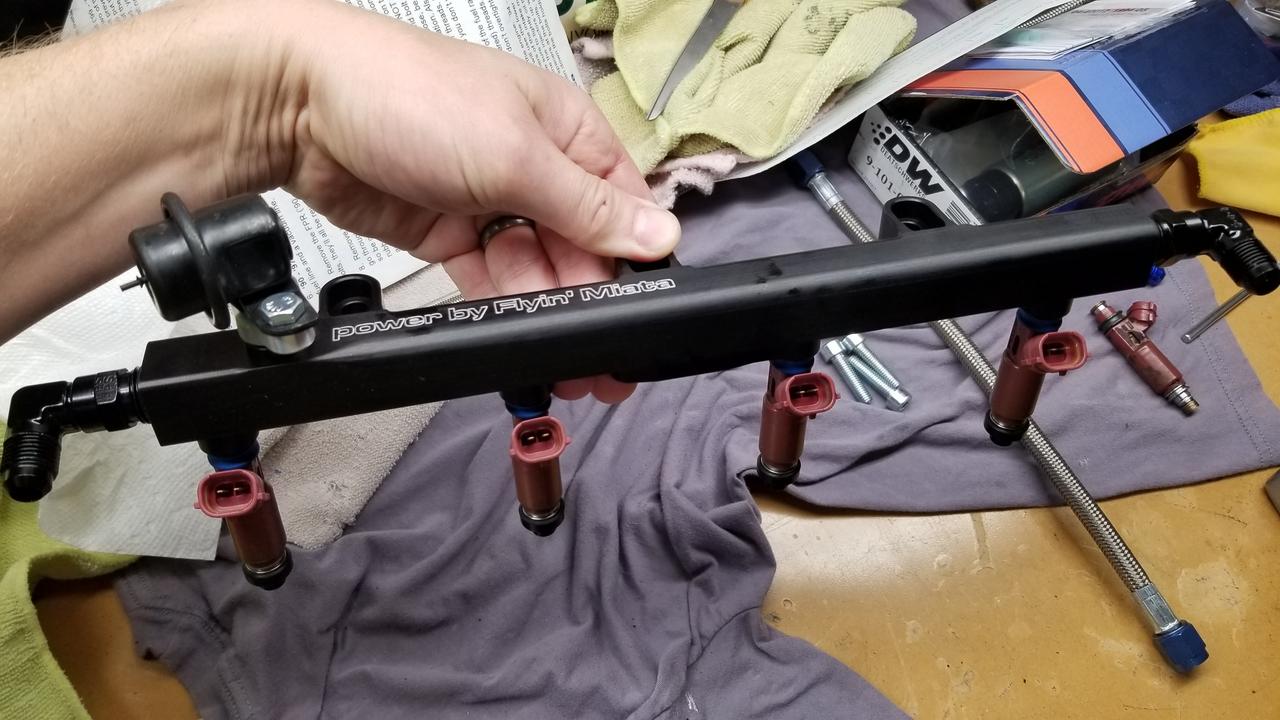
Bad cell phone pic. At least this time with the install I don't have to account for EGR (deleted!) and can put the damper in a more accessible place up front.
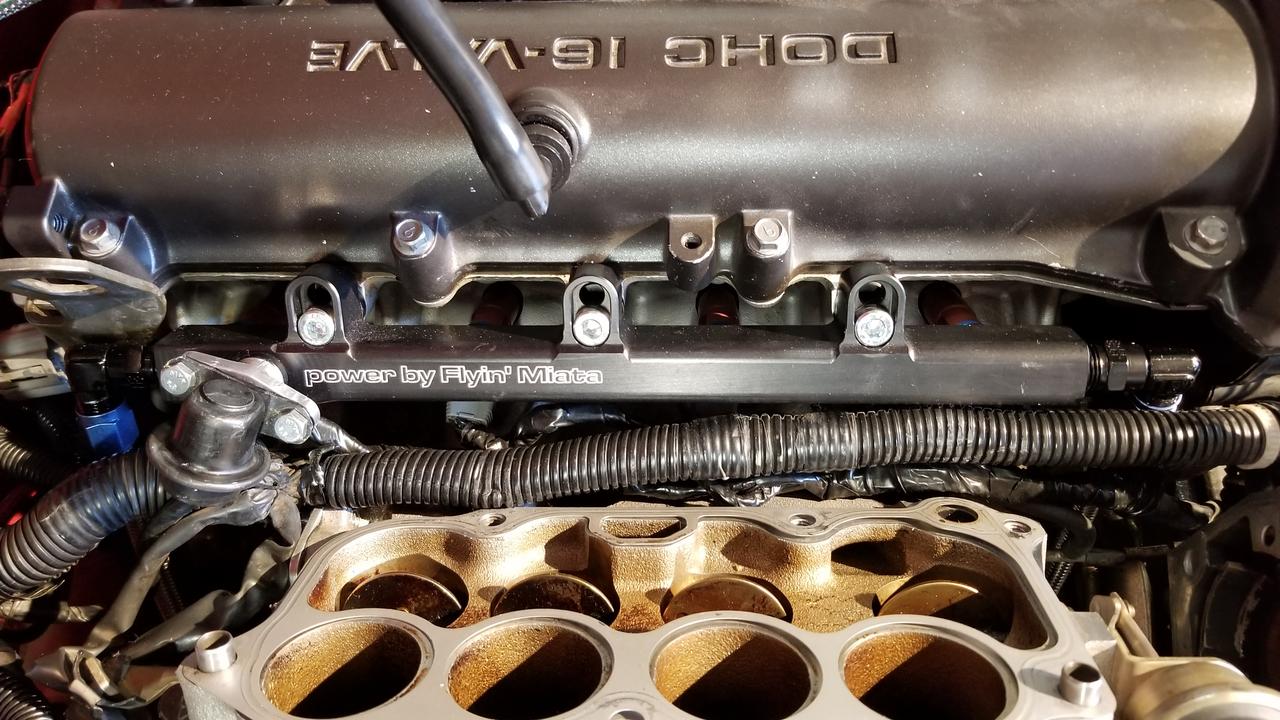
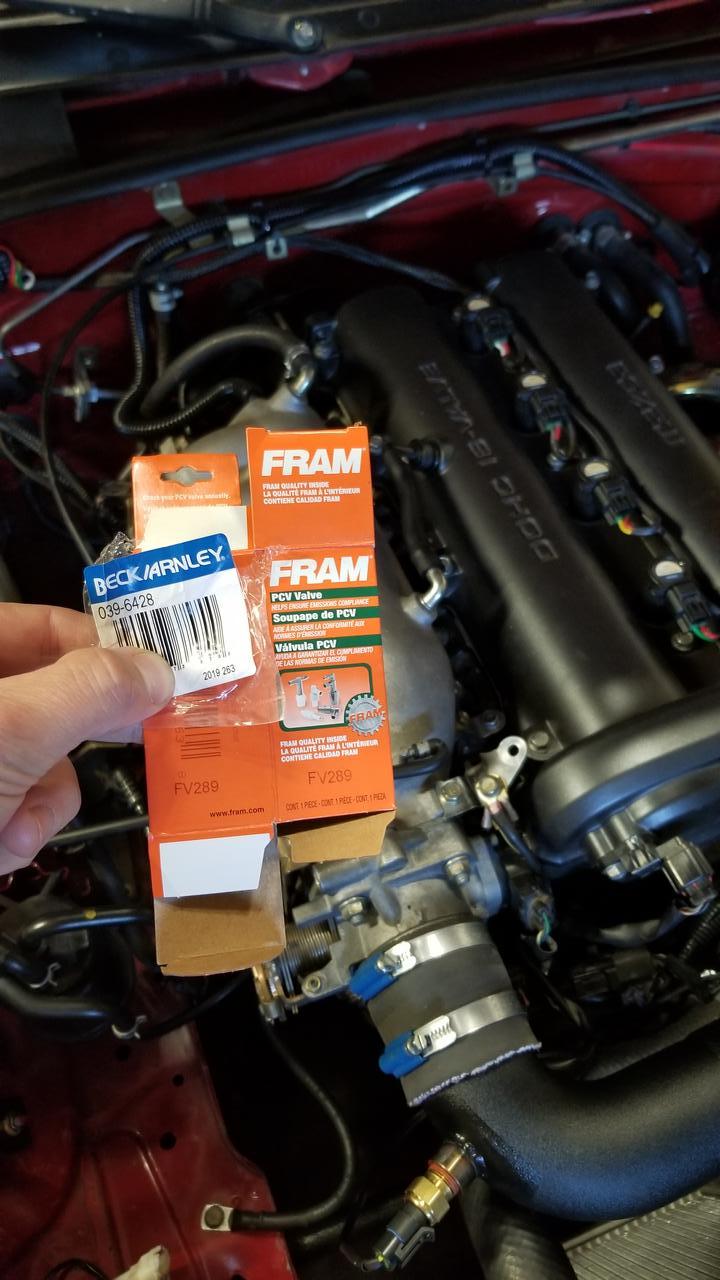
I noticed some fresh oil in the intake, so I have a new PCV on the way. Itching to get this thing running again so I can retune (sounds cool, but I'm still a major noob) with the new injectors.
The drama...
I bought this fuel rail back when I was a total noob and didn't realize this would do me little to no good at my power levels. But it blings. So in 2016 I bought it, and installed it, and damn things leaked like real bad, including the predrilled hole to accept a damper (I know it's the crappy rail's fault because the replaced fuel damper is brand new OEM). So I threw it in the parts bin, and then I got a recall notice email from FM saying these things rupture and leak. LOL. So they sent me a replacement and I never ever installed it. Fast forward to now and I was going to install the new-to-me FIC injectors, and decided to give the new fuel rail a try. Mistakes.
NEW replacement unit LEFT, original faulty unit RIGHT
I'm currently plugging leak after leak with the rail. The inserts for the injectors/o-rings seems out of spec, in that 2 of the 4 ports damaged the new injector o-rings, which I had to get replacements for. After that was fixed, now the damper NPT threads leaked, so I had to get it bubba tight to seal (seemed too tight for aluminum, but oh well). Now, the 90 degree elbows are the source of the leaks, so I've cleaned those threads up and reapplied a ton of thread paste to compensate, and are now curing whilst Bubba tight. Will check for leaks after 48 hours of cure time to be safe. If I continue to have issues, I'll uninstall and turn this thing into a lamp or something more functional.
It does look cool though
Bad cell phone pic. At least this time with the install I don't have to account for EGR (deleted!) and can put the damper in a more accessible place up front.
I noticed some fresh oil in the intake, so I have a new PCV on the way. Itching to get this thing running again so I can retune (sounds cool, but I'm still a major noob) with the new injectors.
Reply
0
0
You do not want to mess around with fuel leaks in a car that sees time on the track. It doesn't add any value other than cosmetic but introduces a ton of failure points that are already failing it sounds like. Just bin it before you're dealing with an engine bay fire, not worth the risk.
Reply
2
2

Thread Starter
Junior Member
Joined: Mar 2016
Posts: 113
Total Cats: 55
From: Phoenix AZ
You do not want to mess around with fuel leaks in a car that sees time on the track. It doesn't add any value other than cosmetic but introduces a ton of failure points that are already failing it sounds like. Just bin it before you're dealing with an engine bay fire, not worth the risk.
@Spaceman Spiff I appreciate the input. I think I'm just going to toss it aside and move on. Expensive lesson.
Reply
0
0
Thread Starter
Junior Member
Joined: Mar 2016
Posts: 113
Total Cats: 55
From: Phoenix AZ
Ha. I'd be happy to work a deal out with you, but I know what I got lol. I'd sell it for sure, as I know someone who knows what they're doing would be more open to the install. PM me if you wanted to work something out I suppose.
Reply
0
0


Fuel rails boggle my mind. I'd love to do more work with one, but I just made 330hp with great fueling control on a stock rail. Not sure what power you'd need to empty a stock rail quicker than a Walbro 255 could fill it. I'm sure there's some math that'll tell me though.
Reply
1
1
Also when you go to put the stock one back in, use Gates Barricade fuel injection hose to replace the stock 20+ year old rubber hoses. It's pretty inexpensive online. It's rated for use with e85 if you go that way in the future, it's what I used on my Miata for years and years without issues.
Reply
1
1
Thread Starter
Junior Member
Joined: Mar 2016
Posts: 113
Total Cats: 55
From: Phoenix AZ
Also - hello fellow Oregonian. I am a transplant to the desert from Boring, OR. I wish AZ had roads like Oregon. It's all pretty flat and straight out here in my area yawn.
Also when you go to put the stock one back in, use Gates Barricade fuel injection hose to replace the stock 20+ year old rubber hoses. It's pretty inexpensive online. It's rated for use with e85 if you go that way in the future, it's what I used on my Miata for years and years without issues.
Reply
0
0
Thread Starter
Junior Member
Joined: Mar 2016
Posts: 113
Total Cats: 55
From: Phoenix AZ
Update after new-to-me injectors: I'm ignorant and should have done this from the very beginning. This noob is learning a lot. The car starts much easier, and in general it climbs through the RPMs more smoothly. My idle is still a little rough but that's on me for not mastering idle yet. I'm retuning my VE table with the new injectors slowly but surely, and I think the VE table is starting to look better. Still a lot of learning to do in that regard though.
While it was apart, I replaced the PCV, grommet and a new OEM rail-mount fuel damper:
The other big update! My uncle showed up with this short block for me out of the blue. He owns an auto repair/alignment shop up in UT and a while back he helped a customer with an NB2. The block was good and he set it aside for me. It was like Christmas when he showed up the other day with this thing for me in hand and free (my Uncle is a super generous man). I'm not at all sure on the direction I'm going to go with it, but having a free NB2 short block to work with gives me some options and budget for long term goals.
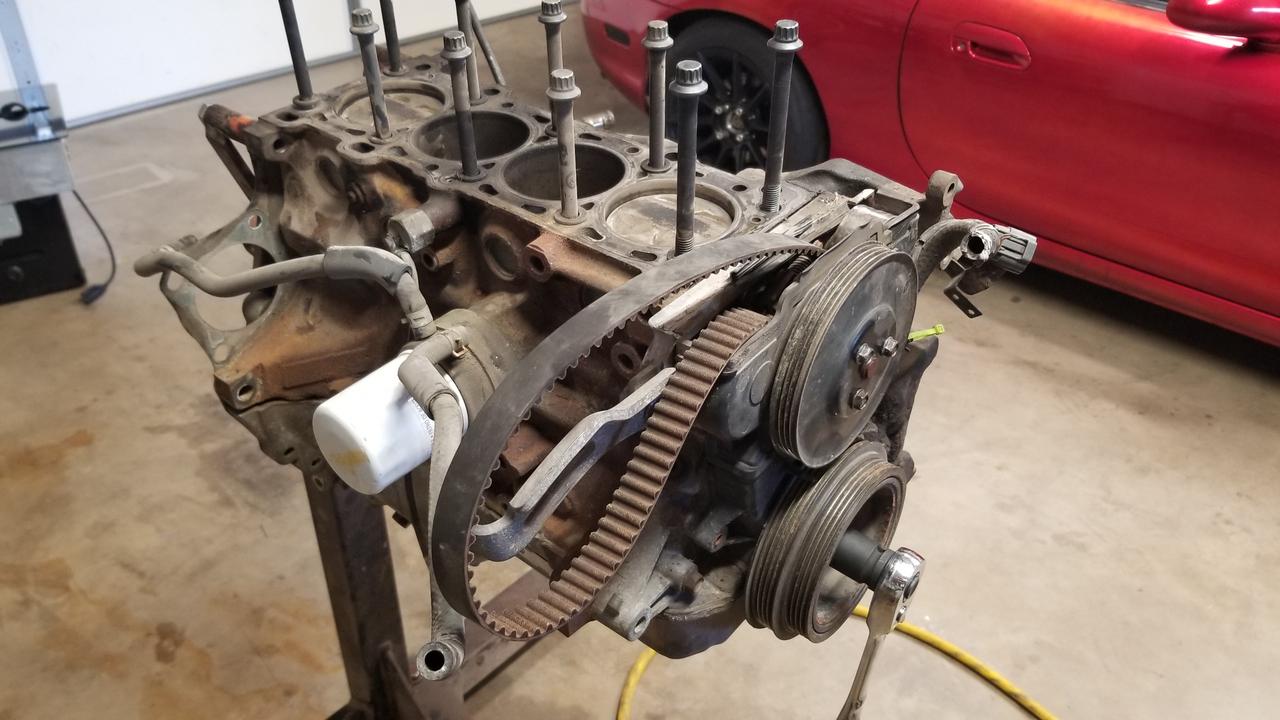
I think this is my starting point of reference I'm working off of on the direction and level of "build" I would like to tackle with this, and the steps to get there: https://supermiata.com/planningbpenginebuild.aspx
While it was apart, I replaced the PCV, grommet and a new OEM rail-mount fuel damper:
The other big update! My uncle showed up with this short block for me out of the blue. He owns an auto repair/alignment shop up in UT and a while back he helped a customer with an NB2. The block was good and he set it aside for me. It was like Christmas when he showed up the other day with this thing for me in hand and free (my Uncle is a super generous man). I'm not at all sure on the direction I'm going to go with it, but having a free NB2 short block to work with gives me some options and budget for long term goals.
I think this is my starting point of reference I'm working off of on the direction and level of "build" I would like to tackle with this, and the steps to get there: https://supermiata.com/planningbpenginebuild.aspx
Reply
0
0
Thread Starter
Junior Member
Joined: Mar 2016
Posts: 113
Total Cats: 55
From: Phoenix AZ
I took all of the timing and accessory parts off the block and cleaned it up. Someone did a sloppy timing belt job on it prior...non-oem ACE hardware bolts used for pulleys, etc. I ran the VIN on the oil pan and confirmed it's a '01 engine. I don't see any cracks in the block, I think it's a solid core.
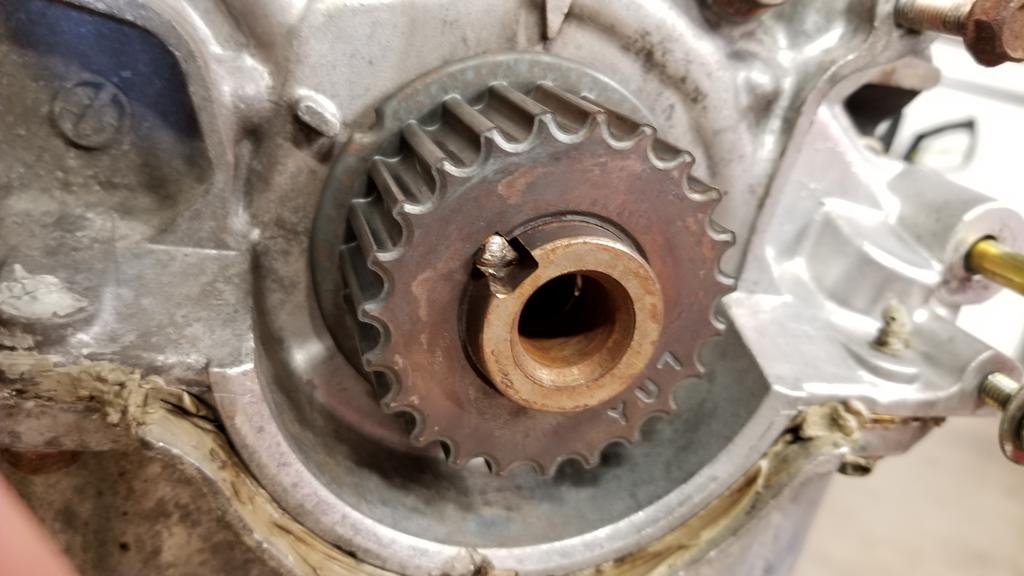
However, I think this means the crankshaft needs replacing? I'd take any advice on it.
However, I think this means the crankshaft needs replacing? I'd take any advice on it.
Reply
0
0
Thread Starter
Junior Member
Joined: Mar 2016
Posts: 113
Total Cats: 55
From: Phoenix AZ
I don't really know what the practical result is but by looking at it the gear is not aligned exactly to the crank, off by a couple/few degrees or so is my guess. The customer described the engine as having "lack of power on the top end...", so guessing this is the cause. Ugh, setback after setback with this thing, but at least with this I'm into it for $0 and less than an hours worth of time. And I'm right back to where I started so no harm done really if it's unusable. And it was practice getting familiar with the timing pieces for my upcoming TB/WP job with the current engine. It's only a failure if nothing's learned.
Reply
0
0
Thanks, PM'd you. Is it really fucked or just the crankshaft?
I don't really know what the practical result is but by looking at it the gear is not aligned exactly to the crank, off by a couple/few degrees or so is my guess. The customer described the engine as having "lack of power on the top end...", so guessing this is the cause. Ugh, setback after setback with this thing, but at least with this I'm into it for $0 and less than an hours worth of time. And I'm right back to where I started so no harm done really if it's unusable. And it was practice getting familiar with the timing pieces for my upcoming TB/WP job with the current engine. It's only a failure if nothing's learned.
I don't really know what the practical result is but by looking at it the gear is not aligned exactly to the crank, off by a couple/few degrees or so is my guess. The customer described the engine as having "lack of power on the top end...", so guessing this is the cause. Ugh, setback after setback with this thing, but at least with this I'm into it for $0 and less than an hours worth of time. And I'm right back to where I started so no harm done really if it's unusable. And it was practice getting familiar with the timing pieces for my upcoming TB/WP job with the current engine. It's only a failure if nothing's learned.
Buying just a crankshaft sometimes can be almost as expensive as buying an entire junkyard engine so that's definitely one thing to consider. That and crankshafts that are out of engines and being sold are usually because of some other catastrophic failure and you might not know what you got until you get it and measure it up.
Reply
1
1
You might pull the key and sprocket and see how bad the crank is. Often the damage is limited to the first ~3mm of a ~10mm key, and with a brand new pulley sprocket, timing sprocket, and key, it’s plenty strong. I’ve made this decision on a few installed street car engines, so if it’s already out and you’re planning on boosting it to the moon, a new crank might be a better solution.
edit: zooming in a bit, I’m not confident you’ll be that lucky.
edit: zooming in a bit, I’m not confident you’ll be that lucky.
Reply
1
1
Thread Starter
Junior Member
Joined: Mar 2016
Posts: 113
Total Cats: 55
From: Phoenix AZ
You might pull the key and sprocket and see how bad the crank is. Often the damage is limited to the first ~3mm of a ~10mm key, and with a brand new pulley sprocket, timing sprocket, and key, it�s plenty strong. I�ve made this decision on a few installed street car engines, so if it�s already out and you�re planning on boosting it to the moon, a new crank might be a better solution.
edit: zooming in a bit, I�m not confident you�ll be that lucky.
edit: zooming in a bit, I�m not confident you�ll be that lucky.
Reply
0
0


