
Hairdresser HP - An NB 105kpa max HPDE Build


Thread Starter
Senior Member
Joined: May 2011
Posts: 638
Total Cats: 76
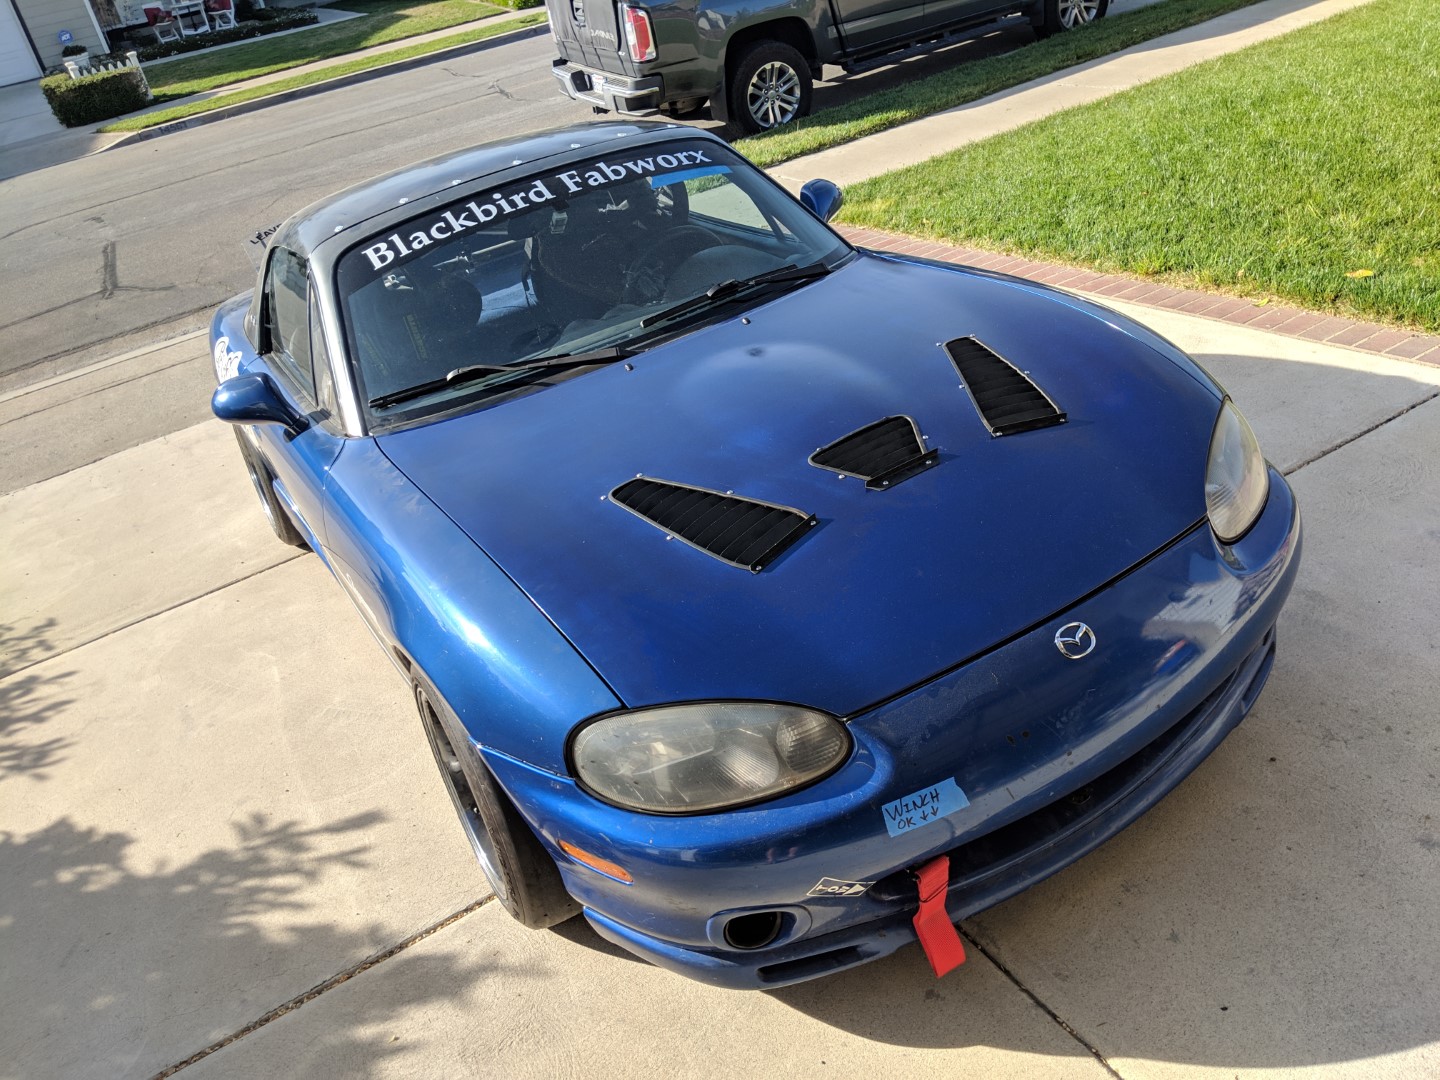
The clearcoat was coming off of the hood pretty badly. The new owner isn't quite as capable in the garage/shop as I am and asked if I could help for a fee. I stupidly, agreed to do this. I forgot how much I hate body work.
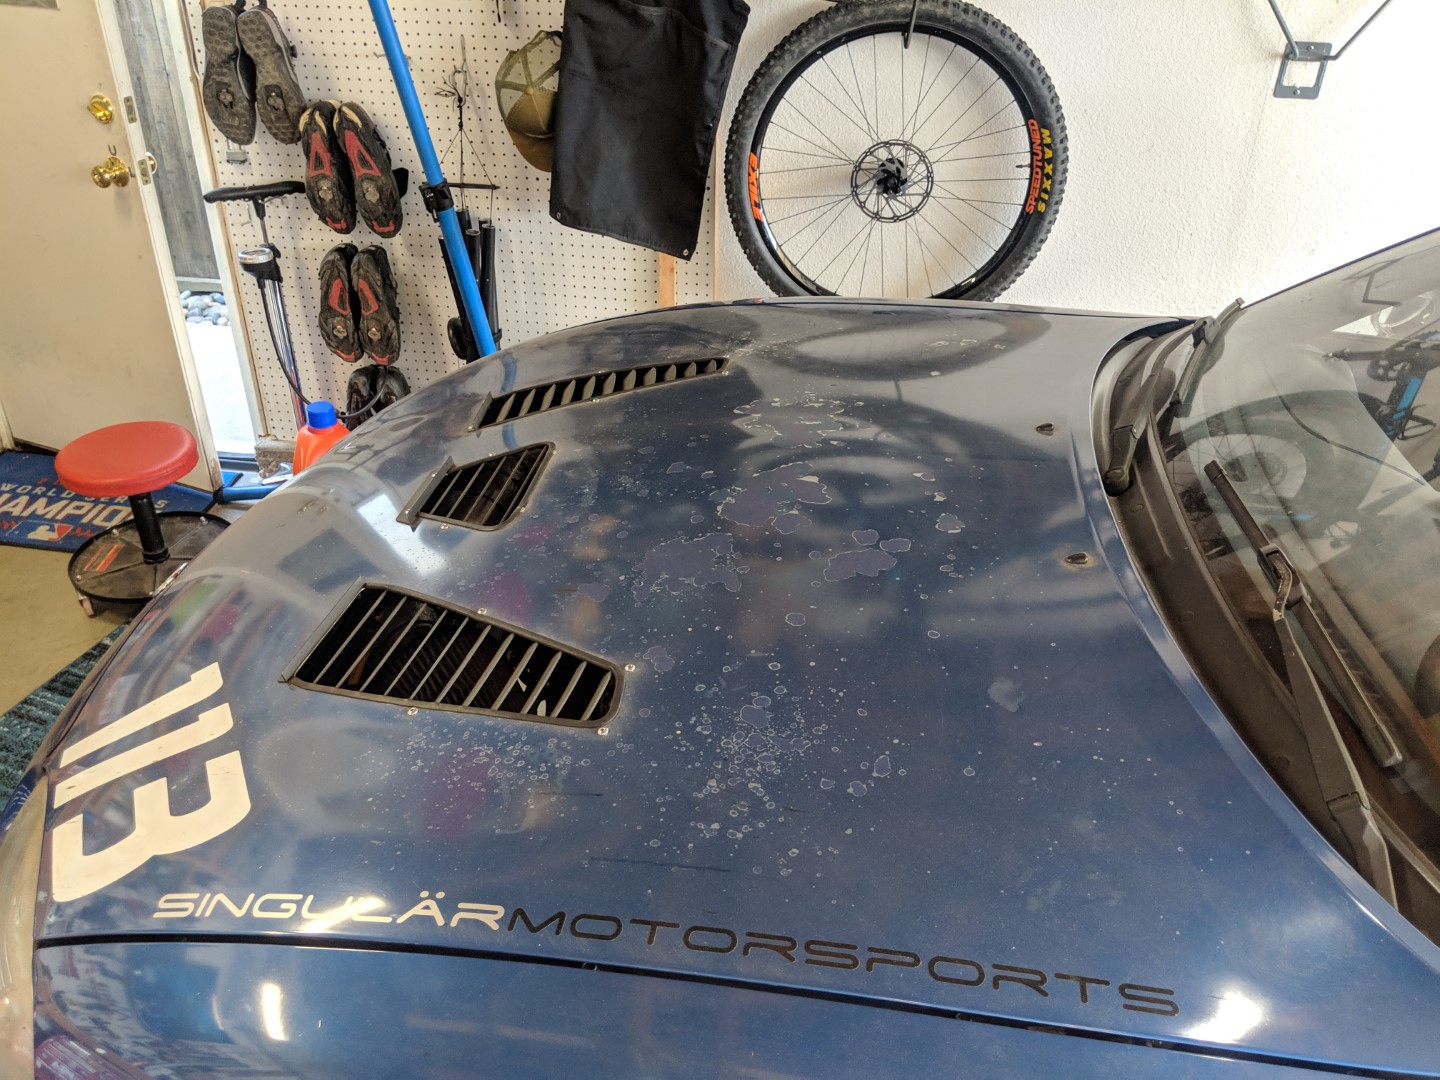
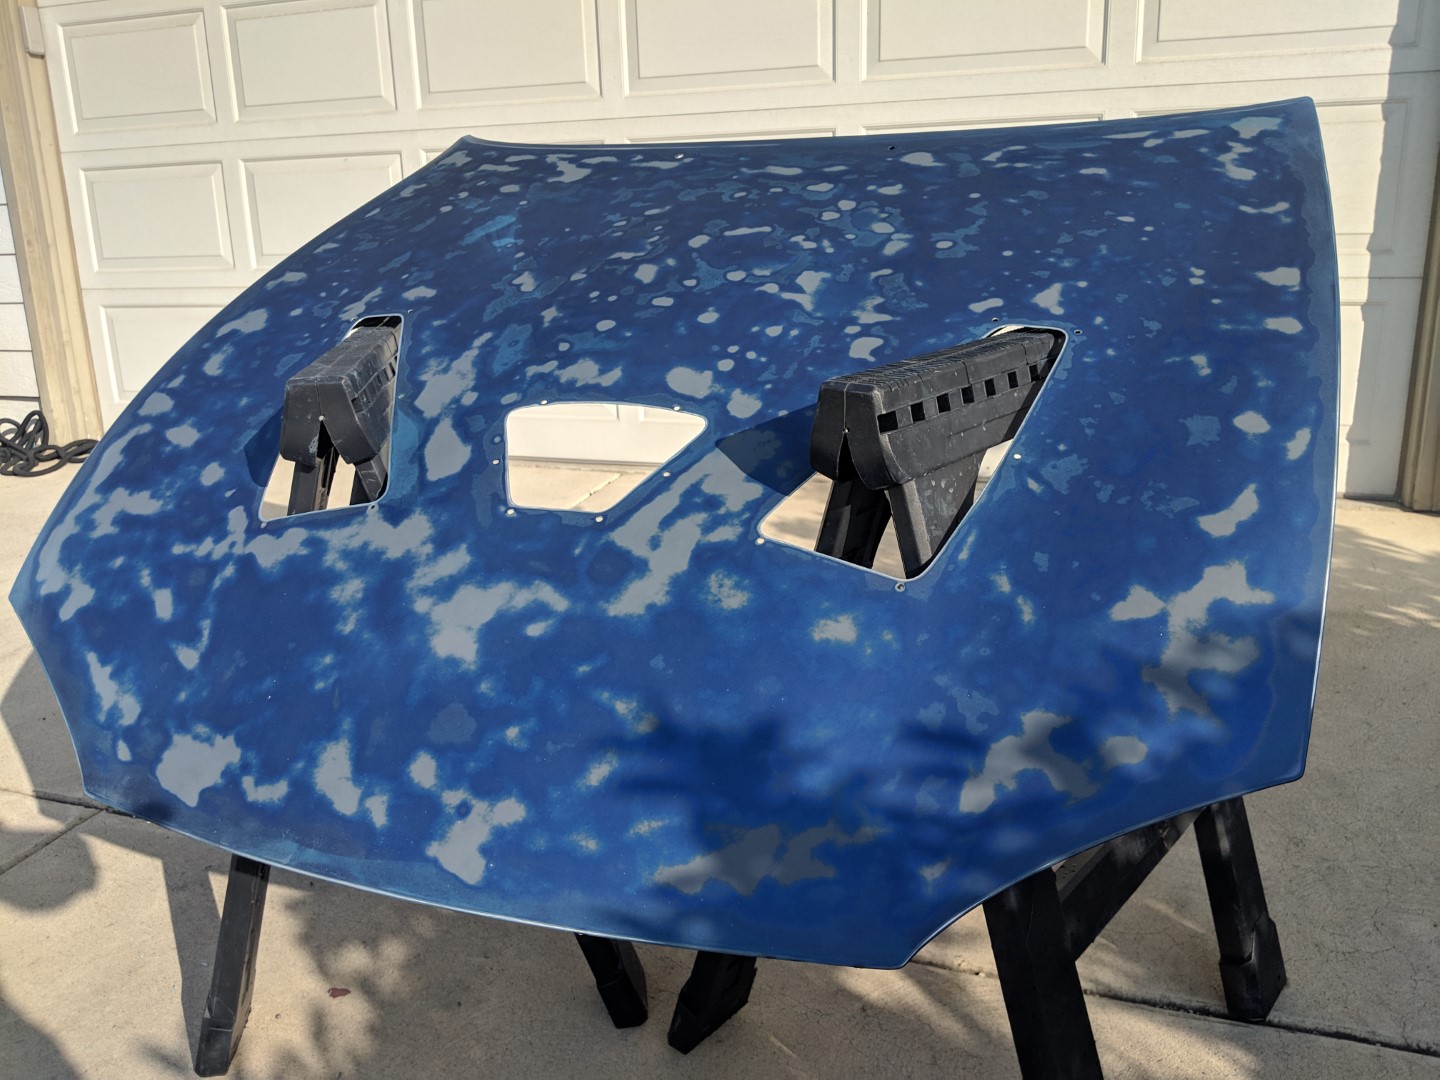
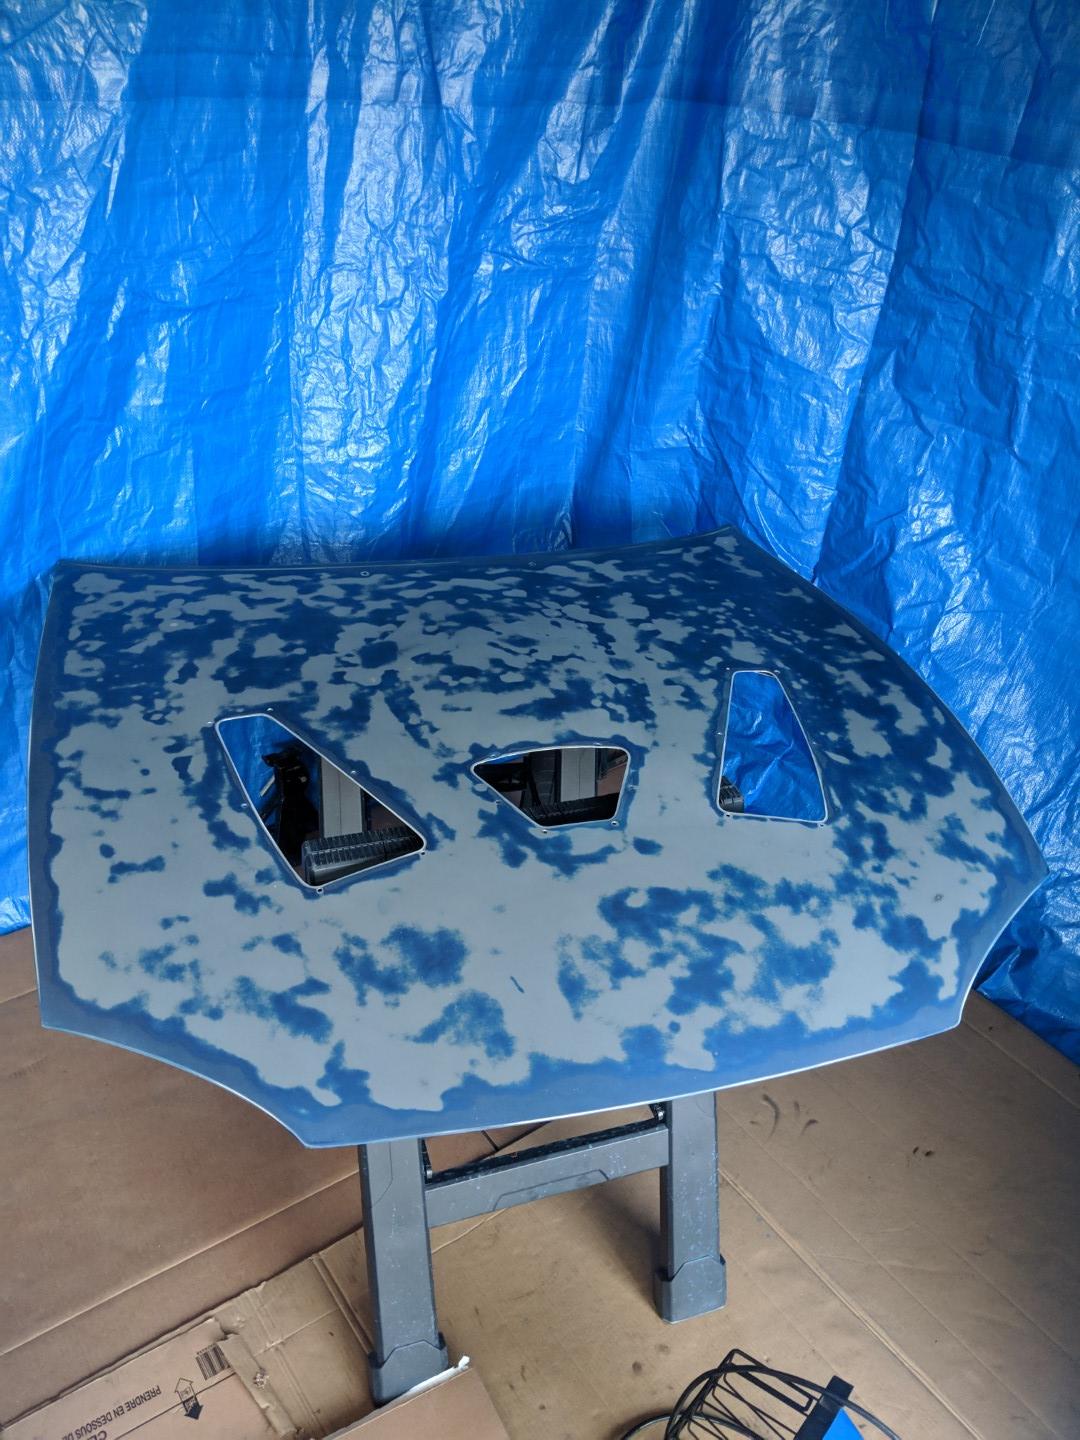
Started at 320grit and moved all the way to 800. This was the first pass with the 320 and then the 400. My original intent was to leave as much of the original color on the hood as possible, hopefully only needing some small base coat corrections and clear. That did not actually work, the more I touched the clear, the more of it ended up coming off. Once this start, there is no safe spot on the hood. The parts of it that aren't yet flaking, are certainly failed already, and are just waiting for their moment to peal off.
After 320
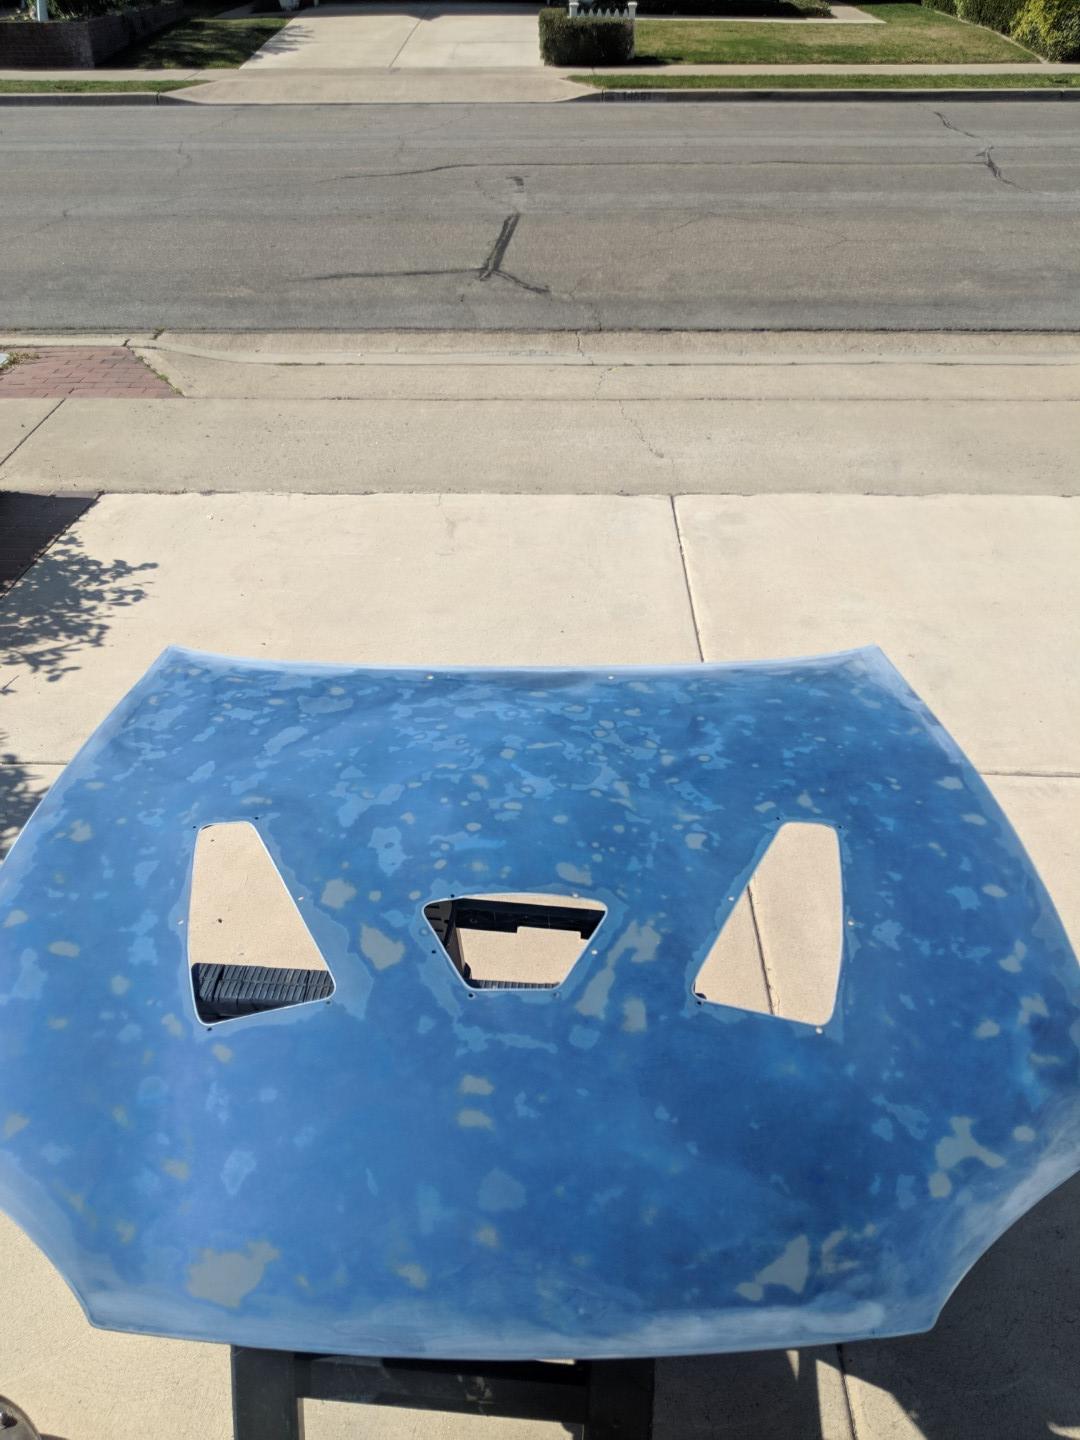
After 400
Mostly ready for some primer on the spots that went to bare medal, and then more sanding and prep for base coat.
Poor mans paint booth.
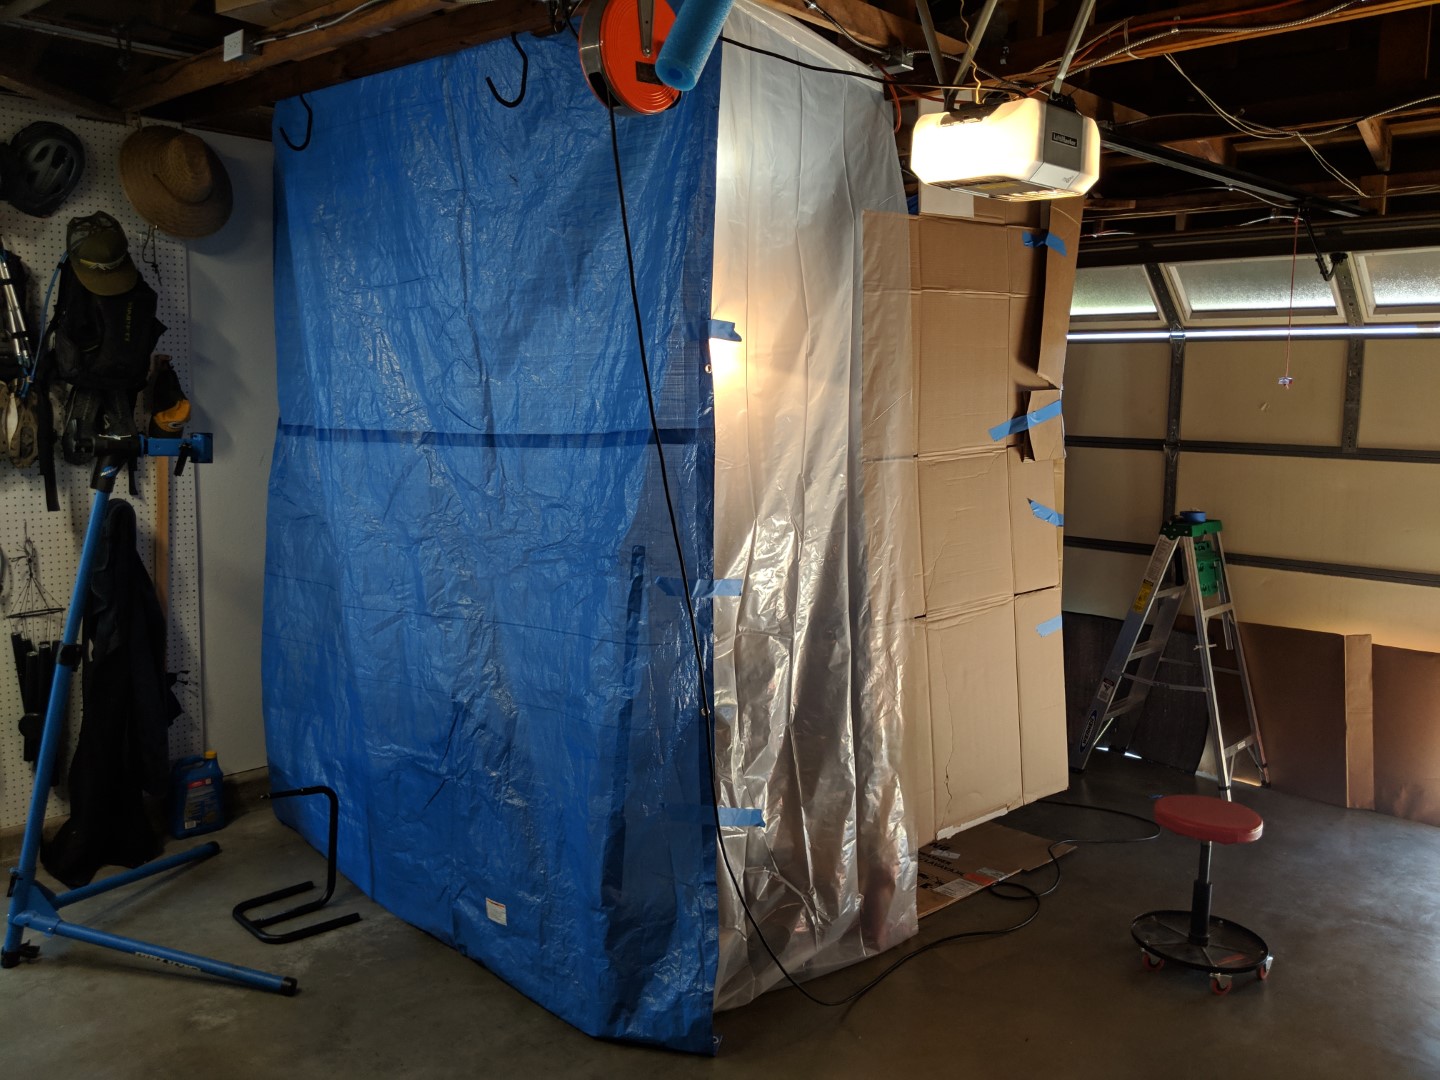
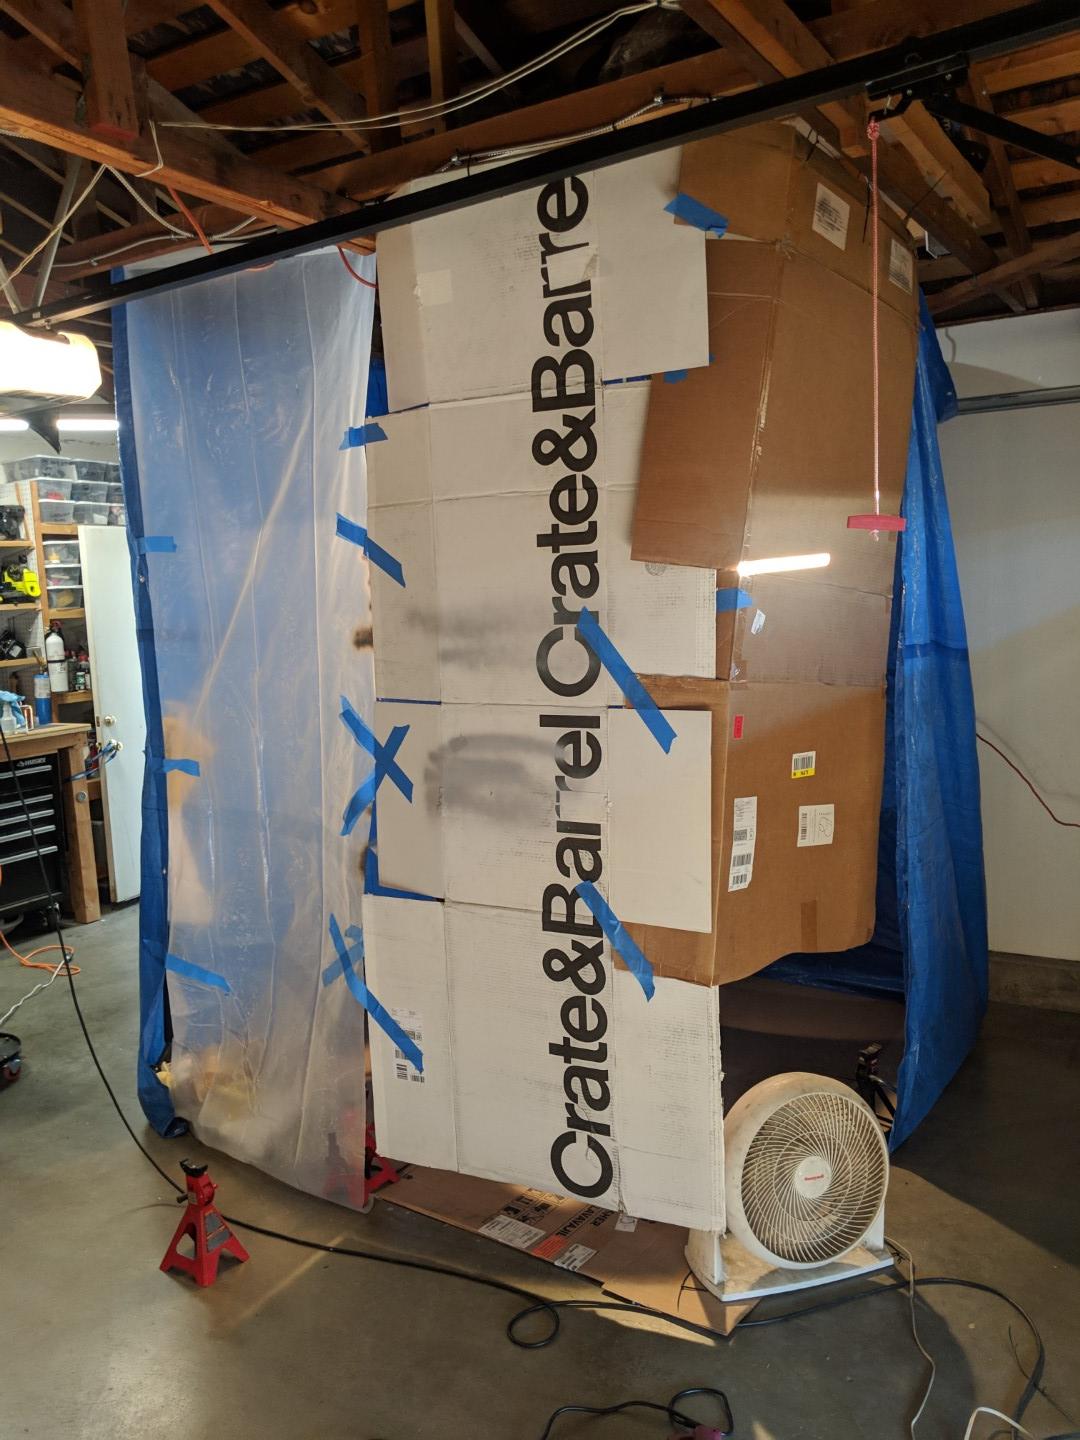
tac coat of base.

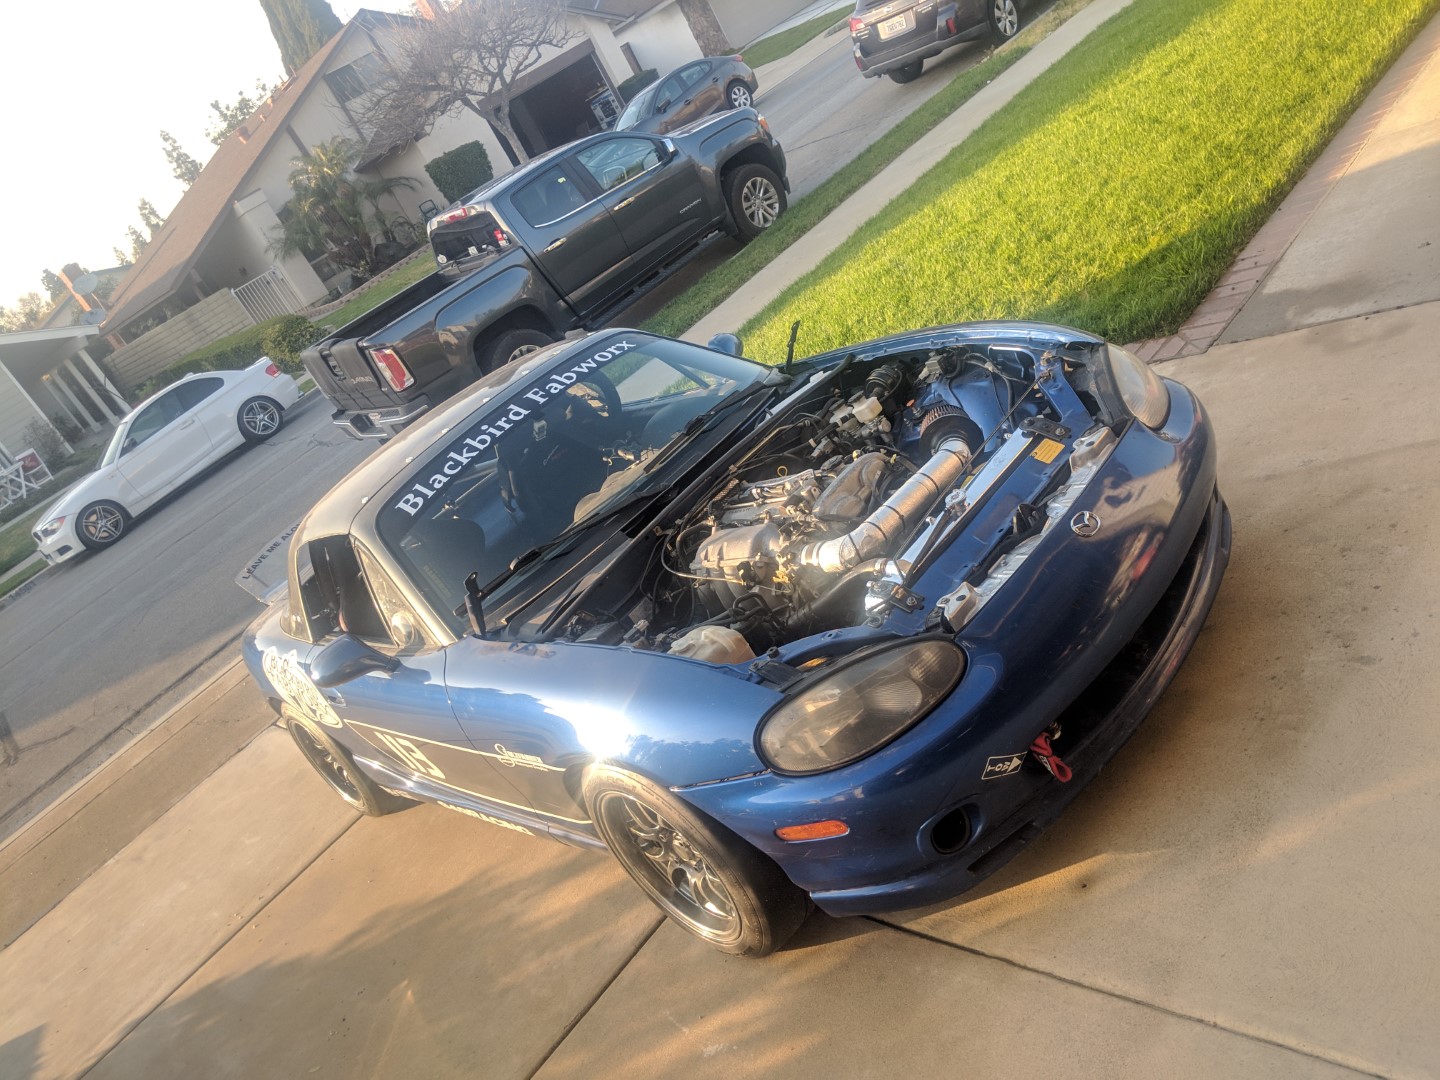
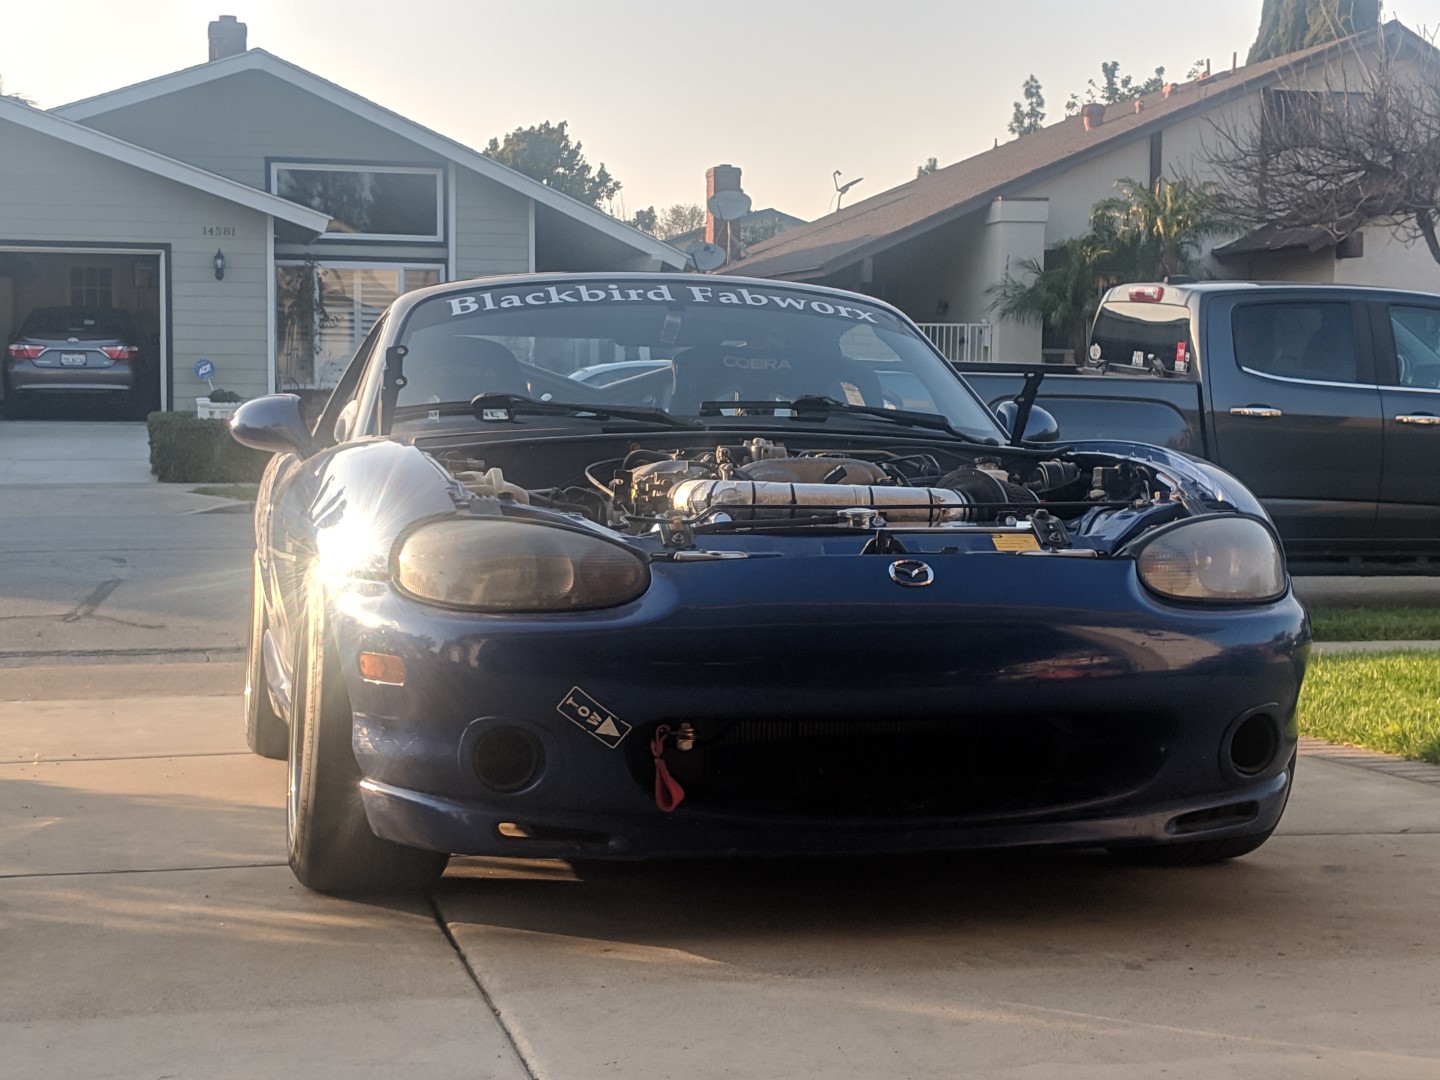
Car looks very punk rock with the hood off. You can also see the CSF radiator that I installed some time ago. Wifes 135is in the background as well as my truck.
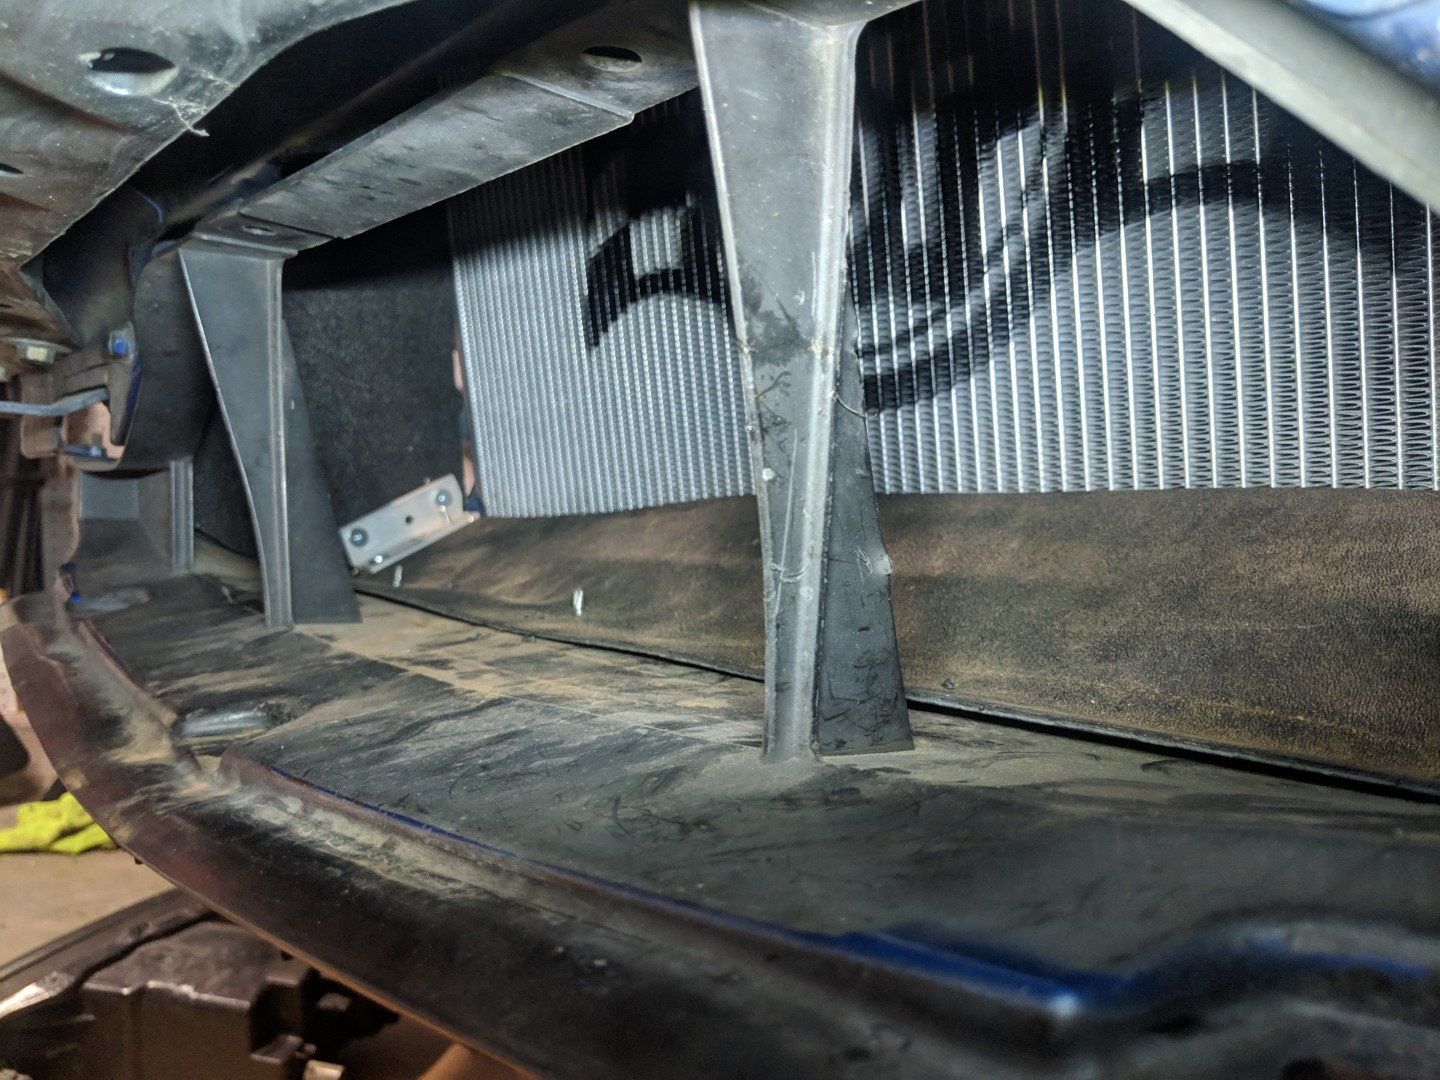
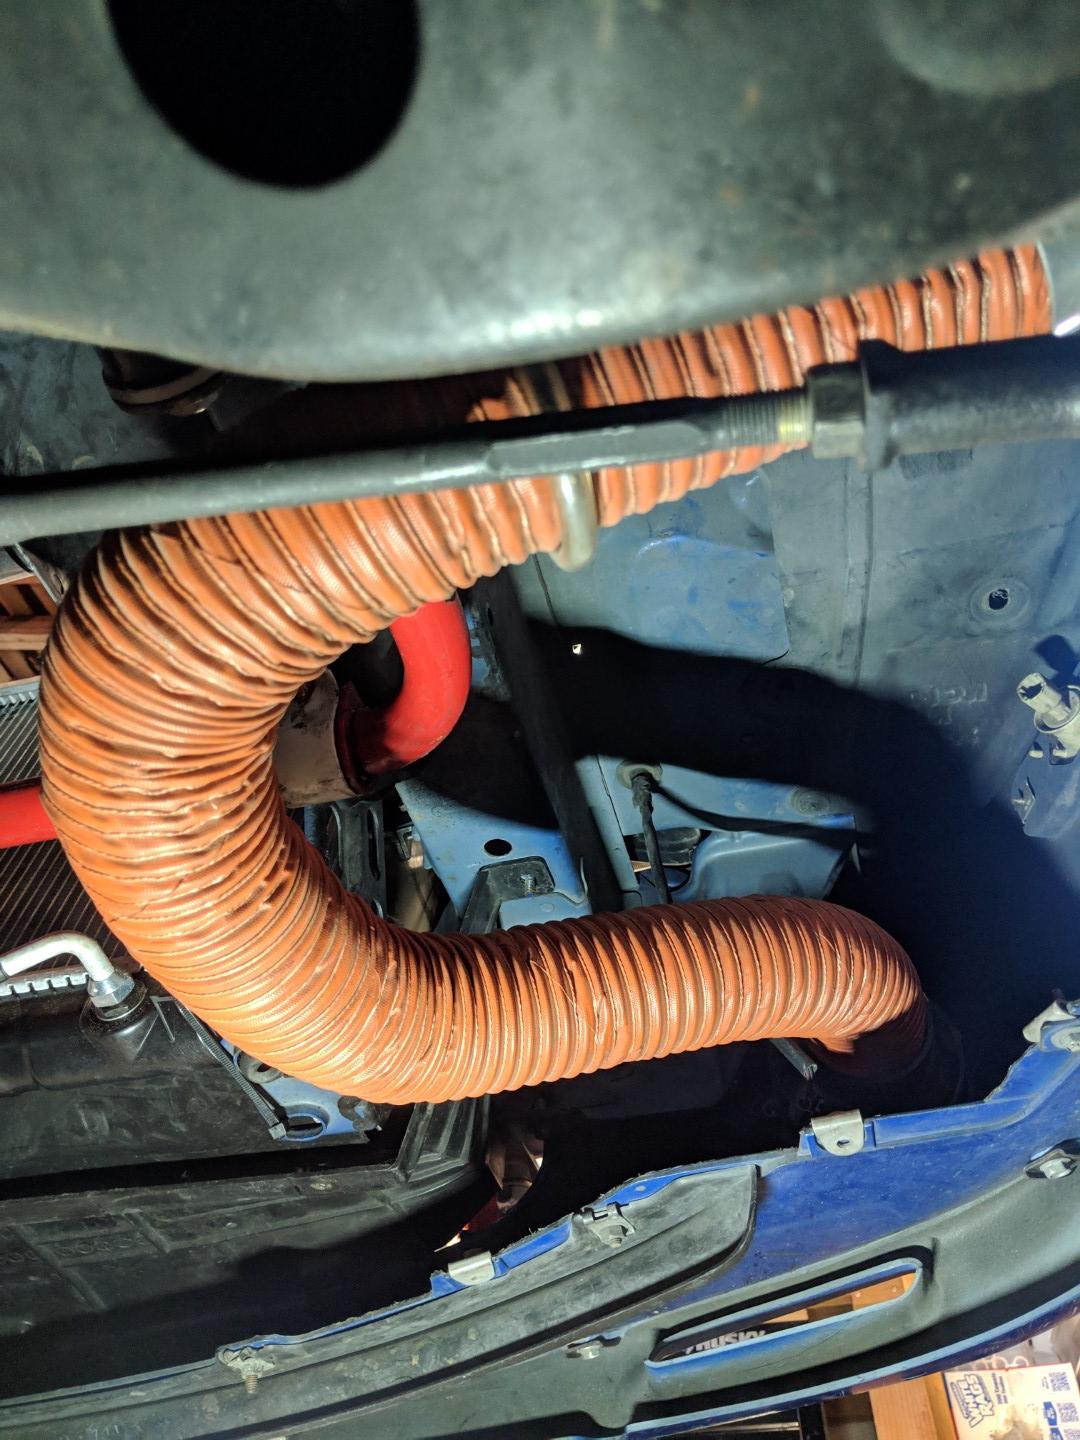
Speaking of the csf radiator... Here it is. The quality level on this thing far exceeding my expectations.
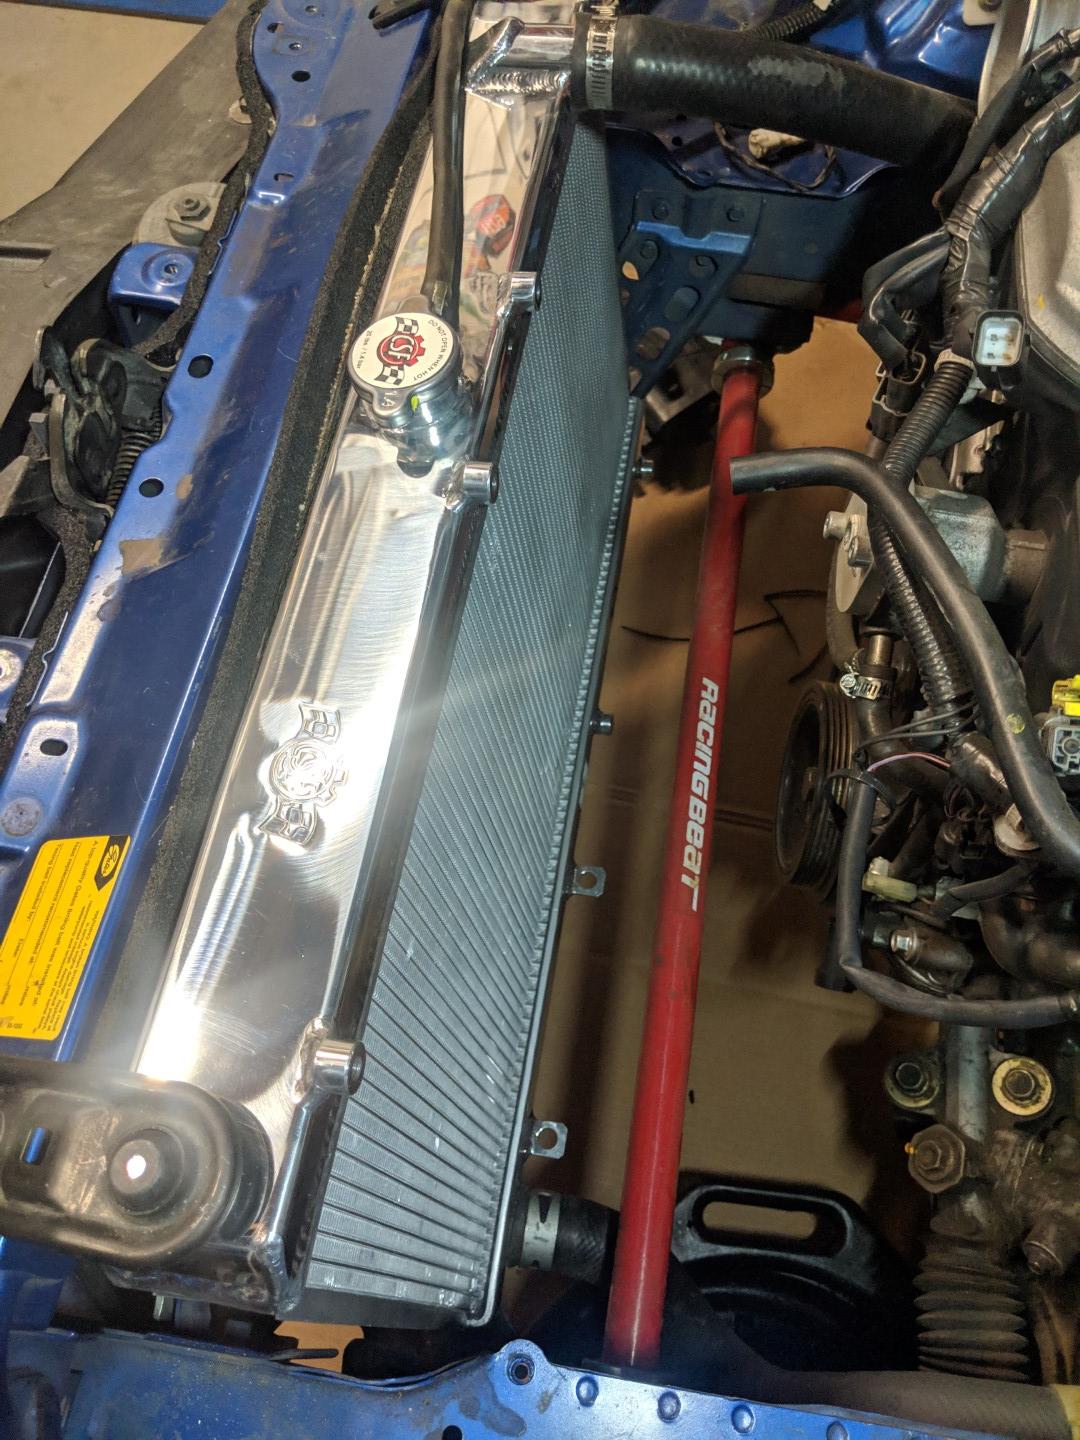
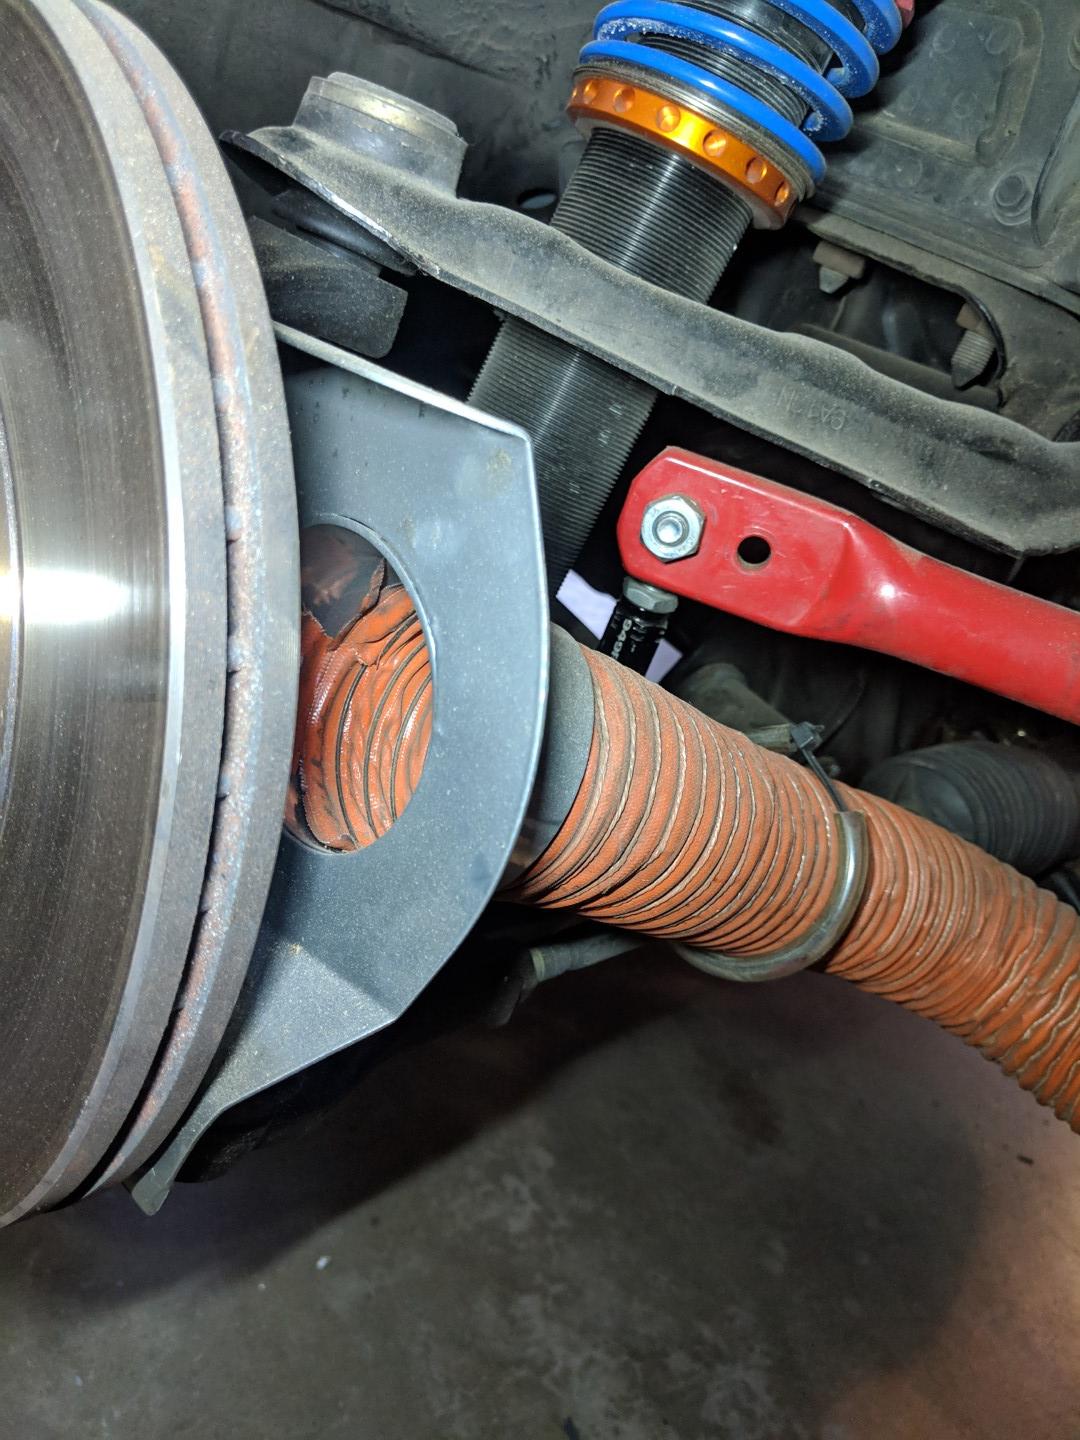
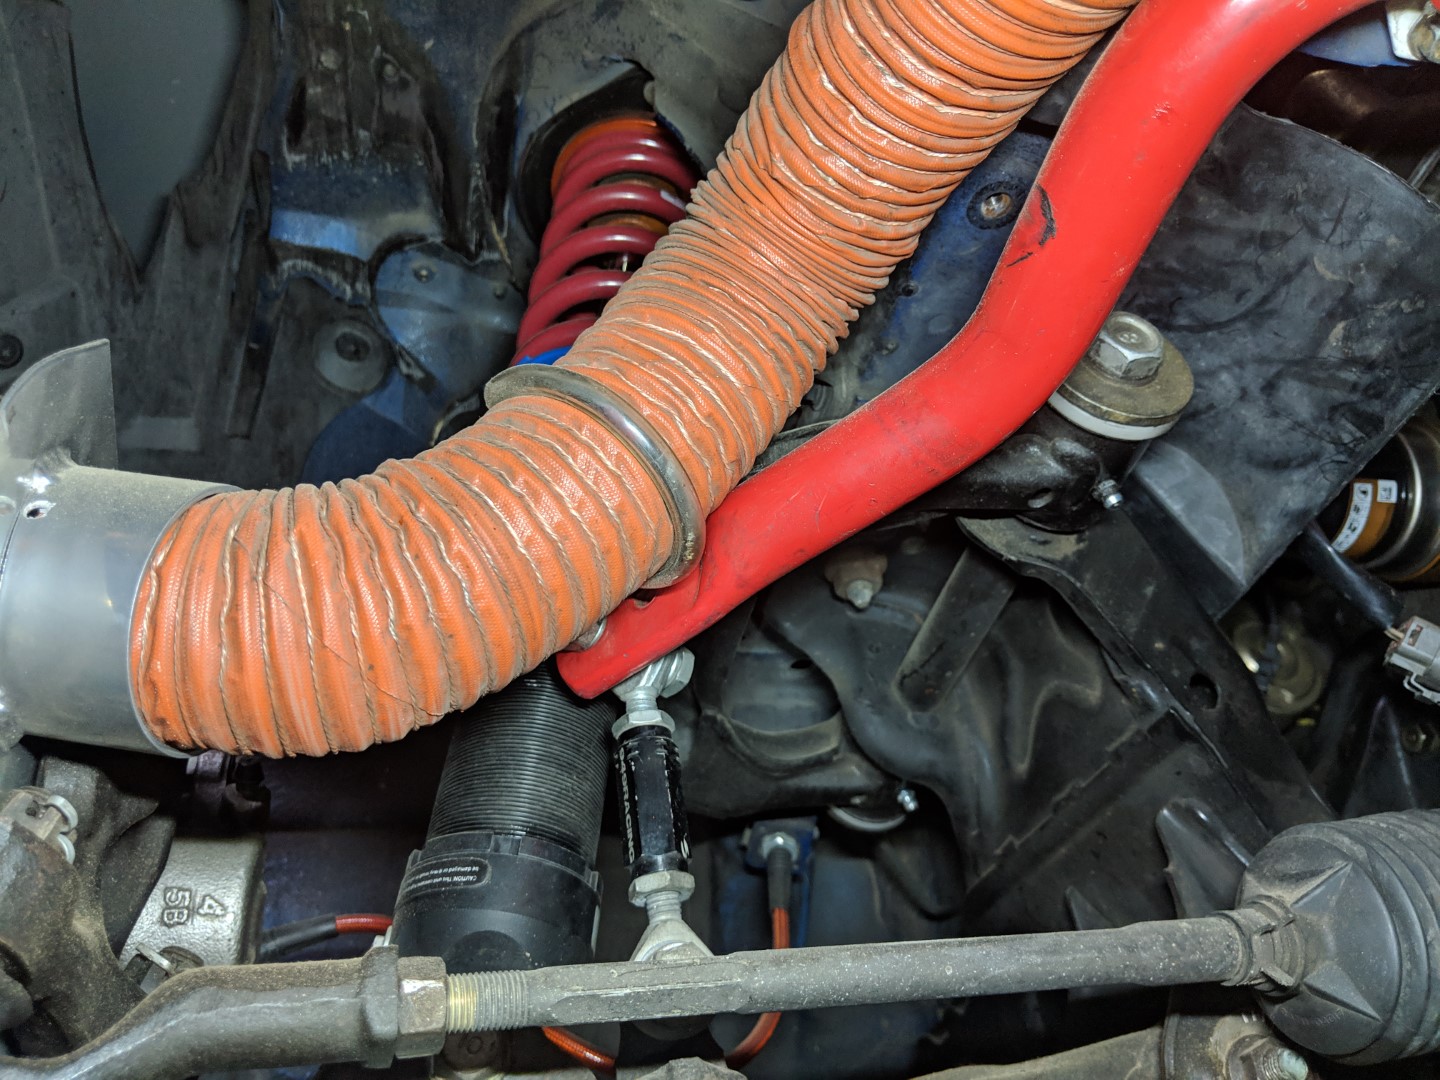
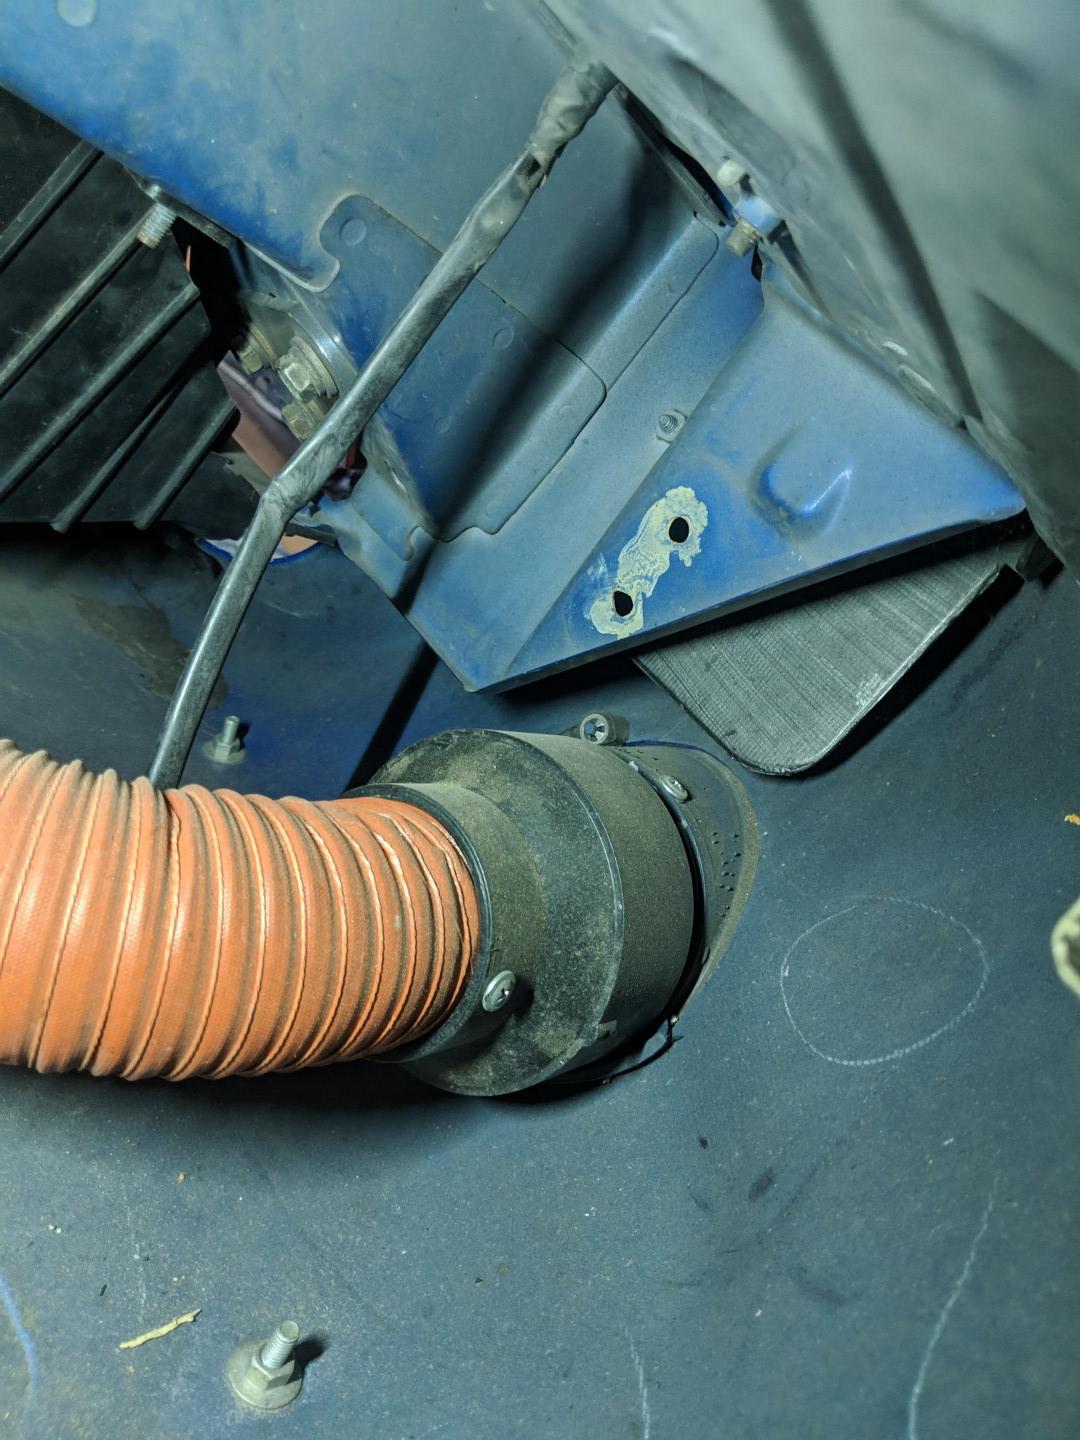
my radiator ducting is pretty rudimentary but it works. It works well enough to fill the radiator full of rubber bits after a few sessions on track.
Started at 320grit and moved all the way to 800. This was the first pass with the 320 and then the 400. My original intent was to leave as much of the original color on the hood as possible, hopefully only needing some small base coat corrections and clear. That did not actually work, the more I touched the clear, the more of it ended up coming off. Once this start, there is no safe spot on the hood. The parts of it that aren't yet flaking, are certainly failed already, and are just waiting for their moment to peal off.
After 320
After 400
Mostly ready for some primer on the spots that went to bare medal, and then more sanding and prep for base coat.
Poor mans paint booth.
tac coat of base.
Car looks very punk rock with the hood off. You can also see the CSF radiator that I installed some time ago. Wifes 135is in the background as well as my truck.
Speaking of the csf radiator... Here it is. The quality level on this thing far exceeding my expectations.
my radiator ducting is pretty rudimentary but it works. It works well enough to fill the radiator full of rubber bits after a few sessions on track.
Reply
 0
0

0
Thread Starter
Senior Member
Joined: May 2011
Posts: 638
Total Cats: 76
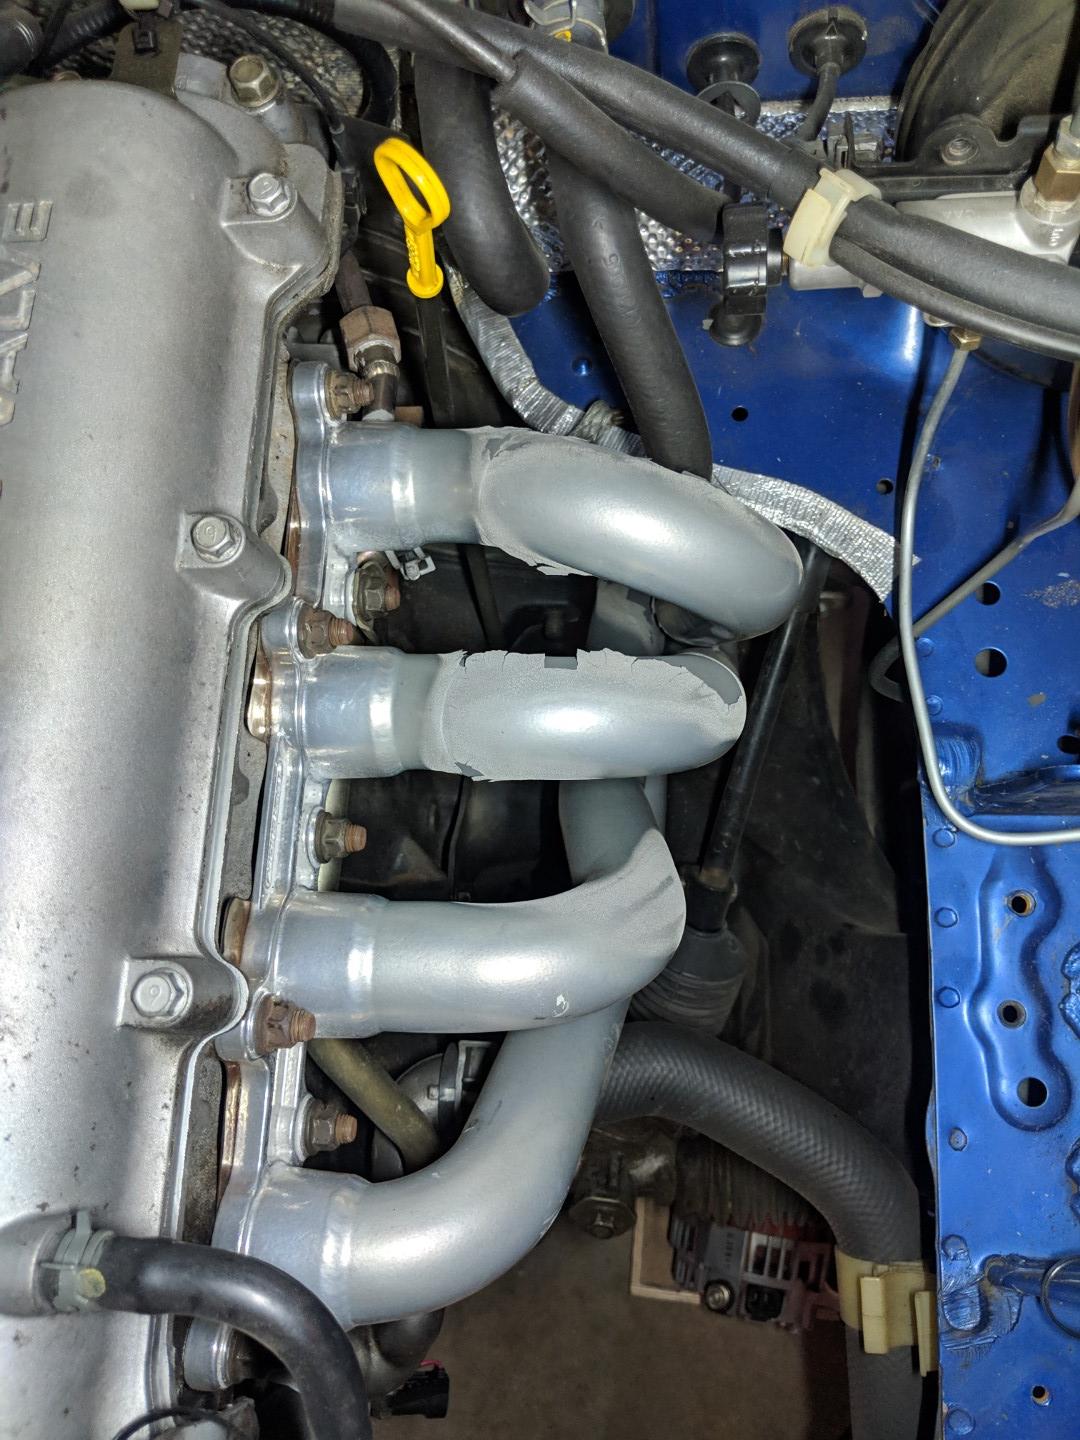
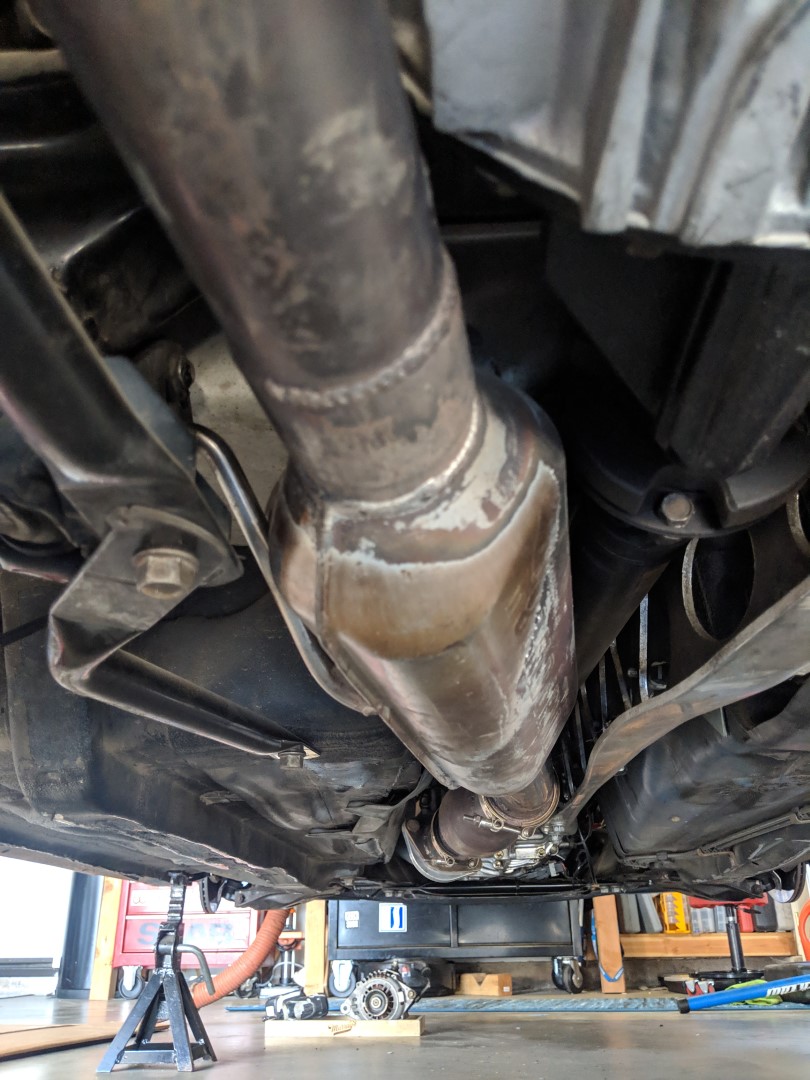
Exhaust. This car is loud, af. It has a racing beat header that has been ceramic coated inside and out, and a 2.5" straight through exhaust (made by blackbird fabworx) that has a single cell racing cat and a magnaflow in line resonator. No muffler. It's nice that you can hear it on track with ear plugs in, it's not nice that you have to wear earplugs to drive it on the street. I warned the new owner about this, he seemed to understand, but I hope it's not too loud for him to enjoy the car.
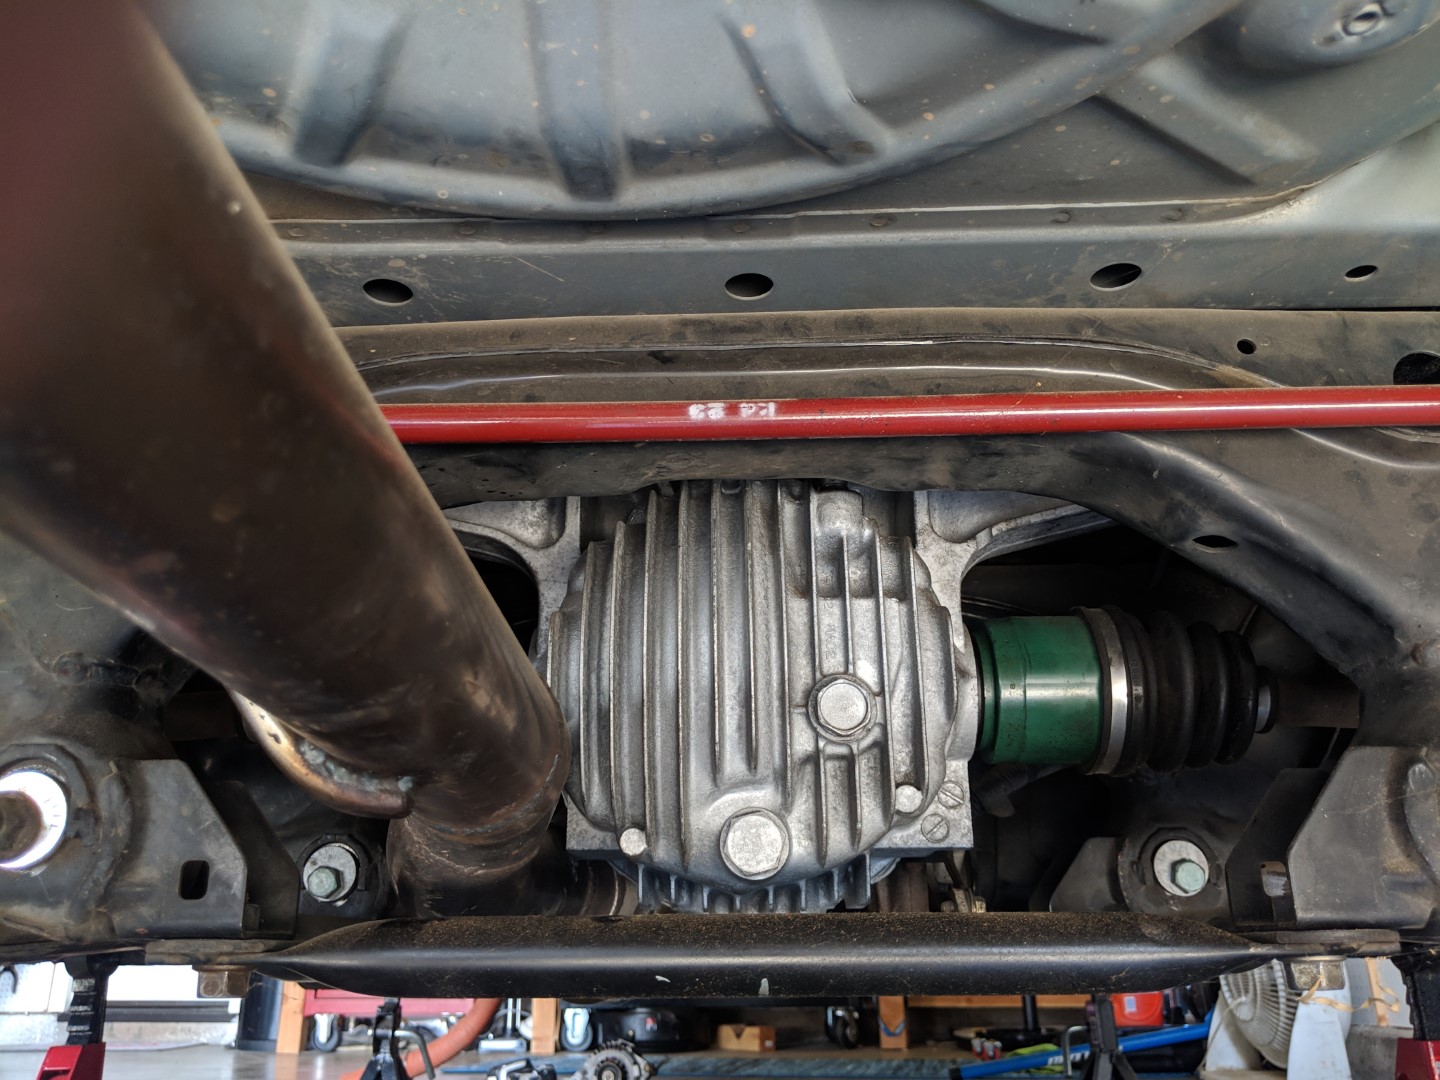
Also, compounding the exhaust noise level, is a newly rebuild 4.3 differential that I put in the car.... another step that was taken towards supermiata.
diff
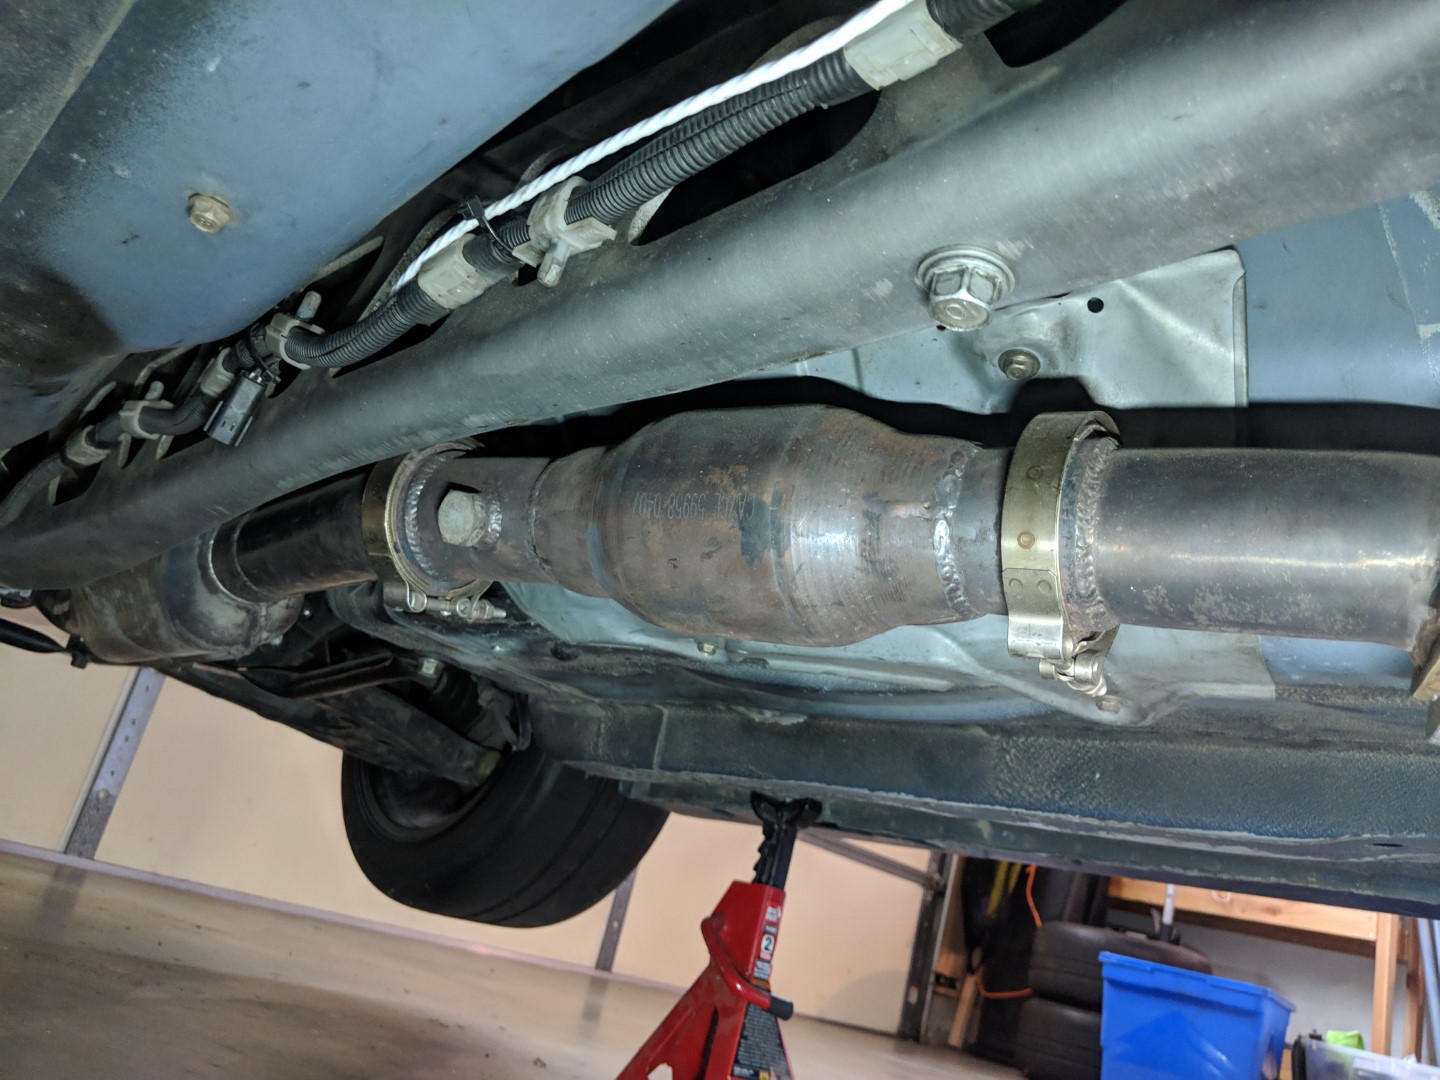
vbanded cat setup. This is the single cell racing cat, I also have a magnaflow cat that has a proper carb eo number that I used to pass smog on the rare occasion that I had/wanted to.
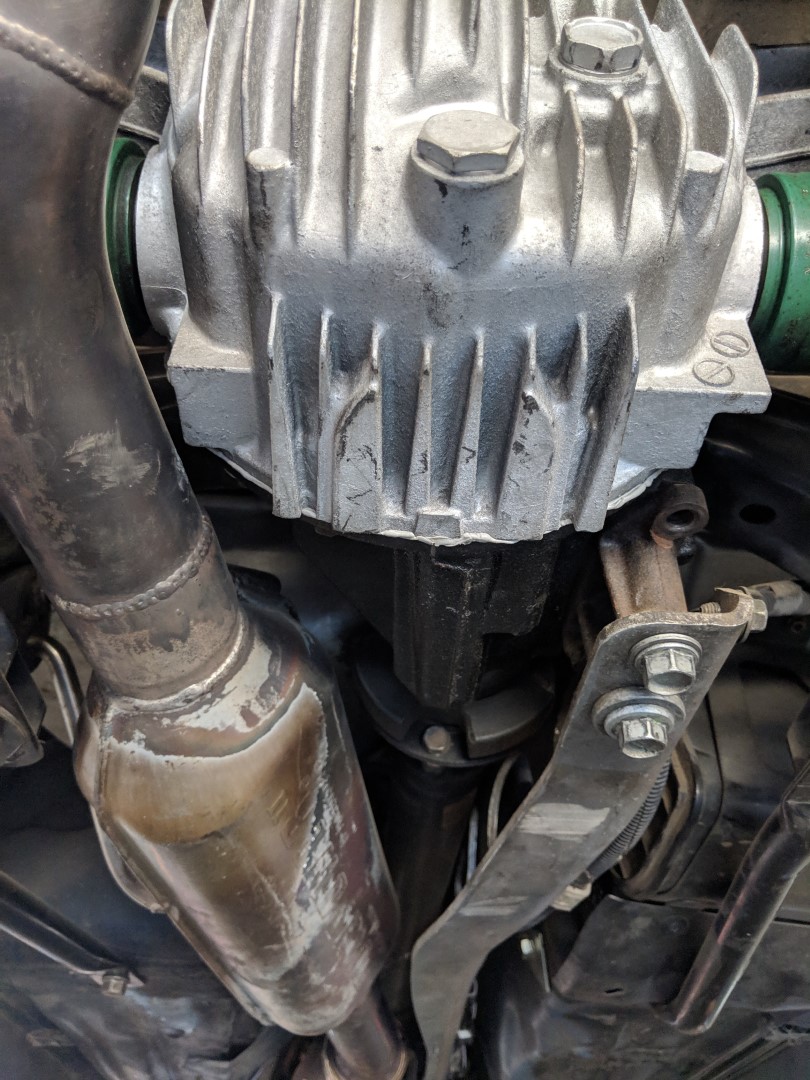
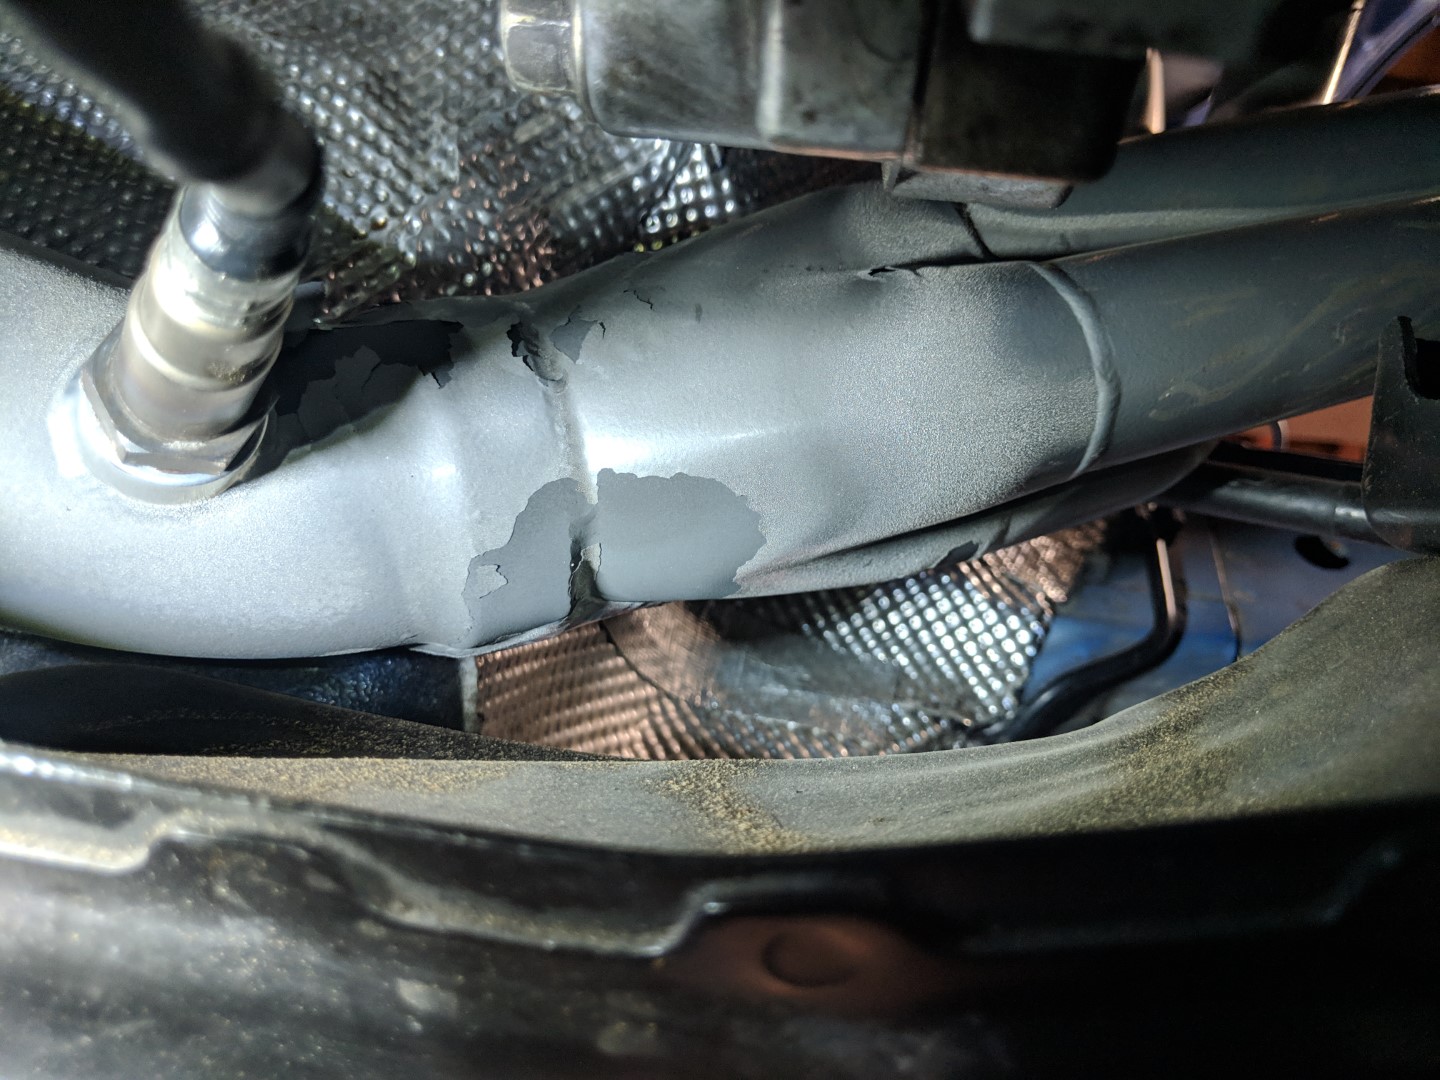
the ceramic coating on the outside of the header started to flake off. A lot of companies that do these coating will warn you that this can happen if you coat a brand new chome plated heater. The coating on the inside is still copper colored and intact. This is only a visual thing and doesn't affect function. It's the coating on the inside doing the work. You can also see the insulation I put on the driver side of the trans tunnel as well.
BWWWWWAAAAAHHHHHHHHHH!!!!!!!!!!!!!!!!!!!!!!!!!!!!! !!!!!!!!!!!!!!!!!!1111111111111111111111111111111
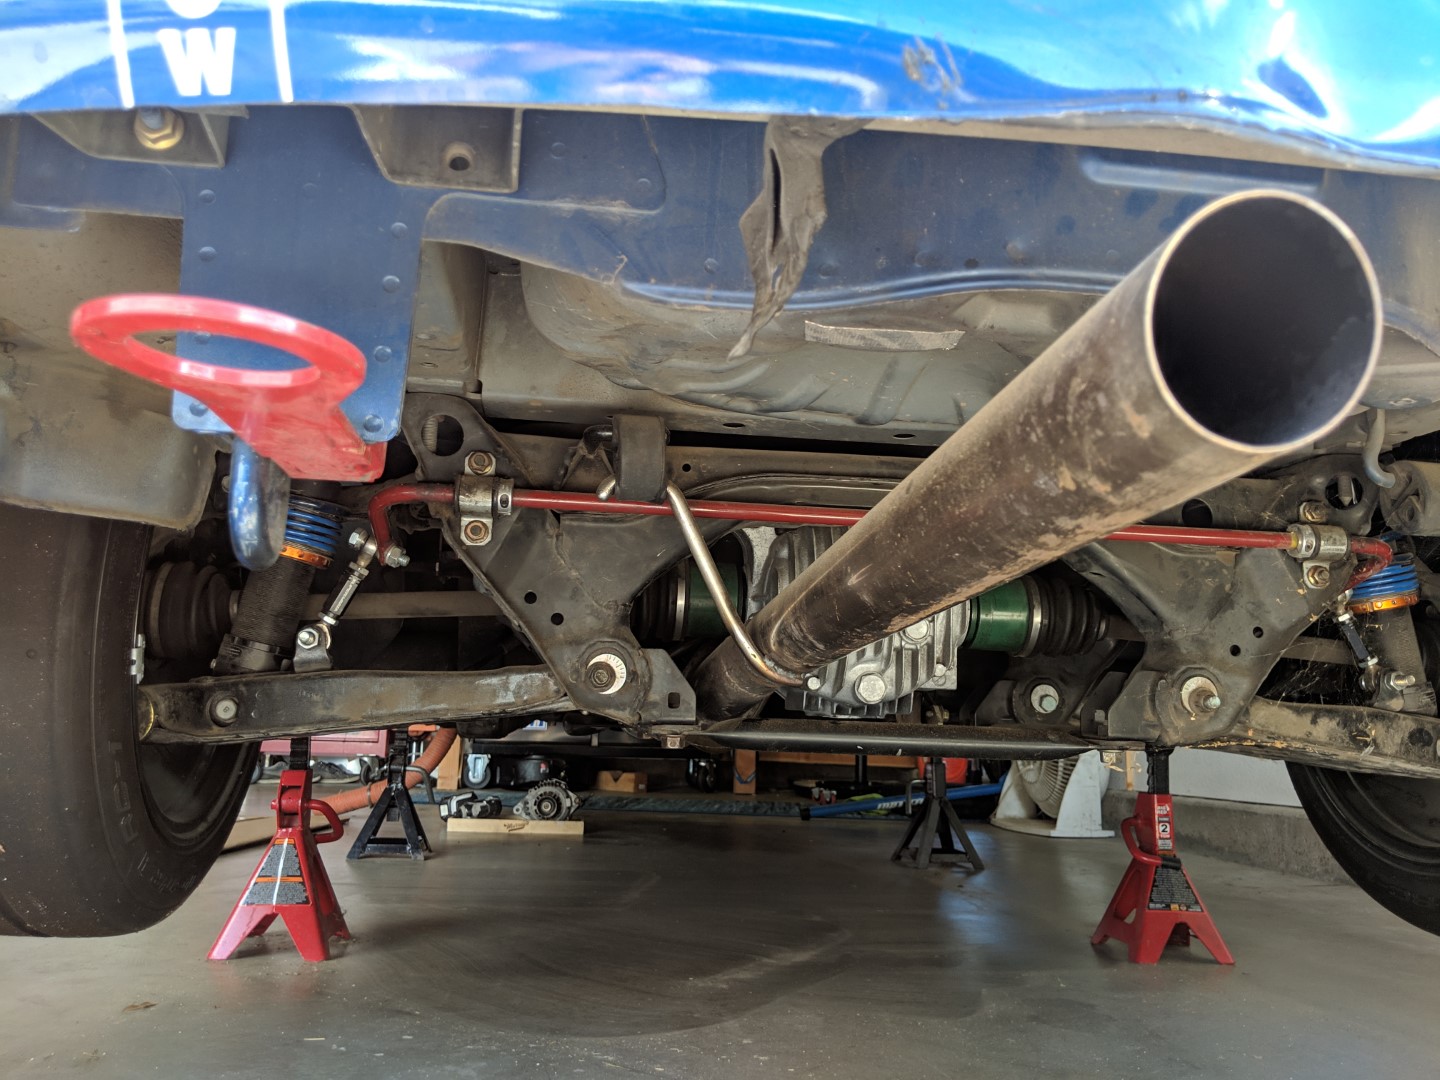
Also, compounding the exhaust noise level, is a newly rebuild 4.3 differential that I put in the car.... another step that was taken towards supermiata.
diff
vbanded cat setup. This is the single cell racing cat, I also have a magnaflow cat that has a proper carb eo number that I used to pass smog on the rare occasion that I had/wanted to.
the ceramic coating on the outside of the header started to flake off. A lot of companies that do these coating will warn you that this can happen if you coat a brand new chome plated heater. The coating on the inside is still copper colored and intact. This is only a visual thing and doesn't affect function. It's the coating on the inside doing the work. You can also see the insulation I put on the driver side of the trans tunnel as well.
BWWWWWAAAAAHHHHHHHHHH!!!!!!!!!!!!!!!!!!!!!!!!!!!!! !!!!!!!!!!!!!!!!!!1111111111111111111111111111111
Reply
0
0
Thread Starter
Senior Member
Joined: May 2011
Posts: 638
Total Cats: 76
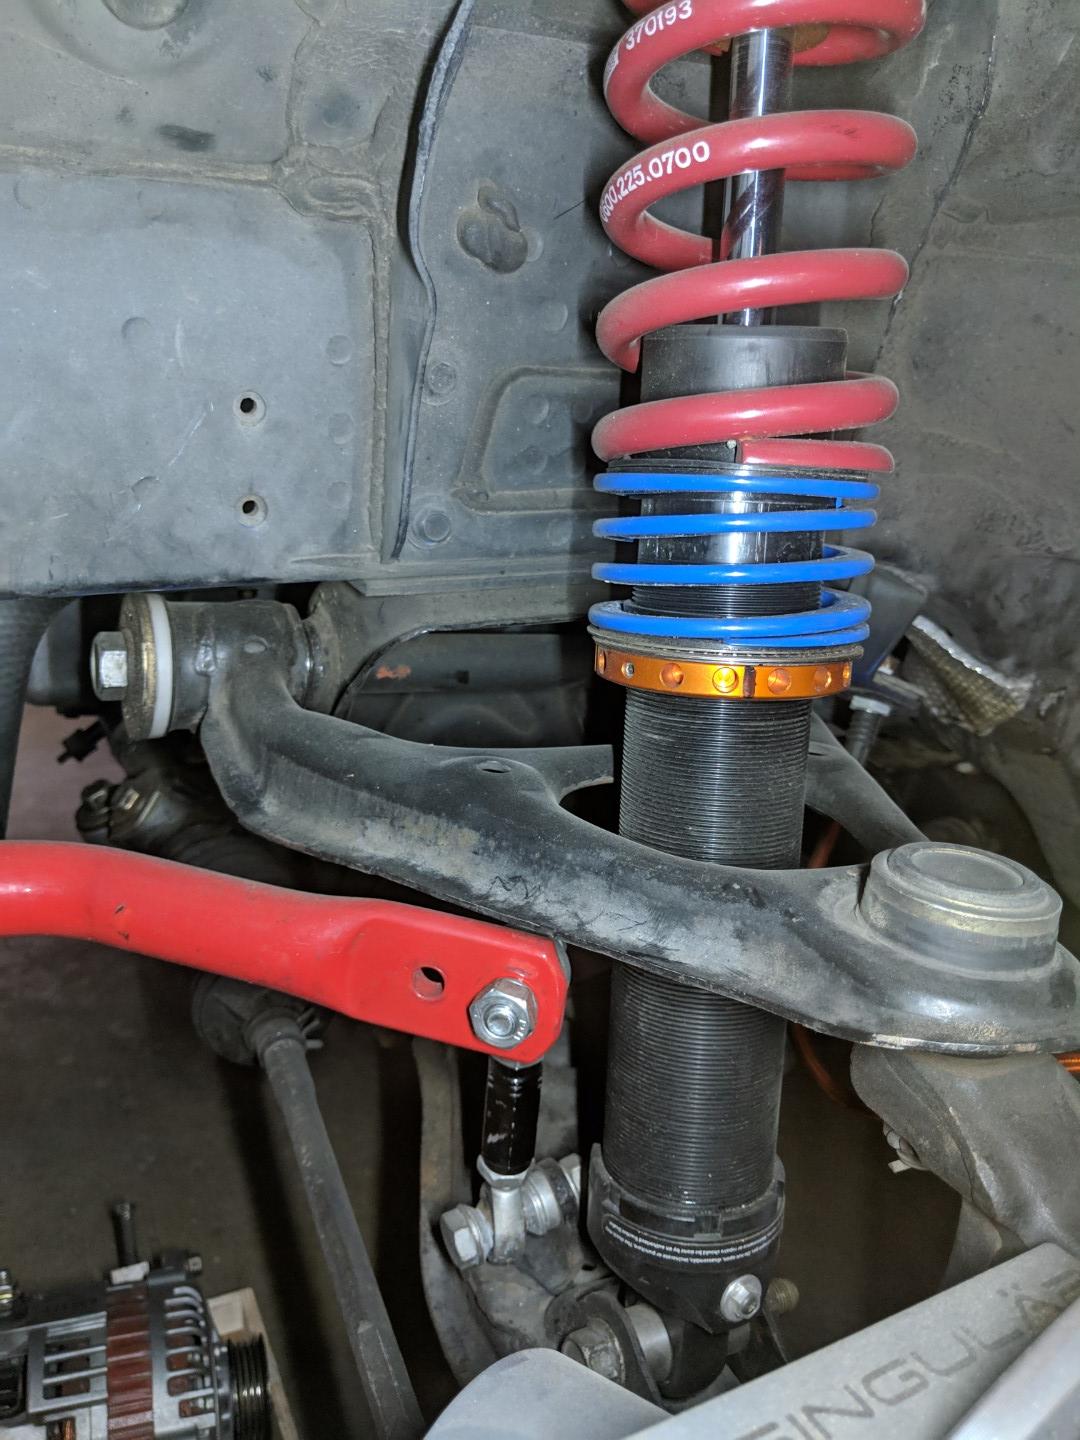
Nothing really all that ground breaking suspension wise... although I consider it special because man, this is my favorite suspension setup of any I've ever had on any car.
Poly bushings
ELBJs
Delrin Front, Upper Inners
Xida CS G 2
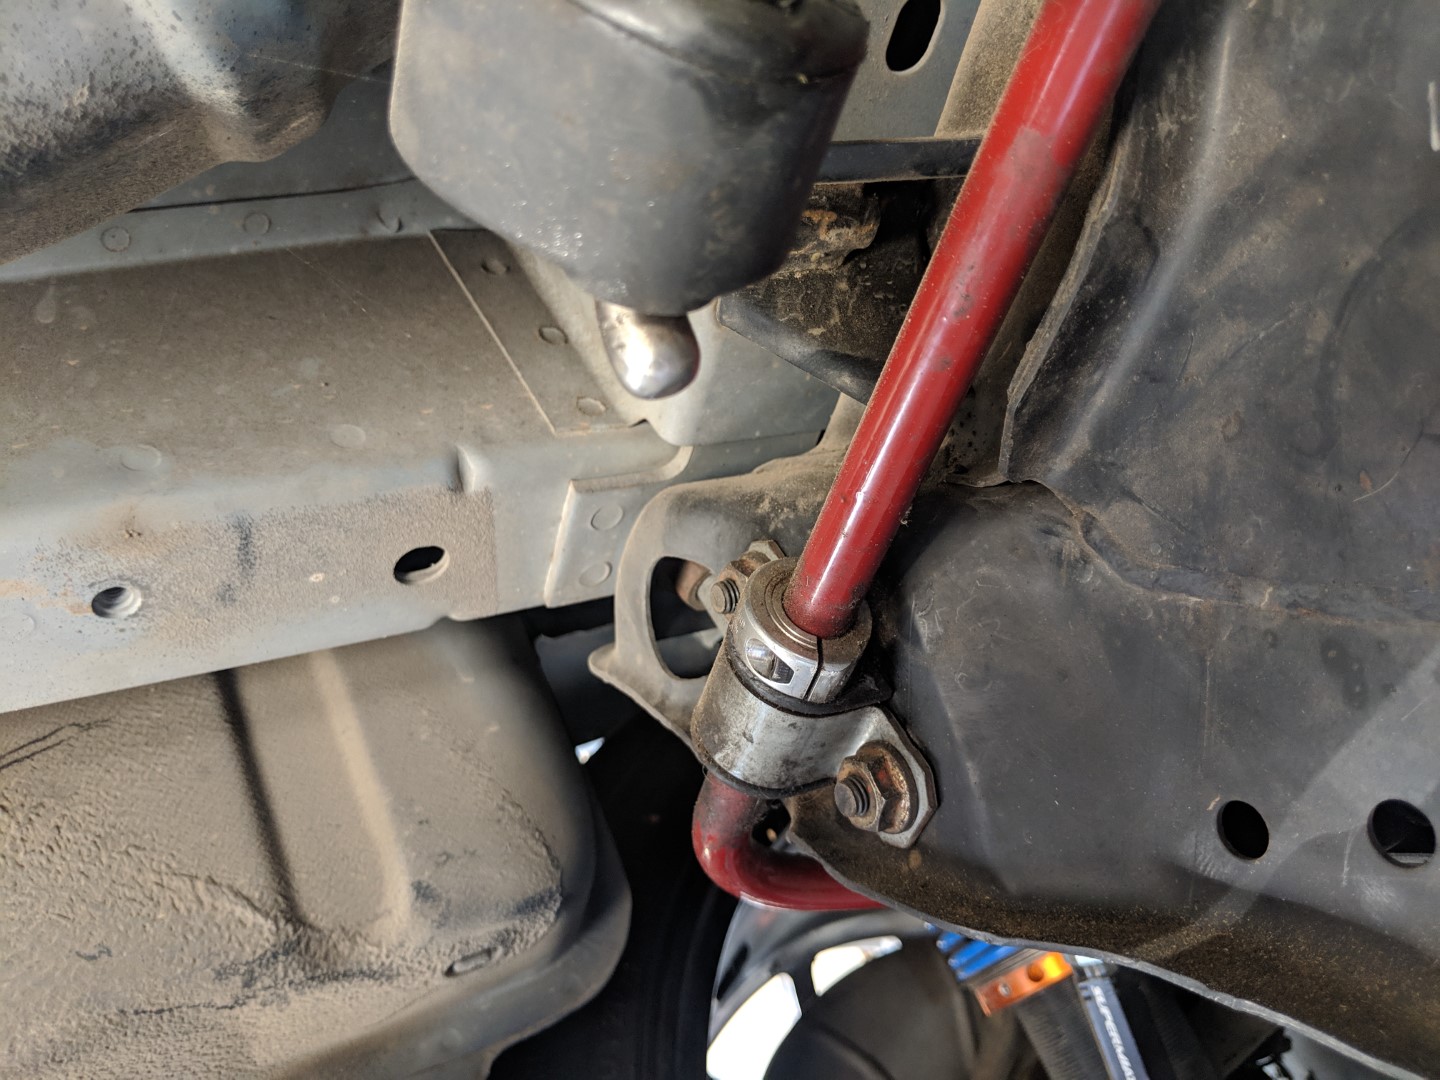
RB Front Sway
MSM Rear Sway
G2 Xidas that you saw earlier in this thread
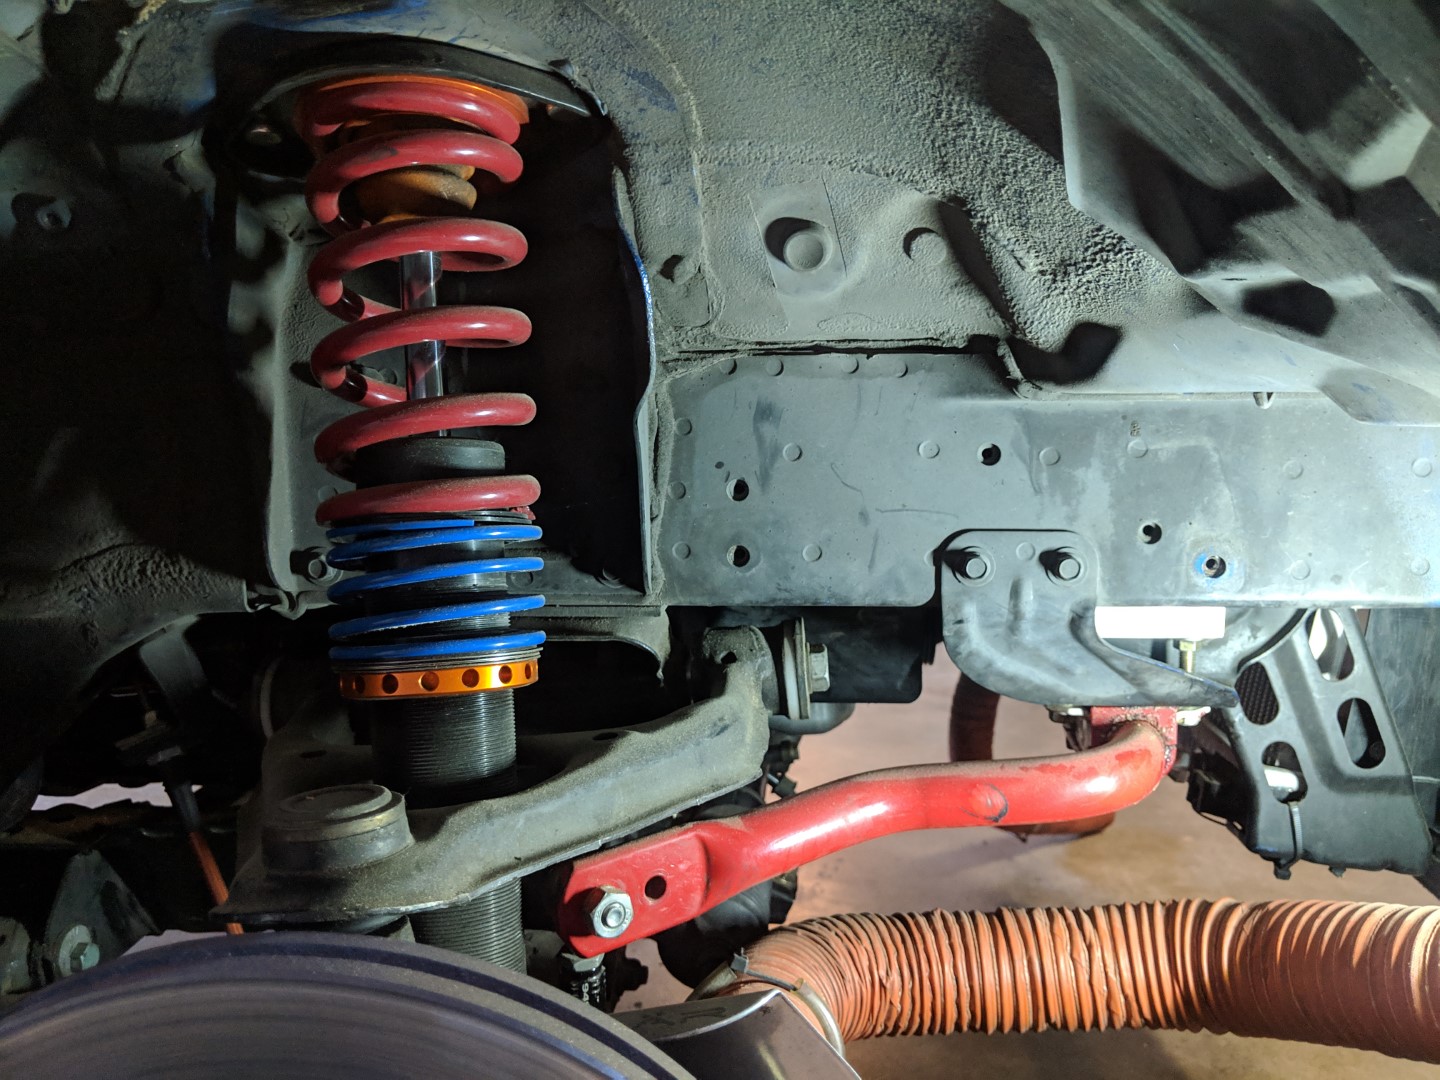
msm rear bar. SPM End links of course.
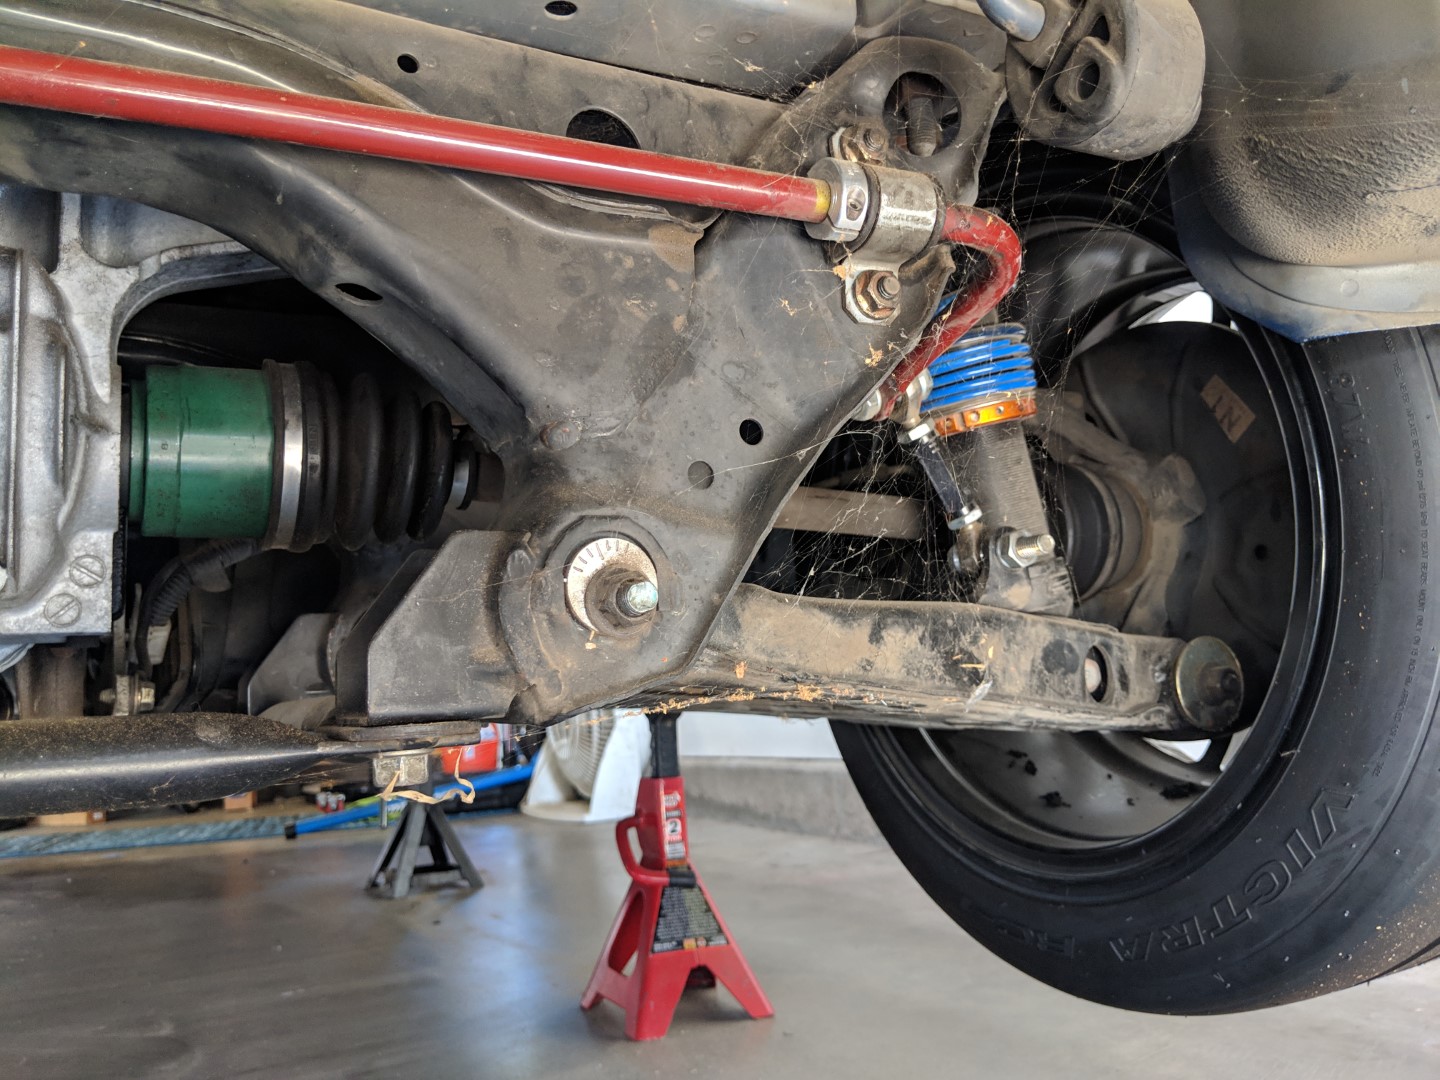
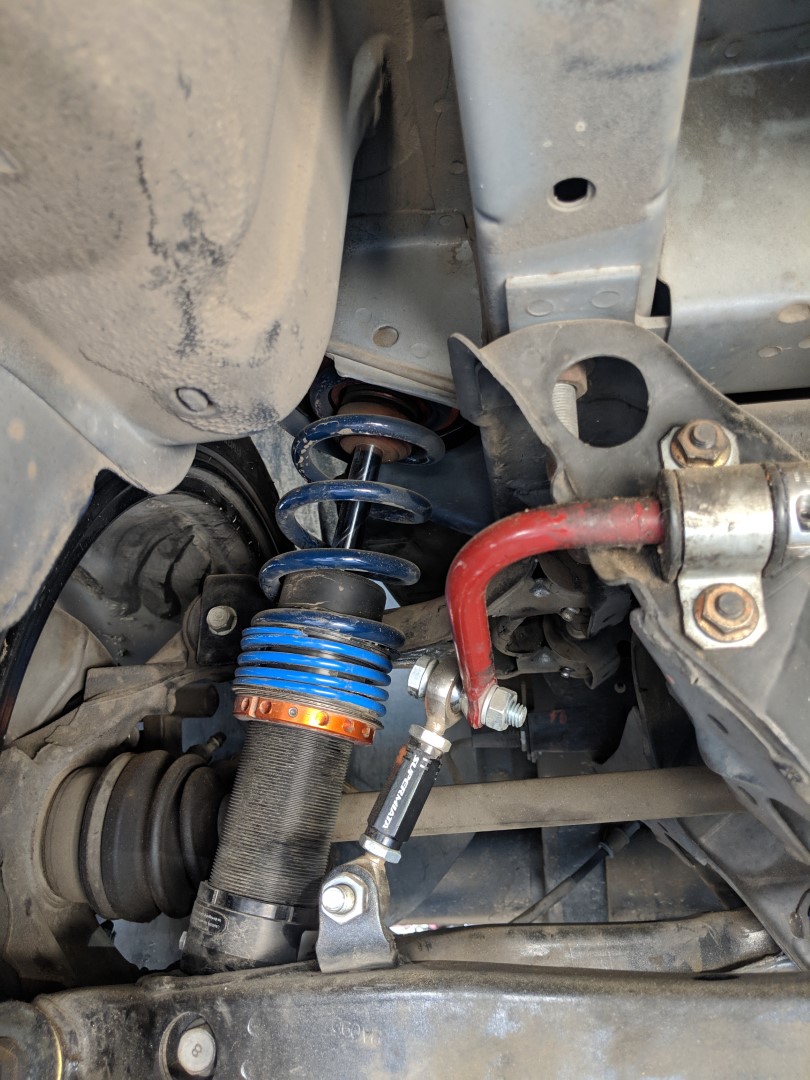
I got these little aluminum collars from McMaster. I had to grind one side of them into an elliptical sort of shape so that the bar could move through its' full range of movement without them binding.
Delrin upper inners.
Poly bushings
ELBJs
Delrin Front, Upper Inners
Xida CS G 2
RB Front Sway
MSM Rear Sway
G2 Xidas that you saw earlier in this thread
msm rear bar. SPM End links of course.
I got these little aluminum collars from McMaster. I had to grind one side of them into an elliptical sort of shape so that the bar could move through its' full range of movement without them binding.
Delrin upper inners.
Reply
0
0

No muffler. Ouch. You may want to add one, keeping the current resonator.
__________________


Reply
0
0

Thread Starter
Senior Member
Joined: May 2011
Posts: 638
Total Cats: 76
Fortunately, it's the new owner that has to deal with the ear plugs. I gave him the option of having me sell the exhaust that was on the car and sourcing a new one locally... I figured it would be close to an even up trade. However he elected to keep it.
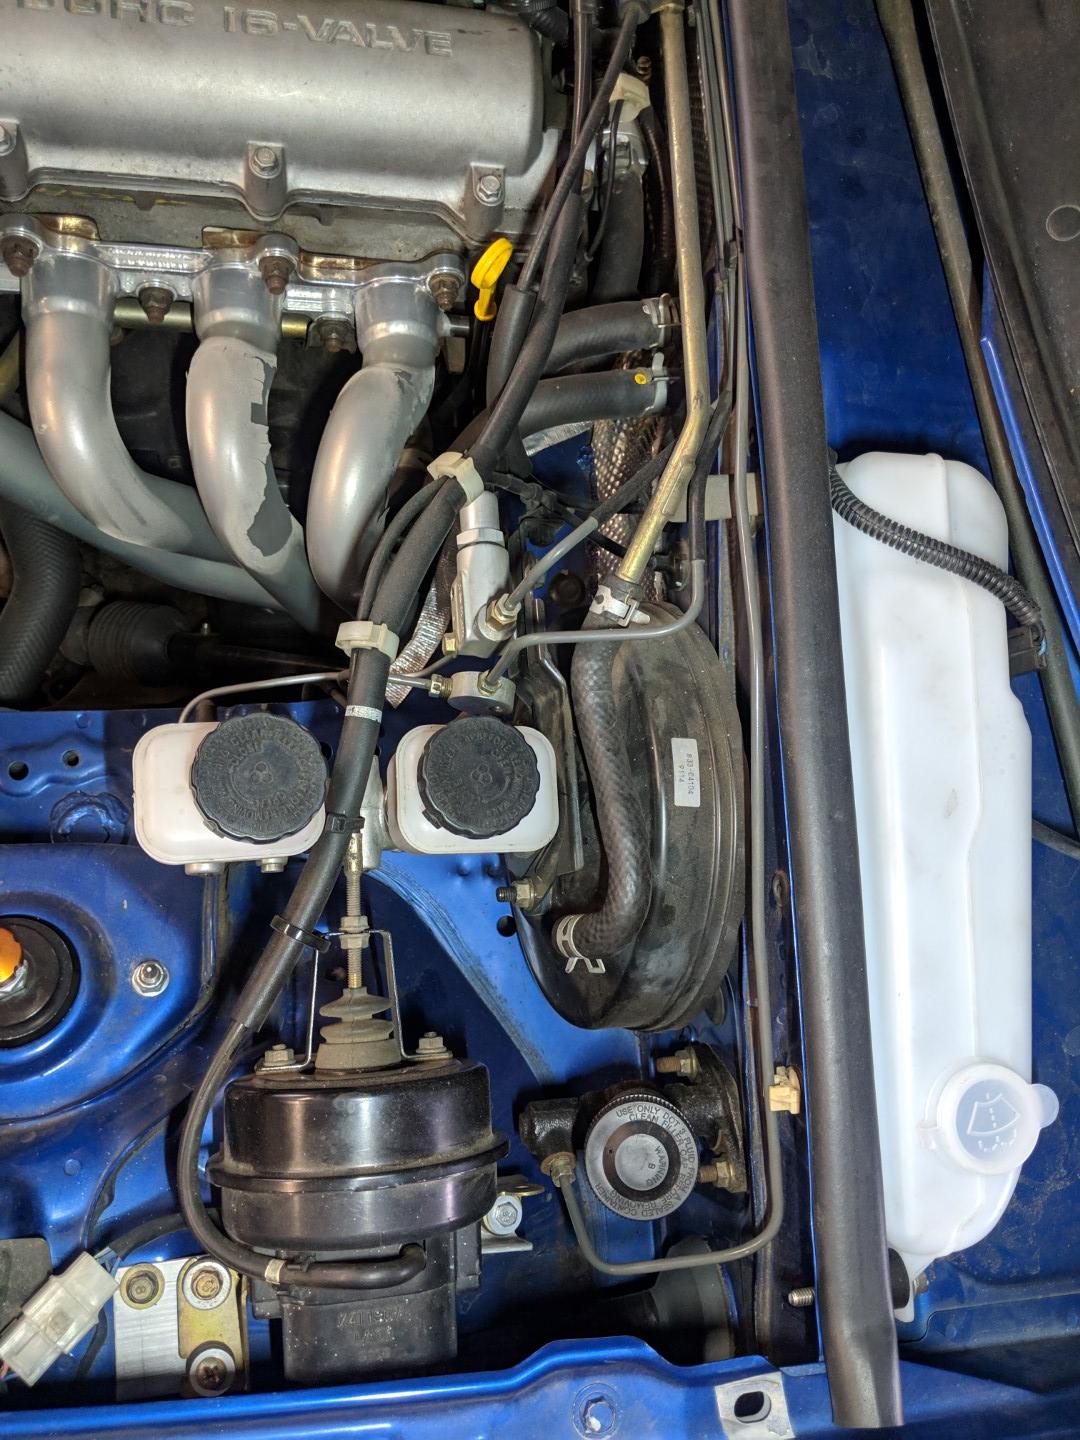
Brakes: Nothing ground braking here. Sport Brakes fronts, 1.8 rears. XP12 front, XP10 Rear, 949 Stainless Lines, Willwood 1" Master, Prop Valve, No ABS, Singular Motorsports - Brake Spats, Home Depot Racing Brake Ducting.
I had 2.25" ID high temp hose sitting around from my previous car. It just so happened that the 2.25" high temp silicone hose fit inside the singular motorsports 2.5" kit. I then sourced a reducer from home depot racing and used a small bit of 3" Id pipe, cut on an angle and fastened to the original fog light location in the bumper. I had some metal screen sitting around so I threw that in there as well, even though you can't see it in photos.
This is obviously the nothing special braking package, but I never got it to fade and it was perfect for my HP level.
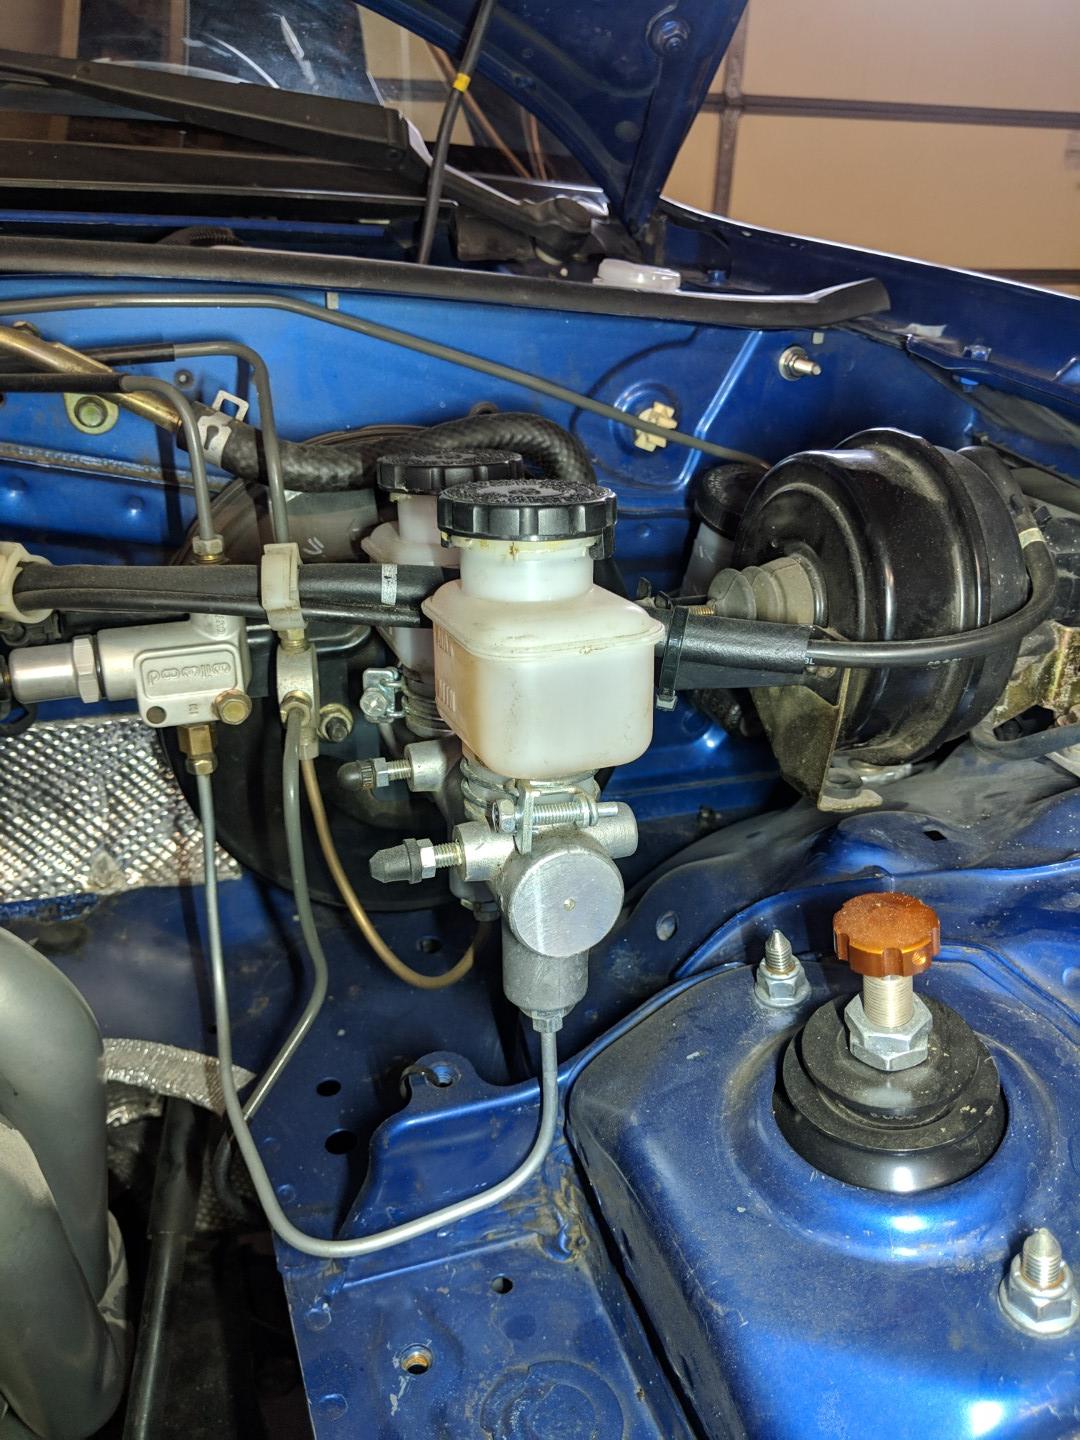
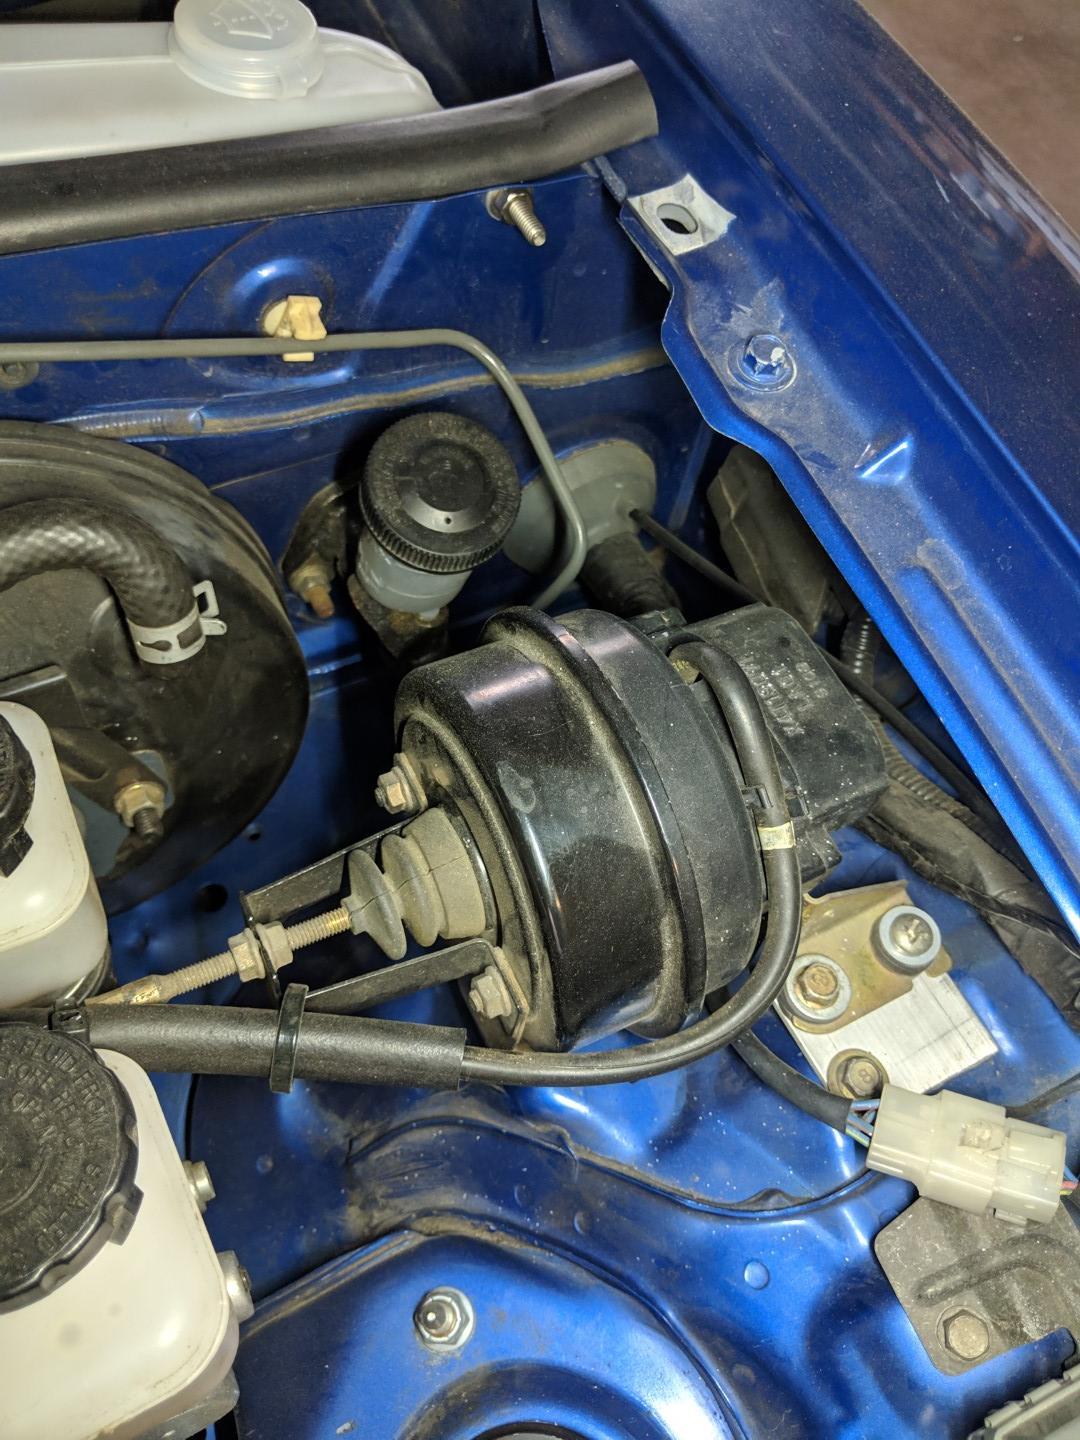
I wanted to keep the cruise control so I fabbed up a little offset bracket to relo the cruise control about 1.5" aft so that the throttle cable went between the two reservoirs of the master. I kept some rubber grommets in there so that the cruise was isolated from vibration and could move a bit.
Brake ducts. I use zip ties to keep the silicone hose in the singular spats. The silicone hose is attached to the plastic undertray utilizing zip ties with 1/4" silicone hose around them so that the hose doesn't get cut due to chaffing.
Home depot racing reducers
the 3" pvc fits just inside the fog light holes. The pvc is angle cut to follow the angle of the bumper as it passes over the fog light locations.
Brakes: Nothing ground braking here. Sport Brakes fronts, 1.8 rears. XP12 front, XP10 Rear, 949 Stainless Lines, Willwood 1" Master, Prop Valve, No ABS, Singular Motorsports - Brake Spats, Home Depot Racing Brake Ducting.
I had 2.25" ID high temp hose sitting around from my previous car. It just so happened that the 2.25" high temp silicone hose fit inside the singular motorsports 2.5" kit. I then sourced a reducer from home depot racing and used a small bit of 3" Id pipe, cut on an angle and fastened to the original fog light location in the bumper. I had some metal screen sitting around so I threw that in there as well, even though you can't see it in photos.
This is obviously the nothing special braking package, but I never got it to fade and it was perfect for my HP level.
I wanted to keep the cruise control so I fabbed up a little offset bracket to relo the cruise control about 1.5" aft so that the throttle cable went between the two reservoirs of the master. I kept some rubber grommets in there so that the cruise was isolated from vibration and could move a bit.
Brake ducts. I use zip ties to keep the silicone hose in the singular spats. The silicone hose is attached to the plastic undertray utilizing zip ties with 1/4" silicone hose around them so that the hose doesn't get cut due to chaffing.
Home depot racing reducers
the 3" pvc fits just inside the fog light holes. The pvc is angle cut to follow the angle of the bumper as it passes over the fog light locations.
Reply
0
0
Thread Starter
Senior Member
Joined: May 2011
Posts: 638
Total Cats: 76
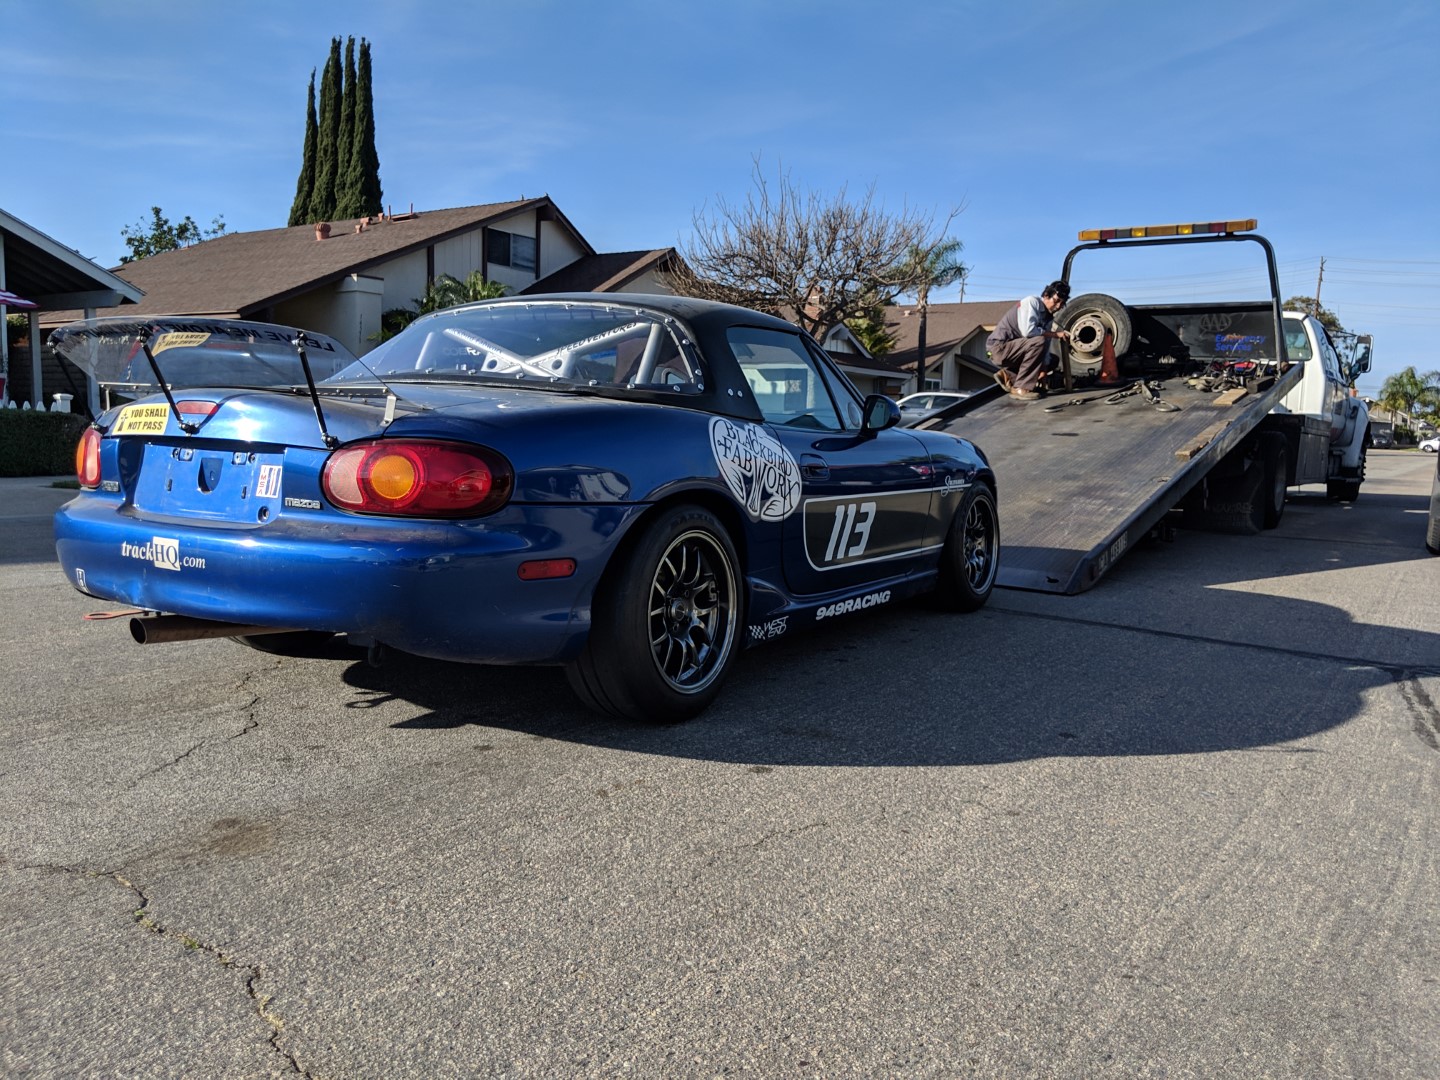
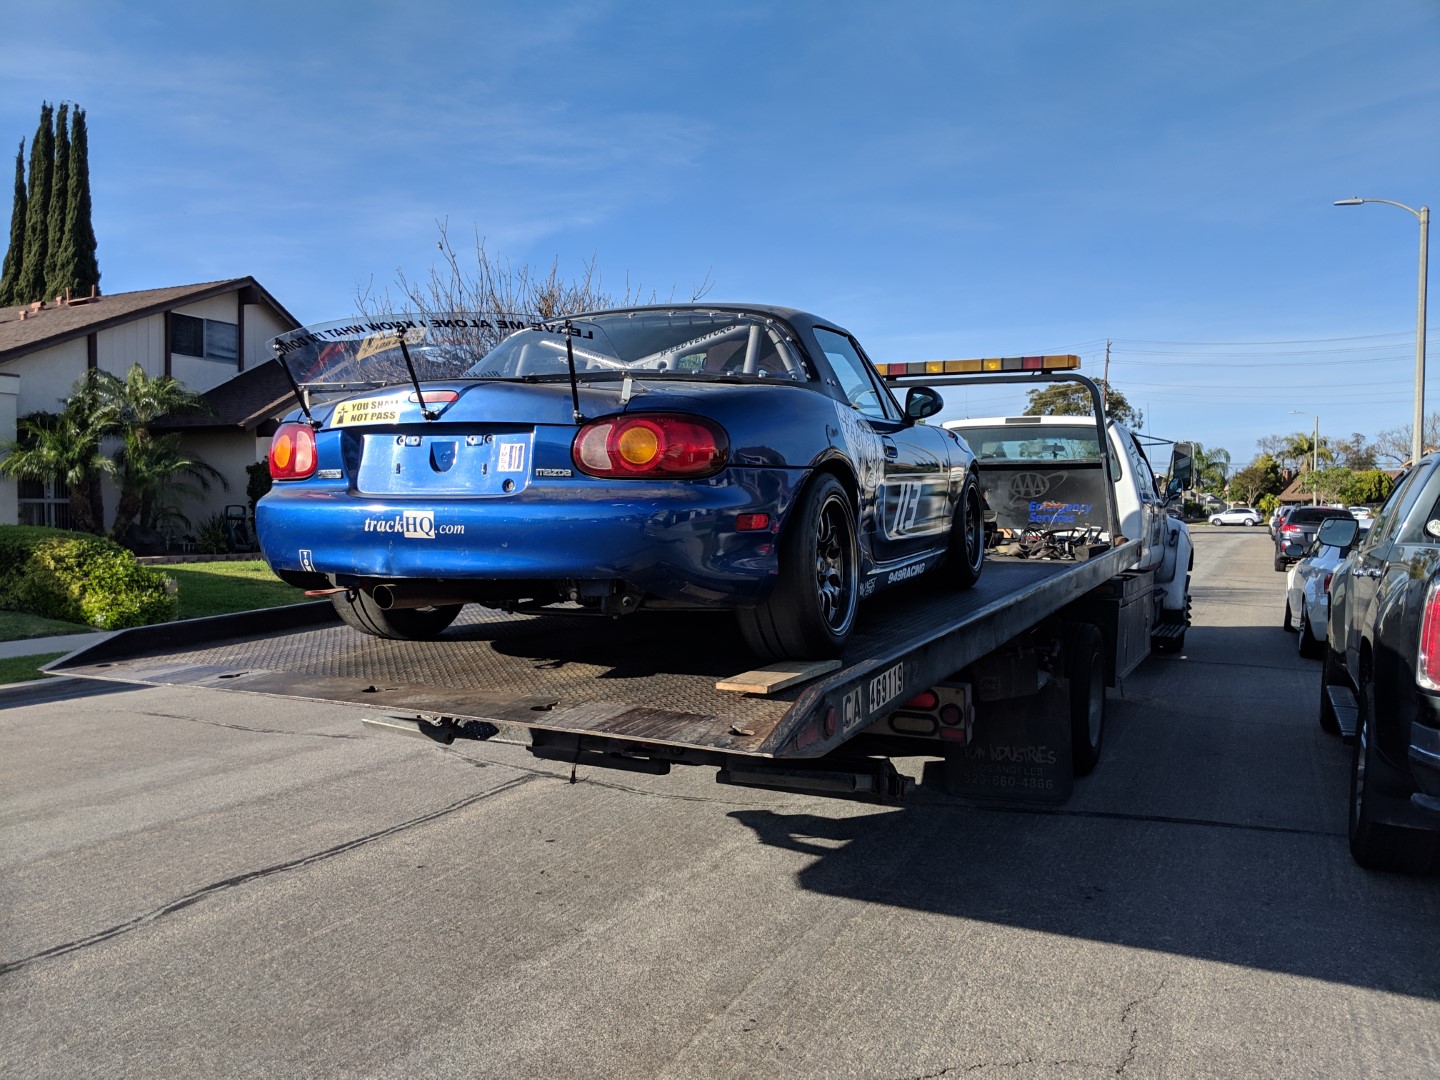
Saturday 10AE #1126 headed to it's new owner. I got it loaded up with all of the spares and documented a last few final items for the new owner. It got loaded onto a flatbed to be taken to a logistics company distribution hub and it's on it's way to north carolina. I took a last few photos as it went out the door. Miss the car already, but really it needs to be used or it's going to just fall apart, it can't sit for years on end waiting for me to jump back into the deep end. I'm certain the new owner is going to love it, I can't wait to hear his impressions after he drives it. I'm going to try and get him to step in and take over this thread.
Some last shots.
Hood back on the car, waiting for the logistics pickup.
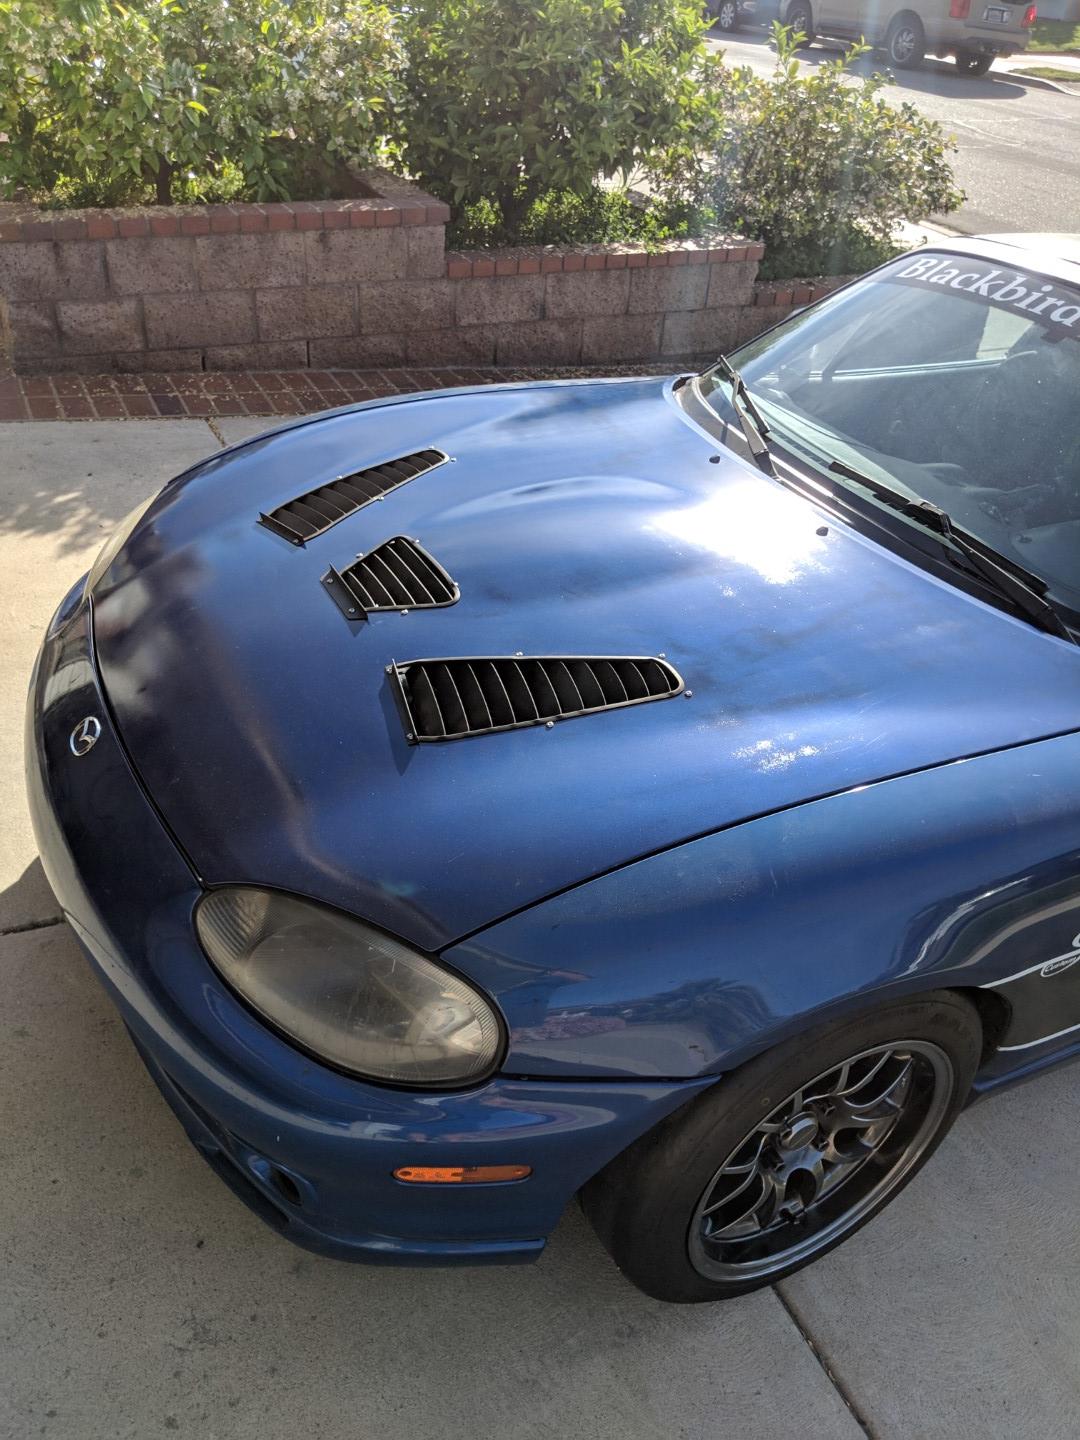
The hood looks good from 2/5 angles. I did a B-/C+ job. I made 2 mistakes on the base coat that you can see from certain angles. The biggest mistake was not applying the clear thick enough on the first coat. It really needs to go on as thick as you can get it on the first coat without it running/dripping. Once it's wet sanded and buffed out it will look better for sure. I learned a lot on this part of the project.
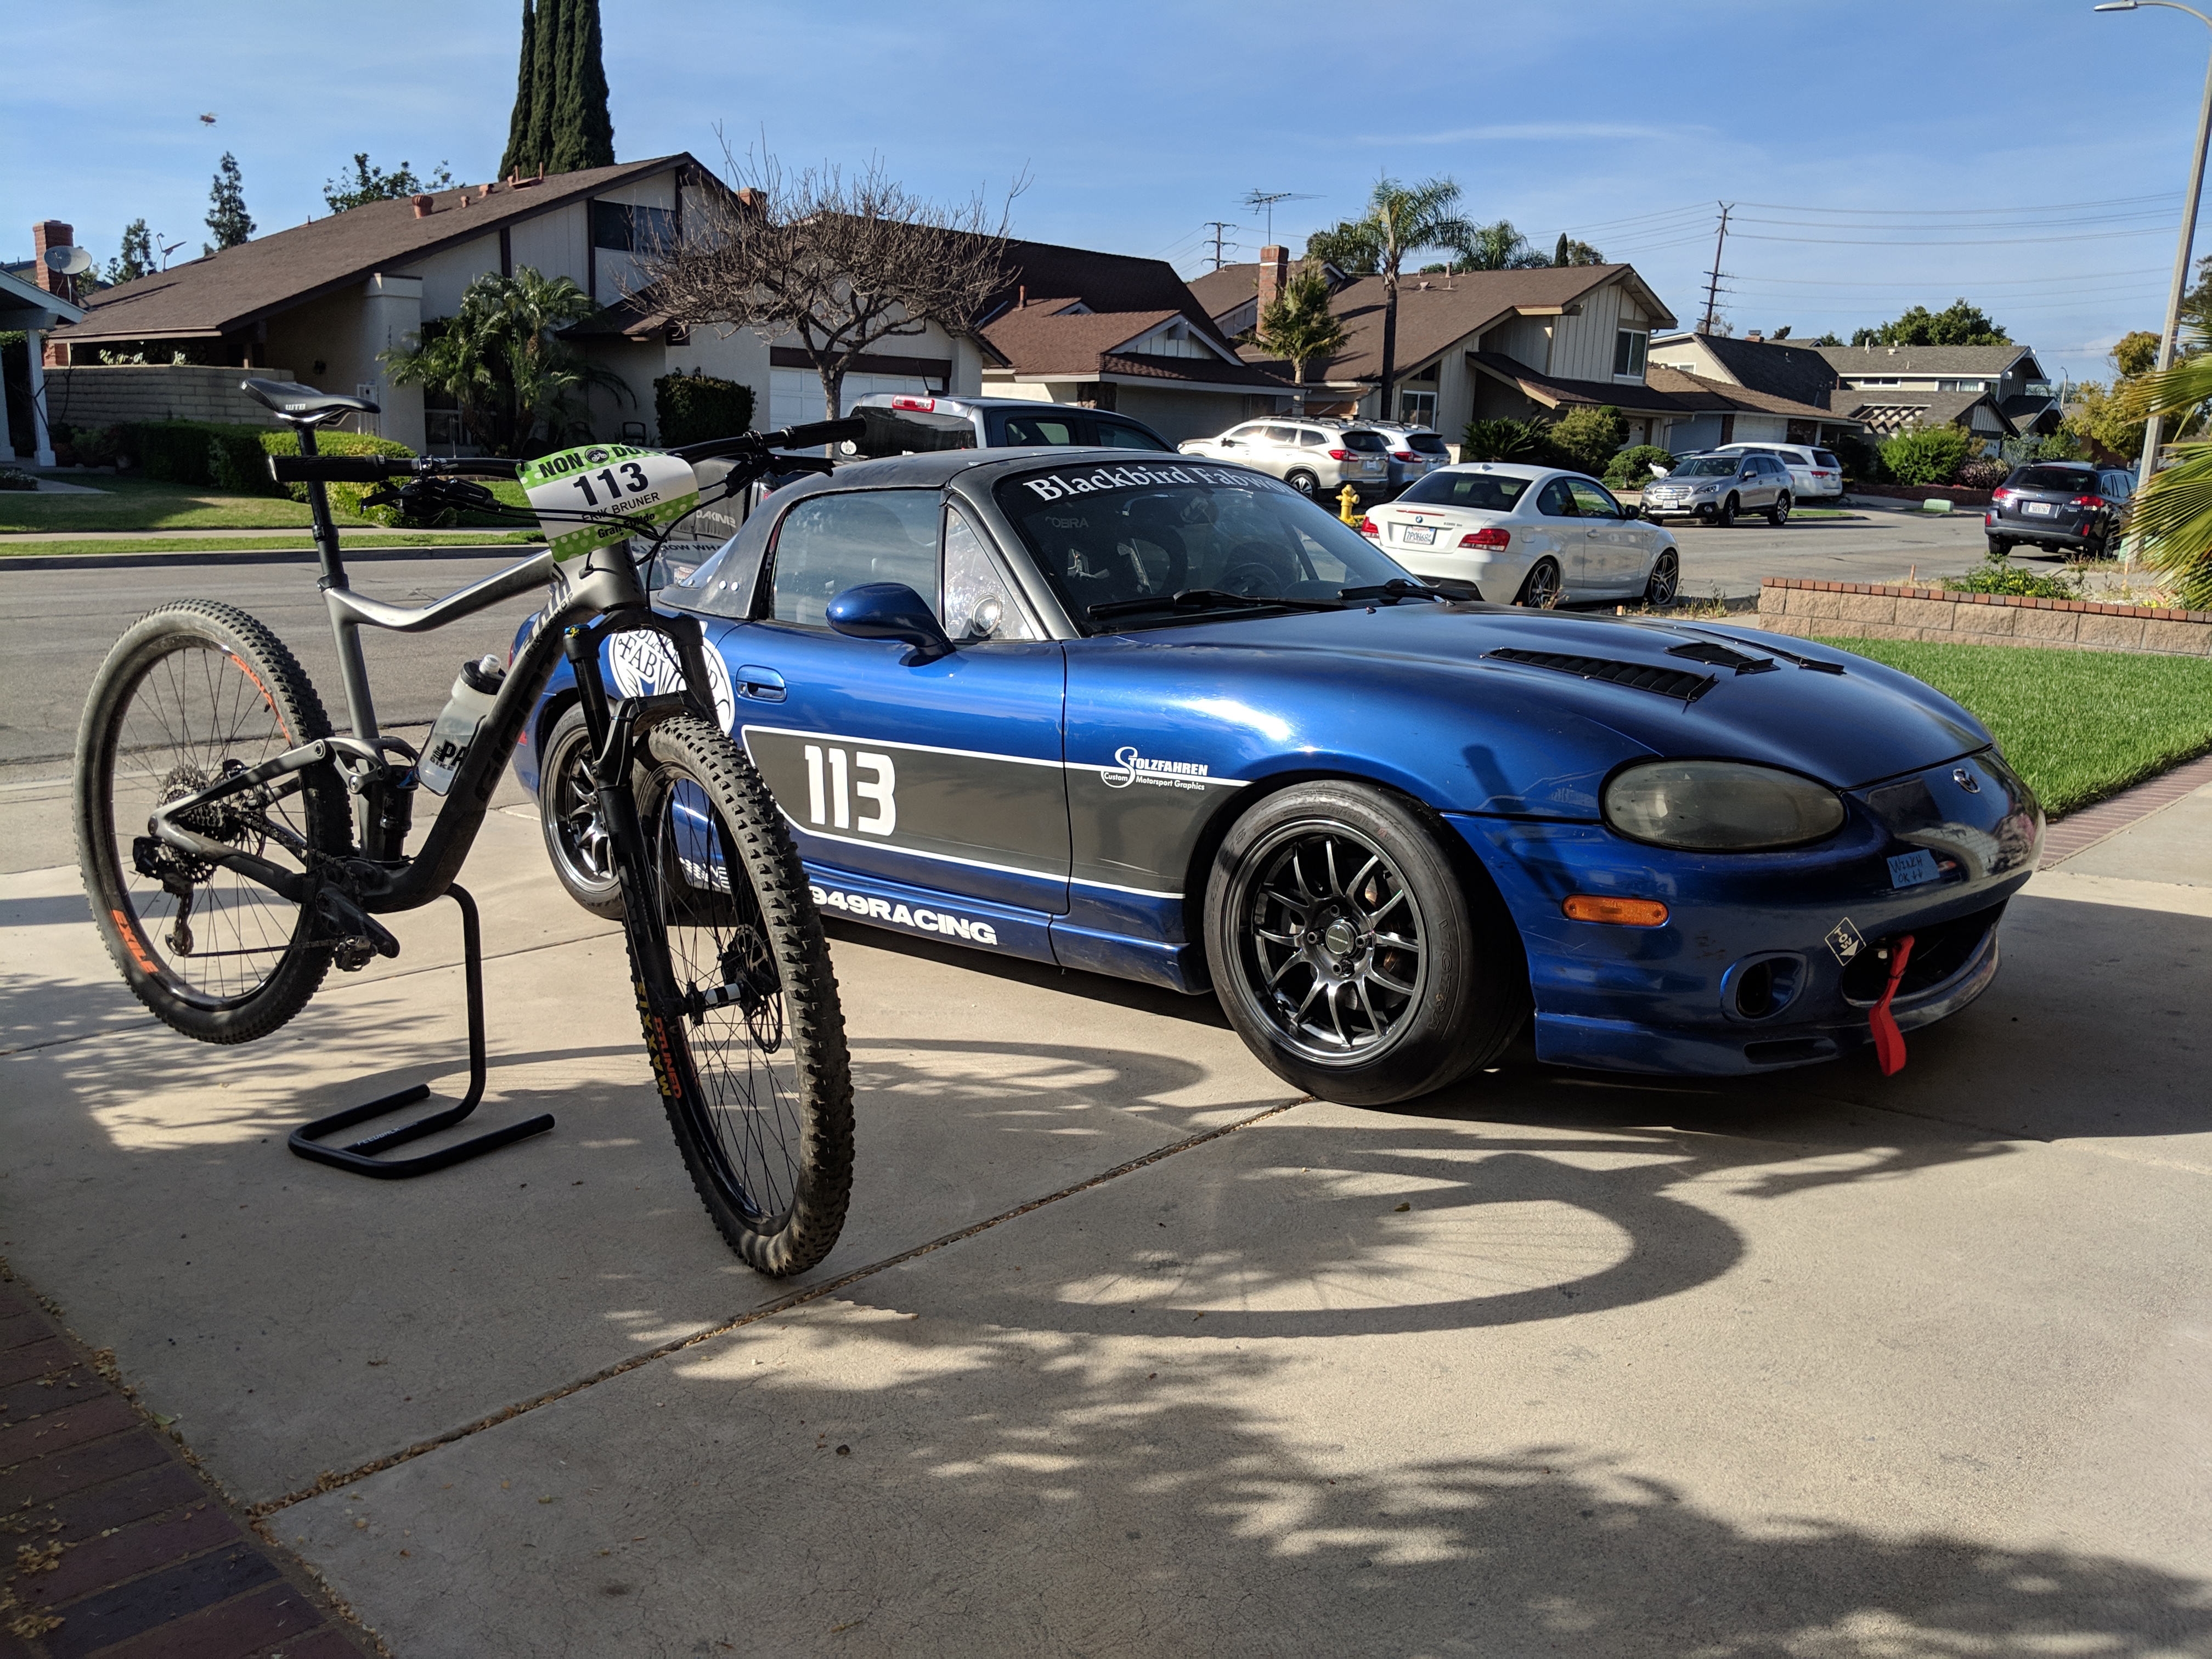
I had a mtb race/event Saturday morning and the irony of having the same number plate for the event that the miata wears. It was a bittersweet way to send the car off and transition into a new phase of life.
I stood there and watched it wheel down the street like a parent watching their child leave for college. The driver was sufficiently weirded out in the process lol.
I'm gonna do a last few posts here wrapping this up for posterity and people searching the forums. For now, thanks for tuning in to this rather mundane and boring build.
Some last shots.
Hood back on the car, waiting for the logistics pickup.
The hood looks good from 2/5 angles. I did a B-/C+ job. I made 2 mistakes on the base coat that you can see from certain angles. The biggest mistake was not applying the clear thick enough on the first coat. It really needs to go on as thick as you can get it on the first coat without it running/dripping. Once it's wet sanded and buffed out it will look better for sure. I learned a lot on this part of the project.
I had a mtb race/event Saturday morning and the irony of having the same number plate for the event that the miata wears. It was a bittersweet way to send the car off and transition into a new phase of life.
I stood there and watched it wheel down the street like a parent watching their child leave for college. The driver was sufficiently weirded out in the process lol.
I'm gonna do a last few posts here wrapping this up for posterity and people searching the forums. For now, thanks for tuning in to this rather mundane and boring build.
Reply
0
0
If it helps, this car was one of the reasons why i stuck with Miatas after selling my last turbo car. I was going to move to MR2 Spyders. Did one last CL search and bought an NB1 instead and tried to pretty much copy your build. Wish i had stopped where you do. The car was better then. 
Reply
0
0

Junior Member
Joined: Apr 2008
Posts: 181
Total Cats: 14
From: Dacula, GA
I don't think I'm the only one that has subscribed to this build, has looked through every photo looking at minor details to help shape their own project, and slowly work on morphing their car into something different that shares some common themes to your car. Probably not the only one that also through, oh hell it is for sale, i should sell my half finished dumpster fire and buy this one. Thanks for putting this together.
Reply
0
0

Newb
Joined: Mar 2019
Posts: 3
Total Cats: 0
Hello gang, I'm the new owner of this wonderful machine. Erik did such a nice job over the years that there probably won't be a whole lot of further development, for now. But it will definitely see track time, starting next week.
After ignoring all the warnings that the car would be loud, I rather like it. Let's see what my neighbors think at 5am on race day
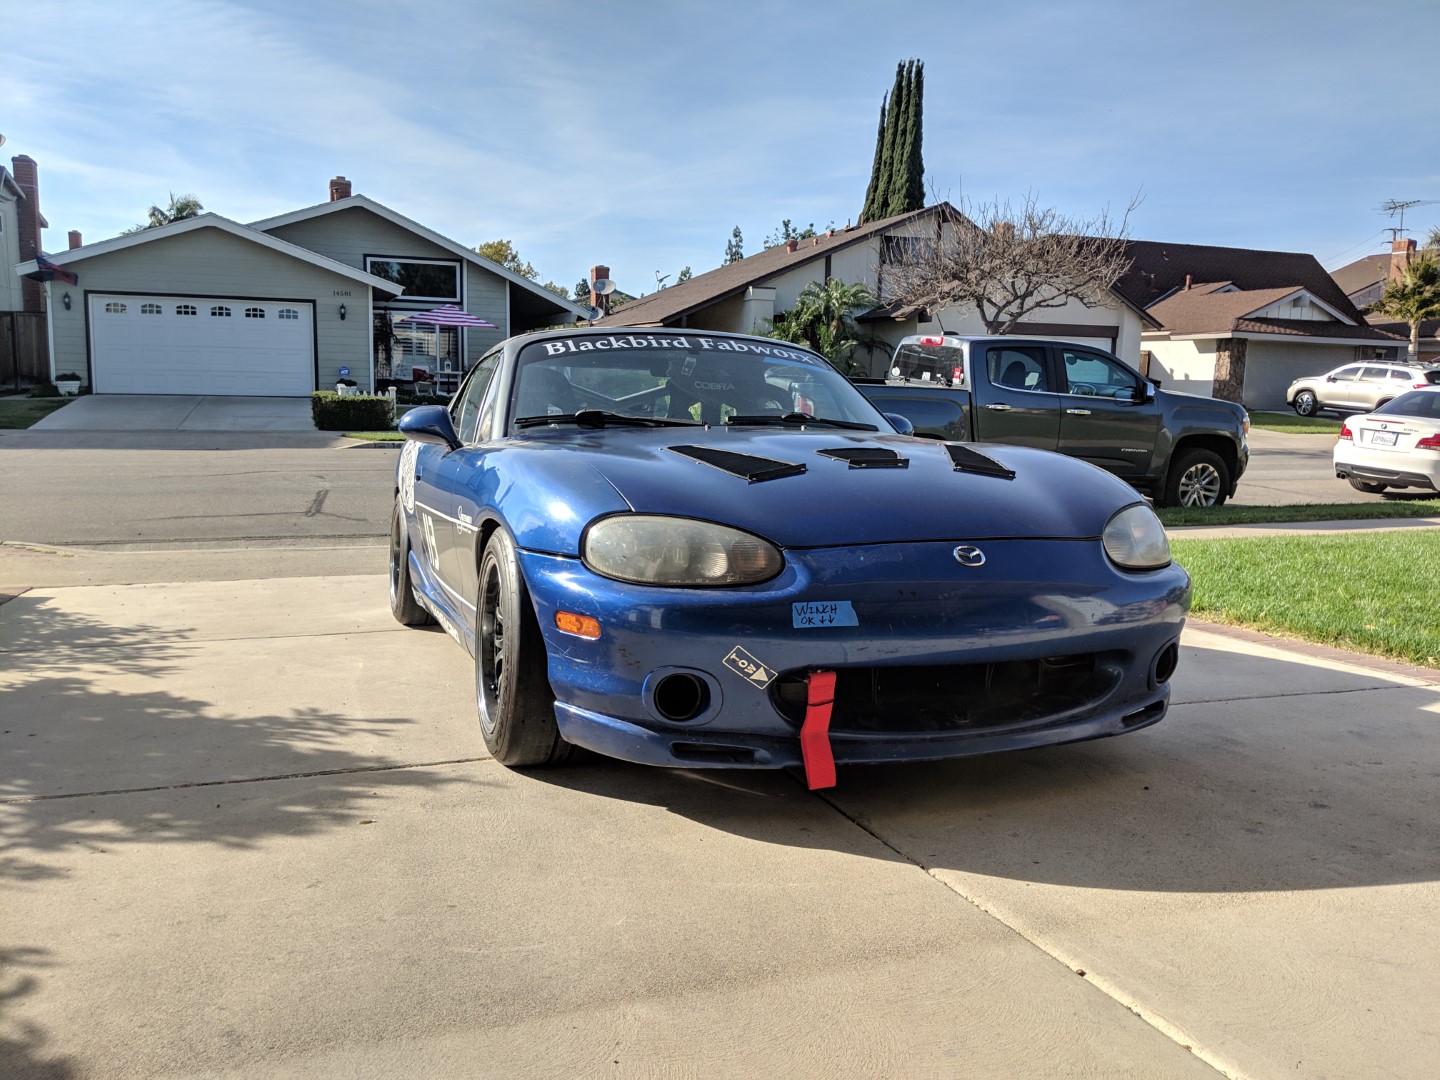
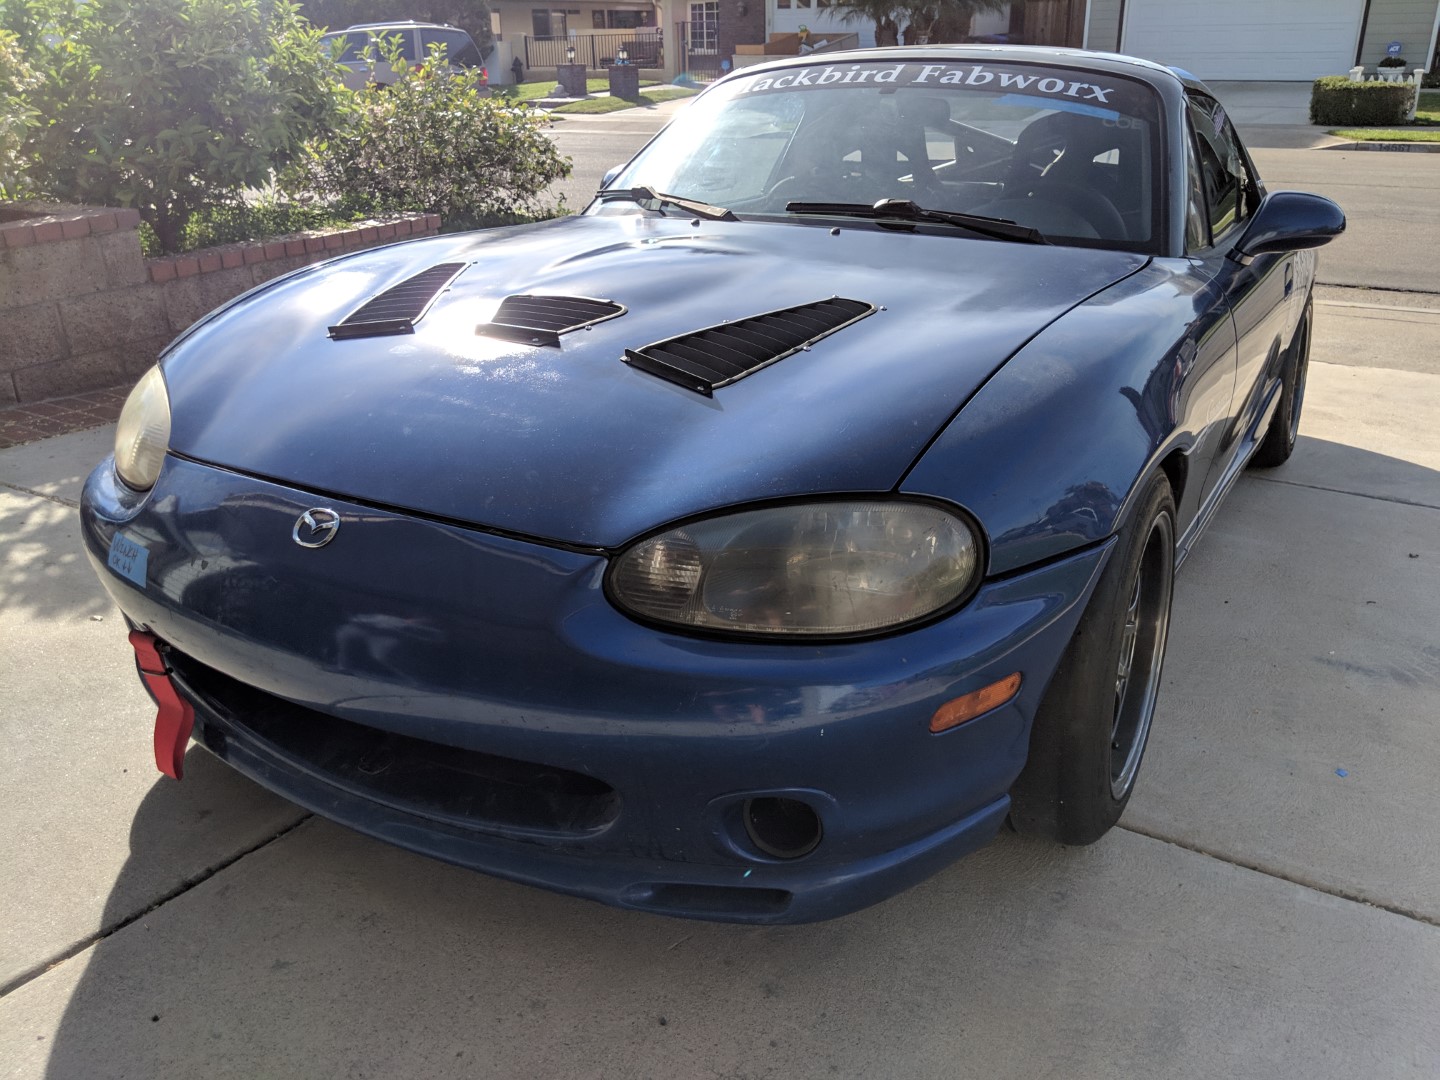
Fresh off the truck:

First things first. Washed, checked fluids, set some baselines on setup and packed it away in the garage. Tomorrow it gets a plate, hopefully.

Cat-approved!

After ignoring all the warnings that the car would be loud, I rather like it. Let's see what my neighbors think at 5am on race day
Fresh off the truck:
First things first. Washed, checked fluids, set some baselines on setup and packed it away in the garage. Tomorrow it gets a plate, hopefully.
Cat-approved!
Reply
0
0

Thread
Thread Starter
Forum
Replies
Last Post


