
Ian's 99 build thread


Elite Member
Joined: Oct 2013
Posts: 1,822
Total Cats: 144
From: NorthWest NJ
Congrats on the new car! a clean FD is a thing of beauty.
My friend has a white 94 FD, black leather interior. He bought it as a roller with ~75kmi on it and dropped an LS1 in it. He tracks it and takes care of it, what an amazing/beautiful car.
I know waaaaay more people with bad subaru head gaskets (literally everyone I know with a '97-'10 non turbo one) than I know that have had a stock, naturally aspirated rotary fail. A guy I know has a 1979 RX7 with 180,000 miles on it. The engine is coming out for the first time (he has all the maintenance records). The... rotor face seals(? is that what they are called? not the apex seals, the other oil seals) have failed. A close friend of mine has an RX-8 with 150,000 on it with zero issues.
It depends, but from all I've seen/heard its nowhere near that, and despite being problematic also, Subaru hg's are still nowhere near as bad.
But knowing IAN he'll probably use the opportunity to rebuild using way cooler parts and do a fantastic job of it as he does with everything.
But knowing IAN he'll probably use the opportunity to rebuild using way cooler parts and do a fantastic job of it as he does with everything.
Reply
 0
0

0

All I know about the rx7 is from a 1988 RX-7 that had a huge turbo, motec ecu, made 640whp as a result of two days of dyno tuning, and pulled every. single. car. on the street to 120mph including a tt gallardo.
Reply
0
0


Thread Starter
Elite Member

Joined: Mar 2007
Posts: 5,306
Total Cats: 887
From: Santa Clara, CA
Nope. Auto shippers are way behind FedEx/UPS in this regard. I know they have tech to track truck locations precisely (back in the 90s I worked for Qualcomm, who had one of the first satellite-based systems for this, before GPS was ubiquitous), but they don't seem to make that information available on the web.
It sounds like my car was first on and last off (not surprising for a cross-country trip like this), which is why it's taking 10-14 days to make the trip. I'll call them for an update next week.
--Ian
It sounds like my car was first on and last off (not surprising for a cross-country trip like this), which is why it's taking 10-14 days to make the trip. I'll call them for an update next week.
--Ian
Reply
0
0
Thread Starter
Elite Member
Joined: Mar 2007
Posts: 5,306
Total Cats: 887
From: Santa Clara, CA
FWIW, if you're trying to swap valve springs, make sure you buy the right valve spring tool. This (the Lisle 36200) is the wrong one. It's too big to fit through the holes that the lifters go in:
The Lisle 36050 includes two of them, a big one and a small one, and G says it's the right size. Apparently Amazon has it in stock in the near-bay-area warehouse, so overnight shipping (Sunday delivery!) was free.
So while the valve cover was off, we checked the valve clearances. The intake valves were all still bang on (varying between .007 and .008), but only two of the exhaust valves were solidly in spec at .012, two of them were marginal at .013, and four were out of spec at .014. I've got a few spare shims sitting in a box, so I'll see if I can clean some of those up once the valve springs are done.
Also dropped the USB borescope down into the cylinders to look at them. Some wall scoring which I'm not thrilled about although it doesn't look *bad*. A bit of detonation evidence on the center of the pistons in #2/#3 (but not so much on #1/#4). The cylinders are a bit wet, not sure where that's coming from. It's not blowing smoke so I don't think the valve guides seals are bad, but I dunno. Maybe it's just because the car ran for 2 minutes backing it out and putting it up on the lift, so never warmed up.
--Ian
Last edited by codrus; May 29, 2016 at 03:13 AM.
Reply
0
0

Reply
0
0
Thread Starter
Elite Member
Joined: Mar 2007
Posts: 5,306
Total Cats: 887
From: Santa Clara, CA
Reply
0
0
Thread Starter
Elite Member
Joined: Mar 2007
Posts: 5,306
Total Cats: 887
From: Santa Clara, CA
So the valve spring project started out reasonably well today, then turned to crap. Doh.
First, the valve spring tool got here. It looks like this (pretty much the same as all the other threads that talk about it), and it works quite well. It's in two pieces, you pull out the cam, pull out the bucket, put the aluminum part on top of the retainer, whack it with a hammer, and the keepers come flying out and get grabbed by the magnet inside the tool. It also takes the stock (steel) retainers off as well. After that you can just pull the spring out, easy peasy. Takes a few tries to get the hang of it, but no big deal.
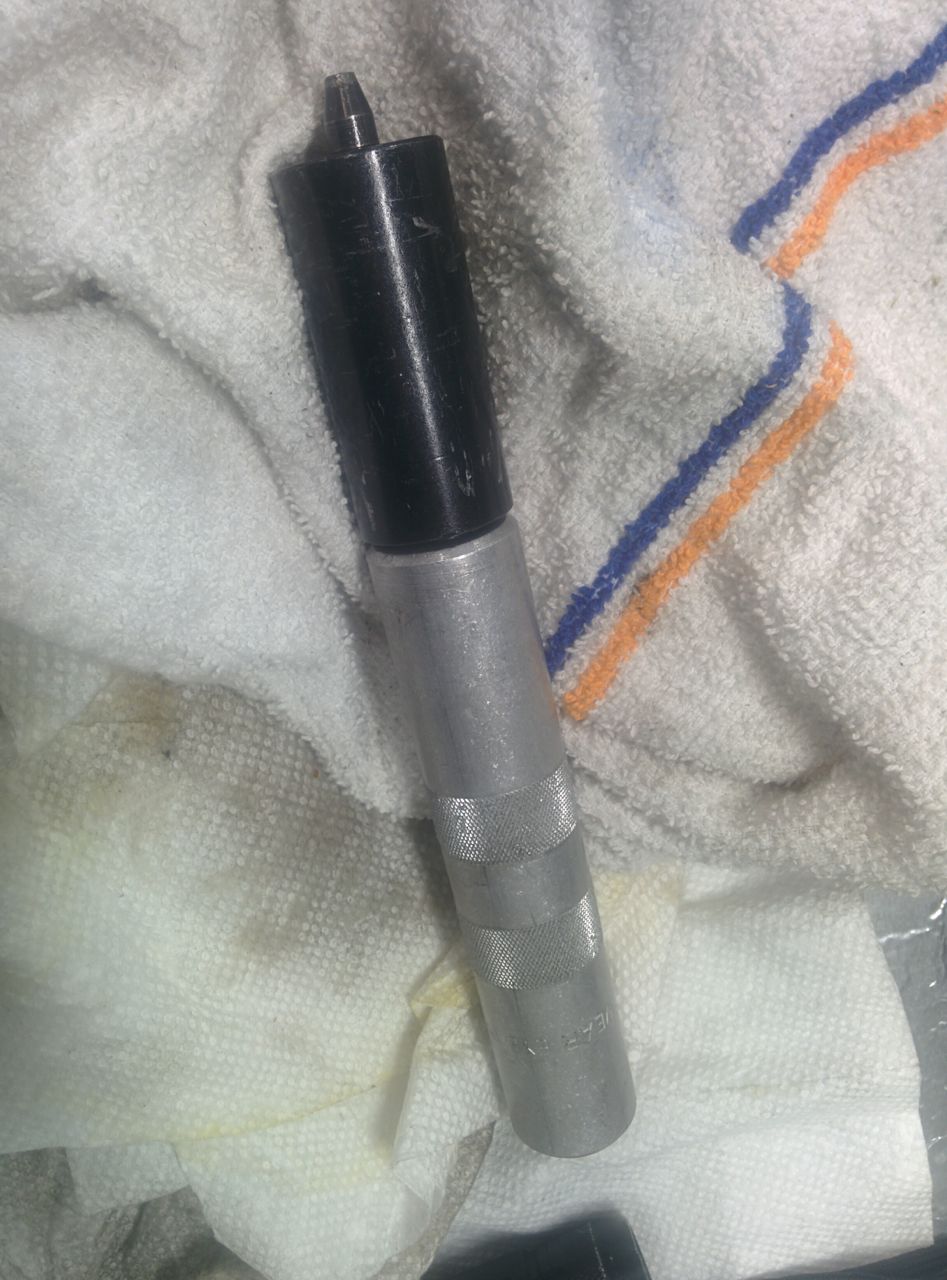
The black part is for putting it back in. You assemble everything, put the two pieces of the tool together, put the spring-loaded pointy tip right up against the valve stem between the keepers and whack it again (somewhat harder than for removal). If you get it right, everything locks in. Sometimes it takes multiple tries, if you screw it up then you may need to reset the keepers. If you REALLY screw it up then the keepers go flying across the engine bay and you spend 10 minutes looking for them. I did this once, oops. Fortunately the keeper didn't wind up down in the spark plug well and we managed to find them.
Oh, right, the cylinders. You put it at BDC then fill it with rope (I used cotton sash cord from the hardware store), and it goes in a lot easier if you put a small piece of pipe in the spark plug well. A 3 inch piece of brass 3/8" NPT pipe works really well, it makes it much easier to push the rope down. Then you turn the crank to compress the rope up against the cylinder head with the piston so the valve can't fall out.
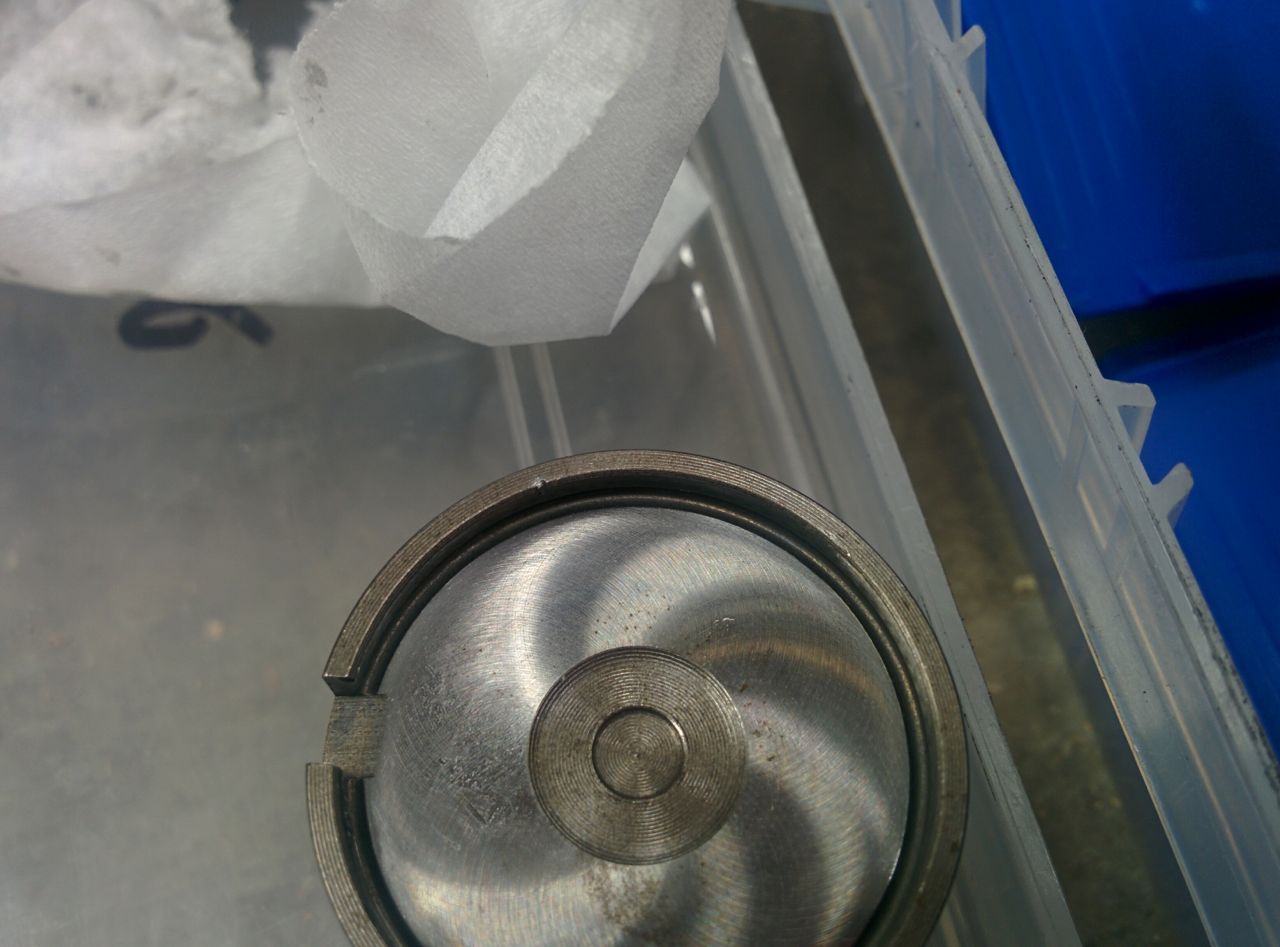
So there's a little tiny half mm thick washer that sits underneath the stock spring, which apparently you're supposed to use with the super tech valves. We didn't know this, and assembled it without them, then had to go back and do it again. Oops. It goes a lot faster the second time though. The washer looks like this:
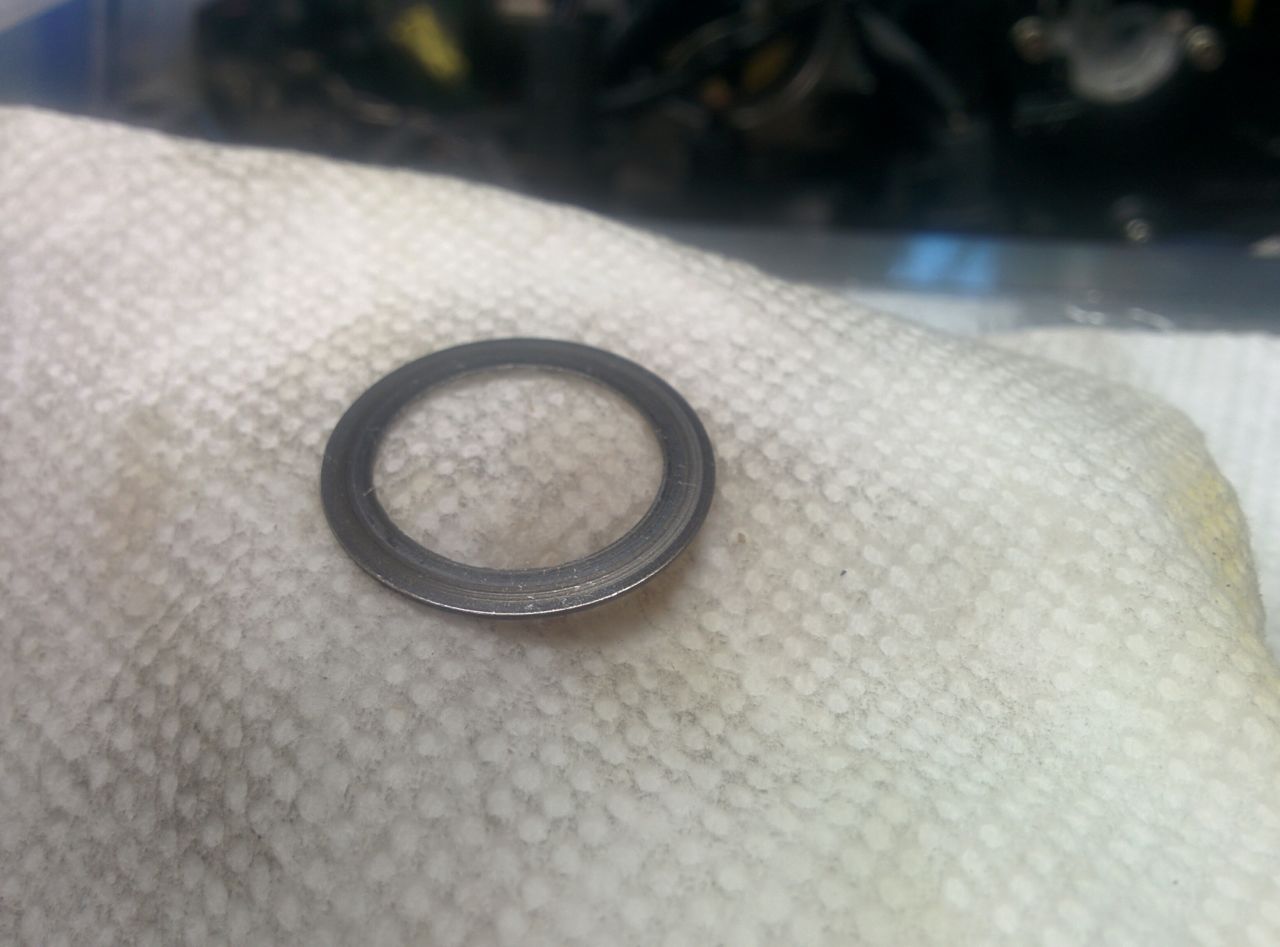
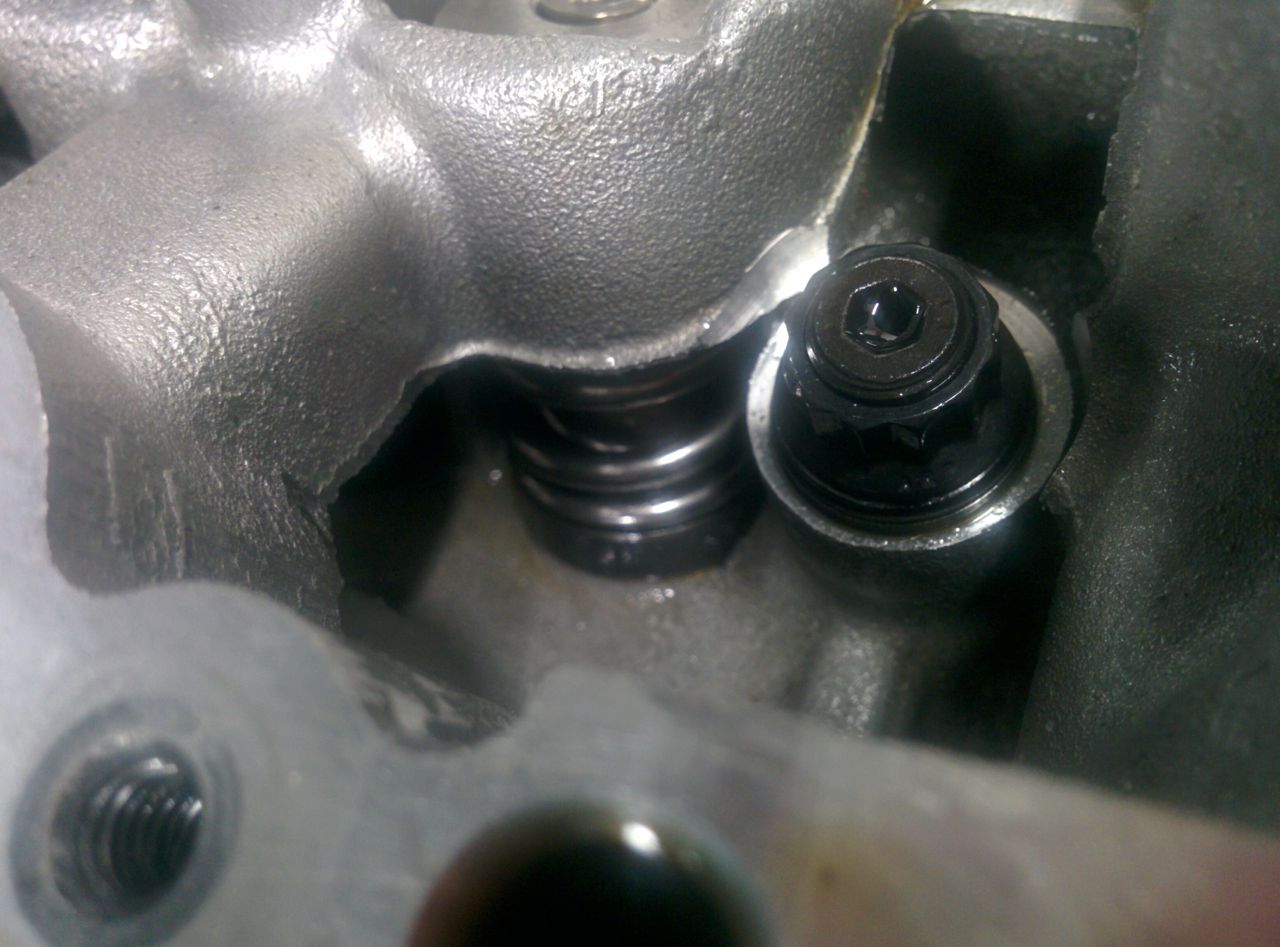
When assembling the super tech valves, this has to go on the bottom, against the head (it's the only way it fits). Sitting around the valve stem it looks like this. It's hard to make out, but it's sitting on the head surface, surrounding what I think is the top of the valve guide:

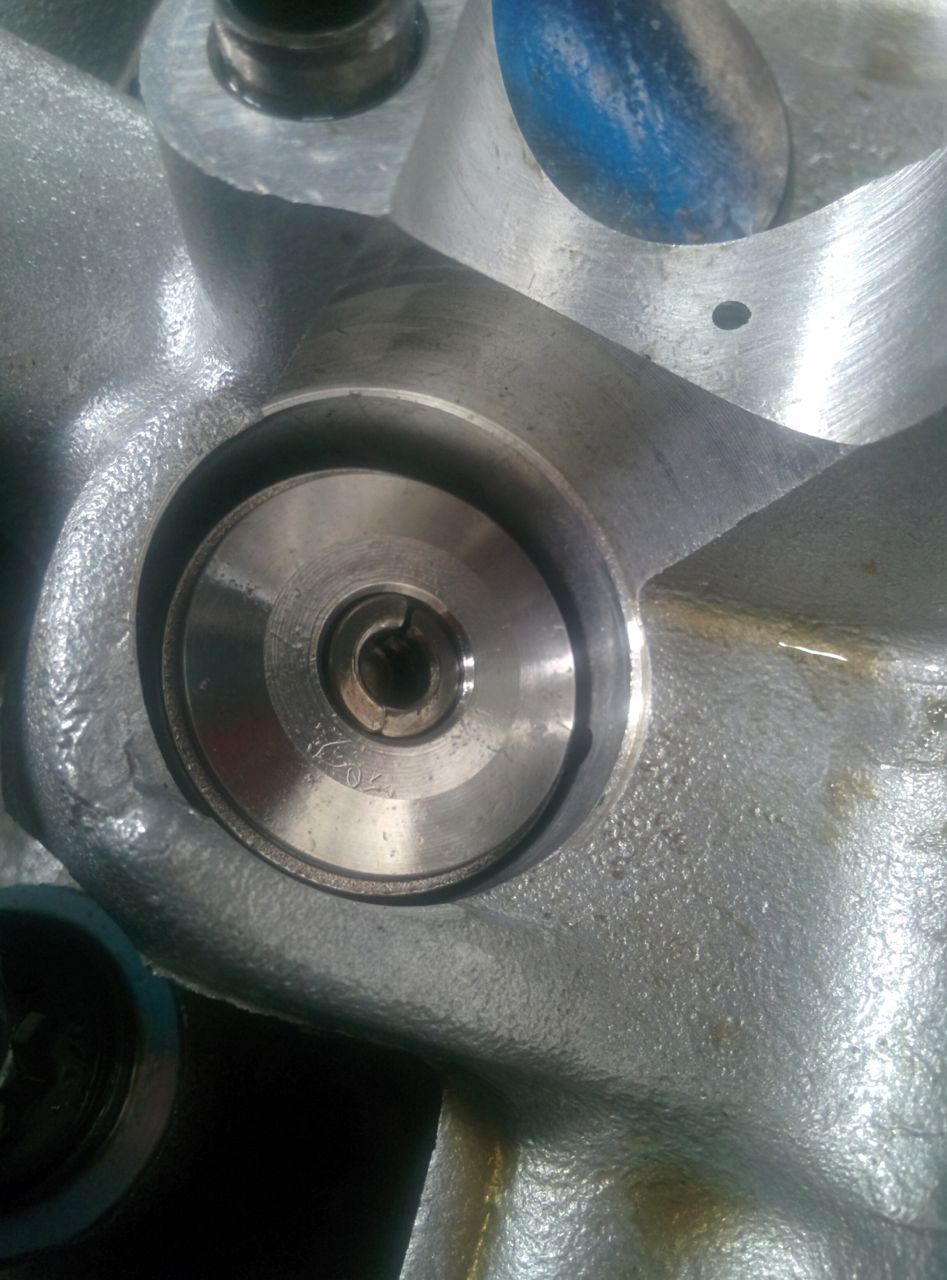
On top of it goes the SuperTech valve shim:
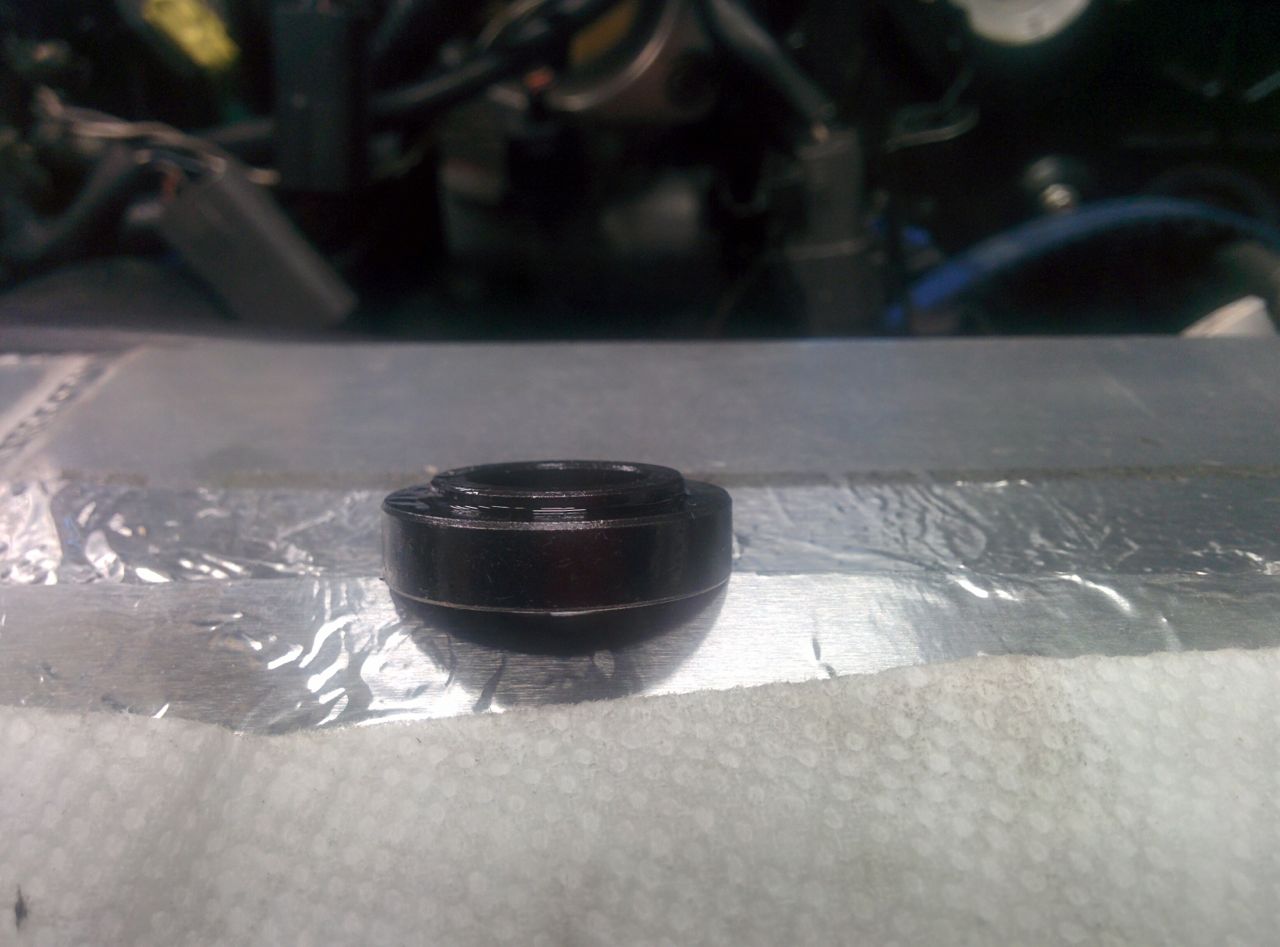
The concave side goes down, assembled it looks like this:
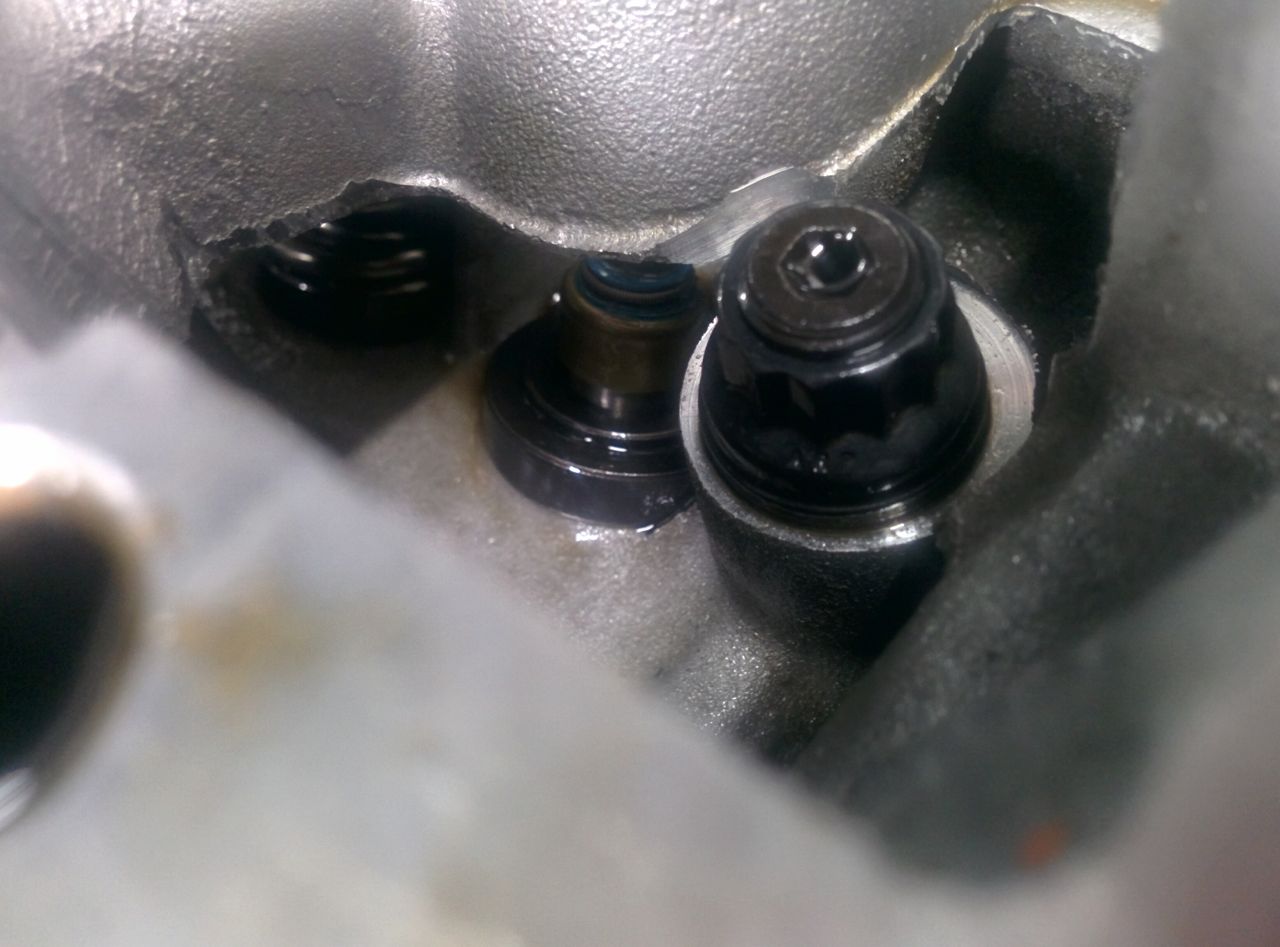
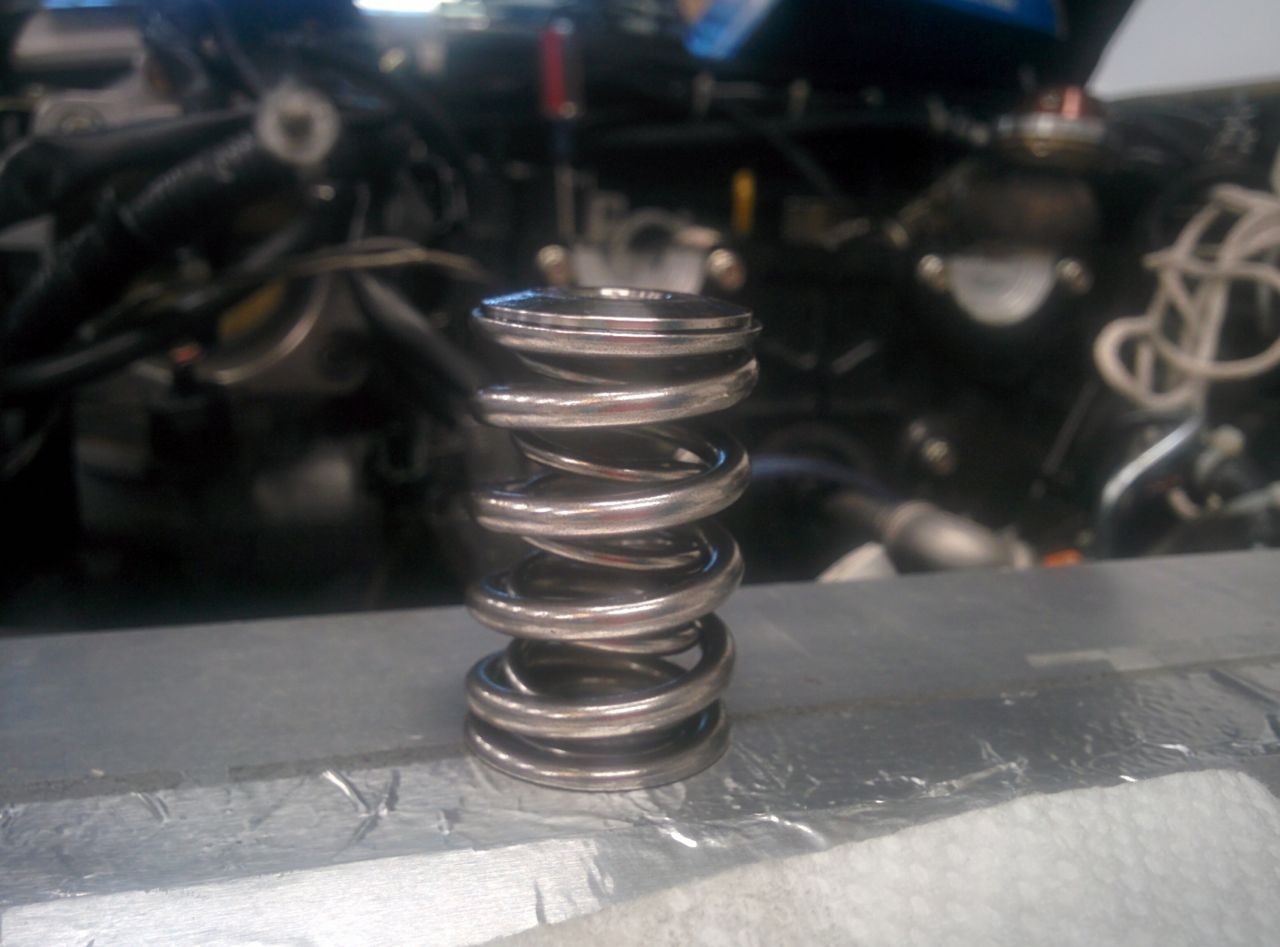
Next is the spring. I used the super tech heavy doubles, so there are two concentric counter-helix springs. The titanium retainers go on top, and once you assemble it the retainer locks into the springs and they don't come apart easily. Since we the took the pictures when redoing it, they're locked together.
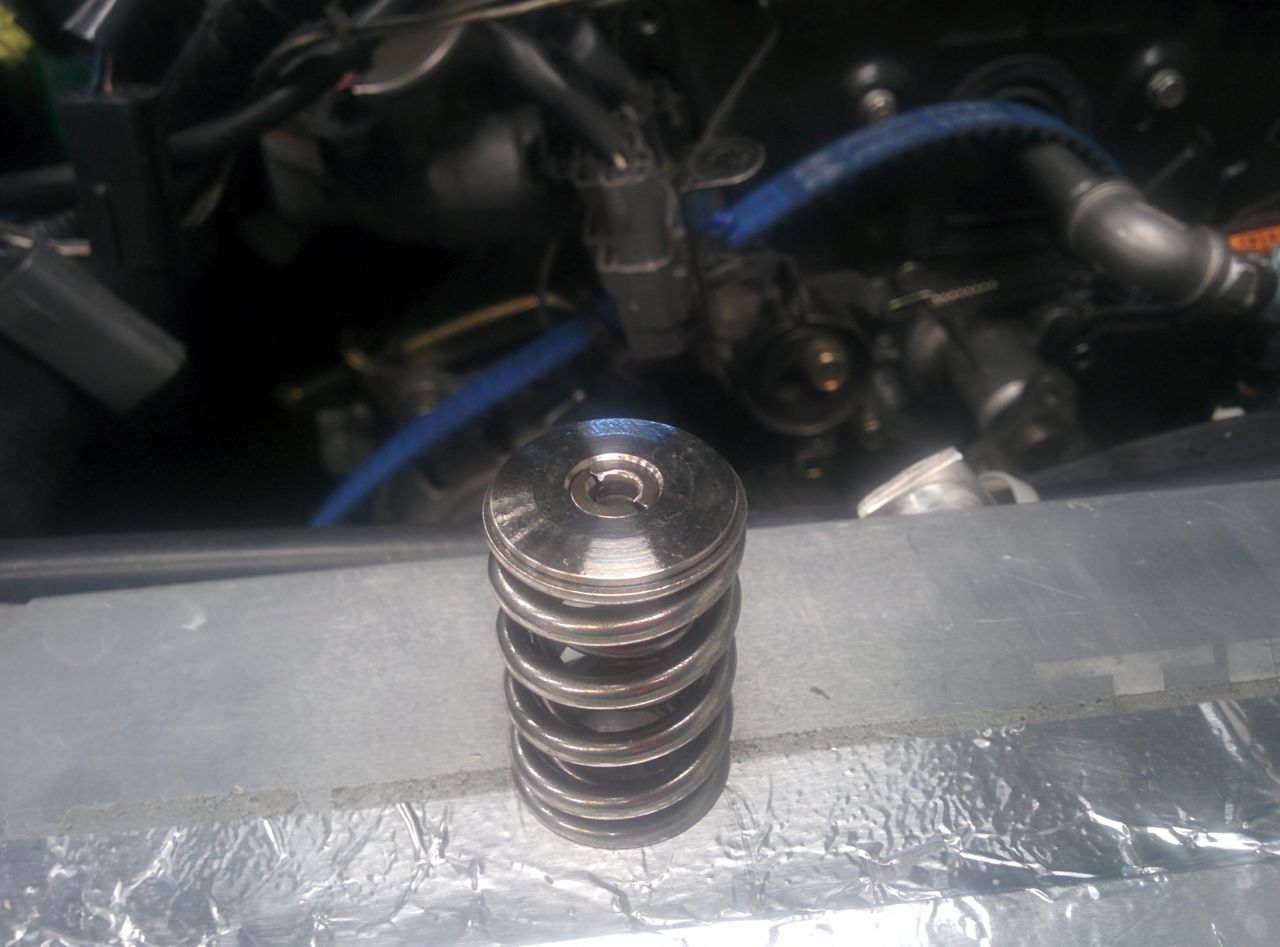
The keepers are inside the retainer, I don't have a separate shot of them. Sitting on the shim it looks like this:
And from the top:
And then you put the tool on and whack it and poof.
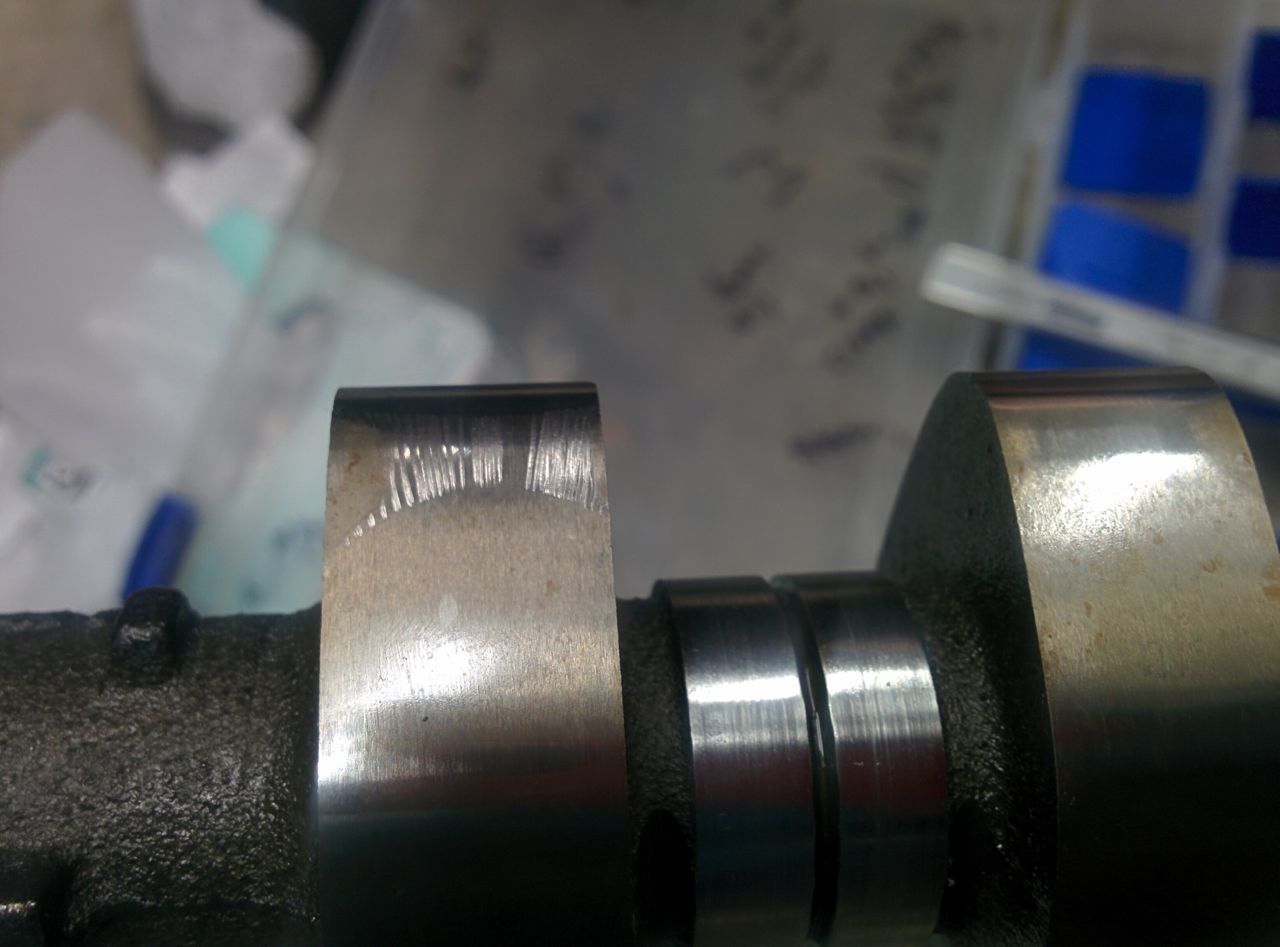
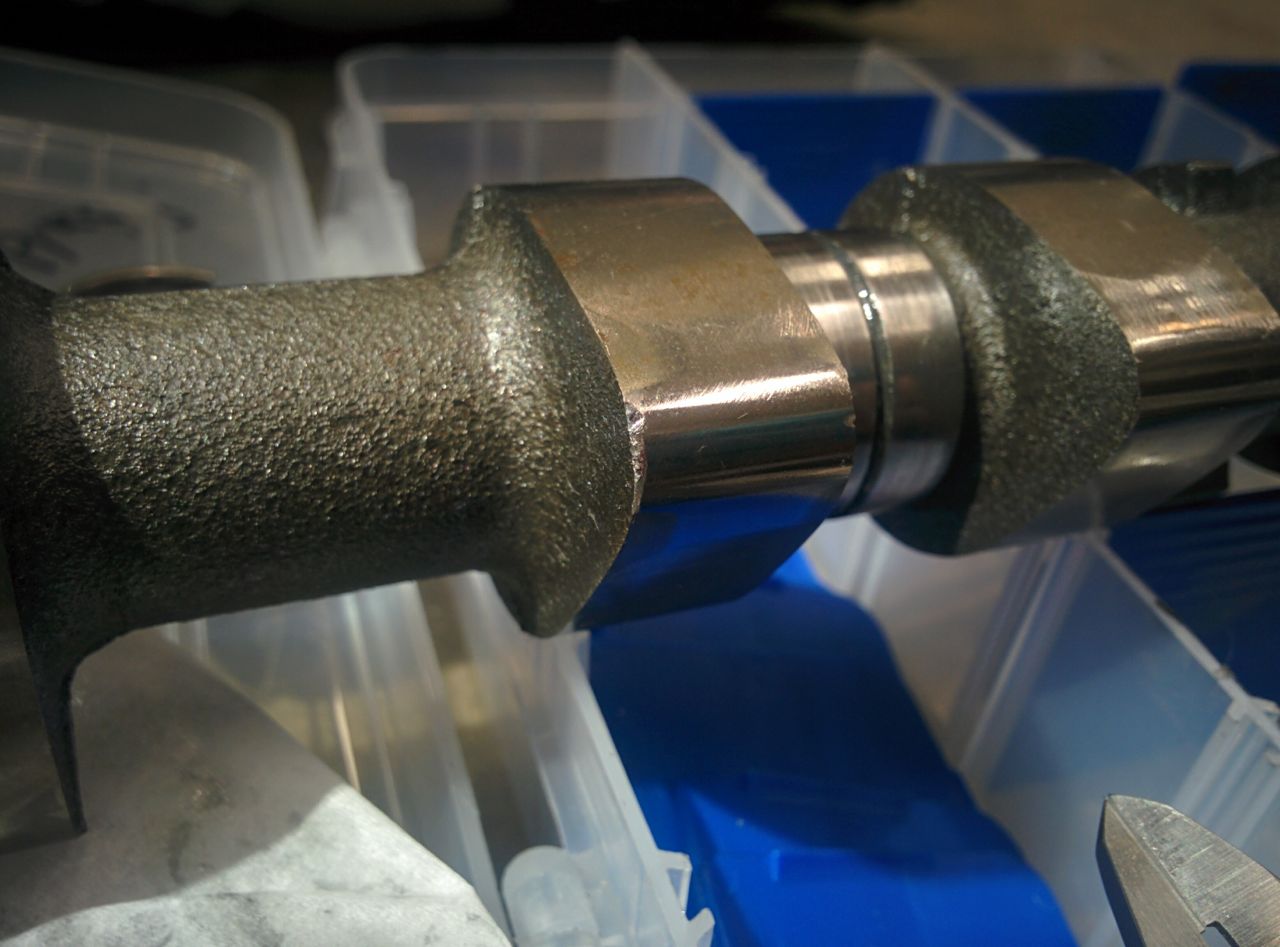
While I had the cams out I noticed an unusual wear pattern on one of the exhaust lobes (front exhaust valve on #3):
First, the valve spring tool got here. It looks like this (pretty much the same as all the other threads that talk about it), and it works quite well. It's in two pieces, you pull out the cam, pull out the bucket, put the aluminum part on top of the retainer, whack it with a hammer, and the keepers come flying out and get grabbed by the magnet inside the tool. It also takes the stock (steel) retainers off as well. After that you can just pull the spring out, easy peasy. Takes a few tries to get the hang of it, but no big deal.
The black part is for putting it back in. You assemble everything, put the two pieces of the tool together, put the spring-loaded pointy tip right up against the valve stem between the keepers and whack it again (somewhat harder than for removal). If you get it right, everything locks in. Sometimes it takes multiple tries, if you screw it up then you may need to reset the keepers. If you REALLY screw it up then the keepers go flying across the engine bay and you spend 10 minutes looking for them. I did this once, oops.
Fortunately the keeper didn't wind up down in the spark plug well and we managed to find them.Oh, right, the cylinders. You put it at BDC then fill it with rope (I used cotton sash cord from the hardware store), and it goes in a lot easier if you put a small piece of pipe in the spark plug well. A 3 inch piece of brass 3/8" NPT pipe works really well, it makes it much easier to push the rope down. Then you turn the crank to compress the rope up against the cylinder head with the piston so the valve can't fall out.
So there's a little tiny half mm thick washer that sits underneath the stock spring, which apparently you're supposed to use with the super tech valves. We didn't know this, and assembled it without them, then had to go back and do it again. Oops. It goes a lot faster the second time though.
The washer looks like this:When assembling the super tech valves, this has to go on the bottom, against the head (it's the only way it fits). Sitting around the valve stem it looks like this. It's hard to make out, but it's sitting on the head surface, surrounding what I think is the top of the valve guide:
On top of it goes the SuperTech valve shim:
The concave side goes down, assembled it looks like this:
Next is the spring. I used the super tech heavy doubles, so there are two concentric counter-helix springs. The titanium retainers go on top, and once you assemble it the retainer locks into the springs and they don't come apart easily. Since we the took the pictures when redoing it, they're locked together.
The keepers are inside the retainer, I don't have a separate shot of them. Sitting on the shim it looks like this:
And from the top:
And then you put the tool on and whack it and poof.
While I had the cams out I noticed an unusual wear pattern on one of the exhaust lobes (front exhaust valve on #3):
Reply
1
1
Thread Starter
Elite Member
Joined: Mar 2007
Posts: 5,306
Total Cats: 887
From: Santa Clara, CA
Argh, the editor ate the end of my post and I have to retype it. Not a fan of the new editor.
So now comes the sad part. While putting stuff back together, we managed to spit out the shim for the rear valve on #3 and not notice it until trying to line stuff up for the timing belt. This meant we turned the lobe into the empty bucket and they nicked each other. DOH.
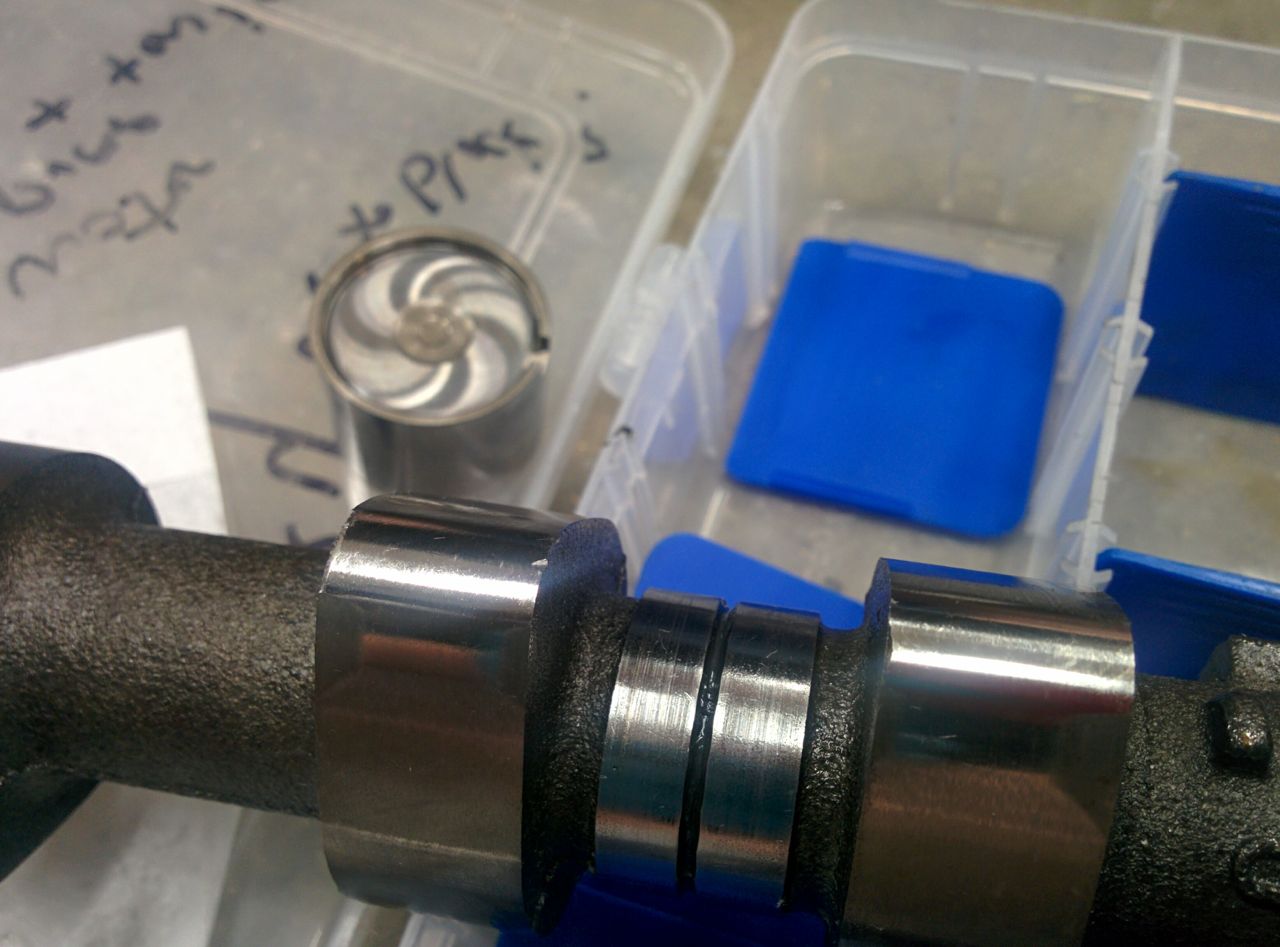
The bucket is nicked too:
The shim itself is fine, although it made a small gouge in the head in a non-critical area. So what to do about it? I see a couple options:
1) Polish/grind/file/whatever the high spots out, put it together and run it. Lots of people on random car forums seem to recommend this. The thing that gives me pause is that it's 1mm on either side of a 16mm wide lobe, and that's making it like 15% narrower. Also, most other people seem to nick journals rather than lobes.
2) Get a new cam & bucket from somewhere and replace 'em. It's just a 100K mile BP4W exhaust cam, nothing special (although it is one of the very few remaining original parts in my engine). Anyone got one for sale?
I've decided not to use this as an opportunity to "upgrade" to a 949 cam or something like that because I suspect any cam mild enough to not worry about for smog isn't worth the money/effort.
--Ian
So now comes the sad part. While putting stuff back together, we managed to spit out the shim for the rear valve on #3 and not notice it until trying to line stuff up for the timing belt. This meant we turned the lobe into the empty bucket and they nicked each other. DOH.
The bucket is nicked too:
The shim itself is fine, although it made a small gouge in the head in a non-critical area. So what to do about it? I see a couple options:
1) Polish/grind/file/whatever the high spots out, put it together and run it. Lots of people on random car forums seem to recommend this. The thing that gives me pause is that it's 1mm on either side of a 16mm wide lobe, and that's making it like 15% narrower. Also, most other people seem to nick journals rather than lobes.
2) Get a new cam & bucket from somewhere and replace 'em. It's just a 100K mile BP4W exhaust cam, nothing special (although it is one of the very few remaining original parts in my engine). Anyone got one for sale?
I've decided not to use this as an opportunity to "upgrade" to a 949 cam or something like that because I suspect any cam mild enough to not worry about for smog isn't worth the money/effort.
--Ian
Reply
1
1
Thread Starter
Elite Member
Joined: Mar 2007
Posts: 5,306
Total Cats: 887
From: Santa Clara, CA
OK, so advice I'm getting elsewhere is that the nicks/gouges in the cam can be polished out no problem, but the flower pattern wear on the lobe next to it (the one I dismissed as no big deal) is actually pretty serious.
--Ian
--Ian
Reply
0
0

Reply
0
0
Thread Starter
Elite Member
Joined: Mar 2007
Posts: 5,306
Total Cats: 887
From: Santa Clara, CA
--Ian
Reply
0
0


