When you click on links to various merchants on this site and make a purchase, this can result in this site earning a commission. Affiliate programs and affiliations include, but are not limited to, the eBay Partner Network.
First off, I can't thank the members of this forum enough. I joined with very limited automotive knowledge, and years later have what I feel is a fairly wholistic knowledge of automotive and performance systems.
This thread has been a long time coming and would not have been even close to possible without the valuable knowledge shared on here. This is entirely a hobby to me and unrelated to my Computer Science degree. Here is the build as it "currently" stands.
Being Gen Z and all, I documented the whole build on Instagram @apexmiata but MiataTurbo deserves a review of the history since its mildly entertaining:
.
2016 - Looked into buying my first car. A friend's older brother had a Miata and mentioned people race them on tracks. I thought that was hot ****, test drove one, and decided it in fact was. After purchasing a bone stock 90' Miata repainted candy apple red, learning manual, and getting my license, I put in plenty of work fixing little issues and cleaning it up to be a fun daily. I learned from the internet to fix some simple things like the clutch slave, headlights, shocks, and oil leaks. Soon after, an acquaintance in high school noticed the car and told me that he and his family raced Spec Miatas. He took me out to his track/garage, stuck me in the passenger seat, and I was immediately hooked when he showed me what a Miata could really do, even at 100hp.
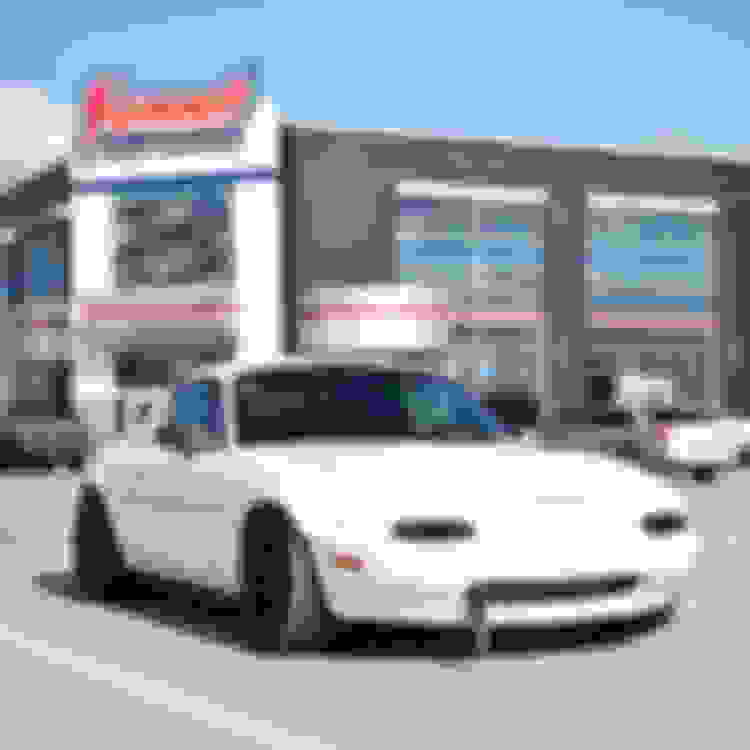
2017-2018 - Enjoyed the car as a daily, but realized that I wanted to get more out of the car and try autox. Ended up selling my Miata and buying my current (White 95'), but with a handful of decent budget performance upgrades. Kept learning how to do more repairs on my own, got some good seat time, but inevitably decided I needed more power.
2019 - Here’s where the fun begins. I decided a turbo was in my Miata's future and started reading everything I could find on this site. It took a few months, but I had planned out a solid T25 budget build, bought everything, and knew I could do it before my freshman year of college was over. I spent the entire summer building it in my parent's garage to their bewilderment and barely managed to write the street tune and drive the car to get dyno-tuned (without issues) the day before I moved back to college. I'll elaborate on the first build in the following posts. I was in love with the car and the whole 230hp it made, and everyone I gave rides to agreed it should be illegal to have a car be that much fun.
2020 - After a few months, I learned about this underrated quote from Keith Duckworth, “An engine runs at its best moments before it disintegrates.” With a friend in the passenger seat, a random Miata downshifted and drove past on an empty highway at night, so I flipped the NLS switch, gave it the beans, flew by feeling like Ricky Bobby, and promptly blew the absolute **** out of my 3rd cylinder, adding a 5th and 6th exhaust port, seizing the motor, and leaving the bottom of my oil pan looking like a 5yr old’s rock collection. I'm guessing I retarded the NLS spark a bit too far, and the torque spike caused the stock rod to take its leave. Since I wasn't a complete idiot and knew there was a chance it could eventually happen, I had set funds aside to pick up a daily, which I promptly did, and simultaneously inspired myself to set some bigger goals on the rebuild because I simply could not quit Miatas and wanted even more power. After another month or two of reading, I decided I was ready to go all-in, build a forged engine, and throw on every supporting upgrade I could think of as a long-term project that I could drive on weekends and grow into as a track car. Obviously, my autox skills were nowhere near what is needed for a track-prepped EFR Miata, but I still convinced myself that it was the right call. Even better, I had no garage and decided to make it work in the basement of the gated apartment parking garage I was living at since only my friends and I parked down there. Yes, you read that right, I built most of my project in a parking garage on jackstands.
2021 - Moved into a storage unit that allowed me to work out of it, then later a shared industrial garage with friends building their own cars.
Currently (2/22) - I have nearly stripped the car down to the bare chassis, built it back up with an overkill list of parts, spent an absolutely unreasonable amount of time/money on it, and guess what? Still doesn't run. The variety of setbacks have been interesting and I barely have time to work on it between school/work/life, but hopefully, after finishing the oil pan leaks I developed, I'll have a car ready to hit the dyno in its “final” form.
.
With how much this build has stalled out, I put off making this thread, but I am confident that we’re close to getting dyno'd at full boost. Anyone reading the parts list will quickly realize I have built a car beyond my own skill level, but I am looking forward to the challenge of catching myself up, even if it takes a few years to master. I’ll post the documentation of the car to where it is now for completeness, but I'm more than ready to just have it driving and kissing apexs again. More coming soon.
Last edited by Jumpster74; Feb 21, 2022 at 05:04 PM.
Currently swamped by college and job offers / interviews, but also need to move to a new garage at the end of the month. Slightly stressed with my subframe sitting on the floor...
Where it started:
First time at a track, sensory overload can be observed:
Current Miata. Karen hit me in a parking lot first day driving it expediting removal of the "jdm" foglights:
Of course. The vocal majority of members here seem to be older and more experienced, but I know there are plenty of members like myself starting from ground zero. Hopefully this thread can be another useful reference for someone wanting to go from A-Z.
As for the compression, honestly, I did all that research 2 years ago and cant remember the exact deciding factor, but I believe I choose to run as safe of a setup as possible knowing my turbo would produce more than adequate power with <25 psi on 93 octane when I don't have e85 available. Squeezing that little extra performance out seemed unnecessary considering the raised EGTs and knock potential.
Also, my engine machinist is one of the go-to builders for Spec Miata teams, and gave me a heads up that the decked block and shaved head would bump me up to approximately 9:1, which is what I was shooting for.
Now to get into the fun stuff. Ill spare most of the details because there's plenty of detailed documentation on this site for how to build a budget T25 stock engine turbo kit, but ill post up the trials, tribulations, and revelations that I can remember from the first setup I built.
There's plenty of things I overlooked, so noobs, feel free to ask unless you haven't already read and understood this by heart, in which case learn to recite it backwards.
Here's the original parts list for reference. This was the cheapest collection of mostly used parts found at discounts that I felt would be "reliable" in the long term. I still stand by this and think much less than this is likely "unreliable".
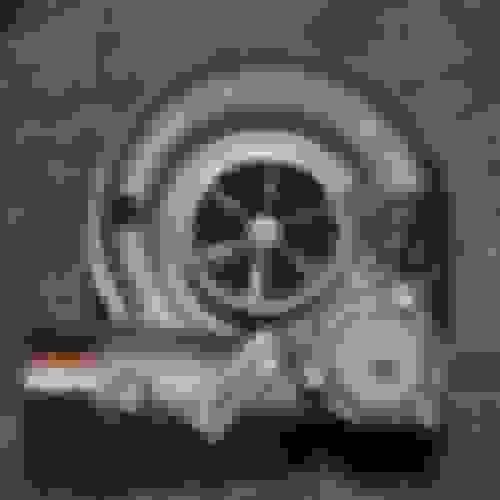
First thing on the agenda was to rebuild, port match, and polish the T25 turbo. The Chinese cast eBay manifolds are sometimes T3 ports with T2 spaced threads despite photos, so I took the liberty of porting and polishing my exhaust housing to match it and get some efficiency back.
Yes, use ducting. Made a huge dent in the overheating issues I was seeing, and eventually upgrading to an aluminum rad and SPAL fans solved it.
Likewise, I like many, read for hours on here about catch cans, remained confused, and reverted back to a diagram that made sense in my head. It worked until the engine didn't.
I've done a few 2twisty flushes on multiple cars, and they've always resulted in higher compression tests and quieter HLAs than before. Has worked like magic for cleaning out any engines for me.
Drilling the pan should not be stressful if you do the research. Just tape the bit, use grease, and blow a few psi of air though the engine to clear shavings out.
I loved the feeling of quick revs from a lightweight flywheel. Made the car noticeably more fun to drive imo.
Its a one piece chunk of metal, no serious tech involved, so I didn't see the need to drop serious money on one. Installed a lower end 10lb chromoly flywheel and never looked back.
Surface wear and hotspots may be a valid concern, but mine never developed hotspots and came balanced when I checked. Still running this same one.
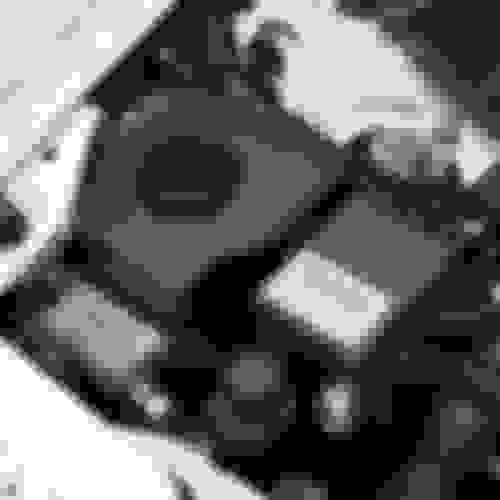
For the intercooler piping, I chose to follow what @hornetball did here. Routing is clean and worked great after figuring out how to cut the hole.
I used a ebay aluminum IC piping kit, chop saw, a cheap home made "bead roller" I made from customizing old pliers with a dremel, and an autozone rental pipe expander to make slip fittings and JB weld pipes together.
Pretty ghetto solution but its held up for years and looks fine after a light coat of paint. BOV positioned right in front of intake.
Had to bite the bullet and get a downpipe custom welded for the T25.
Gave the welder the T25 flange and told him to work his magic while keeping material costs down.
V-bands are easily worth the cost for ease of use however. Flex pipe as well to prevent cracks down the road from vibrations.
To use a eBay cast manifold, make sure you use proper hardware and you'll be fine. They're bulletproof.
Wish I could find the specs, but you'll need to remove the studs and use extended bolts for the 4 corners, apply resbond on everything, and use quality studs and lock washers on the turbo/manifold connection.
Never had any issues with this setup with street/autox use other than burning out a turbo/maifold gasket (note burns on hood in 1st post). Instead just verify both surfaces are flat and skip the gasket.
I took some machining metal (straight edge) and worked on the mating surfaces until I couldn't see any light pass under the straight edge on the mating surface when held together. Never leaked after that.
After sorting out all the other details, I wrote a quick street tune and had a professional tuner do his work on the dyno.
As a testament to reading this forum religiously before starting, I had zero issues besides a quickly fixed vac line popping off under boost. Ended up making 230hp w full tq at 3.8k (dyno scale was skewed).
As a final addition to the OG kit, I later switched to an ARTech downpipe. Definitely was not necessary, but I couldn't pass on the deal + just look at it.
Last edited by Jumpster74; Mar 23, 2022 at 12:28 PM.
Next, I sat the car on jackstands and focused on school/work for a few months while researching what it would take to seriously build out the car. I set my goals on building a long term dual purpose car for weekend street driving and as a track car I could grow into. There's still a few aspects like transmission and suspension that will be upgraded as tracking becomes more serious.
I was in a good spot financially, but it was still a DIY build and I wanted to do all the work as an experience and to teach myself new skills, so this meant building a new engine myself.
There's plenty of documentation on BP building but here's a few points of interest I ran into:
I stuck with the stock valves, but tried to at least give them a refresh. In hindsight, this probably wasn't the smartest decision of the build because of potentially taking any material off the valve shafts, but I stuck each valve in a power drill and carefully removed the carbon buildup with some fine steel wool, polish, and a cleaning.
After that, I did a standard valve lapping job and called it a day. If I were to repeat this, I would at least tape over the exposed valve shafts to prevent any scratching. I had extra OEM valves, however, I didn't observe any scratching, they cleaned up great, and I ran through a full engine break-in without issues so I think this turned out ok.
Next was installing the valves and Volvo springs and man this an unenjoyable learning process.
The method I eventually found to work the best while cheaping out was to cut a window out of an appropriate sized spare socket, use a 10" C-clamp with a rag underneath, and use a magnetic flathead to pull the valve retainer locks out.
For installing them, I put some grease on the end of the valve, the tip of the flathead, and the retainer locks, stuck a retainer lock to the tip of the flathead, and then stuck both retainers locks in place on the valve through the socket window using grease to hold everything in place while I let out the spring.
This actually proved fairly effective and much more efficient than other advertised methods that left me sweating and punching thin air.
For painting the block, I definitely had an OCD moment, but painters tape and a razorblade did pretty quick work. This of course was after an ultrasonic bath at the machine shop (machine specs in build list link up top).
Not saying much but the VHT block paint appears to have done its job and looks new after putting 2k on the motor and sitting for 1.5 years...
Finally, this photo offers no value except for proof that I in fact built my motor, and as an addition to my hand modeling portfolio.
I've now realized that from building this setup for 2.5 years, I have way too much sharable information and detailing everything would be a huge PITA. The build list speaks for its self and more details are always a question away.
Instead, Ill post about each category of currently installed parts, then get back to the chronological posts when we get there.
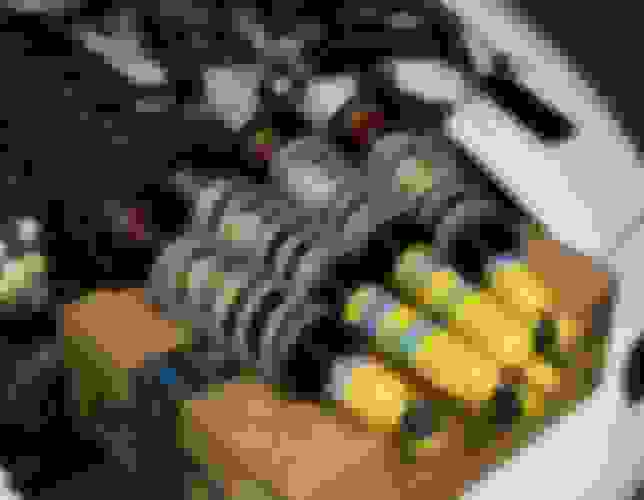
First of course is the engine:
BP4W - Obvious pick. Best flowing head and living near Dallas (a hub for miatas/racing) made sourcing one easy. Valve cover - From a Protege. Will be repainting eventually, but I drilled out the air passages for more flow, used some copper scrubber material in the baffling, and had it locally hydrodipped. Cam gears - Fidanza. Mainly splurged for looks since I got a deal, but ill go ahead and adjust them on the dyno.
Forged Rods - maxspeedingrods. cheap and proven Forged Pistons - 84mm Supertechs. Again, cheap and proven with Wisco rings Bearings - ACL Race. The standard Head Gasket - Just used a new OEM HG, but I've heard many good things about permatex copper spray and put on a coat on before installing.
Oil Pump - Boundary stage 1. Would have gone stage 2 but a local gave it up for cheap Valve springs - Volvo B20 springs. An easy upgrade for increased seat pressure to counteract boost and valve float Main/Head/Rod studs/bolts - All ARP. The standard Gasket/seal kit - Now mostly OEM, but I originally used aftermarket seals. Do not do this, something is bound to leak and you will deeply regret not just paying the extra money Squaretop - For better flow. Had mine shipped from the UK, then coated it in heat paint. Also tossed on EGR delete plates
Throttle body - Junk2. Picked up off eBay. seemingly decent quality, and the alleged spring issue had been fixed Harmonic damper - ATI Superdamper. Huge pain to install/remove, but was clearly the best option at eliminating harmonics from what I found
Oil baffle - Supermiata. Just there for when I get to the track. Pressure is good Machine shop - I was lucky to catch X-factor racing in a lull and had them work their magic. The experience building hundreds if not thousands of spec miatas/motors showed. Here's what I had them do before assembly: - 84mm overbore - Hone cylinder walls - Deck the block/head - Polish and mic all the bearing surfaces - Balance rotating assembly - Line hone main bearing caps for ARP hardware - Gap the upper/lower/oil control rings - Ultrasonic hot tank everything
Built the engine in my parents garage and covered it with a trash bag between sessions. This is a story of dedication, I certainly didn't follow all the recommendations.
I'm nearing graduation, so my responsibilities are through the roof at the moment, but I had to take a break and post something to get the thread closer to where I'm at currently.
Turbo/Hotside
For the hotside, I went with the EFR 6758 since I believe it will realistically make numbers in the 400 range with a good powerband.
After riding in other turbo miatas, and reading over some great comment threads (on FB of all places... also here) this is about the max I figured would be manageable for the street, and would need to be turned down for the track.
I also installed a Turbosmart BOV for better control and to get rid of the whistle.
For the manifold and downpipe, the obvious pick was a Kraken kit. Got lucky again and a local guy ended up not using the exact kit I needed, so I had it immediately available. The quality of this kit exceeds OEMs. Amazing pieces.
For the exhaust, I went with full vbands, a switchable vibrant resonator, and the MF12259 Magnaflow muffler, all from polished stainless 304.
The car wasn't tuned for boost when I drove it so I cant comment on the sound much, but it had good tone and seemed fairly unassuming without stepping on it hard.
Ill include the catch can here too, but I just went with a DaveFab unit routed straight from both breathers VTA.
Construction looks great and its performed on the companies personal track cars, but I haven't run the car enough to give any personal feedback yet.
The drain plug on the bottom will be handy though for adding a valve and hose to drain it.
Also grabbed a coolant reservoir to match. Just for looks. Thanks COVID stimulus.
I finally graduated and have a bit more time on my hands before I start my job. Getting this build assembled and fully tuned soon is a high priority so this thread should start moving faster.
Fuel/Ignition
For the fuel system, I went with the most tested and well-reviewed parts with the intention of running flexfuel E85:
Injectors - ID1000's
Fuel pump - DW300
FP Relay - Supermiata
Fuel rail - Radium
Rail spacers - FlowForce
FPR - Fuelab
Fuel damper - Radium
Flex Fuel Sensor - Innovative
I picked up my ID1000's used from a local guy. Got them cleaned and watched as the flow went up over 20% on at least one of the injectors. Definitely a must-do step for any used injectors.
I also ran into a really specific odd situation where the ID1000 tophats and radium rail are both designed to be OEM compatible, but are not actually directly compatible with each other leading to a lot of confusion.
Youll need to add 10mm of spacers to the rail so everything sits correctly. Luckily ForceFlow makes a rail spacer kit that makes for a easy fix.
Finally, don't take any shortcuts to the fuel system... I originally skipped buying an extra NB fuel quick connector for the old OEM FPR when i was using the stock rail, and used a random fuel clamp i had laying around instead. I was sure it was secure, but when I was breaking in the motor, it popped off on the highway after just a few hours of driving and sprayed about a gallon of gas around my engine bay, windshield, and car before I had it shut off. I got lucky that nothing ignited it, but quickly trying to find a route to the emergency lane while pulling out the extinguisher is something I hope everyone else avoids.
For the ignition, I had heard some say that toyota COP's handled everything they thew at them, and others say they were ****. Given I found a good local deal on a set + harness, I went the Toyota route and will be finding out myself once i get to add the boost.
The cooling system is probably the most lacking besides aero, but works great on the street. Ill definitely be upgrading a few things before seriously tracking the car, but here's where it stands now.
Oversized Ebay Aluminum Radiator + Spal Fans
M-Tuned Coolant Reroute
LRB Undertrey + ducting
Moss Turn Signal Intakes
FM turbo heat shield
DaveFab Coolant tank
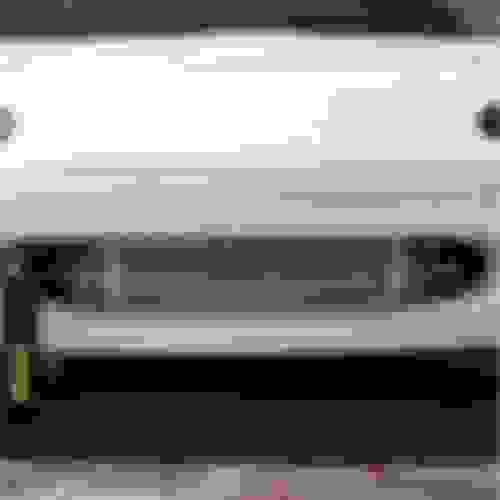
Vibrant 12800 Intercooler (stage 1)
For future upgrades, I'm thinking a SM Crossflow radiator, fan shroud, more ducting, hood vents (sitting in garage), and potentially an oil cooler if data shows i need one. For now this setup is adequate for spirited drives and autox, but I'm sure the track will be a different story.
A BMW Getrag and diff swap is likely in the future for reliability, but for now I set up the best drivetrain I could with OEM/Modified Mazda parts due to simplicity. I am very curious to see more about this 6spd mod from @jrmiata42069 and potentially give that a try as well.
Here's the currently installed parts:
MSM 6 Speed - Hoping this holds up to ~350tq but I have a spare 6 if not. This is the cars weak link as far as I can tell
3.6 Torsen + Diff Plates - Reinforced and installed with prothane bushings. RPMs are great for the street, but interested to see how the ratios do on track. Installed without changing anything but the breather needed cleaned and I ended up replacing both axle seals.
MiataRoadster tall/angled shifter - Worth. The. Money. I've put a lot of work into modifying/perfecting short shifters over the last 6 years and bill has perfected the formula better than anyone
SuperMiata sport pucked clutch - Very streetable and rated for ~350tq so as long as it holds up after the dyno tune, I've only got goods things to say
10lb Flywheel - mentioned in a previous post. quick revs are cool
Extended Clutch Line - upgrade for simplicity. makes life easier for maintenance
4.1 Speedo Sender - spent a lot of time trying to pin down the right speedo gear to build/swap into the 6spd that would both fit and read a correct speed. I actually gave up due to the complication of sourcing parts during covid, but my 5spd 4.1 speedo gear actually gets within a few percent of the correct speed with the 6spd, 3.6 torsen, and 245/40r15 tires.
This is probably the area I am least educated on. I went from Megan coil overs that came with the car, to converted Koni yellow coilovers, to all new DIY Bilstein coilovers. Xidas are certainly in the future, but that will come when I get the car on track, learn more about spring rates, and feel that the current setup is inadequate.
DIY Bilstiens - 450/300 rates. Probably not the best for a tracked car, but they have done well in autox and are decent for the street. Xidas are definitely next up, however
Front Sway Bar - FM. First aftermarket part I ever installed. Basically a must for any miata driven hard
Endlinks/Braces - RTheory. Needed the braces since I thought the OEM mounts were close to breaking and tossed the endlinks in too for a package deal. No idea what difference they made since I installed way too many parts at once
Steering Rack Spacer - Helps correct the steering geometry for lowered miatas. Should make a more noticeable difference on track when touching curbs
Rear Upper Arms - Had the OEM arms cut/welded with a giant nut/bolt so make them adjustable while retaining strength. Cheapest option and appears very strong. I was able to easily nail my alignment specs even when lowered due to this mod
Camber Bolts - Upgraded to NB bolts (wear much slower) since my OEMs were old and slipping. Nothing crazy here
Refreshing all the suspension bushings (poly?) is definitely in the future as well, but that will also be as needed once I hit the track.
In a few free days, I've managed to put the Miata back together, get it to start up, fix up the tune to drive decently, and take it out for a few light throttle shakedown drives. The only issue I've noticed is soft brakes, but another bleed should fit that. Currently out of state to see family, but next up is finding a tuner willing to sit down and dial in the power!
Chassis
Solidifying the car to provide predictability and responsiveness was essential to me after riding in a fully caged and reinforced track Miata, so I've made some solid steps short of a full cage and frame rails. Safety is ofc a big factor also.
Hard Dog roll + harness bar - Went with the M2 hardcore hardtop bar with a harness bar and coated them in a gunmetal flake. Looks great, feels much safer, and definitely tightened up the feel of the car
Rear jack bar - Not needed, but man is it convenient to have a quick spot to jack the rear up at. came with built-in tow hooks as well
Fender bracing - Also a noticeable difference in the front end
Front/Rear bash bar - hopefully should save the front/rear from some damage in the event of a smaller collision. I have multiple friends that drift and recommend bash bars, so I figured it wouldn't hurt while they were on sale.
Engine mounts - Innovative 60D mounts. No complaints. We'll see how long they hold up.
Door bushings - Some claim snakeoil, but I swear it felt a little better after putting them on. Either way, no reason to return them now
Wheels - 15x10 Jongbloed 500's. I love the look and performance of these wheels. I spent nearly 2 years waiting for 6uls to come back, but after realizing that was a lost cause, these wheels did not leave me with much disappointment.
Tires - 245/40r15 currently running VR1 tires. I've heard many mixed opinions about the best mixed-use tires in this size, so I am experimenting myself until I have a separate set of dedicated track wheels/tires. The "want" list just never ends...
BBK - SuperMiatas latest and greatest 11.75" Boxmount BBK using BP-20 pads. I have neither comparable experience nor background to evaluate the performance, but they feel incredible to me and I trust SuperMiata to only release products that maintain the quality of their brand.
Brake Bias Valve - Willwood, nothing too crazy here but this reminds me that I still need to dial in the bias a little more.
Front Hubs - Do it once, do it right. Right? Overkill once again, but I want to see minimal issues for years. Don't think I could forgive myself if I somehow cracked a hub and crashed in autox/track while knowing the weakness, so I went ahead and installed this great kit from BroFab. No way I'll ever need to touch those hubs again.
Wheel Studs - Bimmerfest racing studs. Thank covid ARP shortages and E30 hubs.
Brake Brace - FM brace. A local guy gave it up for $20 so wth.
I think really the only thing left here is some better rear pads, testing more tire options, and waiting on the time/money to modify/buy stronger rear hubs. This setup is clearly superior to what I previously autox'd with so the grip/braking should take some learning.
Currently in the middle of a move, but I'm getting this thread caught up one way or another.
Interior
Bucket Seats - Switched to Sparco Sprints after having bride reps. The bride reps felt great, but it didn't feel right running reps in the car. No complaints with the sprints so far
Harnesses - Using Braum 5pt harnesses. They take a little time to break in, but have been working perfectly.
Black Interior - The car started with a full tan interior, so I've fully swapped all carpeting and plastics for a all black interior. I ended up with 2 spare carpet sets after finding out its very difficult to dye Miata carpeting...
Sound Deadening - While I had the chassis stripped, I figured I would do something unique and potentially regrettable. I spent about $150 and added 20sq ft of killmat on all interior surfaces/doors and a 2-3 layers of closed cell foam under the carpet. The difference is pretty wild and makes it a totally manageable street car. Conversations are easy and road noise is hugely cut down, but as a car I plan on tracking, I might regret adding the weight later. Very happy with the results so far though.
Door Panels - LRB door panels. My OEM ones were falling apart so installed these as a sturdy replacement.
Pedals - Moss Miata pedals. Just to make heel-toes easier and give more grip.
Fire Extinguisher - Originally mounted to the roll bar with scosche clamps, but access was awkward so I switched to the blackbird mount. Definitely recommend the extinguisher for peace of mind. Especially after my one fuel incident. make sure to get the properly rated extinguisher though or you'll just do additional damage.
Steering Wheel - Sparco L360 330mm.
Rear View Mirror - Broadway, definitely a recommended cheap upgrade for better visibility.
Window Vents - Unnecessary? Probably, but I live in Texas where airflow is a prized possession. I opted for the Moss Miata vents.
Speakers - Aside from aftermarket speakers and head unit (for now), I decided to go "MTV pimp my ride" and add a sound bar (<!--td {border: 1px solid #ccc;}br {mso-data-placement:same-cell;}-->BRT26RGB). It mounts to the harness bar and I installed a 12v car charger port on the rear deck to make it fully removable for track days. It just syncs to the rest of the system with Bluetooth and adds a good punch when listening to music. Unfortunately I didn't consider that I would mostly just be listening to the car when driving...
Battery Box - Finally, the OEM battery tie down was a hail Mary for my battery setup, so I got an actual box to to bolt in and stop worrying about the battery moving.
ECU - MS3, great upgrade from the MS2 plus a lot of tuning and support options
Oil Temp/Pressure Gauge - Innovate MTX-D. The temp reading from the oil pan and the pressure from the oil T fitting.
Boost Gauge - Autometer 30psi gauge
AFR Gauge - Innovate heard some issues about gauge failures, but I've never had to replace anything in 3yrs.
Ethanol Gauge - Innovate MTX-D. An issue I ran into with this gauge is that it only outputs an analog signal for E content, but the MS3 only takes a frequency signal. This means that the frequency signal from the actual Flex Fuel sensor must be split to go to both the MS3 and the gauge. Luckily I didn't see more than a half percent difference.
EBC - MAC valve controlled by MS3. Untested yet but should be a significant upgrade from the old manual controller.
I wish I had started this thread earlier to document all the ups and downs of the build and my learning experience, but that wraps up the notable parts I currently have installed.
I just hit the dyno for the first time in 3 years a few days ago, and everything held up great mechanically. Unfortunately, however, I had not realized that the innovate ethanol content gauge outputs an analog signal, while the MS3 only takes a frequency signal, so the ECU was not actually reading the ethanol content.
Also, since I took so long building the car, I had added a dash switch to the EBC->ECU wire in order to switch between wastegate and full boost. I forgot about this and the fact that it was switched off, and proceeded to spend 30min on the dyno troubleshooting the EBC and ECU pinout just to give up and realize the issue when I left the dyno.
The good news however is that I got tuned for pump gas (93oct) on wastegate boost (11psi) and put down a solid 235hp and 220tq that I can drive around with until there's another opening for the dyno. The issues are already sorted out and she feels healthy. Its a great feeling to drive this car even at low power after having it sit on jackstands for years.
Next up are finishing some cooling upgrade. This Texas heat is relentless. After that, its finally time to get some aero and styling on this car. I get compliments on its looks occasionally, but it deserves some cleaning up and minimal styling at least.
All I can say is very nice.
I want to steal your fuel system...
In fact, there are lots of parts on your car that I could use.
Never give me your address, it will keep me honest...
It was nice meeting you last month, Next time you're down this way stop by.
Please bring your Miata with you, I want to drive!
Have some cats...


 9
9