When you click on links to various merchants on this site and make a purchase, this can result in this site earning a commission. Affiliate programs and affiliations include, but are not limited to, the eBay Partner Network.
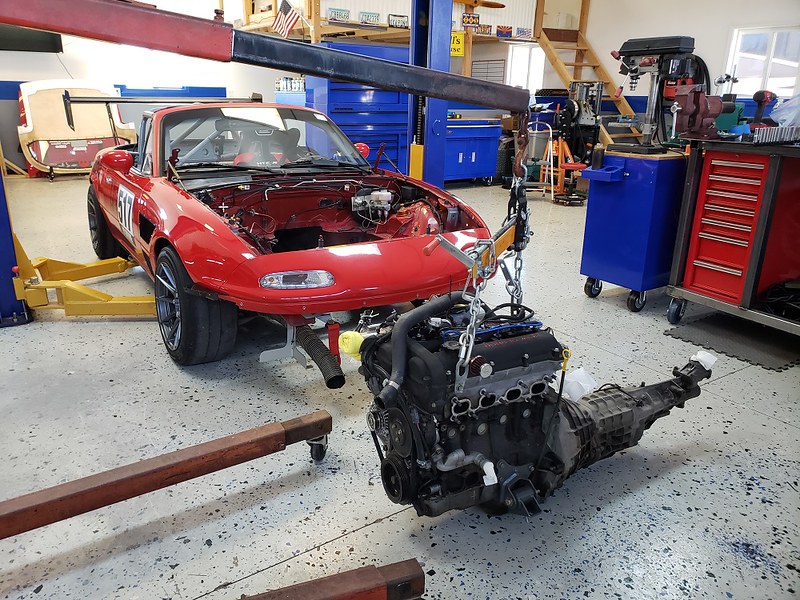
Nice cars! It will be interesting to follow this build. I seriously thought about going the K swap route vs turbo but when I added it all up I want to say it came out to ~$12k to do a K24A2 swap. I couldn't justify it (at least at this time). It'll be interesting to hear how the K swap compares to your turbo miata.
The K swap was the answer for me for simplicity and stockish reliability on track at ~220whp. When you figure in the cost of a built engine, it really isn't that much more than a turbo BP if you're starting from stock. And, if necessary, replacement engines are far cheaper. Of course, the benefit of a turbo BP is you can do a lot of things incrementally, so you can spread the costs over a longer time.
^I found that same logic to be true on my Kswap... I was starting from a completely stock BP, so it ended up being a few grand more to do a Kswap vs a properly set up turbo BP that wouldn't have cooling issues lap after lap.. relatively cheap insurance policy to me and now junkyard Kseries engines are everywhere (and cheap) if something went south on my K24.
That's good to hear the K swap has been that reliable. I heard some different issues with the K swap (perhaps the Z3 swap related to the hydro throwout bearing) but sounds like you guys have ironed things out. FWIW I think a turbo setup can be affordable and reliable on track but we'll see how it goes.
Pulled the remainder of the factory harness. All that's left is the wiring for the rear lighting (tail/brake/backup/etc), and the fuel pump. I don't see the ROI on re-wiring all the rear lighting, so I'll use a connector to hook up to the factory wires; the fuel pump will be getting new wires.
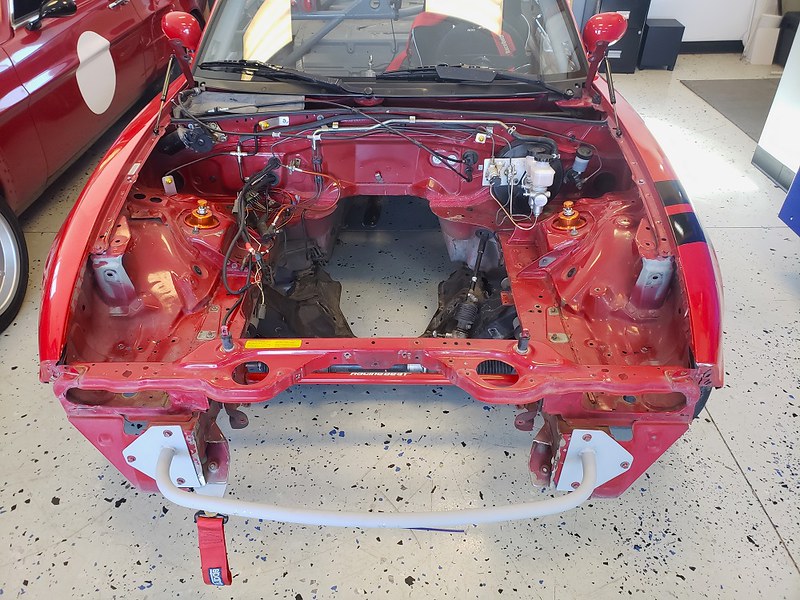
Did a little upgrade to the front support bar I made when I built the front aero. I added a gusset to each mounting plate for a little more strength. I don't think it'll mean much in the long run, but it made me feel less neglectful. LOL Also painted it... the engine compartment will get painted as well, same gray as the interior/cage.
The support bar looks great. I wonder how much, if any, rigidity is lost going to a bolt on setup and cutting out the support. I really want to do it, but something in the back of my head thinks it might be a bad idea, unless you built a really beefy support bar (yours I'd consider pretty beefy compared to most I've seen).
As everyone knows, this time of year is difficult for getting work done on car projects...
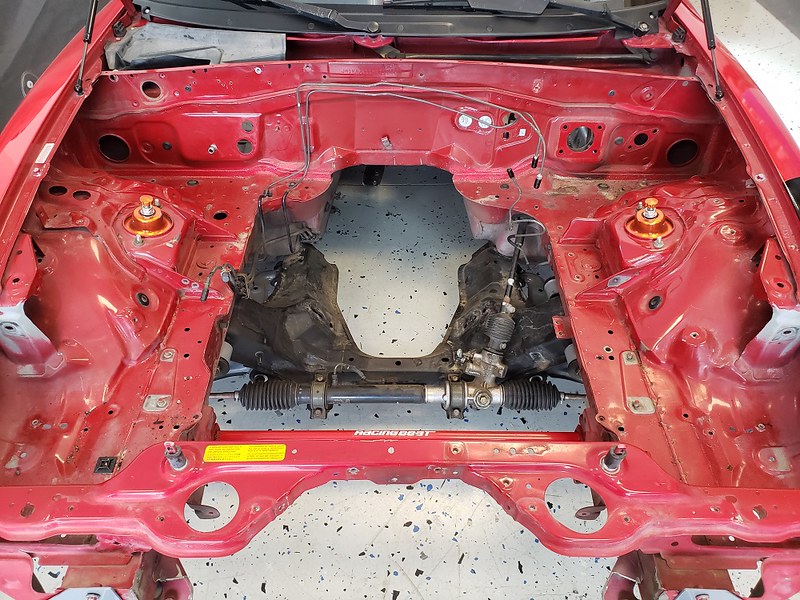
I was able to make a little progress. Engine compartment is stripped... got the hydraulics and other remaining stuff out. Ready for cleanup and paint. I'll be making new brake lines for the front.
Did a quick 'test fit' with the AIM dash and CAN switch panel.
The center stack panel will be re-made, and I may install some warning lights where the gauges were... not 100% on that yet...
Just a recommendation, you may be interested in this dash mount custom fit for your AIM display. I have it saved in my "want list" for when I get to the digital dash point of my build. https://makomotorsport.com/collectio...h-mount-custom
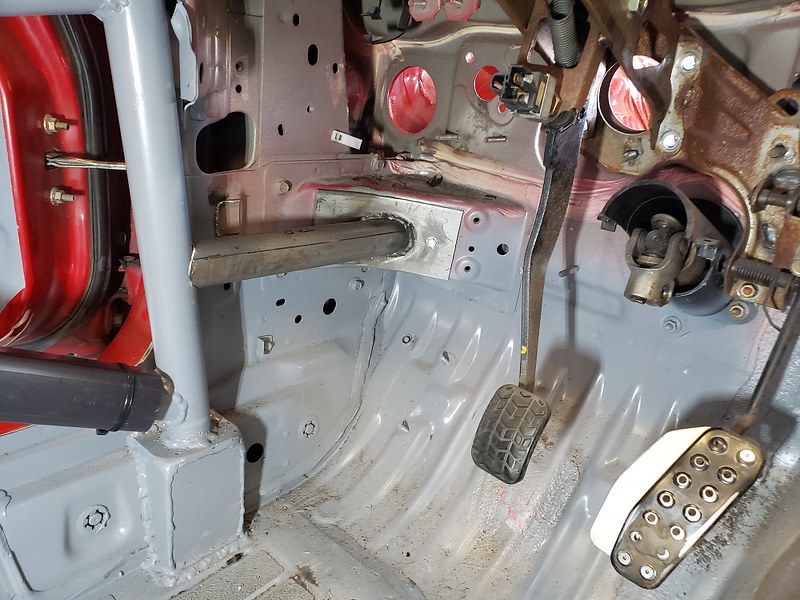
Pulled the steering column and clutch pedal today. First, I mounted the AiM dash just to see where it was going to sit.
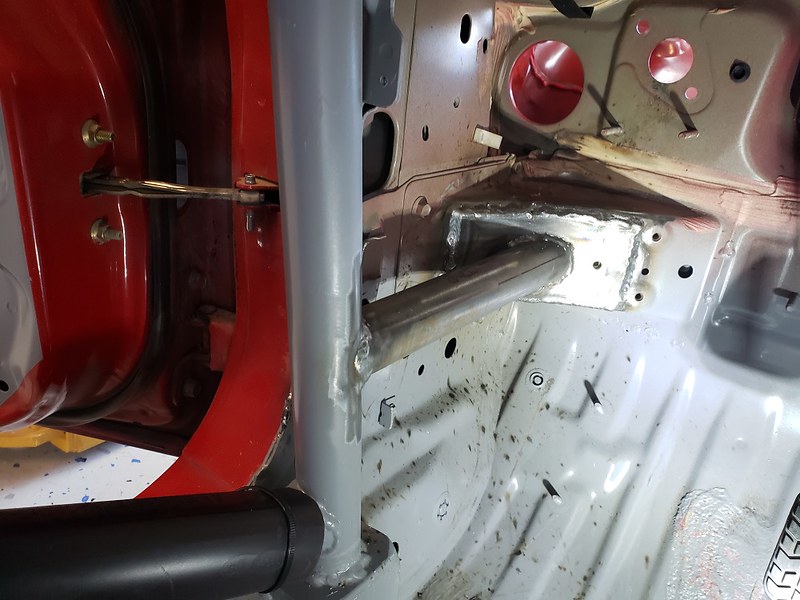
When I built the cage, I didn't have time to strip the harness out, so I skipped adding braces from the front down tubes to the firewall. Now that I've got everything out of the way, I'm adding them in. Fittted and welded to the plate, but not welded in yet.
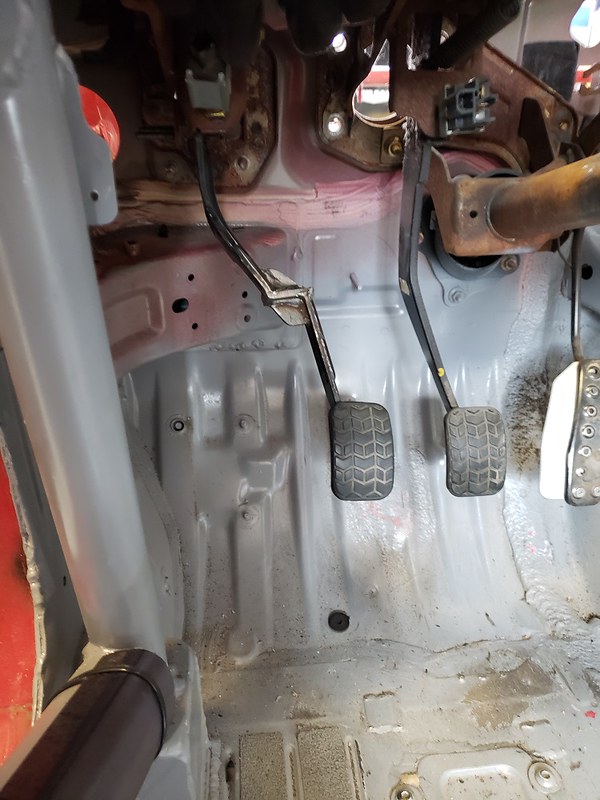
While the clutch pedal is out, I modified it to move the pad ~1" closer to the brake to make more foot room between the pedal and cage down tube. It was pretty tight getting my foot to the dead pedal, but this should help.
Running around town got me off to a late start today, and I didn't feel like crawling around inside the car with a wire wheel and welder, so I made the new center stack panel instead.
Laid out a pattern from the old one...
Then I poked some holes in it and bent the tabs and sides. Test mounted with the CAN switch panel:
One tool I'd really like to have is a good sheet metal brake, but it would take up a lot of shop space for something that doesn't get used a lot.
Footwell cage tubes are in. I had forgotten how much fun it is trying to work in the deep, dark corners of a caged Miata... Ibuprofen is on the menu tonight.
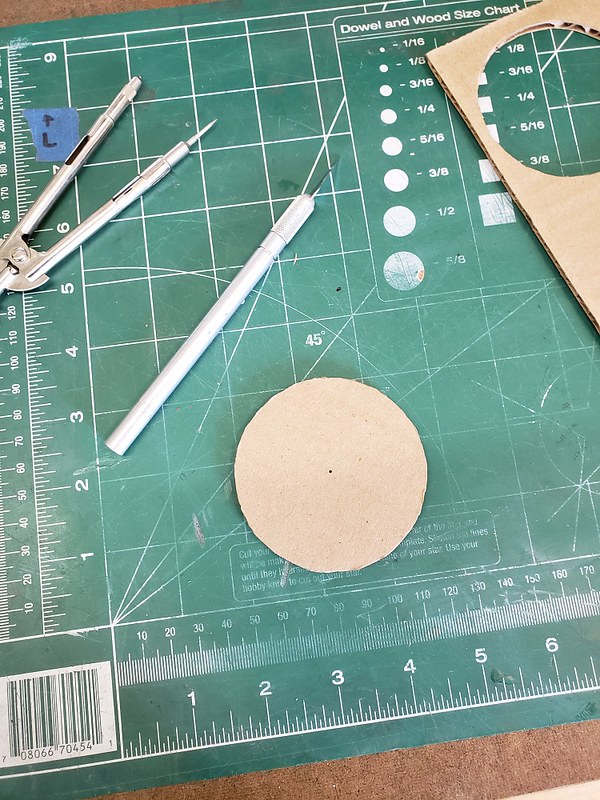
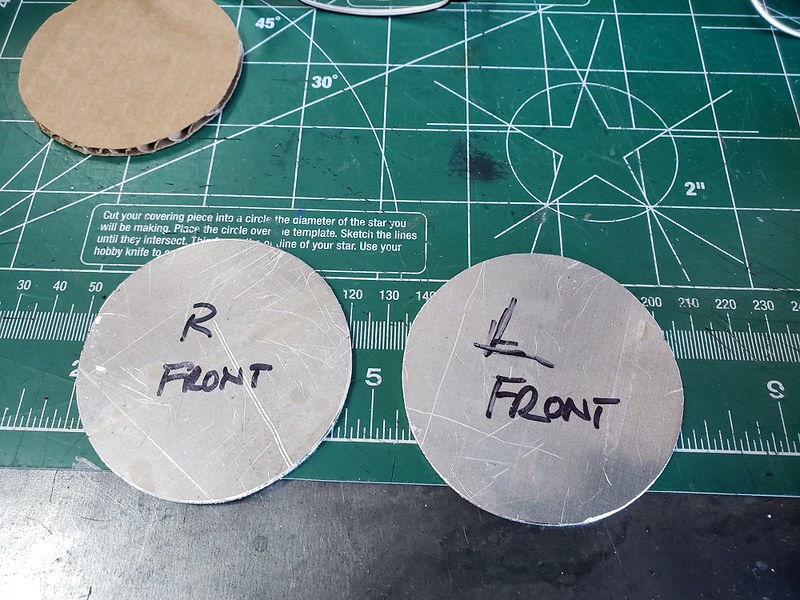
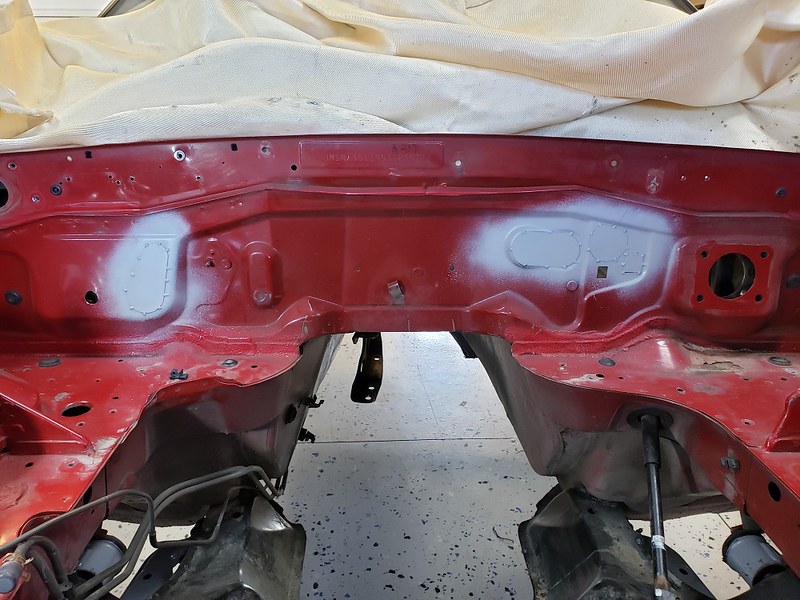
Main project for the day was working on plugging holes in the firewall. The biggest holes are where the factory harness goes through on each side, with a large rubber pass-through grommet, and they're nearly 4" in diameter.
I started with a CAD (cardboard aided design) pattern for an aluminum plug, which I transferred onto 12ga aluminum sheet.
You can see the nice quality material I'm getting from my new local metal supply...
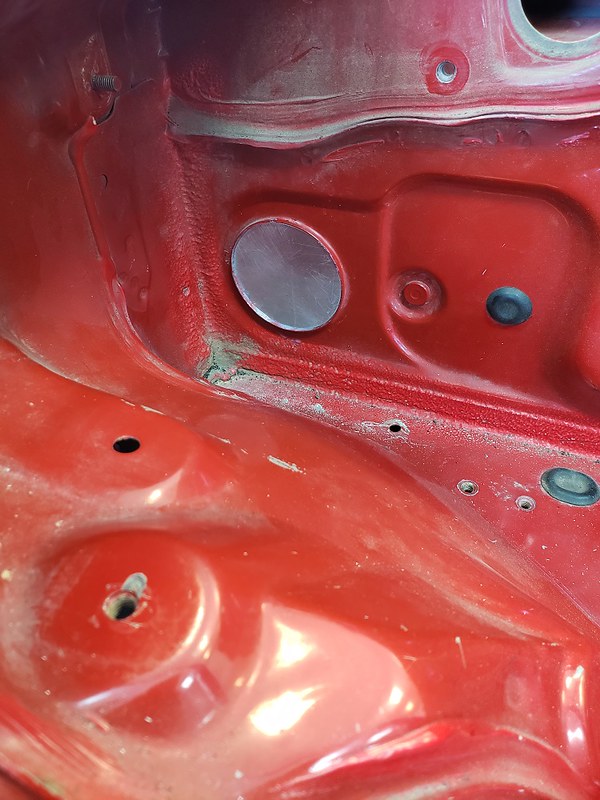
I used an aerospace grade epoxy that I've got a lot of experience with to fix them in the holes.
Once the epoxy cures, I'll use some body sealer on the inside, then paint.
Next step is to repeat the process for the other holes that won't be needed... I might just use steel for these and weld them in place since they don't have a flanged opening.
More work on the firewall today. First step was disconnecting the brake lines from the front calipers. I picked up some brass plugs to cap the lines while things are sitting around. Also bent the rear brake hard line out of the way for now.
Next was getting down to bare metal around the holes, and welding in the patches. These aren't structural and will be backed up by seam sealer, so not fully welded.
And a shot of primer to hold off any corrosion until paint.
Having the car on the lift to reach a comfortable working height is a bonus. As is being able to stand in the engine compartment...
Decided to 'notch' the frame corners in the engine compartment. Not strictly necessary for a K swap, but should free up some working space, and leave extra room on the exhaust side. Just in case something has to happen over there in the future....
Plasma cutter makes for quick and easy removal...
A little 'CAD' work...
Some high quality steel from the local metal supply


 1
1