When you click on links to various merchants on this site and make a purchase, this can result in this site earning a commission. Affiliate programs and affiliations include, but are not limited to, the eBay Partner Network.
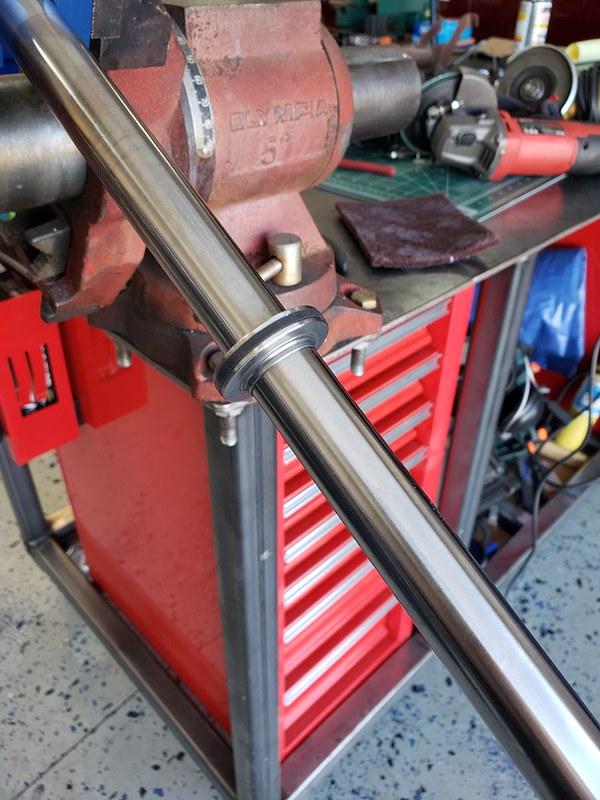
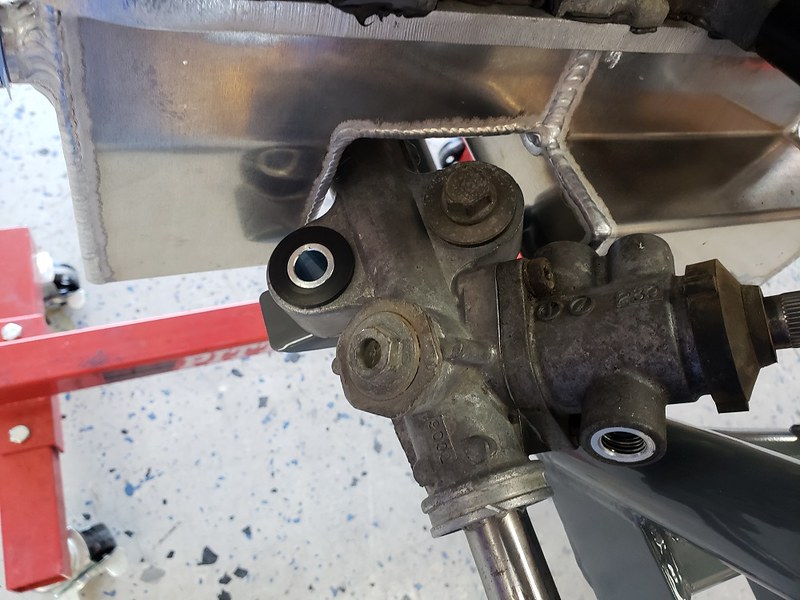
The crossmember for the K24A2 swap is set up for an NB steering rack, so I had sourced one a while back. Before installation, I'm depowering the rack, as I'll be adding electric power steering. I had depowered the NA rack years ago, but it was just a line loop/plug. This time I'm going to do it properly. First step was stripping the lines off the rack.
Today I disassembled the rack, and pressed out the mounting bushings.
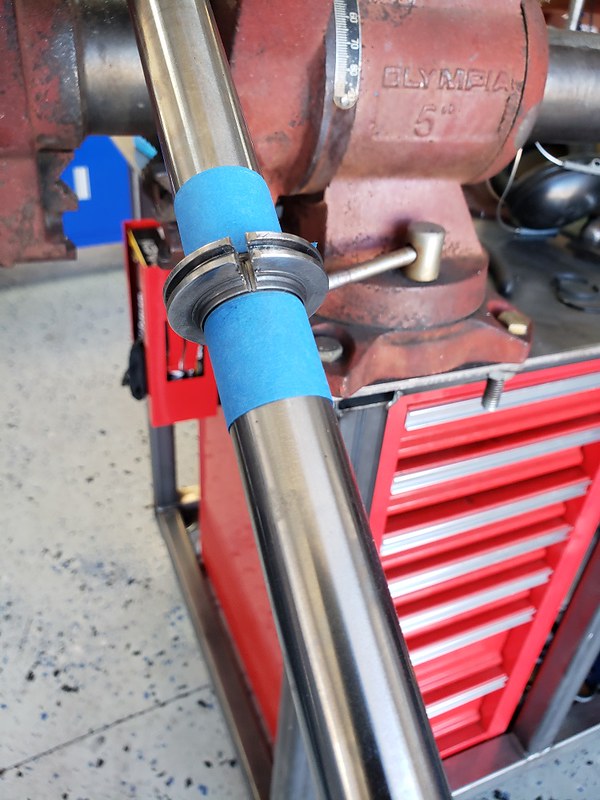
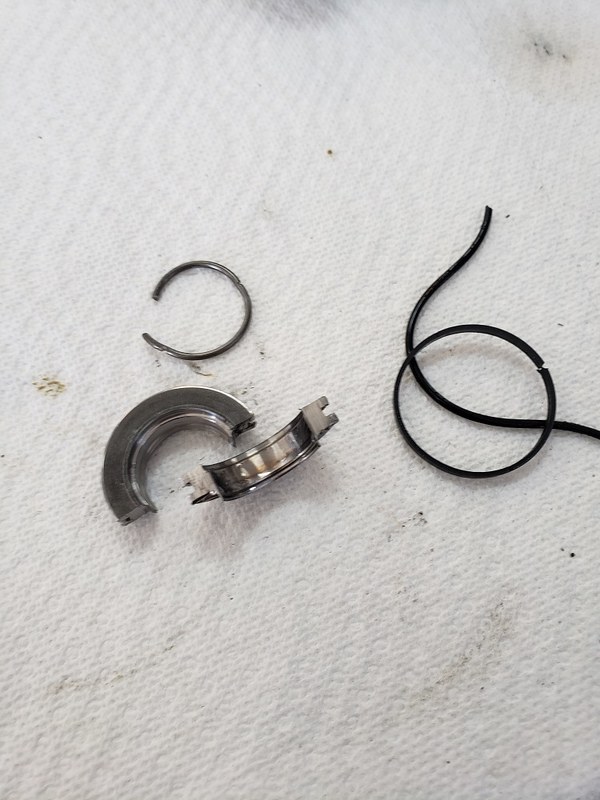
1st up was the actual 'depower', removing the 'piston' from the steering shaft.
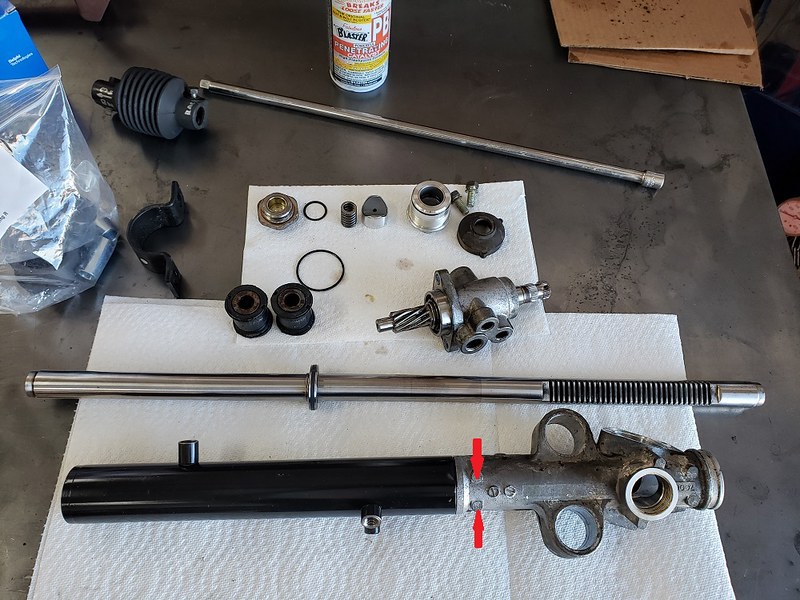
Next was shaving the hydraulic fittings off the rack body, welding up the holes and repainting.
Also did a little cleanup on the splines for the pinion...
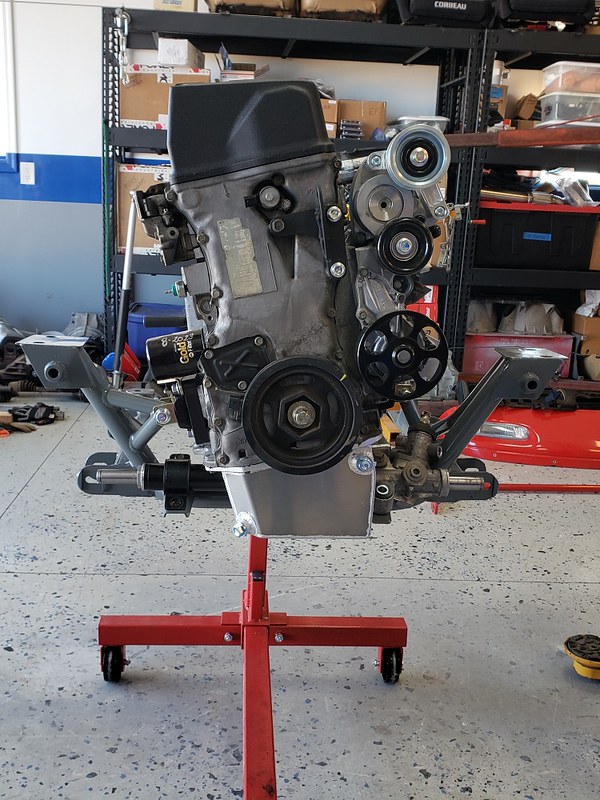
Got the rack mostly re-assembled after spending 40 minutes looking for the plug set I bought over a year ago... (still need a couple of plugs for the hydraulic fittings on the pinion cover), new bushings pressed in, and got it mounted for a test fit after chasing the threads on the V8R subframe.
I bolted the V8R subframe to the K24 on the engine stand to check out the fitment of the steering rack and ensure I had done everything necessary for clearance. It's really tight in some spots...
do yourself a favor now and check for flange clearance between your 2-1 pipe and the subframe in this area once bolted up to the 4-2 part as shown. mine was tight and I trimmed my flange back a little
I am just an observer and not speaking from experience, but I have heard of two issues on the V8R subframe you may want to consider addressing by reinforcing it now while the subframe is easily modified.
do yourself a favor now and check for flange clearance between your 2-1 pipe and the subframe in this area once bolted up to the 4-2 part as shown. mine was tight and I trimmed my flange back a little
Thanks. It appears I should have plenty of clearance. Flange for the 2->1 pipe is a match for the header. I'll definitely keep an eye on it as it goes together.
I am just an observer and not speaking from experience, but I have heard of two issues on the V8R subframe you may want to consider addressing by reinforcing it now while the subframe is easily modified.
I appreciate it! This is exactly the kind of info that can be difficult to find unless you stumble onto the right build thread.
I stole a pic from Zoot's thread of his failure:
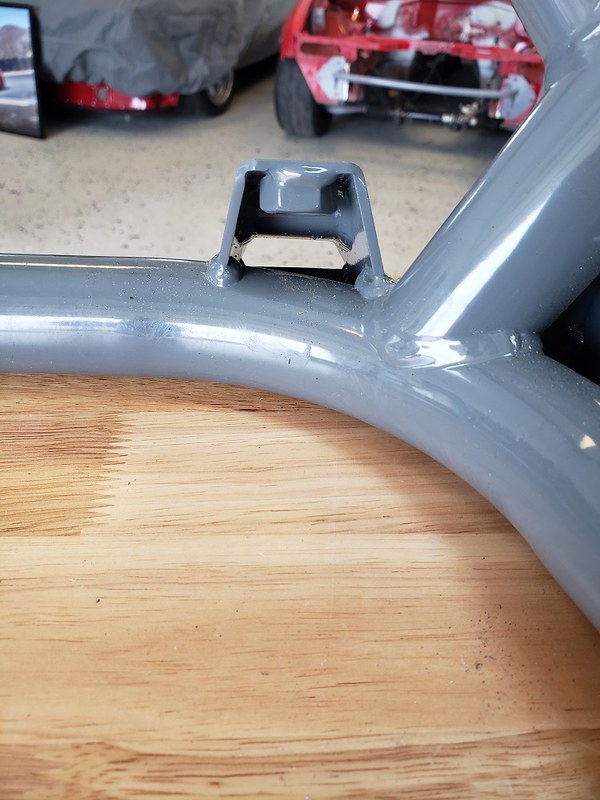
As he noted in his thread, that subframe was a much earlier build (and Keith's would have been as well), and had 90* brackets. The current version, if what I have is representative, has angled brackets, and the bottom is also boxed for additional strength. Pics are passenger side, but driver's side is similar.
I will definitely be keeping an eye on things, but I think the improvements in the mounting brackets, and the fact that I won't be running on 275 Hoosiers should improve the odds of the rack staying attached to the subframe.
I do think the rear subframe mounts could stand some reinforcement, so I'm taking a close look at what I can do there.
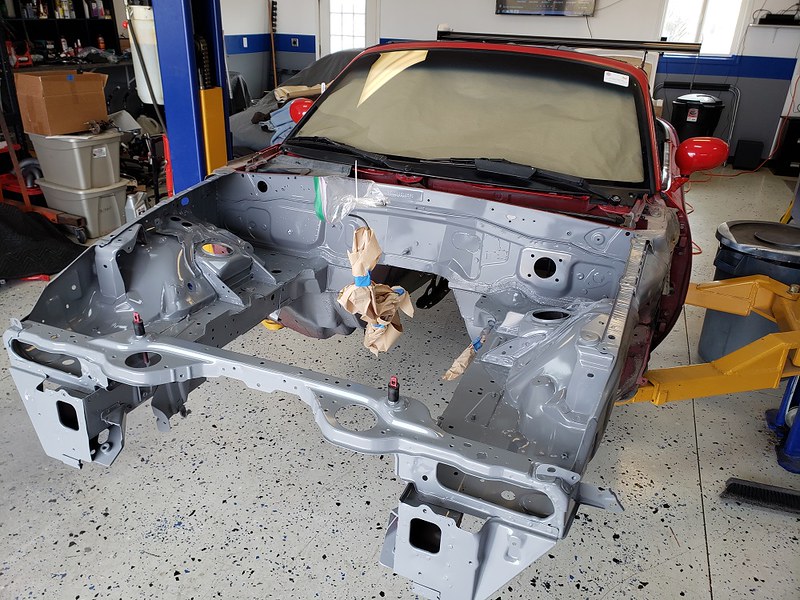
Last week, I got the interior paint touched up on the new fabrication. I've been waiting for the weather to warm up a bit so I can get my shop into the 60s to paint the engine compartment.
Things were finally warming up, so yesterday I pulled the front subframe and prepped for paint. I started with pulling the fenders.
Then, I used a lift table to pull the subframe (which worked pretty well).
Reinstalled the clutch hydraulics. Also re-bent the factory hard fuel lines to go up the firewall instead of out the right frame rail. Re-bent the rear brake hard line to follow the new firewall profile as well. All of these will eventually be pointed towards the driver's side, but for now they're out of the way and where they need to be.
As far as I can tell, the rear bolt misalignment happens either during welding or powder coating. Wrap a ratchet strap around it towards the back and pull it together a bit, I've had to do that on the ~6 V8R subframes I've installed.
The engine I bought for my swap is a JDM K24. It's a 3 lobe RBB head engine, so it's basically the same as a K24A2 from an 06-08 TSX, but there are some differences. When I bought the engine, it was the right combination of availability, price, and proximity. I was able to pick it up rather than having it shipped, so overall it was the easy button at the time. That said, I eventually discovered enough differences between the JDM and USDM engines to pretty much wipe out any cost advantage.
For prosperity, these are the USDM parts (Honda/Acura part #s) I ended up using to convert the JDM engine for use in a Miata with the KPower kit:
In most cases I just bought new OEM because in my experience the cost difference over used/aftermarket is worth it in track reliability down the road. I used a re-man alternator, and was able to find the alternator bolts at my local hardware (for about the same cost as the Honda parts). The JDM balancer will work, but it's a slightly larger diameter than the USDM part, so it will require a different belt than specified by KPower. Since this is a track car, I figured reducing the accessory speeds could only be a good thing, so I just bought a new balancer.
Please double check any part numbers before ordering... going by my notes. I may also have missed a couple of small parts and didn't include gaskets, etc in the list.
If you are using a mechanical (cable) throttle, and want ECU idle control you will also need an Accord/Element IACV (16022-RAA-A01). This tidbit is buried in the KPower install manual.
Since I'm building a new wiring harness, I went with all-new connectors. Ballenger Motorsports is a great source for this stuff, and below are the part numbers for the K24 connectors:
Crank position sensor - CONN-76246
Cam position/MAP/TPS - CONN-75778
VTC Solenoid/IAT/CLT - CONN-75781
Injector - CONN-75783
Coil - CONN-75784
Alternator - CONN-76257
IACV (Accord/Element for KPower manifold) - CONN-76125
Note that these are "connector kits" with the connector, terminals and seals. They can also be ordered as pigtails with different part #s. Ballenger's site is pretty easy to navigate.
 01-15-2024, 04:59 PM


 0
0

 Thanks!