
my LeMons car


Junior Member
Joined: Apr 2008
Posts: 109
Total Cats: 16
This is the best build ever! I guess you are going to be at the Thunderhill event? I am tempted to drive all the way up there just to see this deformed turbo throwing beast run.
Oh and like Joe said, what kind of $ do you have left? I'm thinking a FPR would do in your situation, but if you have the $, a MS would be awesome. At these low boost levels, you could probably get away with just running some 1.8 injectors if you went with the MS.
Oh and like Joe said, what kind of $ do you have left? I'm thinking a FPR would do in your situation, but if you have the $, a MS would be awesome. At these low boost levels, you could probably get away with just running some 1.8 injectors if you went with the MS.
I used to have one of those MSD boost retard boxes kicking around, but unfortunately I sold it on eBay for like $40. IDIOT! An FPR and retardo box would probably be enough...
Unless someone has a fuel cell they want to sell for cheap...
-Dave
Reply
 0
0

0


Reply
0
0
Junior Member
Joined: Apr 2008
Posts: 109
Total Cats: 16
we have a second stock tank, and were considering adding it to the trunk, along with some fancy wiring that used the rear fuel pump to refill the front tank whenever the gas gauge was less than empty, but a comination of rules and common sense ruled that out.
-Dave
-Dave
Reply
0
0
Junior Member
Joined: Apr 2008
Posts: 109
Total Cats: 16
How to freebuild a Miata engine.
Step 1: Get four donor engines.
#1: 1.6 Automatic (low compression) that runs on 3 cylinders. Burned exhaust valve, scored bearings, small-nose crank with keyway damage.
#2: 1.6 Manual (less-low compression) with spun bearing, three burned exhaust valves, no pistons or rods, and grooved main bearings.
#3: 1.6 of unknown origin with severely grooved (big nose) crank, blown head gasket and all the rust and other damage that creates.
#4: Low-mileage short block that's been sitting, headless, under a bird cage for at least 10 years, but nonetheless has a good (small nose) crank.
Take block, head and low-compression pistons from #1, crank, bearings, oil pump, and rear main seal from #4, camshafts from #2, one exhaust valve from #2, and manifolds from, well, actually, we're not even sure which engines those came from..
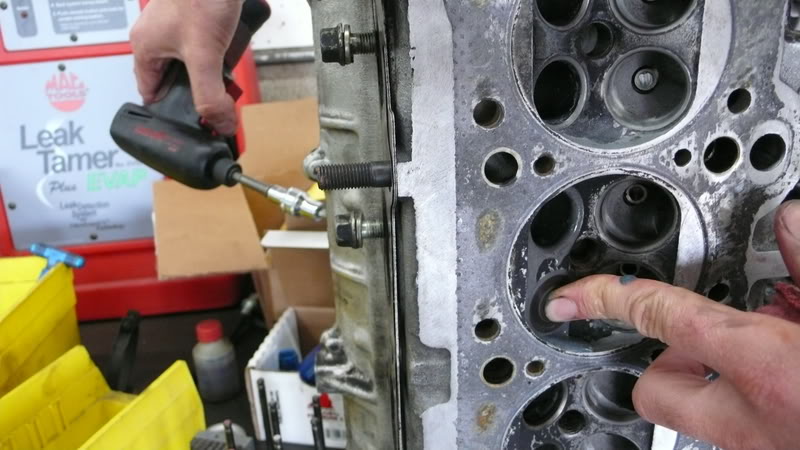
Do a "valve job" with a drill, 3-inches of vacuum hose, and some valve lapping compound:
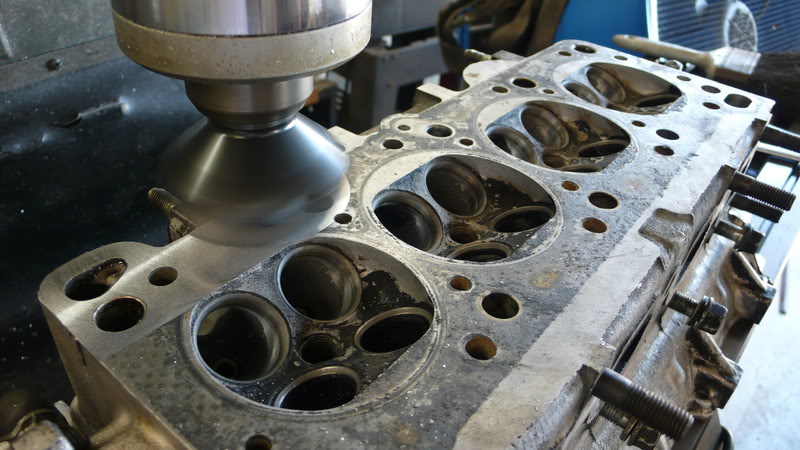
Deck the head with a slightly-too-small flycutter and get rid of the ridge between passes by wrapping 400-grit sandpaper around a steel block and taking turns sanding it until it seems smooth and flat enough.
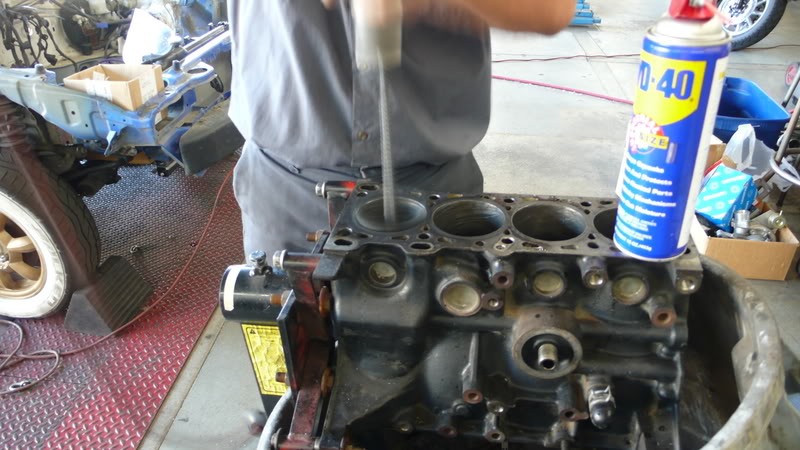
Hone the cylinders with a drill and some WD40
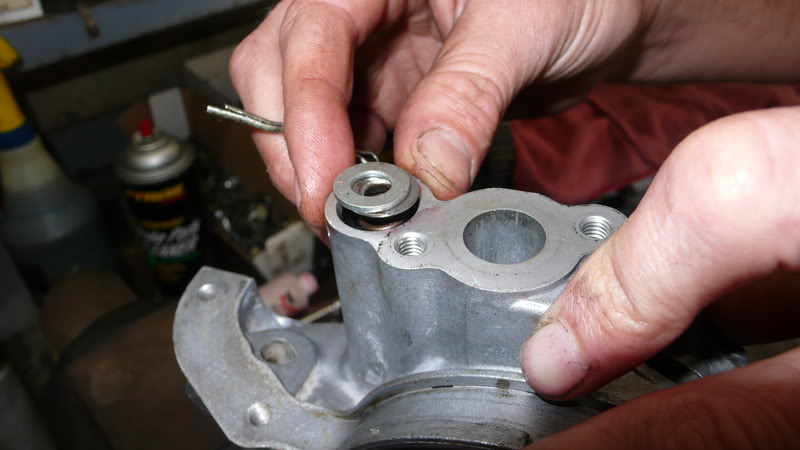
Increase oil pressure by wedging a random washer from the floor under the oil pump relief spring.
Buy piston rings and a head gasket from Mazdaspeed Motorsports (yes, this does count as a motorsport) at their sweet racer discount, and assemble the engine with used gaskets everywhere else.
-Dave
Step 1: Get four donor engines.
#1: 1.6 Automatic (low compression) that runs on 3 cylinders. Burned exhaust valve, scored bearings, small-nose crank with keyway damage.
#2: 1.6 Manual (less-low compression) with spun bearing, three burned exhaust valves, no pistons or rods, and grooved main bearings.
#3: 1.6 of unknown origin with severely grooved (big nose) crank, blown head gasket and all the rust and other damage that creates.
#4: Low-mileage short block that's been sitting, headless, under a bird cage for at least 10 years, but nonetheless has a good (small nose) crank.
Take block, head and low-compression pistons from #1, crank, bearings, oil pump, and rear main seal from #4, camshafts from #2, one exhaust valve from #2, and manifolds from, well, actually, we're not even sure which engines those came from..
Do a "valve job" with a drill, 3-inches of vacuum hose, and some valve lapping compound:
Deck the head with a slightly-too-small flycutter and get rid of the ridge between passes by wrapping 400-grit sandpaper around a steel block and taking turns sanding it until it seems smooth and flat enough.
Hone the cylinders with a drill and some WD40
Increase oil pressure by wedging a random washer from the floor under the oil pump relief spring.
Buy piston rings and a head gasket from Mazdaspeed Motorsports (yes, this does count as a motorsport) at their sweet racer discount, and assemble the engine with used gaskets everywhere else.
-Dave
Reply
0
0
Junior Member
Joined: Apr 2008
Posts: 109
Total Cats: 16
Free coolant re-route:
Drill and tap the back of the head to accept the ECU coolant temp sensor (green)
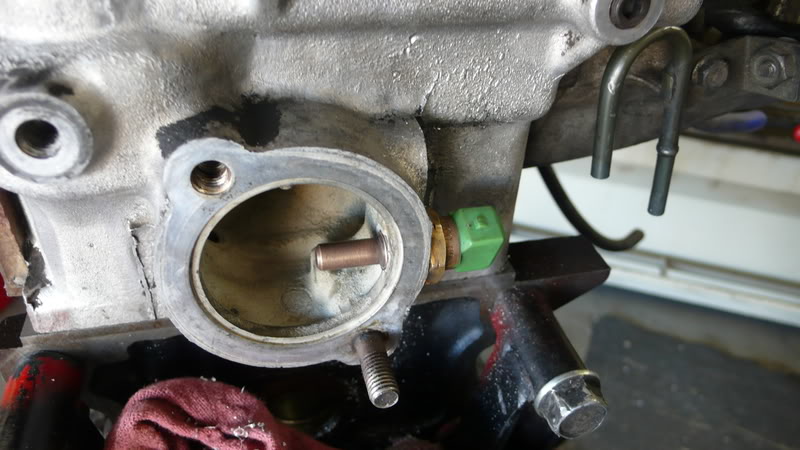
Bust out the little mini thermostat that hangs out next to the big thermostat so there will be enough coolant flow when the engine is cold to keep the water pump from cavitating.
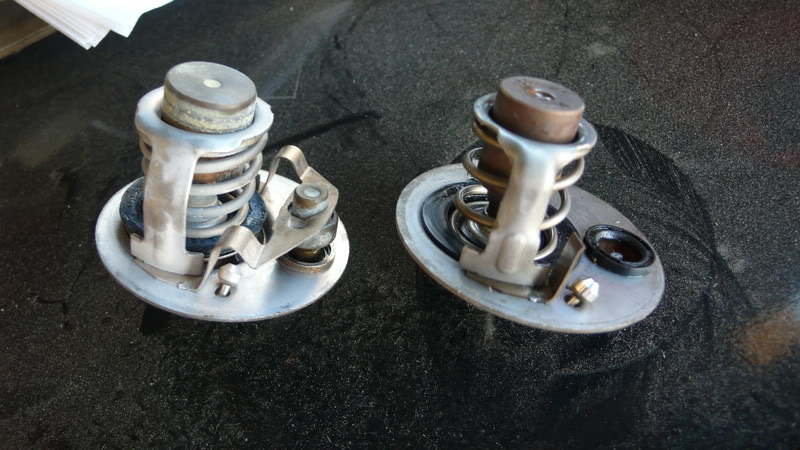
AND so it will clear the temp sensor...
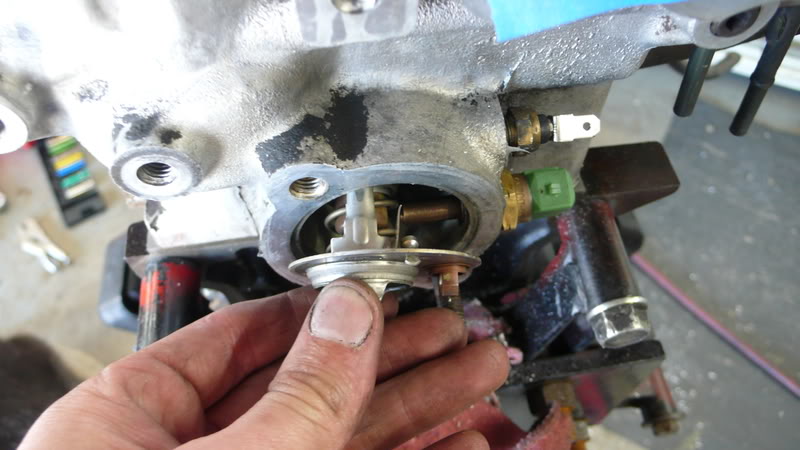
Bolt the thermostat housing from the front onto the back, using a broken thermo fan switch to plug the hole while clearing the firewall (and stick the real thermo fan switch in the coolant pipe just downstream of the thermostat).
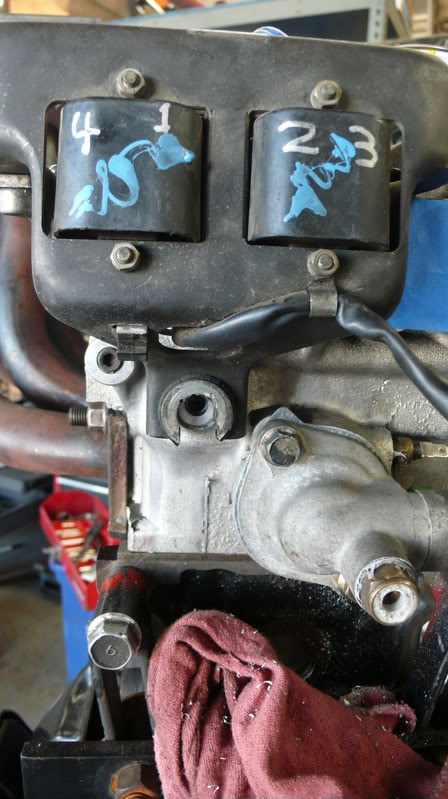
(oh, and slot the bottom hole on the coil pack so you can get it on and off easily later when the engine is in the car)
Then, if you're planning ahead, plug the coolant outlet in the front of the head with a Honda freeze plug. Or, if you already bolted the coolant neck on before installing the cam gears, go ahead and leave the neck on and make some kind of block-off plate for it later...
-Dave
Drill and tap the back of the head to accept the ECU coolant temp sensor (green)
Bust out the little mini thermostat that hangs out next to the big thermostat so there will be enough coolant flow when the engine is cold to keep the water pump from cavitating.
AND so it will clear the temp sensor...
Bolt the thermostat housing from the front onto the back, using a broken thermo fan switch to plug the hole while clearing the firewall (and stick the real thermo fan switch in the coolant pipe just downstream of the thermostat).
(oh, and slot the bottom hole on the coil pack so you can get it on and off easily later when the engine is in the car)
Then, if you're planning ahead, plug the coolant outlet in the front of the head with a Honda freeze plug. Or, if you already bolted the coolant neck on before installing the cam gears, go ahead and leave the neck on and make some kind of block-off plate for it later...
-Dave
Reply
0
0
Junior Member
Joined: Apr 2008
Posts: 109
Total Cats: 16
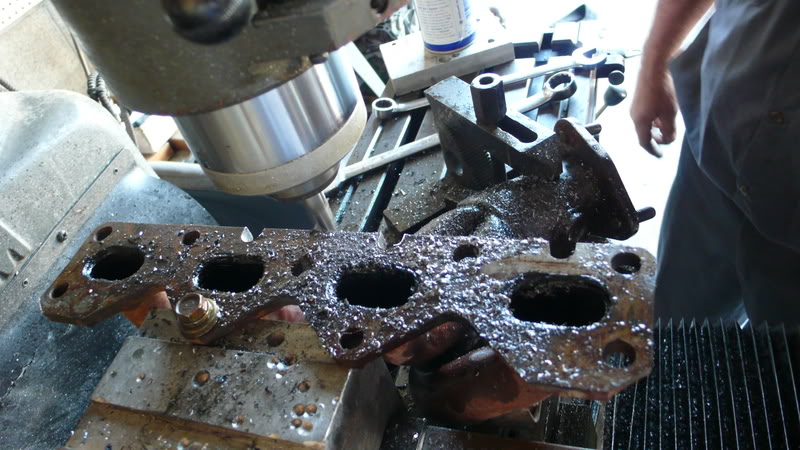
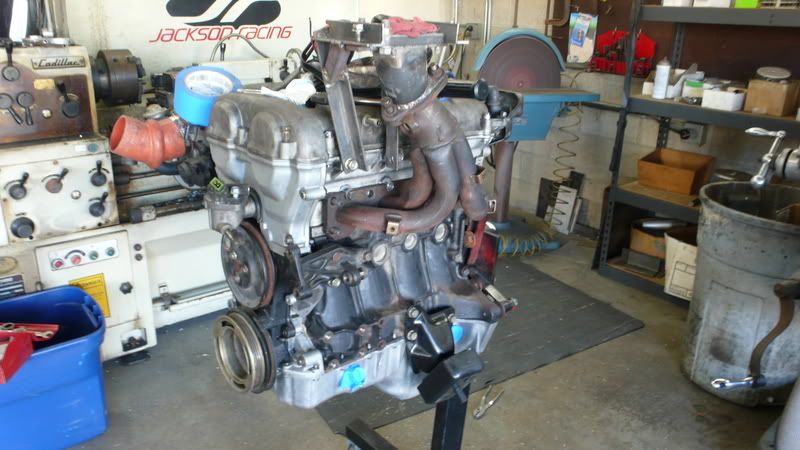
Free turbo manifold:
Flip the gasket upside-down, note that the four outer holes and exhaust ports all still line up, and mark the manifold where the few mistaligned holes hit the flange.
Cut metal:
There will be a total lack of clamping force at the bottom of the flange...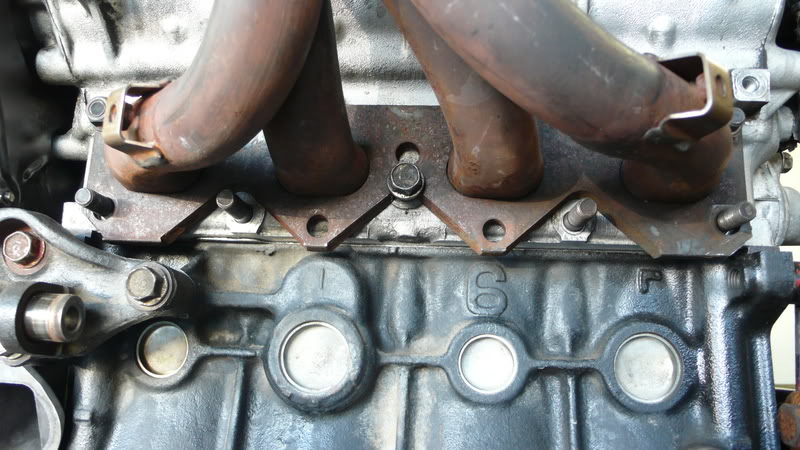
Fix this by making a bridge to connect the four studs along the bottom of the manifold. In the middle, where there is a large gap between studs, just weld in a reinforcing rib. The welding also warps the bridge in the right direction to increase the clamping force across the two middle tabs.
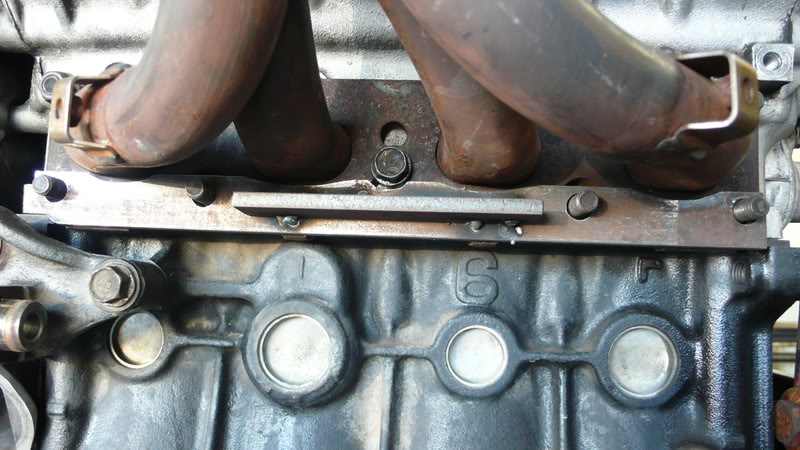
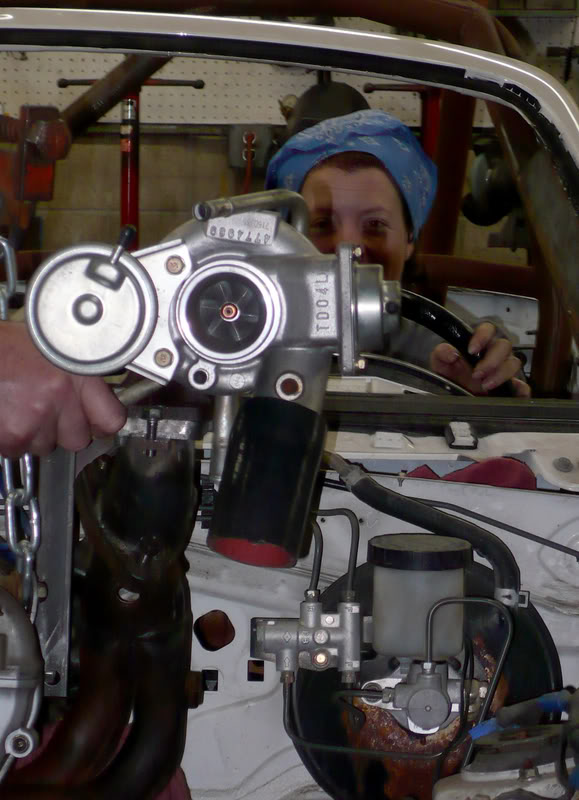
Build the adaptor y'allns have already seen, then make a support bracket to take the weight of the turbo off the flimsy stock manifold.

Finally, install engine and answer the burning question about forward visibility.
-Dave
Flip the gasket upside-down, note that the four outer holes and exhaust ports all still line up, and mark the manifold where the few mistaligned holes hit the flange.
Cut metal:
There will be a total lack of clamping force at the bottom of the flange...
Fix this by making a bridge to connect the four studs along the bottom of the manifold. In the middle, where there is a large gap between studs, just weld in a reinforcing rib. The welding also warps the bridge in the right direction to increase the clamping force across the two middle tabs.
Build the adaptor y'allns have already seen, then make a support bracket to take the weight of the turbo off the flimsy stock manifold.
Finally, install engine and answer the burning question about forward visibility.
-Dave
Reply
0
0


Junior Member
Joined: Apr 2008
Posts: 109
Total Cats: 16
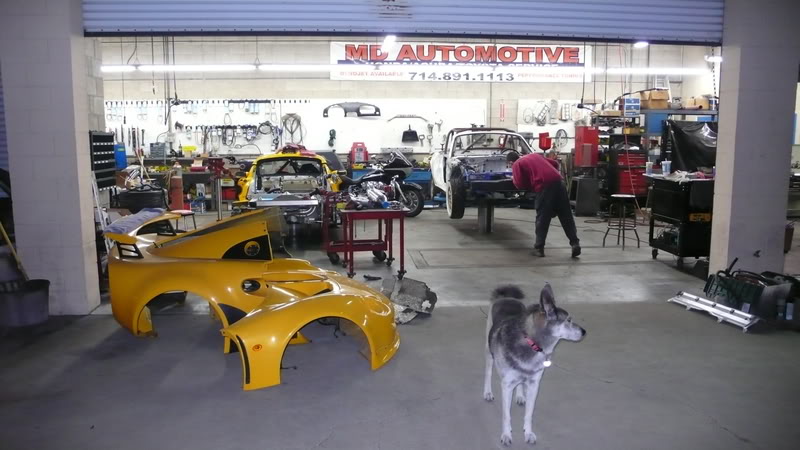
And while we're on the subject of awesome, here's a big shout out to Mark DiBella, owner of MD Automotive, who not only asked us if we'd like to clean that big pile of fucked up old Miata parts out of his back parking lot, but then let us use his shop, his parts washer, his mill, lots of his tools, and let us move his supercharged K20-powered Exige project out of the way so we could assemble said shitpile.
Reply
0
0

Newb
Joined: Oct 2008
Posts: 2
Total Cats: 0


Reply
0
0


I noticed you didn't mention anything about upgrading your motor mounts. I never took a detailed pictured of what I did but here is a pic from my book of ghetto. Take a close look at my motor mounts.
http://i33.tinypic.com/11b2ems.jpg
Cheap, easy, and stiffer/stronger than stock without being to stiff like some of those solid mounts out there. Should costs about $4 for the pucks and another couple bucks on the hardware if you don't already have...
http://i33.tinypic.com/11b2ems.jpg
Cheap, easy, and stiffer/stronger than stock without being to stiff like some of those solid mounts out there. Should costs about $4 for the pucks and another couple bucks on the hardware if you don't already have...
Last edited by MikeRiv87; Oct 22, 2008 at 09:44 PM.
Reply
0
0


This is just awesome, I cant stop laughing. Do donations count in the budget? You should open a thread for people that want to help you out, for example piping, couplers, etc, just stuff that you will need
Reply
0
0

Junior Member
Joined: Apr 2008
Posts: 109
Total Cats: 16
I noticed you didn't mention anything about upgrading your motor mounts. I never took a detailed pictured of what I did but here is a pic from my book of ghetto. Take a close look at my motor mounts.
http://i33.tinypic.com/11b2ems.jpg
Cheap, easy, and stiffer/stronger than stock without being to stiff like some of those solid mounts out there. Should costs about $4 for the pucks and another couple bucks on the hardware if you don't already have...
http://i33.tinypic.com/11b2ems.jpg
Cheap, easy, and stiffer/stronger than stock without being to stiff like some of those solid mounts out there. Should costs about $4 for the pucks and another couple bucks on the hardware if you don't already have...
I know where they are now, though...
So, what, did you just bolt through them?
-Dave
Reply
0
0


