Need More Towing Power........
 03-10-2015, 09:07 PM
#101
Senior Member
Thread Starter
iTrader: (2)

Join Date: Sep 2009
Location: Edmonton, AB, Canada
Posts: 1,193
Total Cats: 29
Torque specs for BELFAB rod cap ARP bolts ? - MX-5 Miata Forum
The more I read this the better I feel. Sav knows his Miata engines, but I do not.
The more I read this the better I feel. Sav knows his Miata engines, but I do not.

Reply
 0
0

0
03-10-2015, 09:08 PM
#102
Senior Member
Thread Starter
iTrader: (2)
Join Date: Sep 2009
Location: Edmonton, AB, Canada
Posts: 1,193
Total Cats: 29
Torque specs for BELFAB rod cap ARP bolts ? - MX-5 Miata Forum
The more I read this the better I feel. Sav knows his Miata engines, but I do not.
The more I read this the better I feel. Sav knows his Miata engines, but I do not.
Reply
0
0
03-12-2015, 04:45 PM
#104
Senior Member
Thread Starter
iTrader: (2)
Join Date: Sep 2009
Location: Edmonton, AB, Canada
Posts: 1,193
Total Cats: 29
My machinist said he could not grind them down. He said try Kawasaki. I did some research but bikes don't commonly have 27mm so I started moving down the scale and found some 25mm diameter shims that fit the Yamaha 1300cc bikes.
26H-12168-F0-00 PAD,ADJUSTING 2.30
$10 CDN and they are in stock. I'll use 1 for setting clearance. The diameter won't matter for just setting it up as long as it doesn't rock.
26H-12168-F0-00 PAD,ADJUSTING 2.30
$10 CDN and they are in stock. I'll use 1 for setting clearance. The diameter won't matter for just setting it up as long as it doesn't rock.
Reply
0
0
03-13-2015, 02:04 PM
#106
Senior Member
Thread Starter
iTrader: (2)
Join Date: Sep 2009
Location: Edmonton, AB, Canada
Posts: 1,193
Total Cats: 29
Looks like I'll need the 2.4mm shim instead of the 2.3mm. The depth of the buckets lip is about 2.29 ish so it interferes with getting a true reading. I should have remembered that when I was doing the math earlier. Plus my feeler tops out at .89mm and them takes a jump to .81 and it's probably about a .83 proper gap I am measuring with the 2.3 shim. I've never liked putting 2 feelers together to add up to whatever you need and trust it so the taller shim will help give me more feeler options.
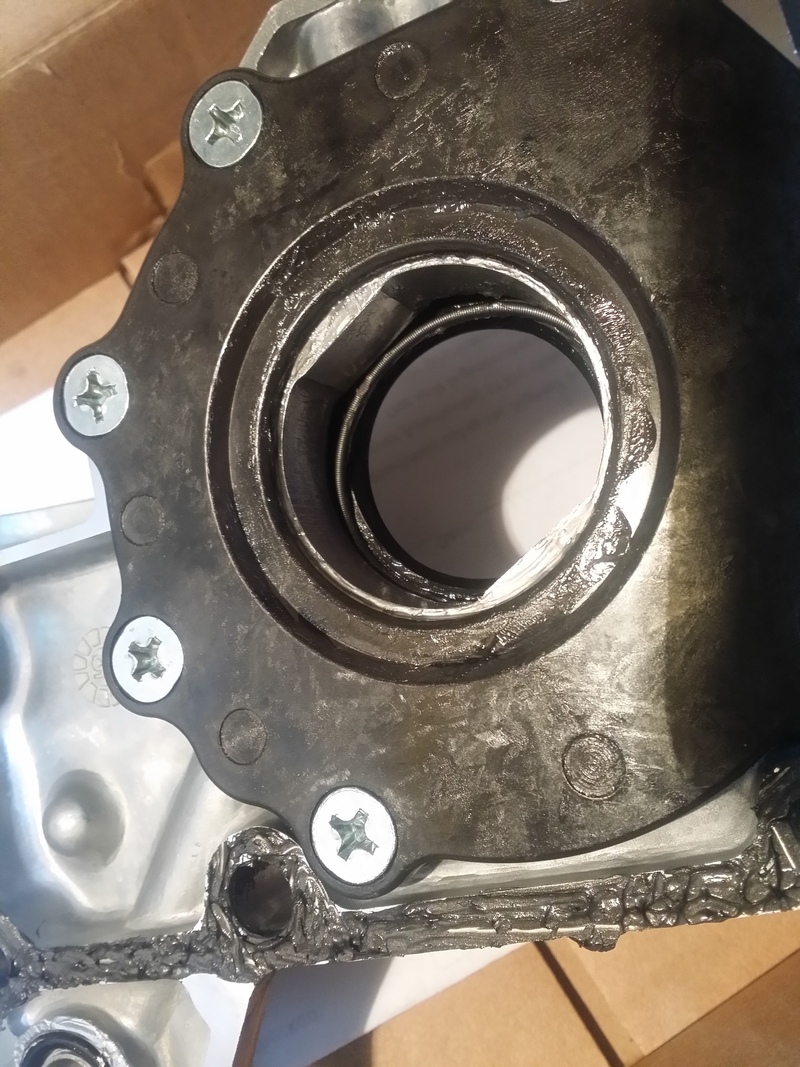
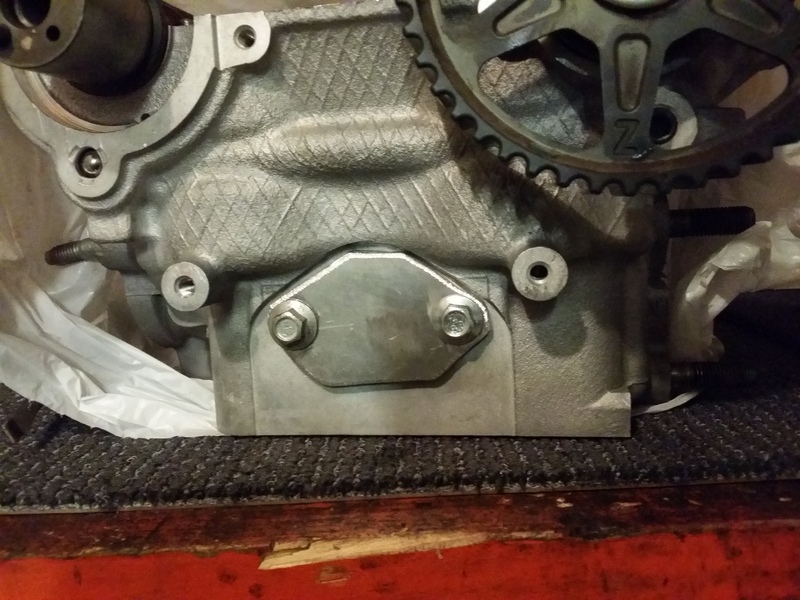
Put on the oil pump for testing a few times which was probably the demise of the shaft seal. Then I RTV'd it all for its final assembly and went to put it on and noticed the seal got caught, then the spring came off. Not going to chance it so I will get another seal. When I took off the pump I could see where the RTV did not make it. I tried to use as little as possible so them I added some more and bolted it in. BTW there are only 5 bolts holding the pump on right? I checked the FSM but didnt see how many??

Cleaned up the OEM oil cooler. Ran RTV on the orange silicone seal just to add some insurance in a place that always, always leaks.
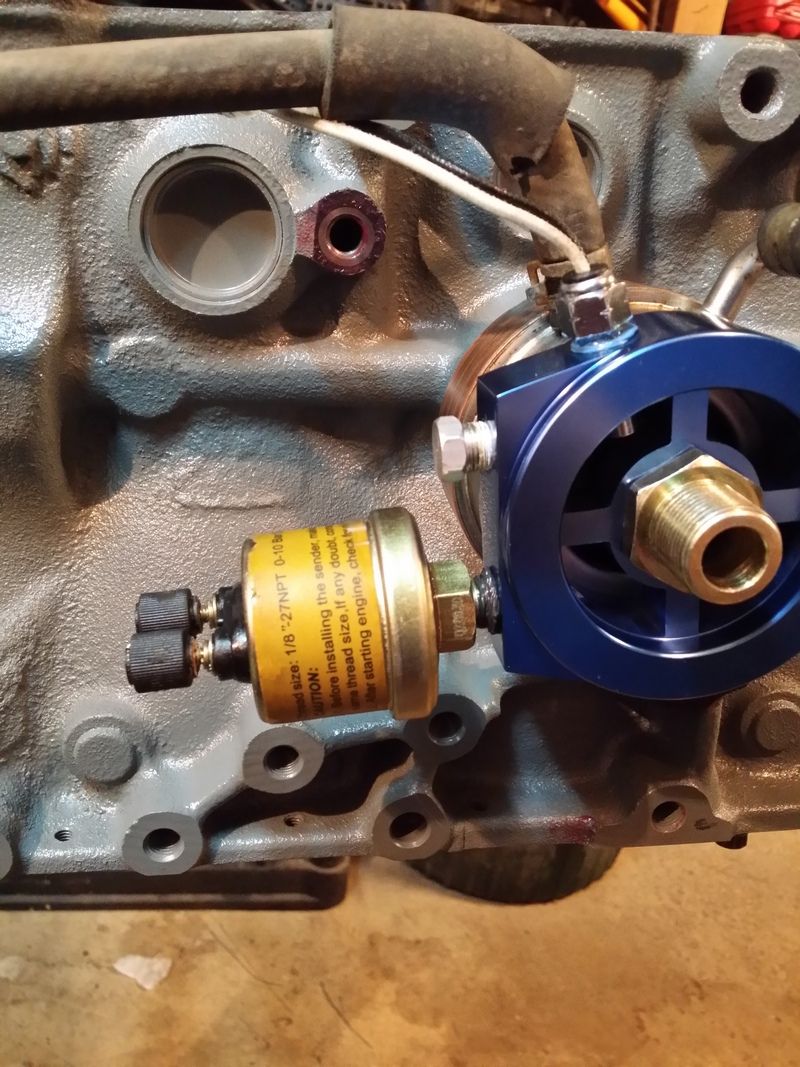
Added an oil sandwich and instead of the seal it comes with I picked up 2 seperate o rings and then put a bead of RTV in between them to "seal" the deal.
No RTV overflow in there
The last open port I was going to run the turbo feed from, or should I stick to my old T - fitting on the block??
I like magnets. I don't like ferrous particles in my oil. In addition to a magnetic drain plug I run this bad boy. A Neo HDD magnet. Its very strong, and 3 times thicker than 99% of todays HDD's. I stick one on all my filters, I even stick little round Neo's on my ATV/Bike filters against the throwaway elements. You would not believe the paste that accumulates in a typical sump that shares gearbox and clutch. Nasty.
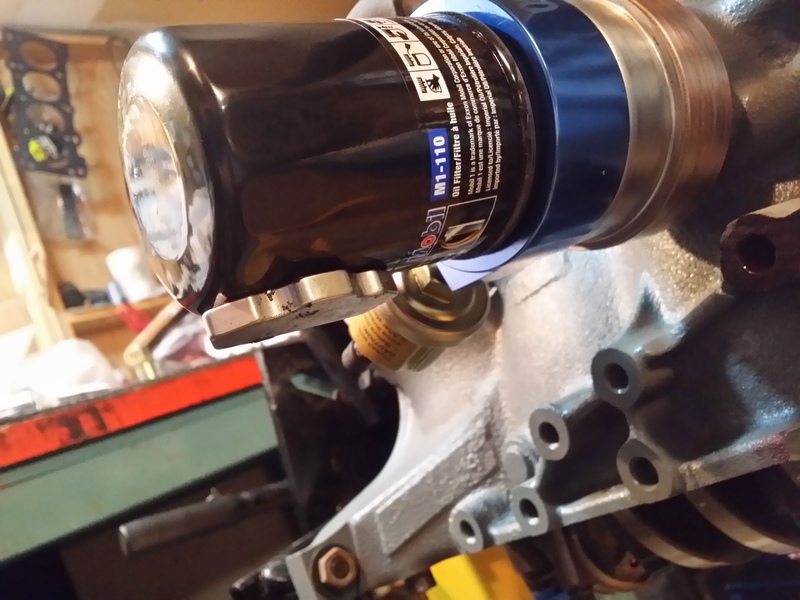
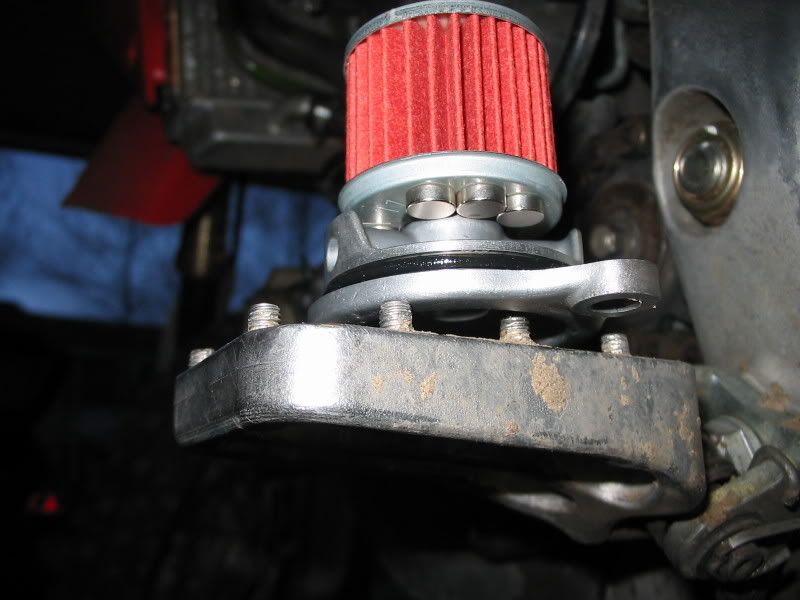
Bike filter
Put on the oil pump for testing a few times which was probably the demise of the shaft seal. Then I RTV'd it all for its final assembly and went to put it on and noticed the seal got caught, then the spring came off. Not going to chance it so I will get another seal. When I took off the pump I could see where the RTV did not make it. I tried to use as little as possible so them I added some more and bolted it in. BTW there are only 5 bolts holding the pump on right? I checked the FSM but didnt see how many??


Cleaned up the OEM oil cooler. Ran RTV on the orange silicone seal just to add some insurance in a place that always, always leaks.
Added an oil sandwich and instead of the seal it comes with I picked up 2 seperate o rings and then put a bead of RTV in between them to "seal" the deal.

No RTV overflow in there

The last open port I was going to run the turbo feed from, or should I stick to my old T - fitting on the block??

I like magnets. I don't like ferrous particles in my oil. In addition to a magnetic drain plug I run this bad boy. A Neo HDD magnet. Its very strong, and 3 times thicker than 99% of todays HDD's. I stick one on all my filters, I even stick little round Neo's on my ATV/Bike filters against the throwaway elements. You would not believe the paste that accumulates in a typical sump that shares gearbox and clutch. Nasty.


Bike filter

Last edited by Landrew; 03-13-2015 at 02:16 PM.
Reply
0
0
03-13-2015, 03:06 PM
#107
Senior Member
Thread Starter
iTrader: (2)
Join Date: Sep 2009
Location: Edmonton, AB, Canada
Posts: 1,193
Total Cats: 29
Found this from Manley so I'm feeling better about my 60ft/lbs on my rods
FASTENERS
PROPER FASTENER INSTALLATION WILL PREVENT ROD FAILURE!! Ninety percent of all rod failure
are due to incorrect fastener installation and/or maintenance. Fasteners supplied are as follows:
Torque Value w/30wt. Oil Recommended
During Final Torque Value Range
Bolt Bolt Assembly At Bolt w/30wt. Oil
Part No. Diam. Material U.H.L. Manley Performance Stretch In ft./lbs.
42350 3/8� ARP 2000 1.500� 60 ft. lbs. .0058� - .0062� 55 - 65
42351 3/8� ARP 2000 1.600� 65 ft. lbs. .0058� - .0062� 60 - 70
42390 7/16� ARP 2000 1.450� 90 ft. lbs. .0050� - .0060� 90 - 100
42249 7/16� ARP 2000 1.600� 95 ft. lbs. .0060� - .0065� 90 - 100
42384 7/16� ARP 2000 1.650� 95 ft. lbs. .0064� - .0068� 90 - 100
42391 7/16� ARP 2000 1.850� 105 ft. lbs. .0069� - .0073� 100 - 110
Reply
0
0
03-14-2015, 04:46 AM
#108
Elite Member

Join Date: Mar 2007
Location: Santa Clara, CA
Posts: 5,166
Total Cats: 855
My Carrillo A-beams come with 5/16" bolts. I thought most Miata rods used that size, but googling it appears that many are 3/8" instead. If yours are 3/8", then a higher torque value would be appropriate.
--Ian
Reply
0
0
03-14-2015, 05:35 AM
#110
Senior Member
Thread Starter
iTrader: (2)
Join Date: Sep 2009
Location: Edmonton, AB, Canada
Posts: 1,193
Total Cats: 29
It's really late so I'll just list what I need.
2.40mm
2.42
2.45
2.48
2.49
2.53
2.57
2.62
2.87 (X2)
2.90 (X2)
2.95
2.96
2.99
3.04
This is based on loosest clearances of .24mm Intake and .34mm Exhaust.
Must sleep now.....
2.40mm
2.42
2.45
2.48
2.49
2.53
2.57
2.62
2.87 (X2)
2.90 (X2)
2.95
2.96
2.99
3.04
This is based on loosest clearances of .24mm Intake and .34mm Exhaust.
Must sleep now.....
Reply
0
0
03-16-2015, 09:55 PM
#111
Senior Member
Thread Starter
iTrader: (2)
Join Date: Sep 2009
Location: Edmonton, AB, Canada
Posts: 1,193
Total Cats: 29
Replaced clutch master. I have the soft line and slave i just need the adaptor for the slave fitting
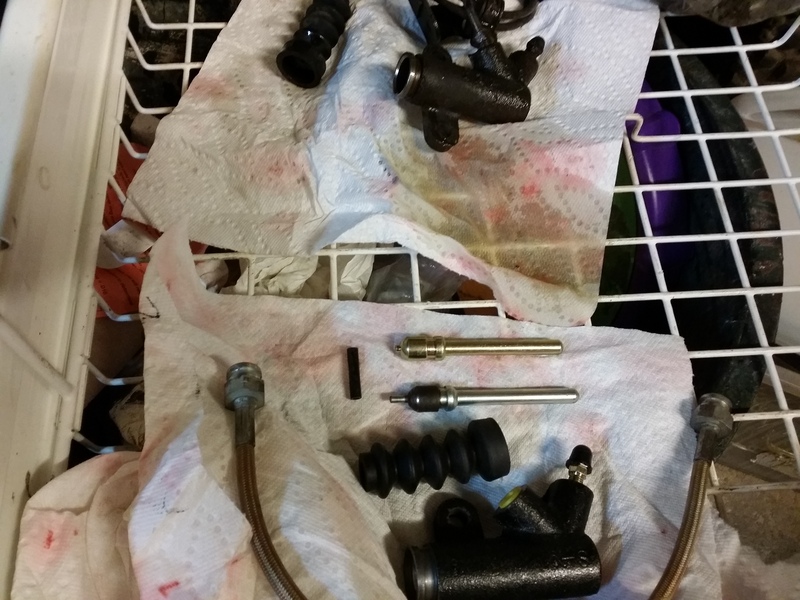
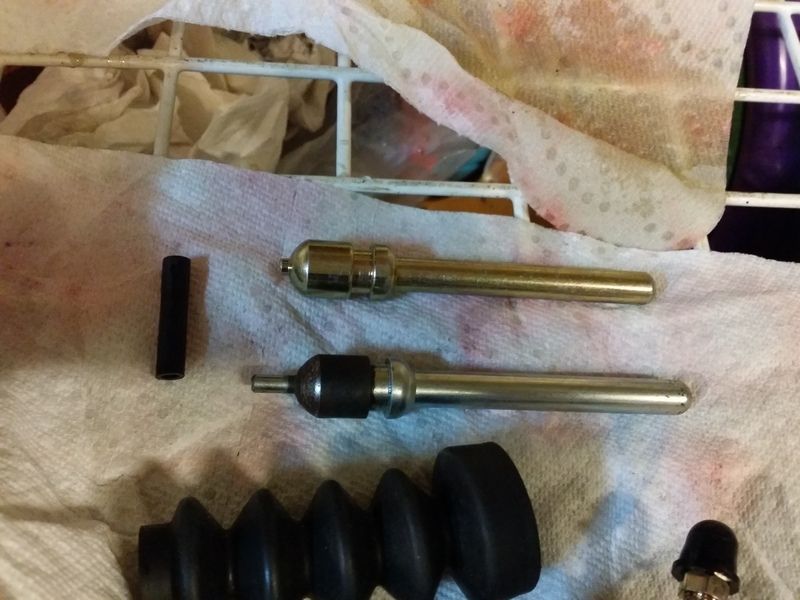
See the nipple on the end of the push shaft. Is the longer one preferred?
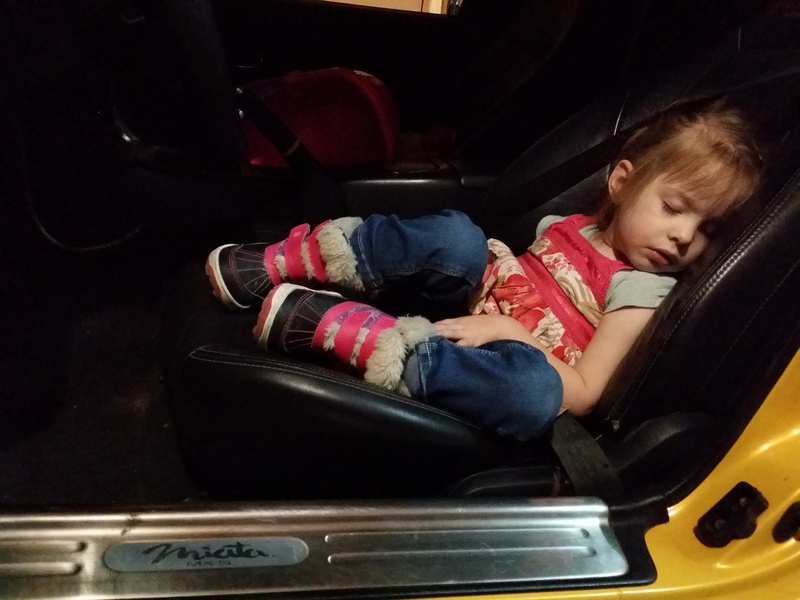
She helps me work on the car. She found the seats a bit to comfortable.

See the nipple on the end of the push shaft. Is the longer one preferred?

She helps me work on the car. She found the seats a bit to comfortable.

Reply
1
1
03-17-2015, 06:55 PM
#112
Senior Member
Thread Starter
iTrader: (2)
Join Date: Sep 2009
Location: Edmonton, AB, Canada
Posts: 1,193
Total Cats: 29
Front of head freeze plug and retaining plate put in. Stuck the 30mm plug in with a coating of RTV. My jigsaw had problems so I used a cutoff wheel on a grinder to make the plate, not very accurate. It's got more angles than a protractor but it was done in minutes and no one will see it. Adding one to the EGR ports as well. All from a huge plate of 5mm thick aluminum. In your scale it's like 27.543/186.34 half's of a third thick.
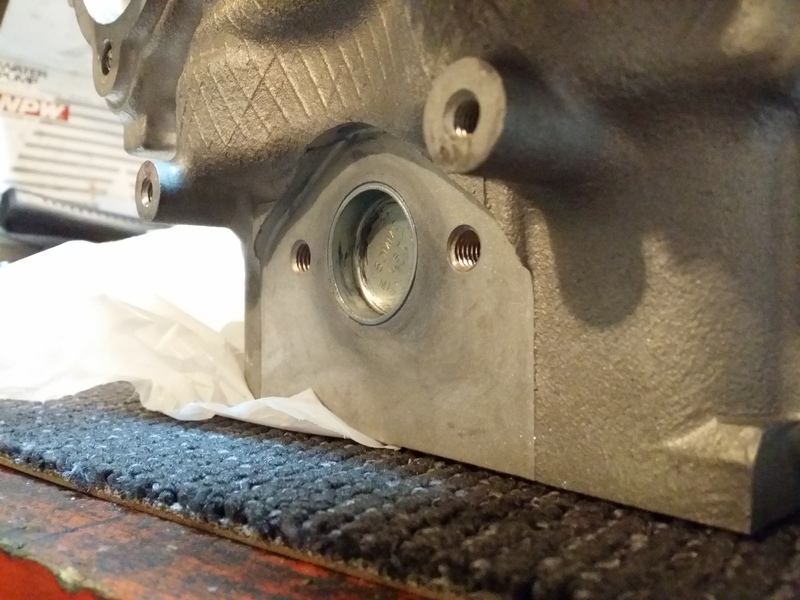
I took the picture at an angle to hide it's hideousness

I took the picture at an angle to hide it's hideousness

Reply
0
0
 03-19-2015, 03:16 PM
#114
Senior Member
Thread Starter
iTrader: (2)
Join Date: Sep 2009
Location: Edmonton, AB, Canada
Posts: 1,193
Total Cats: 29
Didn't like the gap after I installed the small side skirts. I didn't do anything wrong and they all have a bit of a groove there I just see it as a void to catch all manner of detritus. Fed in some flowable silicone to keep things out. Time will tell if it stays through all kinds of weather.


Reply
0
0
03-29-2015, 01:11 AM
#115
Senior Member
Thread Starter
iTrader: (2)
Join Date: Sep 2009
Location: Edmonton, AB, Canada
Posts: 1,193
Total Cats: 29
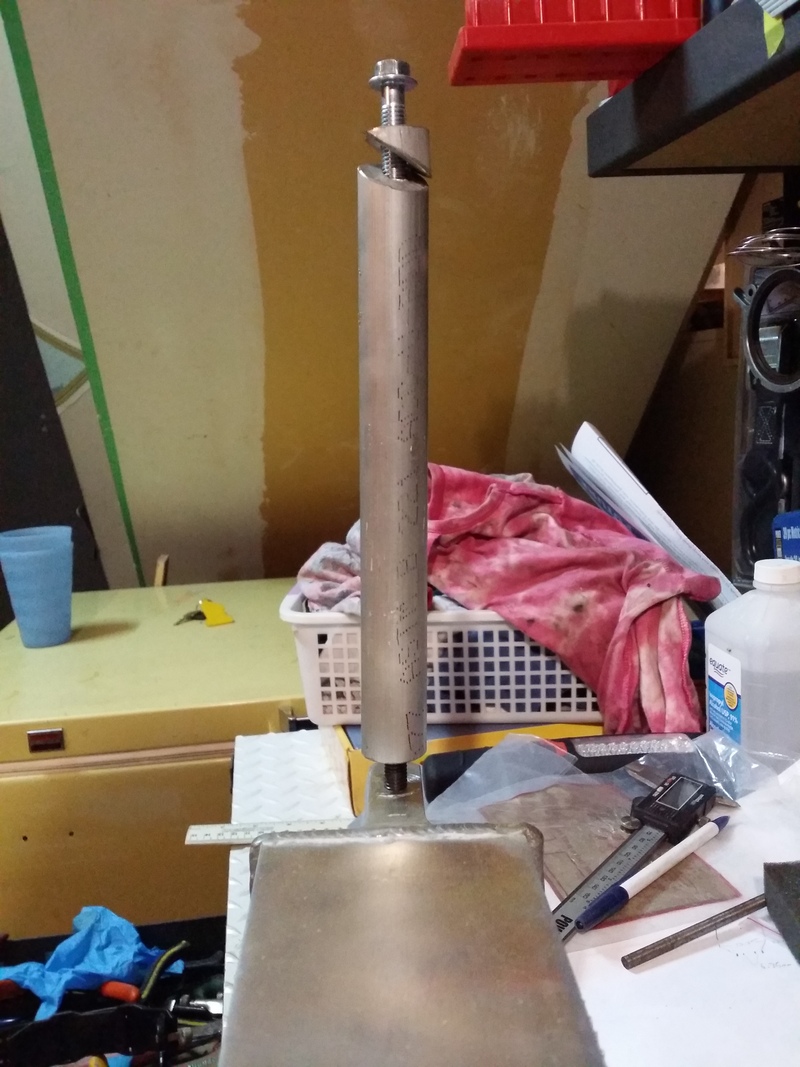
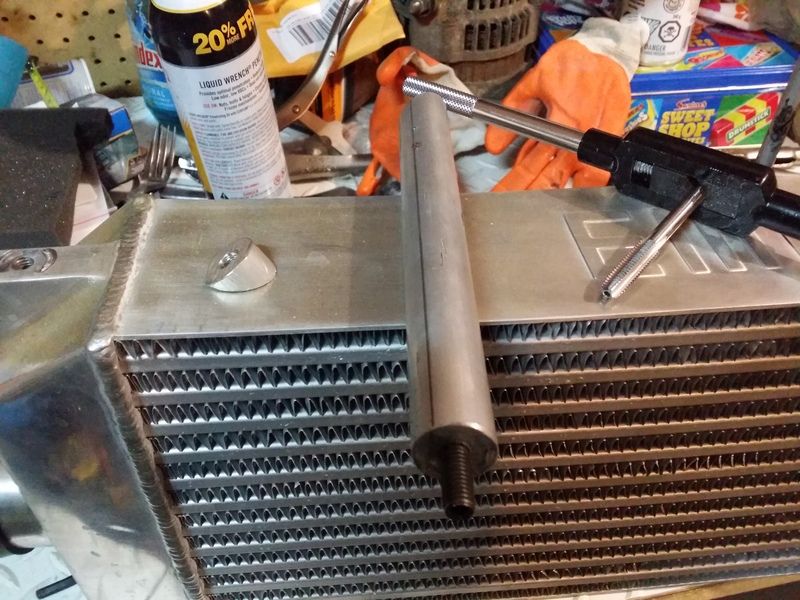
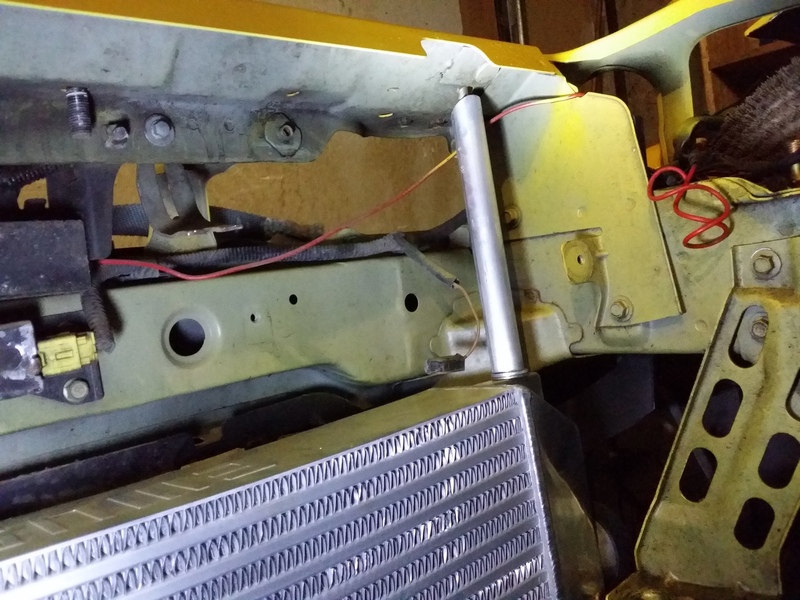
My ebay intercooler came with vertically placed M8 threaded holes at each end. I decided to take advantage of these and the holes relating to the radiator mounts and mount it using them. At first I was going to use long sections of threaded rod, then I thought that was to archaic looking. I decided to try some aluminum rod. Went with 7/8 6061 rod @ $17CDN for 2 feet. Each piece I drilled and tapped and then cut one end at an angle to match the top body frame holes. I used the cutoff peice to make an angled top washer. Yes they are thick but they only weight 240 grams each rod. They look unique and are very strong. Guy at the bolt supply house suggested a long 40mm set screw instead of a threaded rod to use to mount them to the IC side. Worked like a stud. Locktited the stud to the rod and used a bit of RTV on the IC side of the stud. Had to do some final adjustments but I like it.
[IMG]http://i120.photobucket.com/albums
/o190/Landrew109/Mobile%20Uploads/20150328_153343.jpg[/IMG]


[IMG]http://i120.photobucket.com/albums
/o190/Landrew109/Mobile%20Uploads/20150328_153343.jpg[/IMG]


Reply
0
0
04-06-2015, 06:51 PM
#116
Senior Member
Thread Starter
iTrader: (2)
Join Date: Sep 2009
Location: Edmonton, AB, Canada
Posts: 1,193
Total Cats: 29
Removed the OEM dual DIN BOSE 6 CD changer.
Whey : wanted Bluetooth, more gauges, MP3's, and the old one had LCD display issues, plus I'm supposed to get better sound.
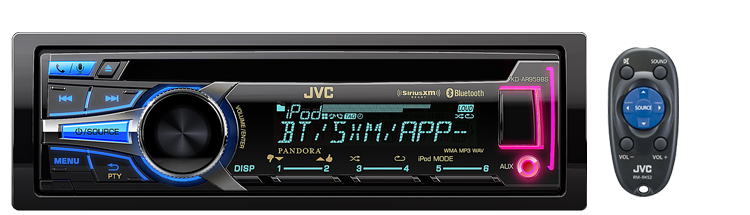
Installing the TDR 3 panel and a JVC KD-AR959BS. Using the Scosche line out controller deally.
Had to take 2-4mm off all 3 sides of the Crutchfield dual single Din adapter they sent me and mod in some arches into it for the gauge panel to fit and the 3 gauges so they could clear. Dremel was the best tool for this. Thy also sent me a single DIN and cubby combo that did fit the radio fine but wanted the gauges.
[IMG]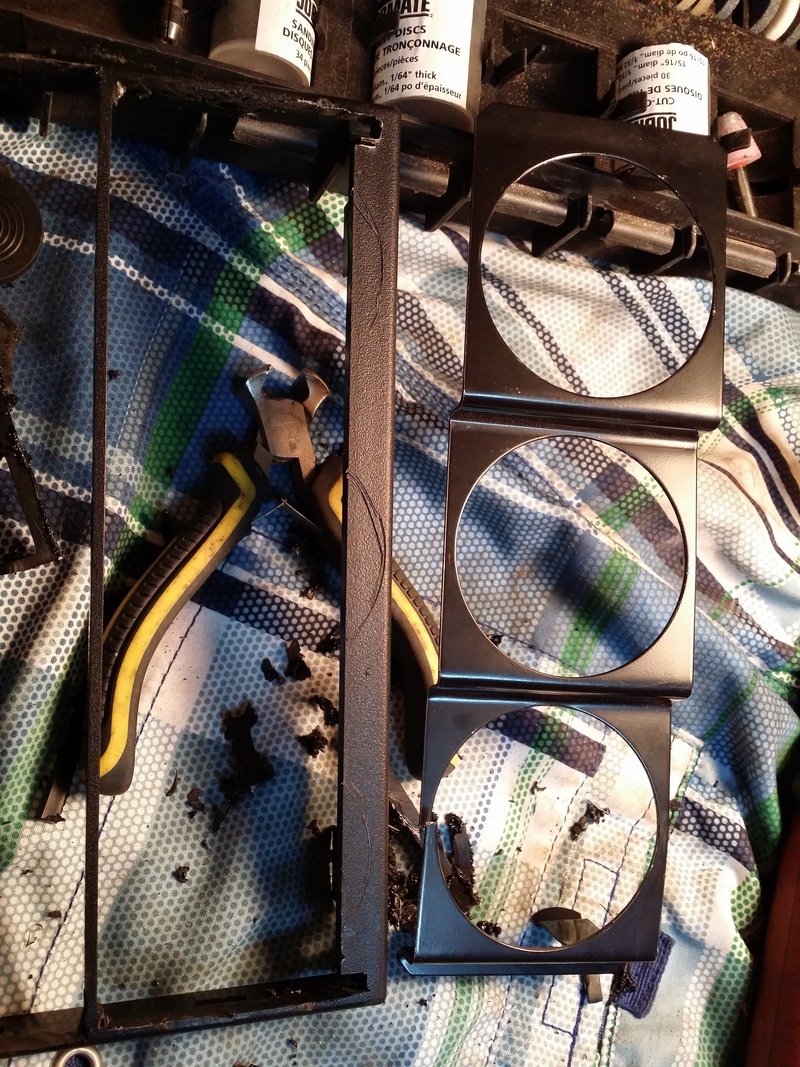 [/IMG]
Also picked up a PanaVise permanent phone mount that sits off the top right edge of the radio/display panel. Then I'm using an Ebay bicycle phone holder. Basically the phone clicks into it and stays put just that I'll have to drill some holes to match the PanaVise. It's mt trusty Note 3 so it will be like having a big screen TV in my face.....
How many have moved the airbag switch and thought it was worth it?
Whey : wanted Bluetooth, more gauges, MP3's, and the old one had LCD display issues, plus I'm supposed to get better sound.
Installing the TDR 3 panel and a JVC KD-AR959BS. Using the Scosche line out controller deally.
Had to take 2-4mm off all 3 sides of the Crutchfield dual single Din adapter they sent me and mod in some arches into it for the gauge panel to fit and the 3 gauges so they could clear. Dremel was the best tool for this. Thy also sent me a single DIN and cubby combo that did fit the radio fine but wanted the gauges.
[IMG]
 [/IMG]
Also picked up a PanaVise permanent phone mount that sits off the top right edge of the radio/display panel. Then I'm using an Ebay bicycle phone holder. Basically the phone clicks into it and stays put just that I'll have to drill some holes to match the PanaVise. It's mt trusty Note 3 so it will be like having a big screen TV in my face.....
How many have moved the airbag switch and thought it was worth it?
Last edited by Landrew; 04-06-2015 at 07:06 PM.
Reply
0
0

 04-07-2015, 07:09 PM
#118
Senior Member
Thread Starter
iTrader: (2)
Join Date: Sep 2009
Location: Edmonton, AB, Canada
Posts: 1,193
Total Cats: 29
And the PanaVise phone mount. Didn't like the holding power of the screws they suggested. Added an m3 bolt and stainless washer with a locking nut.
I wanted it higher than I'd seen others mount it. Wanted it out of passengers knee space and higher up in the sight line.
Had to mod the trim surround to allow for this as one of the holes was now blocked. Dremel to the rescue.
[IMG]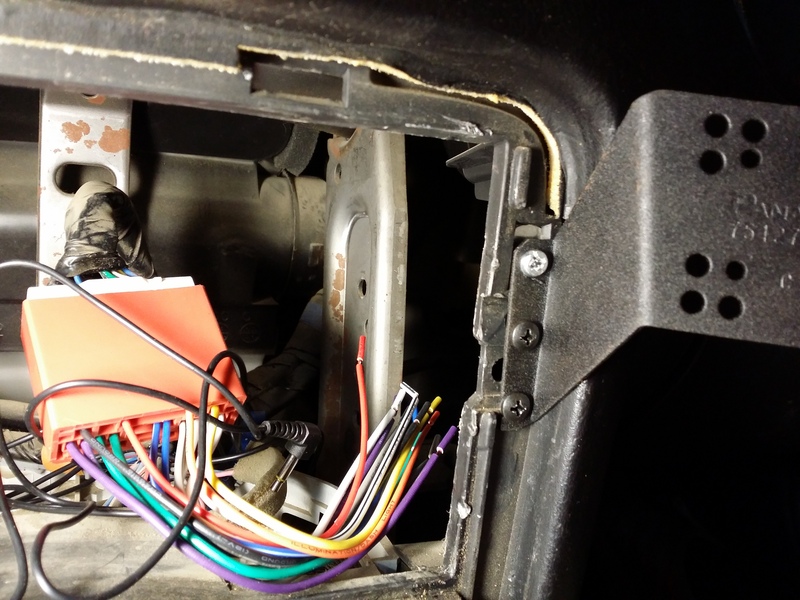 [/IMG]
[IMG]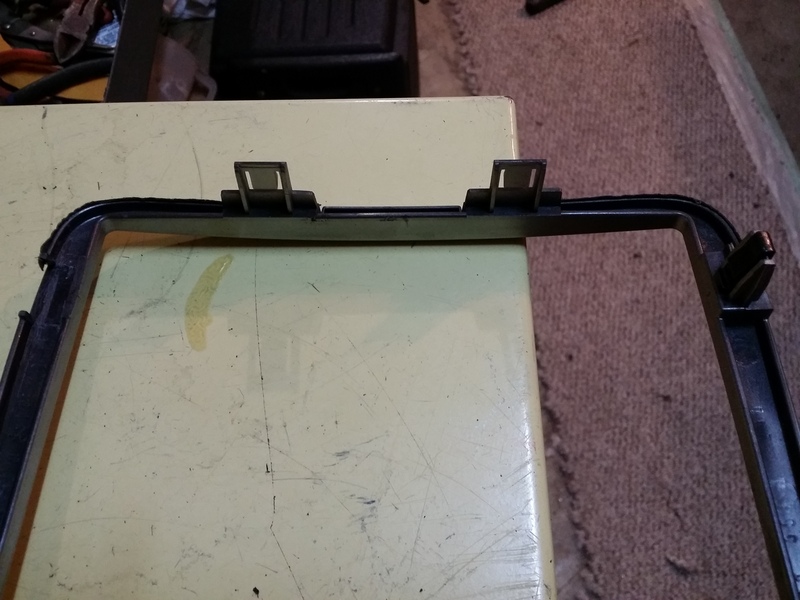 [/IMG]
[IMG]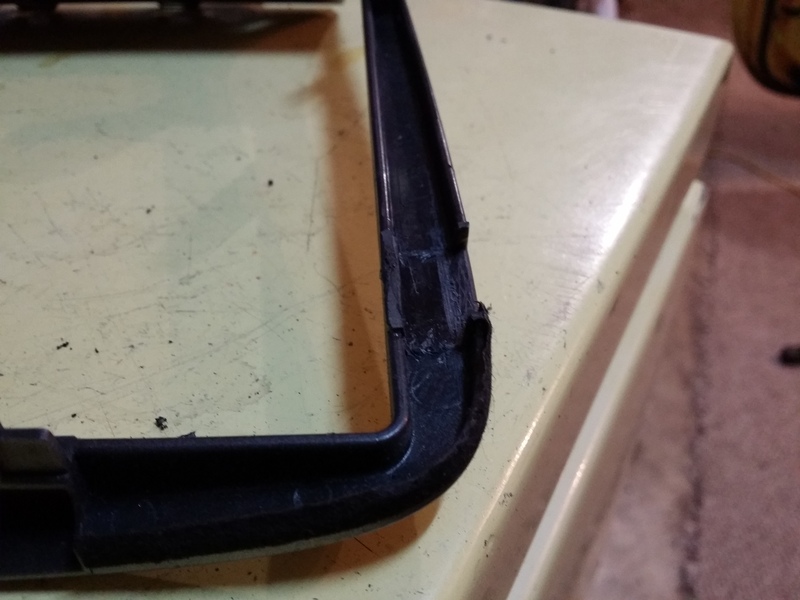 [/IMG]
I wanted it higher than I'd seen others mount it. Wanted it out of passengers knee space and higher up in the sight line.
Had to mod the trim surround to allow for this as one of the holes was now blocked. Dremel to the rescue.
[IMG]
 [/IMG]
[IMG]
 [/IMG]
[IMG]
 [/IMG]
Reply
0
0
04-24-2015, 12:18 PM
#119
Senior Member
Thread Starter
iTrader: (2)
Join Date: Sep 2009
Location: Edmonton, AB, Canada
Posts: 1,193
Total Cats: 29
Getting things sorted
[IMG]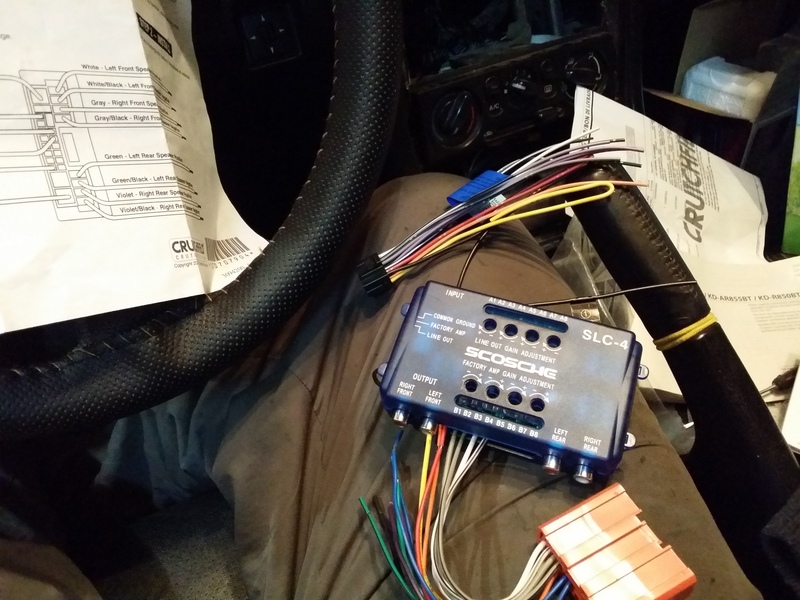 [/IMG]
Prosports installed, they are the older ones so only blue. Too bright at night so I may try to use red vinyl but I'm not sure how that will come out ?
[IMG]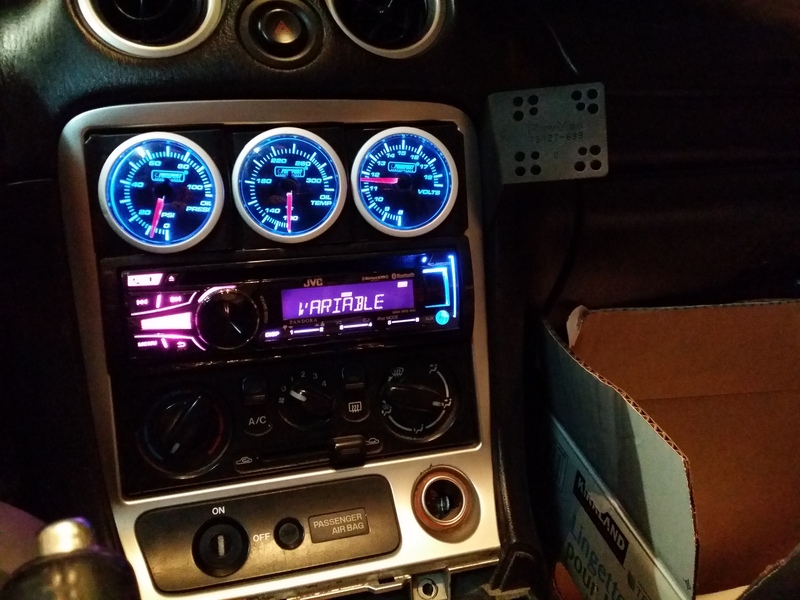 [/IMG]
[IMG]
 [/IMG]
Prosports installed, they are the older ones so only blue. Too bright at night so I may try to use red vinyl but I'm not sure how that will come out ?
[IMG]
 [/IMG]
Reply
0
0
04-27-2015, 12:04 PM
#120
Senior Member
Thread Starter
iTrader: (2)
Join Date: Sep 2009
Location: Edmonton, AB, Canada
Posts: 1,193
Total Cats: 29
Installed the $8 CDN eBay Note3 mount. Intended for a bicycle but I just needed the phone plate not the whole bar clamp/rotating rear mount part. Drilled my own holes so I could mount it up high and away from the passenger. Yes it really is that big of a mount. The Samsung Note 3 is a phablet of wonderful proportions.
[IMG]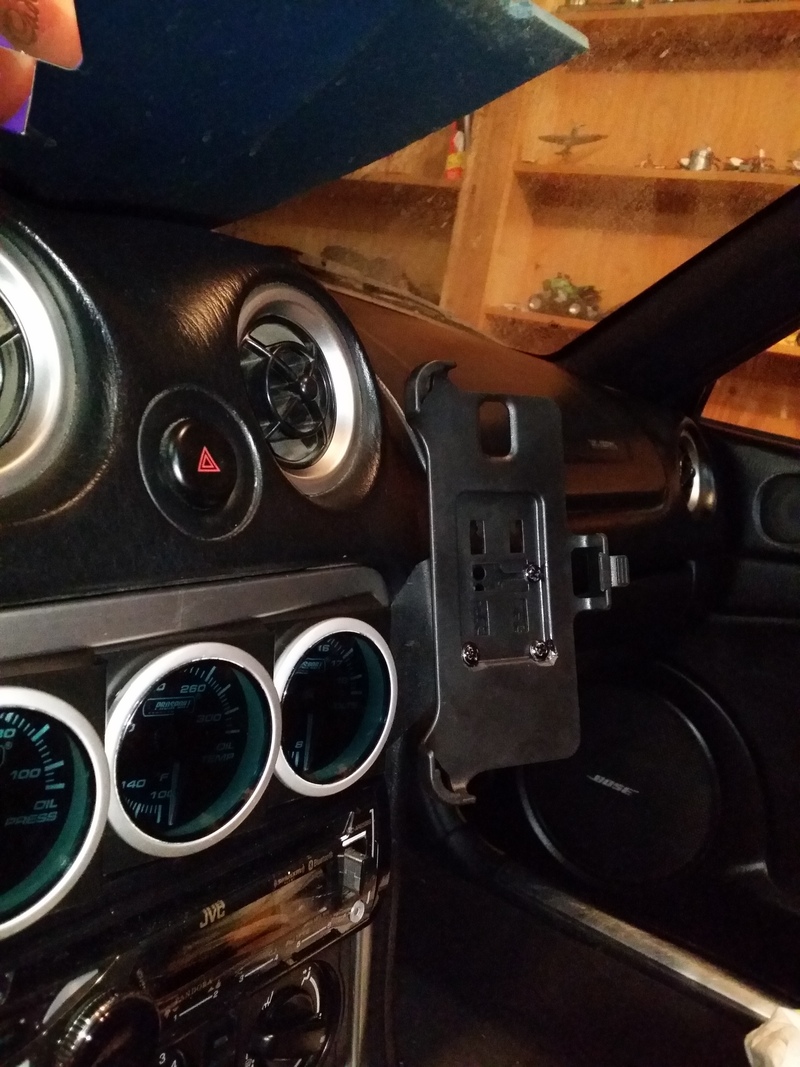 [/IMG]
Colored my mounting screws black with a dab of paint, did not want the chrome to come through.
[IMG]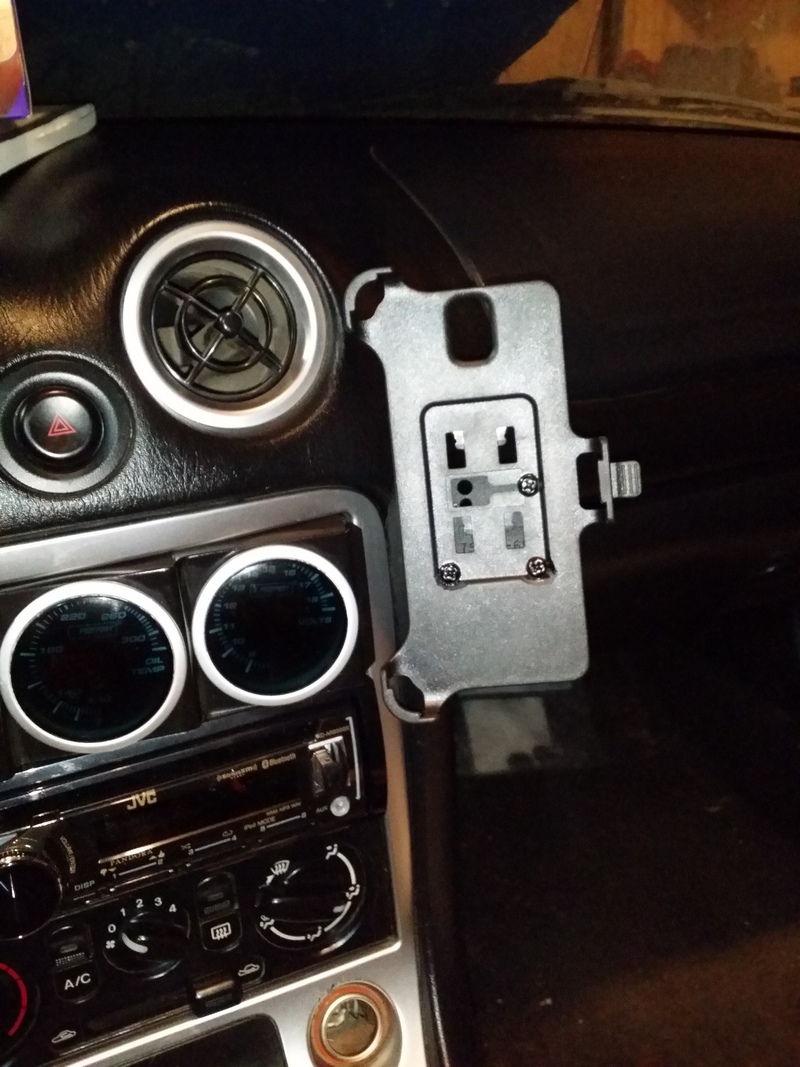 [/IMG]

I was going to take a picture of it with the phone installed but I was using the phone to take pics, so you see the phone could not take a picture of itself as it was installed in the mount so I couldn't take it out quick enough to take the shot and have it mounted because the phone in the mount was the one taking pictures.......I was going to take a picture of it with the phone installed but I was using the phone to take pics, so you see the phone could not take a picture of itself as it was installed in the mount so I couldn't take it out quick enough to take the shot and have it mounted because the phone in the mount was the one taking pictures.......I was going to take a picture of it with the phone installed but I was using the phone to take pics, so you see the phone could not take a picture of itself as it was installed in the mount so I couldn't take it out quick enough to take the shot and have it mounted because the phone in the mount was the one taking pictures.......I was going to take a picture of it with the phone installed but I was using the phone to take pics, so you see the phone could not take a picture of itself as it was installed in the mount so I couldn't take it out quick enough to take the shot and have it mounted because the phone in the mount was the one taking pictures.......All work and no play makes Jack a dull boy....All work and no play makes Jack a dull boy....All work and no play makes Jack a dull boy....All work and no play makes Jack a dull boy....
[IMG]
 [/IMG]
Colored my mounting screws black with a dab of paint, did not want the chrome to come through.
[IMG]
 [/IMG]
I was going to take a picture of it with the phone installed but I was using the phone to take pics, so you see the phone could not take a picture of itself as it was installed in the mount so I couldn't take it out quick enough to take the shot and have it mounted because the phone in the mount was the one taking pictures.......I was going to take a picture of it with the phone installed but I was using the phone to take pics, so you see the phone could not take a picture of itself as it was installed in the mount so I couldn't take it out quick enough to take the shot and have it mounted because the phone in the mount was the one taking pictures.......I was going to take a picture of it with the phone installed but I was using the phone to take pics, so you see the phone could not take a picture of itself as it was installed in the mount so I couldn't take it out quick enough to take the shot and have it mounted because the phone in the mount was the one taking pictures.......I was going to take a picture of it with the phone installed but I was using the phone to take pics, so you see the phone could not take a picture of itself as it was installed in the mount so I couldn't take it out quick enough to take the shot and have it mounted because the phone in the mount was the one taking pictures.......All work and no play makes Jack a dull boy....All work and no play makes Jack a dull boy....All work and no play makes Jack a dull boy....All work and no play makes Jack a dull boy....
Reply
0
0


