
Nothing to see here, just project Sisyphus, move along


Thread Starter
Elite Member
iTrader: (37)
Joined: Apr 2010
Posts: 10,477
Total Cats: 1,924
From: Very NorCal
I actually picked mine up, hell, more than a year ago now and its just been sitting in the garage. Pending paint has motivated the install, and I figured I'd let the body shop guys do it. They probably have a much better eye for it than I ever will.
Reply
 0
0

0
Thread Starter
Elite Member
iTrader: (37)
Joined: Apr 2010
Posts: 10,477
Total Cats: 1,924
From: Very NorCal
As of 1:00pm PST my car will have been out of my posession for 24 hours 
This may sound stupid except I haven't had the Miata out of my hands at all (except that one time when Gesso and I swapped cars at Thunderhill) in about 5 years. The last time I let a shop touch my car I got fucked in the *** for $900 on an OEM Exedy replacement clutch install + free crushed framerail service. After that experience, I've learned to do everything myself.
Needless to say, I'm a little nervous.
Reply
0
0


Junior Member
Joined: Nov 2009
Posts: 99
Total Cats: 7
From: Central Coast C.A
Car is holding up great so far no problems .. got to love boost
 this has been the best money Ive spent ha ha...
Reply
0
0
Thread Starter
Elite Member
iTrader: (37)
Joined: Apr 2010
Posts: 10,477
Total Cats: 1,924
From: Very NorCal
Even though I don't have the car this weekend, progress will be made!
I received this from RoadsterTech this last week:

Double height radio blockoff with angled 3 gauge mount and pocket. This one is not on their website yet I traded a dozen or so emails with Rick explaining that I wanted a single piece blockoff with 3 gauge holes, and I planned to use the lower half of the face to mount a couple switches. The plate is about 1/2" thick (2x 1/4" sections screwed together) so Rick recommended back cutting the lower section as most switches don't have 1/2" mounting depth, but we settled on the pocket in the front as it should give the switches a little protection with the lip.
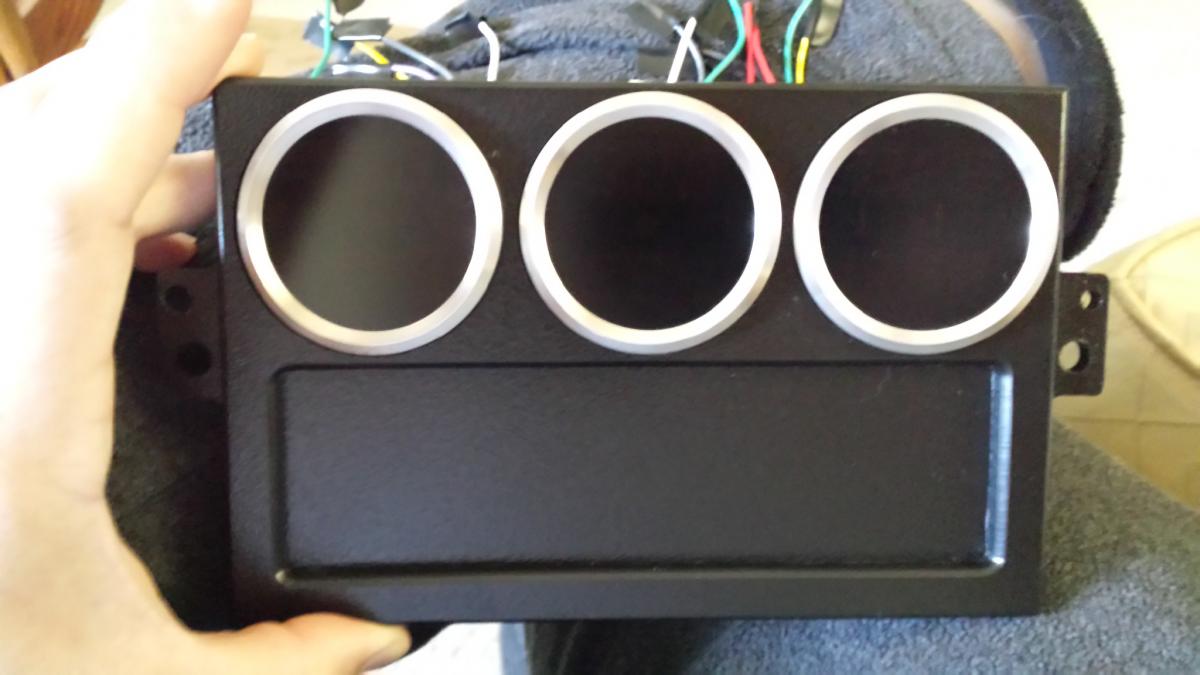
Gauges in the plate. OoooOooo. I've pretty much given up on my cluster butchery project as this is just easier. It's super sanitary and way better than the 3 hole single DIN I had in there before.
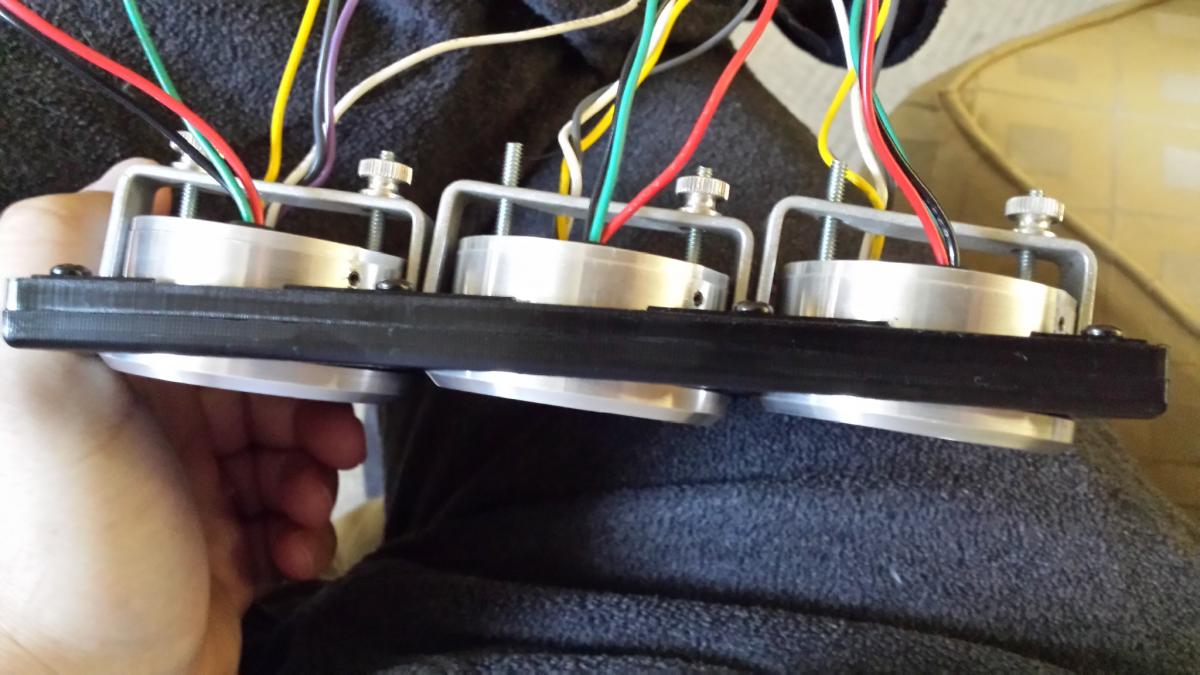
Here you can see the offset/angle that should in theory help with visibility. I sent Rick the dimensions for my gauges so they would fit nice and snug.
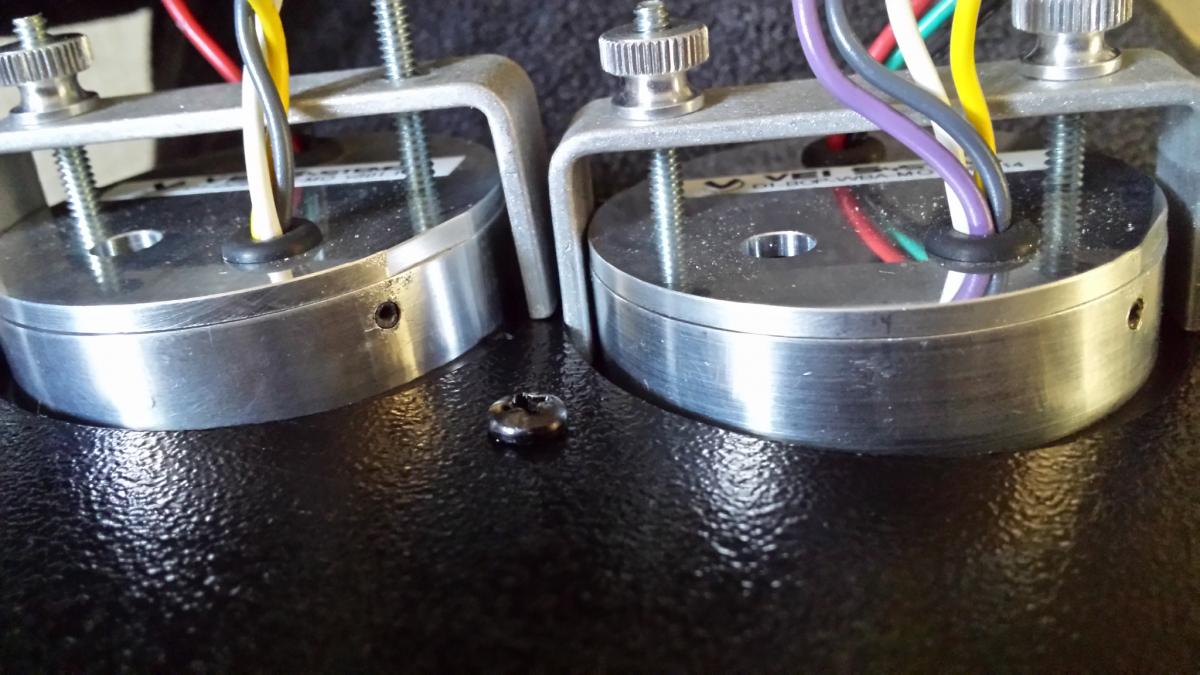
Here you can see where the back of the gauge mounting hole is cut out so the gauge retainer can still be used without shortening one of the legs. That is some serious attention to detail.
I highly recommend Roadstertech, as these guys get it. I enjoy working with vendors that are willing to work with their clients to get them exactly what they want. Rick was always helpful and never treated me like a dumbass when I asked stupid questions. It's called "customer service" and that's how you do it right.
I received this from RoadsterTech this last week:
Double height radio blockoff with angled 3 gauge mount and pocket. This one is not on their website yet
I traded a dozen or so emails with Rick explaining that I wanted a single piece blockoff with 3 gauge holes, and I planned to use the lower half of the face to mount a couple switches. The plate is about 1/2" thick (2x 1/4" sections screwed together) so Rick recommended back cutting the lower section as most switches don't have 1/2" mounting depth, but we settled on the pocket in the front as it should give the switches a little protection with the lip.Gauges in the plate. OoooOooo. I've pretty much given up on my cluster butchery project as this is just easier. It's super sanitary and way better than the 3 hole single DIN I had in there before.
Here you can see the offset/angle that should in theory help with visibility. I sent Rick the dimensions for my gauges so they would fit nice and snug.
Here you can see where the back of the gauge mounting hole is cut out so the gauge retainer can still be used without shortening one of the legs. That is some serious attention to detail.
I highly recommend Roadstertech, as these guys get it. I enjoy working with vendors that are willing to work with their clients to get them exactly what they want. Rick was always helpful and never treated me like a dumbass when I asked stupid questions. It's called "customer service" and that's how you do it right.
Reply
2
2

Elite Member
Joined: Oct 2013
Posts: 2,764
Total Cats: 951
From: Cedar City, UT
One piece of advice Ill give on the prep before the paint is to use 100% undiluted purple power and go over every single part of the car. Also, depending on the quality of the shop, and how much repair work you'll have them do. I'd try to fix as many dings and scratches as you can with a little bondo. My shop overlooked several places. Also, bug the **** out of them by going in often and checking on the progress. Saved me a lot of potential quality control issues by pointing out issues I spotted. Course, this is me speaking, so take that for what it is.
Are you getting the same orange matched on it or a complete repaint? May have missed that at some point.
Are you getting the same orange matched on it or a complete repaint? May have missed that at some point.
Reply
0
0
Elite Member
Joined: Oct 2013
Posts: 2,764
Total Cats: 951
From: Cedar City, UT
Also, that is an awesome panel! I messed with putting an angle on my gauges but it was simply too much work with melting plastic/bondo/glue to make it look good. If I was going to spend money, that is how I would do it.
Reply
0
0
Thread Starter
Elite Member
iTrader: (37)
Joined: Apr 2010
Posts: 10,477
Total Cats: 1,924
From: Very NorCal
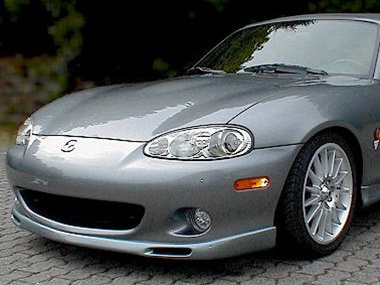
Just the nose, lip, hard top and super faded mirrors. I'm not bothering with all the other little dings and scratches mainly because they don't bother me. It's not a show car and I'm not nice enough to it to justify a full respray. It would just make me even sadder every time I bumped something into it. The little stuff does not bother me as much as just getting the colors matched on everything. (See first post in this thread  ) One trip into the kittylitter and it would all get fubar anyway so I'm just not that worried about it. In truth the whole car probably needs a visit to the clay bar and a good waxing but that's something I'm happy to pay someone to do for me. I haz the lazy and no idea what I would be doing.
The panel is awesomesauce. I could have never built something this nice on my own in any reasonable amount of time and it was really not that expensive in the end.
) One trip into the kittylitter and it would all get fubar anyway so I'm just not that worried about it. In truth the whole car probably needs a visit to the clay bar and a good waxing but that's something I'm happy to pay someone to do for me. I haz the lazy and no idea what I would be doing.The panel is awesomesauce. I could have never built something this nice on my own in any reasonable amount of time and it was really not that expensive in the end.
Reply
0
0


Thread Starter
Elite Member
iTrader: (37)
Joined: Apr 2010
Posts: 10,477
Total Cats: 1,924
From: Very NorCal
Final BEGi update: I got a valve cover back! I think it may actually be cleaner than the one I sent them.
Also: Popped in to the body shop at lunch while I was in the area. They've definitely taken things apart
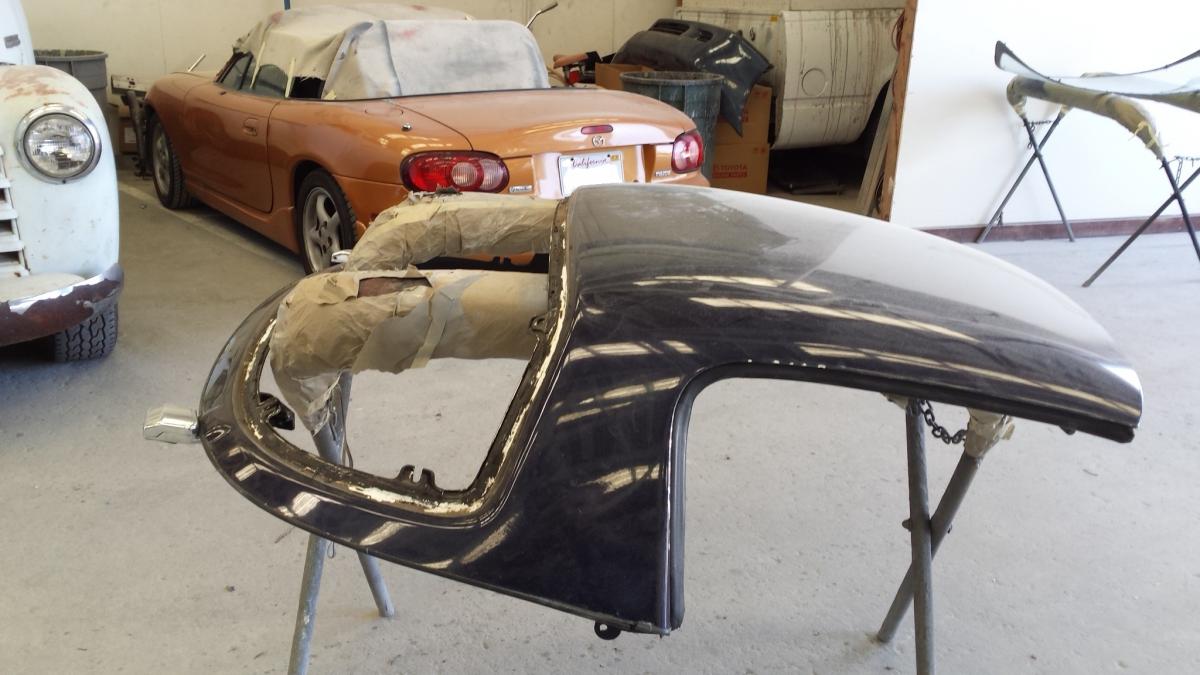
I need to poke around and see if I can find a Mazda part number for the rear window seal thing on the hard top. I really didn't want them trying to mask and paint around it so I requested the window be removed. I'm hoping I don't end up regretting that request.
Also: Popped in to the body shop at lunch while I was in the area. They've definitely taken things apart
I need to poke around and see if I can find a Mazda part number for the rear window seal thing on the hard top. I really didn't want them trying to mask and paint around it so I requested the window be removed. I'm hoping I don't end up regretting that request.
Reply
0
0

SUNROOF. Fits: 2000 Mazda Miata | Jim Ellis Mazda
I'm assuming you're referring to NAY163930
Reply
0
0
Thread Starter
Elite Member
iTrader: (37)
Joined: Apr 2010
Posts: 10,477
Total Cats: 1,924
From: Very NorCal
RR WINDOW MOULD (NAY1-63-930) - $61.65 - NAY163930 + DAM, REAR-WINDOW (NA01-63-895A) - $15.55 - NA0163895A = winning
I figured I might as well replace it all as I'm only going to do this once. Do it once, do it right.
I figured I might as well replace it all as I'm only going to do this once. Do it once, do it right.
Reply
0
0
Someone on m.net said these guys are actually Rosenthal in disguise, just a tad cheaper:
http://www.partsvp.com/products/RR-W...52d930%29.html
$14.91 (Part # NA0163895A) Mazda DAM, REAR-WINDOW
I always like to look on the Jim Ellis sites first because they have the IPB's.
http://www.partsvp.com/products/RR-W...52d930%29.html
$14.91 (Part # NA0163895A) Mazda DAM, REAR-WINDOW
I always like to look on the Jim Ellis sites first because they have the IPB's.
Reply
0
0
Thread Starter
Elite Member
iTrader: (37)
Joined: Apr 2010
Posts: 10,477
Total Cats: 1,924
From: Very NorCal
Earlier this week I sent my stock injectors out for cleaning to the folks at Fuel Injector Clinic because I didn't want them sitting around with fuel and junk in them. They called me to say they received them and did the initial flow test only to find out that 3 of the injectors were within 2% of each other, but one was 10% under  It was recommended that they do the full service on the one and see if it brought it back into tolerance with the rest. I agreed, they did their magic, called me back and lo and behold it came right up to where it was supposed to be, right in line with the 2%. How awesome is that? They went ahead and replaced all the seals and o-rings for the full set and I should see them Monday or Tuesday of next week.
That phone call saved me $30~ worth of service I didn't need, so technically cost them another $30~ worth of sale. I have mad respect for vendors who are willing to do things like that to help out a customer. Again, perfect example of positive customer service. Fuel Injector Clinic Fuel Injector Cleaning
It was recommended that they do the full service on the one and see if it brought it back into tolerance with the rest. I agreed, they did their magic, called me back and lo and behold it came right up to where it was supposed to be, right in line with the 2%. How awesome is that? They went ahead and replaced all the seals and o-rings for the full set and I should see them Monday or Tuesday of next week.That phone call saved me $30~ worth of service I didn't need, so technically cost them another $30~ worth of sale. I have mad respect for vendors who are willing to do things like that to help out a customer. Again, perfect example of positive customer service. Fuel Injector Clinic Fuel Injector Cleaning
Reply
0
0

Make sure they remove EVERY SINGLE part that is removable from that hardtop. And good call having them yank the window for paint. Trust me on this.
I learned with my previous miata that anything not removed for paint but simply masked off will peel and look like crap and be crappy.
It strips the car for paint or it gets the peel again.
I learned with my previous miata that anything not removed for paint but simply masked off will peel and look like crap and be crappy.
It strips the car for paint or it gets the peel again.
Reply
0
0
Thread Starter
Elite Member
iTrader: (37)
Joined: Apr 2010
Posts: 10,477
Total Cats: 1,924
From: Very NorCal
Absolutely. I ordered new OEM trim (Rosenthal sent me the wrong one  ) and rubber stuff for the rear window so that's in the bag. I'll probably end up buying new rubber for the DS and PS side window seals plus the trim that runs around the back of the top, between the top and the rest of the body. Because I have problems.
I just checked in with them today after lunch as they got a bunch of spray-out cards done so we could try to find something that matches up. The original paint is in really good shape, but its faded so finding something that is an absolutely perfect match will be nearly impossible. The metallic flake Mazda used is proving to be a challenge, and the color shifts every time you turn your head or squat down or look at it from a different angle. They've got something that's really, really close but I have no doubt it won't be 100%.
But I knew all this going into the project, so I'm not going to cry about it. Super duper close is going to be way better than the teal and purple I was rocking before. I should have the car back on Tuesday.
) and rubber stuff for the rear window so that's in the bag. I'll probably end up buying new rubber for the DS and PS side window seals plus the trim that runs around the back of the top, between the top and the rest of the body. Because I have problems.I just checked in with them today after lunch as they got a bunch of spray-out cards done so we could try to find something that matches up. The original paint is in really good shape, but its faded so finding something that is an absolutely perfect match will be nearly impossible. The metallic flake Mazda used is proving to be a challenge, and the color shifts every time you turn your head or squat down or look at it from a different angle. They've got something that's really, really close but I have no doubt it won't be 100%.
But I knew all this going into the project, so I'm not going to cry about it. Super duper close is going to be way better than the teal and purple I was rocking before. I should have the car back on Tuesday.
Reply
0
0


