Project Little Cousin - 91' NA White
 05-05-2015, 10:36 AM
#81
Junior Member
Thread Starter

Join Date: May 2014
Location: North St Paul, MN
Posts: 397
Total Cats: 25
Well I didn't take a lot of photos last night. I was in super focus mode. However, we got all of the last bits put onto my car. We dropped my VLSD out of the 91' (soon will be FS) and removed the driveshaft and axles. Then we removed the differential and axles off of the blue 92' (the driveshaft came off over the winter with the transmission).
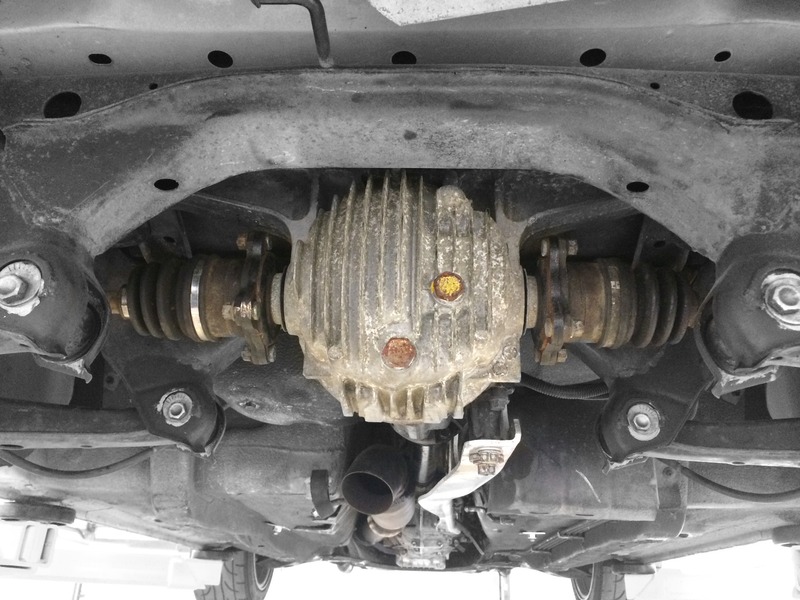
So here is the one picture I did take. My new rear end setup that I am super stoked about
- 3.63 Torsen Differential
- Axles
- Driveshaft
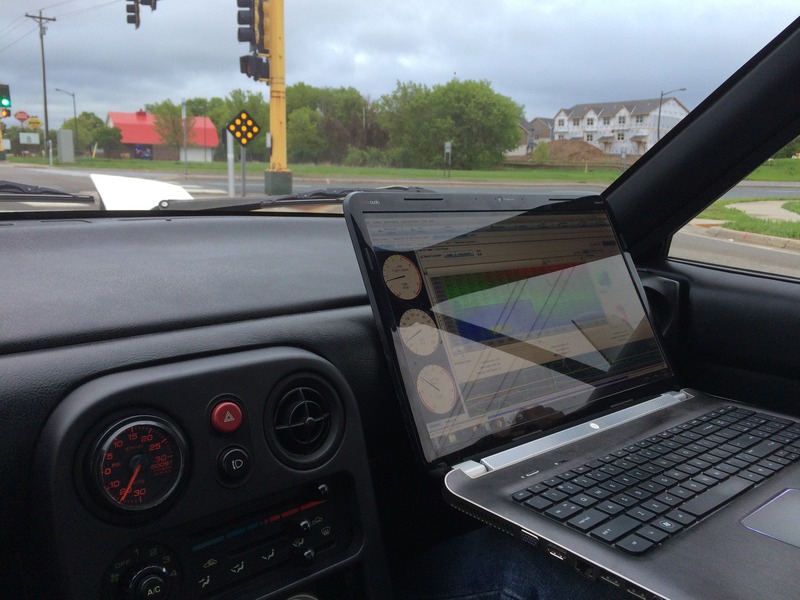
I also installed a new USB cable for the MS3, I got the 10ft one on Amazon... which looks way better in black vs the cream colored one I had running to the MS3 last week. I have it on my list to get a female USB port mounted on the dash in the future. For now I will just run the cable out of the carpet. Maybe wrap it up in the glovebox? I have to spend some more time to find a band-aid solution. I also got a new breather filter for the engine. It is blue, so that added like 50WHP.
All that is left is to show up with a can of E85, set timing on Tuner Studio, add 30% fuel to my tune and take her for a test drive.
Last edited by ofspunk7; 05-05-2015 at 02:06 PM.

Reply
 0
0

0
05-12-2015, 09:37 AM
#82
Junior Member
Thread Starter
Join Date: May 2014
Location: North St Paul, MN
Posts: 397
Total Cats: 25
Well thanks for the help and advice everyone (MT.net). The car is up and running. Took it out for about an hour last night and got some VE Analyzer time in. It is great to have a turbo car again, and I love the smell of E85. New exhaust sounds great! I really like the tone. My cousin did an exceptional job fabbing it up.
ToDO List
1. Dyno Time - email sent to book out time this morning.
2. Silicone Heater Core Hoses (maybe whole coolant system)
3. Turbo Blanket
4. DEI Exhaust Wrap for Heater Core Hoses
5. Heat Sheild for Brakes
I am torn on if I want to swap to my BBK before or after the dyno session. I guess it depends on how far out they are booked.
Damn, it is nice to have my car back.
Reply
0
0
05-15-2015, 08:26 PM
#83
Junior Member
Thread Starter
Join Date: May 2014
Location: North St Paul, MN
Posts: 397
Total Cats: 25
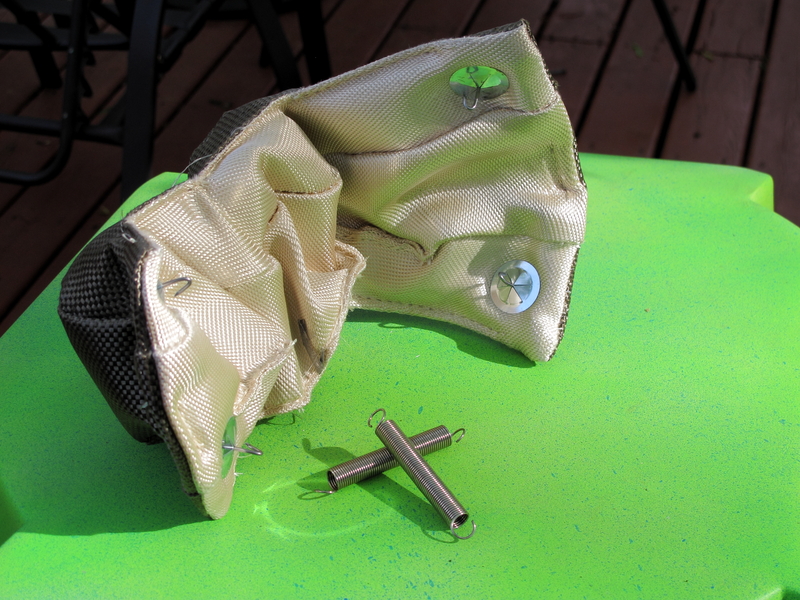
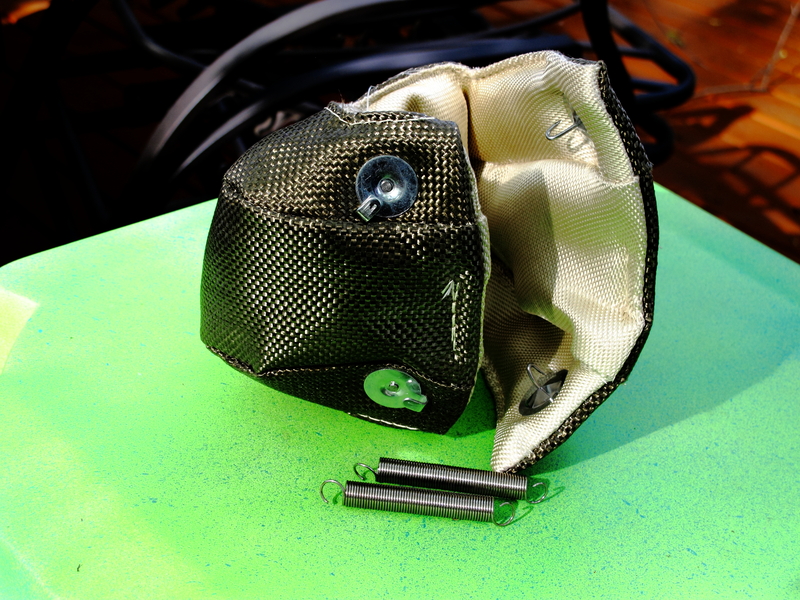
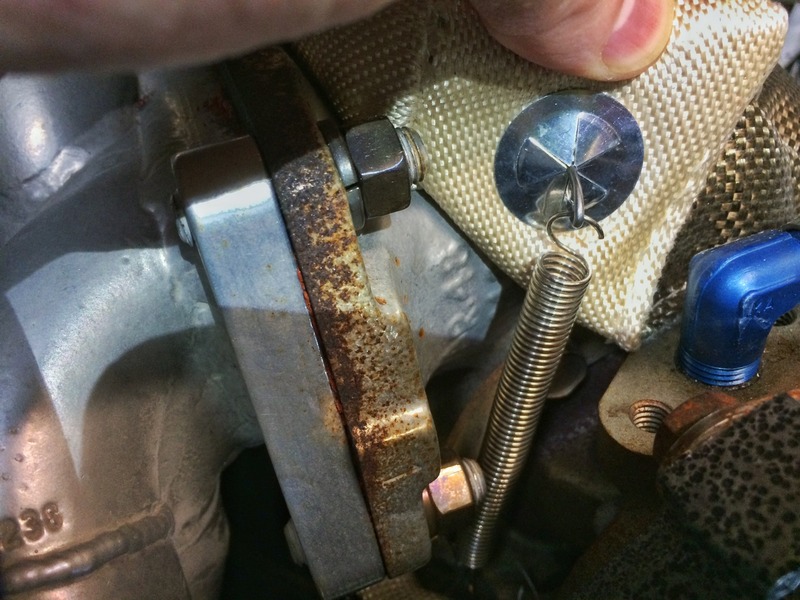
Picked up a Full Blown Turbo Blanket today. Going to start my heat sheild and blanket fab work while I am waiting for the dyno. They use the hook and spring system vs you typical wire setup. My buddy who owns NF Performance suggest picking up a Full Blown blanket vs a PTP Lava for the price. I know that the PTP Lava setups were run on a lot of our subies, but since then they have switched over to this setup. There has been zero issues with these and they are on cars that are double and tripple my setup in HP.


Reply
0
0
05-16-2015, 11:34 PM
#84
Junior Member
Thread Starter
Join Date: May 2014
Location: North St Paul, MN
Posts: 397
Total Cats: 25
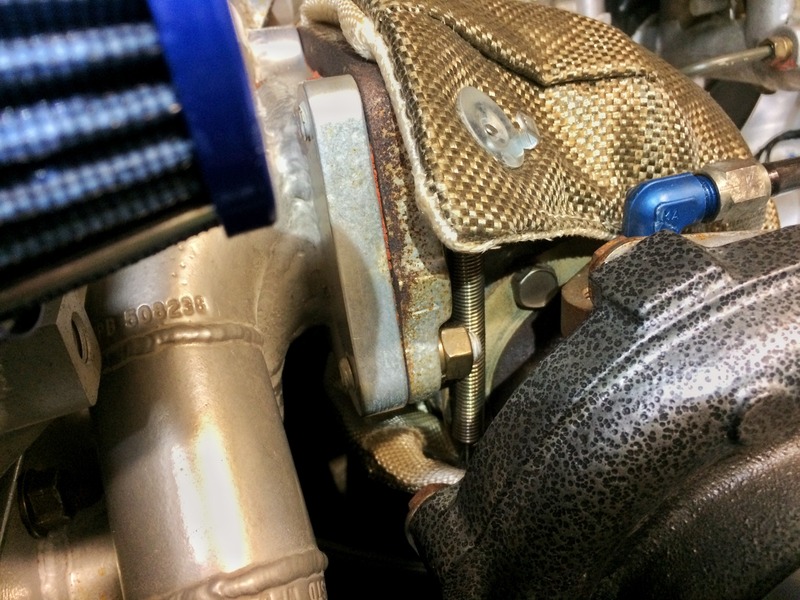
So I started the process of pulling off the heat shield on the turbo to run my new blanket. My cousin really built a sweet heat shield... I actually felt bad removing it. It turns out, removing it was a PITA.
So this bolt has no clearance. It made things interesting.
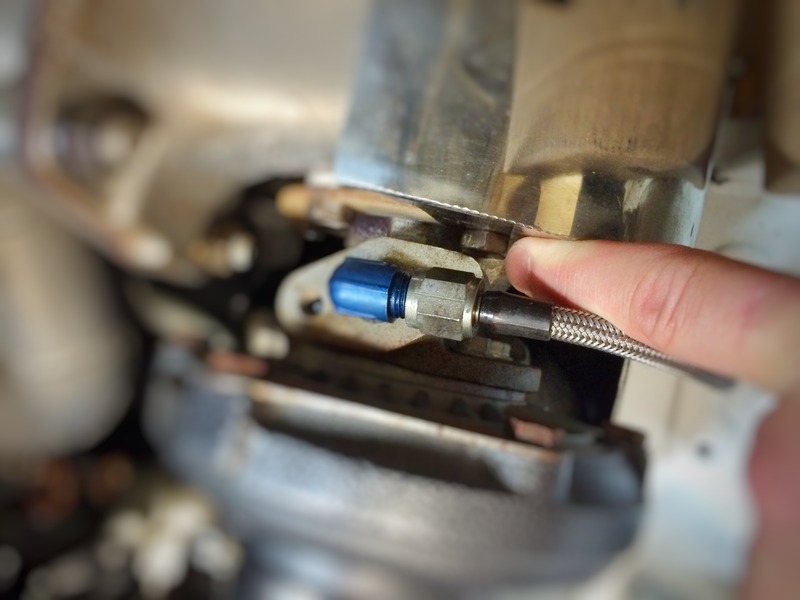
On the bright side, I went and picked up new tools for the heat shield. Also a 13mm wrench and a grinding wheel. I had to make the 13mm a slim wrench to get at that bolt.
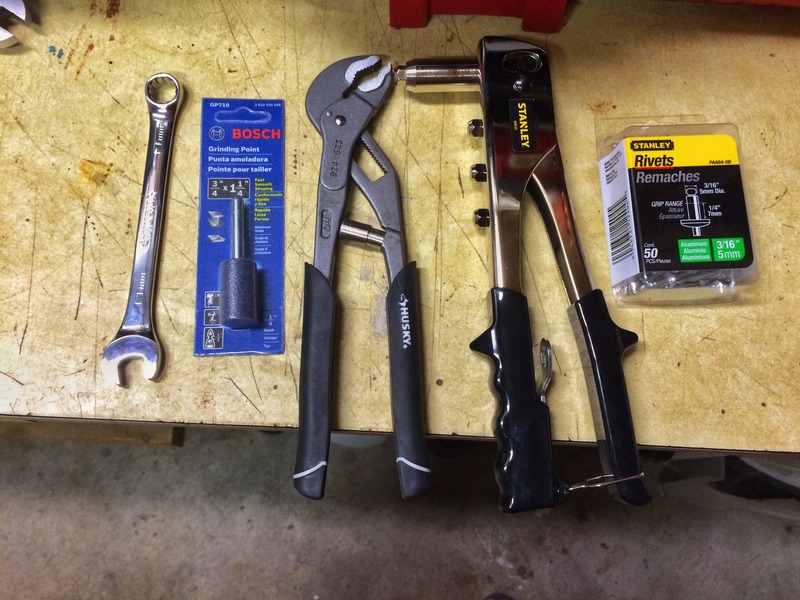
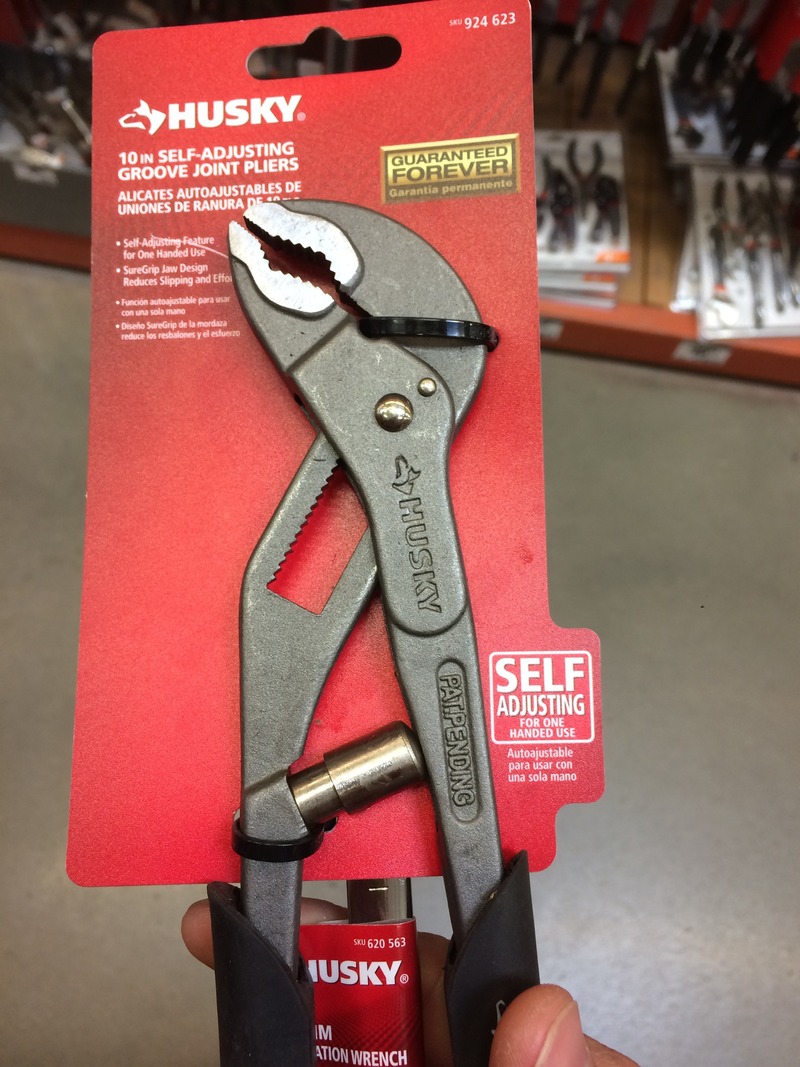
This wrench rocks! I used my cousin's while we did all the swapping over the past few months. It came in handy quite a few times.
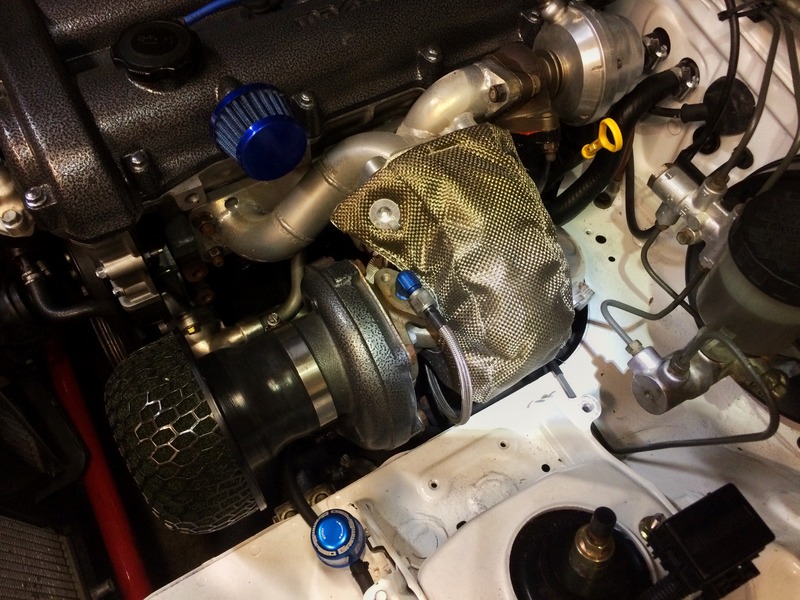
Ok back to car stuff. I got the new turbo blanket on.
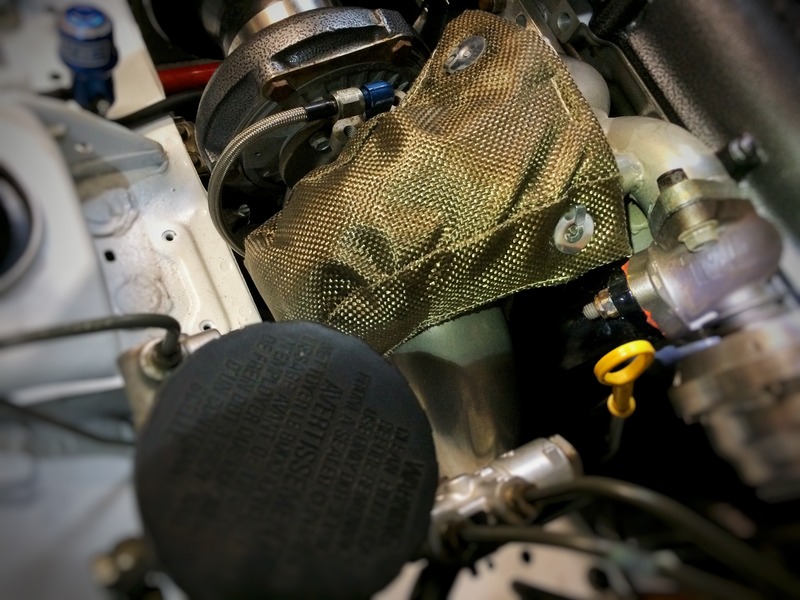
Next up is a heat shield to protect my master cylinder. I have some cardboard I mocked up last night, but I wanted the blanket on to get an idea for clearance. Heading to the garage now to knock that out. We'll see what I can come up with.
So this bolt has no clearance. It made things interesting.

On the bright side, I went and picked up new tools for the heat shield. Also a 13mm wrench and a grinding wheel. I had to make the 13mm a slim wrench to get at that bolt.

This wrench rocks! I used my cousin's while we did all the swapping over the past few months. It came in handy quite a few times.

Ok back to car stuff. I got the new turbo blanket on.


Next up is a heat shield to protect my master cylinder. I have some cardboard I mocked up last night, but I wanted the blanket on to get an idea for clearance. Heading to the garage now to knock that out. We'll see what I can come up with.
Reply
0
0
05-24-2015, 02:26 AM
#85
Junior Member
Thread Starter
Join Date: May 2014
Location: North St Paul, MN
Posts: 397
Total Cats: 25
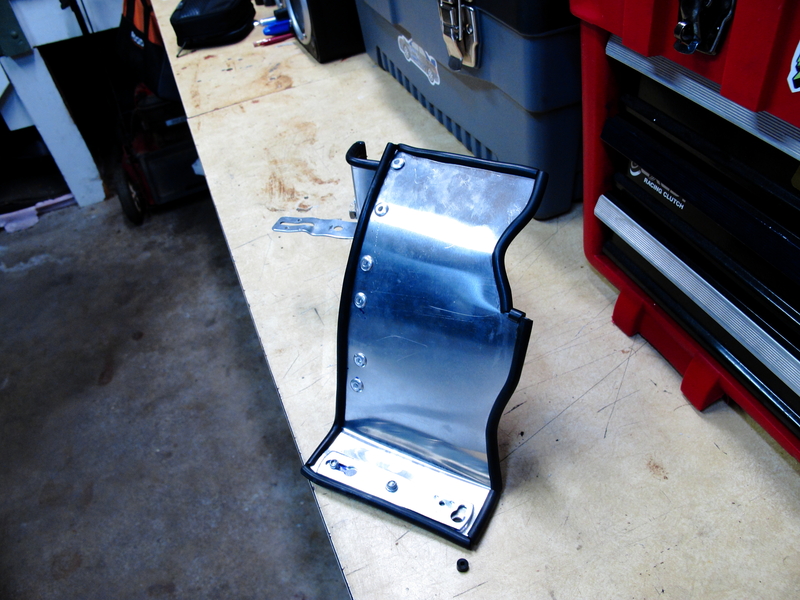
I am proud to present the first hand built part of my car. It is actually pretty funny the different directions this took. I checked out heat shield threads on MT.net via google throughout the week at work. I have to say the tooth pick trick is awesome (MT.net Thread Here). So I started to build a shield around the Master Cylinder. I used the tooth pick trick to run hood clearance. The first version of the heat shield blocked the brakes and scooped air over the DP and Turbo. It was functional (in theory) but I had to burn it with fire. It was ugly. Pictures exist, but they will not be posted. So in an effort to be functional, simple and not attention grabbing I scrapped the first idea and moved onto this.
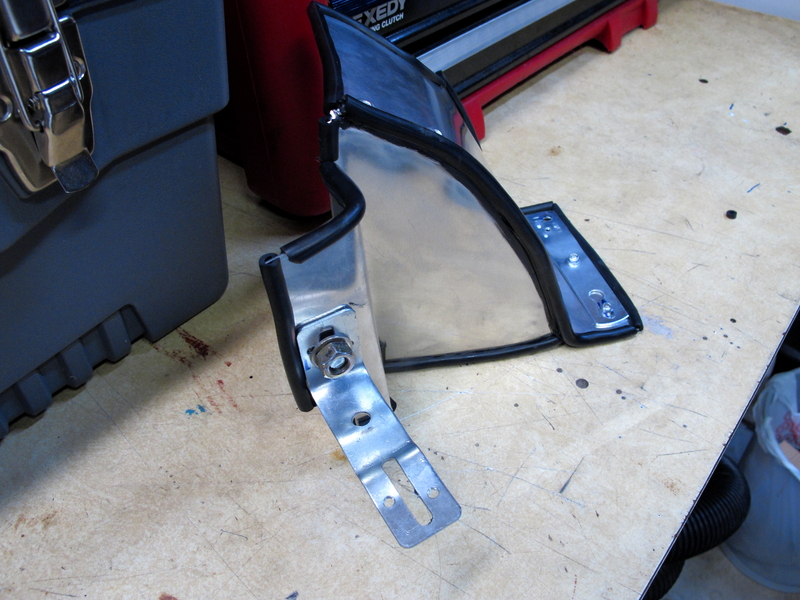
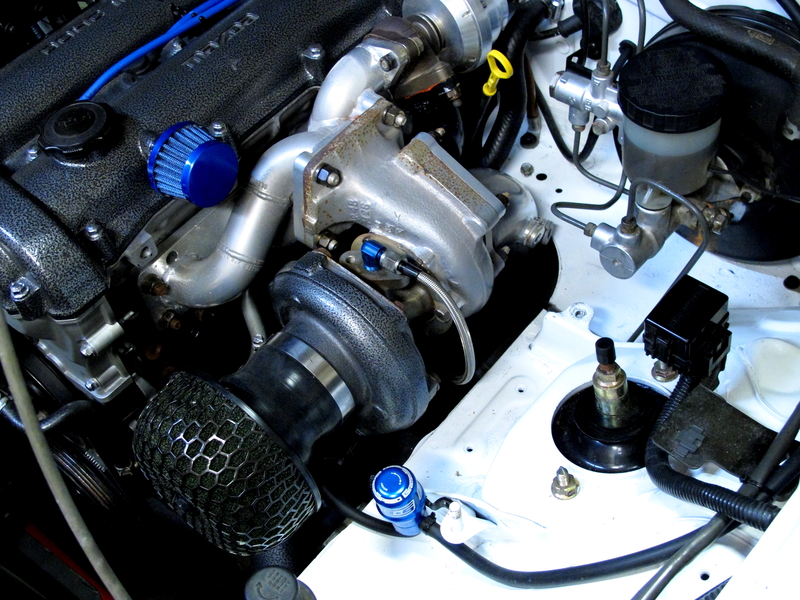
So this is my engine bay without any additional heat fighting tech. The Turbo, Header, EWG Dump Tube and Down Pipe are ceramic coated.
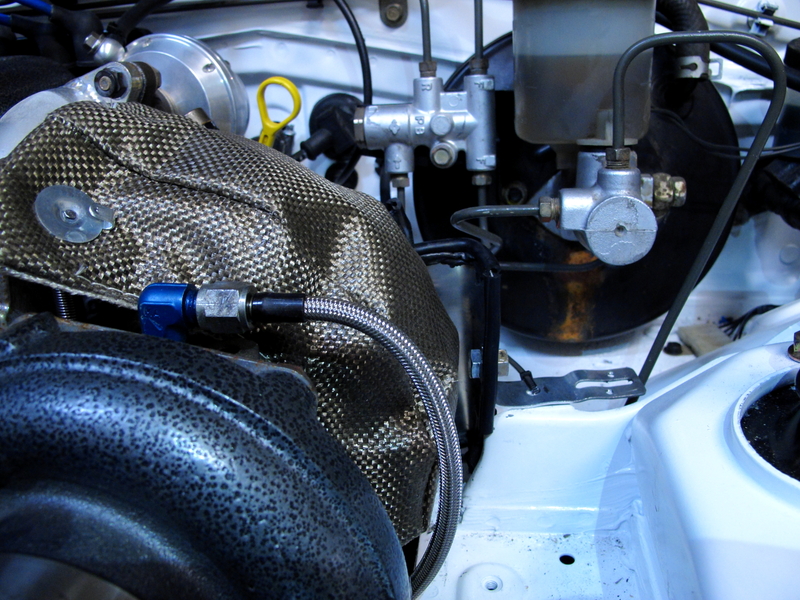
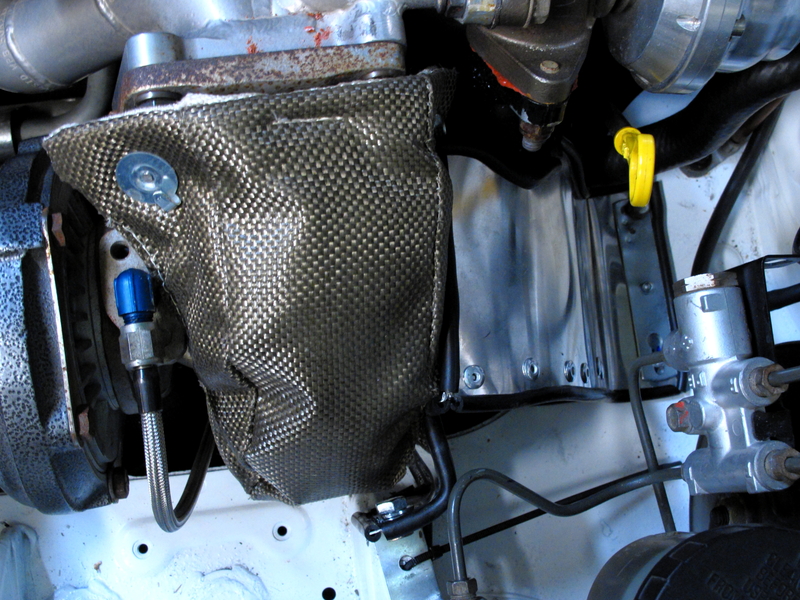
Here is the Turbo Blanket and Down Pipe installed. Yes, I need to pick up a bolt that mounts to the OEM airbox threading. Until then, a zip tie� it works.
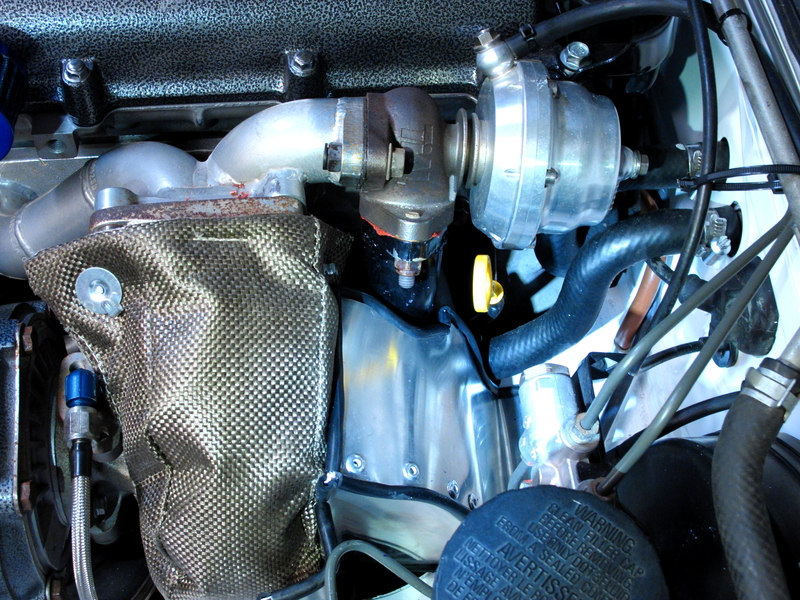
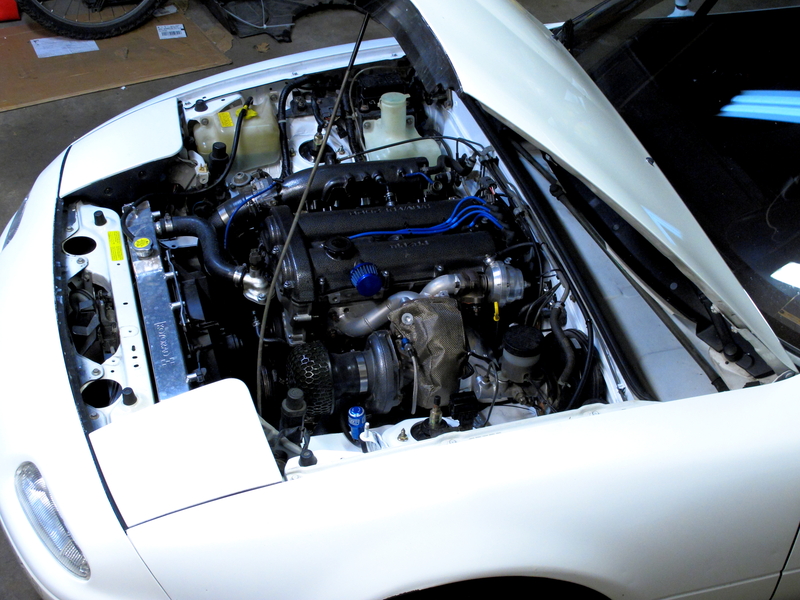


So this is my engine bay without any additional heat fighting tech. The Turbo, Header, EWG Dump Tube and Down Pipe are ceramic coated.


Here is the Turbo Blanket and Down Pipe installed. Yes, I need to pick up a bolt that mounts to the OEM airbox threading. Until then, a zip tie� it works.


Reply
0
0
05-24-2015, 10:24 AM
#86
Junior Member
Thread Starter
Join Date: May 2014
Location: North St Paul, MN
Posts: 397
Total Cats: 25
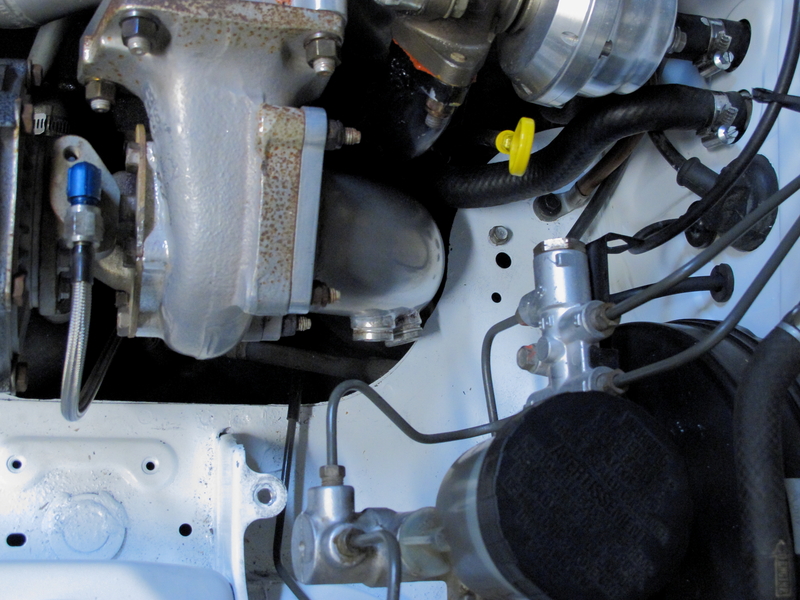
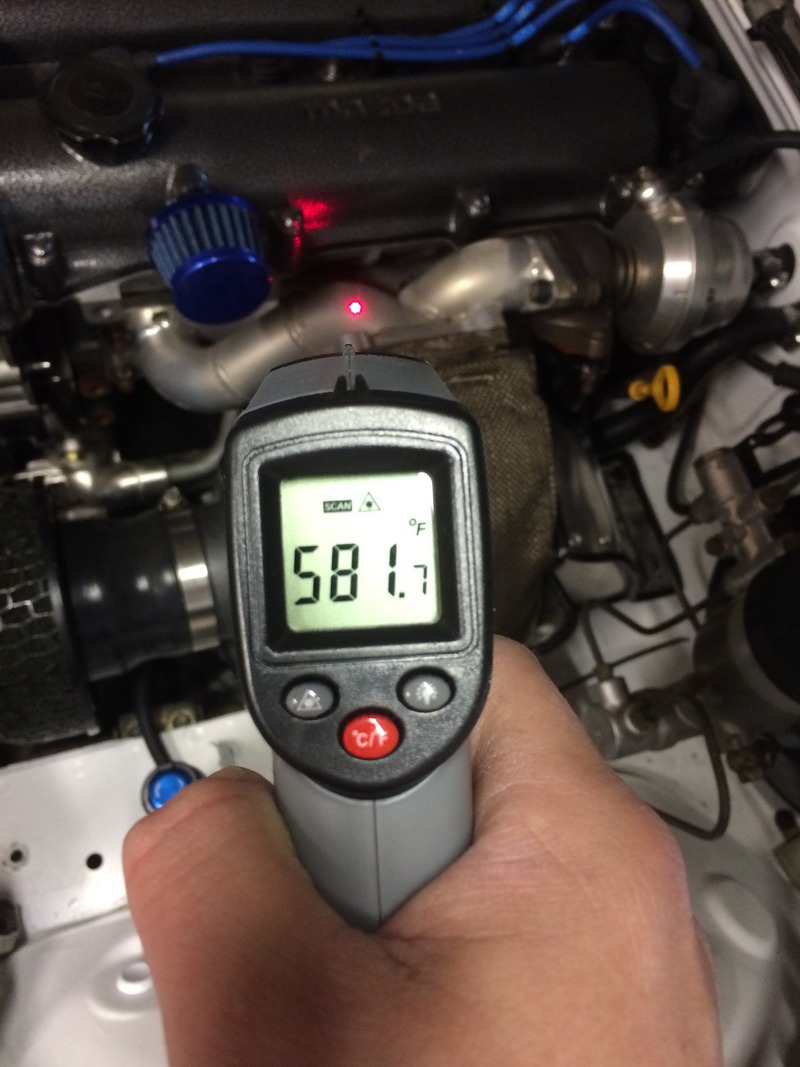
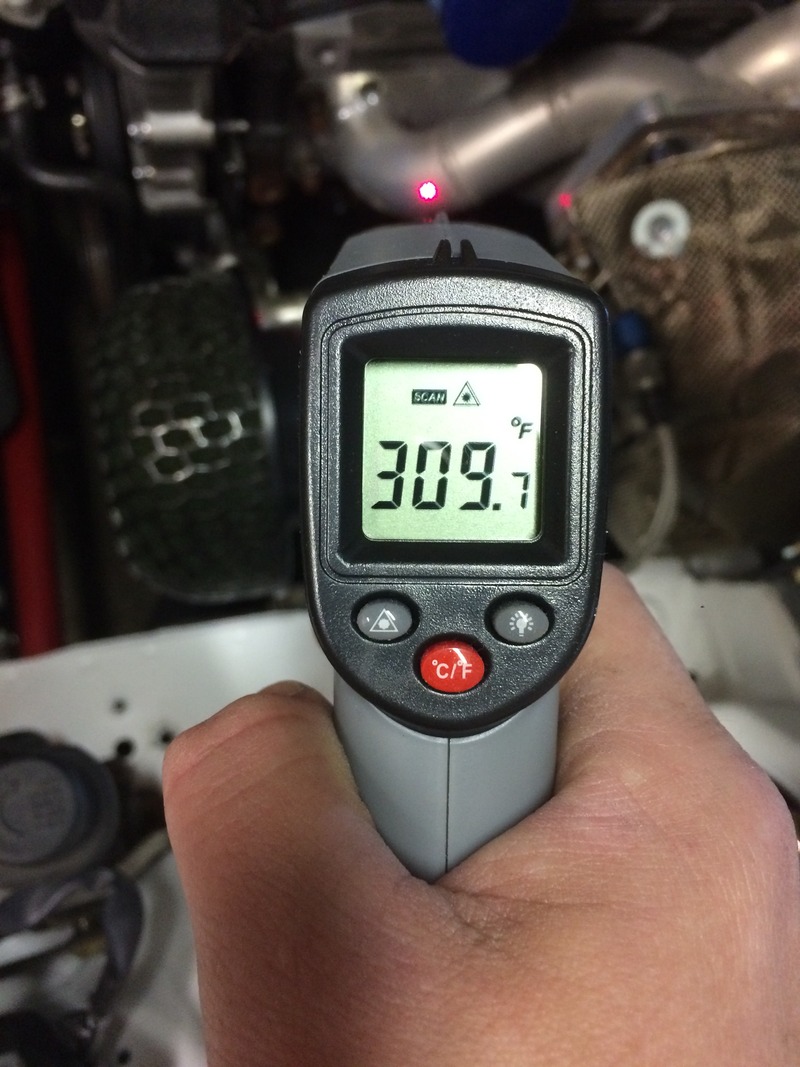
I took a short drive. It seems that the war against engine bay heat has some positive results. It will be a better test when I am fully dyno tuned and can stretch the car's legs.
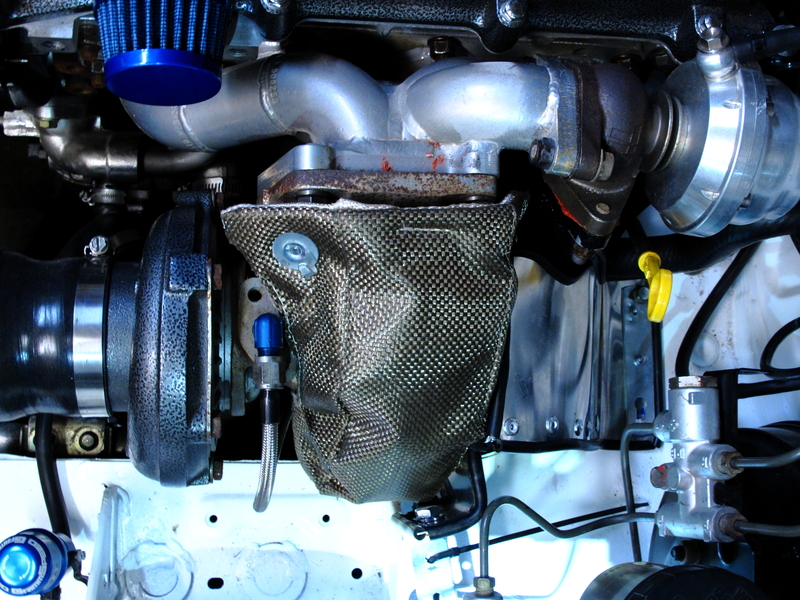
Master Cylinder
Heat Shield
Turbo Blanket
Header high and low
Master Cylinder

Heat Shield

Turbo Blanket

Header high and low


Reply
0
0

 05-24-2015, 11:51 AM
#91
Junior Member
Thread Starter
Join Date: May 2014
Location: North St Paul, MN
Posts: 397
Total Cats: 25
Hmmm.
Well I know that rubber won't last forever. I figured I could get a season out of it and replace over the winter. Seeing the other Vac lines on the car and the ones I used to run on my WRX.... I figured these would last a while. They are cheap to replace. Rubber failing doesn't make me worry. However, fire does worry me. I have some more research to do.
Well I know that rubber won't last forever. I figured I could get a season out of it and replace over the winter. Seeing the other Vac lines on the car and the ones I used to run on my WRX.... I figured these would last a while. They are cheap to replace. Rubber failing doesn't make me worry. However, fire does worry me. I have some more research to do.
Reply
0
0
05-28-2015, 01:20 AM
#92
Junior Member
Thread Starter
Join Date: May 2014
Location: North St Paul, MN
Posts: 397
Total Cats: 25
So I have been picking away at my front and rear brake upgrade for a few hours in the evening this past week. It is the last major project I want to get done before my dyno tuning in July. Also I wouldn't mind some time doing my best to dial in a tune for my car prior to dyno time... we will see how far I get. So I ran into a unforeseen snag tonight that I should have thought about.
I wanted to upload all these at once, but due to my snag I ended earlier than expected tonight so....
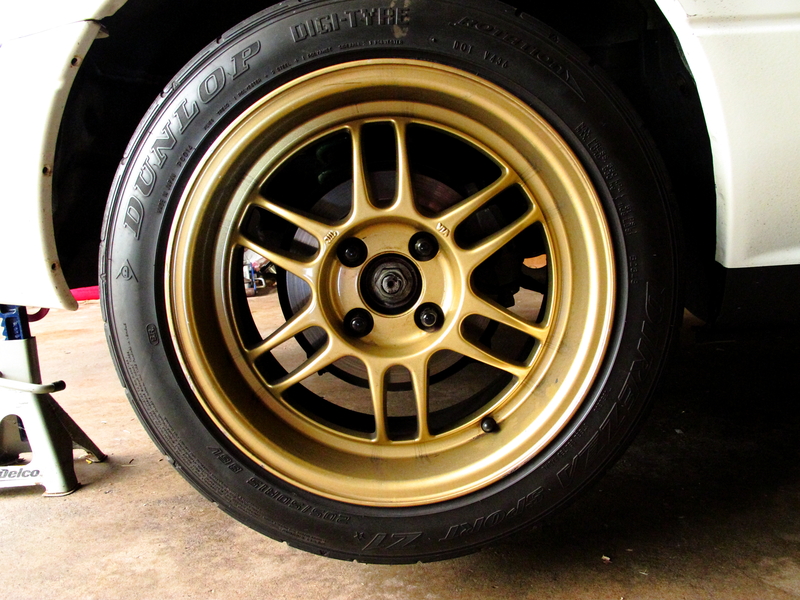
Old Front Brake Setup
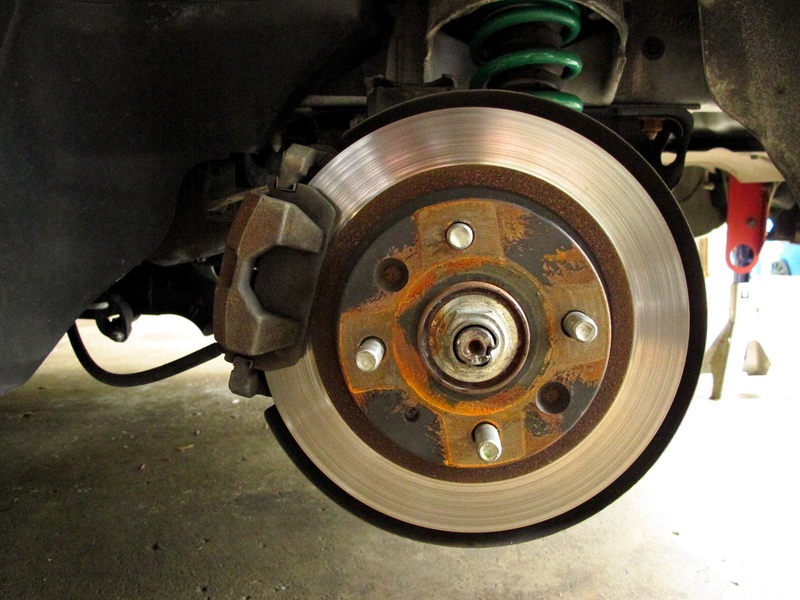
Old Rear Brake Setup
Old 1.6 Rear Brackets vs New 1.8 Rear Brackets
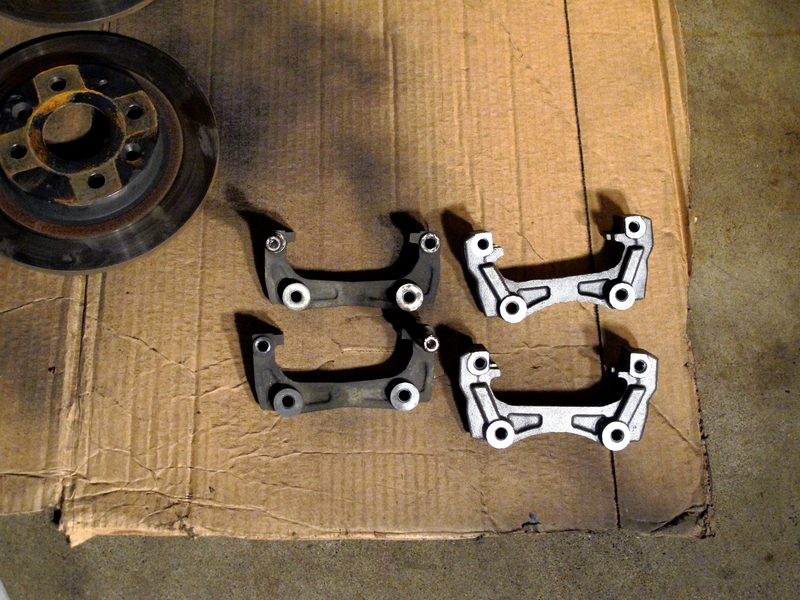
So, then I realized that I had to swap the slider pin from the old brackets to the new brackets. Due to the holes being filled with brake grease I didn't notice the hex hole at the top (first look). I knew the slider pins were threaded and did a quick google search. It didn't help .... or.... maybe I got sick of surfing google on my phone through forums. So I went back to the bracket, wiped it down and noticed the hex hole. Here is my breaker bar hex key removal socket. I look at this in my hand in the garage and in my head xzibit says "I hear you like adapters so we put an adapert on your adapter on your socket on your hex key."
um..... yeah
Oh and I need to buy some blue loctite

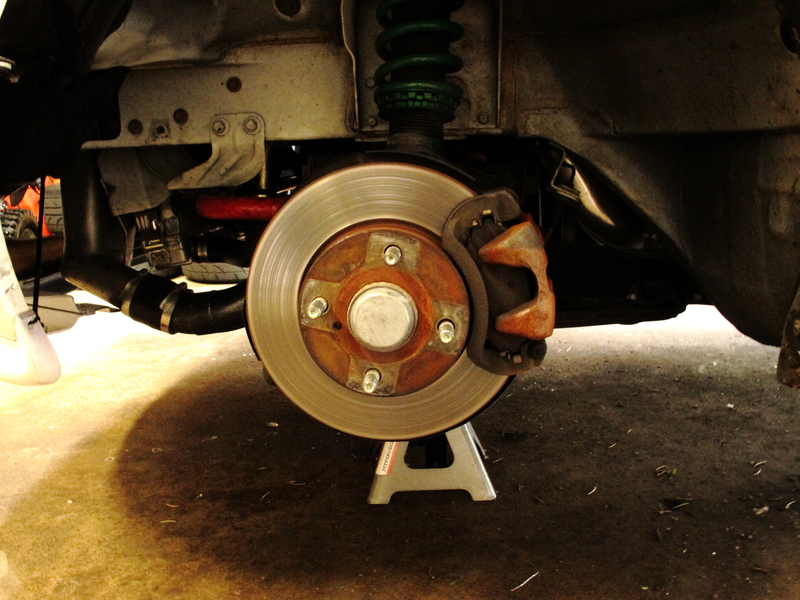
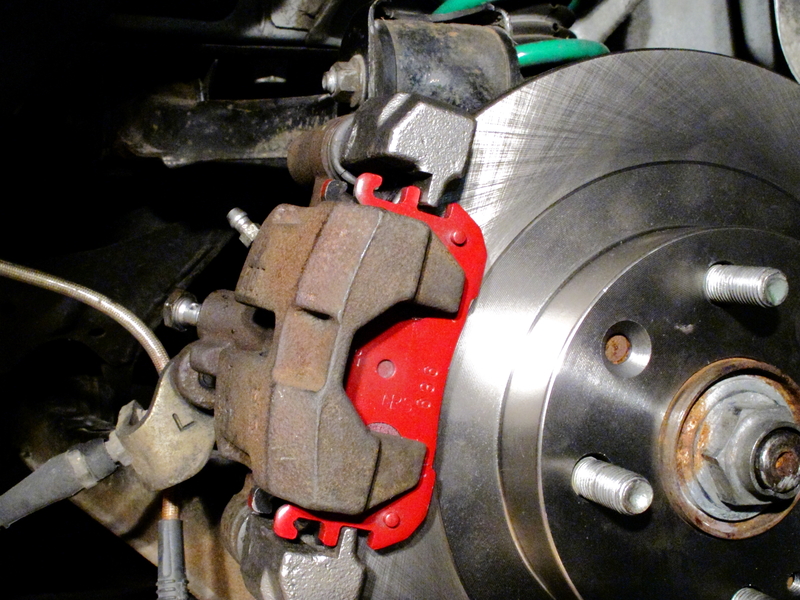
So this was my stopping point. Can you see my problem? Besides the ugly *** caliper that I need to paint black this winter....

I don't have the stupid brake clips and springs. Actually, I assume the 1.8 brakes have springs.... similar to the the 1.6 spring and clip setup I removed from my old setup. Either way, I can't believe it didn't cross my mind earlier. I was sad when I realized this. I knew I didn't have time to start the front swap and finish due to the time of night. Tomorrow I am going to have to research what clips I need and where I can find them. Unless someone happens to know a good place to pick some up.
I wanted to upload all these at once, but due to my snag I ended earlier than expected tonight so....
Old Front Brake Setup


Old Rear Brake Setup


Old 1.6 Rear Brackets vs New 1.8 Rear Brackets

So, then I realized that I had to swap the slider pin from the old brackets to the new brackets. Due to the holes being filled with brake grease I didn't notice the hex hole at the top (first look). I knew the slider pins were threaded and did a quick google search. It didn't help .... or.... maybe I got sick of surfing google on my phone through forums. So I went back to the bracket, wiped it down and noticed the hex hole. Here is my breaker bar hex key removal socket. I look at this in my hand in the garage and in my head xzibit says "I hear you like adapters so we put an adapert on your adapter on your socket on your hex key."
um..... yeah
Oh and I need to buy some blue loctite

So this was my stopping point. Can you see my problem? Besides the ugly *** caliper that I need to paint black this winter....

I don't have the stupid brake clips and springs. Actually, I assume the 1.8 brakes have springs.... similar to the the 1.6 spring and clip setup I removed from my old setup. Either way, I can't believe it didn't cross my mind earlier. I was sad when I realized this. I knew I didn't have time to start the front swap and finish due to the time of night. Tomorrow I am going to have to research what clips I need and where I can find them. Unless someone happens to know a good place to pick some up.

Reply
0
0
05-28-2015, 12:43 PM
#93
Junior Member
Thread Starter
Join Date: May 2014
Location: North St Paul, MN
Posts: 397
Total Cats: 25
Wow, lots of misinformation out there. So surfing threads (Google M.net and MT.net) I saw a lot of comments about not being able to buy clips and springs separately for the rear calipers. So I figured I would post what I found.
Rock Auto has them - LINK HERE Under "Disc Brake Hardware Kit"
I ended up finding them at a local chain store nearby for about $8. Will pick them up today and hope to knock out the brakes over the next few nights. I want to do it tonight, but we will see how long my track event meeting goes (hosting 2 events in June and July).
Rear Hardware Kit Part Number List Edit
CARLSON Part # 13306
Rear; Disc; D636
BRAYMANN Part # BBA4049
CENTRIC Part # 11745023
RAYBESTOS Part # H15804A
DORMAN Part # HW13306
I figured in case someone else uses google and my link dies by then here are a few part options
Last edited by ofspunk7; 05-28-2015 at 12:54 PM.
Reply
0
0
05-28-2015, 12:54 PM
#94

Wow, lots of misinformation out there. So surfing threads (Google M.net and MT.net) I saw a lot of comments about not being able to buy clips and springs separately for the rear calipers. So I figured I would post what I found.
Rock Auto has them - LINK HERE Under "Disc Brake Hardware Kit"
I ended up finding them at a local chain store nearby for about $8. Will pick them up today and hope to knock out the brakes over the next few nights. I want to do it tonight, but we will see how long my track event meeting goes (hosting 2 events in June and July).
Reply
0
0
05-28-2015, 01:05 PM
#96
Junior Member
Thread Starter
Join Date: May 2014
Location: North St Paul, MN
Posts: 397
Total Cats: 25
I trimmed my rear dust shield too. I saw some posts about just bending them back, but I think the trimmed look will be easier on the eyes. I forgot to take pics, I will try and remember with the other side tonight. I need to grind down my trim job a bit, but I am happy with how it turned out.
Reply
0
0
06-02-2015, 12:12 PM
#97
Junior Member
Thread Starter
Join Date: May 2014
Location: North St Paul, MN
Posts: 397
Total Cats: 25
Well, I guess I made a bad estimation of my free time. I didn't take into account a 8.5 month prego wife and toddler duties. So this brake swap took longer than expected. Also I have decided to hold off on swapping the master and brake booster. I don't want anything getting in the way of my dyno time. I will do that project this fall or winter.
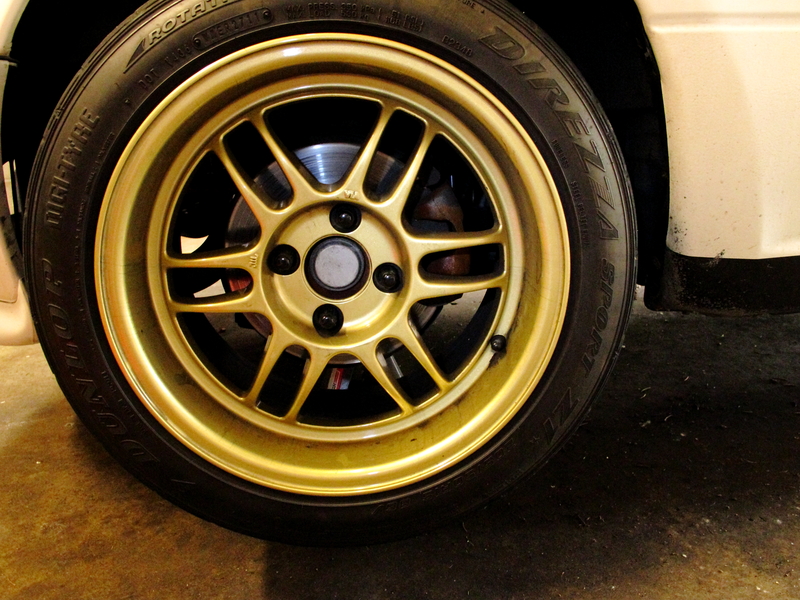
A few pics. I plan to get more. Due to my short spurts of freetime over the last few days I didn't use any of it to take pics. I should have... but getting this done was my focus.
Damn my color balance is messed up
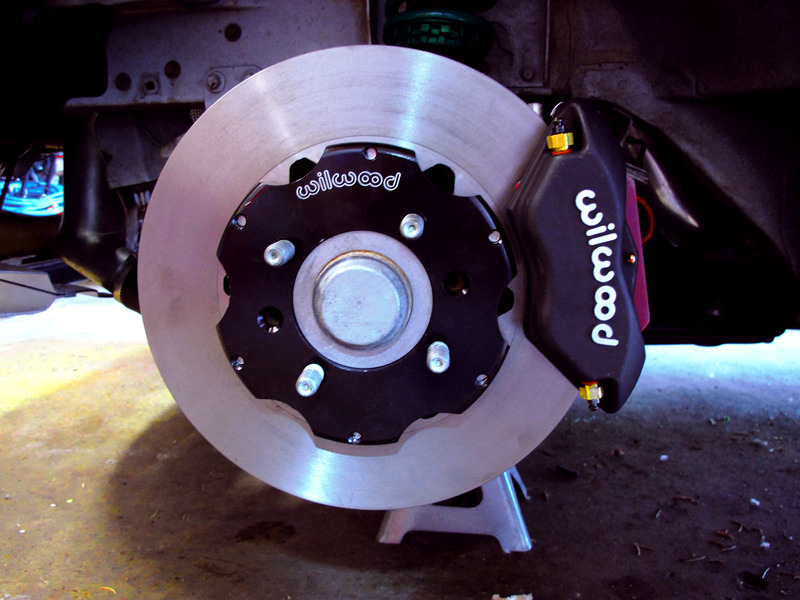
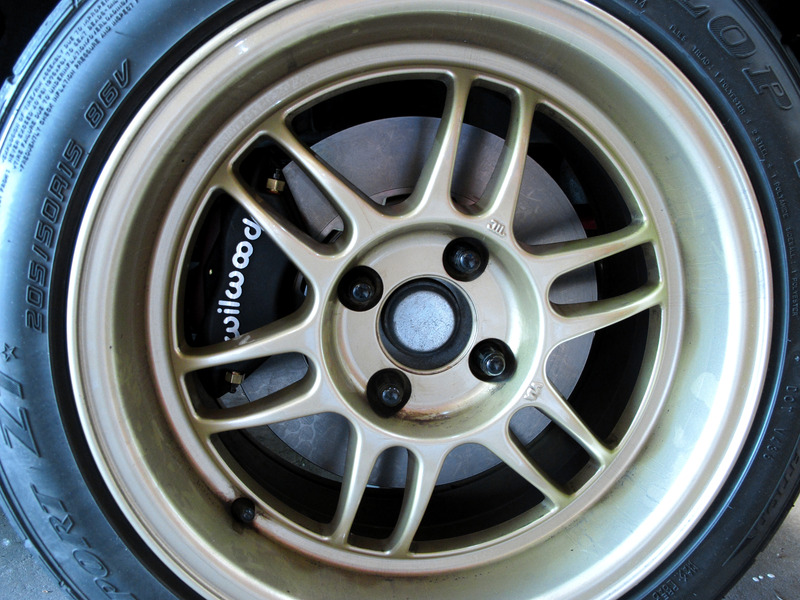
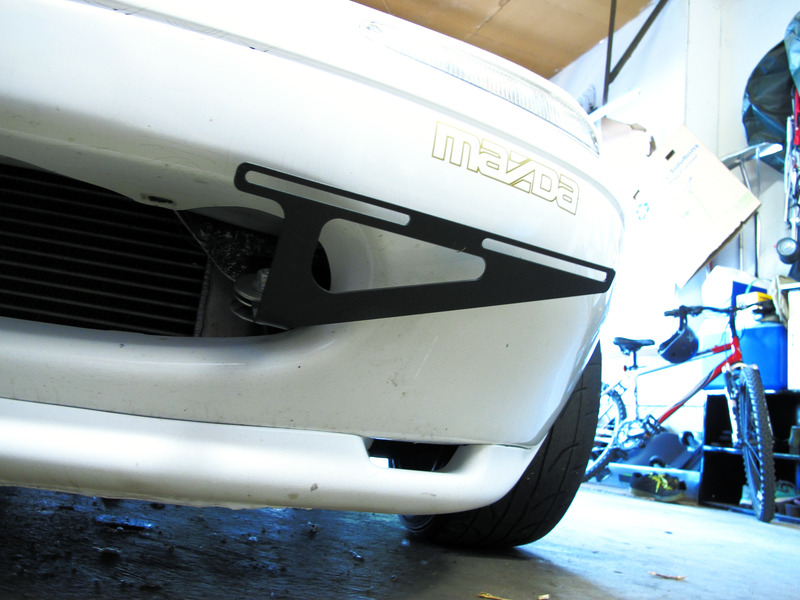
I also dipped my license plate bracket black
I plan to take her for a spin over lunch and maybe snap a few more photos in sunlight.
A few pics. I plan to get more. Due to my short spurts of freetime over the last few days I didn't use any of it to take pics. I should have... but getting this done was my focus.
Damn my color balance is messed up


I also dipped my license plate bracket black

I plan to take her for a spin over lunch and maybe snap a few more photos in sunlight.
Reply
0
0
06-02-2015, 11:54 PM
#98
Junior Member
Thread Starter
Join Date: May 2014
Location: North St Paul, MN
Posts: 397
Total Cats: 25
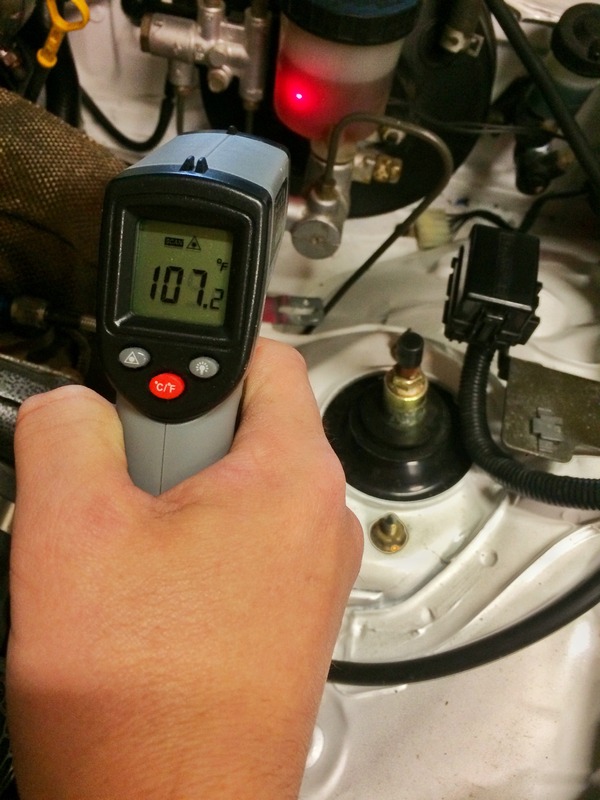
Well, an hour drive on some local twisty roads and I am happy to report I am still alive. The brakes were able to stop my car. I really like this new setup I have. I didn't take pics as it was dusk when I finally was able to escape my responsibilities and go for a drive. I have a nice route that circles a few local lakes and takes about an hour. Lots of turns and elevation changes... But very low speeds. It's still enjoyable. After my tune is more dialed in I will start taking morning trips to the bluffs in southern Wisconsin and Minnesota. I hear there are great snake like roads hidden down there. Google maps confirms these stories.
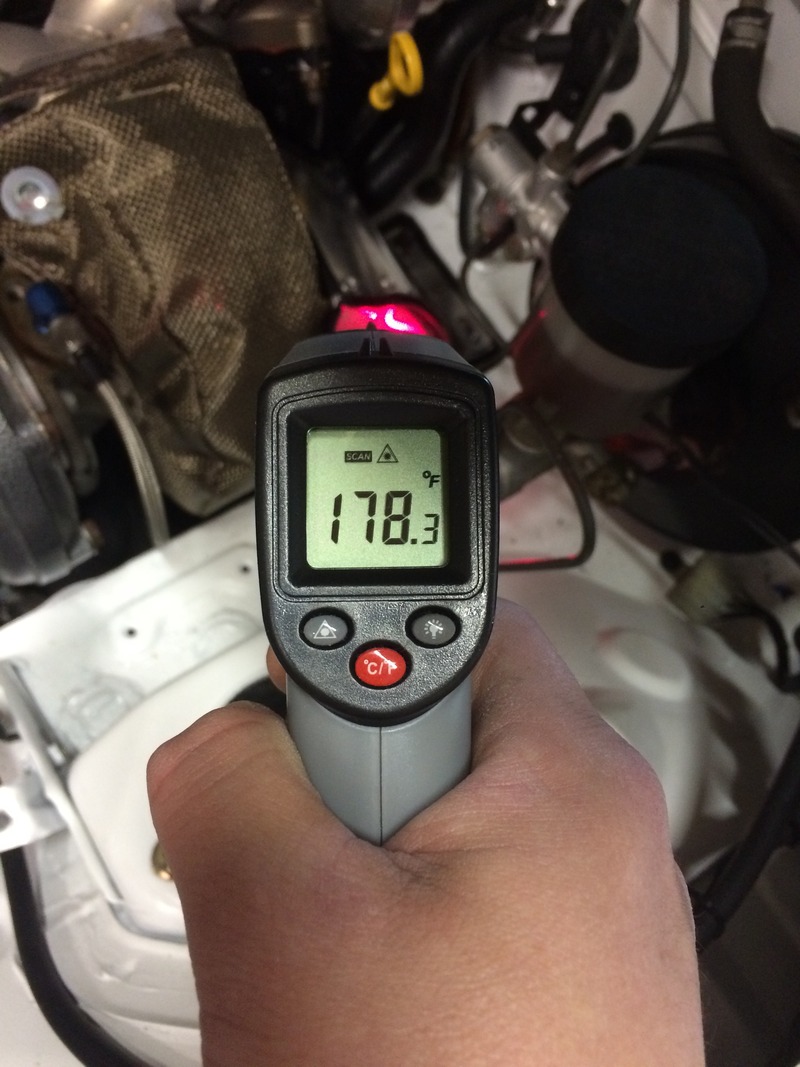
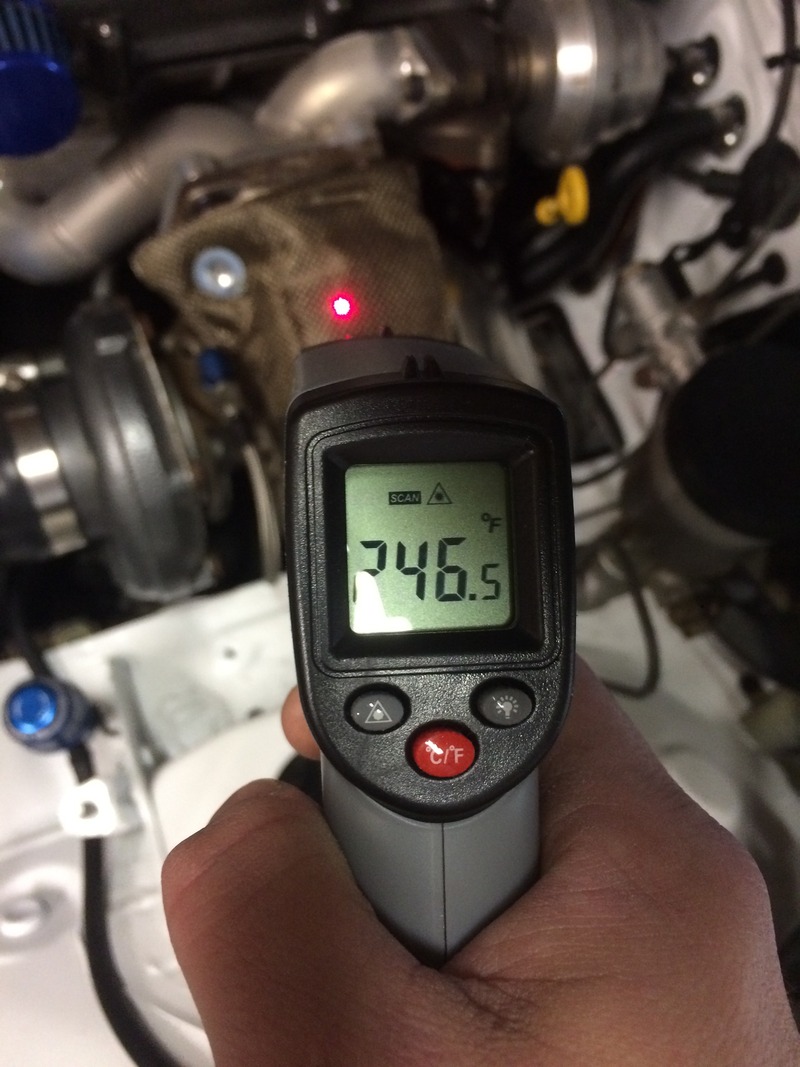
I also did some more temp checks on my heat shield setup. Everything seems to be working great. The difference between manifold and turbo temps vs blanket, heat shield and master cylinder are worlds apart. Actually the MC temp was about 10* higher than the windshield washer fluid on the other side. That made me happy. This winter / fall I will need to get started on my ABS undertray and brake ducting.
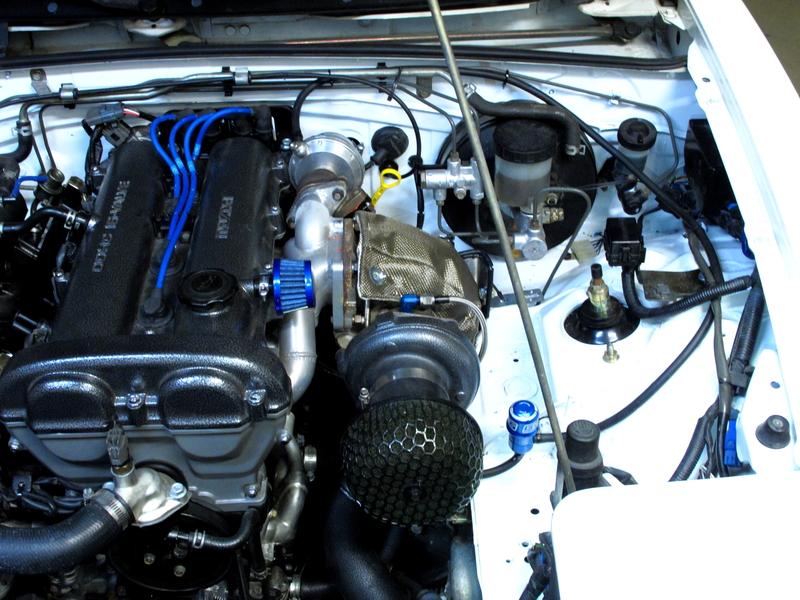
Edit... I took one pic. LoL
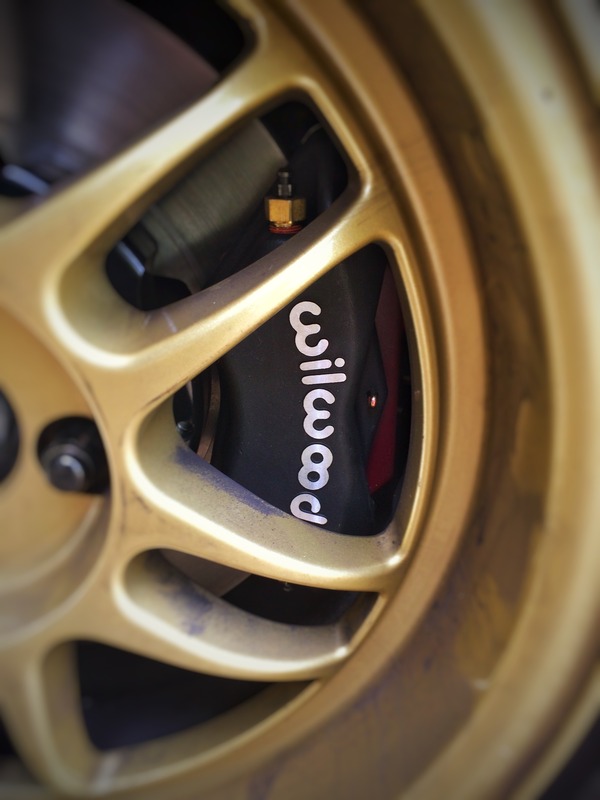
I also did some more temp checks on my heat shield setup. Everything seems to be working great. The difference between manifold and turbo temps vs blanket, heat shield and master cylinder are worlds apart. Actually the MC temp was about 10* higher than the windshield washer fluid on the other side. That made me happy. This winter / fall I will need to get started on my ABS undertray and brake ducting.
Edit... I took one pic. LoL

Reply
0
0
06-04-2015, 09:56 AM
#99
Junior Member
Thread Starter
Join Date: May 2014
Location: North St Paul, MN
Posts: 397
Total Cats: 25
Pulled the heat sheild. The rubber edges seem to be holding up well with the silicone. We will see how it looks after some track time in July. My dyno time on July 1st cannot come soon enough. July 10th I am hosting another track day, so I should be able to get in some good lapping.
Reply
0
0
06-26-2015, 02:05 AM
#100
Junior Member
Thread Starter
Join Date: May 2014
Location: North St Paul, MN
Posts: 397
Total Cats: 25
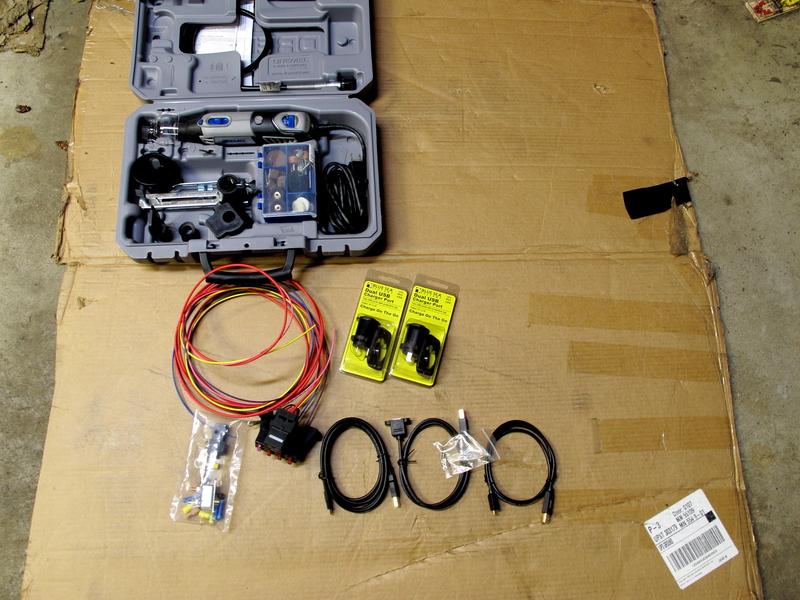
So last project before my tune. I wanted to wire up a new power setup for the GPS unit I have coming from aidandj. Instead of pulling existing power from somewhere I decided to add a new setup. I also ended up spending a bunch of more money on electronics because .... well because racecar. LOL
So father's day present from my wife... Dremel 4000. We I technically ordered it and then asked her if she wanted to make it my gift. LOL
Painless Performance 3 switch fuse and relay setup
2 - USB power ports
A Female / Female USB cable for tuning
USB cable for powering the GPS Unit (GPS unit pending arival)
USB cable to power the Samsung Tablet 3 7" that I picked up for $40 from a friend (not pictured)
V1 radar detector (not pictured) to hardwire in
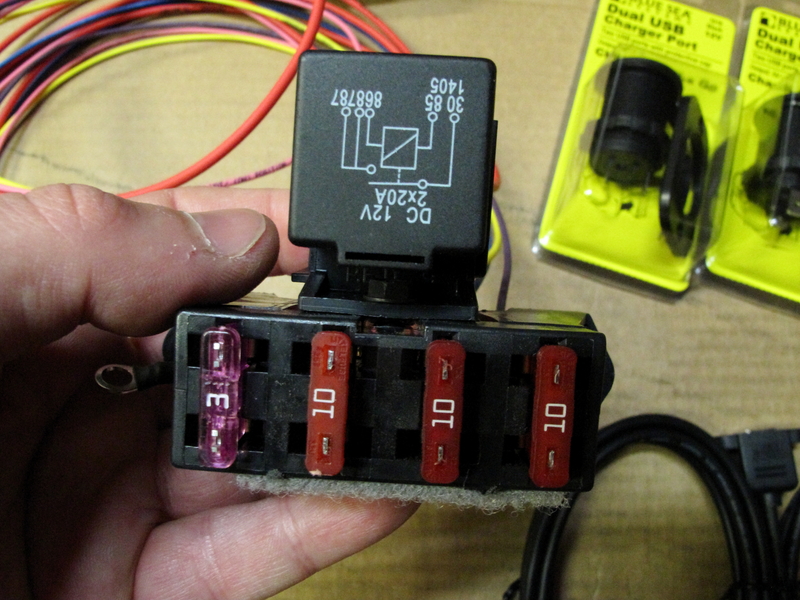
This is the switched fuse and relay setup. Pretty MINT if you ask me
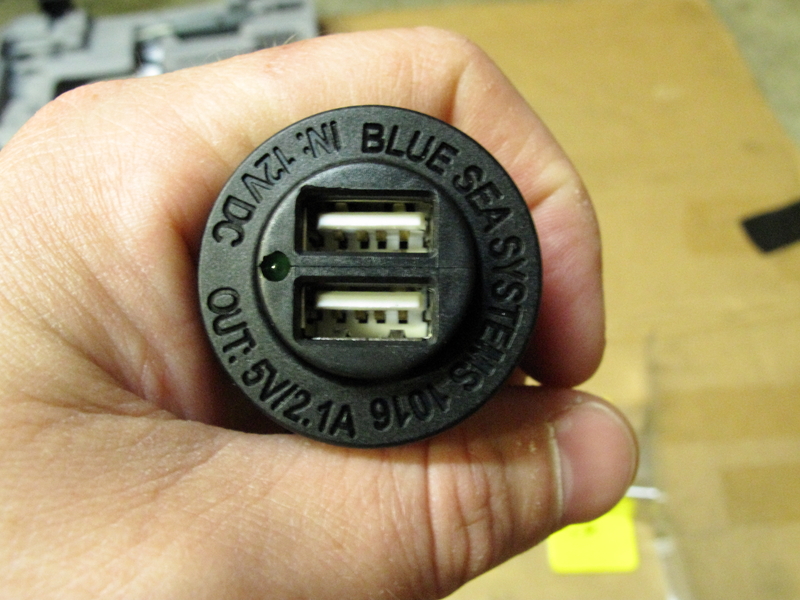
USB Power. 1 for the dash and 1 hidden behind the glovebox for the GPS unit
Time to get working!
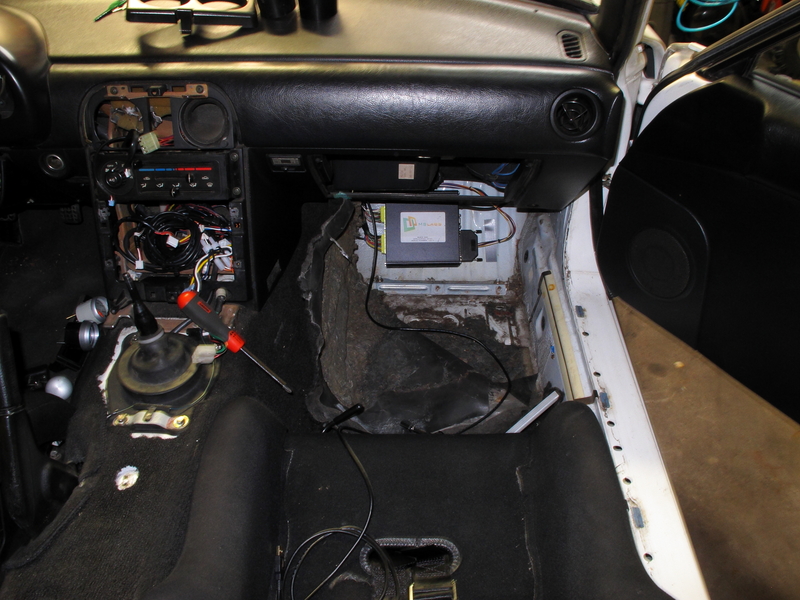
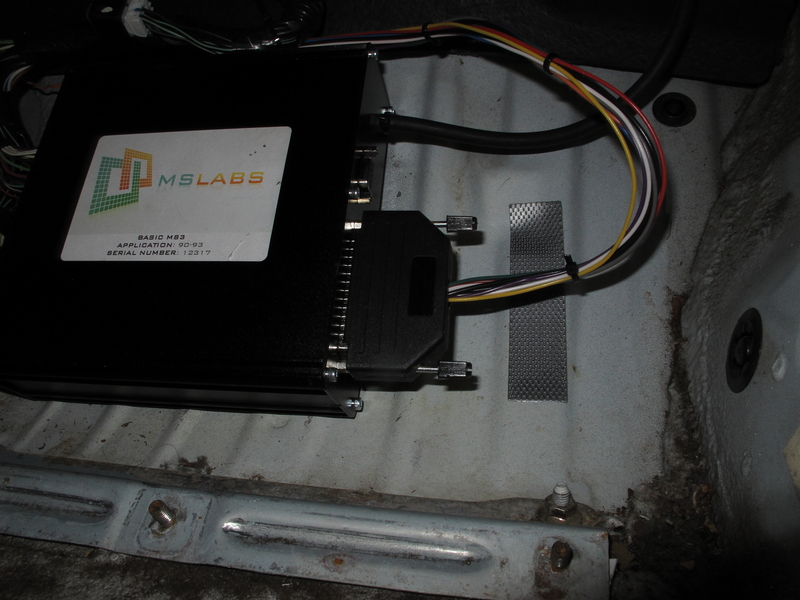
I decided to mount the fused power next to my ECU. Not sure if this was a good idea or not yet. I will have to do some work to remove a fuse if it blows.... but right now I figure it is a few screws and bolts so no big deal. Using velcro again to mount it.
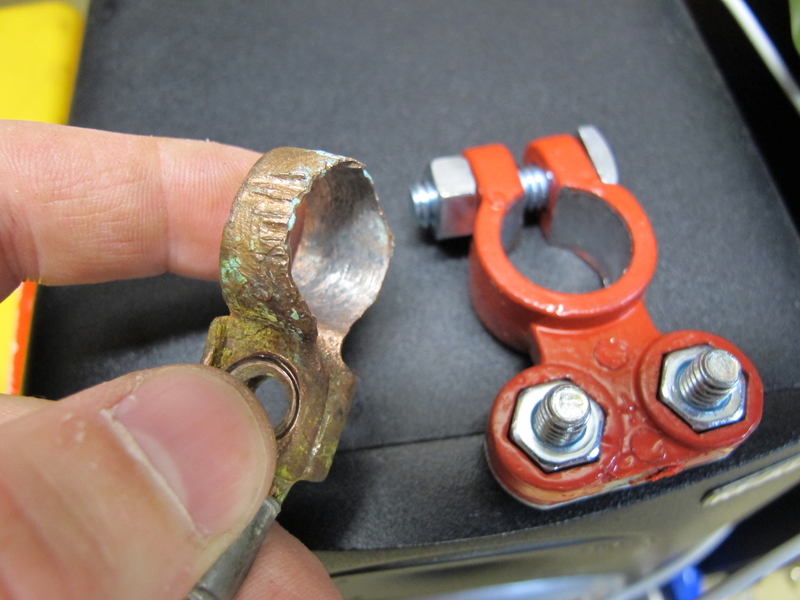
Since I was adding power anyways, I figured it was time to upgrade my power connector. The OEM one had seen better days.
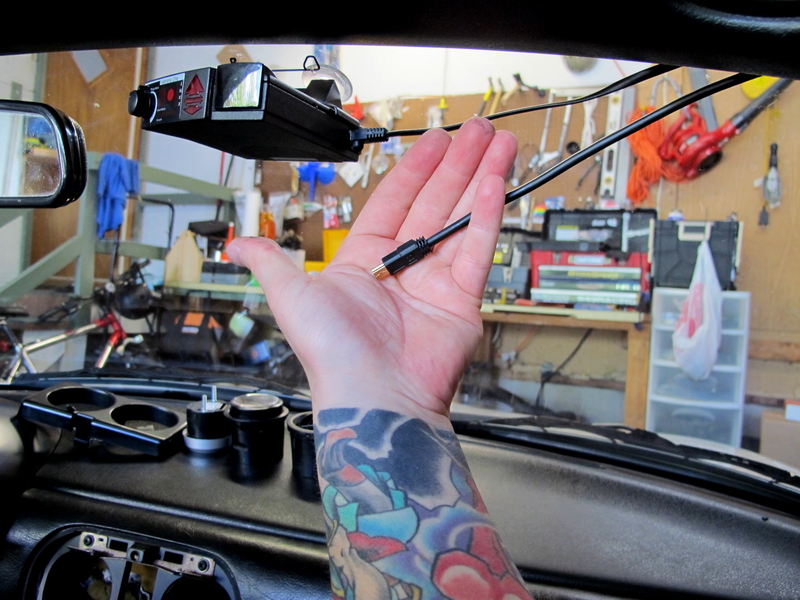
This is the V1 mounted and the USB power for the GPS unit. I ran them up the trim and across the window.
So father's day present from my wife... Dremel 4000. We I technically ordered it and then asked her if she wanted to make it my gift. LOL
Painless Performance 3 switch fuse and relay setup
2 - USB power ports
A Female / Female USB cable for tuning
USB cable for powering the GPS Unit (GPS unit pending arival)
USB cable to power the Samsung Tablet 3 7" that I picked up for $40 from a friend (not pictured)
V1 radar detector (not pictured) to hardwire in

This is the switched fuse and relay setup. Pretty MINT if you ask me

USB Power. 1 for the dash and 1 hidden behind the glovebox for the GPS unit

Time to get working!

I decided to mount the fused power next to my ECU. Not sure if this was a good idea or not yet. I will have to do some work to remove a fuse if it blows.... but right now I figure it is a few screws and bolts so no big deal. Using velcro again to mount it.

Since I was adding power anyways, I figured it was time to upgrade my power connector. The OEM one had seen better days.

This is the V1 mounted and the USB power for the GPS unit. I ran them up the trim and across the window.

Reply
0
0


