
Return of the Miata: 03 DD Turbo build


Thread Starter
Junior Member
Joined: Jan 2012
Posts: 151
Total Cats: -12
From: Calgary, AB
I owned a stock 99' Miata 2 years ago which I rolled during a track day without a roll bar and walked away unscathed. I then picked up a TDI and figured I was out of the car scene. Two years later, the Miata bug hit me and I picked up a03 white Miata.
The modification bug hit shortly after. Roll bar, CAI and exhaust, all sourced locally for cheap. I had told myself that this car being my DD would be stock and that I didn't want to get back into modding, so no buying parts. However, a few things popped up on Kijiji for irresistible prices and I took the bite.
Fast forward a year since ownership and now I'm in the middle of turbo'ing the car. It's my DD and only car. Probably a stupid idea, but I'm not the brightest guy- so why not? So I started doing my research and wrote up a list of parts I needed. Over the last few months I've been collecting parts and finally just pulled the trigger on buying the rest of them from FM.
Here are the parts I've compiled/waiting to ship:
GT2560R turbo
(the turbo needs to be modified with adapters and have a new mounting bracket for the wastegate, but FM and eBay will take care of that)
RX8 Denso yellow
(Found a local shop that solely works on rotaries (Rx-7 specialties)
Megasquirt 3 (Rev built)
Turbosmart Boost Tee
HKS SSQV
(Authentic; although I'm currently selling it because I figured I'd stick with the turbosmart BPV from FM)
AEM boost/failsafe gauge
(Boost and AFR on the same gauge, keeps my cabin clutter free)
Swiffer bottle washer bottle mod
(Got rid of the Canadian washer bottle and using a Swiffer bottle instead)
I've ordered the rest of my parts from FM, took out a few pieces from their no ECU kit and will have a complete kit when it arrives (or when I drive down and pick it up....)
Now I'll go into what I've installed so far, and add what I've learned along the way..
AEM UEGO install: The first thing I installed. I kept the stock IAC (in my CAI), removed my MAF and old O2 sensor. The old O2 sensor was a b**** to get off, I soaked it with sea foam over a weeks time before even trying to get at it. I then took at 22mm wrench and a pipe (for leverage) to crank it out. The clearance on the NBs is what makes this part difficult.
There are a million wires coming from the UEGO, all you need to wire into the MS3 are the power, ground, sensor ground and input (I believe its the yellow). You'll also need to run vacuum lines from the manifold to the gauge.
I used the MS3's calibration to get my gauge to read the same as MS, but that never worked out properly. So I basically entered values I found online somewhere, then slowly modified the numbers until the gauge and Tunerstudio (TS) read the same. The final numbers were: 1v- 9.69 AFR and 4.5v-18.9. I hope this will be able to save you time if you're doing the samething.
Megasquirt 3 Install: This was pretty straight forward besides removing the top bolt of the stock ECU. The only tip I can provide you here is that the top bolt is hidden behind a bunch of wires and clipped in by a zip tie like thing. You'll need to pop the zip tie out before reaching the top bolt. My car was unable to start right away with the settings provided and needed throttle input to keep it revved up until it was warmed. This problem went away after some fiddling with settings but is now back after changing injectors.
RX8 Injectors: I'll document this process and maybe do a write-up when I have more time. There's about 7 bolts on the upper intake manifold, 2 of them located below the throttle body. You'll need to unplug a bunch of vacuum tubes and wires to get at all the bolts. Once the manifold is removed, clean it out with throttle body cleaner. Now the part I wasn't ready for (was never written in any tutorial I've read) was removing the fuel line. YOU NEED A FUEL LINE QUICK DISCONNECT TOOL. The tool is a small plastic O that pops into the fuel line and "pops" out the fuel line. The problem I had was that I had to really yank on the fuel line to disconnect it after the tool had disconnected it. This made me very uncomfortable, but it all works now. I purchased 4 separate O-ring kits and serviced the injectors before installing them on the rail. No leaks. Perfect.
That's all for now. I'm planning to install the FM kit mid April. Meanwhile, I have to figure out my current problems. Here's one..
1) I broke a switch off my clutch (Omron- see pics) and have since re-ordered one to have it installed. My cruise control no longer works, but I cant determine if its the switch or MS3. Once I have the switch installed again, I'll have my answer to this...
2) My cold starts are horrible. The car will crank over but will not keep running without my foot on the throttle. It doesn't seme that the idle valve is opening during startup. I've played with cranking pulse/ASE and WUE with no luck. My CL idle settings don't seem to change anything and I'm just slowly changing parameters until things get better/worse. So before the car is warmed up (60C), if I let my foot off the throttle, the car will drop RPMS and stall. I've learned to heel-toe because of this (not a bad thing.. but annoying). Similarly, when I throw in the throttle to come to a stop, the RPMs will SOMETIMES dip to 400-500 -- but not stall when warmed. When cold, I will stall.
Anyways, those are two issues I need to work out that I can't seem to figure out. I'm hoping that the clutch switch has something to do with my idle, although that doesn't make too much sense.. I'll have more pics up as I take them. I've attached my tune in case someone wants to take a look at my CL idle settings .
.
The modification bug hit shortly after. Roll bar, CAI and exhaust, all sourced locally for cheap. I had told myself that this car being my DD would be stock and that I didn't want to get back into modding, so no buying parts. However, a few things popped up on Kijiji for irresistible prices and I took the bite.
Fast forward a year since ownership and now I'm in the middle of turbo'ing the car. It's my DD and only car. Probably a stupid idea, but I'm not the brightest guy- so why not? So I started doing my research and wrote up a list of parts I needed. Over the last few months I've been collecting parts and finally just pulled the trigger on buying the rest of them from FM.
Here are the parts I've compiled/waiting to ship:
GT2560R turbo
(the turbo needs to be modified with adapters and have a new mounting bracket for the wastegate, but FM and eBay will take care of that)
RX8 Denso yellow
(Found a local shop that solely works on rotaries (Rx-7 specialties)
Megasquirt 3 (Rev built)
Turbosmart Boost Tee
HKS SSQV
(Authentic; although I'm currently selling it because I figured I'd stick with the turbosmart BPV from FM)
AEM boost/failsafe gauge
(Boost and AFR on the same gauge, keeps my cabin clutter free)
Swiffer bottle washer bottle mod
(Got rid of the Canadian washer bottle and using a Swiffer bottle instead)
I've ordered the rest of my parts from FM, took out a few pieces from their no ECU kit and will have a complete kit when it arrives (or when I drive down and pick it up....)
Now I'll go into what I've installed so far, and add what I've learned along the way..
AEM UEGO install: The first thing I installed. I kept the stock IAC (in my CAI), removed my MAF and old O2 sensor. The old O2 sensor was a b**** to get off, I soaked it with sea foam over a weeks time before even trying to get at it. I then took at 22mm wrench and a pipe (for leverage) to crank it out. The clearance on the NBs is what makes this part difficult.
There are a million wires coming from the UEGO, all you need to wire into the MS3 are the power, ground, sensor ground and input (I believe its the yellow). You'll also need to run vacuum lines from the manifold to the gauge.
I used the MS3's calibration to get my gauge to read the same as MS, but that never worked out properly. So I basically entered values I found online somewhere, then slowly modified the numbers until the gauge and Tunerstudio (TS) read the same. The final numbers were: 1v- 9.69 AFR and 4.5v-18.9. I hope this will be able to save you time if you're doing the samething.
Megasquirt 3 Install: This was pretty straight forward besides removing the top bolt of the stock ECU. The only tip I can provide you here is that the top bolt is hidden behind a bunch of wires and clipped in by a zip tie like thing. You'll need to pop the zip tie out before reaching the top bolt. My car was unable to start right away with the settings provided and needed throttle input to keep it revved up until it was warmed. This problem went away after some fiddling with settings but is now back after changing injectors.
RX8 Injectors: I'll document this process and maybe do a write-up when I have more time. There's about 7 bolts on the upper intake manifold, 2 of them located below the throttle body. You'll need to unplug a bunch of vacuum tubes and wires to get at all the bolts. Once the manifold is removed, clean it out with throttle body cleaner. Now the part I wasn't ready for (was never written in any tutorial I've read) was removing the fuel line. YOU NEED A FUEL LINE QUICK DISCONNECT TOOL. The tool is a small plastic O that pops into the fuel line and "pops" out the fuel line. The problem I had was that I had to really yank on the fuel line to disconnect it after the tool had disconnected it. This made me very uncomfortable, but it all works now. I purchased 4 separate O-ring kits and serviced the injectors before installing them on the rail. No leaks. Perfect.
That's all for now. I'm planning to install the FM kit mid April. Meanwhile, I have to figure out my current problems. Here's one..
1) I broke a switch off my clutch (Omron- see pics) and have since re-ordered one to have it installed. My cruise control no longer works, but I cant determine if its the switch or MS3. Once I have the switch installed again, I'll have my answer to this...
2) My cold starts are horrible. The car will crank over but will not keep running without my foot on the throttle. It doesn't seme that the idle valve is opening during startup. I've played with cranking pulse/ASE and WUE with no luck. My CL idle settings don't seem to change anything and I'm just slowly changing parameters until things get better/worse. So before the car is warmed up (60C), if I let my foot off the throttle, the car will drop RPMS and stall. I've learned to heel-toe because of this (not a bad thing.. but annoying). Similarly, when I throw in the throttle to come to a stop, the RPMs will SOMETIMES dip to 400-500 -- but not stall when warmed. When cold, I will stall.
Anyways, those are two issues I need to work out that I can't seem to figure out. I'm hoping that the clutch switch has something to do with my idle, although that doesn't make too much sense.. I'll have more pics up as I take them. I've attached my tune in case someone wants to take a look at my CL idle settings
.
Reply
 0
0

0
Thread Starter
Junior Member
Joined: Jan 2012
Posts: 151
Total Cats: -12
From: Calgary, AB
So just put an order down for a few more goodies:
Fab9 COPs
OG san 15x8 w/ DZ102 wheels
I'll be doing a road trip down to the states to pickup all my parts on Friday and commence the turbo build.. for now.. I decided to spice up the engine and paint the valve cover and run a compression test.
Compression test results: 160/150/150/160, all checks out. Happy about that.
I also figured I should rip apart my MS3 and see whats up with my idle duty. At the moment, if I test run my idle valve, the minimum value to get any RPM increase is 75%, the max is 100%. This problem appears concomitant to my problem with plunging RPMs when the engine is cold. I currently need to rev to start the car and keep the throttle down to drive it while its cold. Once it hits around 40C, then I'm good to go. I talked to Reverent about this problem and was told to checkout the diode with the stripe at the bottom of it (not marked). I opened the MS3 and found that the diode was in the proper place. But..
The fuse is all white, what's up with that? I've never seen a white fuse before, but then again, I've worked on a total of 1 circuit board before, so I don't have any expertise on this. Anyone know anything about that?
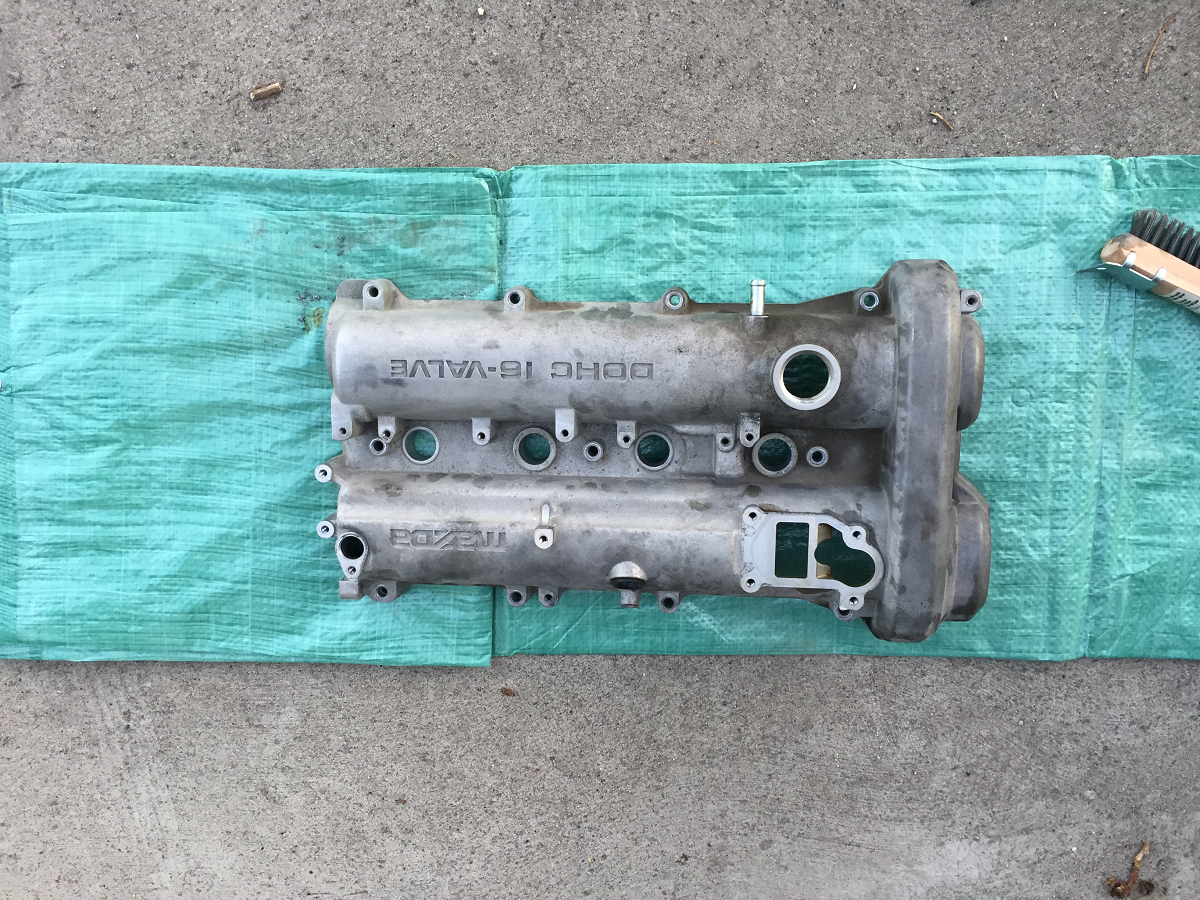
Now for the valve painting.. Removed the few hundred bolts keeping the valve down, at first I thought I had to remove the oil line, but ended up maneuvering the valve cover off without doing so. I took the time to block off all the holes with a shop towel so they don't get painted.
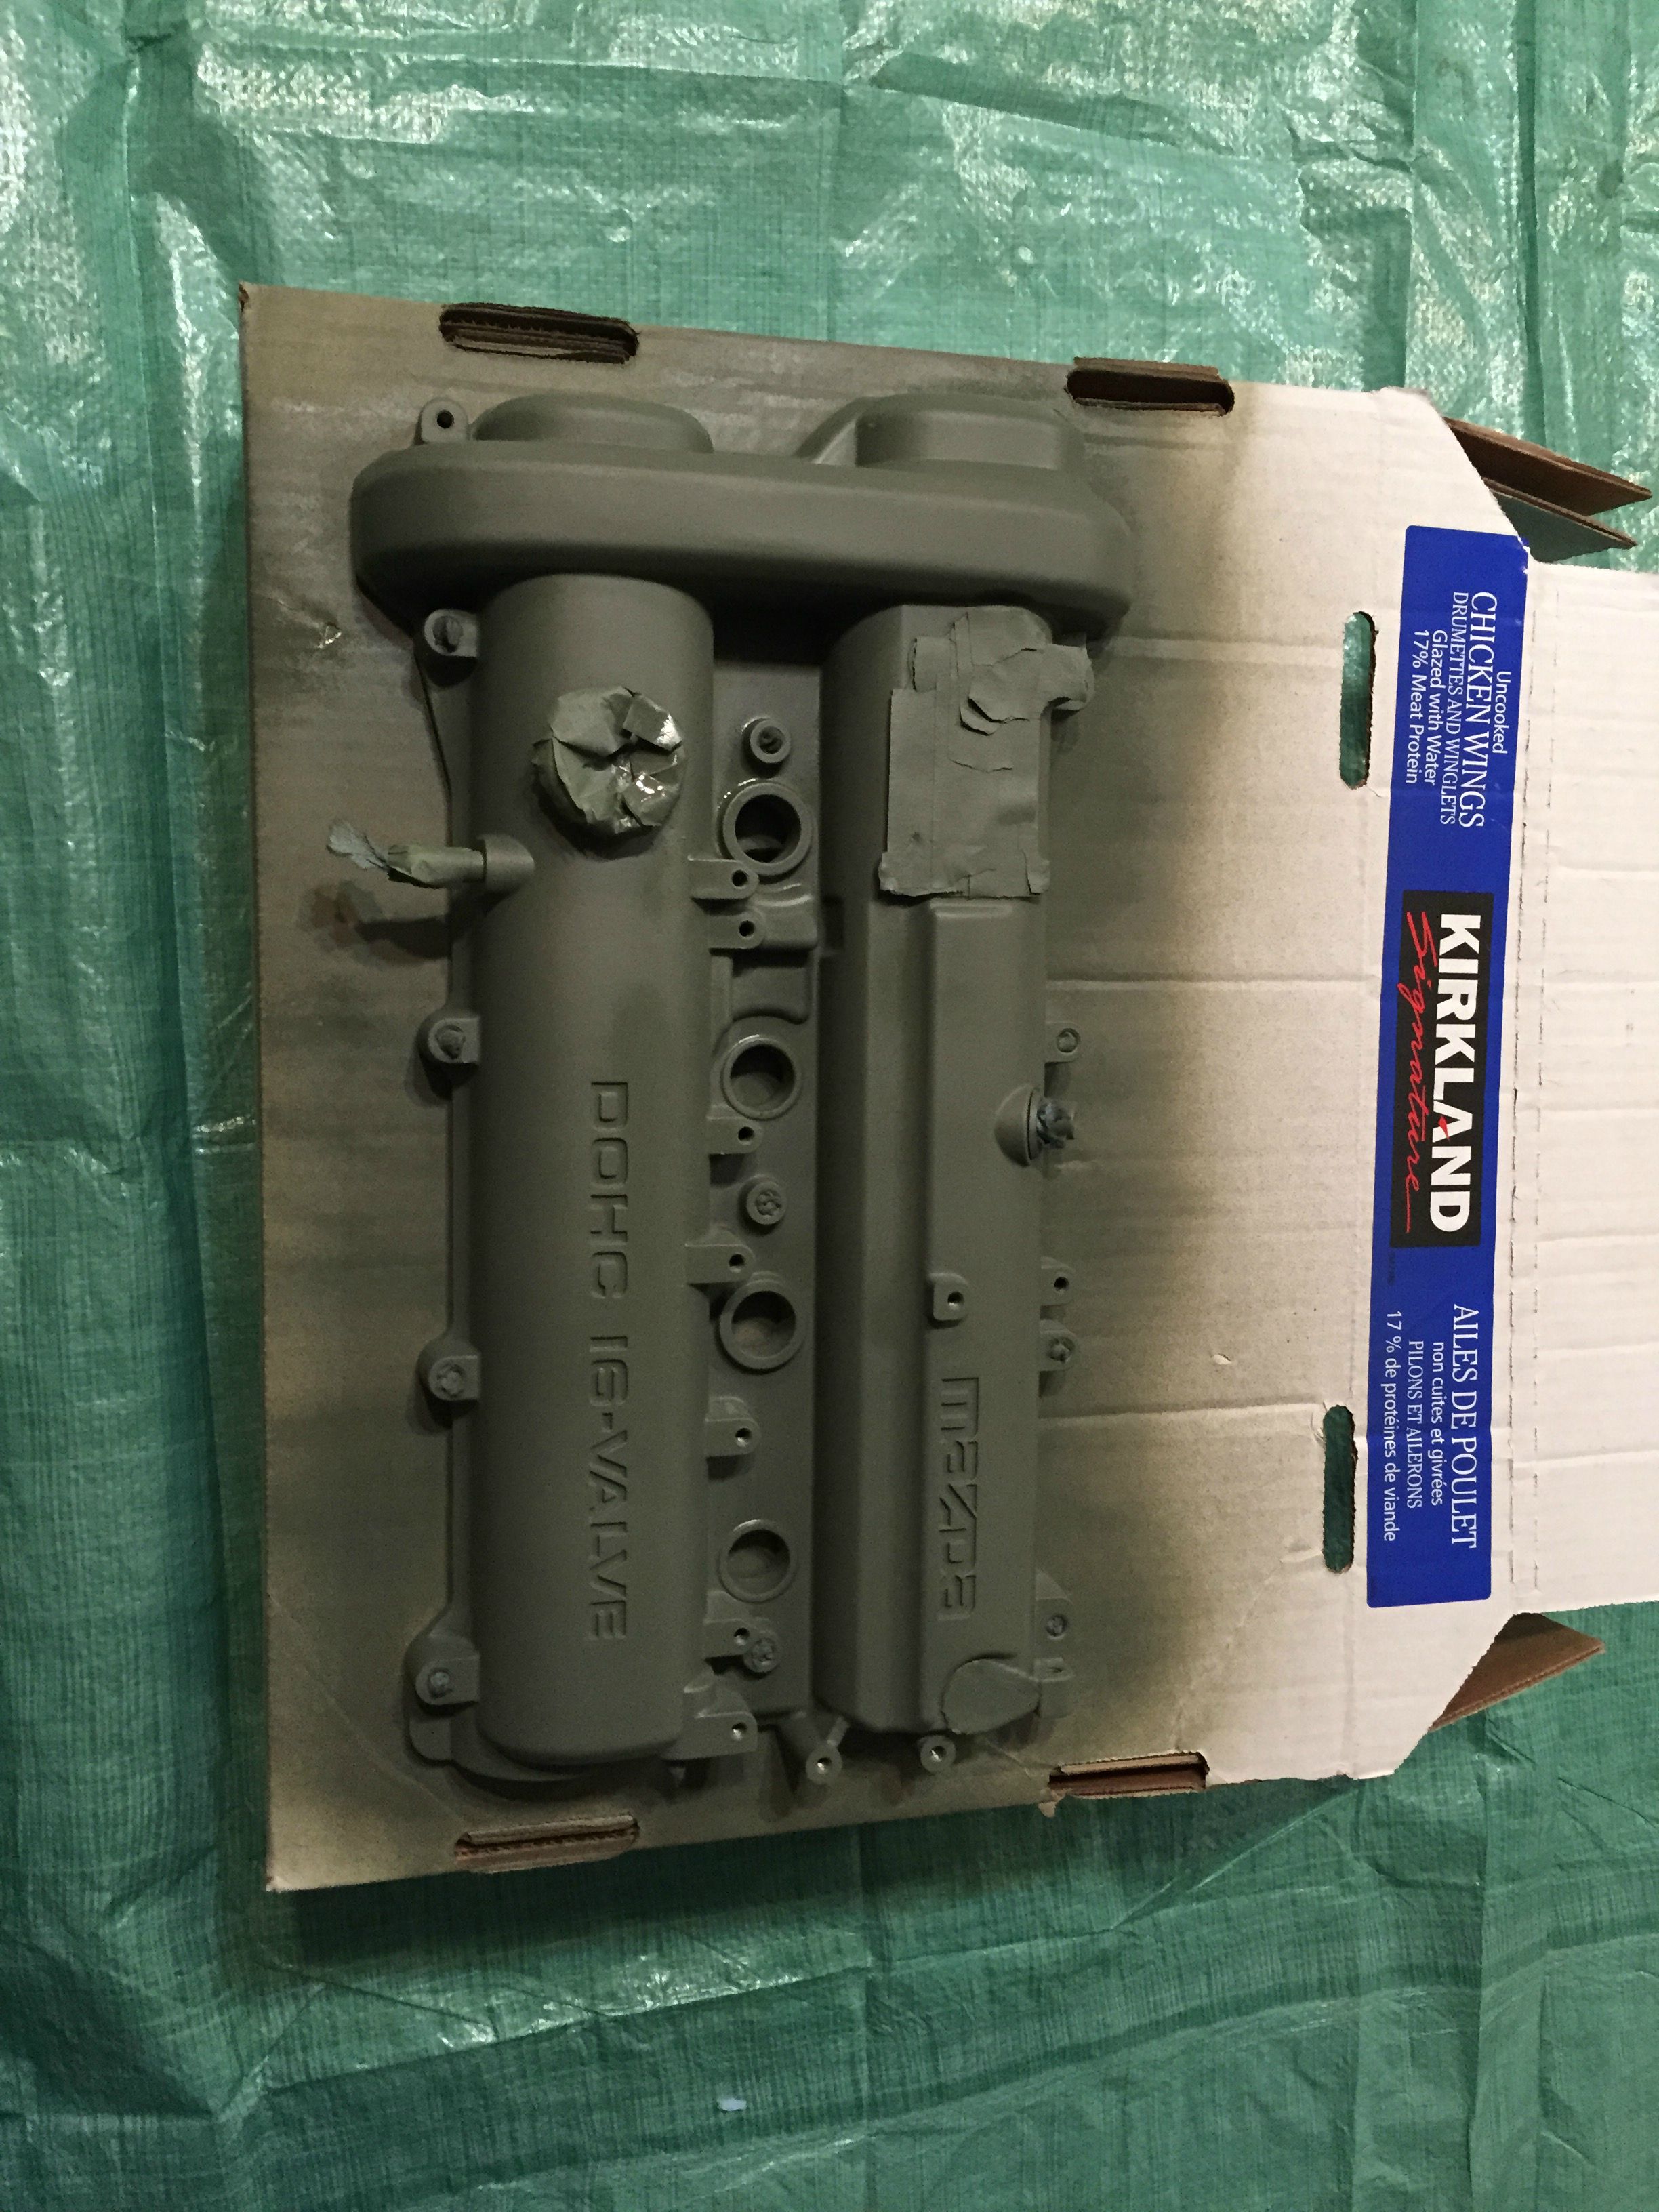
I used a wire brush to get most of the crud off, followed by 800 grit sand paper. If I were to do this again, I would use something like 400, then maybe 800. But 800 is definitely too fine a paper to start with. Either way, I'm happy with my results after spending 2-3 hours on the sanding. The priming was pretty straight forward. Now I'm allowing it to dry before I hit it with a wrinkle red spray in the morning.
Fab9 COPs
OG san 15x8 w/ DZ102 wheels
I'll be doing a road trip down to the states to pickup all my parts on Friday and commence the turbo build.. for now.. I decided to spice up the engine and paint the valve cover and run a compression test.
Compression test results: 160/150/150/160, all checks out. Happy about that.
I also figured I should rip apart my MS3 and see whats up with my idle duty. At the moment, if I test run my idle valve, the minimum value to get any RPM increase is 75%, the max is 100%. This problem appears concomitant to my problem with plunging RPMs when the engine is cold. I currently need to rev to start the car and keep the throttle down to drive it while its cold. Once it hits around 40C, then I'm good to go. I talked to Reverent about this problem and was told to checkout the diode with the stripe at the bottom of it (not marked). I opened the MS3 and found that the diode was in the proper place. But..
The fuse is all white, what's up with that? I've never seen a white fuse before, but then again, I've worked on a total of 1 circuit board before, so I don't have any expertise on this. Anyone know anything about that?
Now for the valve painting.. Removed the few hundred bolts keeping the valve down, at first I thought I had to remove the oil line, but ended up maneuvering the valve cover off without doing so. I took the time to block off all the holes with a shop towel so they don't get painted.
I used a wire brush to get most of the crud off, followed by 800 grit sand paper. If I were to do this again, I would use something like 400, then maybe 800. But 800 is definitely too fine a paper to start with. Either way, I'm happy with my results after spending 2-3 hours on the sanding. The priming was pretty straight forward. Now I'm allowing it to dry before I hit it with a wrinkle red spray in the morning.
Reply
0
0
Thread Starter
Junior Member
Joined: Jan 2012
Posts: 151
Total Cats: -12
From: Calgary, AB
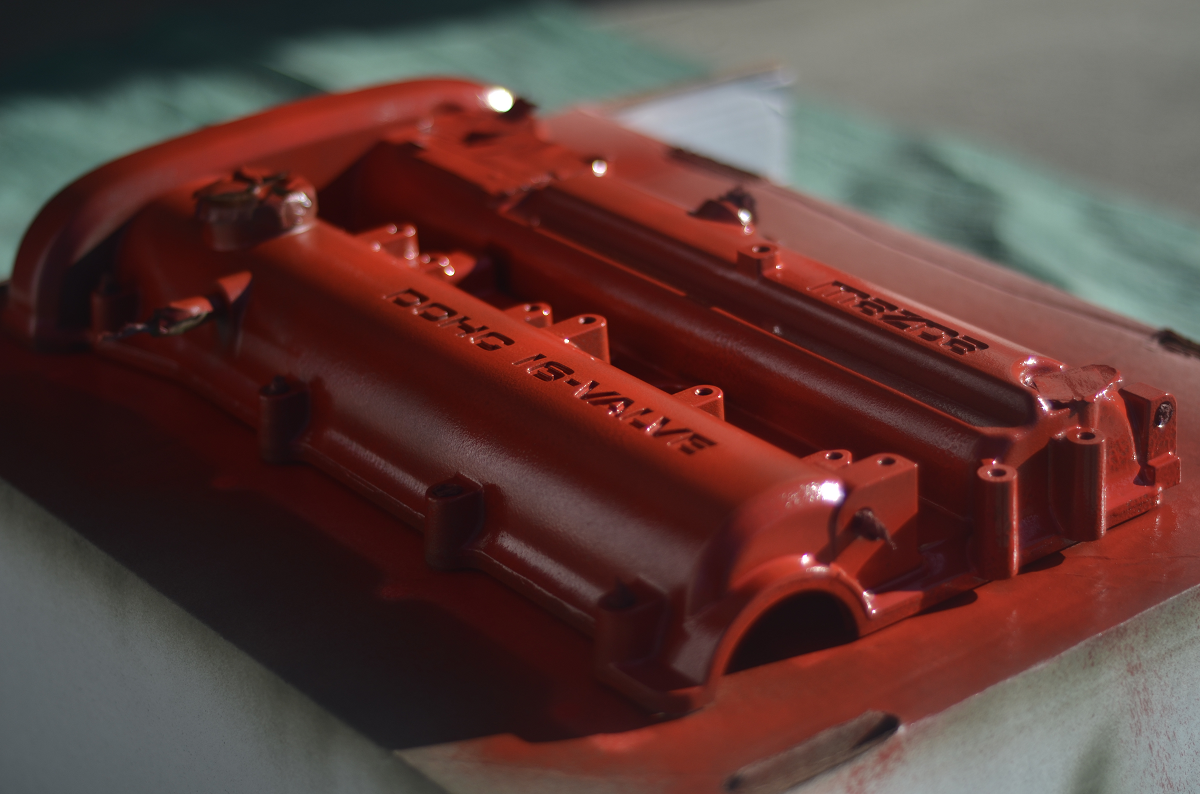
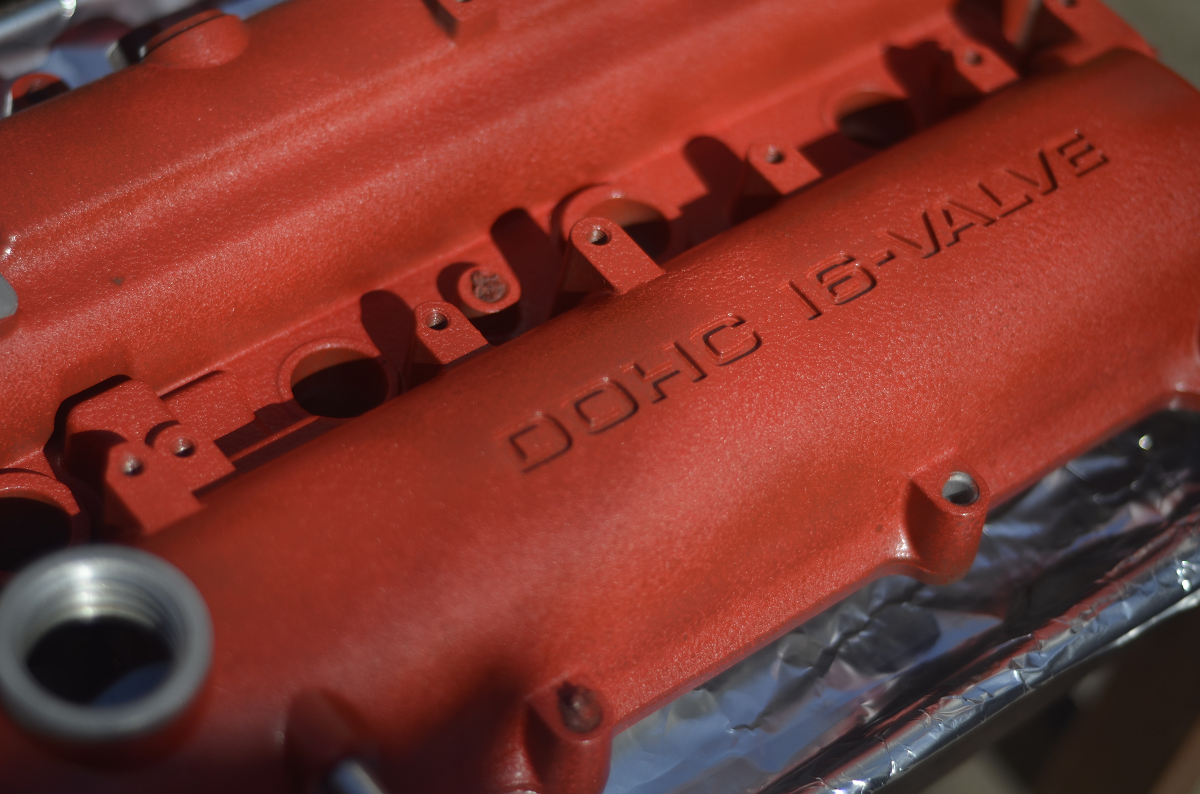
Just did my valve cover with some wrinkle red.. Wet/Dry photos! Turned out great!
After 3 coats sprayed from different angles, I stuck it in an oven at 100C for 30 mins. Turned the oven off and let it cool down in the oven, drying temperature probably around 30C after that (in oven). Takes 24 hours to dry and wrinkle like so.
After 3 coats sprayed from different angles, I stuck it in an oven at 100C for 30 mins. Turned the oven off and let it cool down in the oven, drying temperature probably around 30C after that (in oven). Takes 24 hours to dry and wrinkle like so.
Last edited by Chowcow; Apr 12, 2015 at 10:24 PM.
Reply
0
0

Thread
Thread Starter
Forum
Replies
Last Post


