Sixshooter's Slow Torture™ Build Thread
 03-27-2016, 10:20 PM
#541
Moderator


Thread Starter
iTrader: (12)
Join Date: Nov 2008
Location: Tampa, Florida
Posts: 20,660
Total Cats: 3,011
Good times. Thanks for coming out. It's always more fun when you've got buddies out there. It's even better when they are driving in the same session with you, so hurry up and get out there!

Reply
 0
0

0
09-19-2016, 01:29 PM
#542
Moderator
Thread Starter
iTrader: (12)
Join Date: Nov 2008
Location: Tampa, Florida
Posts: 20,660
Total Cats: 3,011
I bought something from Good-Win Racing last week and installed it on Saturday morning. Many more feels. Much more tight. And less money than a Miata Roadster group buy. The six speed gearbox is now tolerable!
EDIT: And I turned the boost up to 20.
EDIT: And I turned the boost up to 20.
Last edited by sixshooter; 09-19-2016 at 03:19 PM.
Reply
1
1

 09-22-2016, 12:40 AM
#547
MR-SSK-NB1-6-T-A-BR - MiataRoadster shifter kits - MiataRoadster - High-performance customer service...and parts for Roadsters
Reply
0
0
09-22-2016, 07:58 AM
#548
Moderator
Thread Starter
iTrader: (12)
Join Date: Nov 2008
Location: Tampa, Florida
Posts: 20,660
Total Cats: 3,011
MR put them on sale this month but I got mine last month when Good-Win Racing was the cheaper option. I drove the car a few hours yesterday, mostly city driving. Shifter is good.
I got the hardtop glass and side windows lightly tinted and got 99.x% UV protection because harnesses and seat covers are fading. I kept it light for the sake of giving hand signals on track.
I got the hardtop glass and side windows lightly tinted and got 99.x% UV protection because harnesses and seat covers are fading. I kept it light for the sake of giving hand signals on track.
Reply
0
0
11-13-2016, 08:48 AM
#549
Newb

Join Date: Sep 2016
Posts: 36
Total Cats: -41
This is so perfect that I ran out to the Subaru dealer yesterday and got a set. By far the cheapest and best integrated way of venting the hood. How did you map our and mark where you cut? and could you post a side view under hood shot (from the drivers side to passenger side) I want to get a visual how much the come down into the area below the hood.
I think I understand how you trimmed the plastic in the back so they basically slide in and down with the shelf on the vent going under the sheet metal of the hood.
Chris Rummel
I think I understand how you trimmed the plastic in the back so they basically slide in and down with the shelf on the vent going under the sheet metal of the hood.
Chris Rummel
Reply
0
0
11-14-2016, 03:09 PM
#550
Moderator
Thread Starter
iTrader: (12)
Join Date: Nov 2008
Location: Tampa, Florida
Posts: 20,660
Total Cats: 3,011
I eyeballed and measured. It needed to drain water between radiator and pulleys. I removed the screens because they lessen flow. I glued under the edges to retain them temporarily and never went back to do it right. The correct way would be taking the hood off the car and turning it over then applying industrial black adhesive to the underside. I'll fix it correctly when I get ready to paint the car.
Separation and location was all done by eye and with a tape measure and pencil. I took no consideration of the underhood bracing when locating them. I wanted them to be where I wanted them.
I may have posted all of the pics I have, but I'll upload everything I have from my phone in a minute.
Separation and location was all done by eye and with a tape measure and pencil. I took no consideration of the underhood bracing when locating them. I wanted them to be where I wanted them.
I may have posted all of the pics I have, but I'll upload everything I have from my phone in a minute.
Reply
0
0
 11-14-2016, 04:40 PM
#553
Moderator
Thread Starter
iTrader: (12)
Join Date: Nov 2008
Location: Tampa, Florida
Posts: 20,660
Total Cats: 3,011
The modification is a few years old but he was asking for more pictures than I had posted earlier in the build thread. I don't take a lot of pictures of the car because it isn't pretty. It's functional.
Reply
0
0
11-14-2016, 09:17 PM
#554
Newb
Join Date: Sep 2016
Posts: 36
Total Cats: -41
Well you did a hell of a good job with it. Enough to get me out to the dealer to get them. My car is just a street car, so i rather doubt that I need vents like the ones they sell at FM. These are just perfect and they look like they belong there!
Reply
0
0
11-16-2016, 07:58 AM
#555
Newb
Join Date: Sep 2016
Posts: 36
Total Cats: -41
My wife does vinyl work so when I do my vents I plan on having her make a temporary stick on template along with instructions and measurements to make this easier for those who follow. I figure I can sell the template and instructions for like $10 I'll be giving you full props for originating this vent option. again job well done.
Chris Rummel
Chris Rummel
Reply
0
0
11-21-2016, 11:14 AM
#557
Moderator
Thread Starter
iTrader: (12)
Join Date: Nov 2008
Location: Tampa, Florida
Posts: 20,660
Total Cats: 3,011
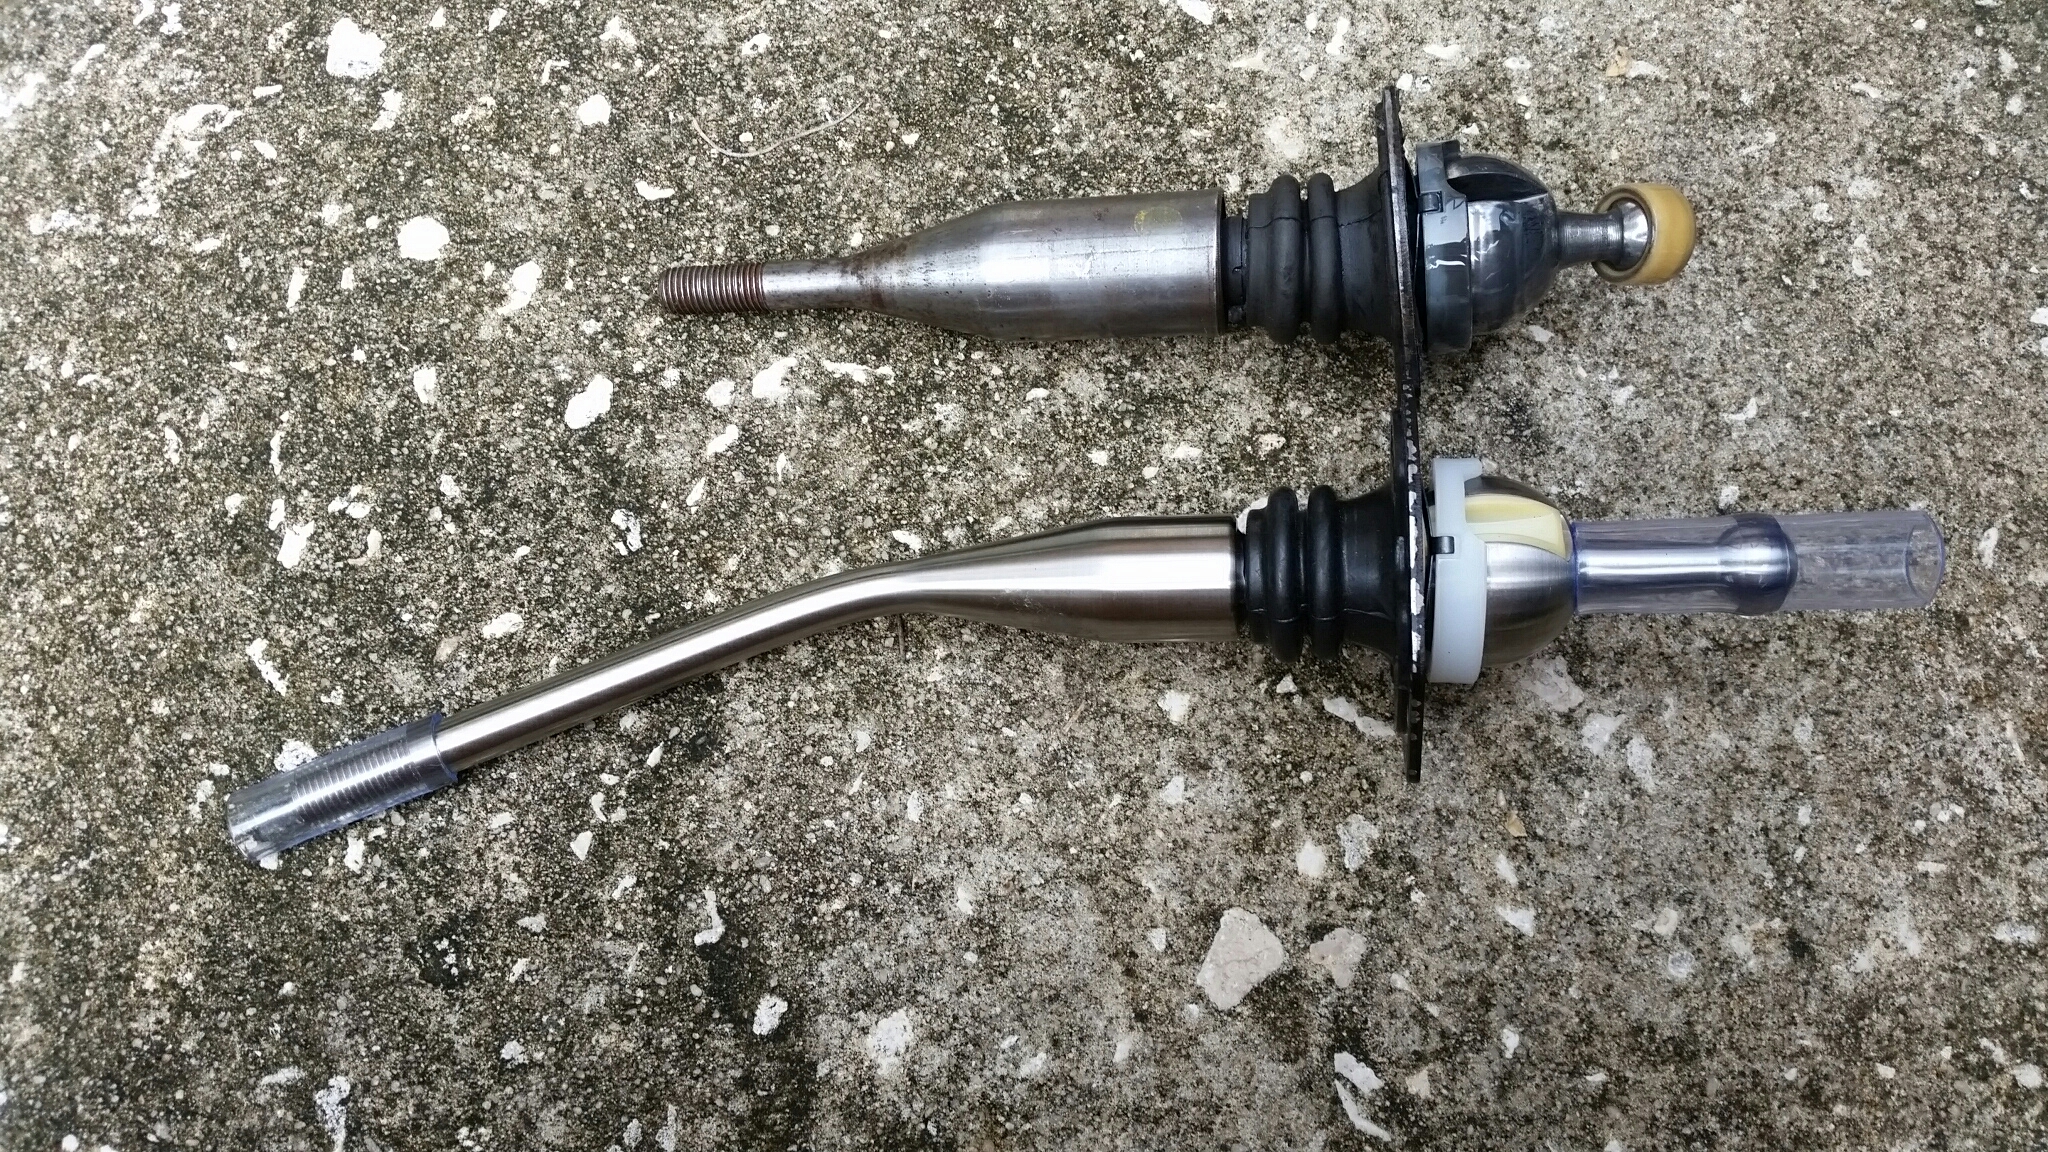
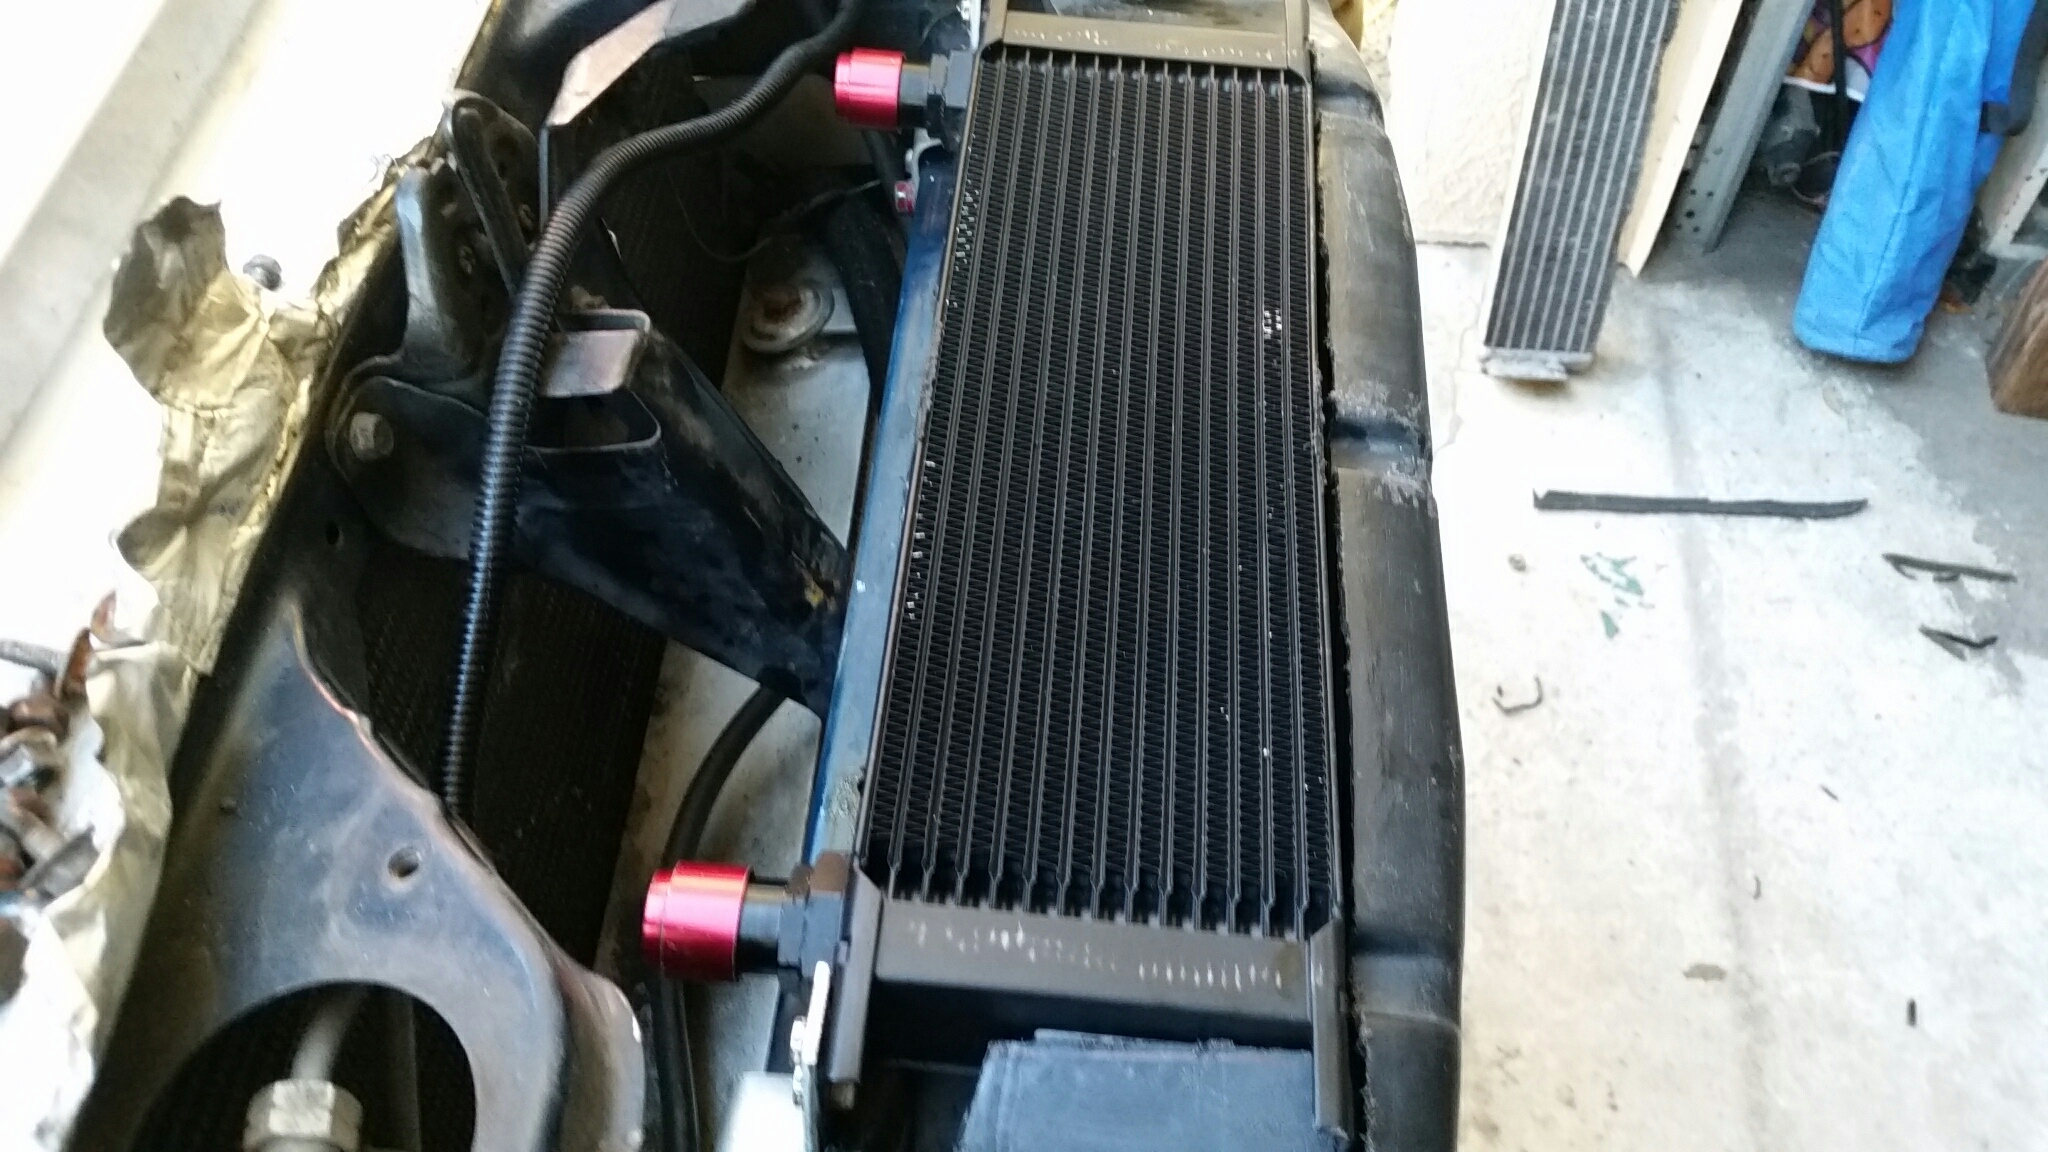
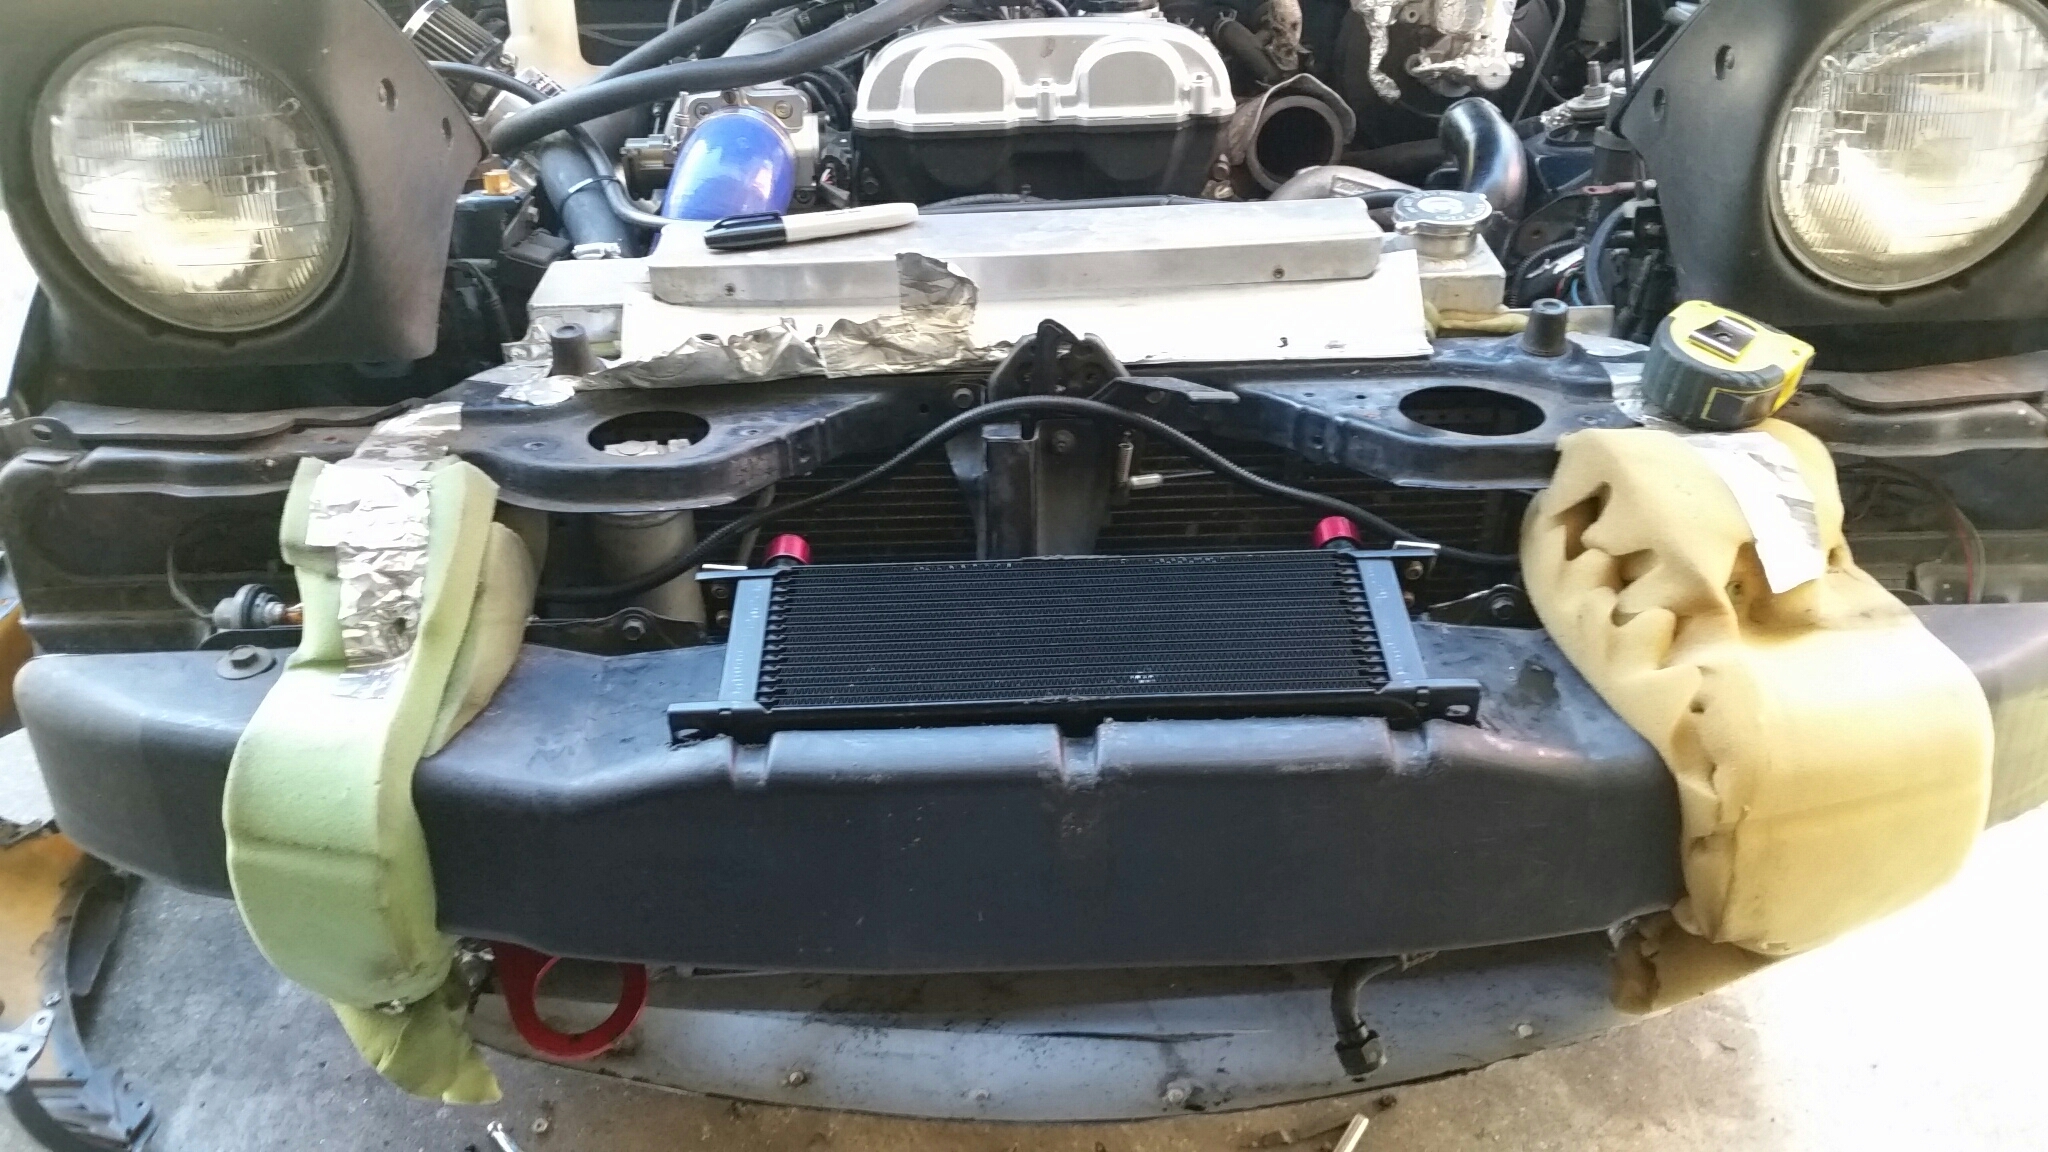
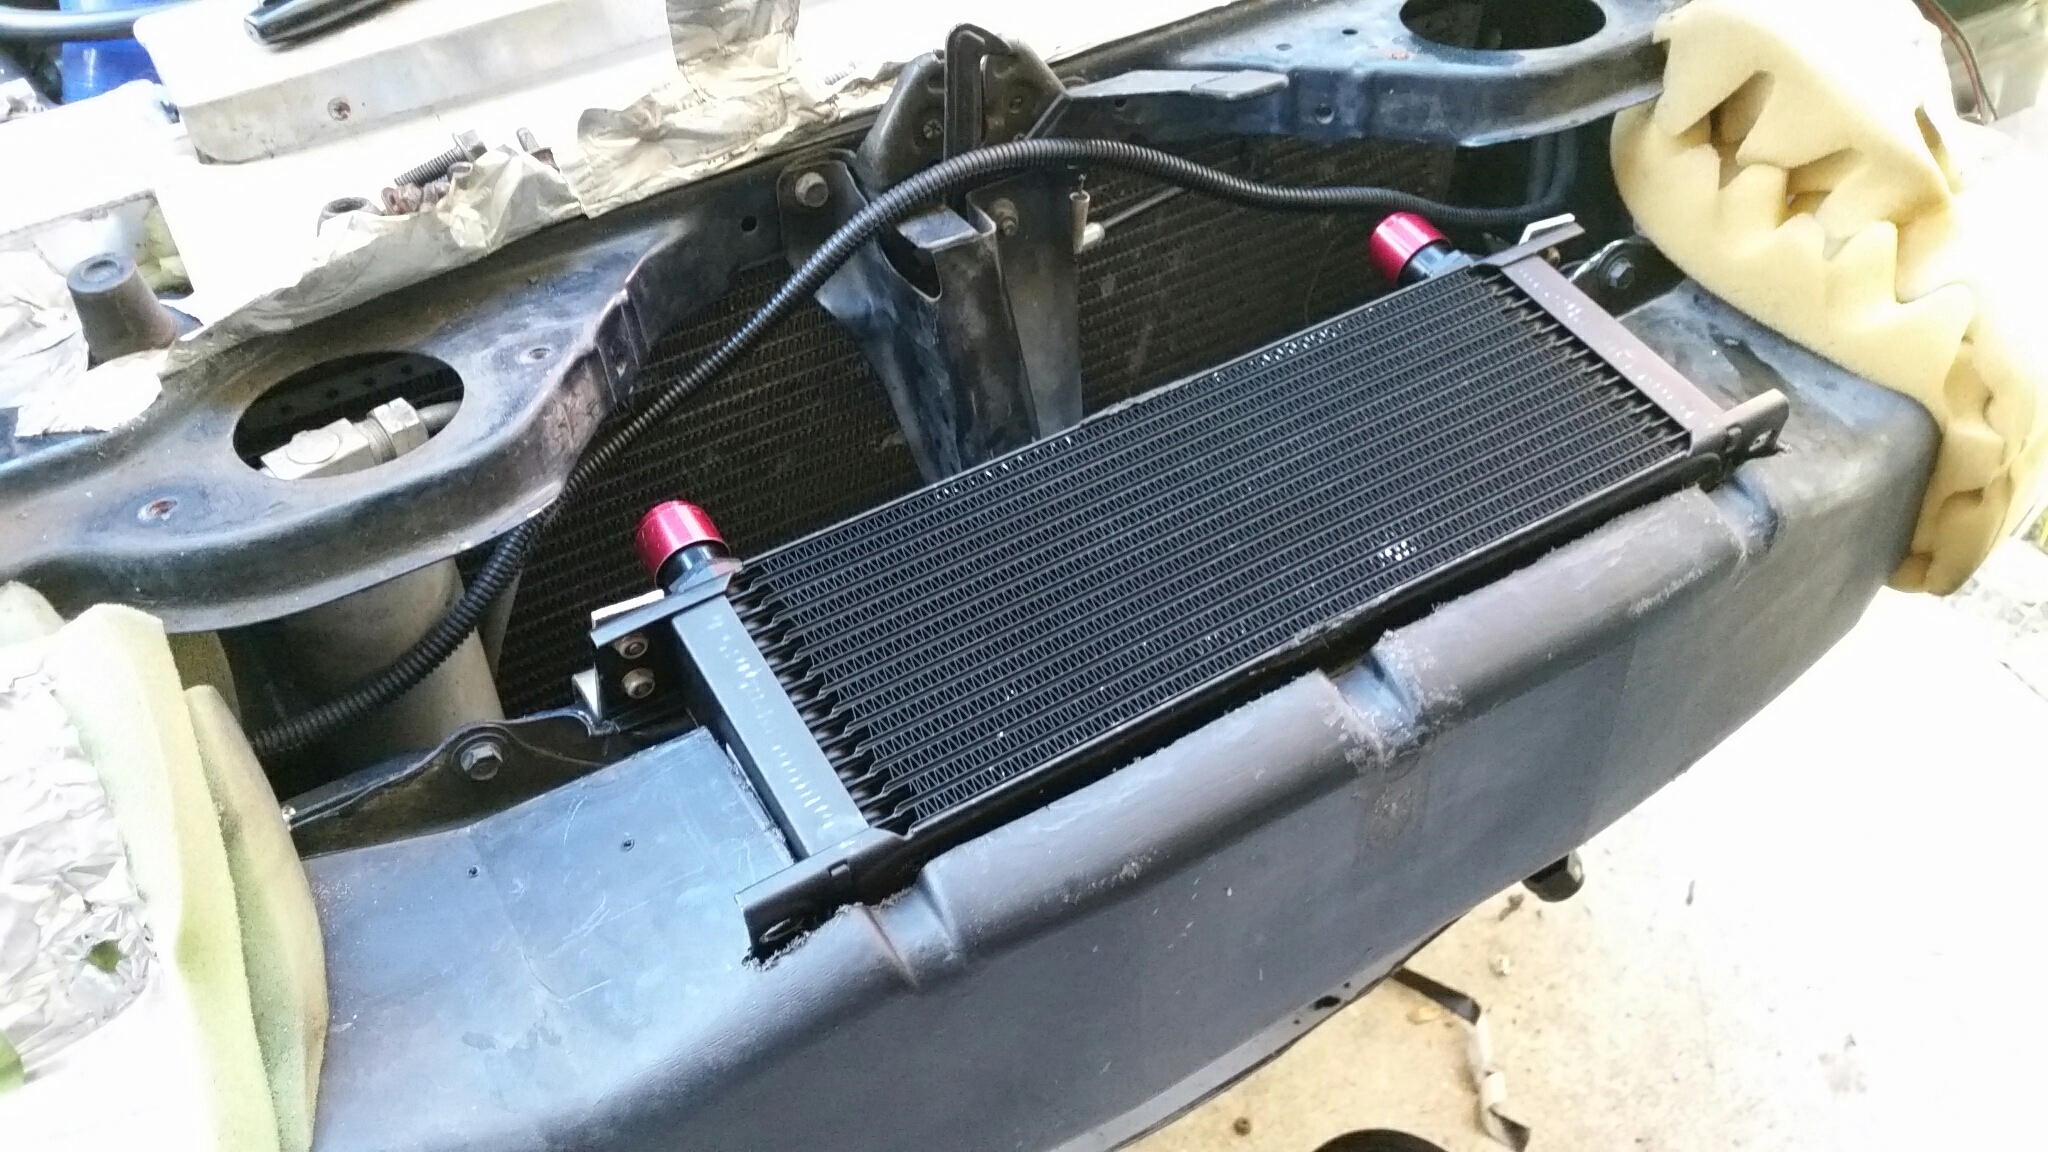
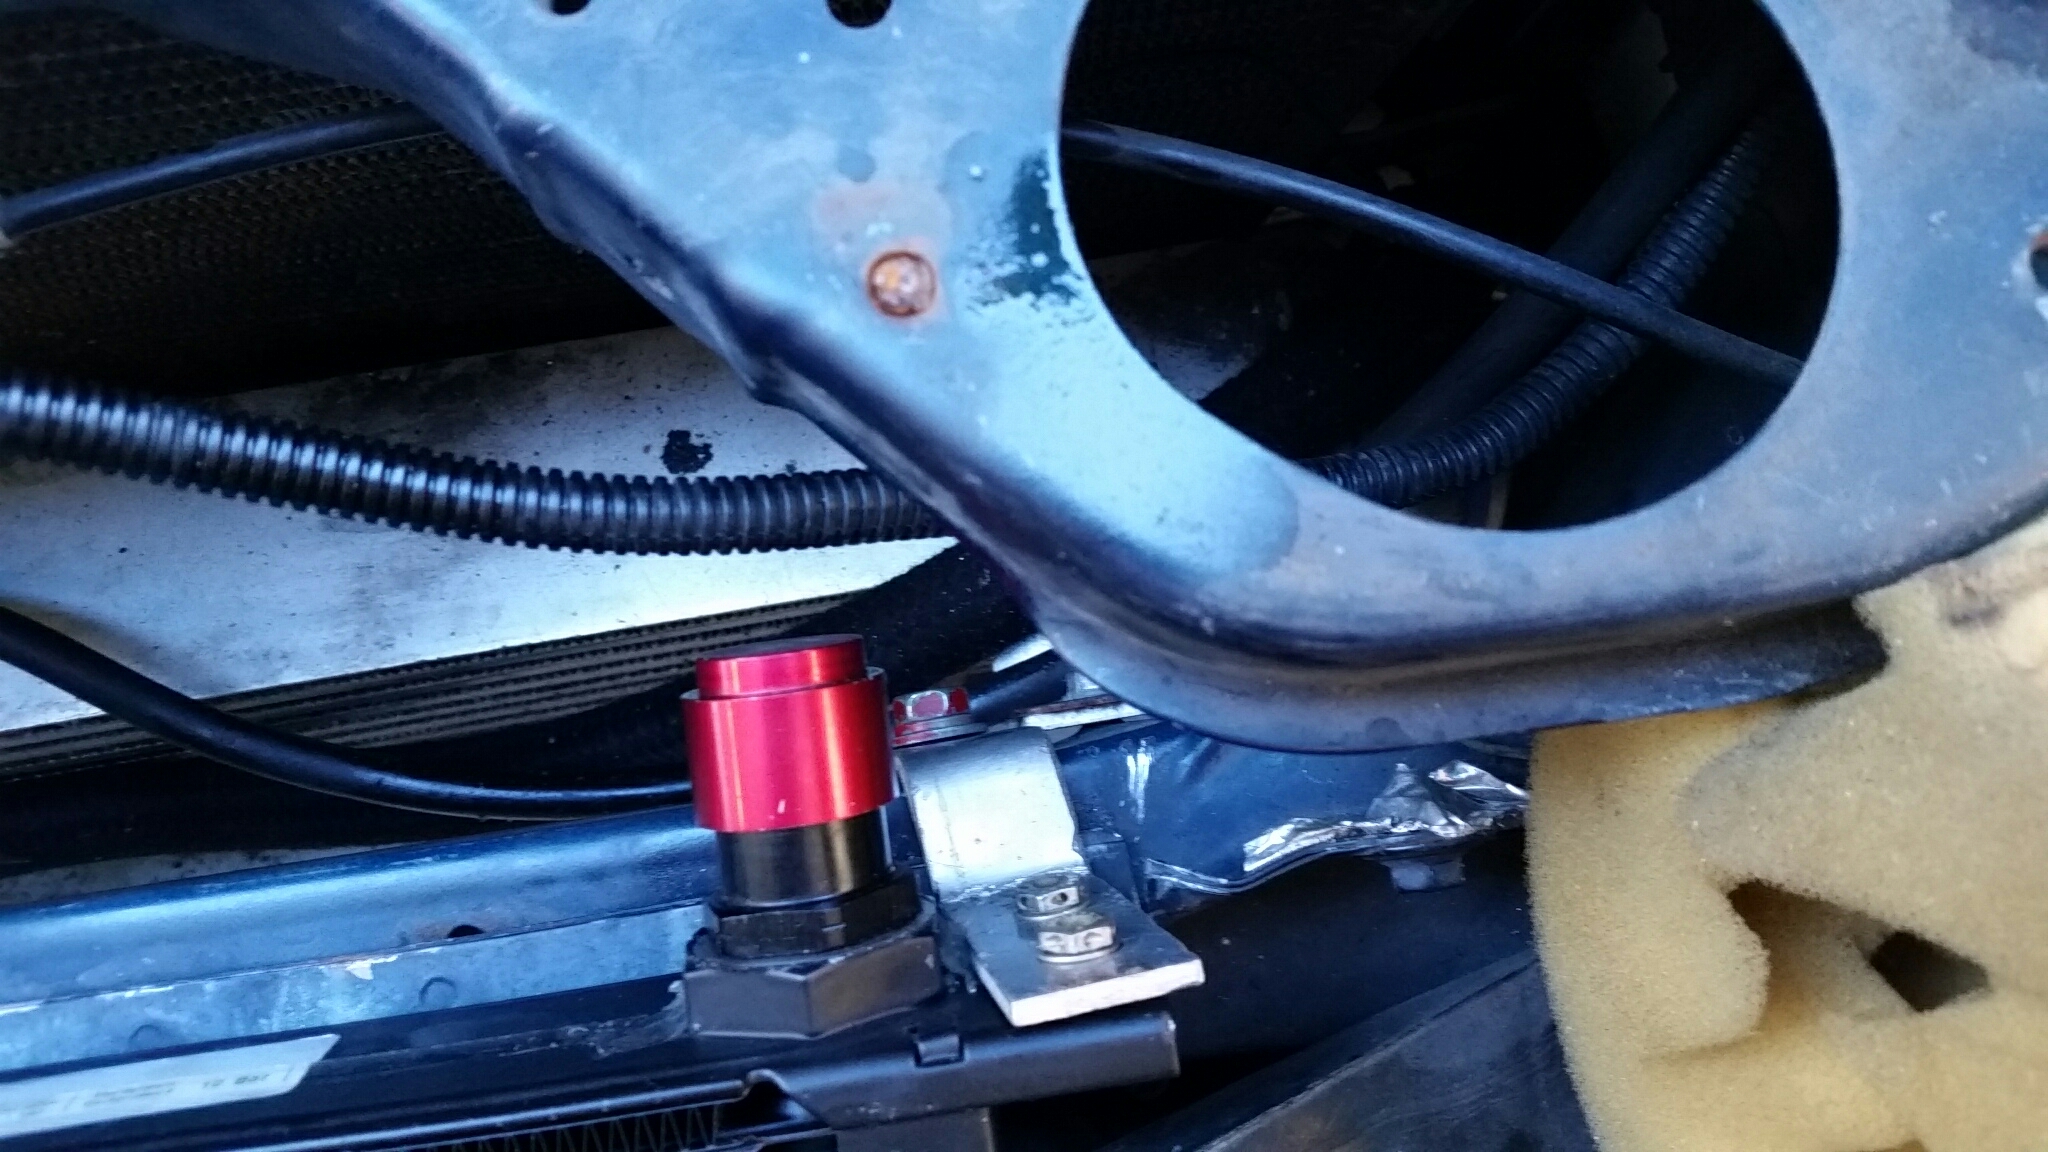
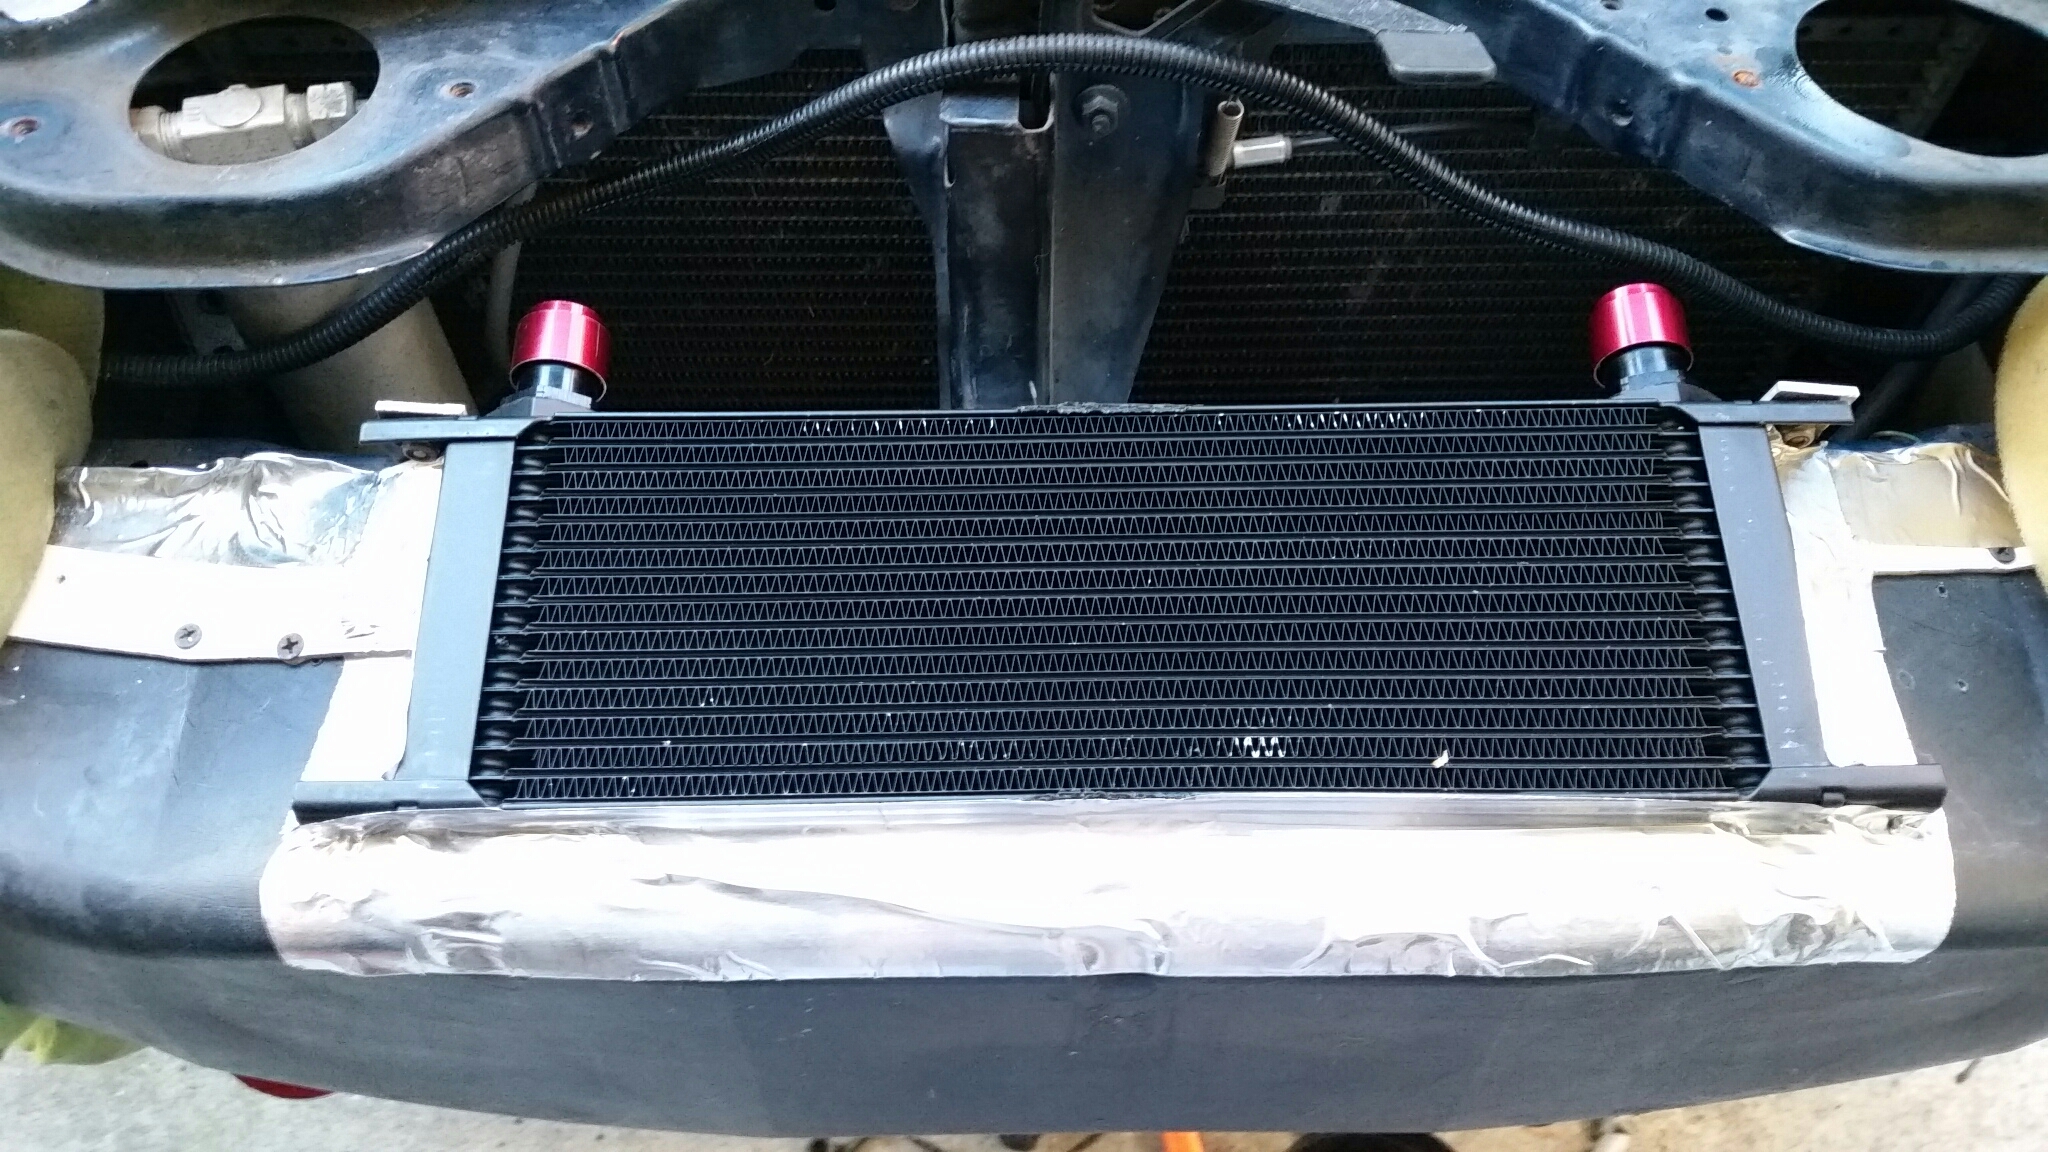
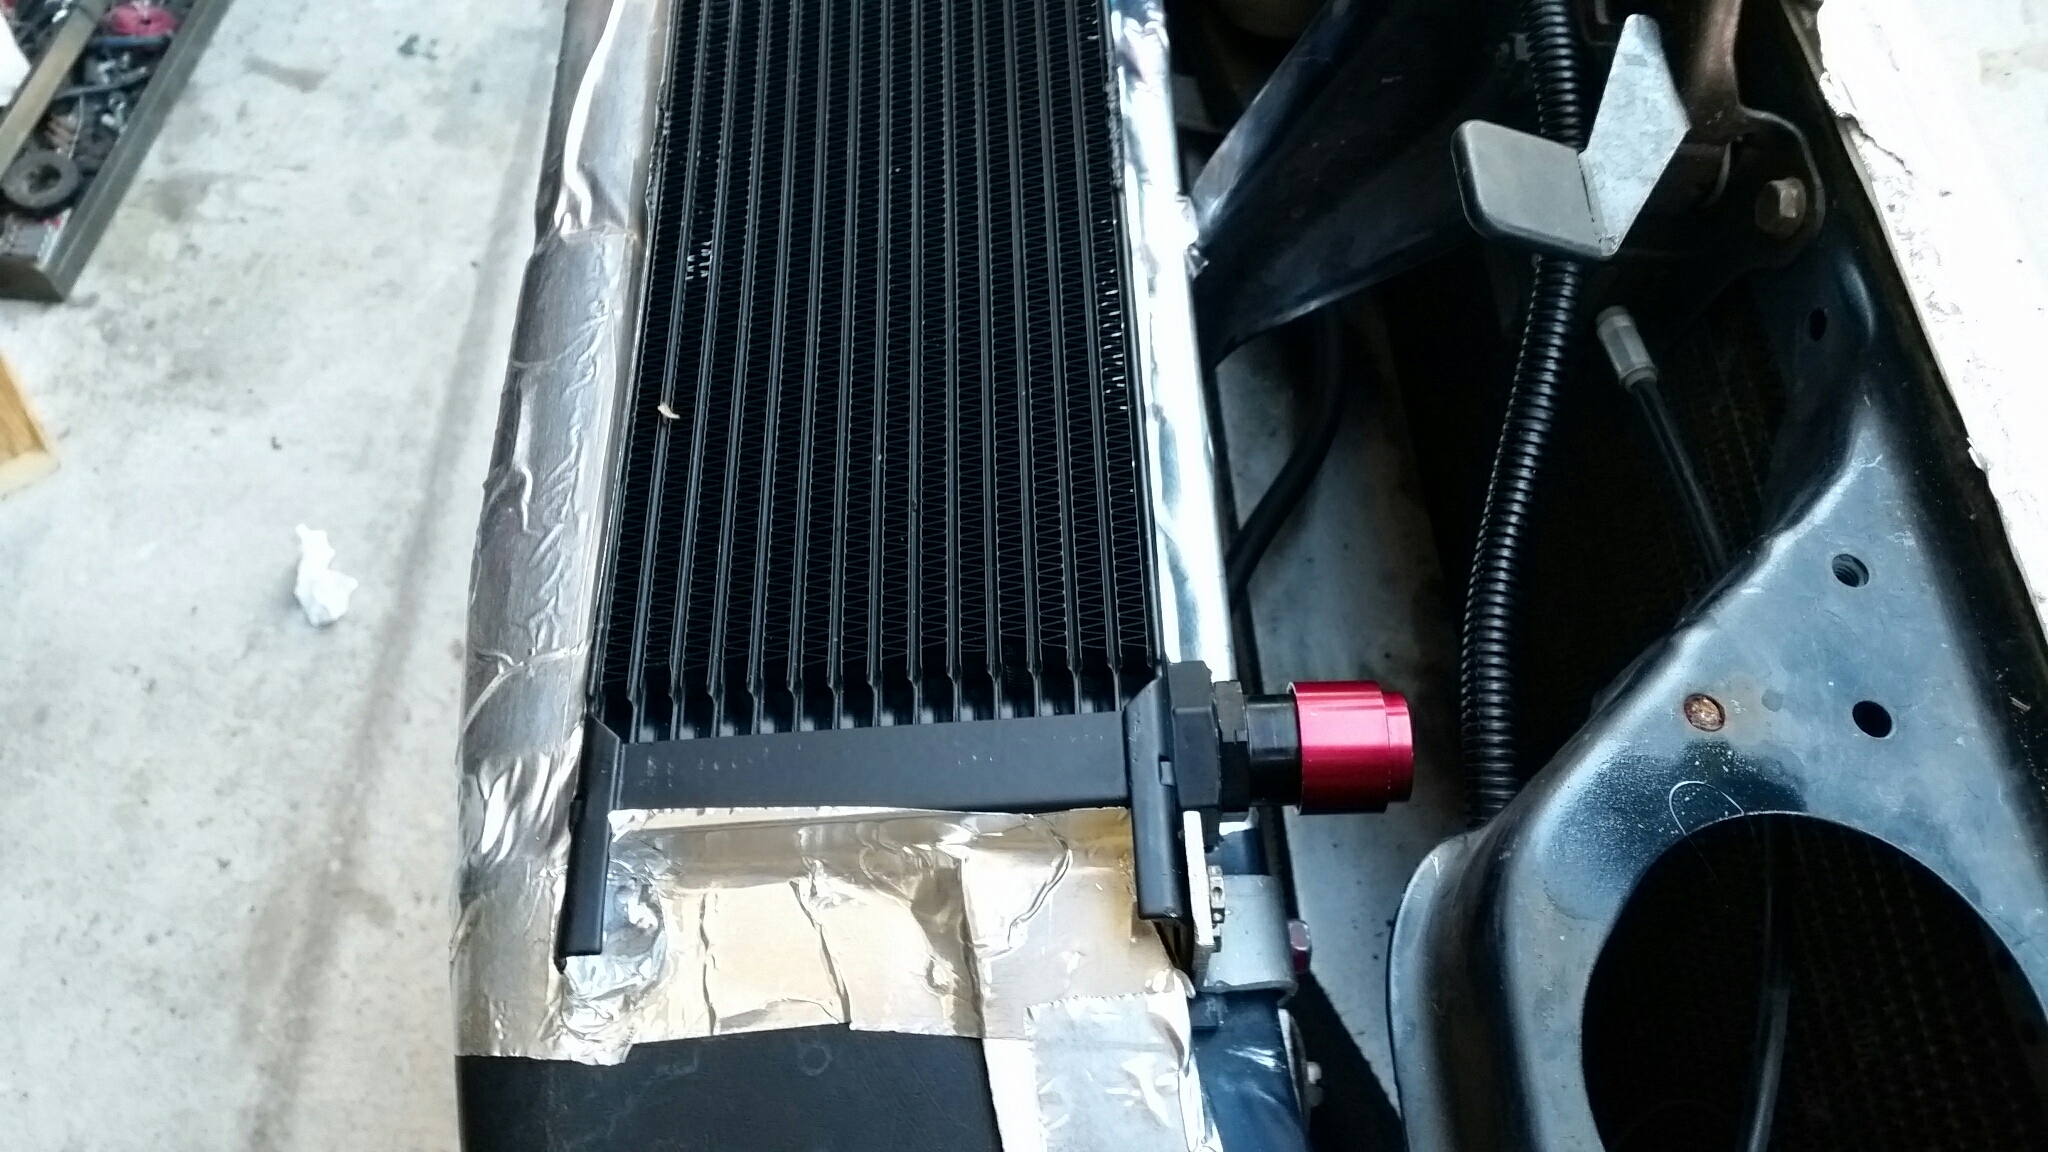
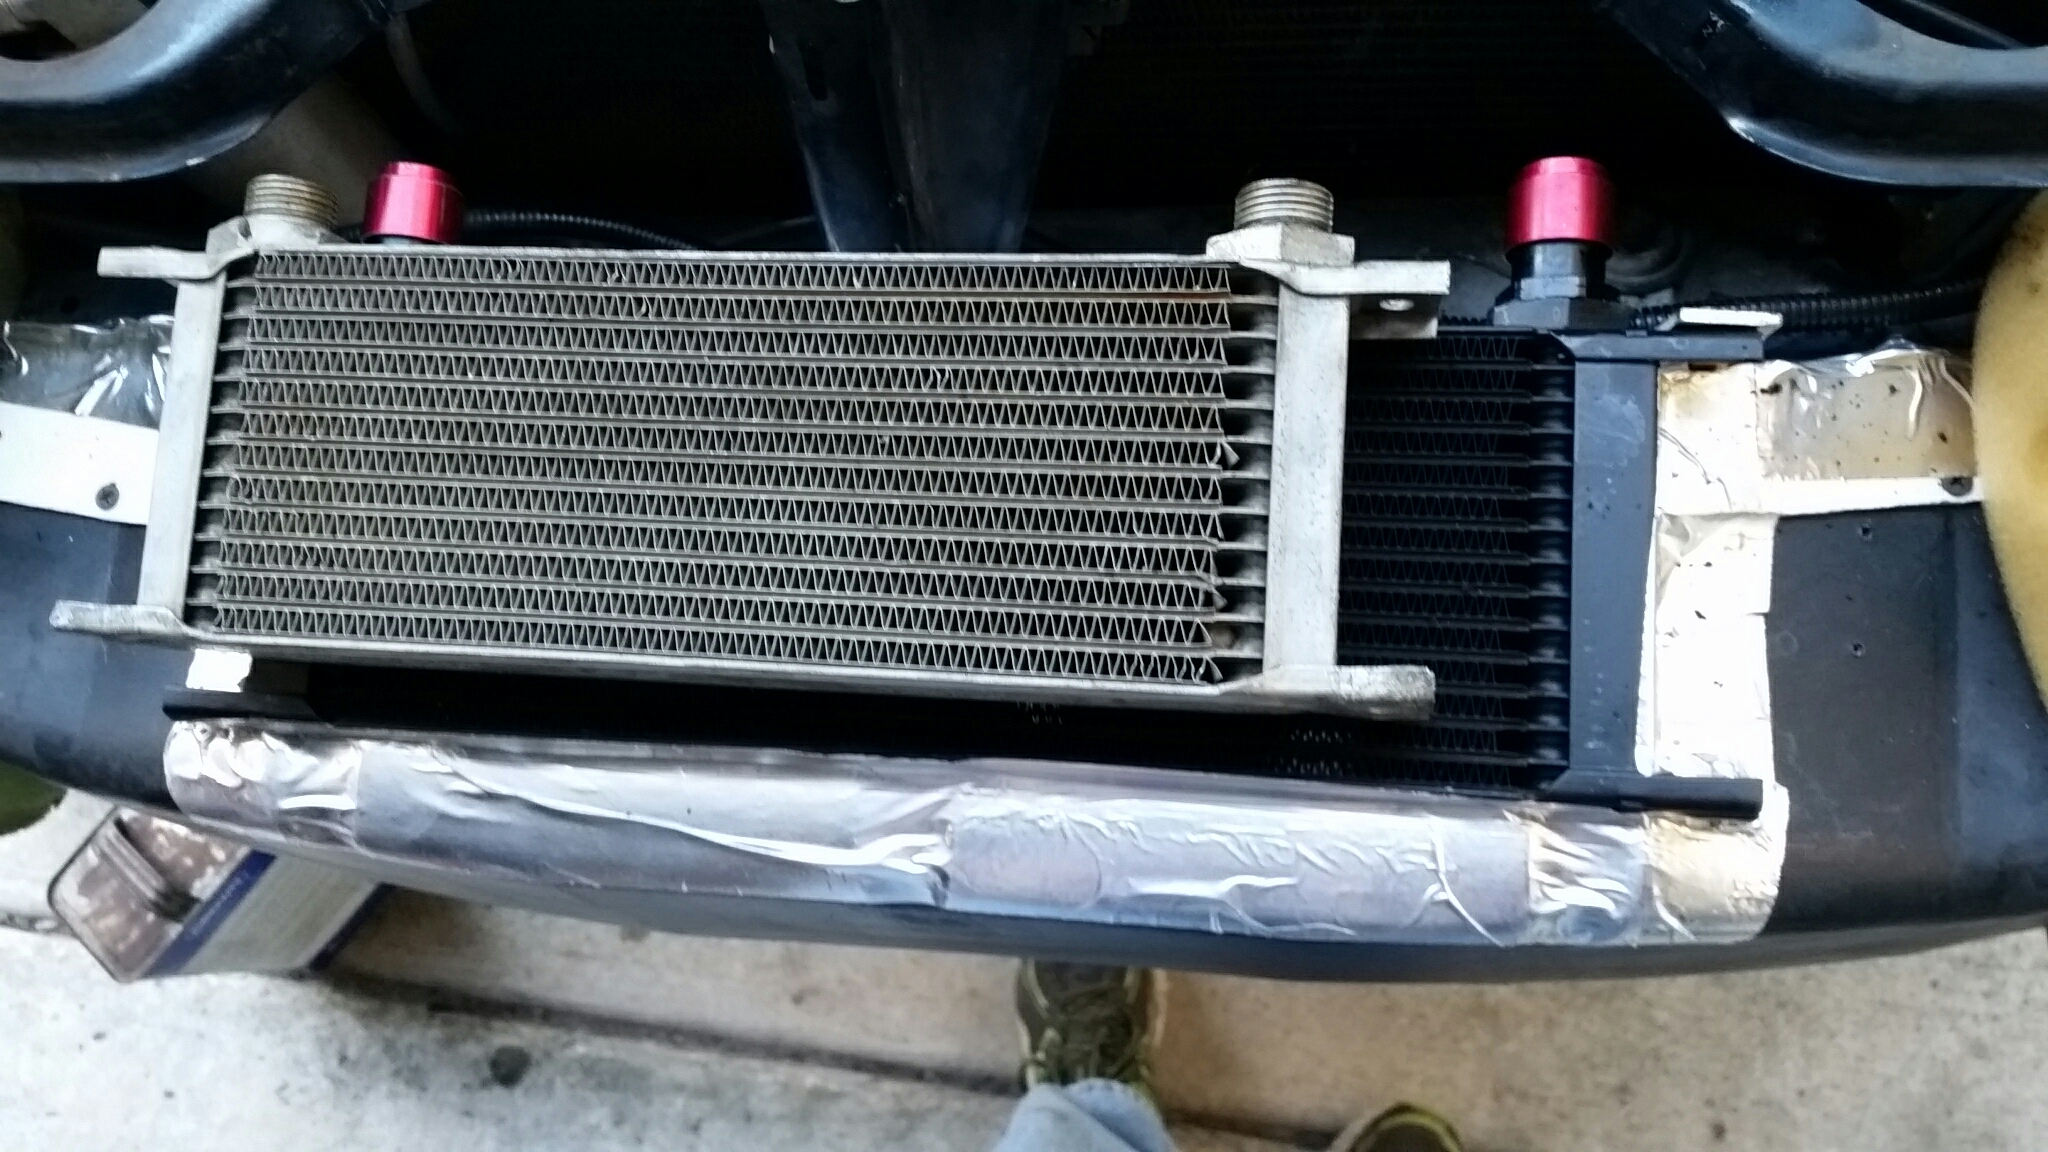
Upgraded to a larger oil cooler. Pic dump.
Old cooler:
New oil cooler is 2.75 inches longer and 2 rows wider.
Old cooler:
New oil cooler is 2.75 inches longer and 2 rows wider.
Last edited by sixshooter; 11-21-2016 at 01:20 PM.
Reply
0
0
11-21-2016, 11:16 AM
#558
Moderator
Thread Starter
iTrader: (12)
Join Date: Nov 2008
Location: Tampa, Florida
Posts: 20,660
Total Cats: 3,011
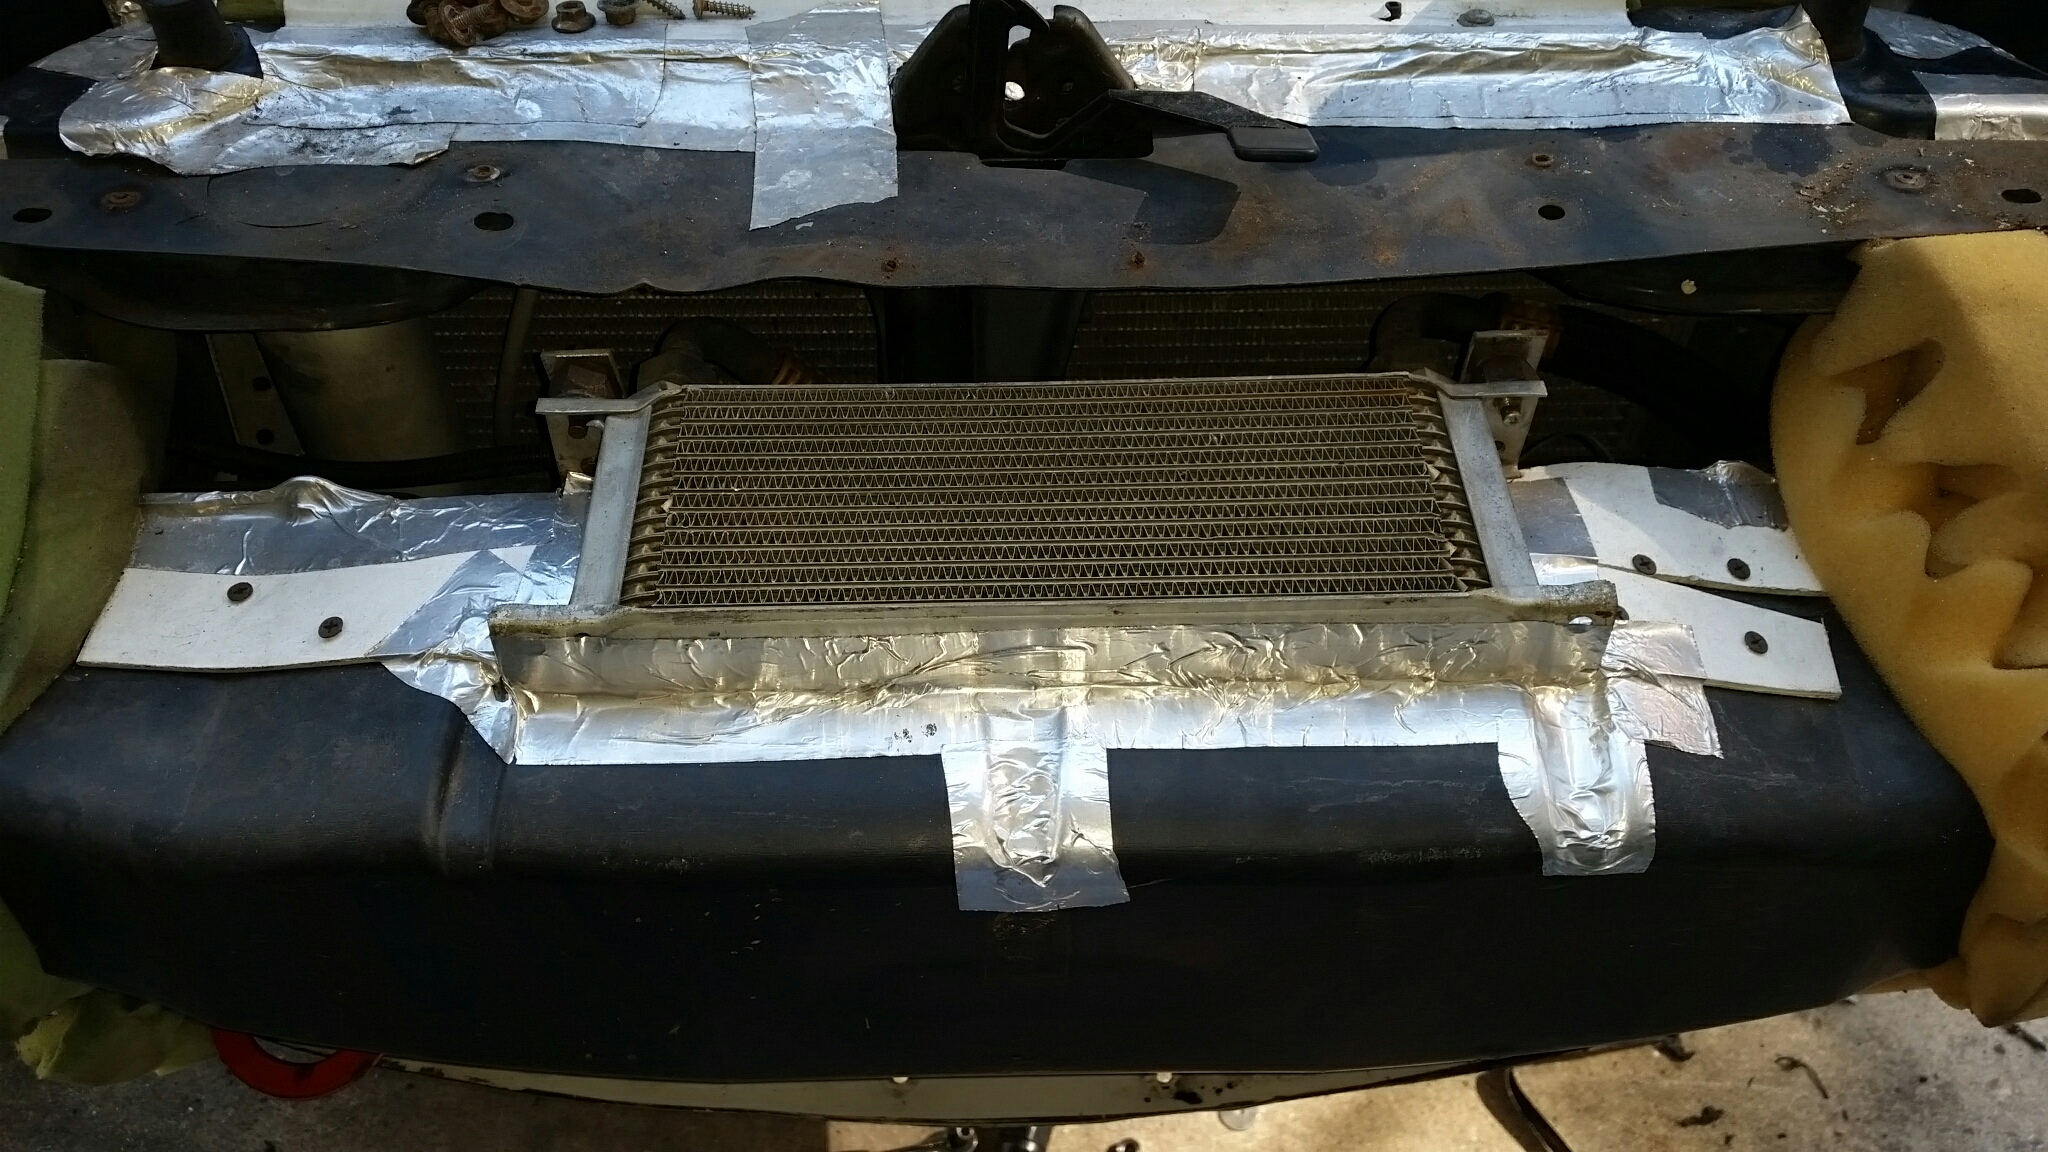
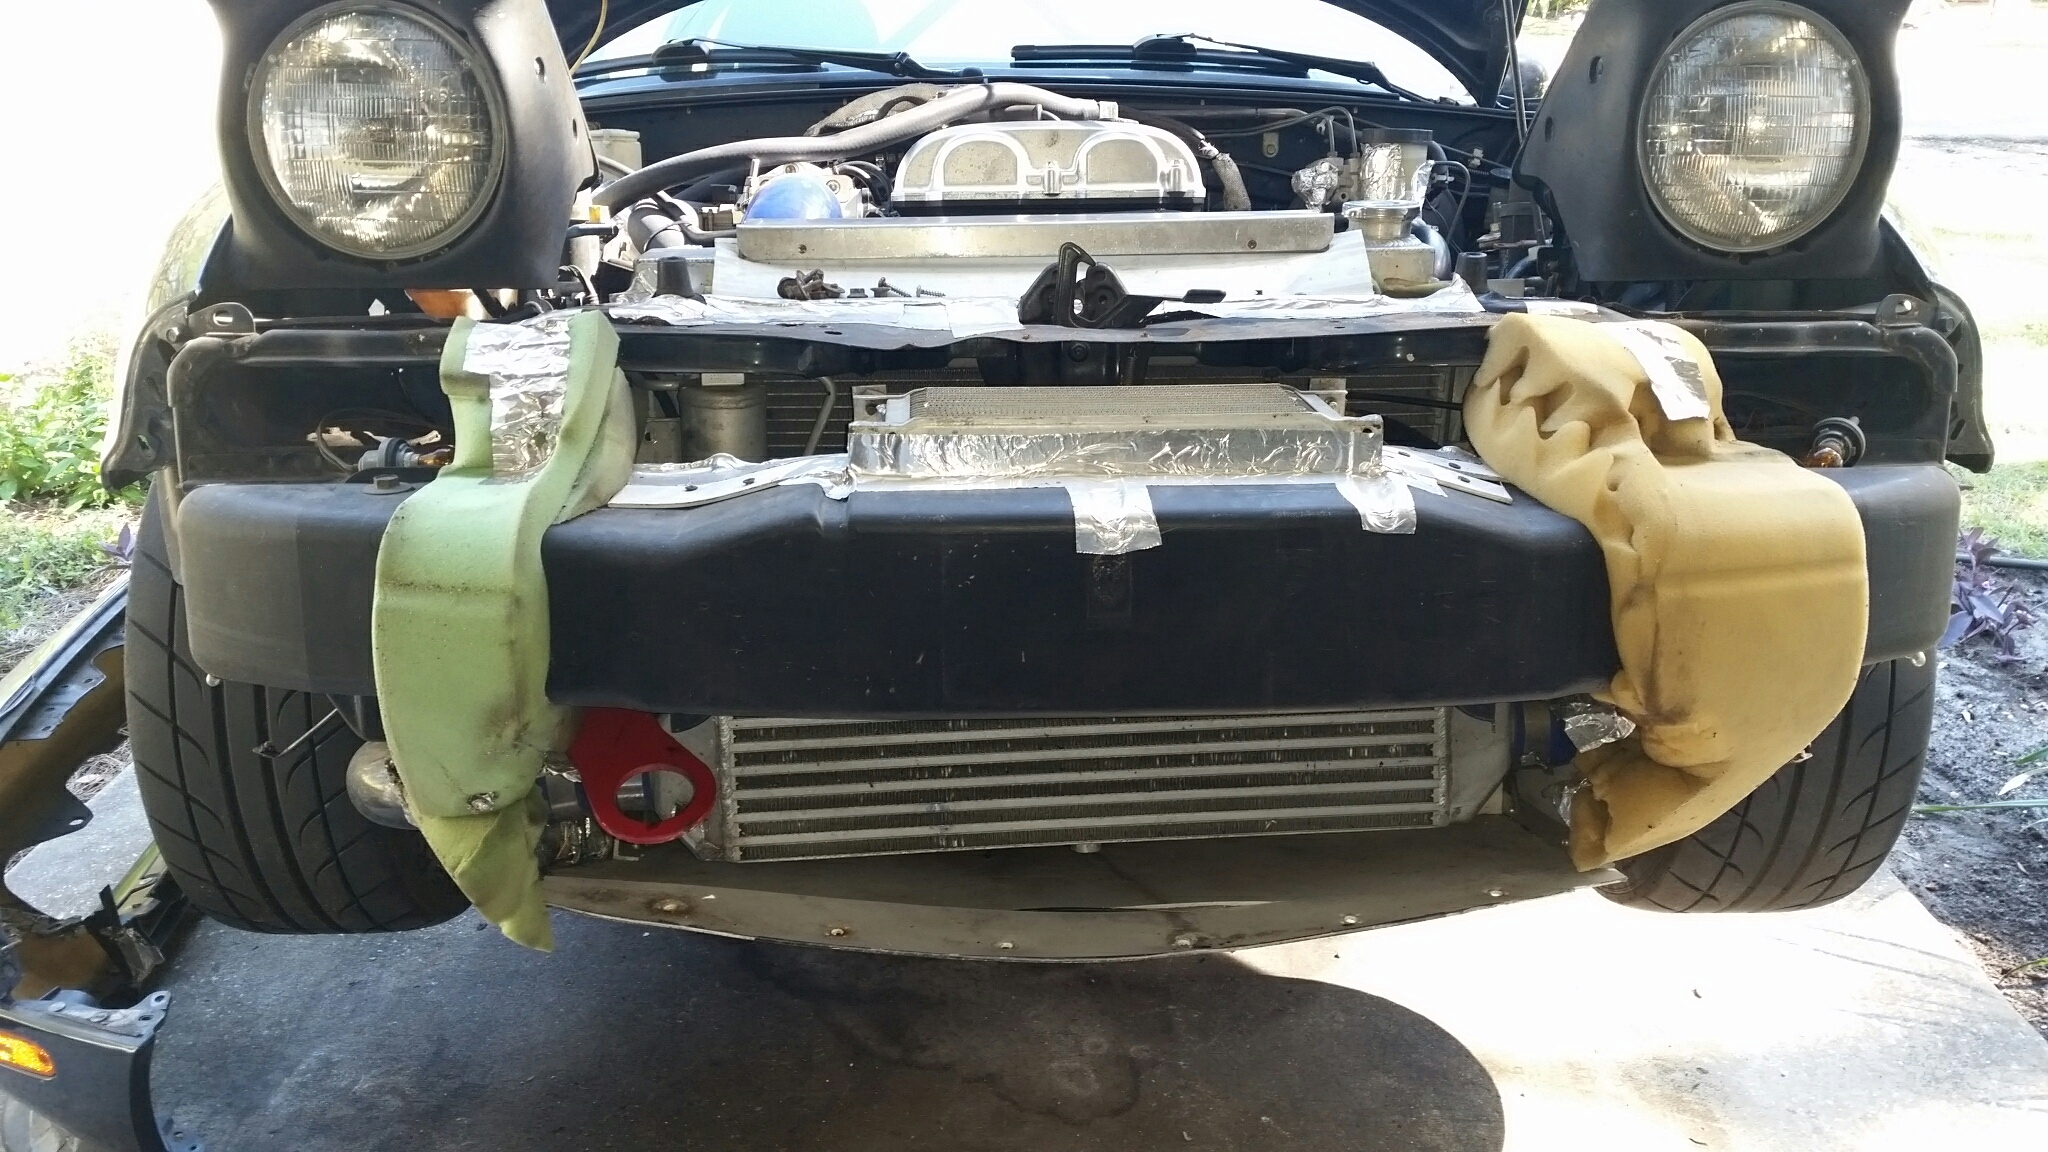
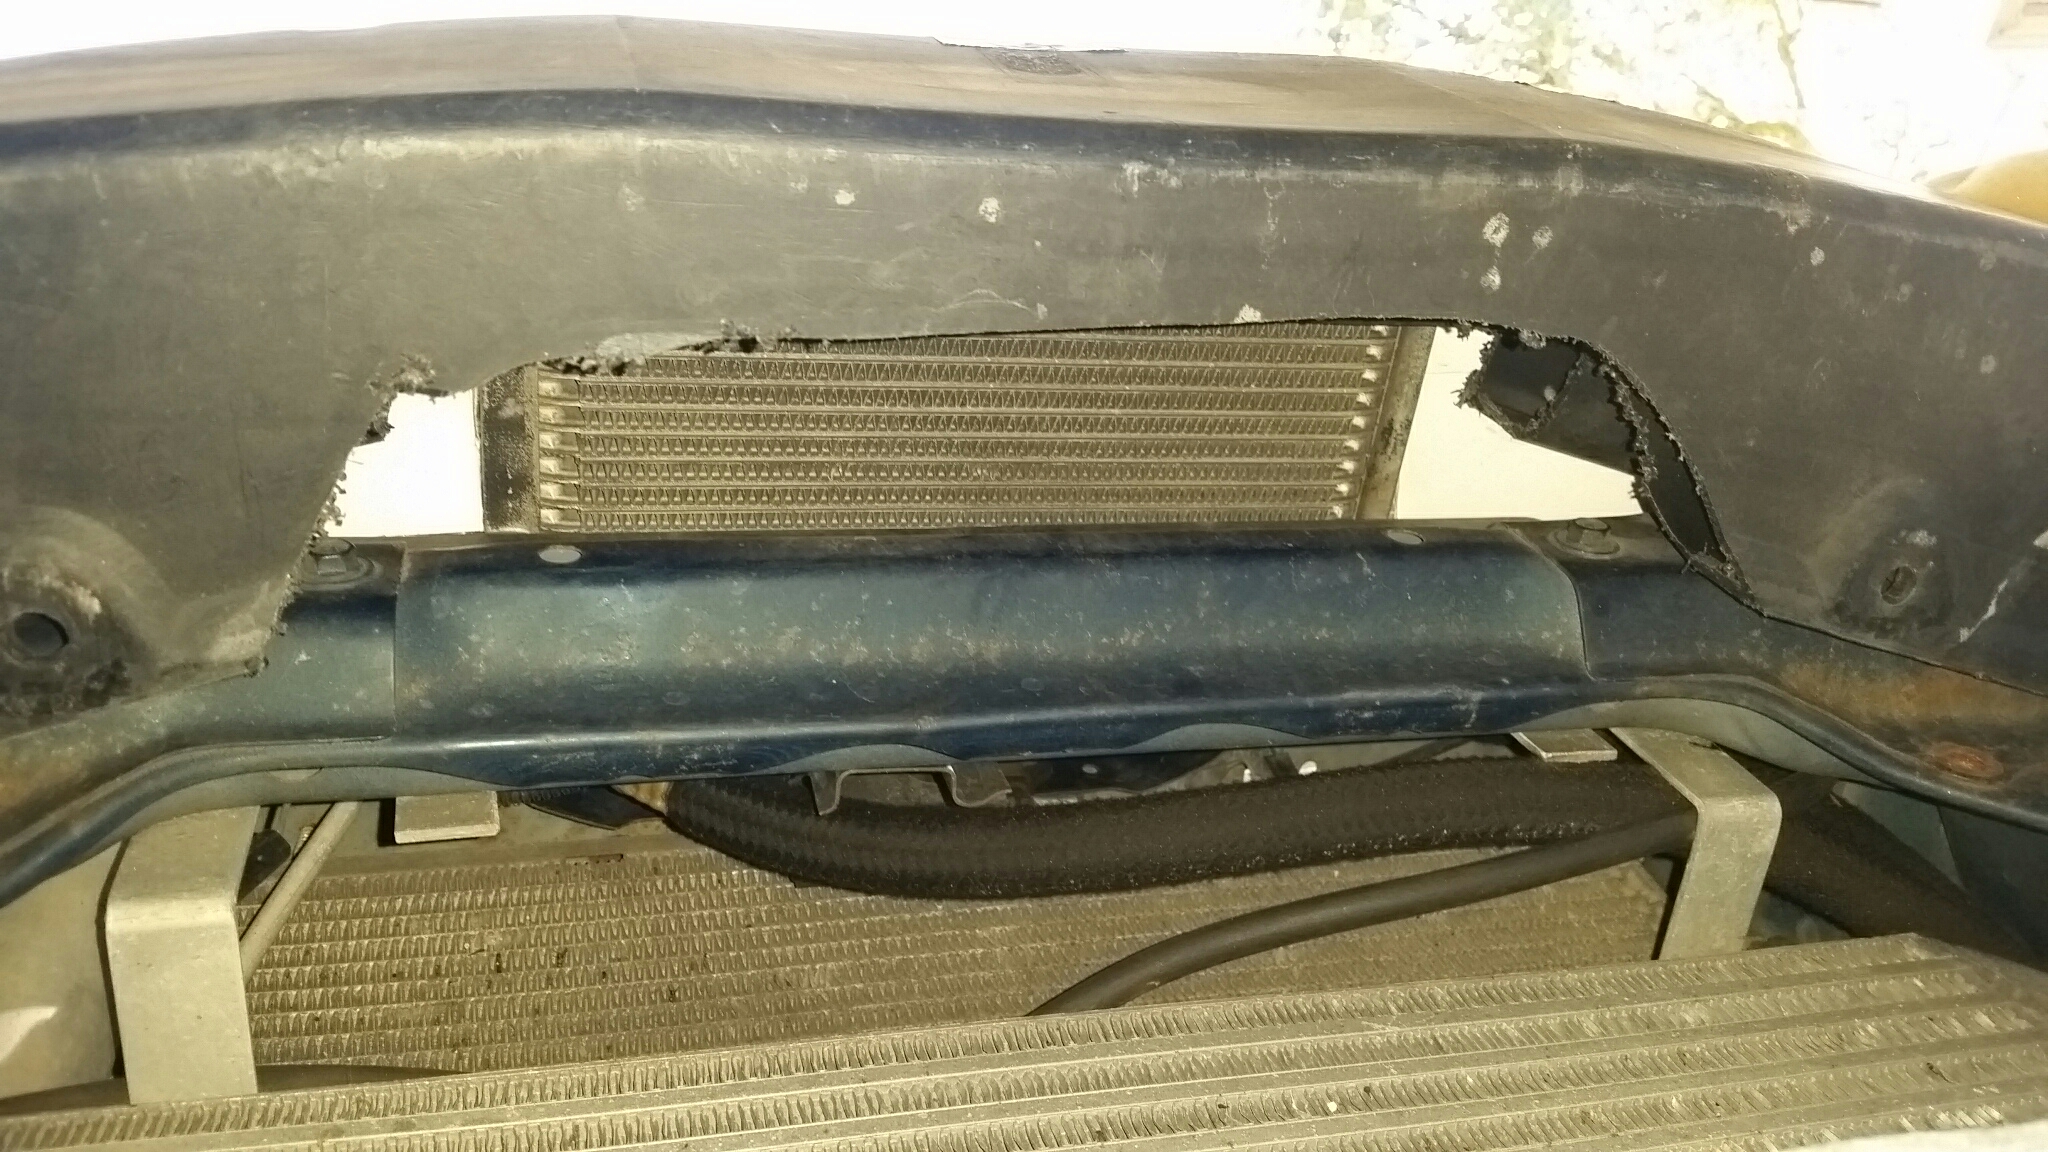
Old cooler versus new one.
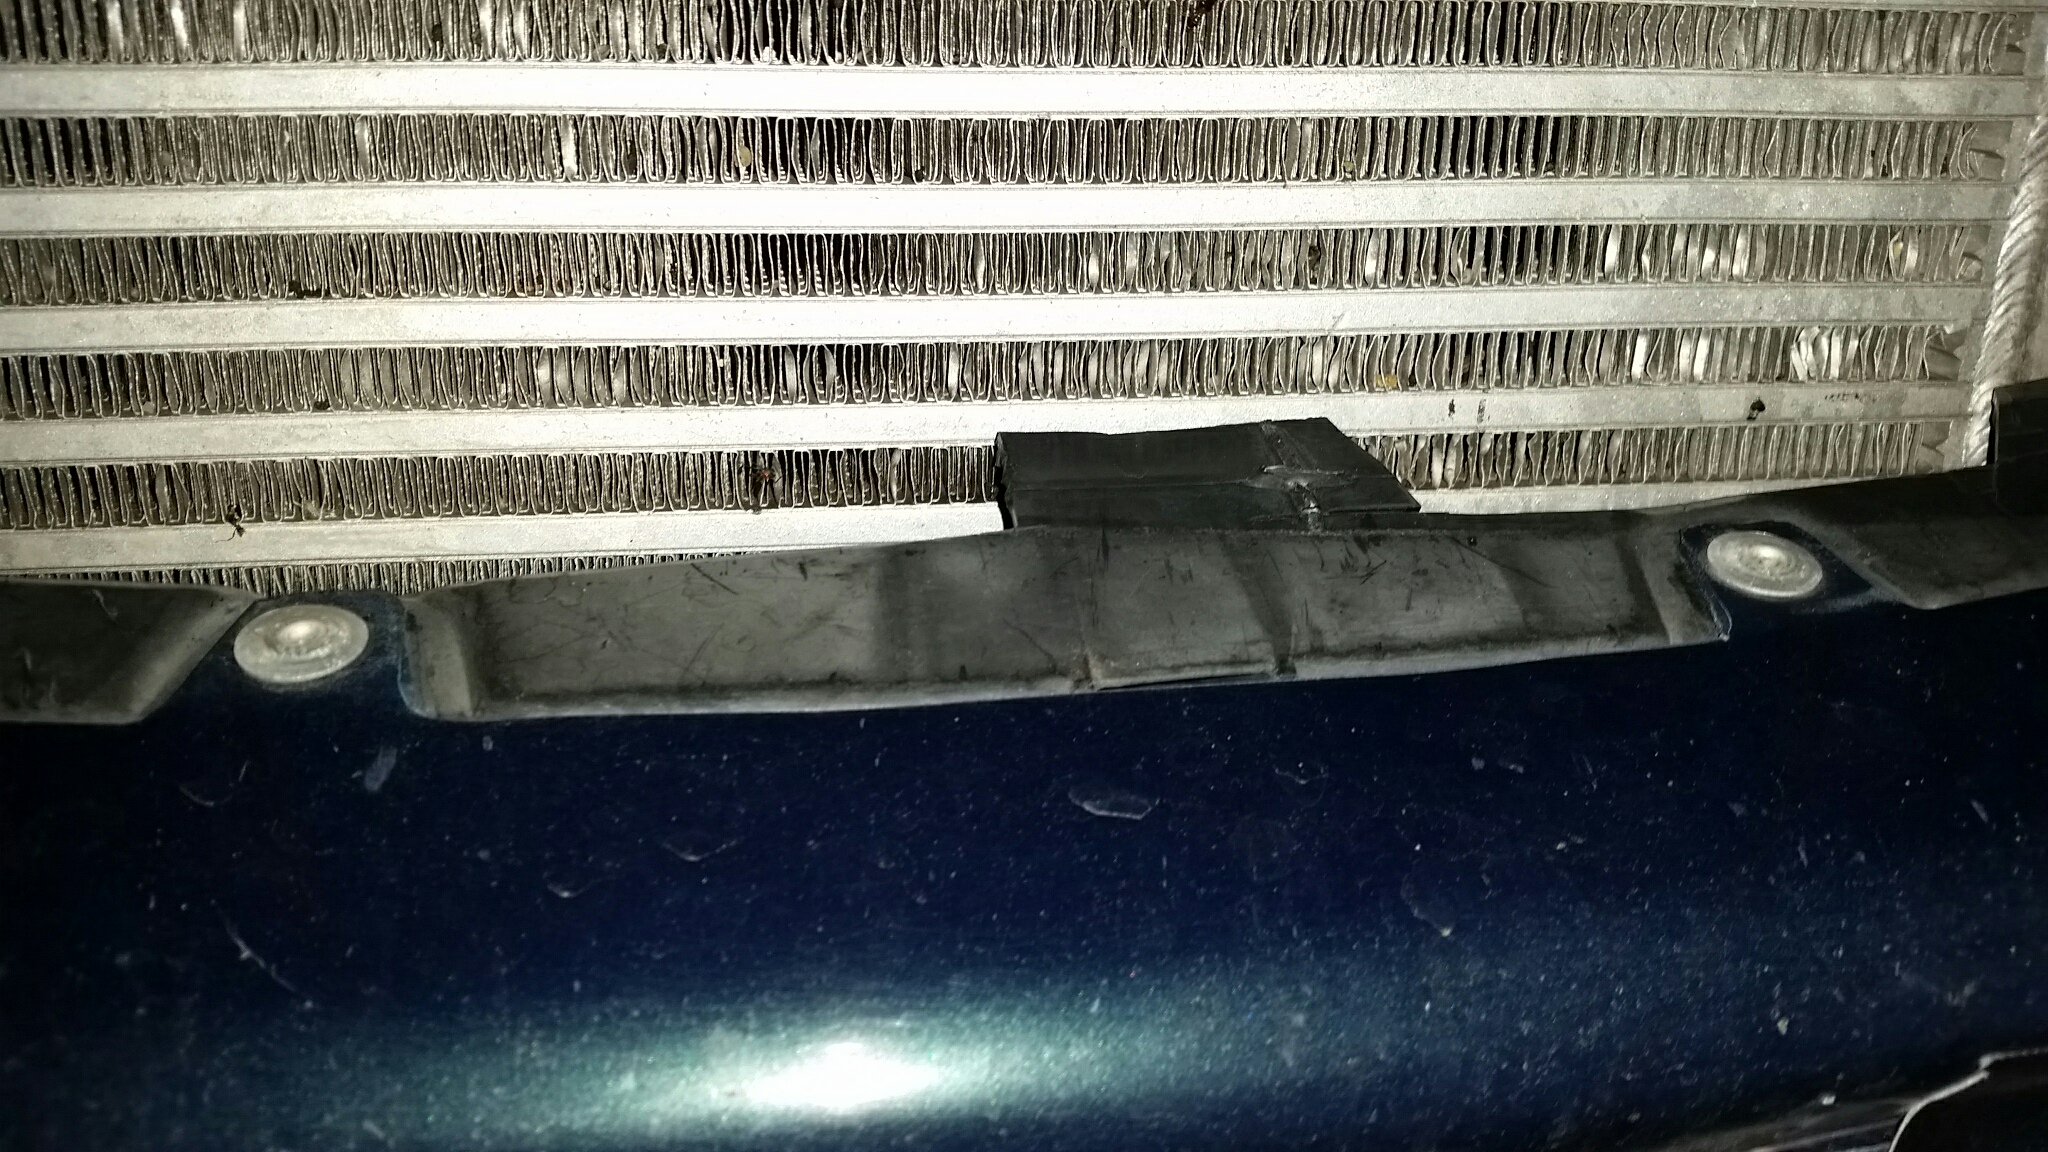
Bottom of bumper mouth opening was notched to allow air to get to the rest of the intercooler and to bypass the intercooler beneath it to get to the radiator. More air is necessary. And the radiator getting air is primary, intercooler is secondary.

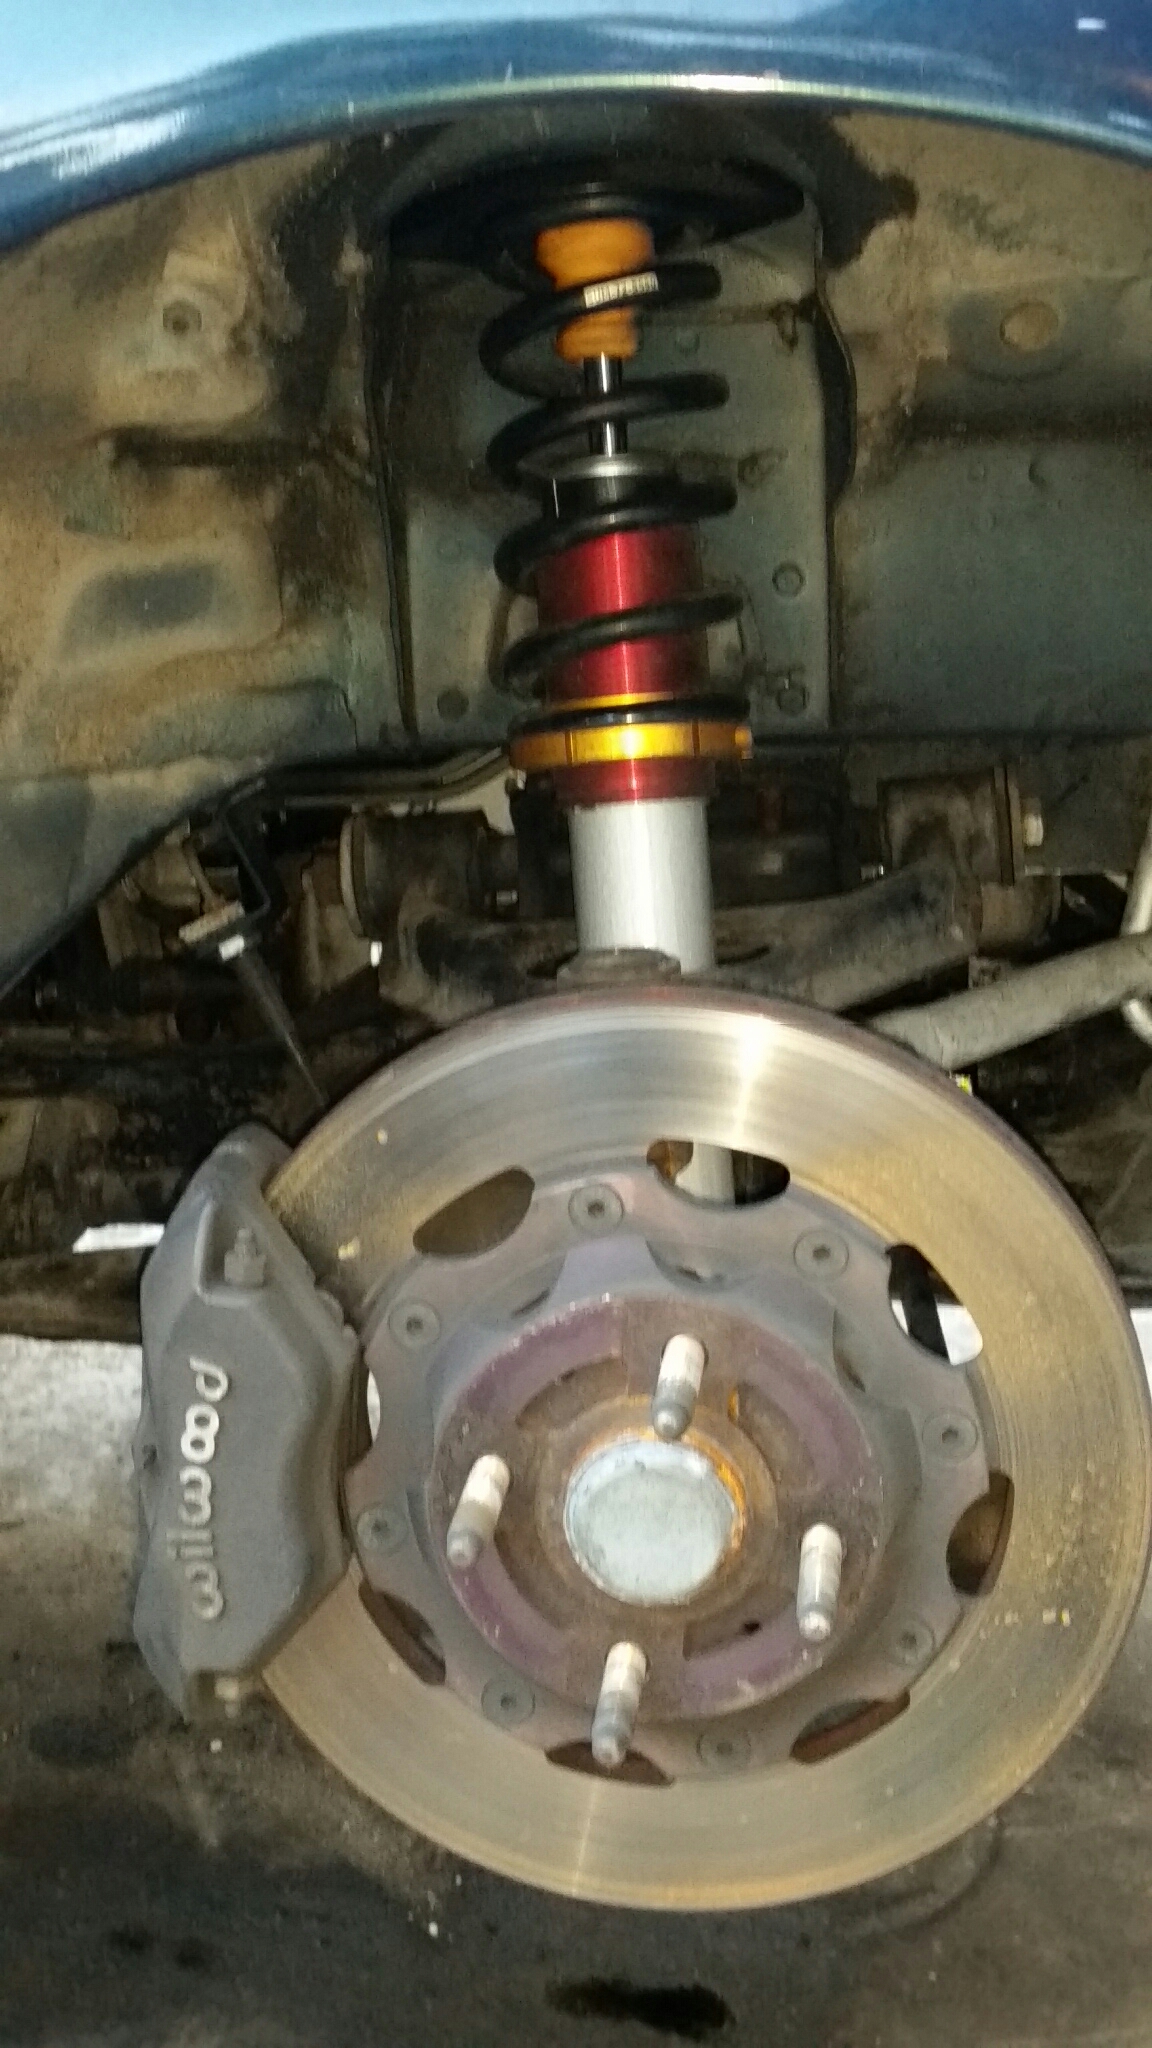
And I had to replace my front shocks. Mazdaspeed Bilsteins brand new.
Bottom of bumper mouth opening was notched to allow air to get to the rest of the intercooler and to bypass the intercooler beneath it to get to the radiator. More air is necessary. And the radiator getting air is primary, intercooler is secondary.
And I had to replace my front shocks. Mazdaspeed Bilsteins brand new.
Last edited by sixshooter; 05-09-2017 at 01:03 PM.
Reply
0
0
 11-21-2016, 01:29 PM
#560
Moderator
Thread Starter
iTrader: (12)
Join Date: Nov 2008
Location: Tampa, Florida
Posts: 20,660
Total Cats: 3,011
-
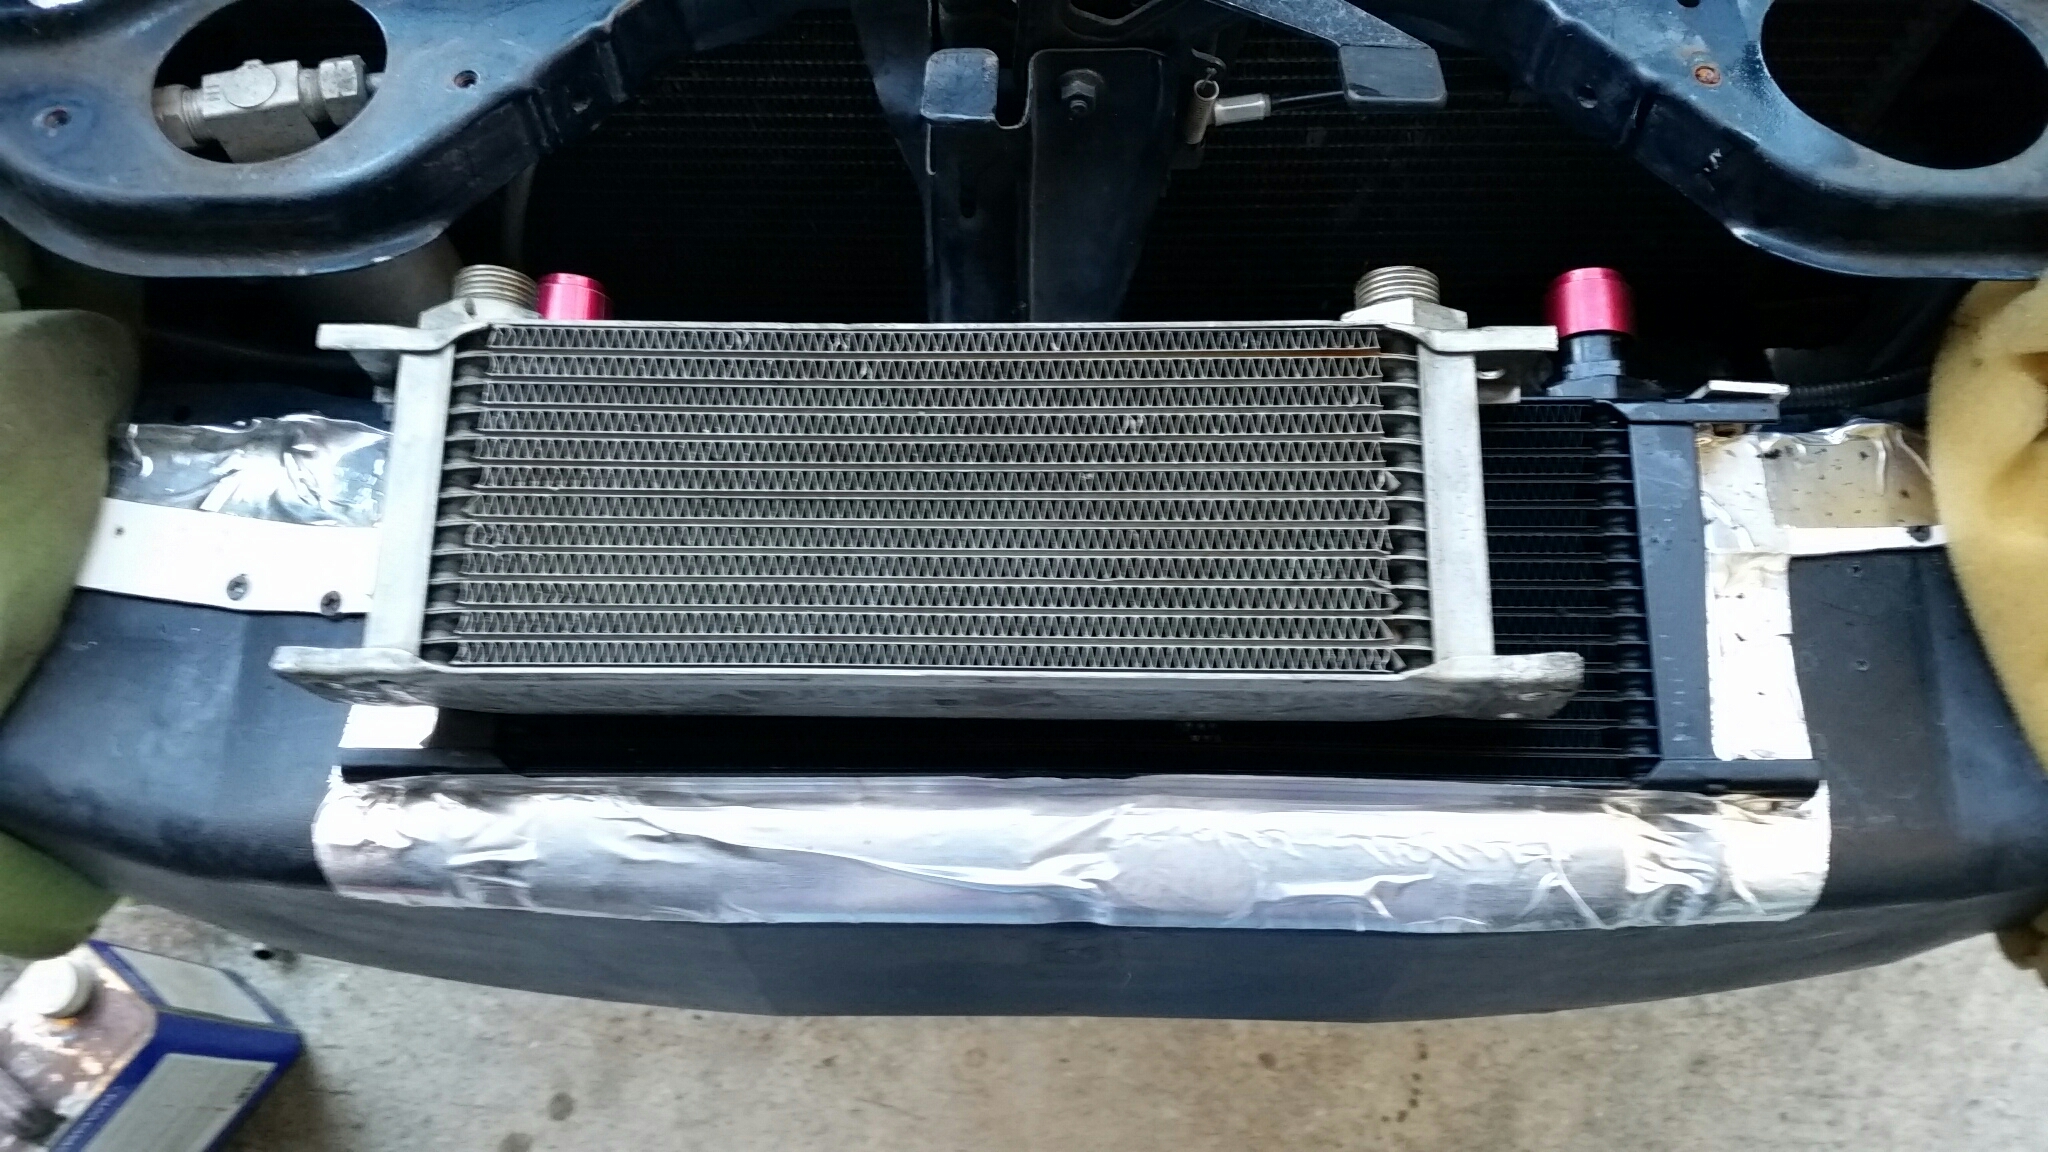
Old cooler worked well enough, but I'm turning up the boost and want more headroom on hotter days. This was good enough for about 12psi on the 2871 without overheating. Part of the overheating problem was the retarded tune in boost caused by the IAT timing settings being wacked out. Retarded timing makes engines run hotter than with proper timing.
BTW, old oil cooler will be going up for sale along with the lines. All anyone will need is a sandwich plate.
Reply
0
0


