
Something more Imaginative?


Elite Member
Joined: Oct 2013
Posts: 2,764
Total Cats: 951
From: Cedar City, UT
As to the bushings, I didn't think my Miata rode roughly at all and it has every single bushing replaced with poly. As long as you do Zerk fittings when you do them it takes the maintenance pain/anguish issue out of the equation.
Then again I may be slightly spoiled with the "Mythical unicorn tear SD Bilsteins". The car rode better than my Jetta in some cases.
Then again I may be slightly spoiled with the "Mythical unicorn tear SD Bilsteins". The car rode better than my Jetta in some cases.
Reply
 0
0

0


As to the bushings, I didn't think my Miata rode roughly at all and it has every single bushing replaced with poly. As long as you do Zerk fittings when you do them it takes the maintenance pain/anguish issue out of the equation.
Then again I may be slightly spoiled with the "Mythical unicorn tear SD Bilsteins". The car rode better than my Jetta in some cases.
Then again I may be slightly spoiled with the "Mythical unicorn tear SD Bilsteins". The car rode better than my Jetta in some cases.
I'm more concerned about missing out on significant handling improvements.
-Zach
Reply
0
0

Watch out for Error 8. Current LC-1 software will kick this error even if nothing is wrong. Read this: https://www.miataturbo.net/megasquir...-lc-1-a-58873/
D) Poly bushings - worth it? I'm a week away from painting and installing all my front end suspension bits and now would be the perfect time to install poly bushings. This said, my OEM bushings still look good and I'd rather put the money towards a Kirkey seat or door bars or beer  . So, for a street/non-competitive track car -is it worth it?
. So, for a street/non-competitive track car -is it worth it?On my rides, Silver has rubber, Red is getting poly. Different missions (Silver has a radio too).
Reply
0
0
I'd ground to where the OEM ECU grounds. That would be on a bolt near the back, passenger side of the engine. Should be a 10mm bolt there with a bunch of grounds going to it.
Watch out for Error 8. Current LC-1 software will kick this error even if nothing is wrong. Read this: https://www.miataturbo.net/megasquir...-lc-1-a-58873/
I'm also generally paranoid about reassembly now that my father has sold his '90 1.6 (which sat conveniently next to my project) ... it was my assembly reference. Having it there also caused me to get a bit lazy about documentation since he quote, "would never sell the '90". Well, he sold it.
-Zach
Reply
0
0
A minor, and rather uninteresting, update.
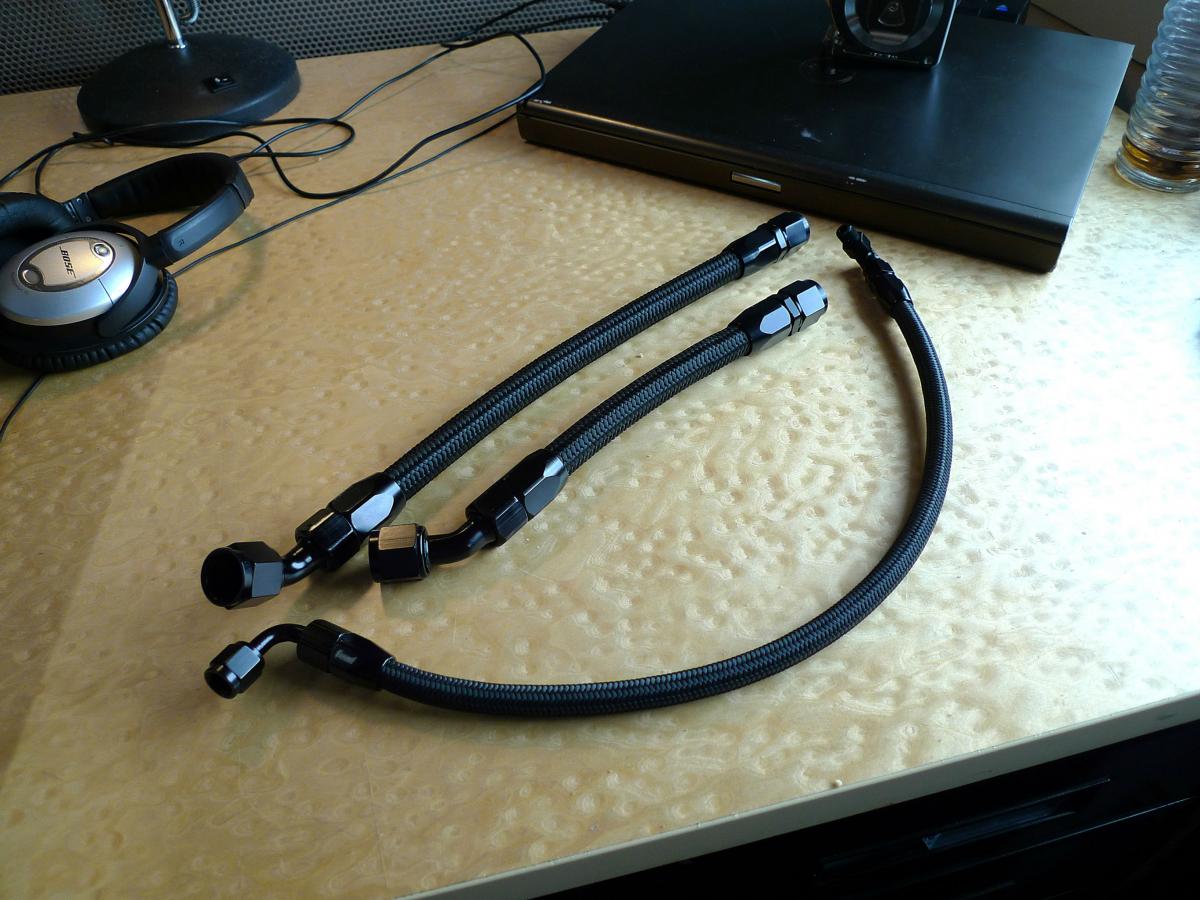
Finished assembling the breather tank/BOV lines. I ended up using Summit fittings for non-critical lines since their cheap and I has Summit bucks to burn. I'll use Goodridge PTFE for fuel/oil. Assembly was simple enough (far easier than older Earl's lines).
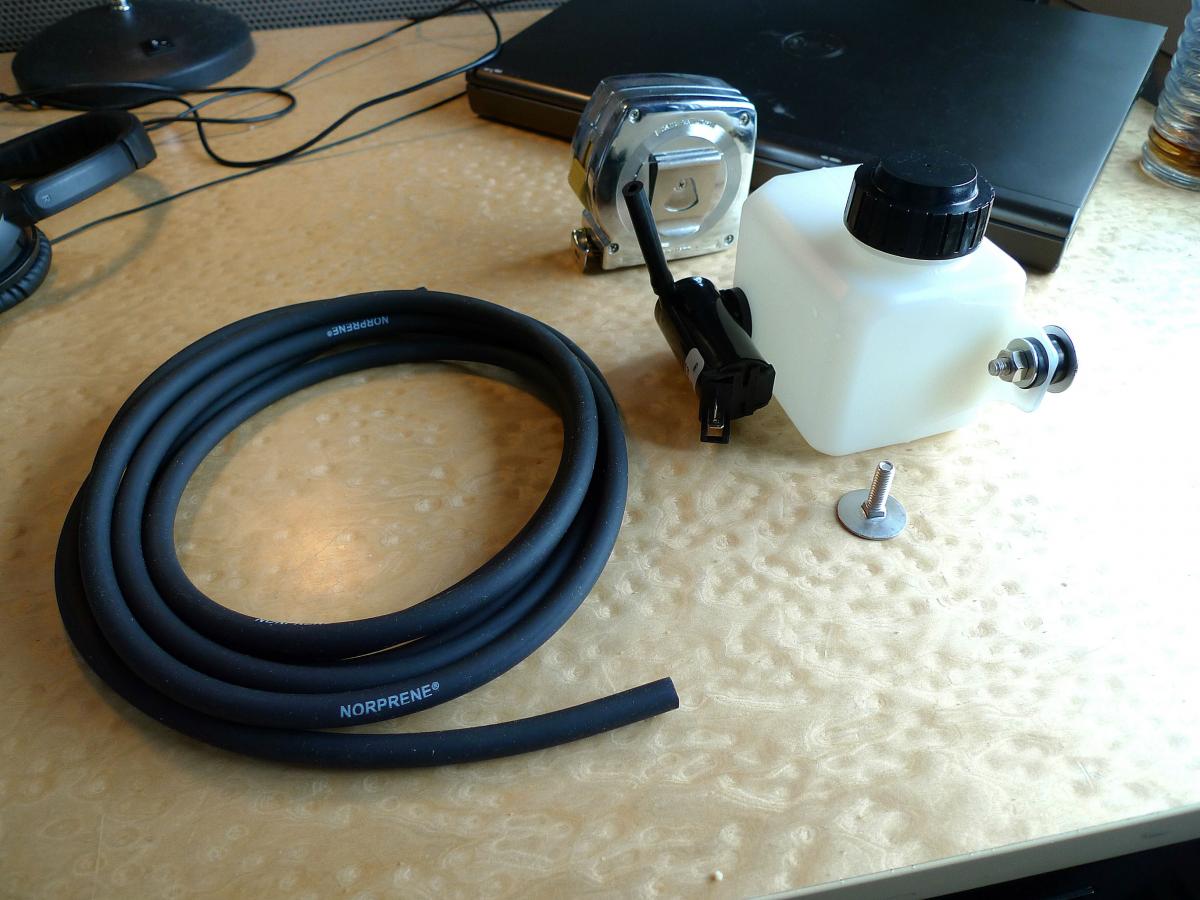
In other news, it occurred to me that I tossed my OEM washer tank (along with the pump) years ago. Being older, lazier and burdened by additional bureaucracy, I wished to have a car which can easily acquire an inspection sticker ... this meant I needed a washer tank (which I'll likely never use).
So, after realizing I mounted my coolant tank to the OEM washer tank mounting point, I began seeking a plan B. Cappucino and BEGI tanks were too $$$ and held far more fluid then I'd ever need or want on a weekend toy.
I ended up finding some small tanks which worked @ U.S. Plastic Corp (The McMaster of plastic containers, with a shittier interface and a heaping of Jesus). Bought an OEM pump through RockAuto which came with a new rubber seal. 5 minutes with a dremel and boom ... leak-free vented washer tank with a new pump for <$25.
Bottle link, if interested: .50 Quart 3.8H X 5.5313W X 3D | U.S. Plastic Corp.
I plan on mounting it to the back side off the firewall behind the booster. I didn't want to add additional holes to my already holey firewall so I picked up some SS elevator bolts off McMaster-Carr which I'll epoxy to the wall with some 3m dp-420 epoxy (metal epoxy with super high shear strength). I'll post picks once completed.
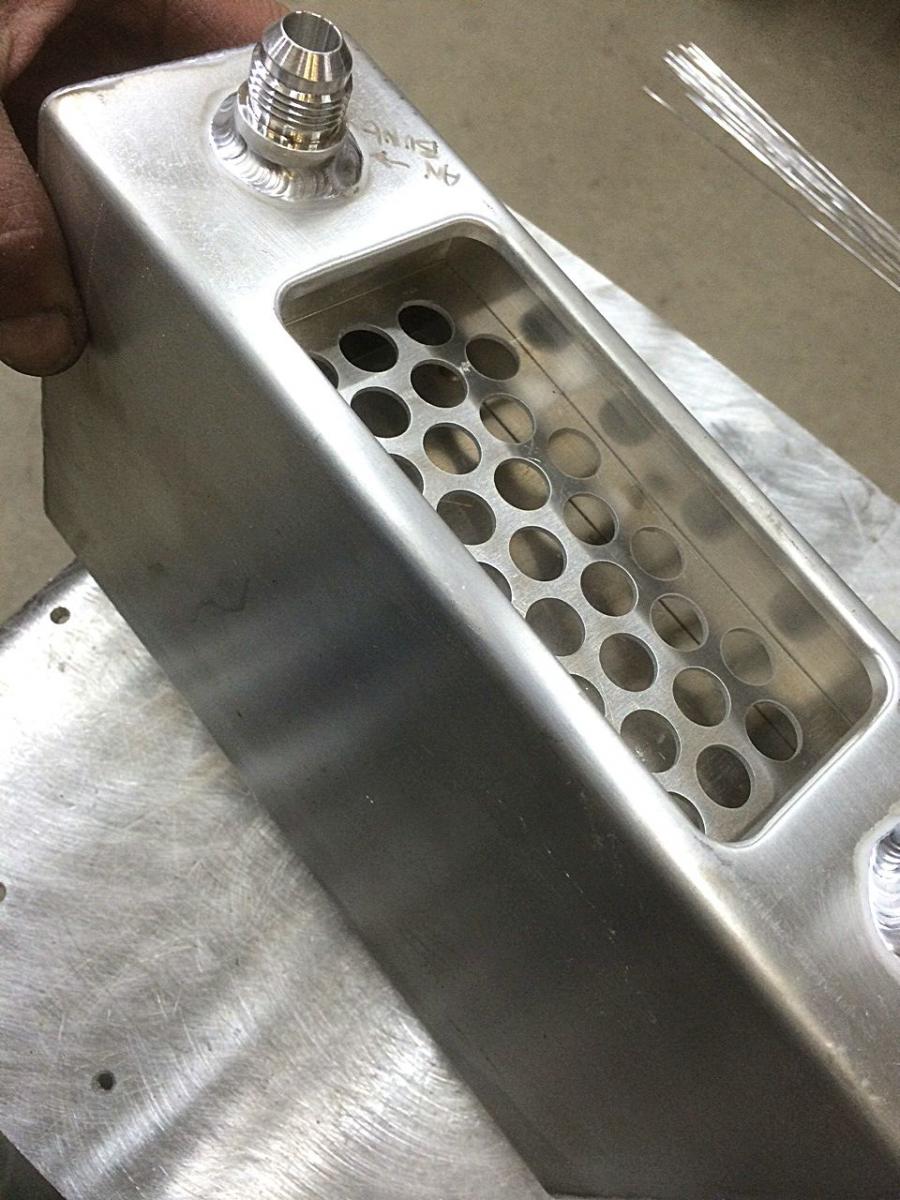
...and the local welder said the tank is ready to go, so I'll be picking that up today and slapping it on. Pics to come.
Audi5k - Zach
Finished assembling the breather tank/BOV lines. I ended up using Summit fittings for non-critical lines since their cheap and I has Summit bucks to burn. I'll use Goodridge PTFE for fuel/oil. Assembly was simple enough (far easier than older Earl's lines).
In other news, it occurred to me that I tossed my OEM washer tank (along with the pump) years ago. Being older, lazier and burdened by additional bureaucracy, I wished to have a car which can easily acquire an inspection sticker ... this meant I needed a washer tank (which I'll likely never use).
So, after realizing I mounted my coolant tank to the OEM washer tank mounting point, I began seeking a plan B. Cappucino and BEGI tanks were too $$$ and held far more fluid then I'd ever need or want on a weekend toy.
I ended up finding some small tanks which worked @ U.S. Plastic Corp (The McMaster of plastic containers, with a shittier interface and a heaping of Jesus). Bought an OEM pump through RockAuto which came with a new rubber seal. 5 minutes with a dremel and boom ... leak-free vented washer tank with a new pump for <$25.
Bottle link, if interested: .50 Quart 3.8H X 5.5313W X 3D | U.S. Plastic Corp.
I plan on mounting it to the back side off the firewall behind the booster. I didn't want to add additional holes to my already holey firewall so I picked up some SS elevator bolts off McMaster-Carr which I'll epoxy to the wall with some 3m dp-420 epoxy (metal epoxy with super high shear strength). I'll post picks once completed.
...and the local welder said the tank is ready to go, so I'll be picking that up today and slapping it on. Pics to come.
Audi5k - Zach
Last edited by thasac; Mar 27, 2014 at 02:07 PM.
Reply
1
1

OMG I rub ru wong time for that plastics place. I needed a new coolant reservoir and a catch tank for my new air oil seperator, I just found the place, no more crystal geezer water bottles.
Now to find a tank with a top entry that goes to the bottom for proper use as a coolant overflow.
Now to find a tank with a top entry that goes to the bottom for proper use as a coolant overflow.
Reply
0
0
OMG I rub ru wong time for that plastics place. I needed a new coolant reservoir and a catch tank for my new air oil seperator, I just found the place, no more crystal geezer water bottles.
Now to find a tank with a top entry that goes to the bottom for proper use as a coolant overflow.
Now to find a tank with a top entry that goes to the bottom for proper use as a coolant overflow.

How a huge company catering to lab sciences remains overtly anti-secular in 2014 is beyond me.
-Zach
Reply
0
0
Alright, here's some low-light, high noise, poorly composed pictures of the breather tank.
I need to tweak the lines some and fixture the BOV line; however, I'll worry about that once it's running. I'm thinking about powder coating the breather tank wrinkle black to match the cam cover, but again, I'll worry about that later.
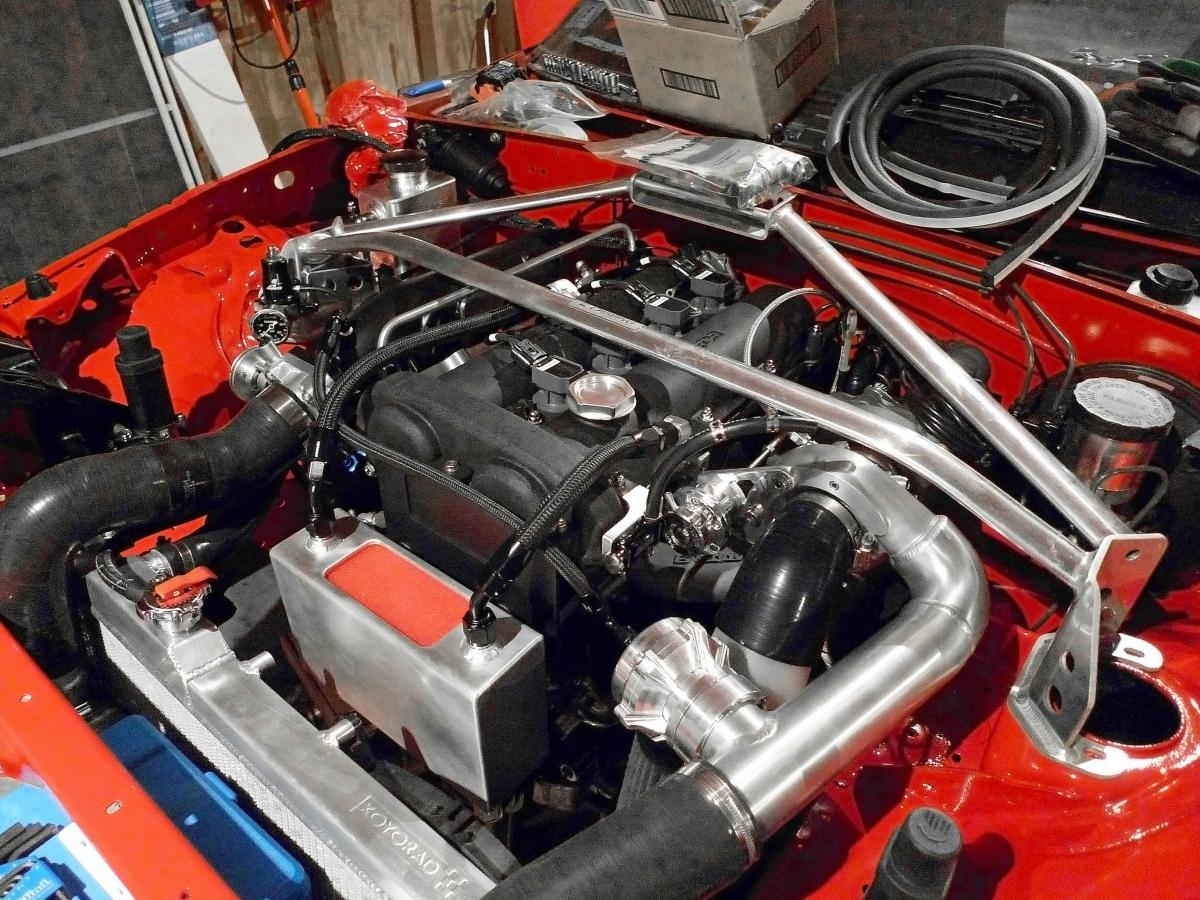
-Zach
I need to tweak the lines some and fixture the BOV line; however, I'll worry about that once it's running. I'm thinking about powder coating the breather tank wrinkle black to match the cam cover, but again, I'll worry about that later.
-Zach
Reply
3
3
Elite Member
Joined: Oct 2013
Posts: 2,764
Total Cats: 951
From: Cedar City, UT
Alright, here's some low-light, high noise, poorly composed pictures of the breather tank.
I need to tweak the lines some and fixture the BOV line; however, I'll worry about that once it's running. I'm thinking about powder coating the breather tank wrinkle black to match the cam cover, but again, I'll worry about that later.
-Zach
I need to tweak the lines some and fixture the BOV line; however, I'll worry about that once it's running. I'm thinking about powder coating the breather tank wrinkle black to match the cam cover, but again, I'll worry about that later.
-Zach
Looks good! I'd leave the catch can raw like that. Really pops as is.
Reply
0
0
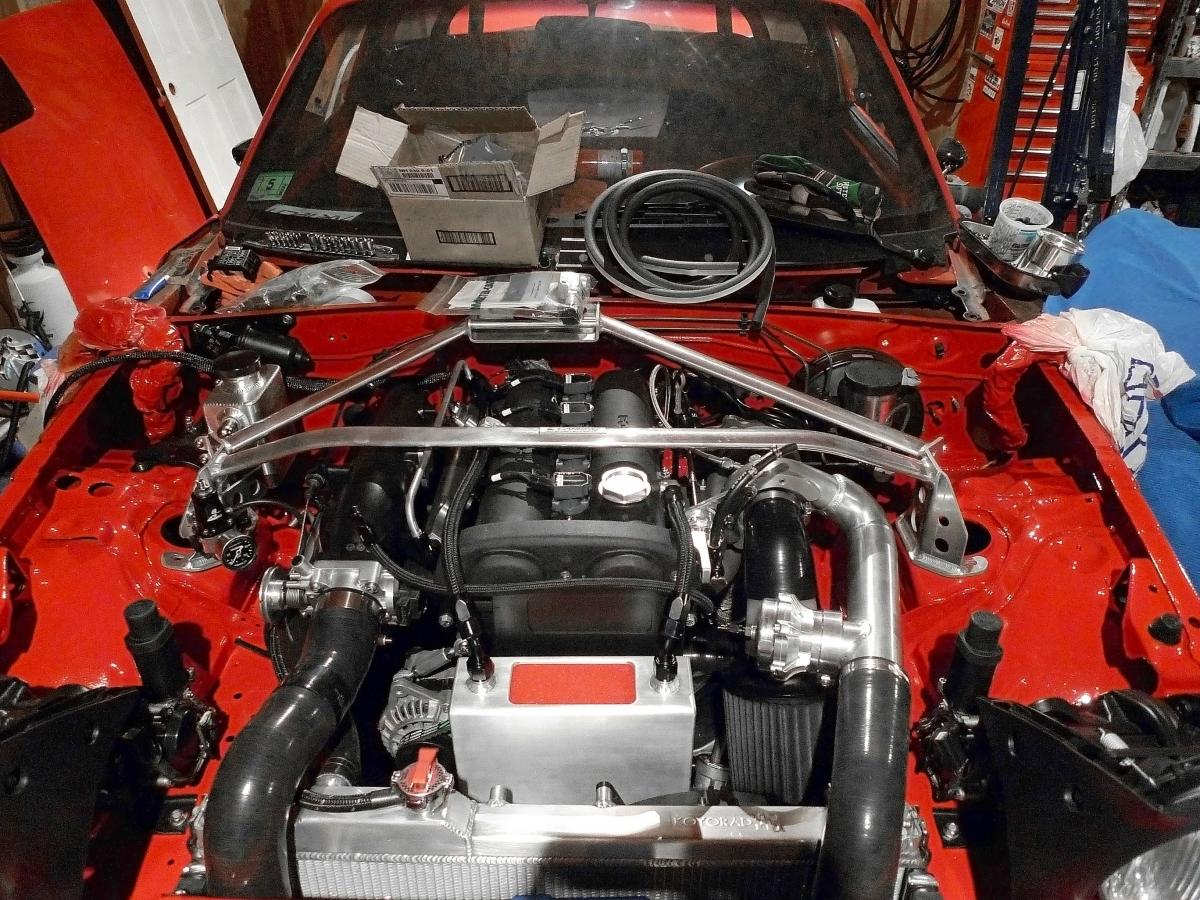
I didn't  ... the harness resides in the oversprayed grocery bags currently draped over the firewall.
Once I add the remaining fuel/oil lines and wiring harness, the car will no longer be CR friendly (gotta tuck it, bro). I thought about doing a 'tuck' but then I reminded myself that function>form on this project.
-Zach
... the harness resides in the oversprayed grocery bags currently draped over the firewall.Once I add the remaining fuel/oil lines and wiring harness, the car will no longer be CR friendly (gotta tuck it, bro). I thought about doing a 'tuck' but then I reminded myself that function>form on this project.
-Zach
Reply
0
0
-Zach
Reply
0
0
Reply
0
0
Elite Member
Joined: Oct 2013
Posts: 2,764
Total Cats: 951
From: Cedar City, UT

Reply
0
0
There is, but it requires re-doing the entire engine bay harness, and If I'm going to do that I'm switching the car to having a seperate engine harness with 3-4 points of disconnection (one for low power, one for high power, two grounds. Using Milspec/motosports connectors. To do it right (my way) is like a $500 project.
Reply
0
0
I'd also add the cluster**** behind the IM is where all the reliability problems are with our harnesses. I've seen rub-throughs there on almost every older harness I've seen.
Reply
0
0


