
To SSM Ahead of Schedule


New week new event. After 80 runs the tires seem to be falling off. They still have like half their tread just heat cycling out. I've got no more national events and honestly they're still probably fast enough to be top 10 overall with a good driver, and I bet they'd go the whole season without cording. I'm just about the crest 100 runs since this weekend was a double with a bunch of runs.
I was the course designer for both courses over the weekend I only took video for sunday because saturday was more of a just for fun thing. Operator error cause me to miss video on a lot of runs. I also didnt take data for this event because the surface of this lot is so crappy.
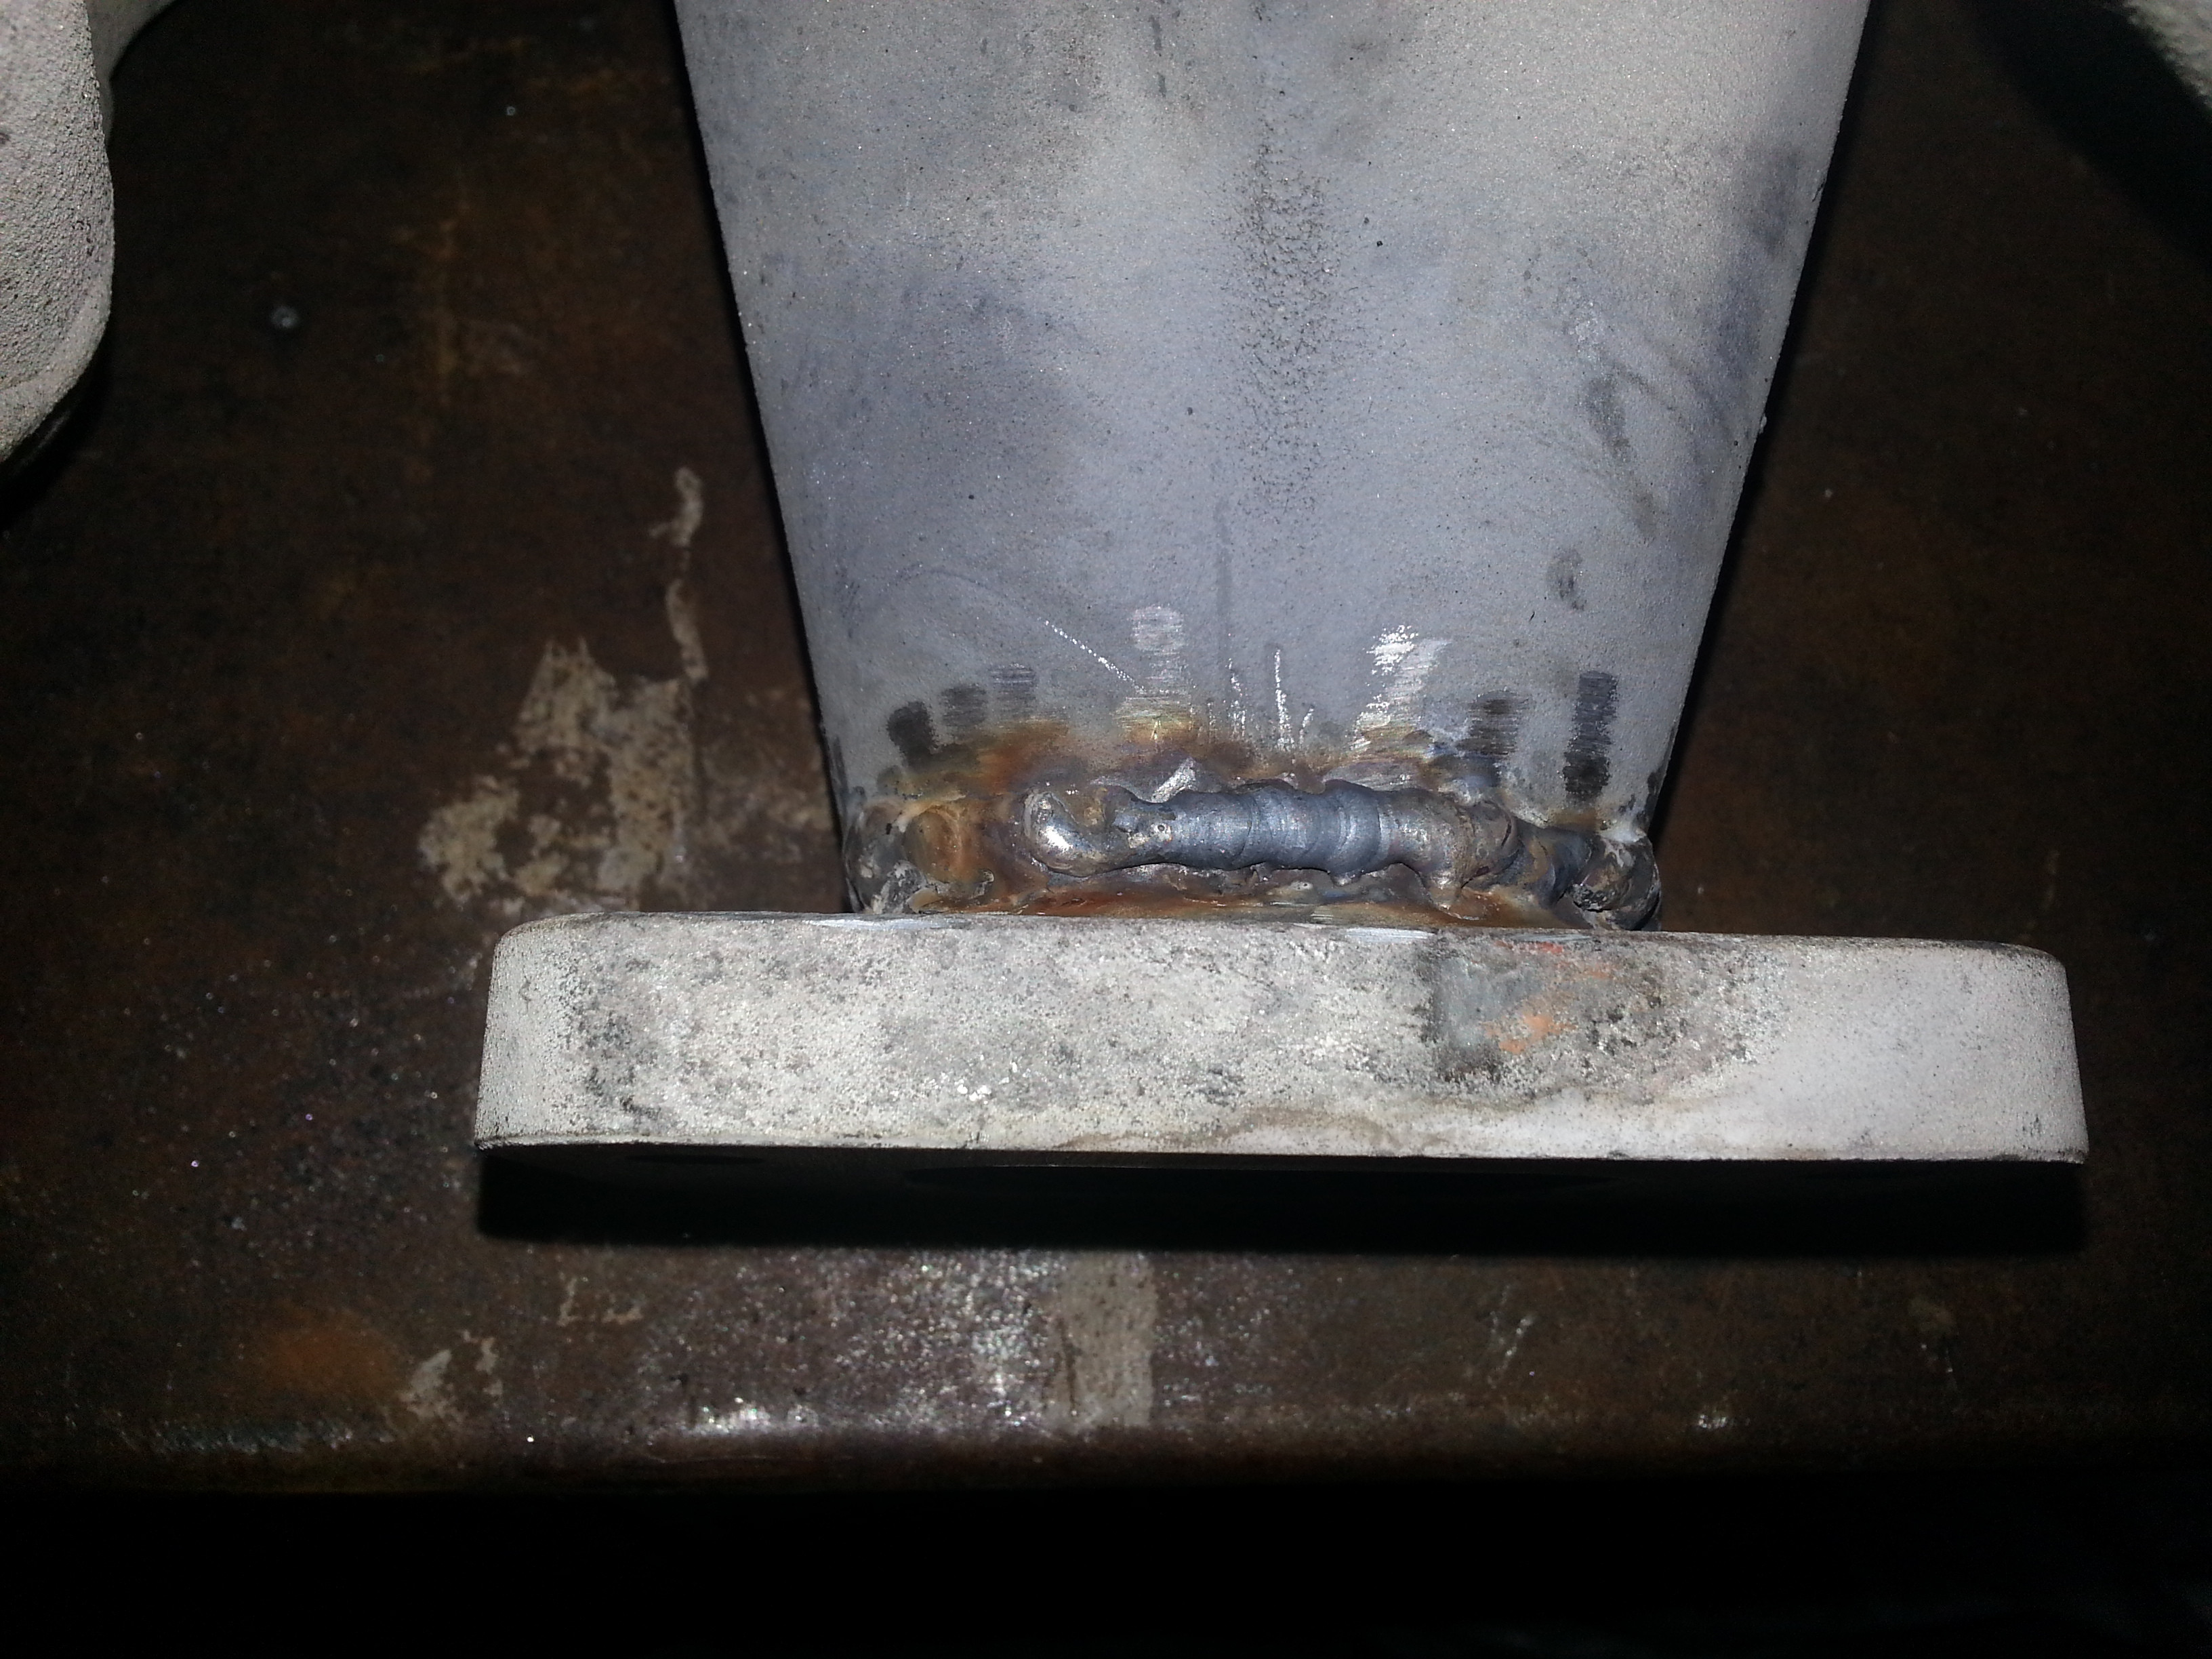
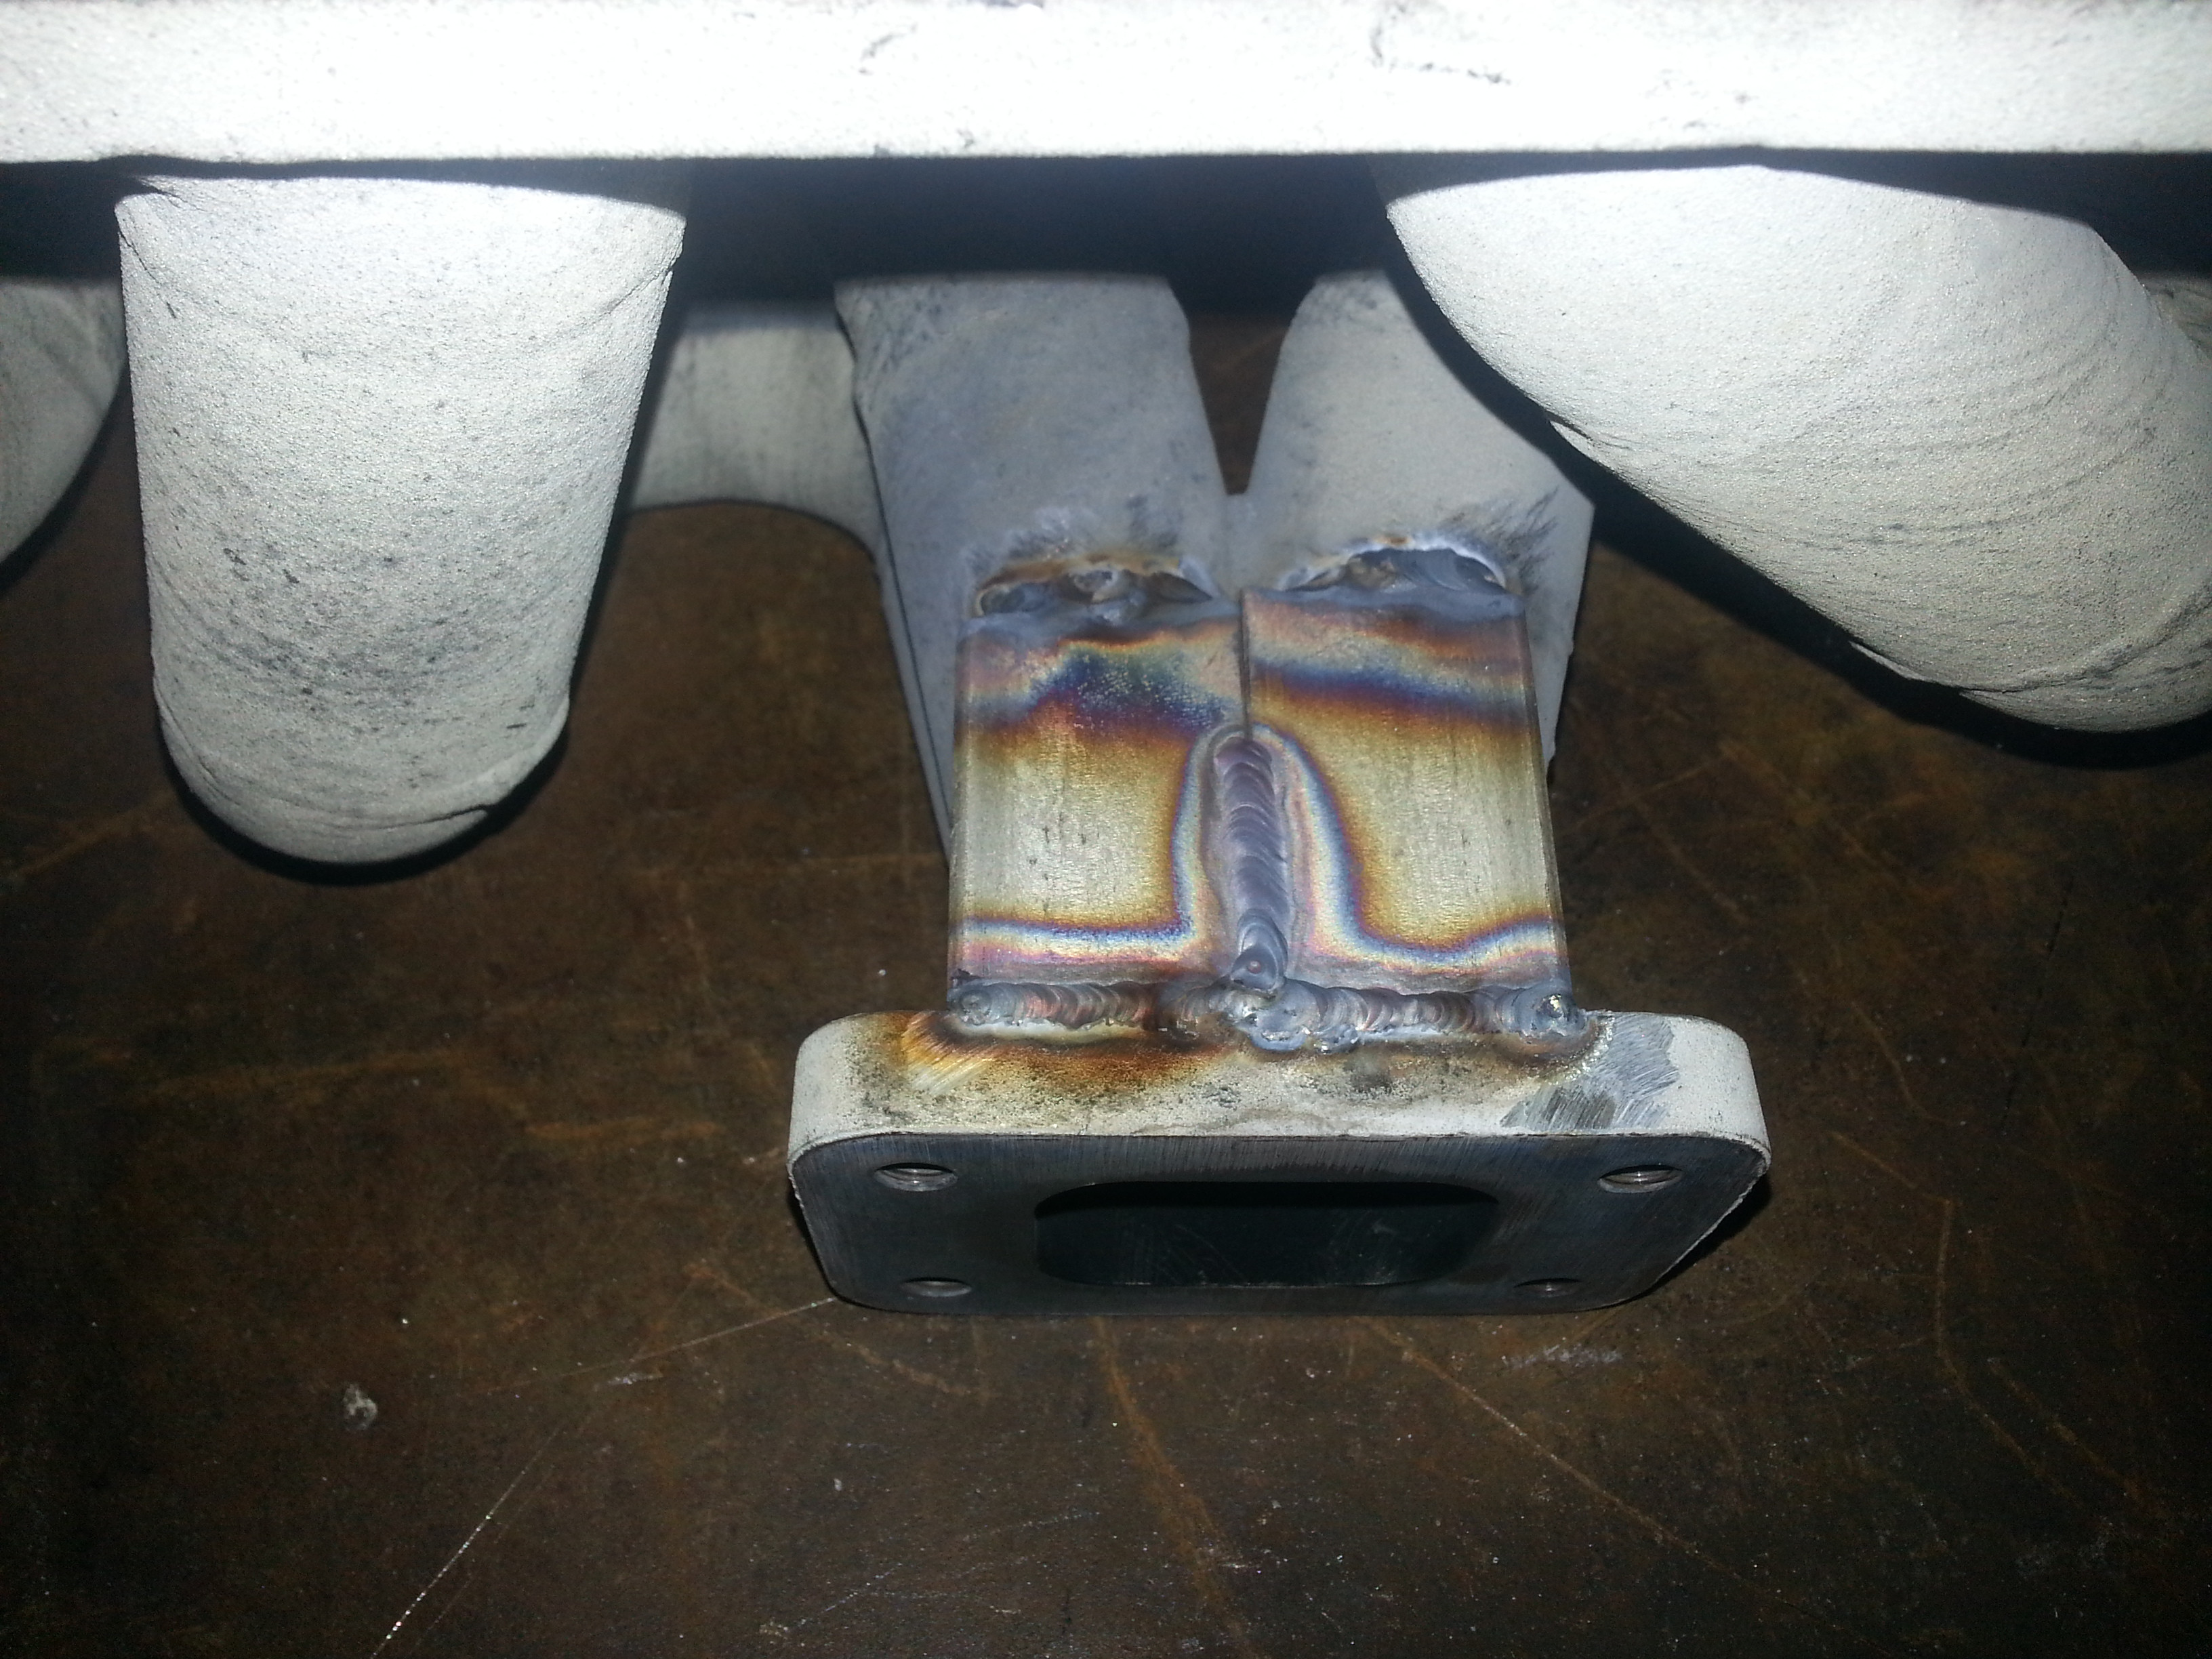
I'm working on yet another version of the lower control arms that doesnt use a miata ball joint. Gets rid of all the water jetting required for the LCAs. Now the only control arm that requires waterjet work is the upper and I may try to come up with something to get around that so I can do everything in house. No water just guy wants to just cut that one plate for you.
Might get to the sway bar next weekend. Also might get to HF and buy the sheet metal roller so I can finally start making mufflers I've got like 3 people lined up for them.
Have a race this weekend. I just need to work on the driver mod. I've only got a 3 point lead in the points with 3 points events left If I can take the win on this one then probably the worst I can do is tie for 2nd unless some ringers come in and mess with the points, or I have a 3rd place finish.
I was the course designer for both courses over the weekend I only took video for sunday because saturday was more of a just for fun thing. Operator error cause me to miss video on a lot of runs. I also didnt take data for this event because the surface of this lot is so crappy.
I'm working on yet another version of the lower control arms that doesnt use a miata ball joint. Gets rid of all the water jetting required for the LCAs. Now the only control arm that requires waterjet work is the upper and I may try to come up with something to get around that so I can do everything in house. No water just guy wants to just cut that one plate for you.
Might get to the sway bar next weekend. Also might get to HF and buy the sheet metal roller so I can finally start making mufflers I've got like 3 people lined up for them.
Have a race this weekend. I just need to work on the driver mod. I've only got a 3 point lead in the points with 3 points events left If I can take the win on this one then probably the worst I can do is tie for 2nd unless some ringers come in and mess with the points, or I have a 3rd place finish.
Reply
 0
0

0

you could always ask the water guy nicely, buy the sheet of material for him and let them keep the leftover stock. However, time on any machine tool can be worth some serious $$$. but if the machine is sitting empty at the time they might be ok with it. can't hurt to try.
Reply
0
0
Trouble is, they dont want to take a small job. If they have a 4x8 machine they want enough quantity to at least do 1 4x8 sheet. And thats like 24 upper control arms.
Reply
0
0
Had a race sunday, won it. Coned away a run that would have been top 10 in pax. Setup is really weird now. Still fighting the terminal understeer issue except I get inside wheel spin on tight turns and bumpy exits, I need to confirm that the rear sway bar hasnt all of a sudden started binding. Whats double weird is that my rear tires are wearing faster than my fronts but I'm able to get way more heat into the fronts.
Currently the setup has ride frequencies of 2.79hz/2.7hz with a front roll couple of 57.5%. Once I make new FLCAs that can handle higher spring rates I'm thinking my ticket is 3.01hz/3.29hz with an frc of either 52.4% or 53.9% (depending on rear bar), and the ability to get it back up to 56.4% with a different front bar. This is going to be a whole lot looser than anything I'm used to driving, but with proper alignment and rake it shouldnt be a problem, just going to take more car control skill than the current setup. The current setup, any meat head with a reaction time faster than a corpse can drive moderately fast around a course. But it certainly cant dance and it really just drives like a fwd car that doesnt have lift off oversteer.
I still havent posted my video with data on the tubes of you. But here's the rest of the video. I had a god damn smudge on the middle camera I didnt notice. I posted all 3 angle of my cameras for the fastest clean and scratch runs. I feel lazy so I'll just link to 1 video that should show all the rest of the recent uploads on the right side.
This weekend I really need to clean up the garage and catalog my random parts to list them for sale. I also need to take apart my ignition switch and clean the contacts so that my wipers, blower, and extra gauges start working again because that circuit **** the bed.
The new LBJ for the control arms showed up. I'm also going to need to take measurements of that to see how it changes roll center compared to the stock lbj, if at all. And take better measurements to see if I want to play around with the LBJ pivot height or not. Then maybe I can finally get around to making the ******* control arms.
Reply
0
0


I wouldn't let one vendor constrain you, especially when water jetting is so easy-peasy.
-Zach
Reply
0
0
JAWS (John Albert Welding) in Amherst NH has done small water jet jobs for me on numerous occasions. He does a lot of small production jobs for DEKA and such so he doesn't demand volume jobs like the big SM shops.
I wouldn't let one vendor constrain you, especially when water jetting is so easy-peasy.
-Zach
I wouldn't let one vendor constrain you, especially when water jetting is so easy-peasy.
-Zach
Reply
0
0
Havent really touched the car much. I did change the oil and send it out to black stone. Kind of boring results. The next oil change will be a lot more interesting.
One more race left in the season for the car. I'm now on a set of tires made up from 1 tire from the set I bought as stickers and a set I got for free that had 1 corded tire. Seems legit...
The fuel pump wiring kind of caught on fire at the last race, but only near the relay. Go more than a couple inches away from the relay and everything is all cool with the wiring. I'm going to check closer to the fuel tank to see if everything looks fine, then just put a new relay and socket in. I've got the stuff to duct the mouth but I dont know how far I'll end up there. I'm buying a beat to **** miata this weekend to take the hard top off of and either part out or sell depending on how it looks. And I've got some lap belts so I can nix the seat belt retractors.
Plans for the winter are more limited this year.
Install valve springs and check lash
If lash needs adjustment, buy shimless ford ztec lifters
Remove seat belt retractors, add lap belts
Remove soft top, add hard top
Make carbon/kevlar front fenders and rear flares
Make carbon endplates for the wing
Plastidip Car
Install Singular Motorsports hood vents
Make the high beams work
Add a capacitor to the ignition harness
Add some coolant to the water so the block doesnt freeze
Duct the rad mouth
Check the brake pads and replace as necessary, lube sliders
Make sure stuff hasnt loosend up
Optional
New drivers seat, put current driver seat on floor of pass side
New splitter, now that I understand the rules better I can still go bigger
New canards
Delrin diff mounts
New control arms
New springs
Reply
0
0
Already crossed a few good things off that list. Hardtop acquired, soft top and seat belt retractors removed, lap belts added, fuel pump wiring fixed, antenna removed.
Plans for the winter are more limited this year.
Install valve springs and check lash
If lash needs adjustment, buy shimless ford ztec lifters
Make carbon/kevlar front fenders and rear flares
Make carbon endplates for the wing
Plastidip Car
Install Singular Motorsports hood vents
Make the high beams work
Add a capacitor to the ignition harness
Add some coolant to the water so the block doesnt freeze
Duct the rad mouth
Check lube sliders
Make sure stuff hasnt loosend up
Optional
New drivers seat, put current driver seat on floor of pass side
New splitter, now that I understand the rules better I can still go bigger
New canards
Delrin diff mounts
New control arms
New springs
Reply
0
0
Well I won the regional championship. With the other driver the car was running times on par with the panda while I was on 1 150 run tire that probably corded the first time I hit the brakes that day, and 3 other tires I got for free that had somewhere north of 100 runs and were covered with opr. I liked the lap belt.
Video's below
Video's below
Reply
0
0
So I pulled the intake manifold to change the starter to an NB unit and delete that failed attempt at crank case venting. I havent done much on this car between fixing the wrx and parting out the 95M. But now I'm starting. I might have to completely change all my plans because I have to totally killer offer on an MS3 pro which will make/allow me to finally re-wire the engine harness the way I want to.
Reply
0
0
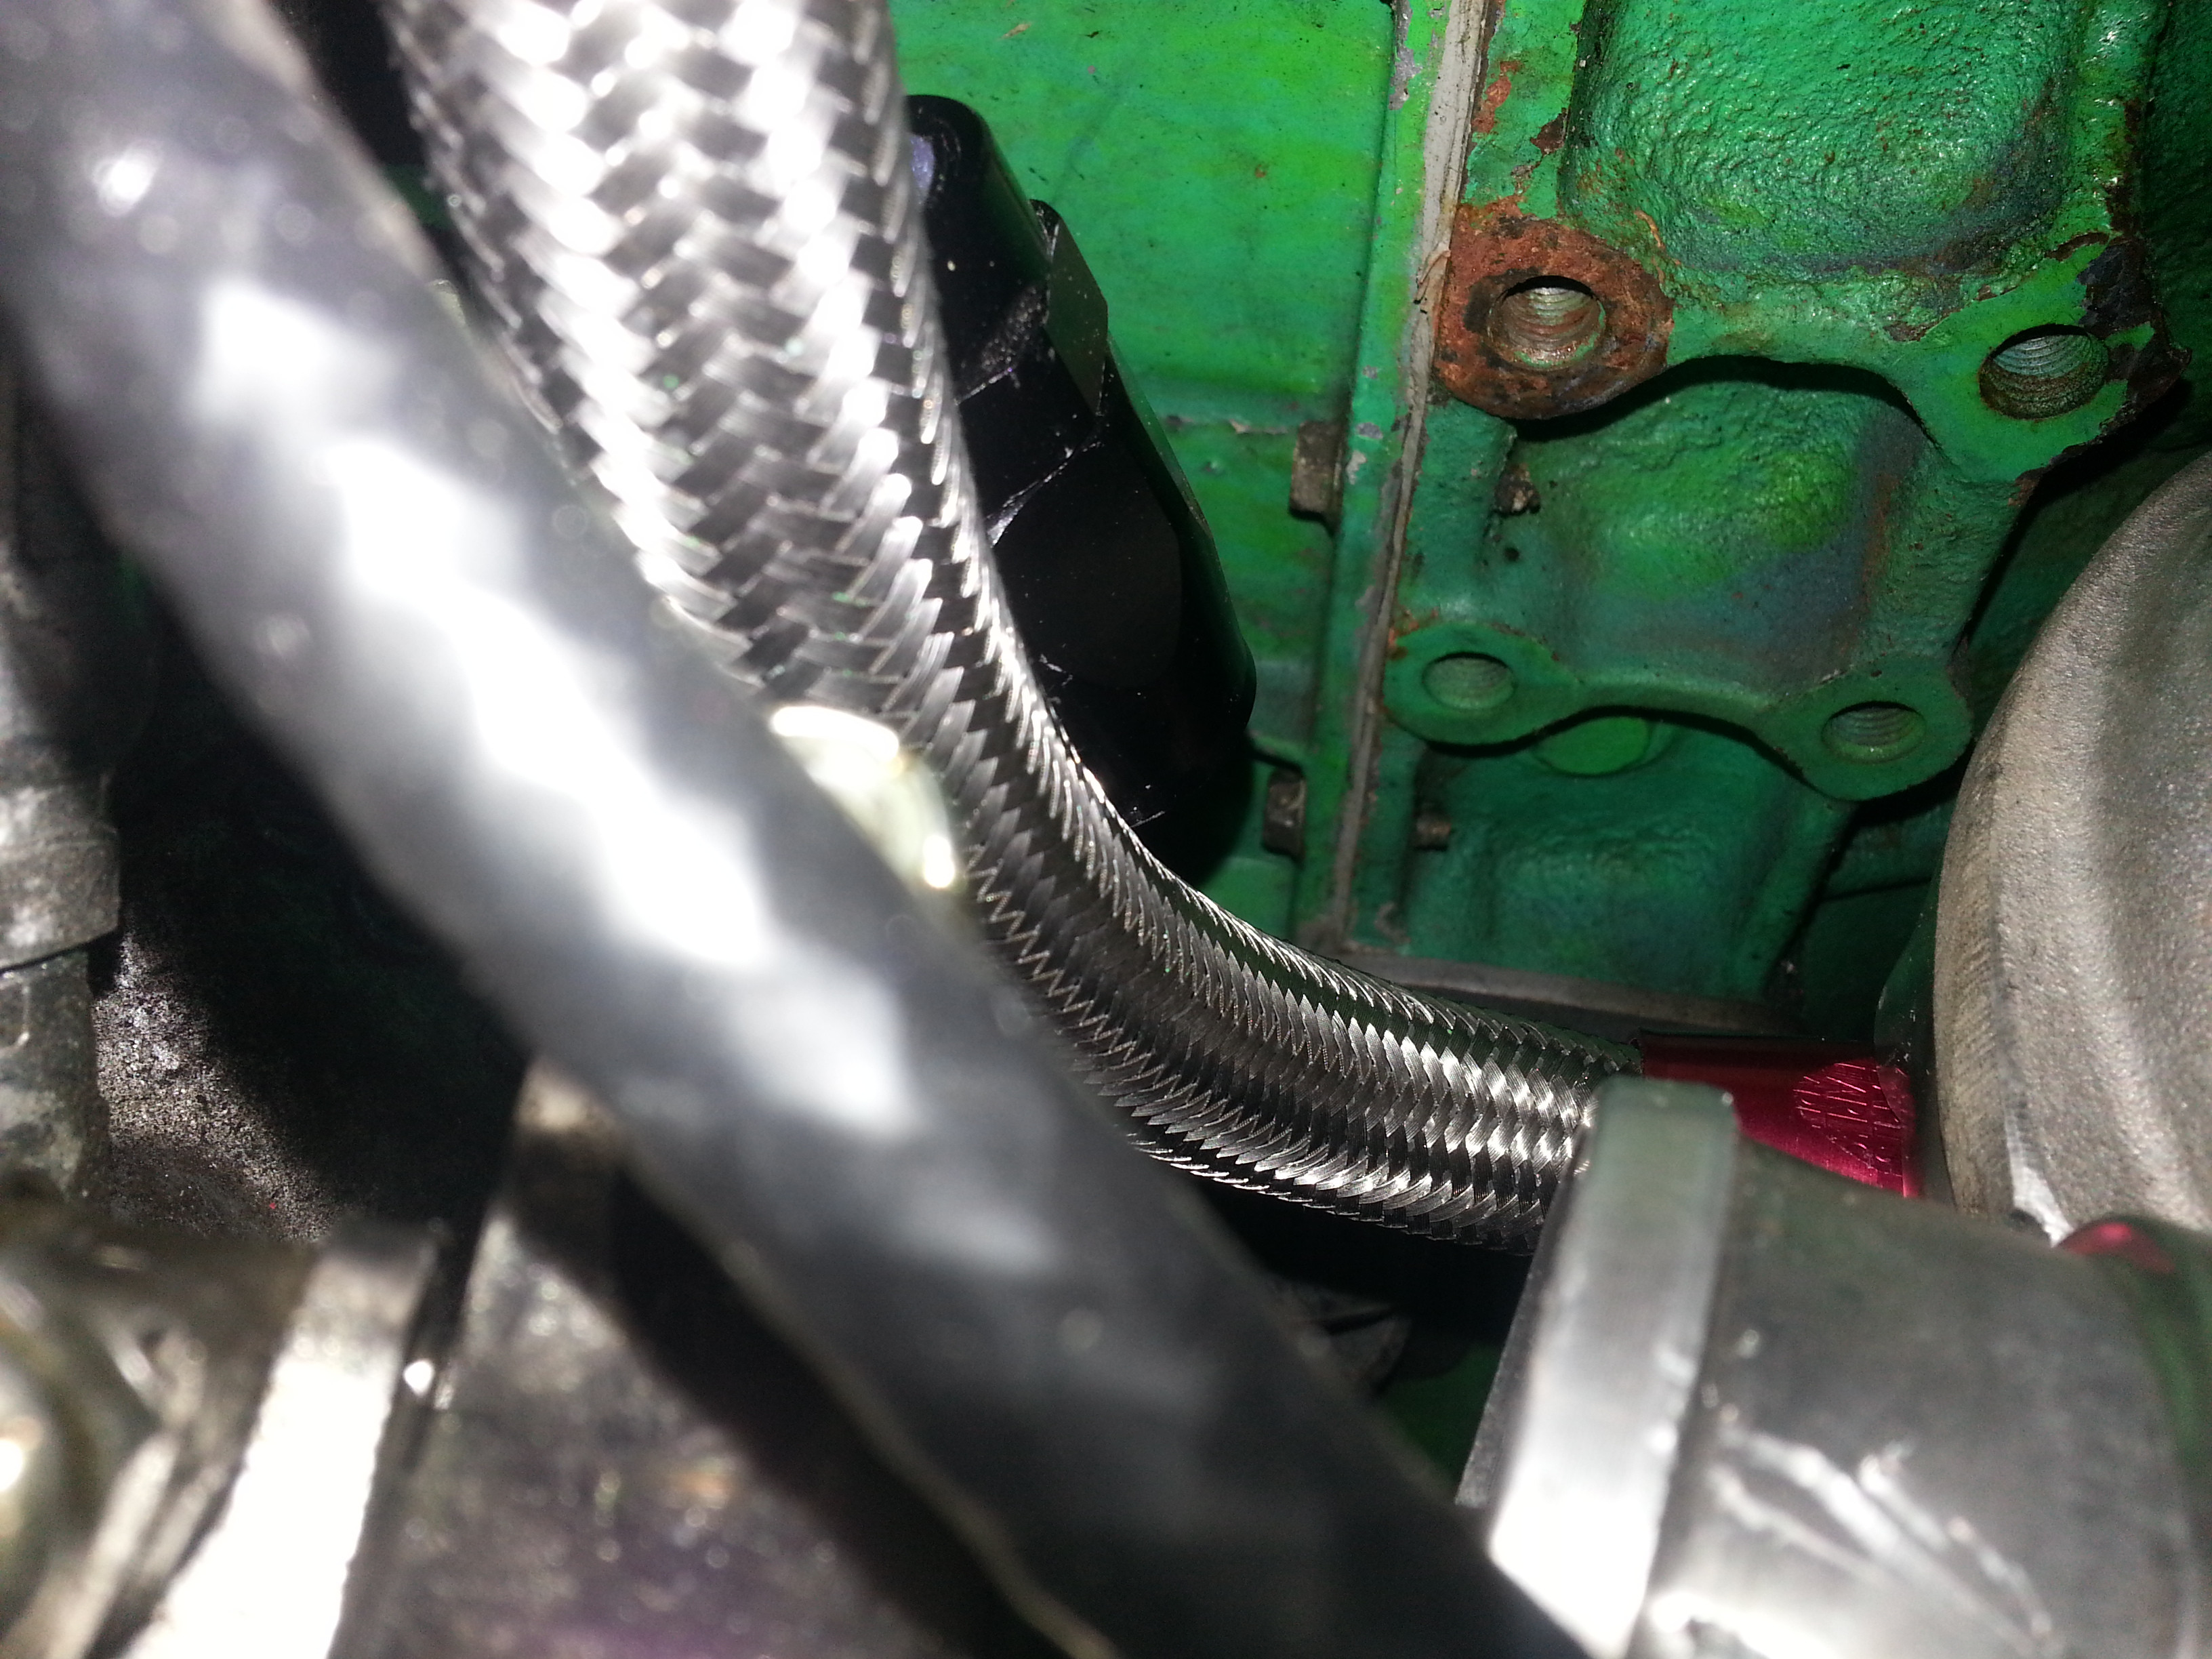
Finally did some more work on the car. Installed the NB starter, blocked the failed port. Broke 3 intake manifold studs, **** those things and **** this intake manifold. Pulled the turbo and the manifold to clean up the mess made by the failed block crank case venting port, found out that 75% of my vband was leaking, broke the ebcs, decided its time to make all the lines connecting to the turbo AN. Didnt get the MS3P, guy decdided he wanted to use it after all and I decided I didnt want to re-wire the whole car just yet. So next weekend I'll make and install the AN lines for the turbo, put grease on the vband so hopefully it makes a carbon gasket, and wire up and install the 4 port EBCS and put a big note on the dash board that I need to hit the dyno before race season starts so I can re-tune boost.
Reply
0
0
I'm a ********, forgot to order the actual hose for making the coolant lines, ordered the 1/2"NPT for the turbo connection instead of 3/8, the banjo fittings I ordered for the coolant to turbo connection dont clear the compressor cover. Yep. ****. Ordered the hose and the correct drain fitting, found that treadstone has custom banjos made so you can attach an hose at the coolant ports on an EFR and dropped nearly $40 on two of those. Maybe this weekend I'll actually make these ******* hoses.
In better non-build thread related news I finally have the sheet metal roller setup so I can make custom ultra light super quiet mufflers.
In better non-build thread related news I finally have the sheet metal roller setup so I can make custom ultra light super quiet mufflers.
Reply
0
0


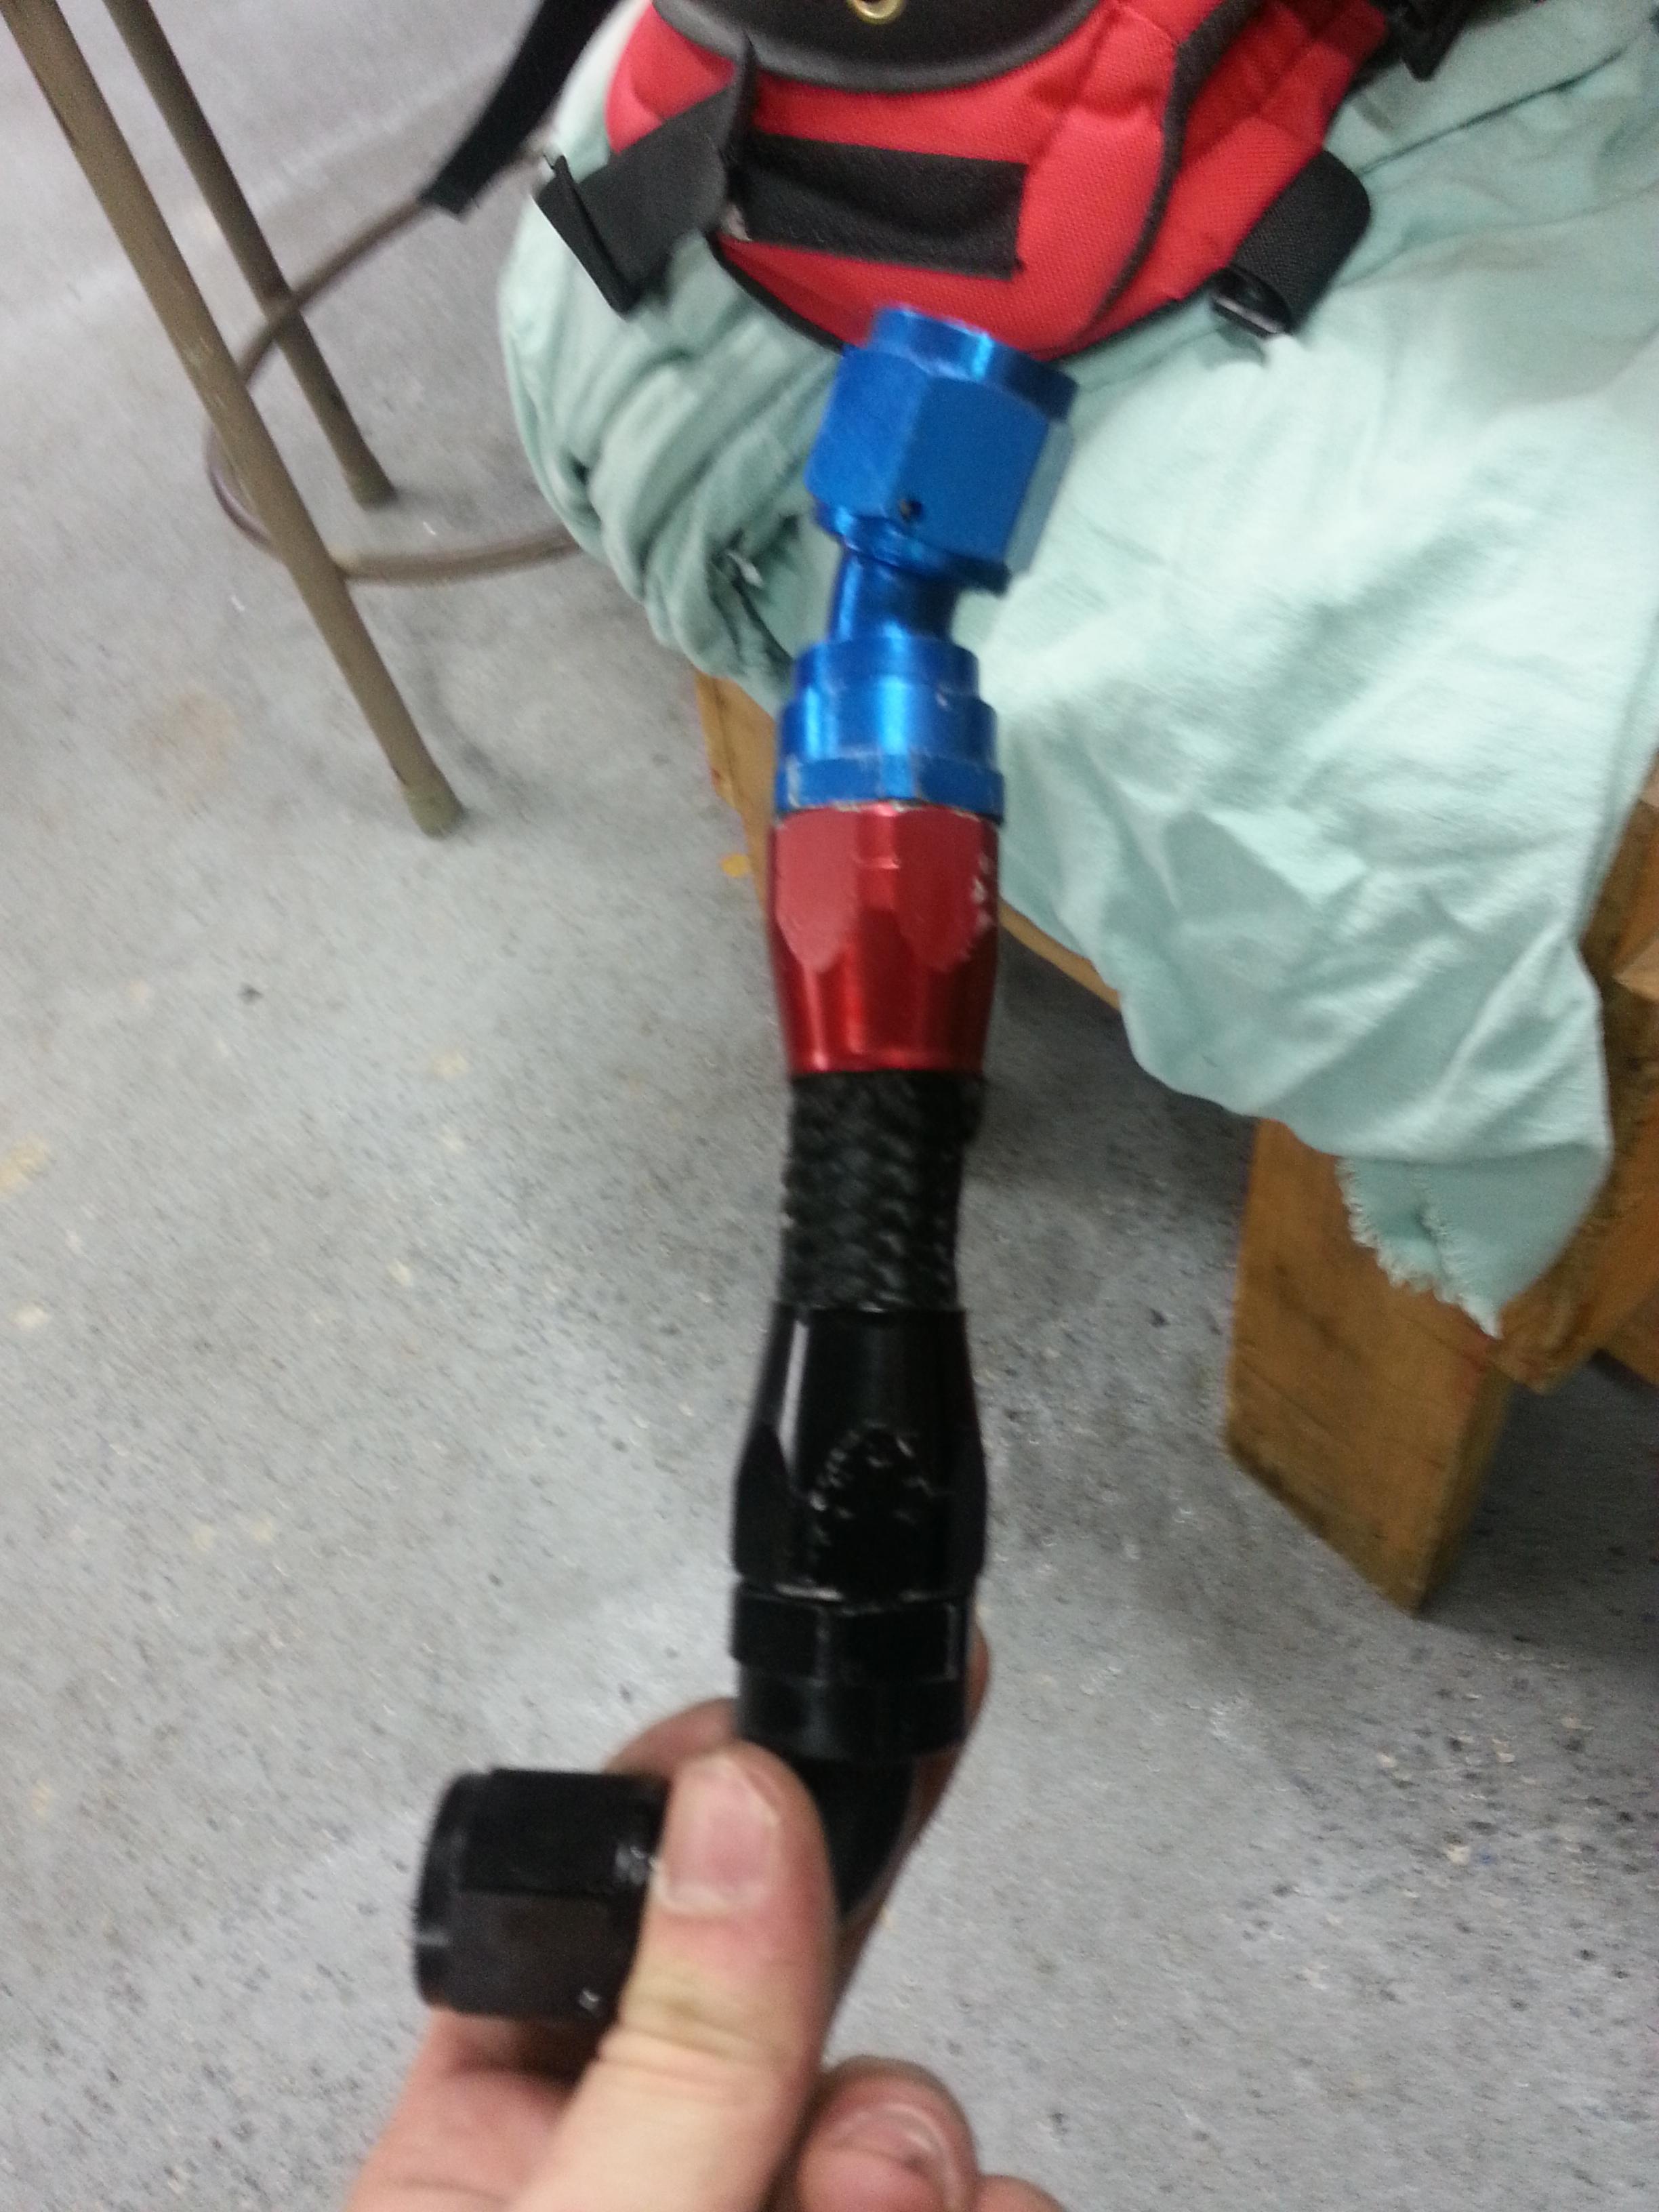
AHHHHHHH. Still unable to make a workable oil drain line. One last try. ******* hell I'm like $500 deep in trying to make a turbo oil drain. Its all because I just HAD to mount the turbo as low and as far back as possible. Thats what I have to work with, I found a slightly shorter 90� fitting thats in the mail.
This was the closest thing I had to working before I gave up and went with nipples and a rubber hose.
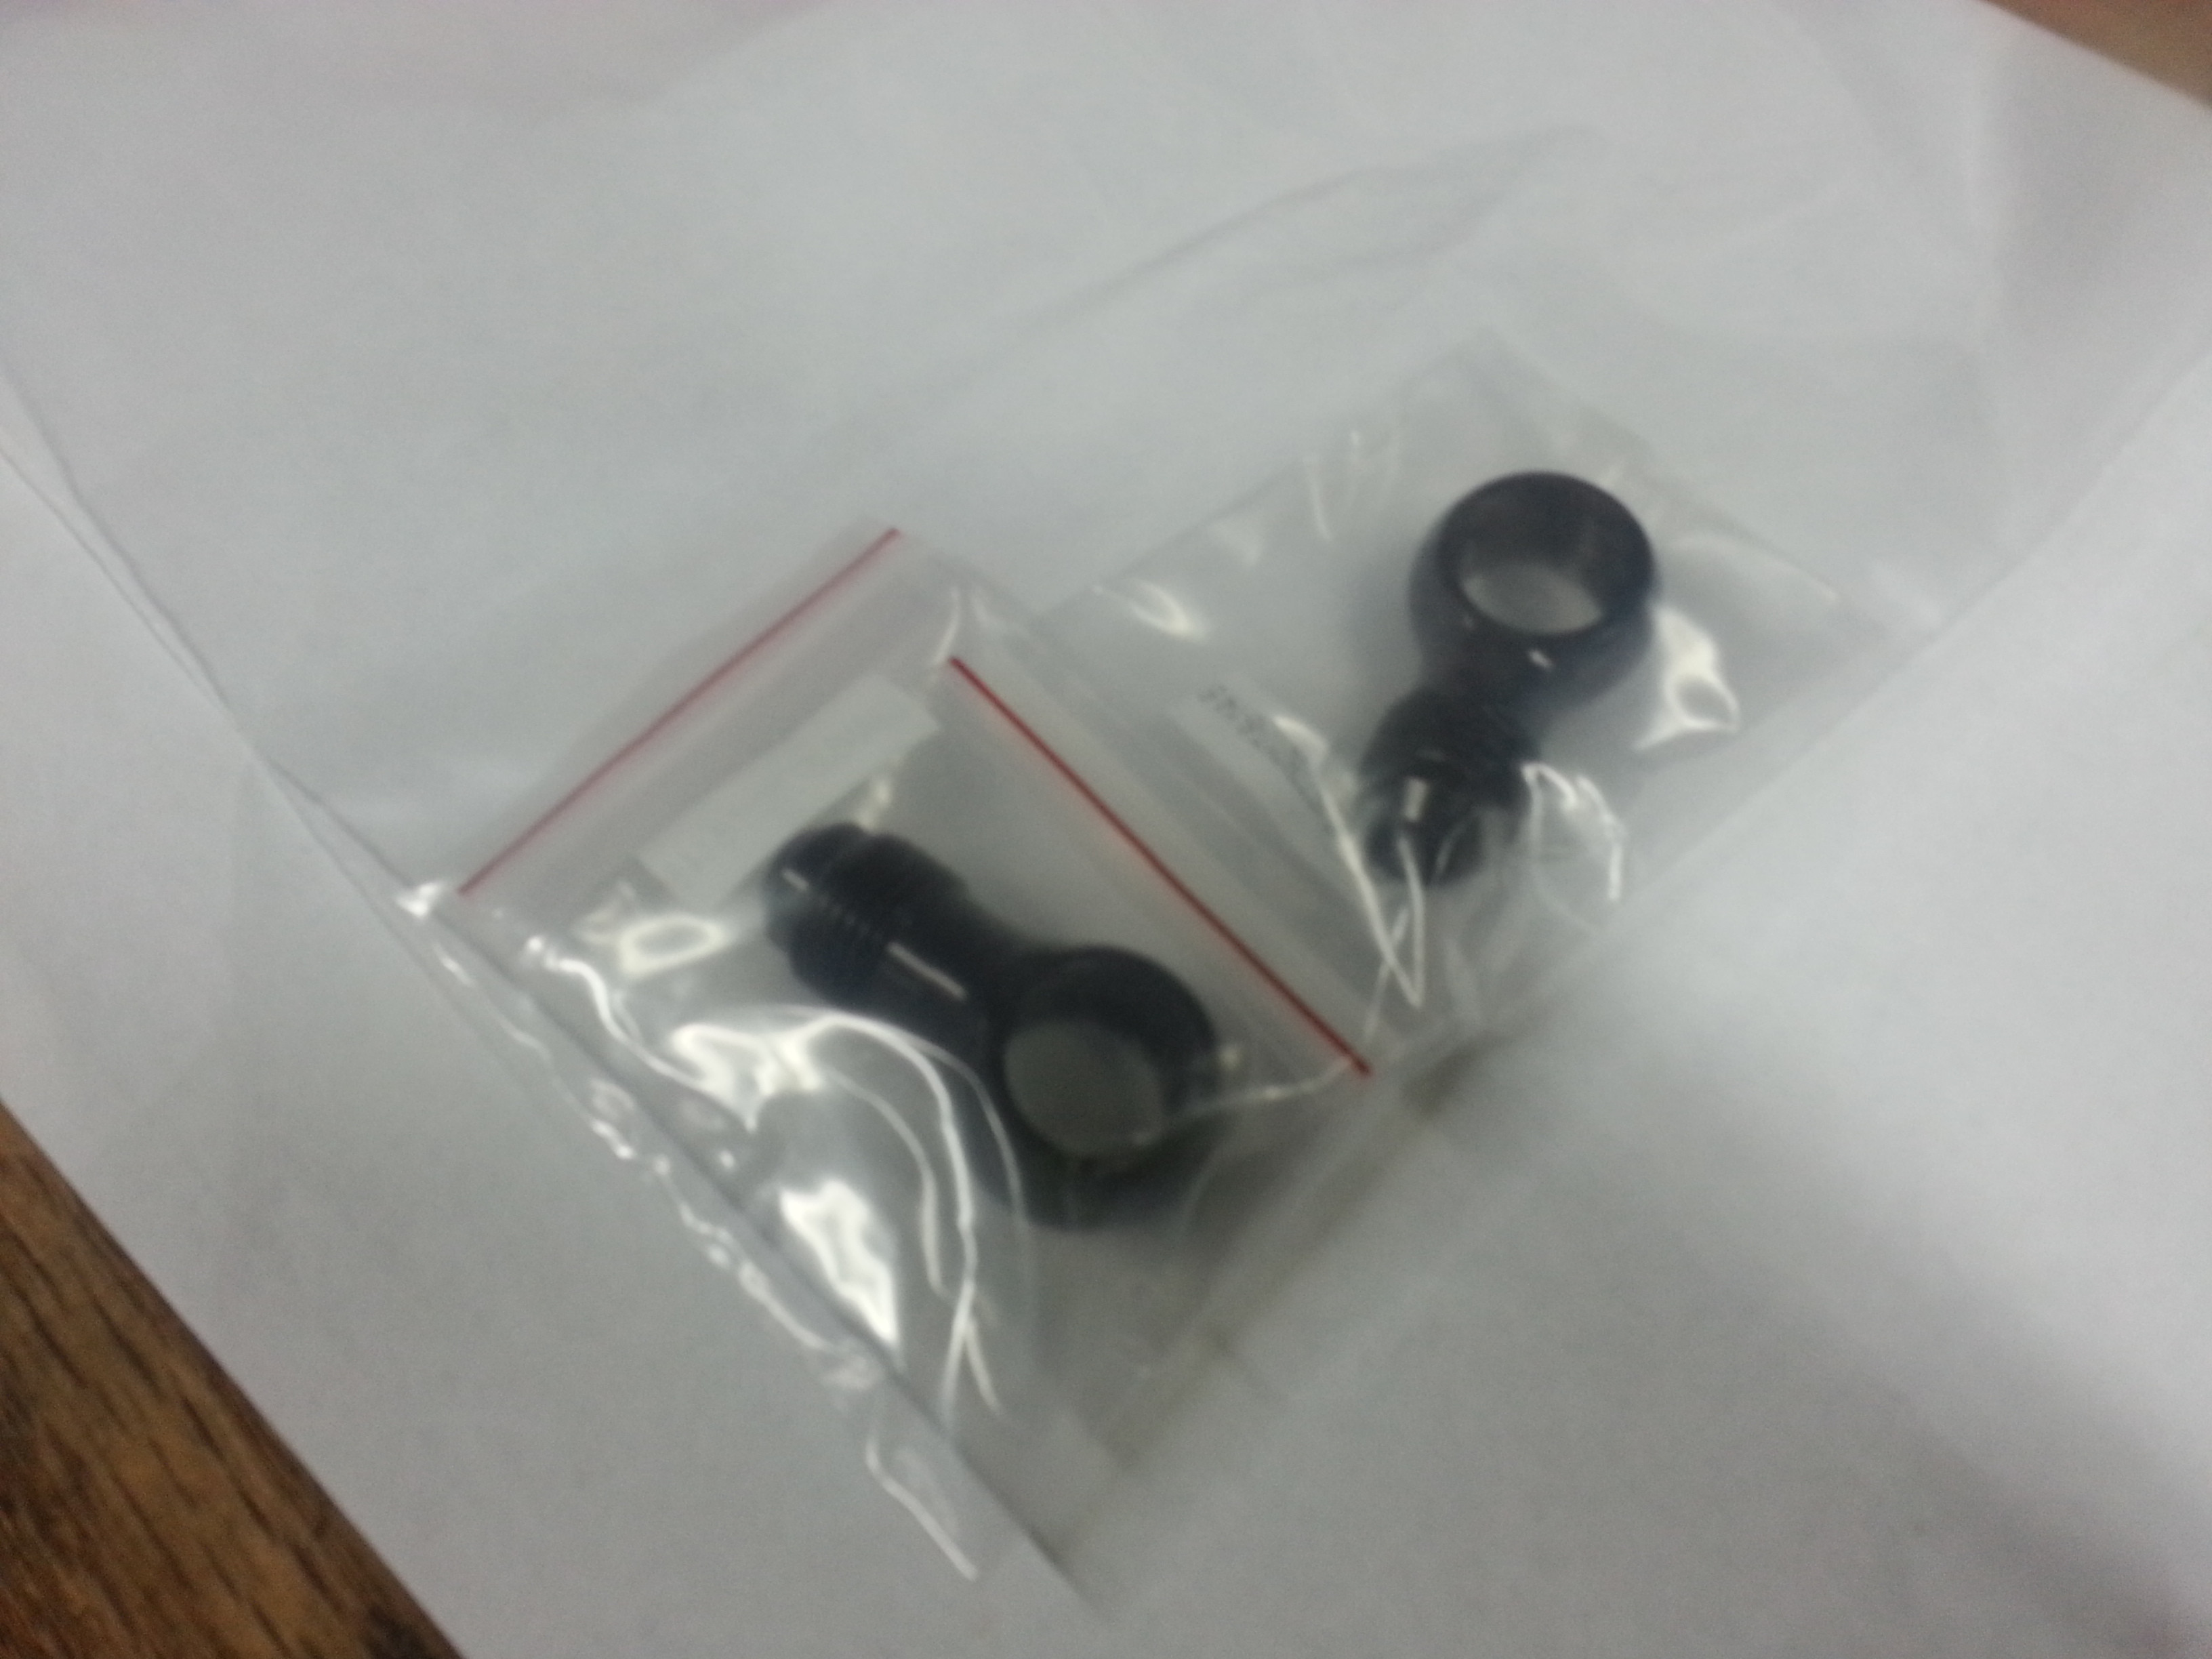
Also ******* treadstone. The $40 I spend on the super special, will actually fit an EFR banjo fittings were only the banjo part and not the bolt so I had to order those thats another $23 after shipping. FU.
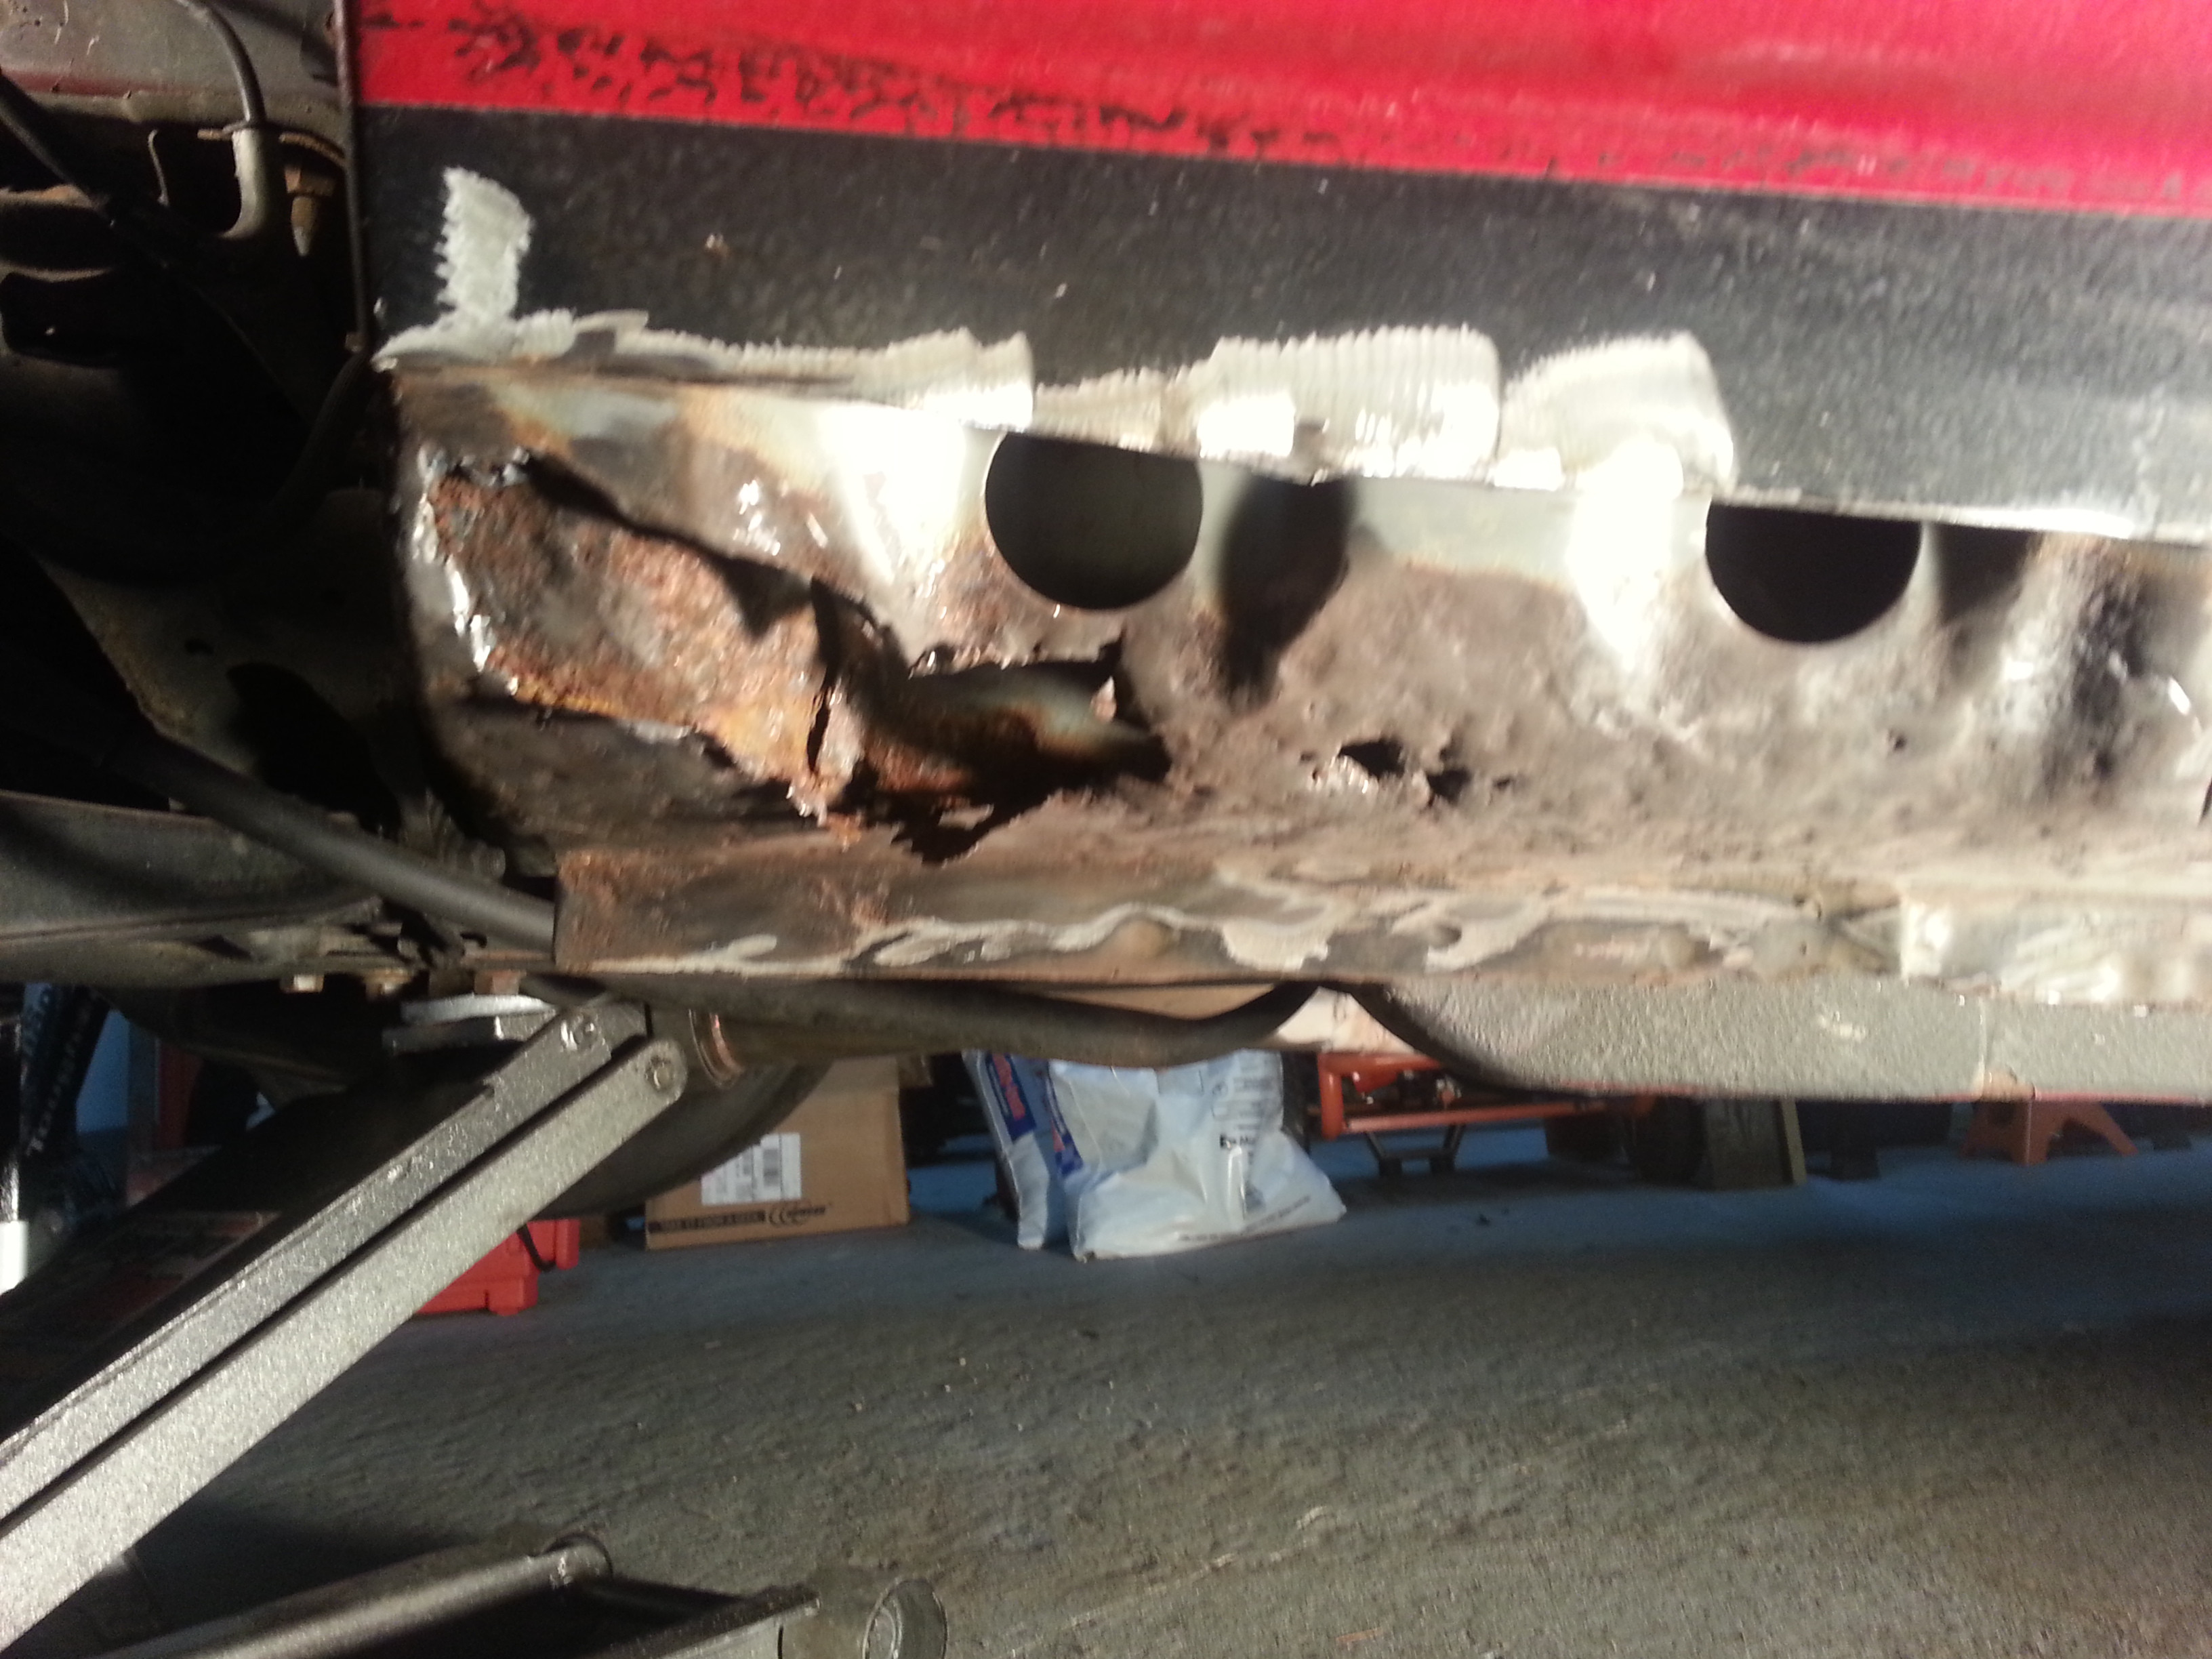
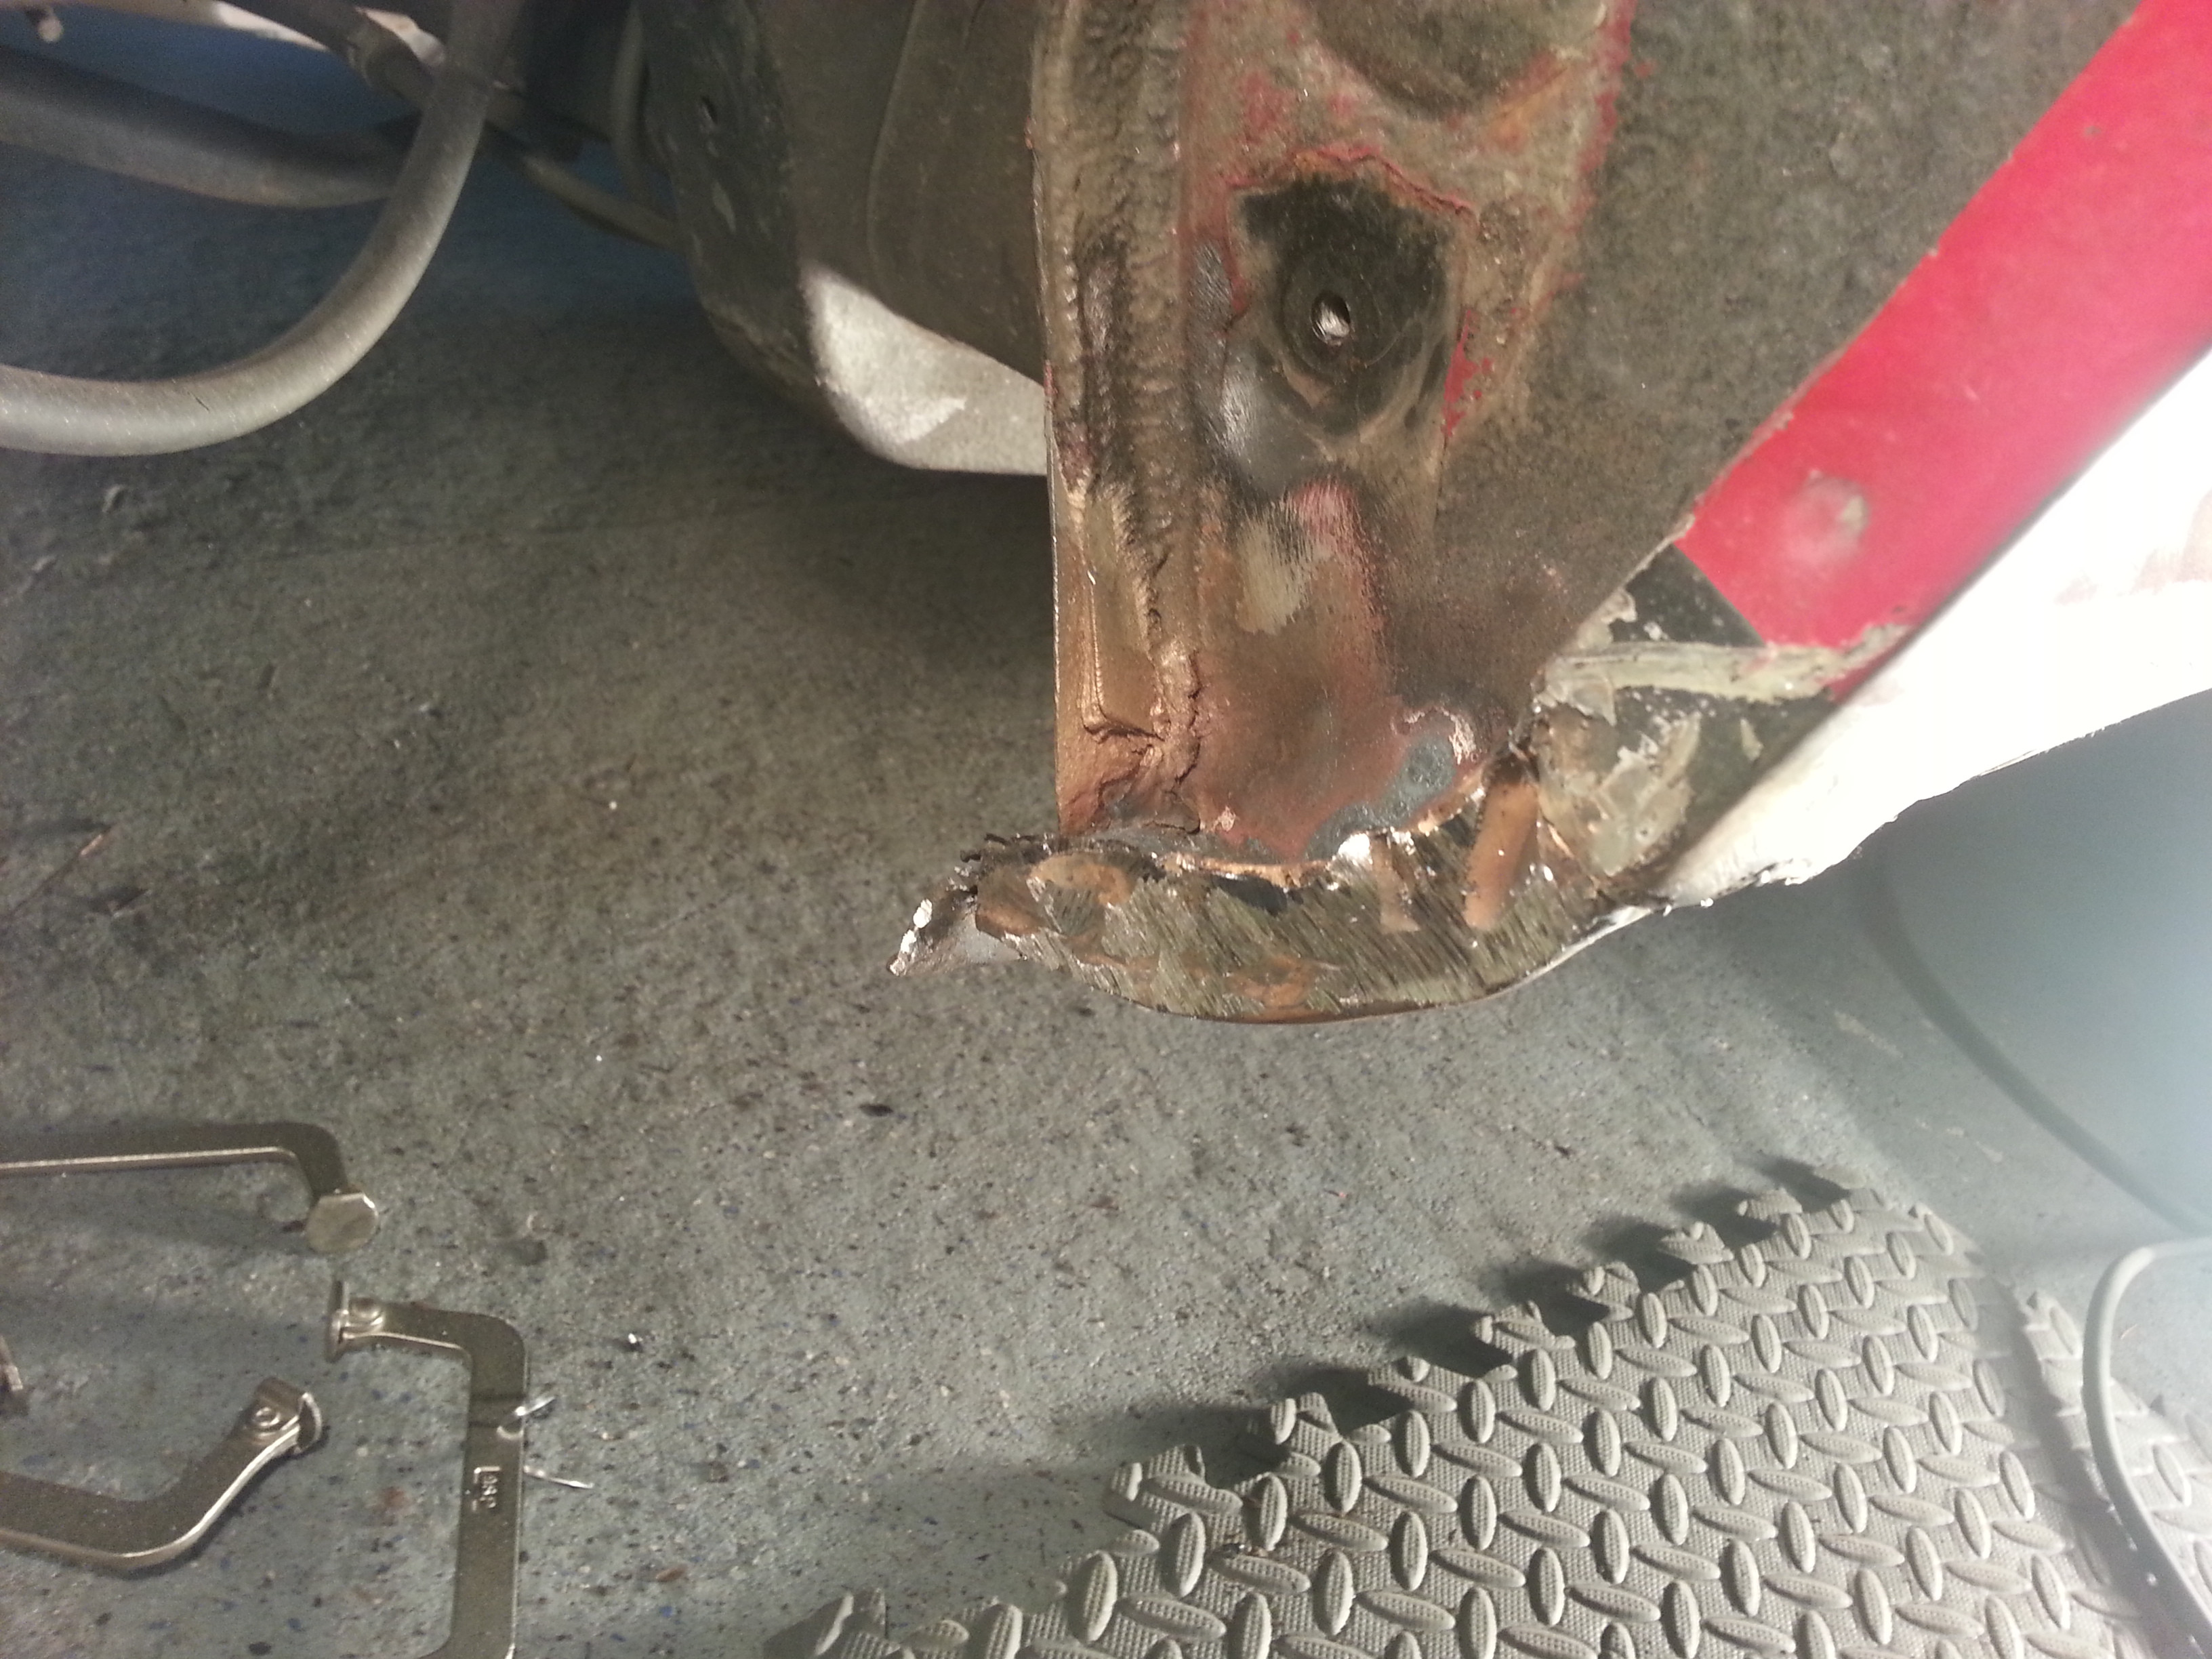
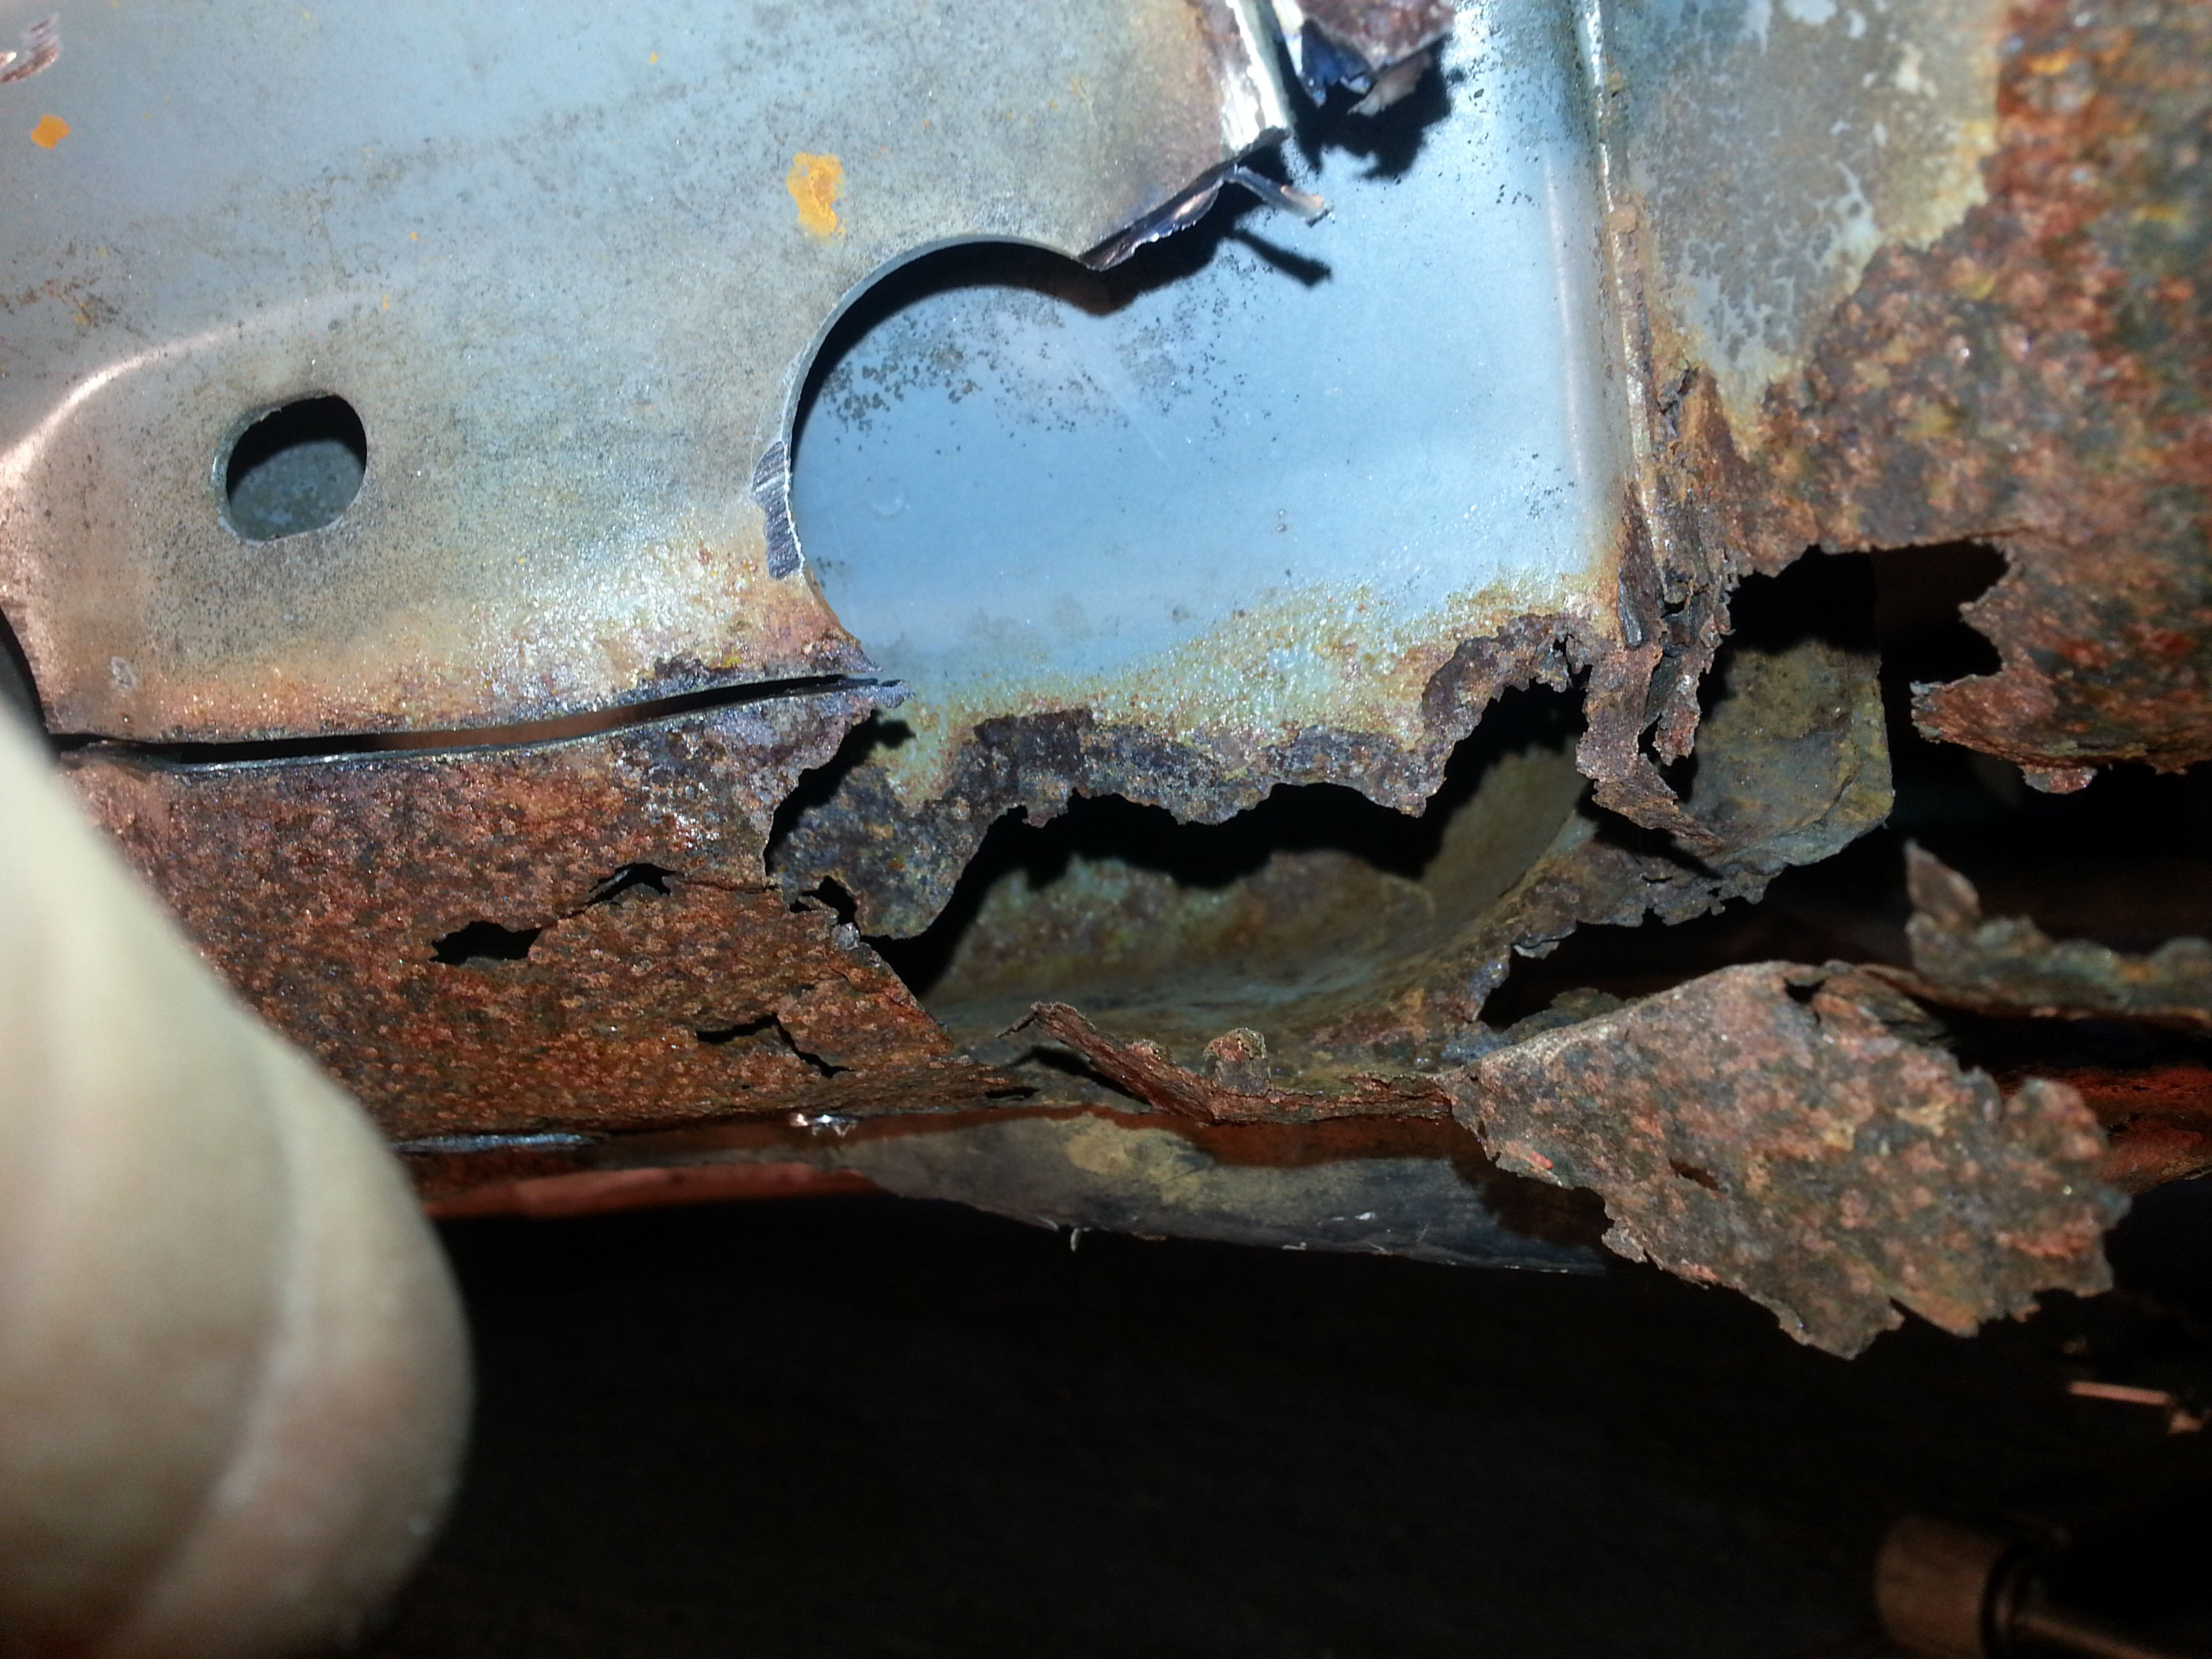
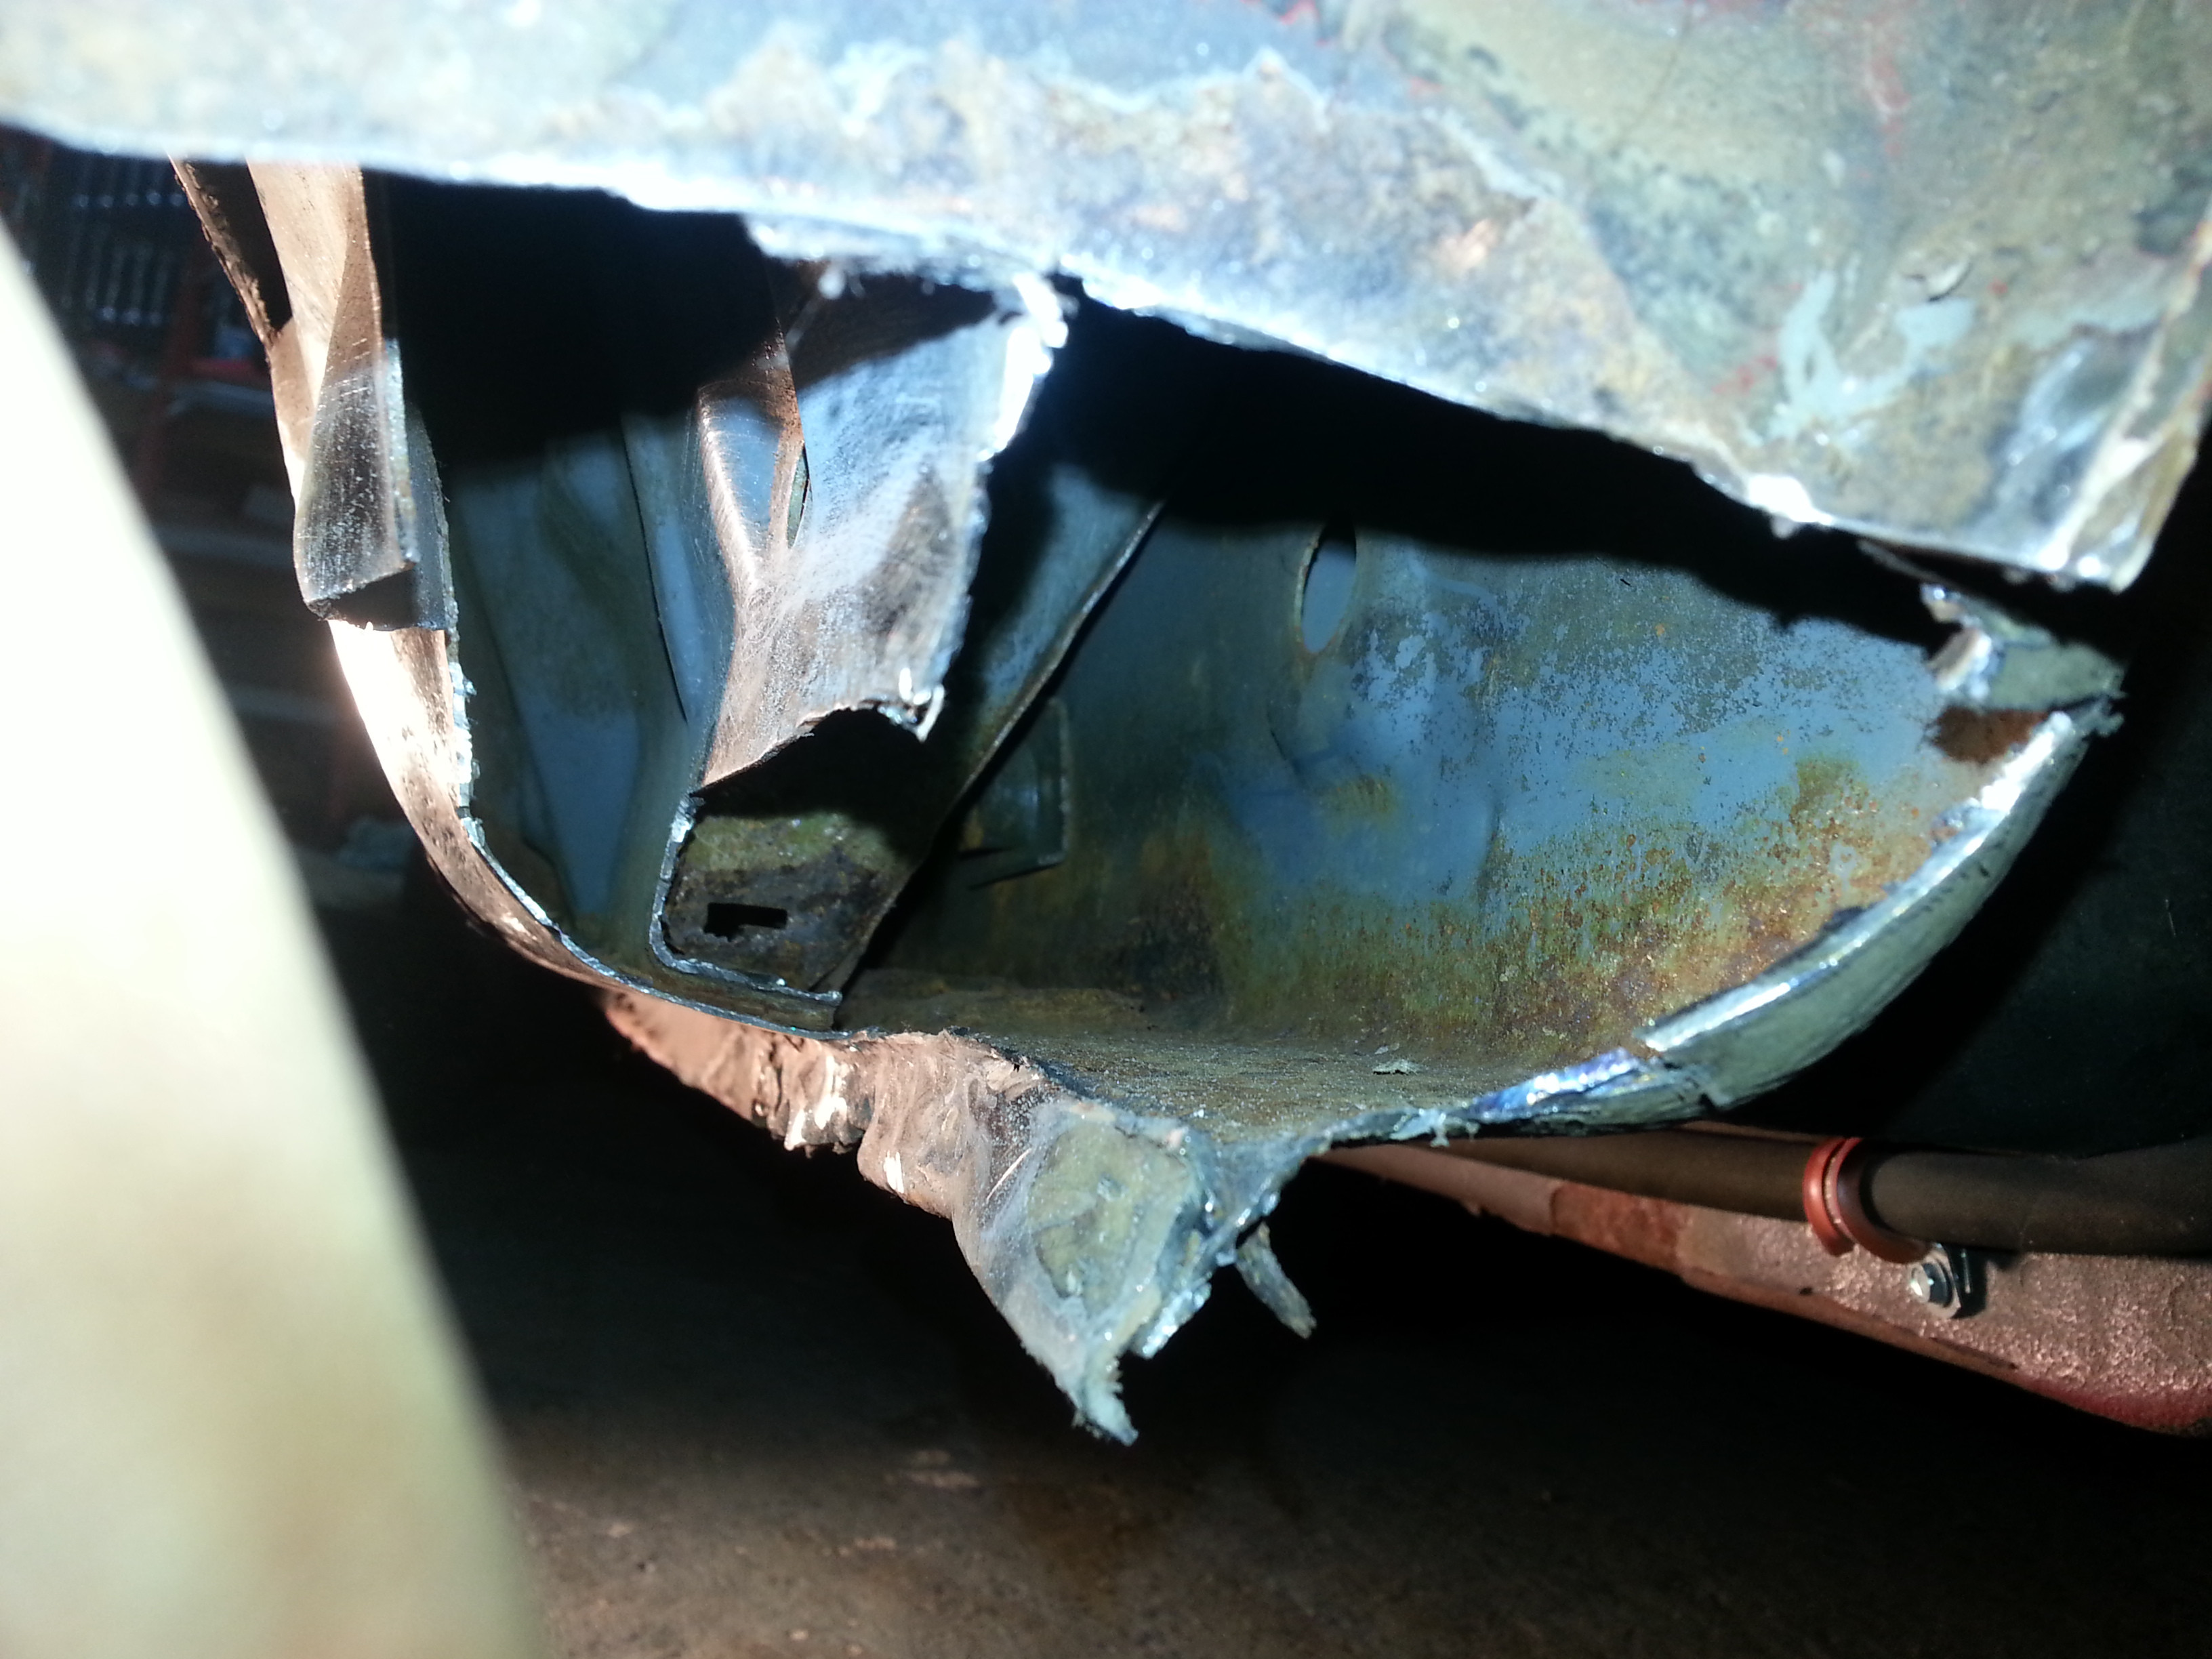
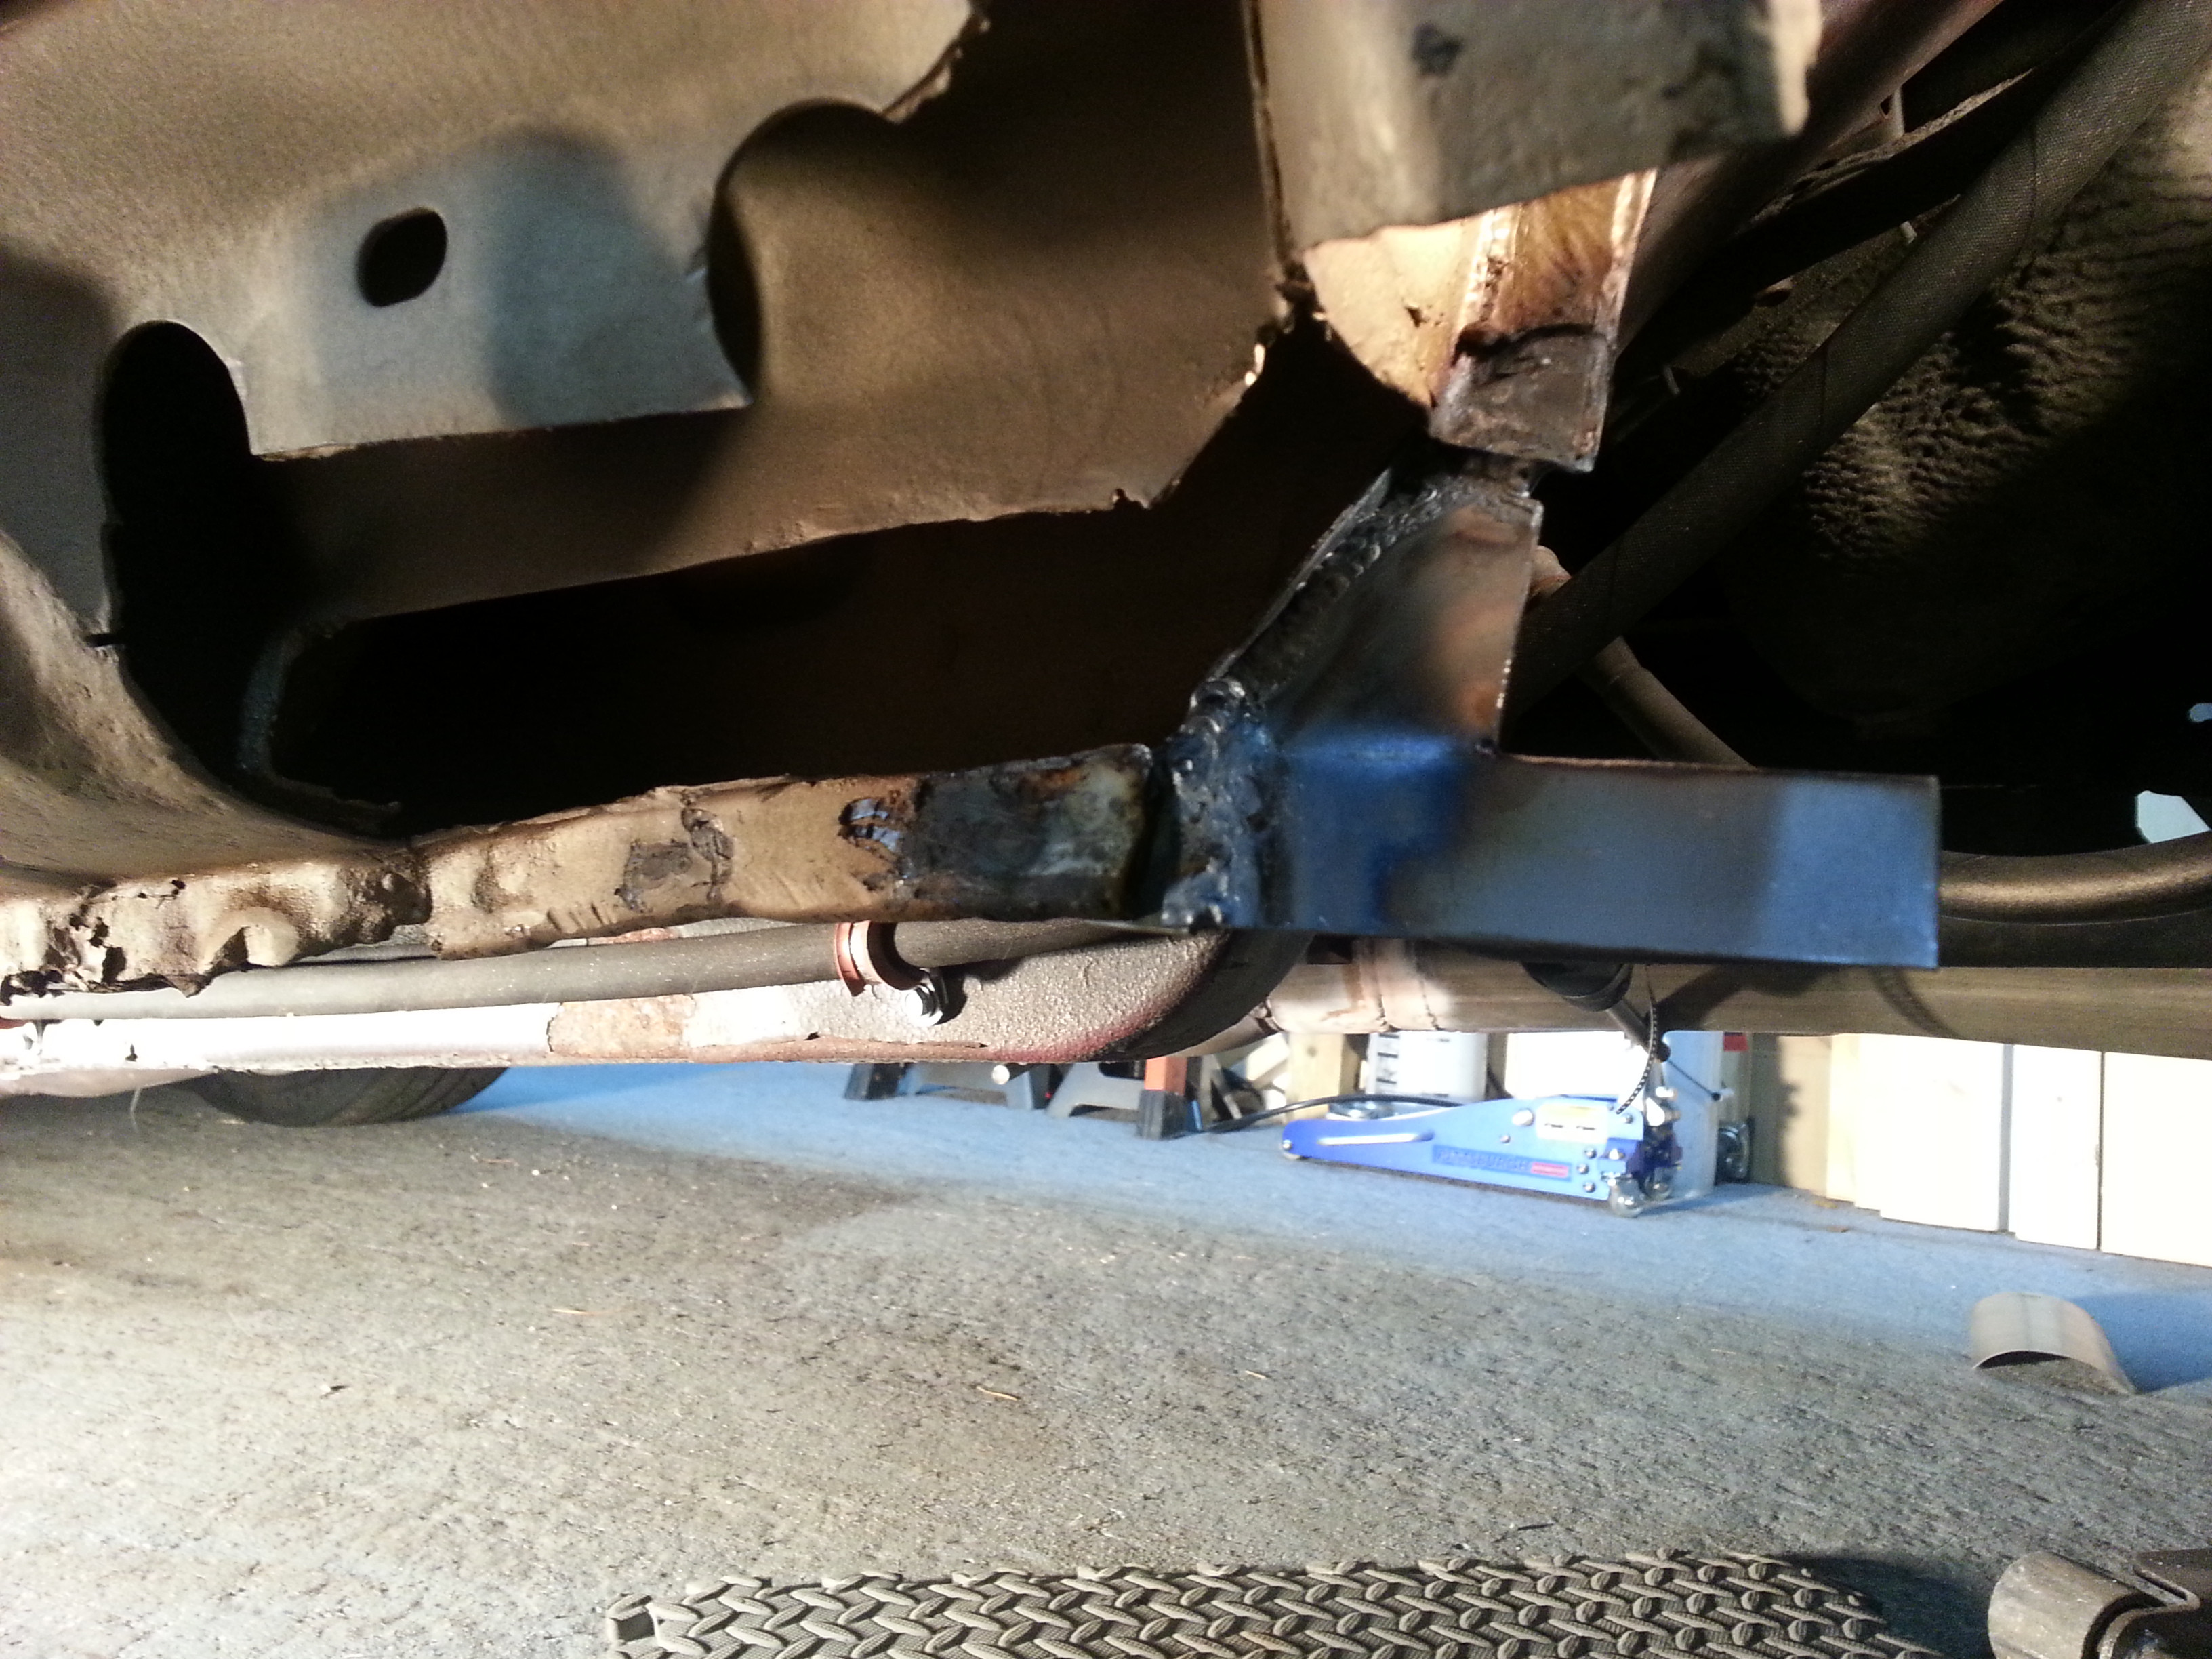
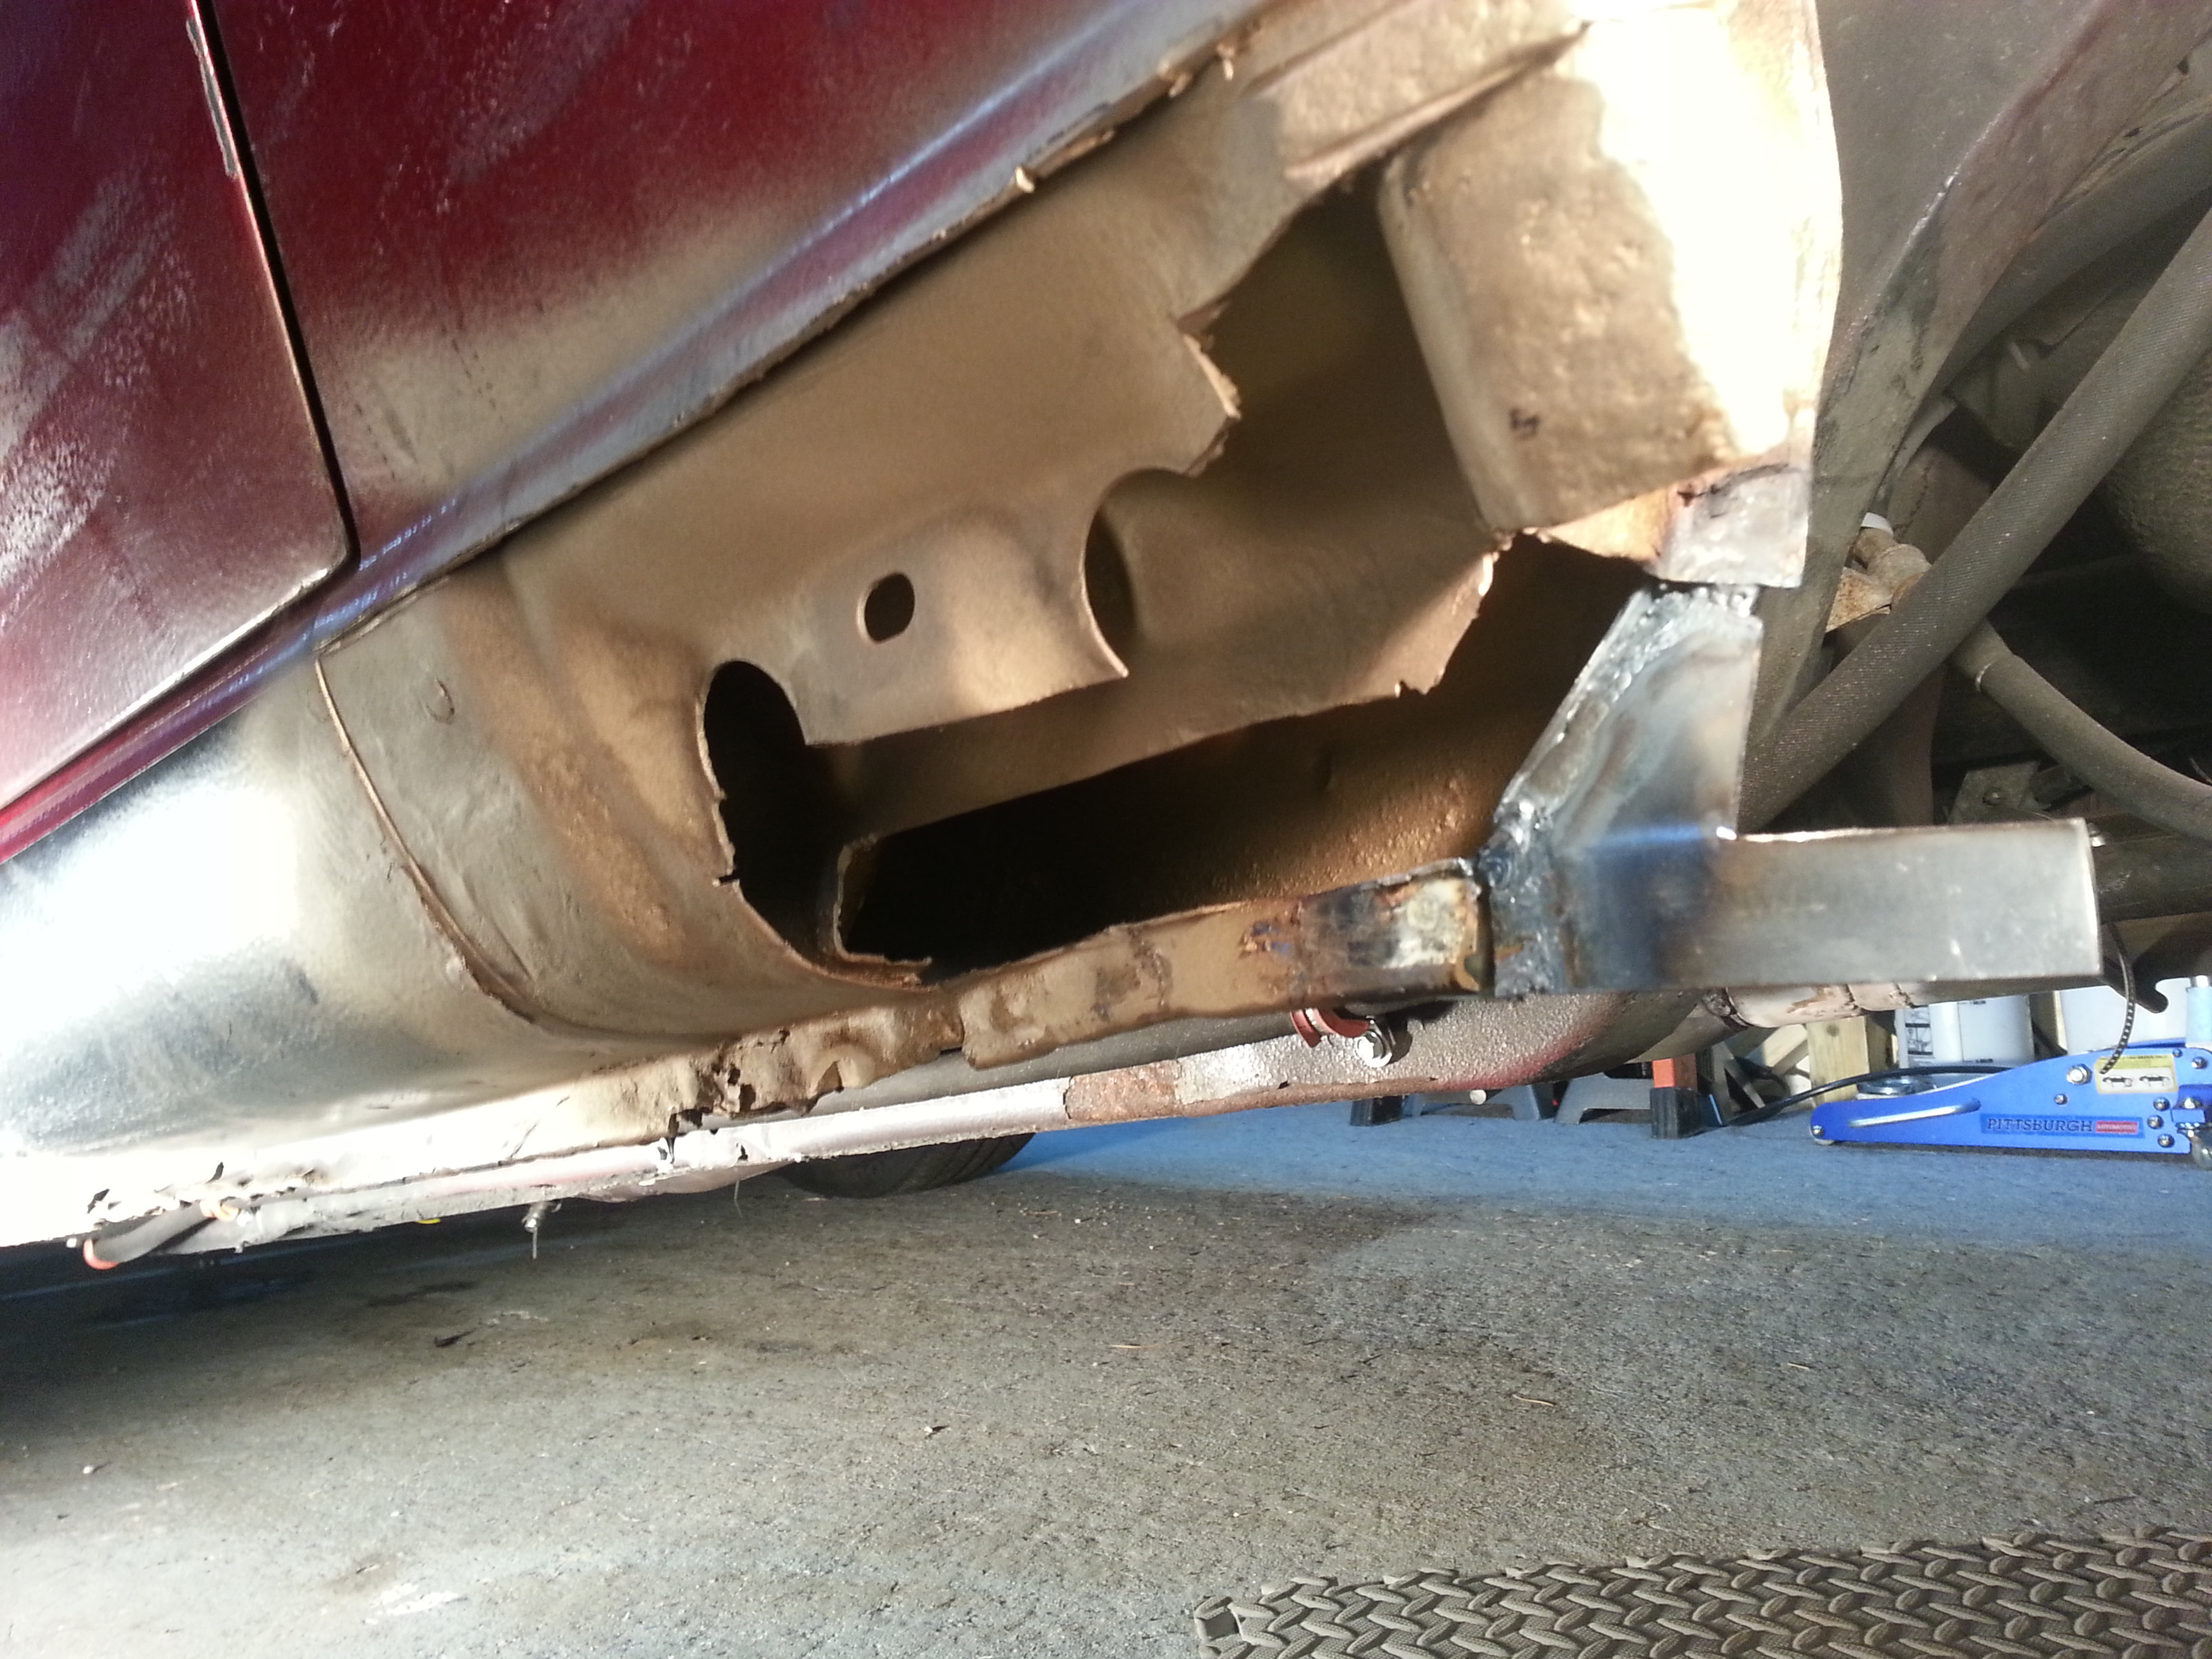
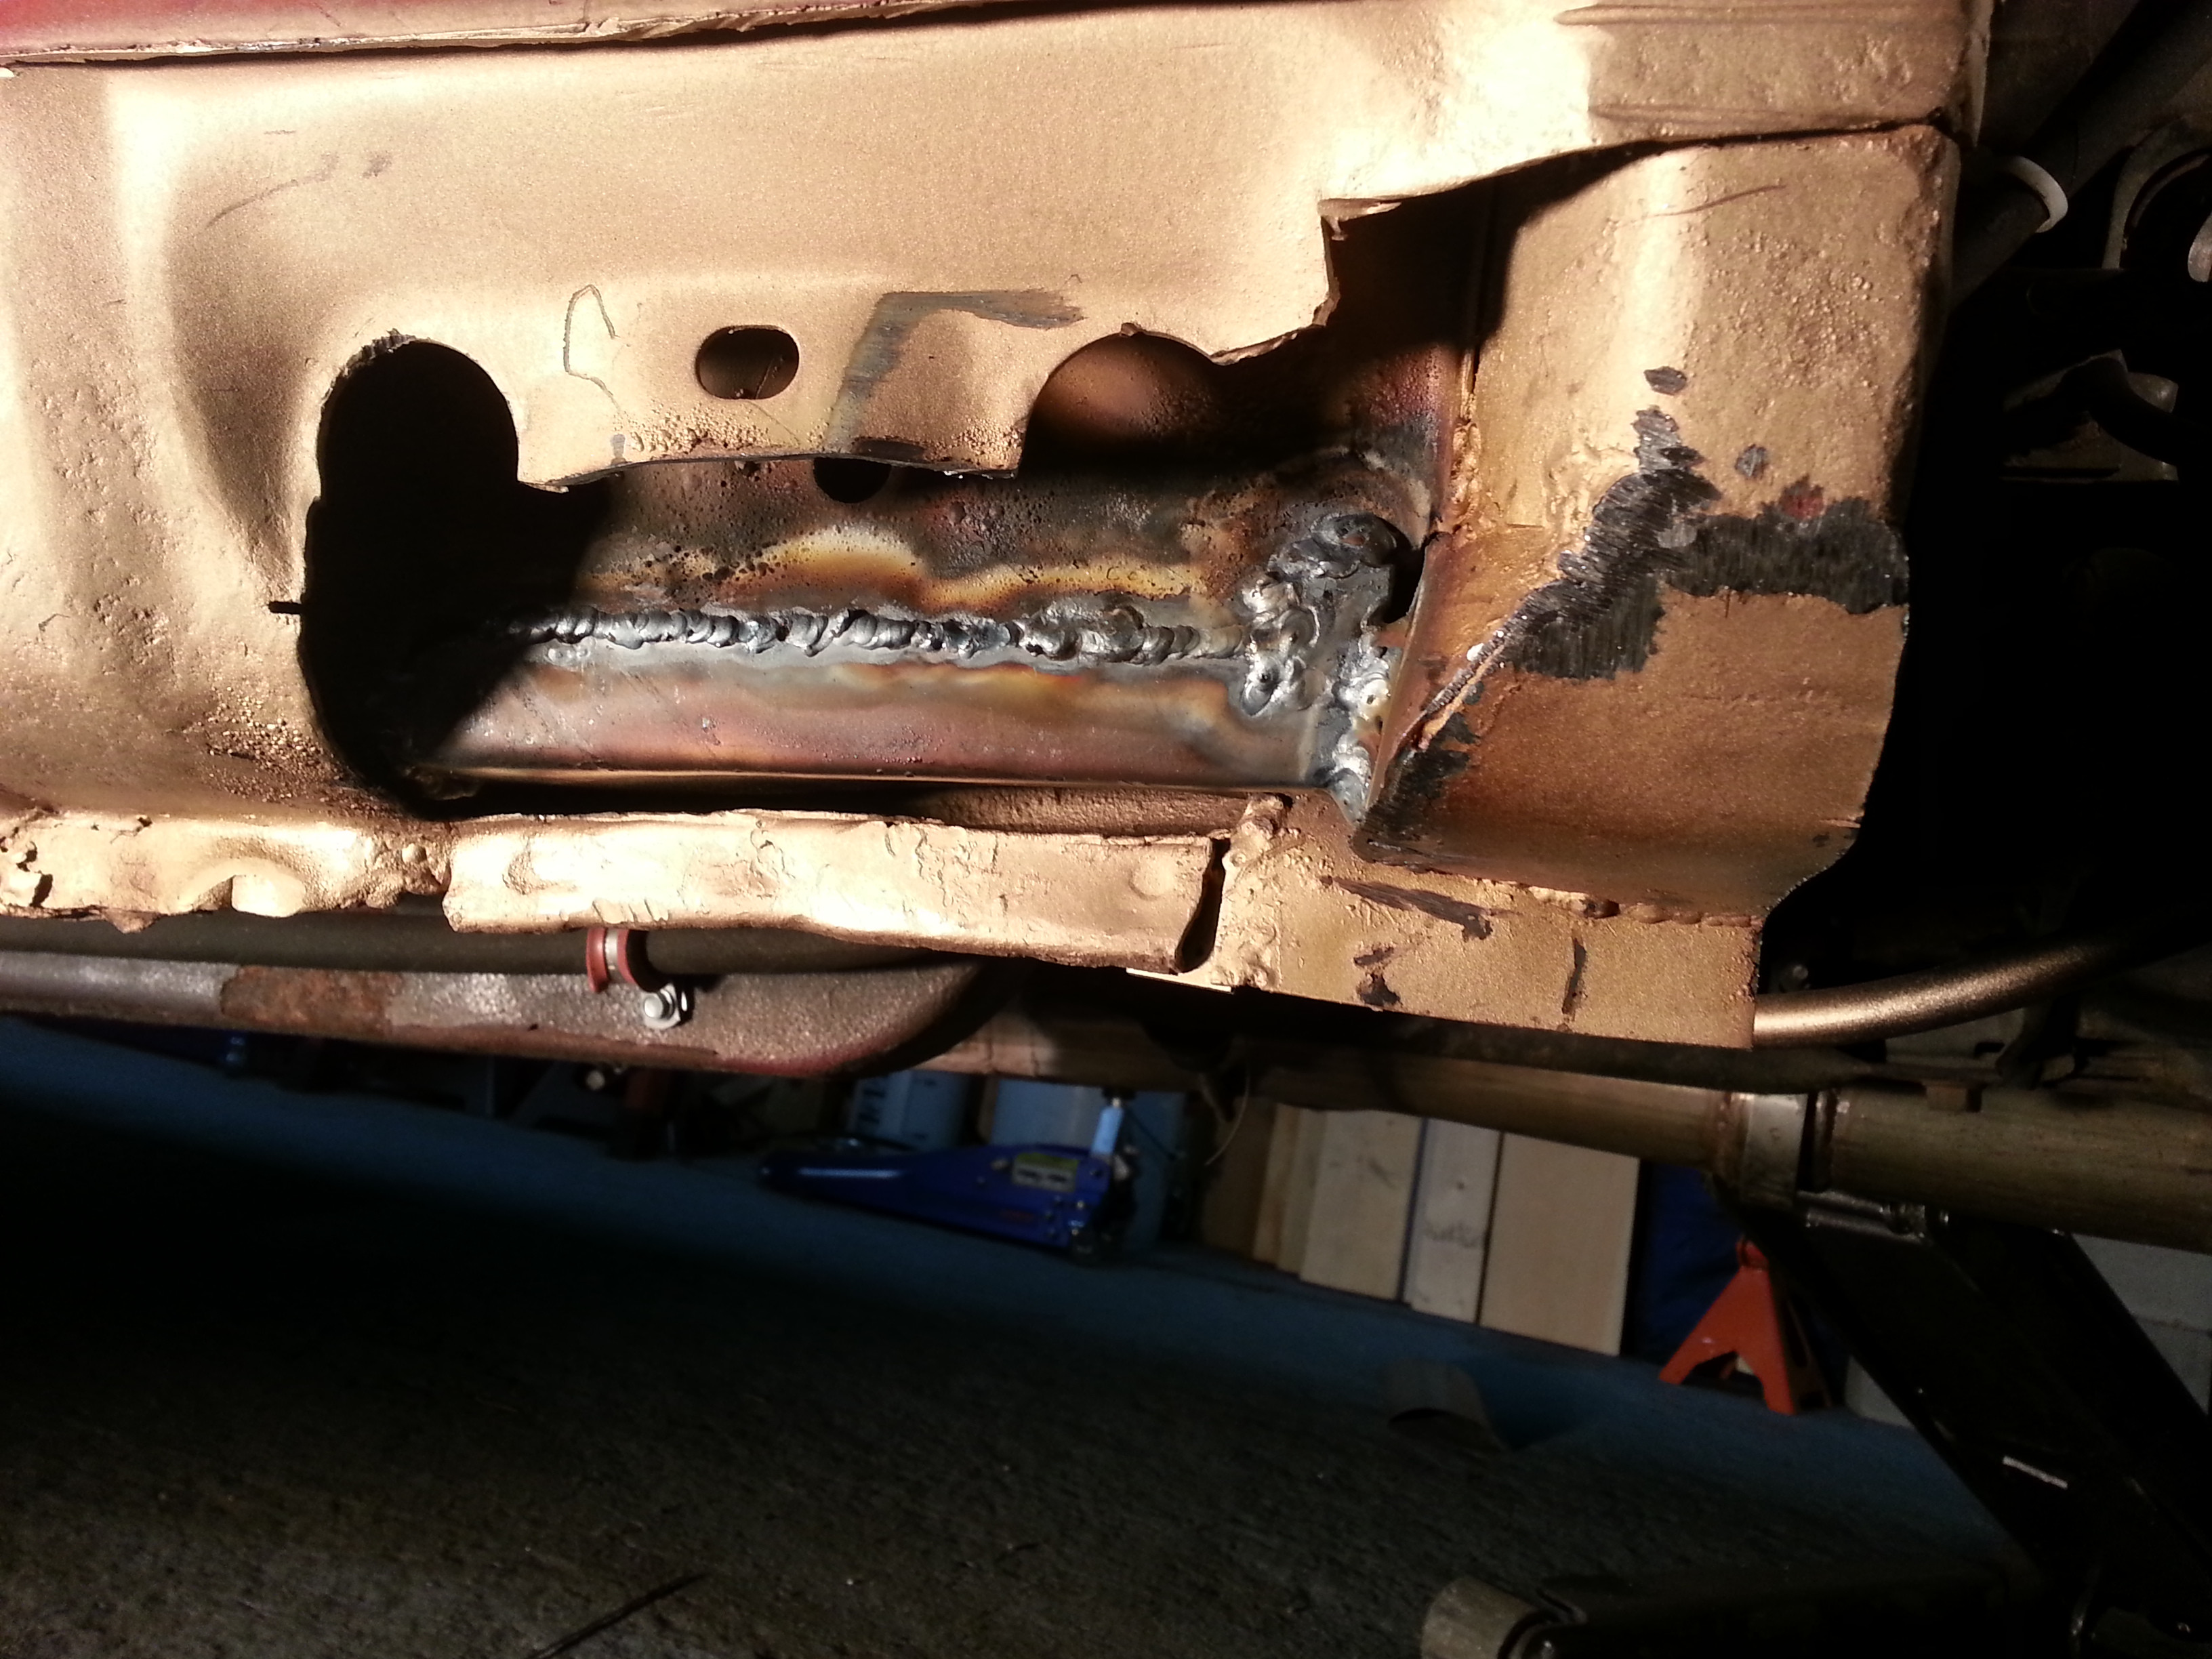
I did manage to glue the stock efr ebcs back together, and I've started cutting the rust out to do the rust repair. This is the less bad side. The other side I'm going to end up cutting off a **** load of the car because I know the rot has made it to the other side of the pinch weld.
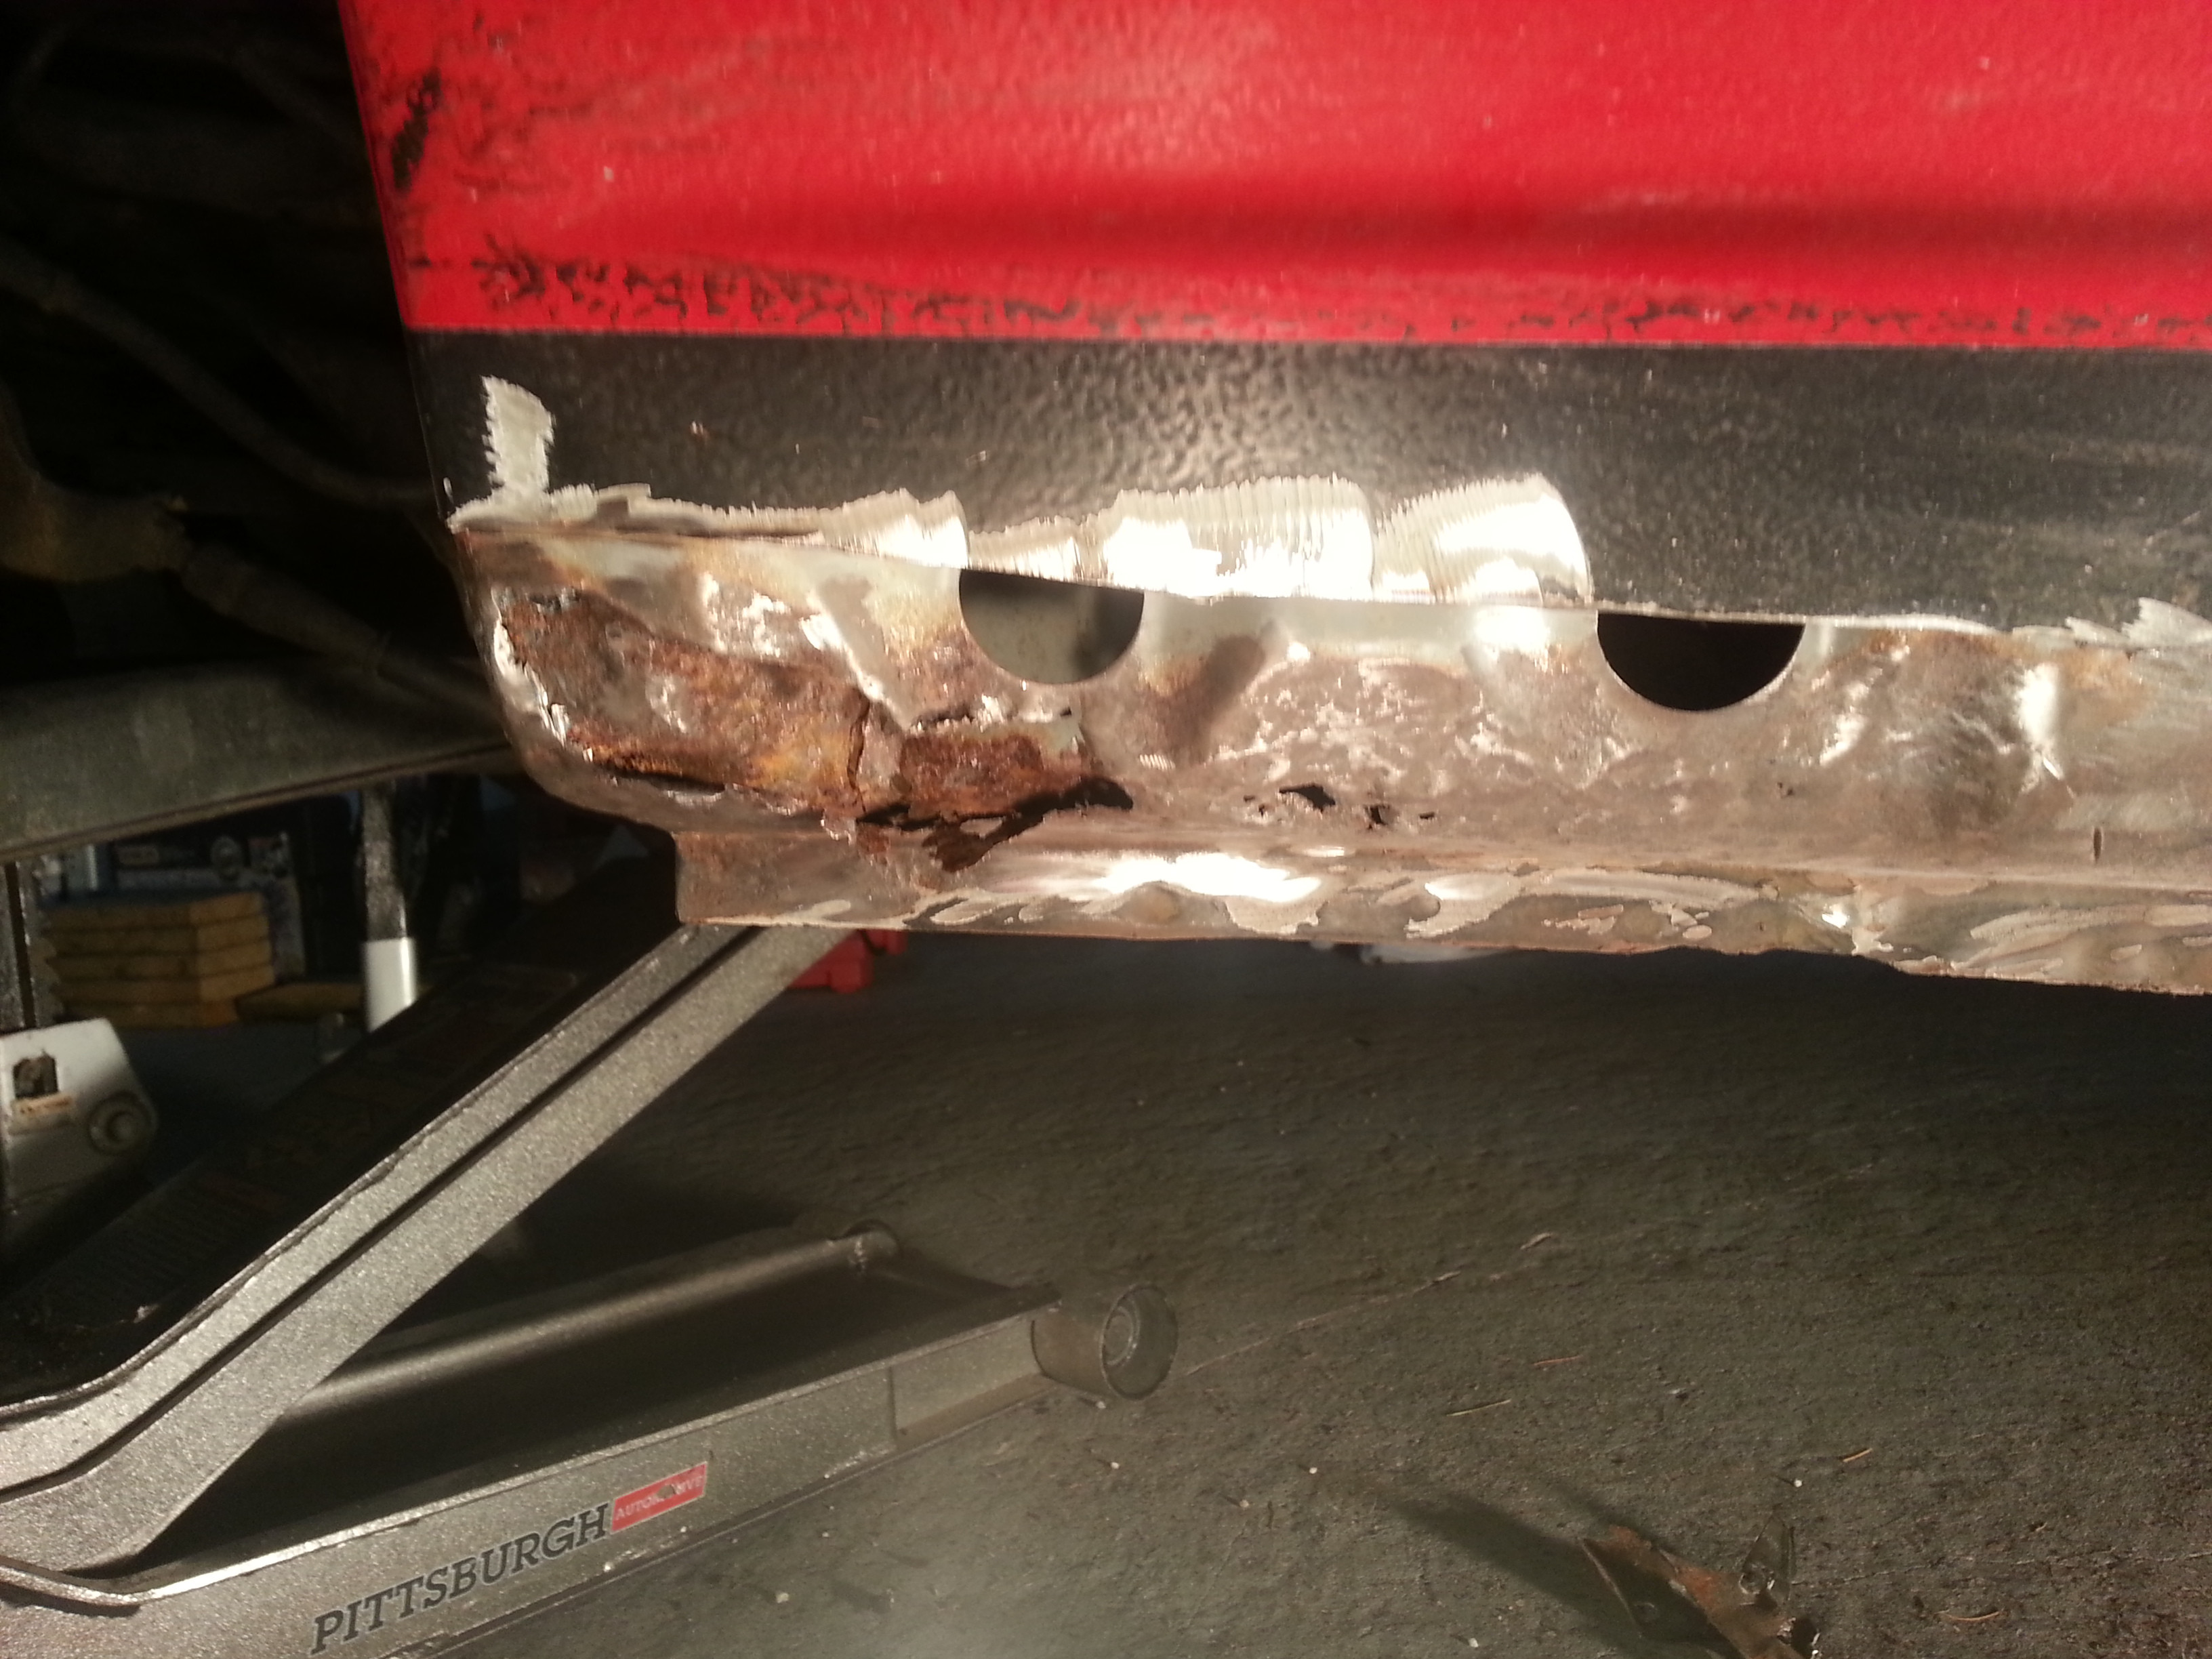
I'm off from noon on the 19th until the 2nd of the new year so I plan on finishing the rust repair, cutting, gutting, and installing the louvers on the new hood, and then checking the valve lash stuff. Maybe get to start forming the rear flares and ordering the vac bagging stuff.
Plans for the winter are more limited this year.
Install valve springs and check lash
If lash needs adjustment, buy shimless ford ztec lifters
Make carbon/kevlar front fenders and rear flares
Make carbon endplates for the wing
Install Singular Motorsports hood vents
<s>Add a capacitor to the ignition harness </s>
<s>Add some coolant to the water so the block doesnt freeze</s>
Duct the rad mouth
Check lube sliders
Make sure stuff hasnt loosend up
New springs
Rust repair
Make turbo fluid lines perfect
Optional
New drivers seat, put current driver seat on floor of pass side
New splitter, now that I understand the rules better I can still go bigger
New canards
Delrin diff mounts
New control arms
Make the high beams work
buy shimless ford ztec lifters anyways
This was the closest thing I had to working before I gave up and went with nipples and a rubber hose.
Also ******* treadstone. The $40 I spend on the super special, will actually fit an EFR banjo fittings were only the banjo part and not the bolt so I had to order those thats another $23 after shipping. FU.
I did manage to glue the stock efr ebcs back together, and I've started cutting the rust out to do the rust repair. This is the less bad side. The other side I'm going to end up cutting off a **** load of the car because I know the rot has made it to the other side of the pinch weld.
I'm off from noon on the 19th until the 2nd of the new year so I plan on finishing the rust repair, cutting, gutting, and installing the louvers on the new hood, and then checking the valve lash stuff. Maybe get to start forming the rear flares and ordering the vac bagging stuff.
Plans for the winter are more limited this year.
Install valve springs and check lash
If lash needs adjustment, buy shimless ford ztec lifters
Make carbon/kevlar front fenders and rear flares
Make carbon endplates for the wing
Install Singular Motorsports hood vents
<s>Add a capacitor to the ignition harness </s>
<s>Add some coolant to the water so the block doesnt freeze</s>
Duct the rad mouth
Check lube sliders
Make sure stuff hasnt loosend up
New springs
Rust repair
Make turbo fluid lines perfect
Optional
New drivers seat, put current driver seat on floor of pass side
New splitter, now that I understand the rules better I can still go bigger
New canards
Delrin diff mounts
New control arms
Make the high beams work
buy shimless ford ztec lifters anyways
Reply
0
0

Ask turbofan (ed) to take a picture of his oil drain line. I went through the same agony with his low-mounted 2871R setup - no combination of fittings left a line that could actually be installed without stressing the fittings. It goes 90* out of the turbo, aims towards the back of the car, then does a slow descent into the pan. Maybe 12-14" long. I had it Adel-clamped to the subframe to keep the angle even all the way down to the pan. Think of it as a water slide - as long as it continually goes downhill, oil will flow through it just fine.
Reply
0
0

Senior Member
Joined: Apr 2011
Posts: 507
Total Cats: 75
From: Martin, Slovakia
Jonathan Have you considered using css tubing? Many oem turbo setups use similar solutions. Copper washers work well between the tubing ends and fittings.
P1060371_zps750eddd0.jpg Photo by wob_03 | Photobucket
aghhh...I just became a senior member after posting this. How do I get back to being junior?
sturovo
Senior Member <<<<<<<<
I am: william
Join Date: Apr 2011
Location: Martin, Slovakia
Posts: 500
P1060371_zps750eddd0.jpg Photo by wob_03 | Photobucket
aghhh...I just became a senior member after posting this. How do I get back to being junior?
sturovo
Senior Member <<<<<<<<
I am: william
Join Date: Apr 2011
Location: Martin, Slovakia
Posts: 500
Last edited by sturovo; Dec 17, 2014 at 05:11 AM.
Reply
0
0
Got some good **** done on my vacation so far. I've got to head back on thrusday.
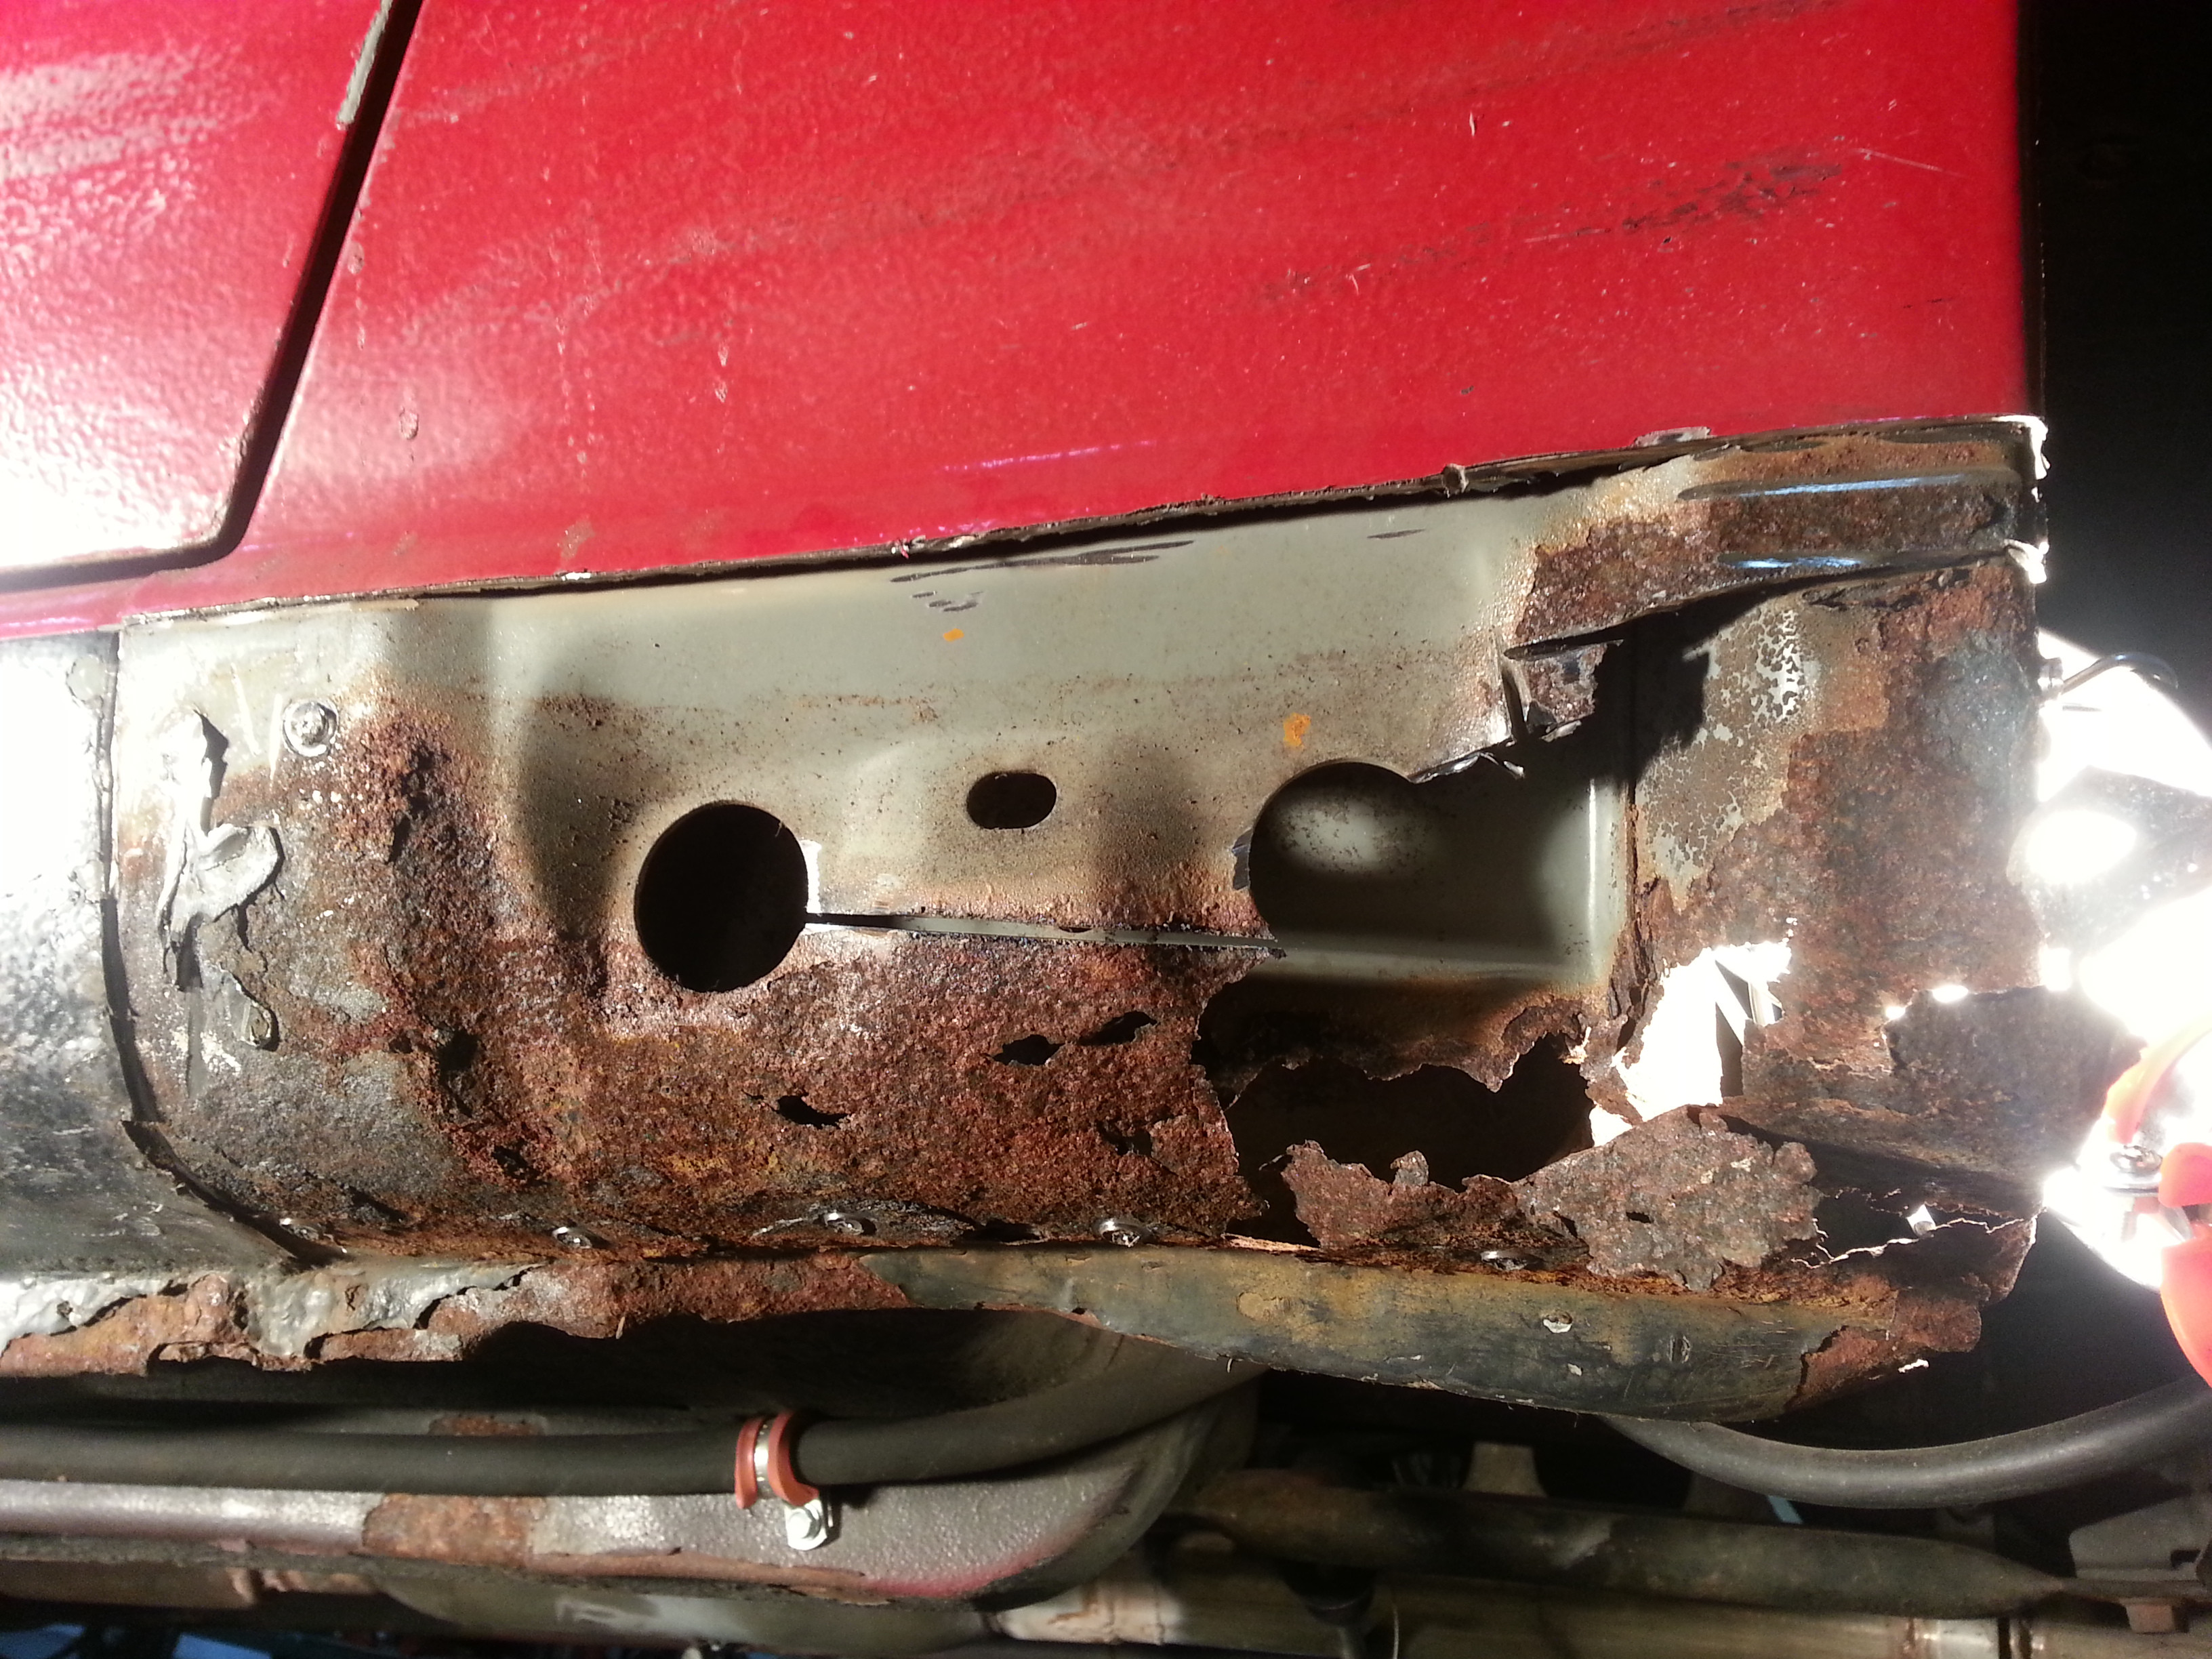
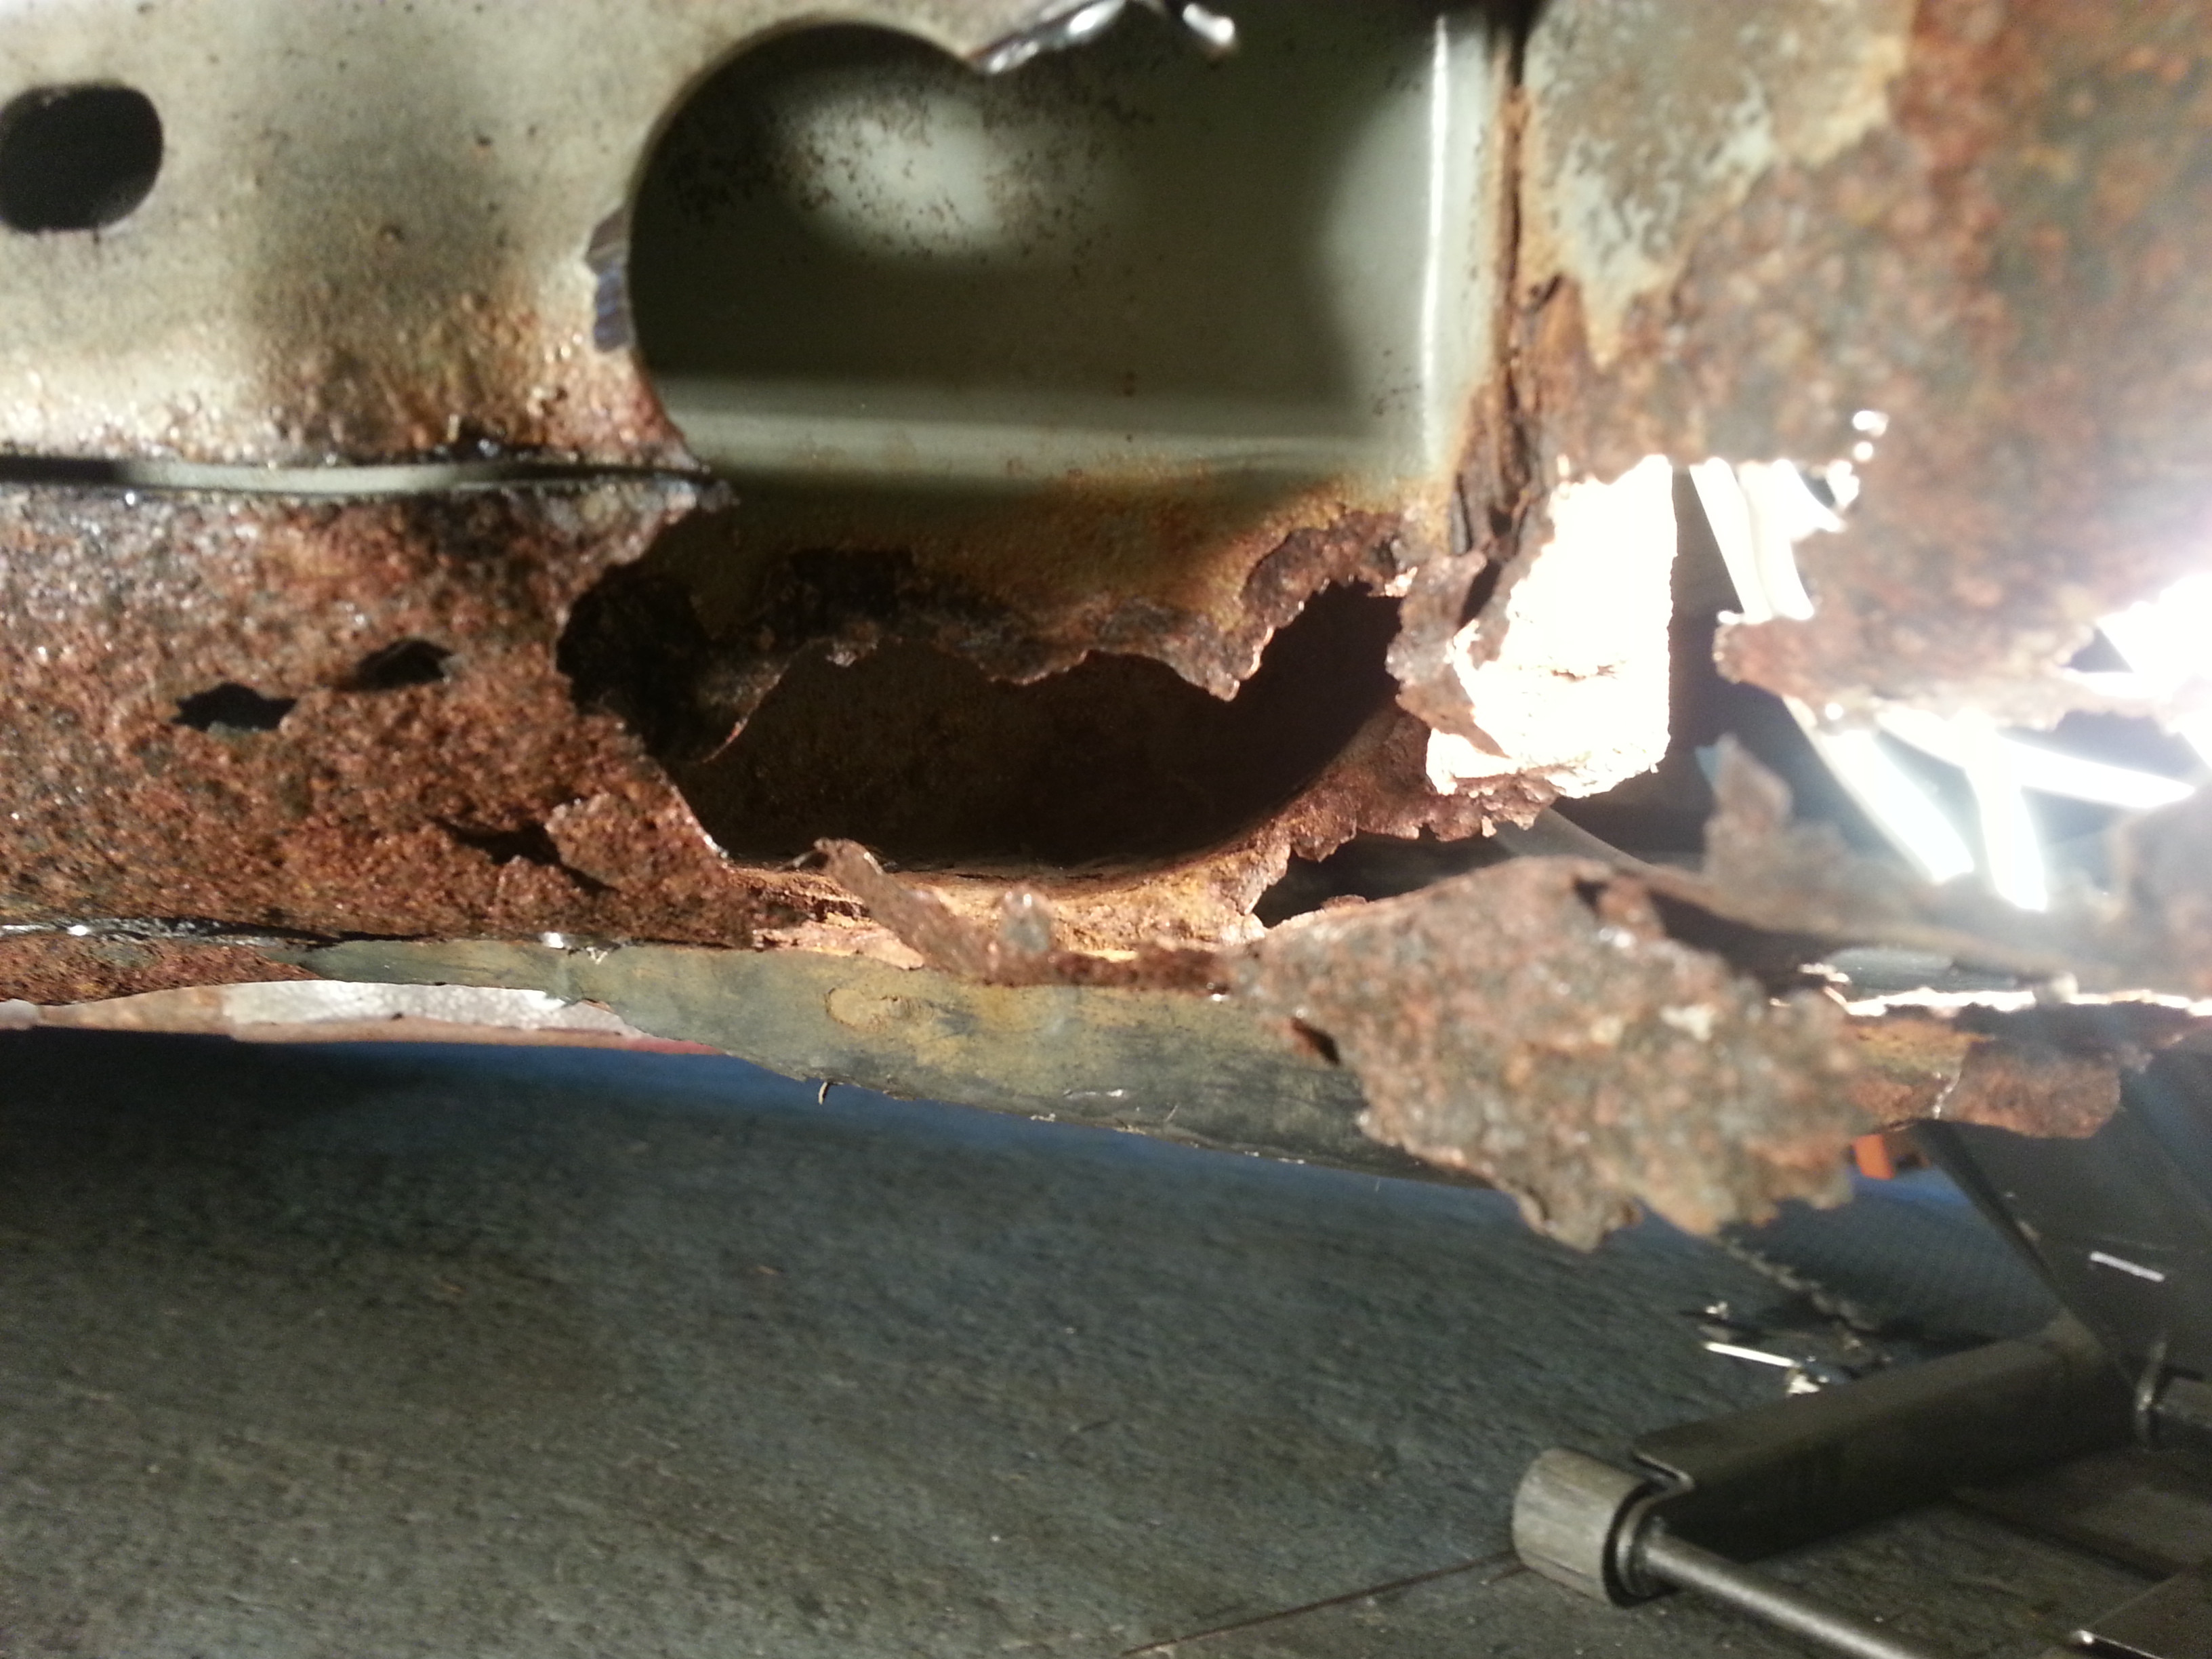
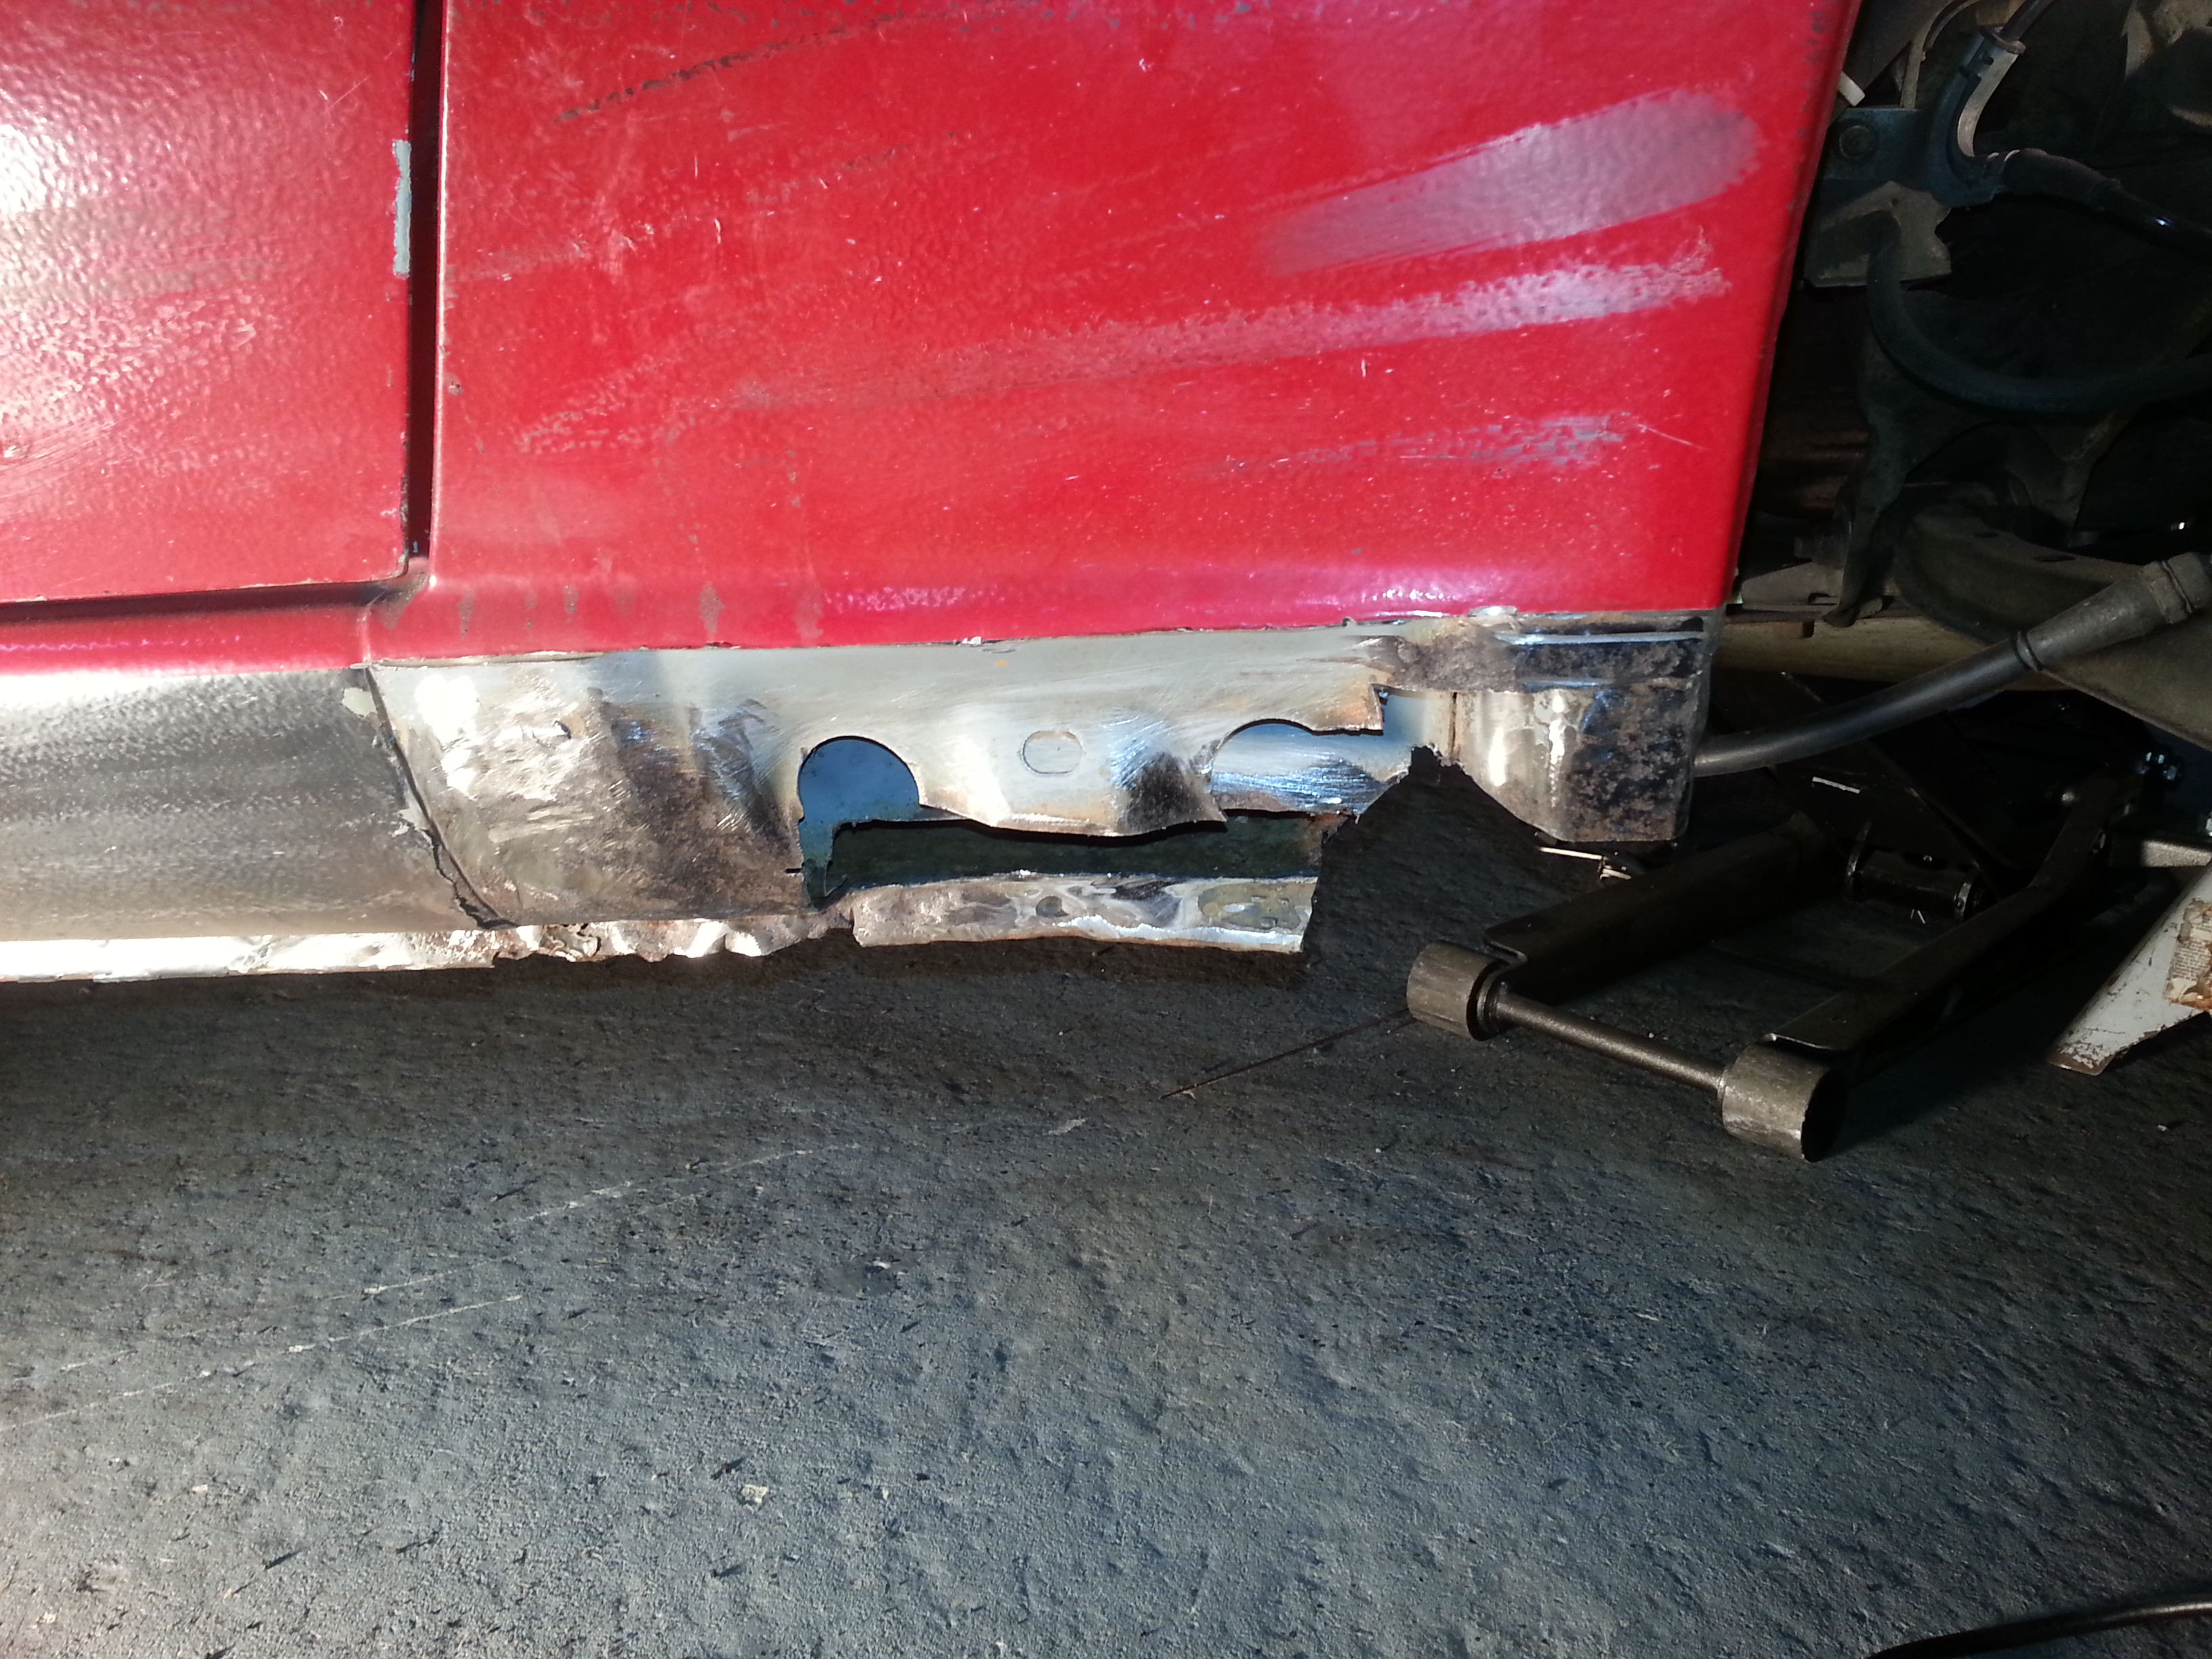
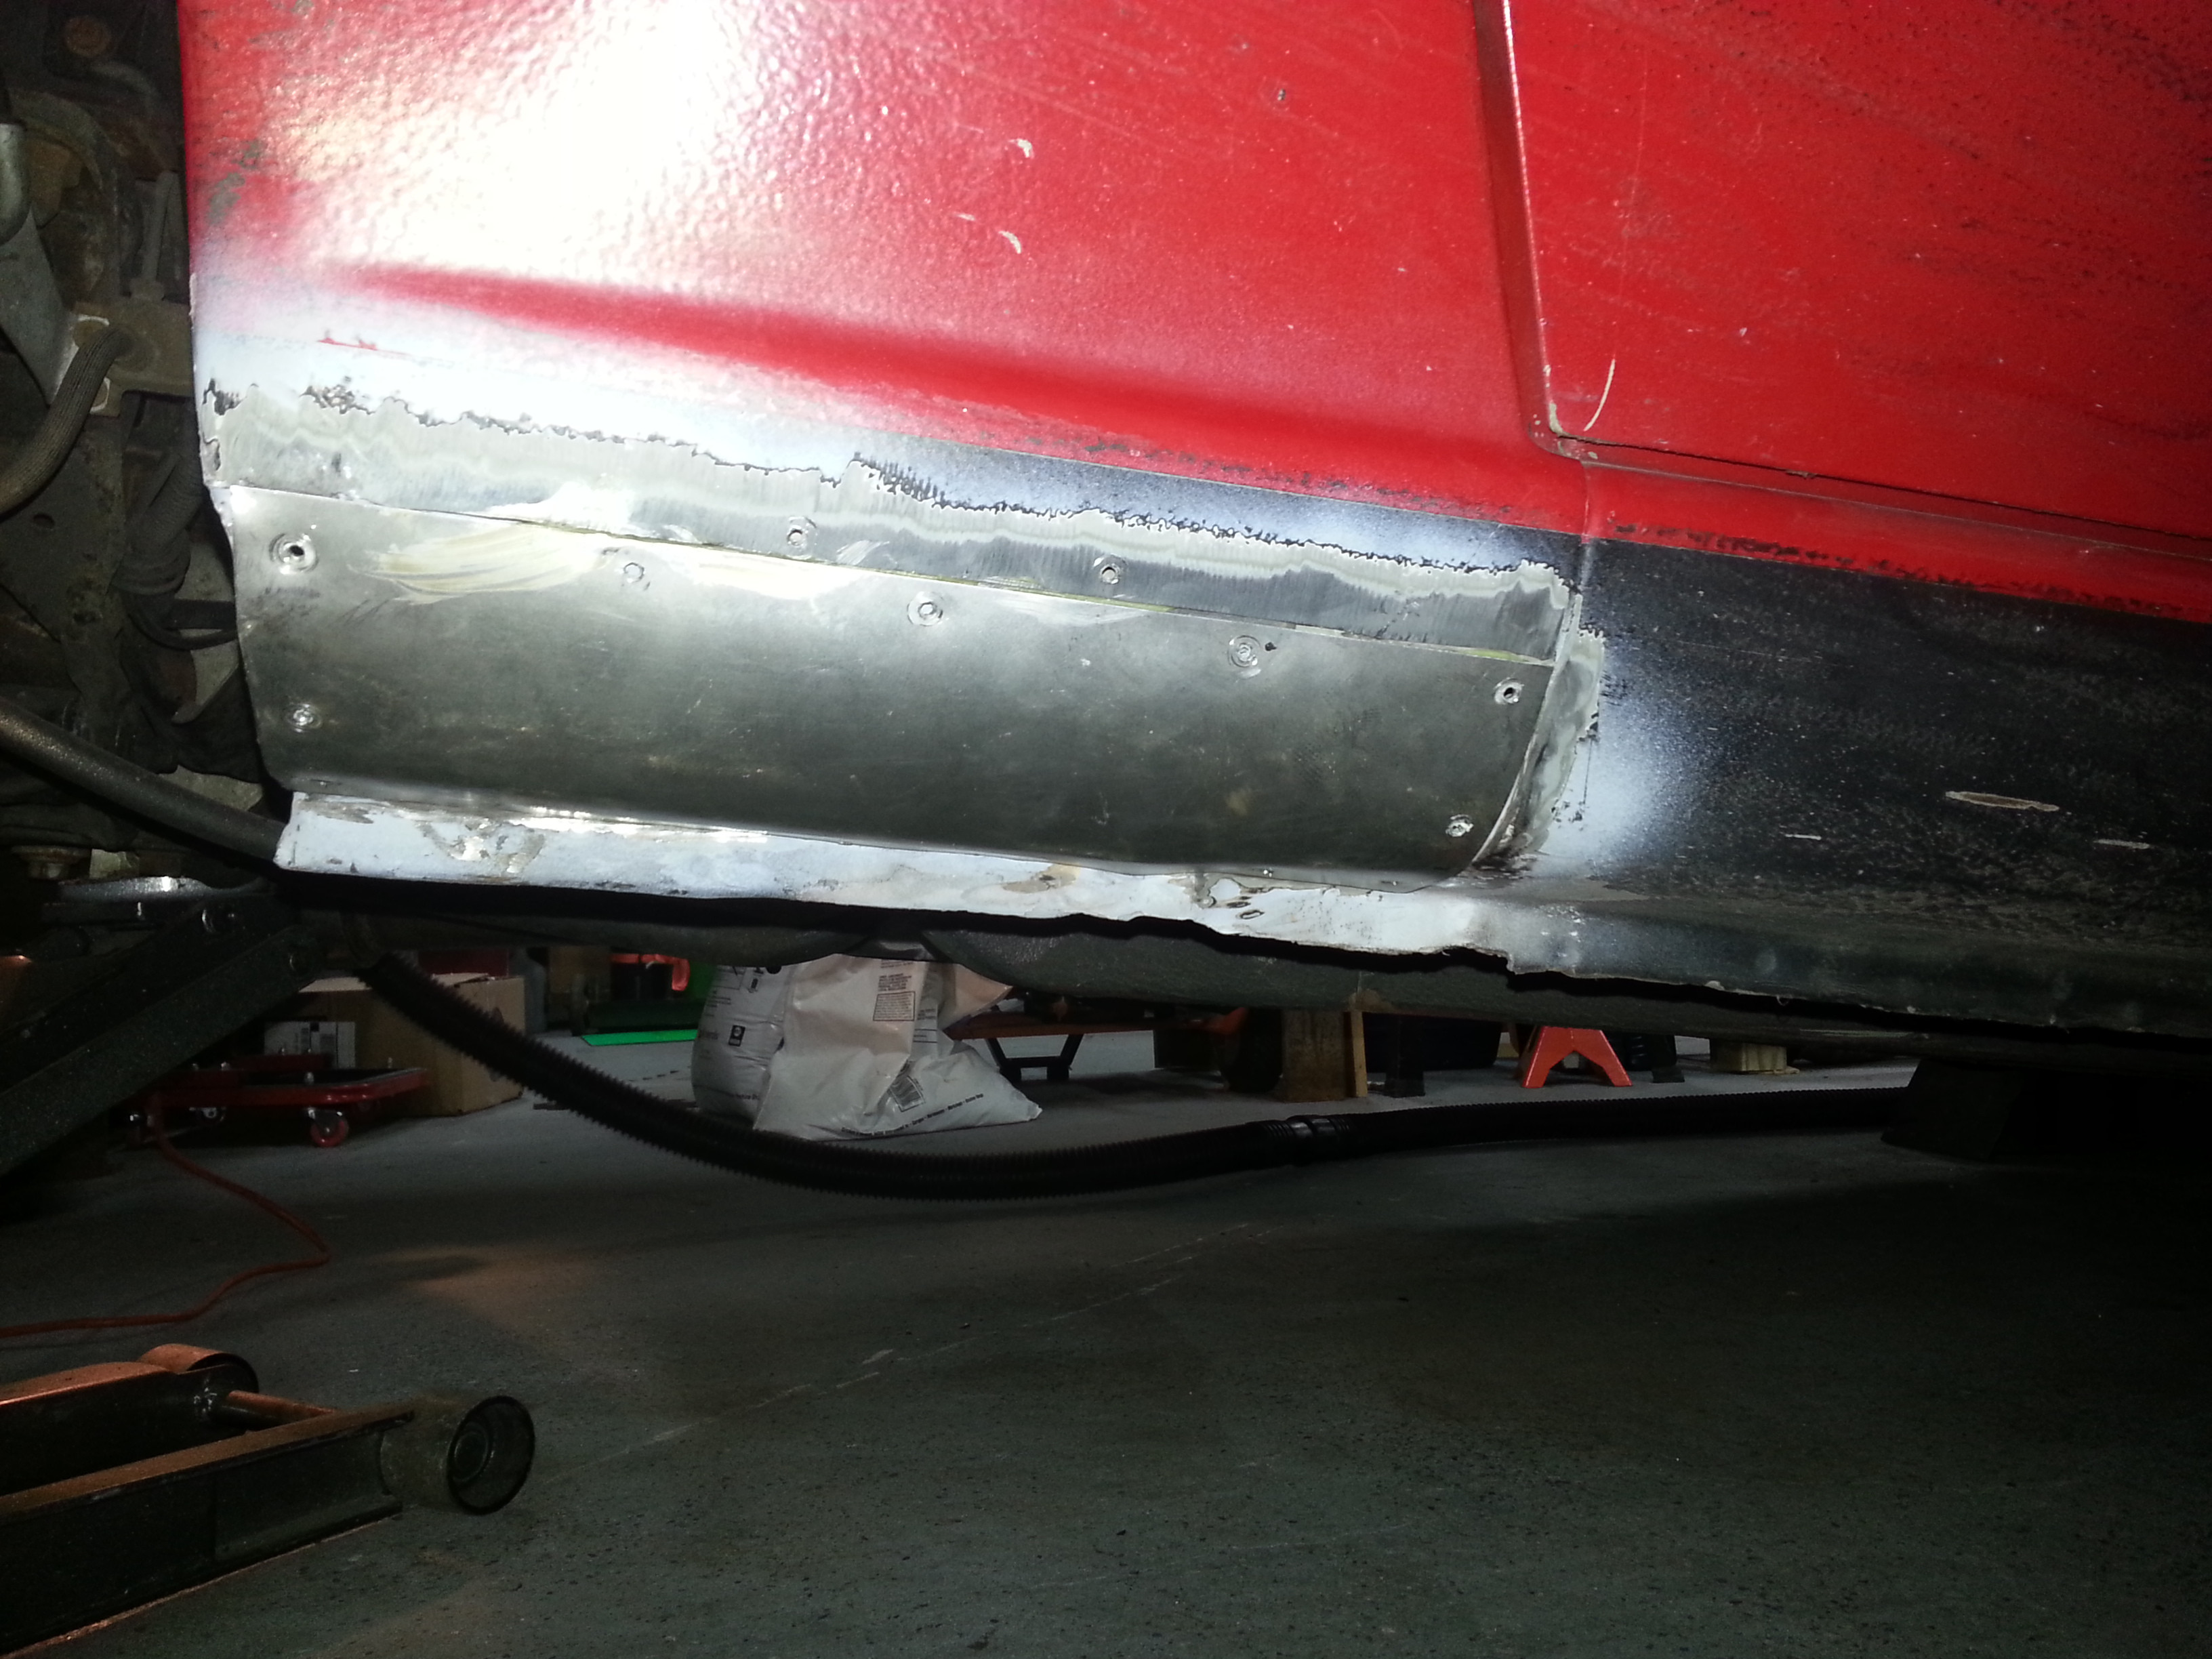
First, rocker rust repair. It just needs to be bondo'ed in have some seam sealer and undercoating replaced and be painted. Came out pretty decent. There was a lot of car that had to be cut out on the drivers side and I had to put a bracing plate on the jacking point because it was starting to tear.


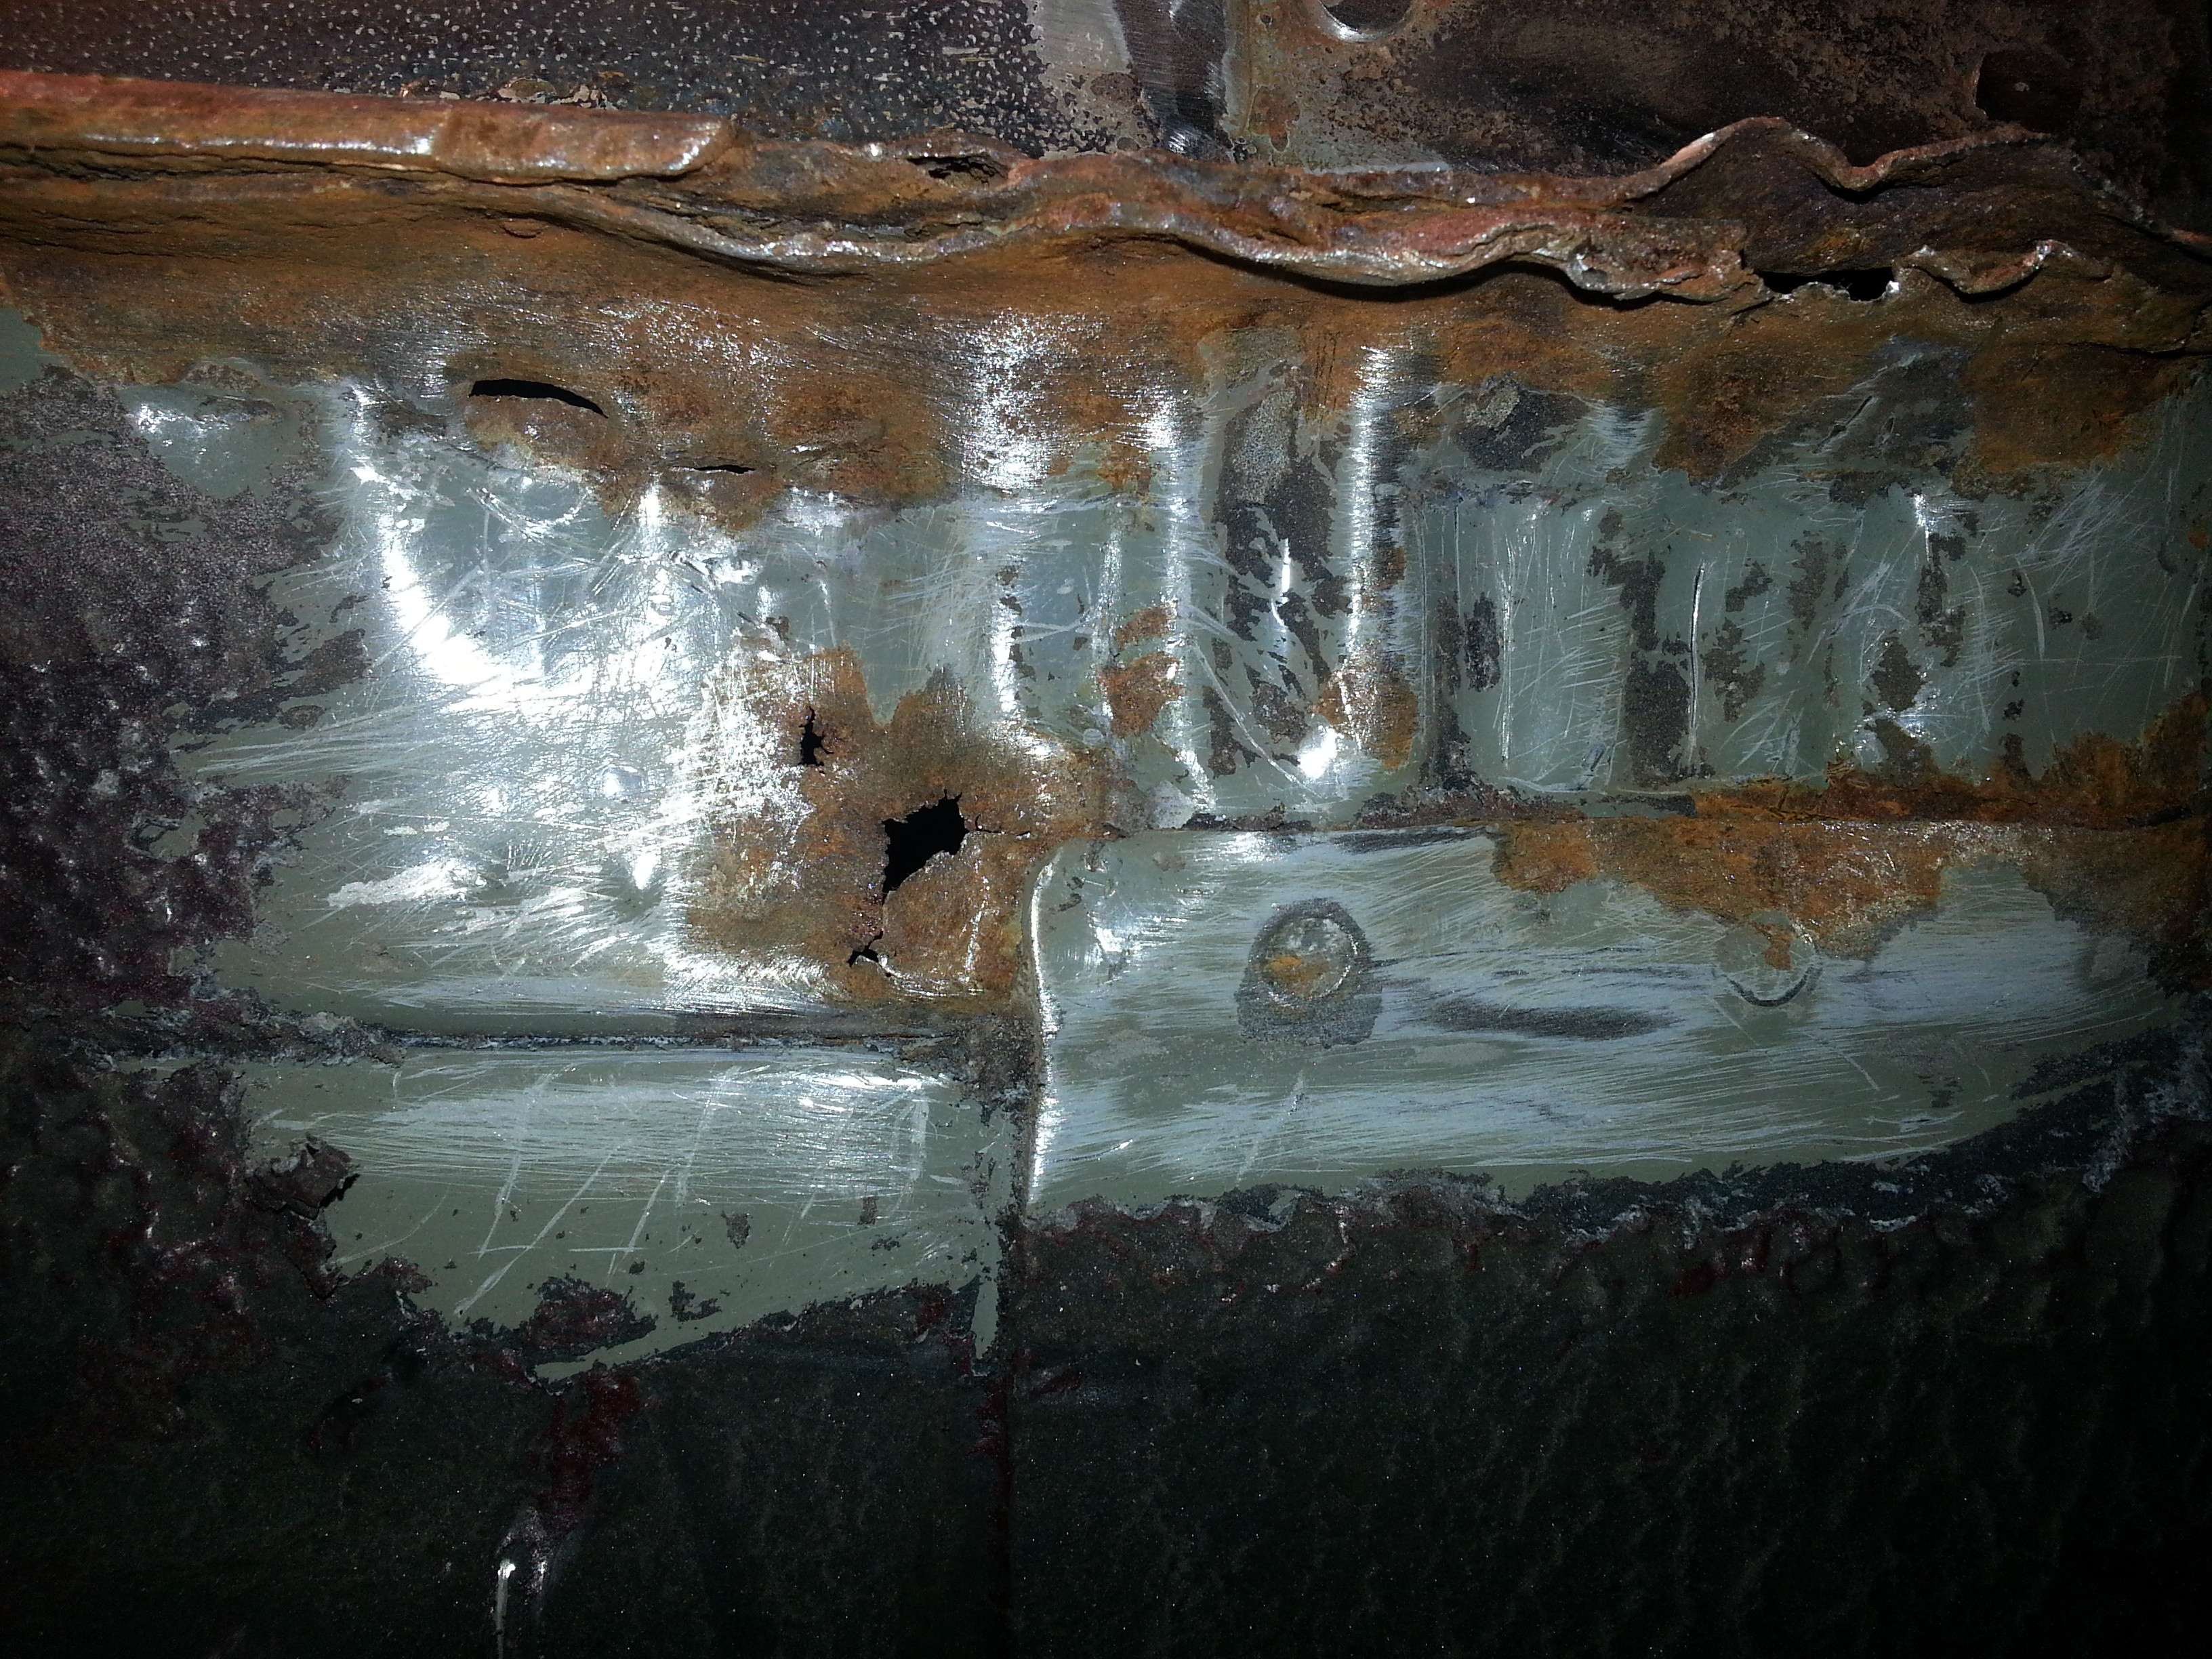
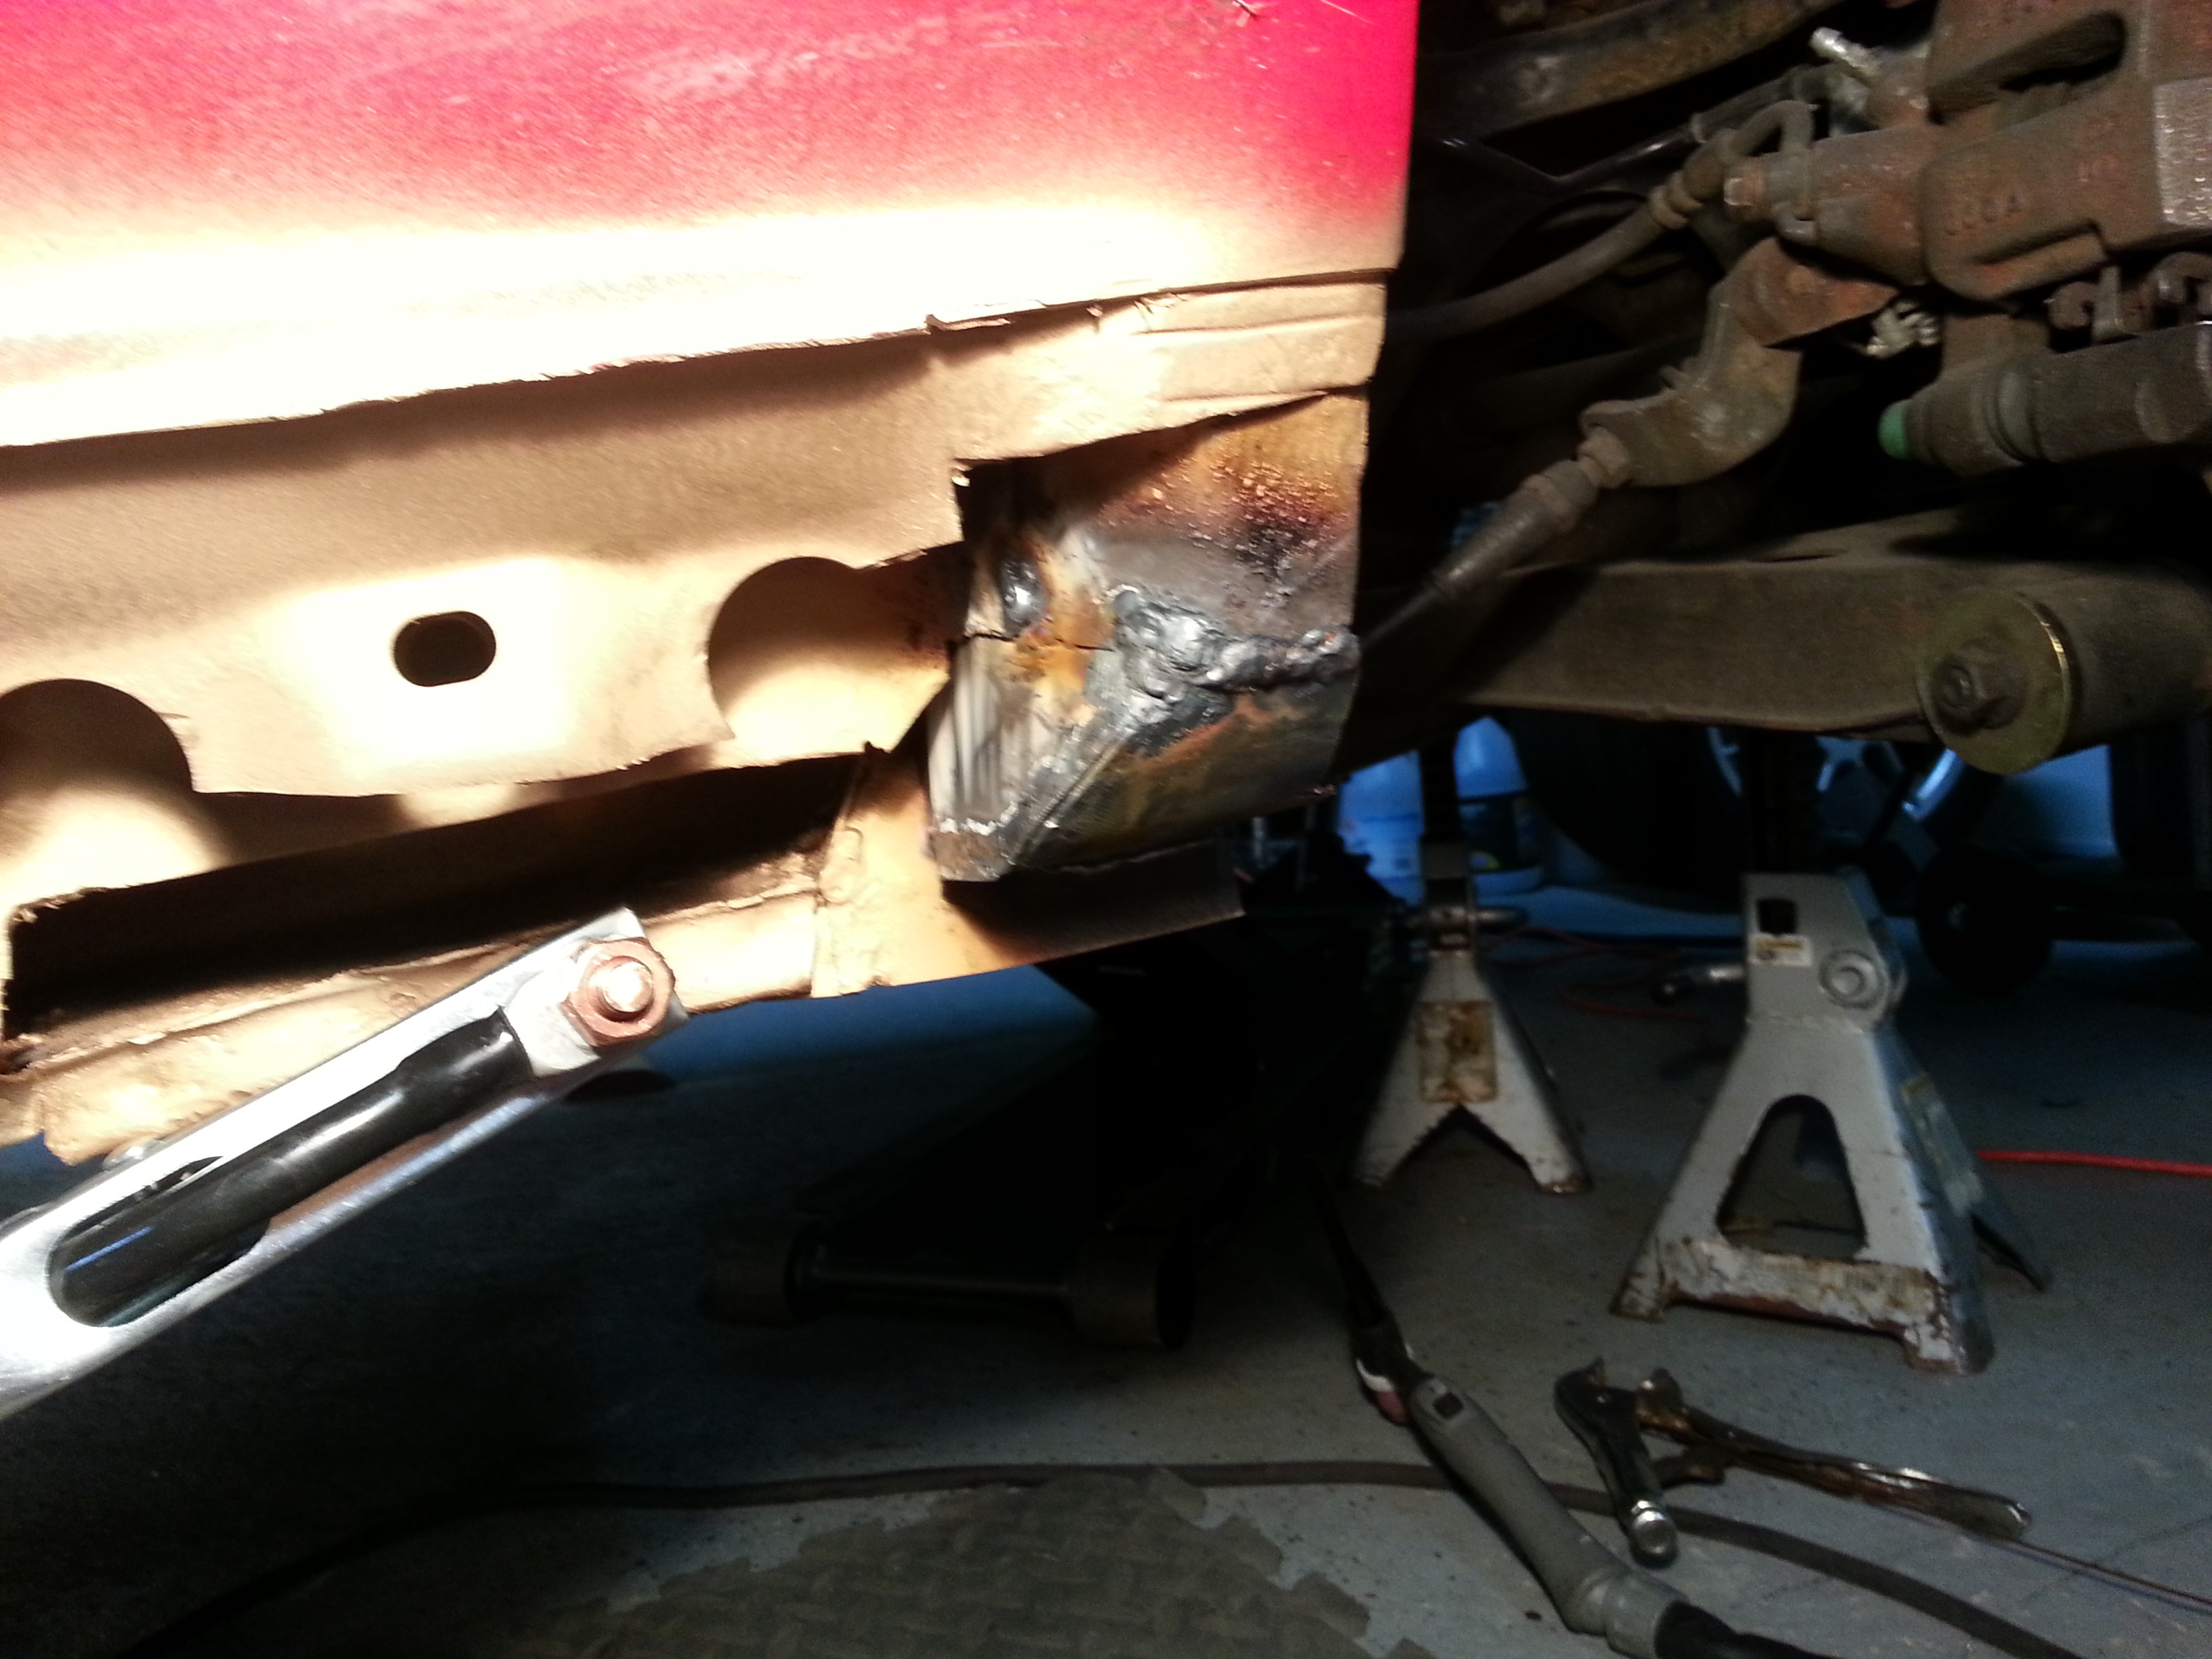
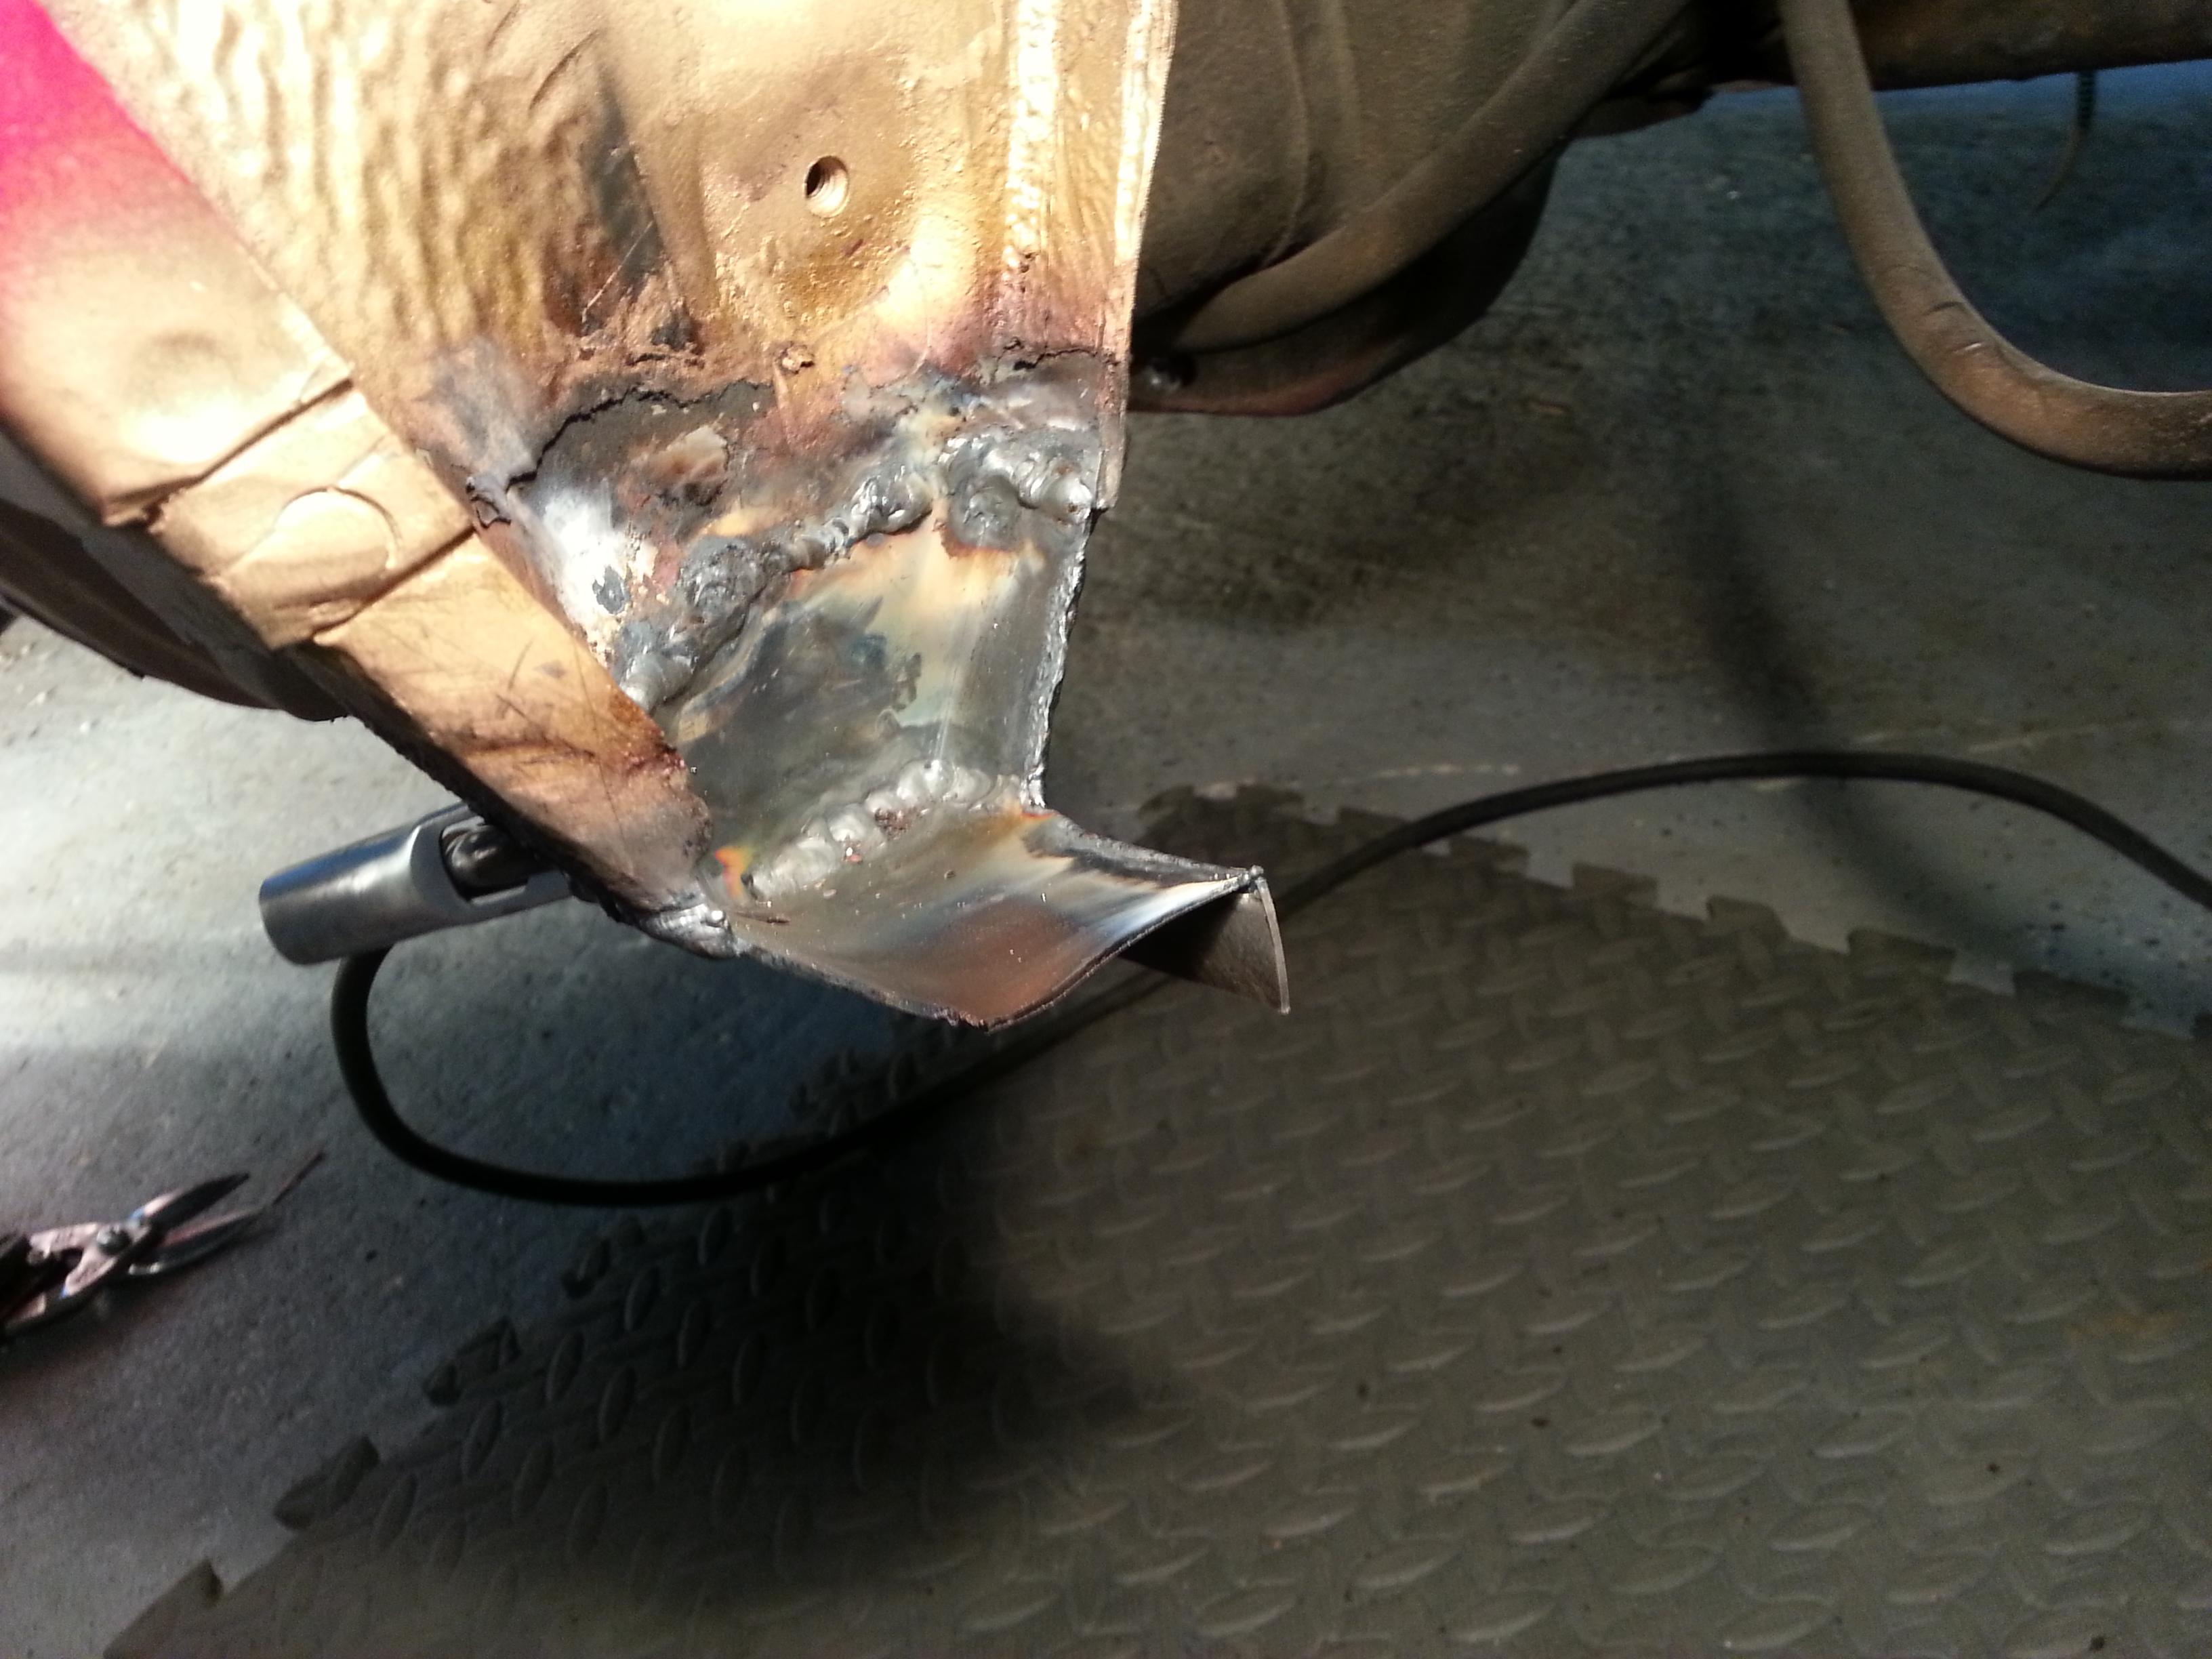

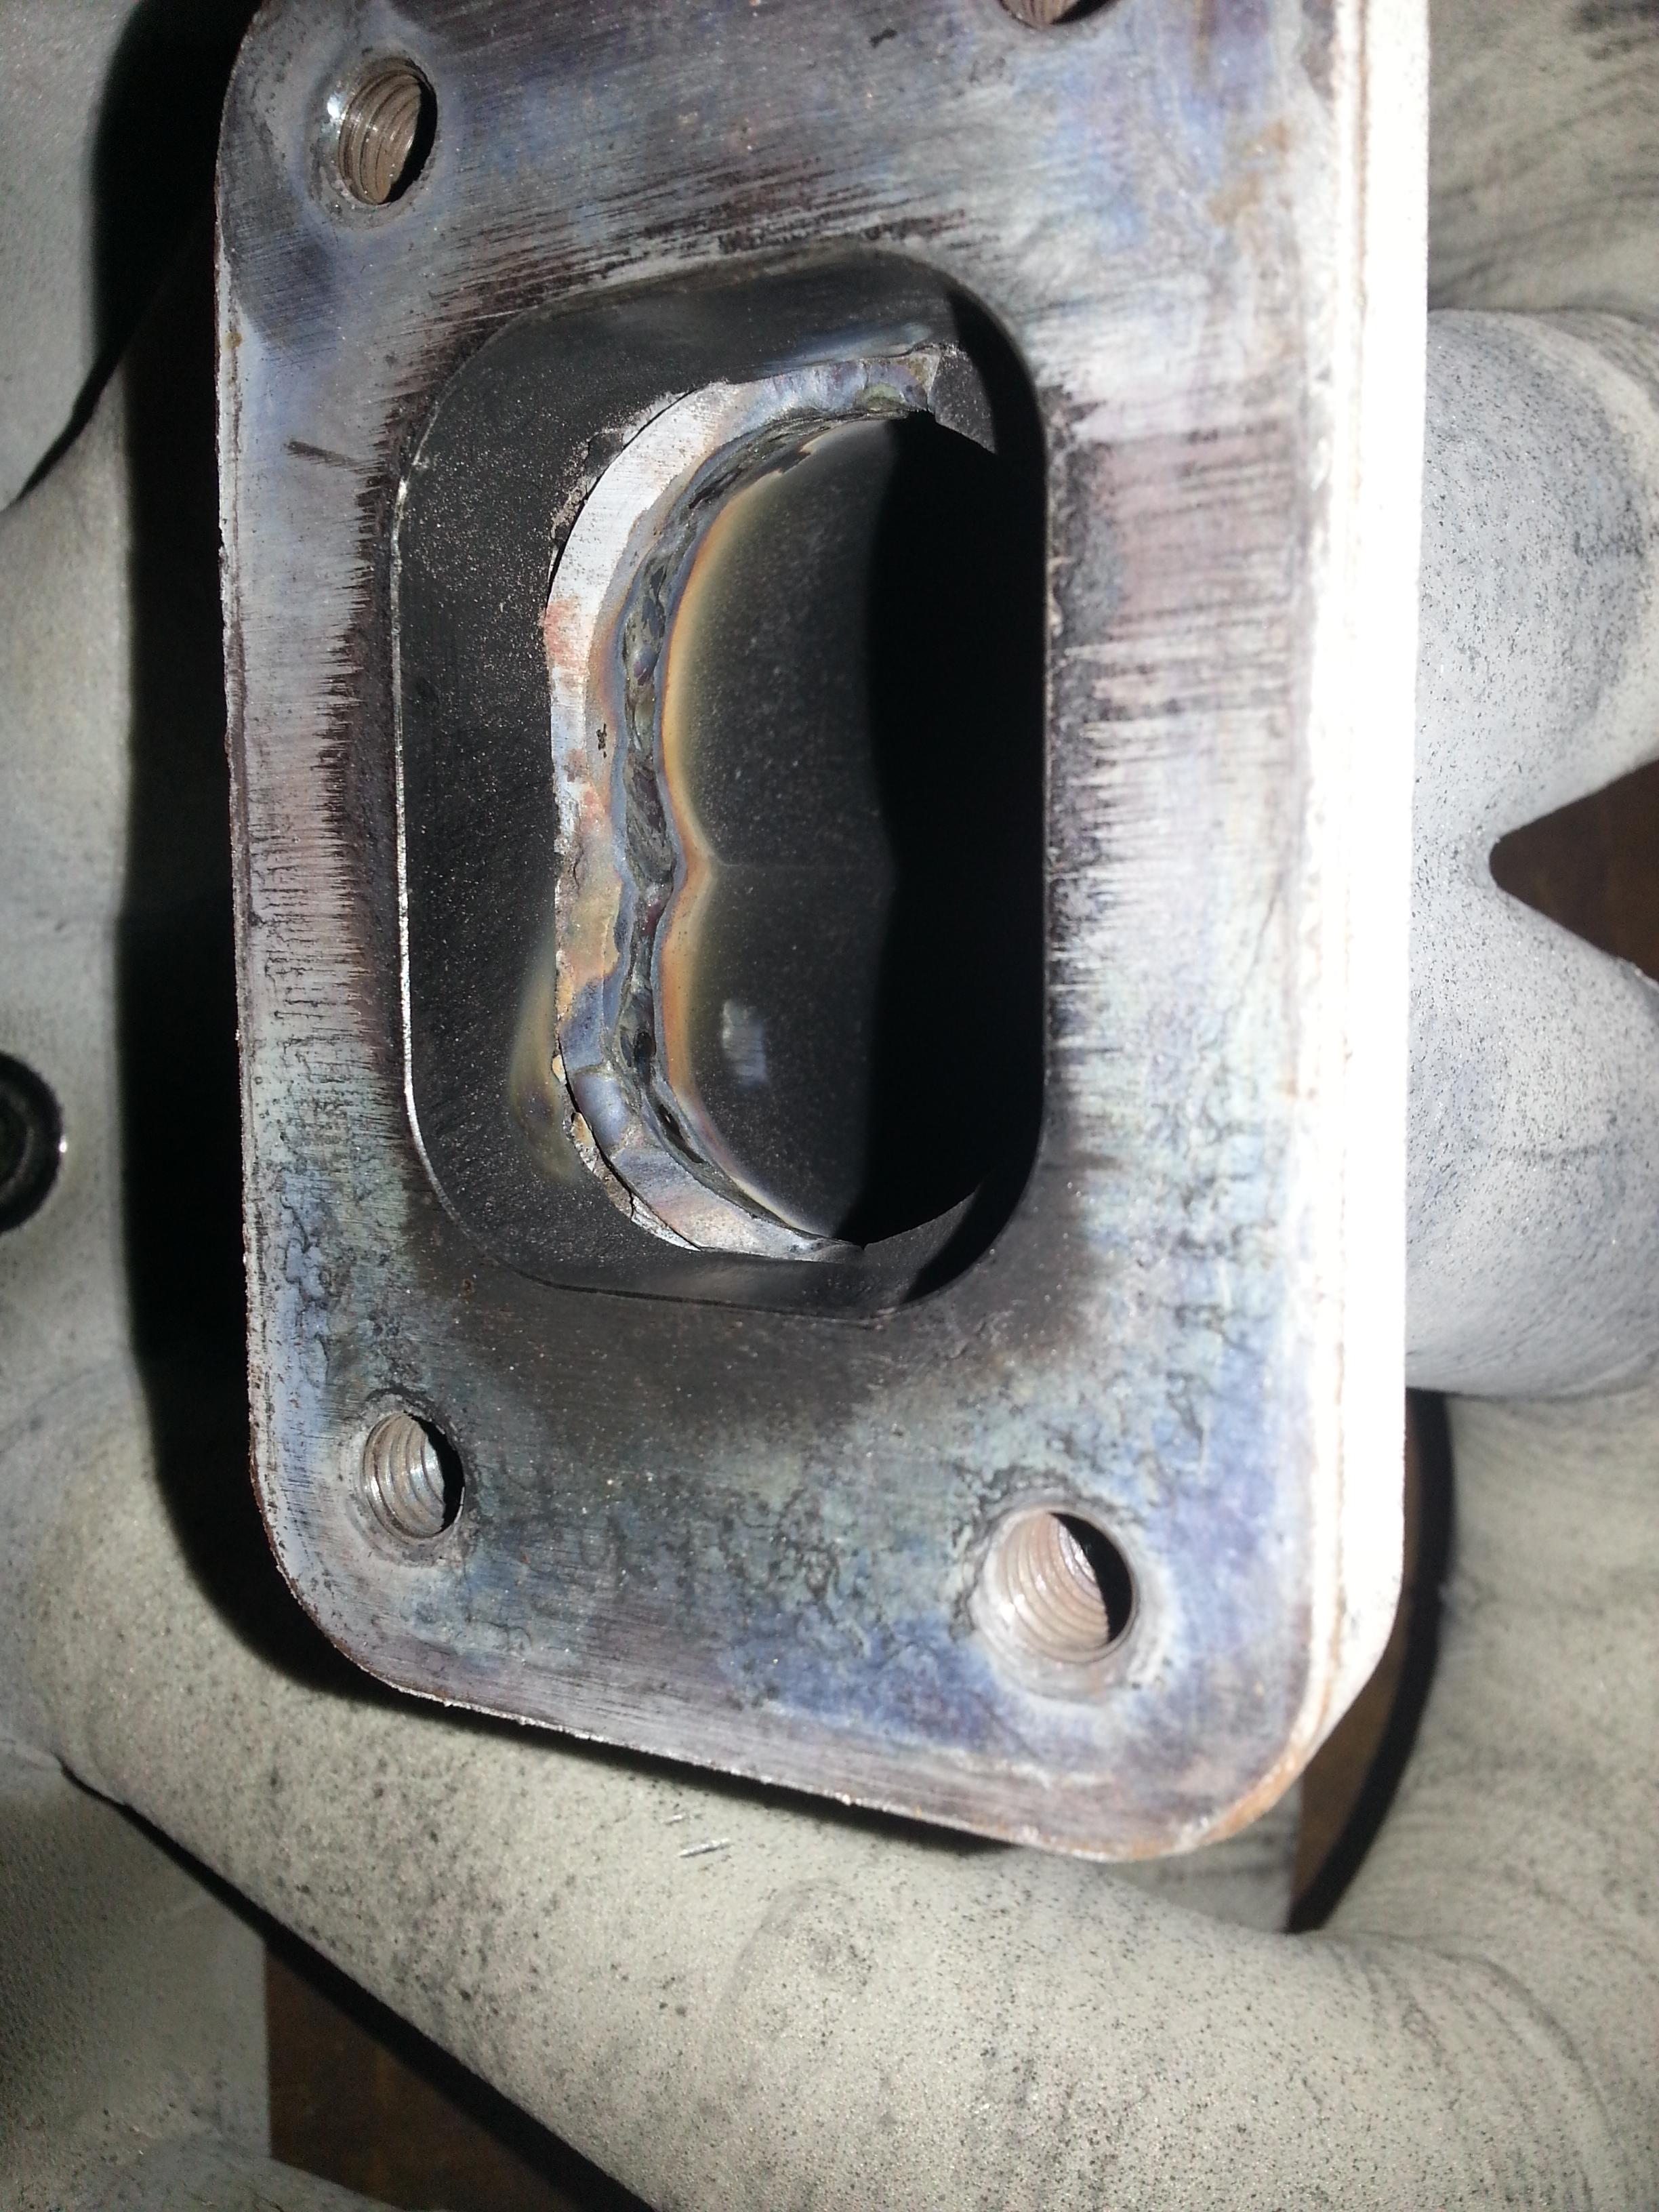
When I went to work on the turbo plumbing I noticed a bit of a problem.
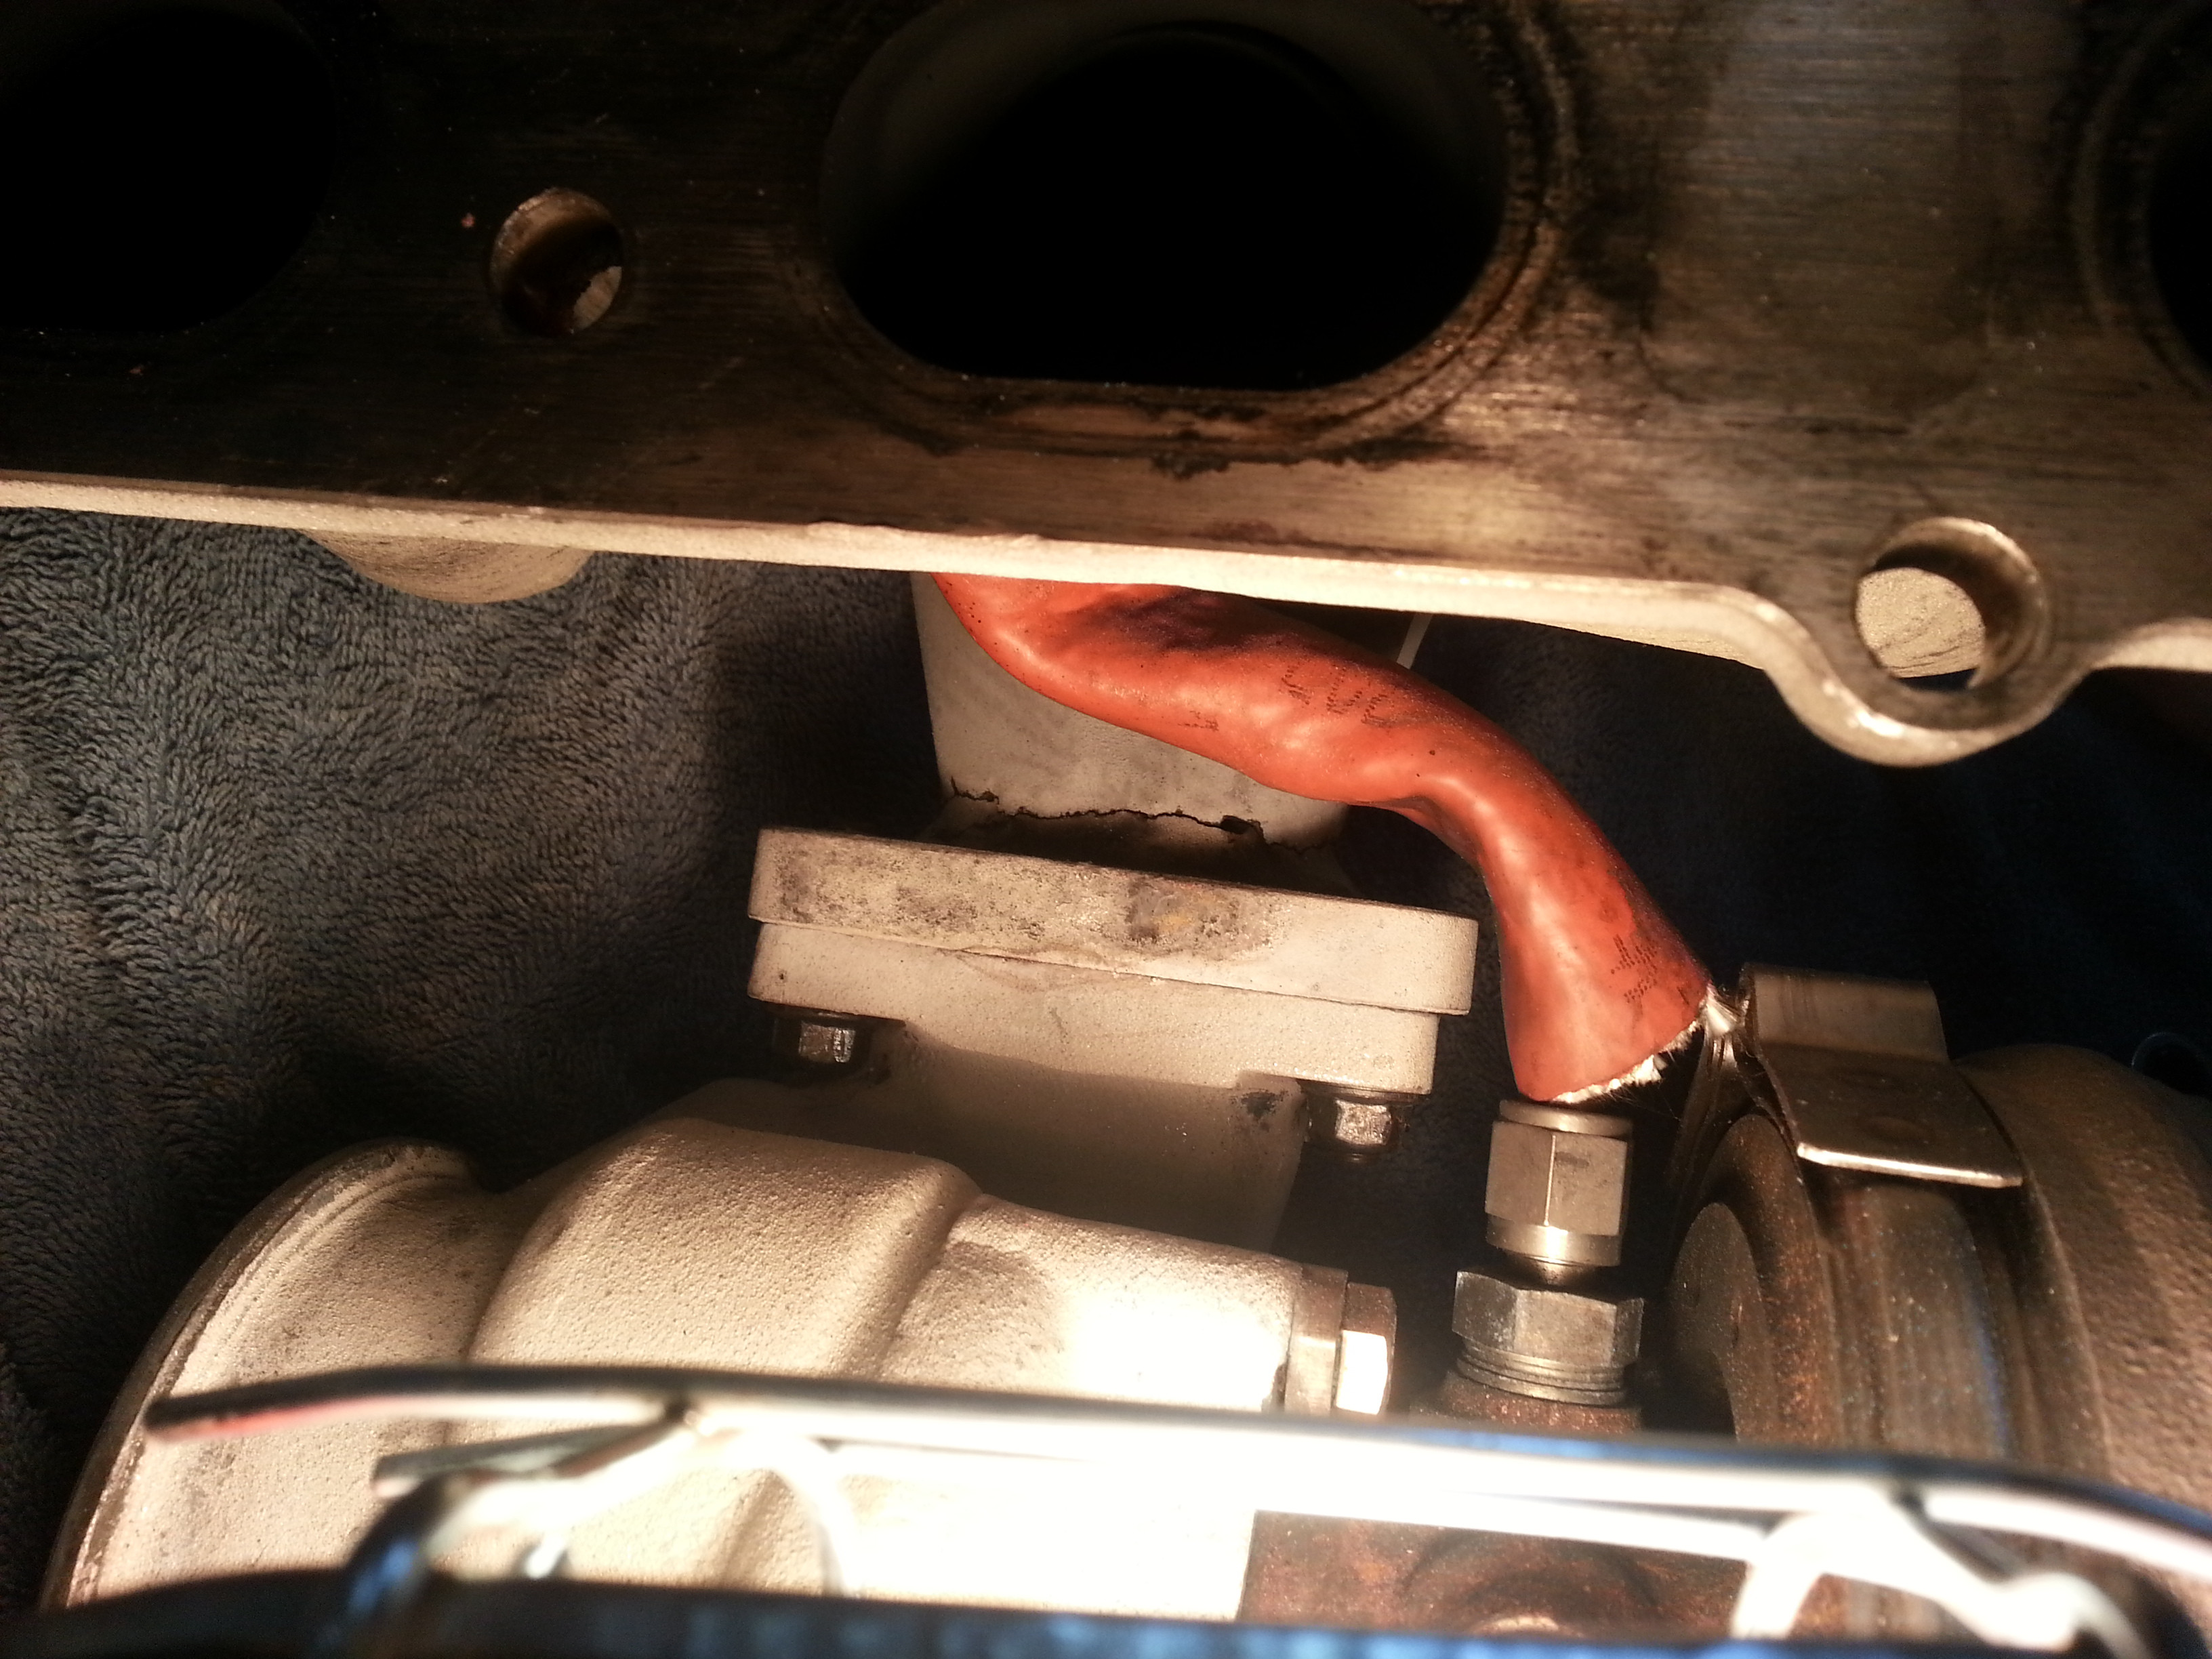
That was unexpected. I welded it up, welded the inside of the crack and then I added this bracing to both sides. Hopefully its not going to cause the wall to tearout on the collector and its going to last a couple more years until I can afford to make a new one with like sch10 or maybe even 16ga 321 stainless. The weld over the scratch looks shity because I didnt grind enough of the ceramic coating off.
And I did finish up all the plumbing and I was actually able to make the oil drain work and the cooling lines seem to have turned out just fine too. I'll take pictures of that stuff tomorrow.
And today I pulled the valve cover off and checked the valve lash. Looks like all the intake valves tightened up and a couple exhaust valves loosened up.
008 013
005 013
006 014
008 015
006 013
007 013
006 013
004 013
front
I'm going to go off the deep end and go with the ford zetec lifters, that should save a total of 3/4 of a pound off the valvetrain for a total of $240 investment assuming the lash doesnt change much. Plan to order the correct ones is to use my 0-1mics to measure the current lifter thickness and then add/subtract what the lash needs to change from the size and order them. Tomorrow I'll add the inner valve springs. We'll see how easy these go with my tool as I've heard of some people having problems with the supertech springs loosing over 20% of their seat pressure after being run in, and thats no good. So I'm assuming that the springs
First, rocker rust repair. It just needs to be bondo'ed in have some seam sealer and undercoating replaced and be painted. Came out pretty decent. There was a lot of car that had to be cut out on the drivers side and I had to put a bracing plate on the jacking point because it was starting to tear.
When I went to work on the turbo plumbing I noticed a bit of a problem.
That was unexpected. I welded it up, welded the inside of the crack and then I added this bracing to both sides. Hopefully its not going to cause the wall to tearout on the collector and its going to last a couple more years until I can afford to make a new one with like sch10 or maybe even 16ga 321 stainless. The weld over the scratch looks shity because I didnt grind enough of the ceramic coating off.
And I did finish up all the plumbing and I was actually able to make the oil drain work and the cooling lines seem to have turned out just fine too. I'll take pictures of that stuff tomorrow.
And today I pulled the valve cover off and checked the valve lash. Looks like all the intake valves tightened up and a couple exhaust valves loosened up.
008 013
005 013
006 014
008 015
006 013
007 013
006 013
004 013
front
I'm going to go off the deep end and go with the ford zetec lifters, that should save a total of 3/4 of a pound off the valvetrain for a total of $240 investment assuming the lash doesnt change much. Plan to order the correct ones is to use my 0-1mics to measure the current lifter thickness and then add/subtract what the lash needs to change from the size and order them. Tomorrow I'll add the inner valve springs. We'll see how easy these go with my tool as I've heard of some people having problems with the supertech springs loosing over 20% of their seat pressure after being run in, and thats no good. So I'm assuming that the springs
Reply
0
0
I dont really think I have enough height difference for that. That picture I sent is already with an NPT hose end into the turbo. With a npt to -10 adapter and a -10 90� hose end the hose run is practically flat going from the turbo to the drain, less than the od of the hose difference in height. This bitch is low. I did once have a hose run where the hose looped around the charge pipe and went in but it was kind of kinked might have been just dead flat most of the way and otherwise looked like ****. I think the combo of parts I have in that picture will work but the hose will be more stressed than I'd like getting the like 1/2" more hose length the low pro fitting should net me will make me feel a lot better.
Reply
0
0


