
TheBandit's Resurrection Build


Thread Starter
Former Vendor
iTrader: (8)
Joined: Mar 2005
Posts: 1,185
Total Cats: 57
From: Broken Arrow,Ok
From reading a few older threads, it looks like this has been done, but I'm trying to make sure I'm not missing something.
Does this turbo coolant routing look like a good idea? I'd prefer not to run two lines (turbo and heater).

Does this turbo coolant routing look like a good idea? I'd prefer not to run two lines (turbo and heater).
Reply
 0
0

0

Very nice build you have here.
For trigger wheel I would just make sure the MS can run each one (I'd assume it can). Typically more resolution is better as long as it's not overkill. So I'd go with the 36t.
For trigger wheel I would just make sure the MS can run each one (I'd assume it can). Typically more resolution is better as long as it's not overkill. So I'd go with the 36t.
Reply
0
0
MS currently cannot run any SuperMiata trigger wheel other than 4 tooth.
Edit: if you make the 36-1 SM wheel look *exactly* like the 36-2 FM wheel, that can work. But as shipped out of the box no SM damper trigger wheels work with MS other than 4t. This is from Rev, so I trust it.
Edit: if you make the 36-1 SM wheel look *exactly* like the 36-2 FM wheel, that can work. But as shipped out of the box no SM damper trigger wheels work with MS other than 4t. This is from Rev, so I trust it.
Reply
0
0
Thread Starter
Former Vendor
iTrader: (8)
Joined: Mar 2005
Posts: 1,185
Total Cats: 57
From: Broken Arrow,Ok
Thanks for the input guys. I'd like to attempt to modify the factory 4t trigger wheel so it will work on the super miata damper. More on that as I get some time.
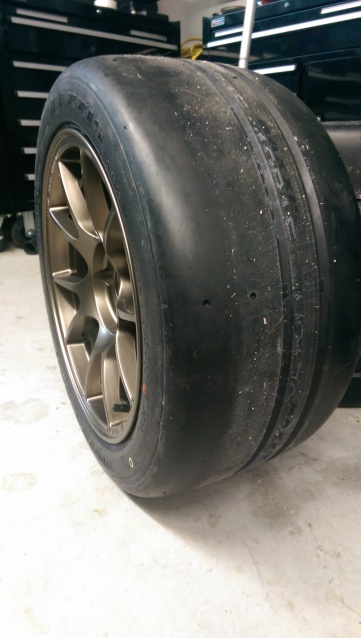
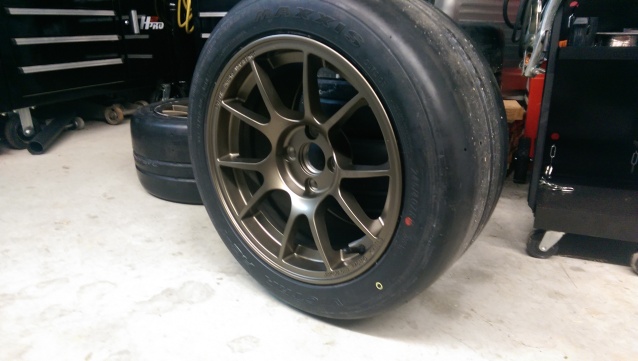
I got a chance to pop on the wheels this evening. No drivetrain, so it's in 4x4 mode but you get the idea.
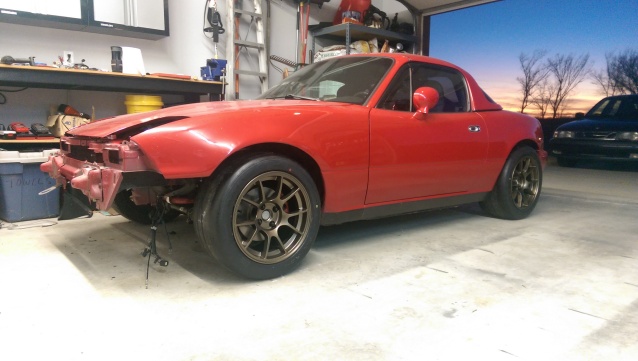
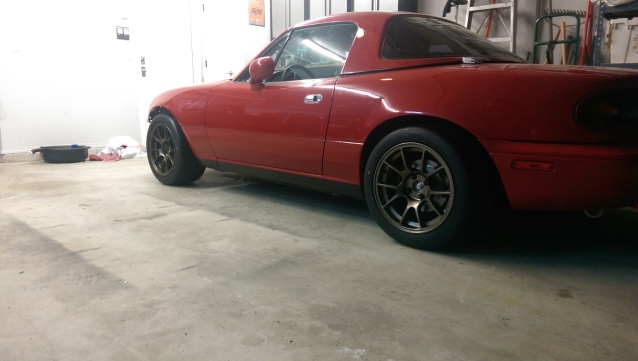
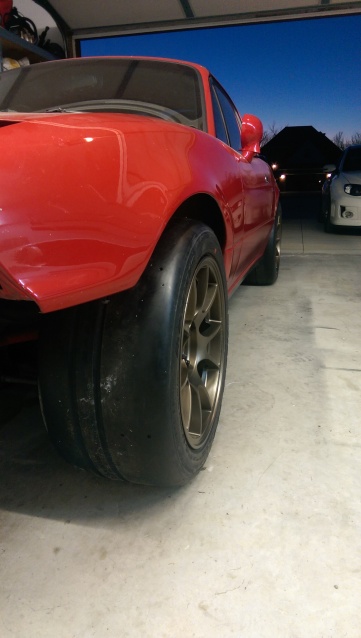

I got a chance to pop on the wheels this evening. No drivetrain, so it's in 4x4 mode but you get the idea.
Reply
0
0

My first thought would be that it would overly restrict the amount of coolant in front of the T/Stat and then the T/Stat might not open well. But, it is the same lines that are used on the front when no re-route is done.
Less heater abitlity, I would think, due to that lower flow.
Interested in answers from those that have done this.
Reply
0
0

Thread Starter
Former Vendor
iTrader: (8)
Joined: Mar 2005
Posts: 1,185
Total Cats: 57
From: Broken Arrow,Ok
Finally got some time to finish up the new mixing manifold and start on the new intake manifold.
Also waiting on new mounts to arrive, but I got the first shipment with the clutch in today from Fab9.
Had a friend put his deposit down on an Exocet, and I'm REALLY tempted to just do that and be done with it. Its either put all this back together and next year to Exocet, or just part out the car now and order the Exocet. Plenty of time to finish the build as they are 20 weeks out..
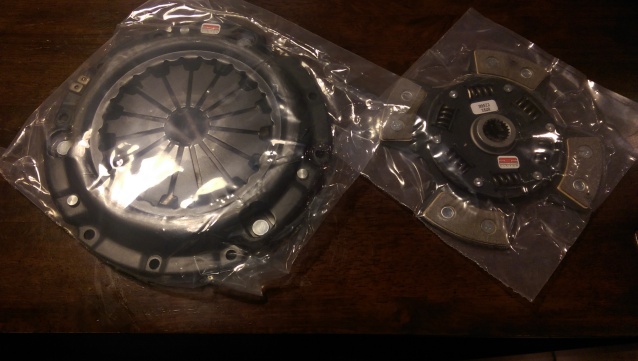
Reply
0
0
Thread Starter
Former Vendor
iTrader: (8)
Joined: Mar 2005
Posts: 1,185
Total Cats: 57
From: Broken Arrow,Ok
Moar Progress!
Gutted the interior and pulled the harness out. Lots of parts stacking up. Almost ready to start prepping for paint.
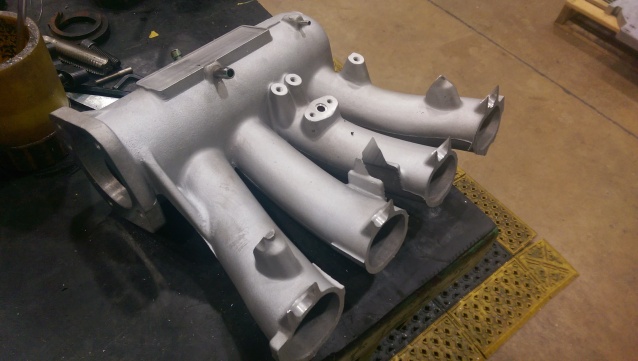
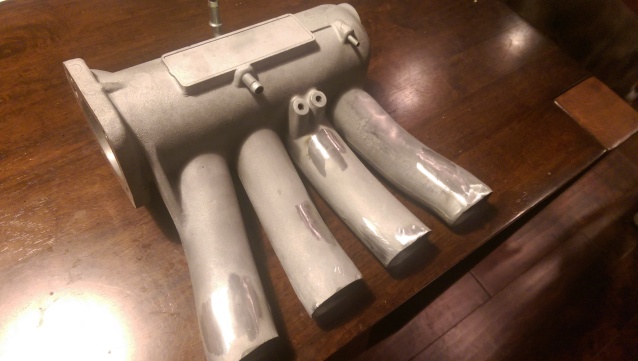
I got a little overboard and removed all the extra bosses on the Honda intake. Need to smooth the runners out and make a flange next week.
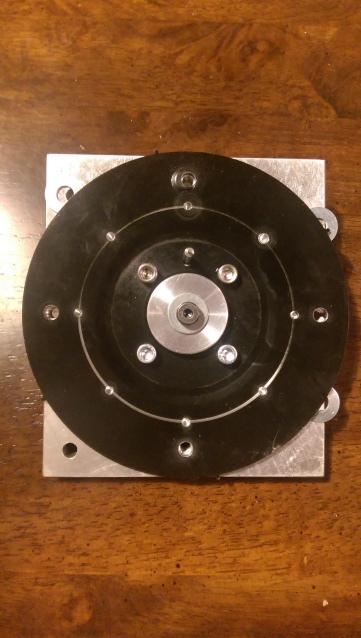
Also, make a fixture to orient and hold the stock crank trigger. Just need to cutout the ID and make sure everything fits.
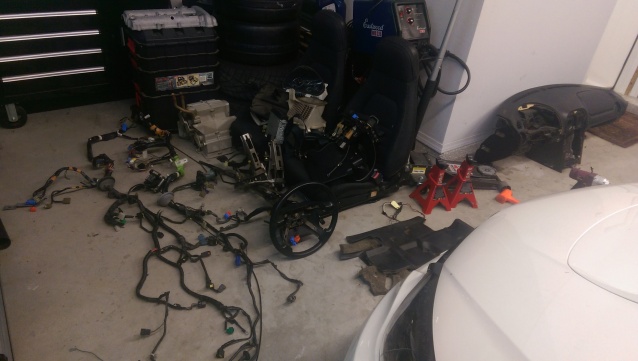
Gutted the interior and pulled the harness out. Lots of parts stacking up. Almost ready to start prepping for paint.
I got a little overboard and removed all the extra bosses on the Honda intake. Need to smooth the runners out and make a flange next week.
Also, make a fixture to orient and hold the stock crank trigger. Just need to cutout the ID and make sure everything fits.
Reply
0
0
Thread Starter
Former Vendor
iTrader: (8)
Joined: Mar 2005
Posts: 1,185
Total Cats: 57
From: Broken Arrow,Ok
I've been make slow progress on this over the past few months. Work, autocross, going e85 on the subaru, etc. have kept me from finishing.
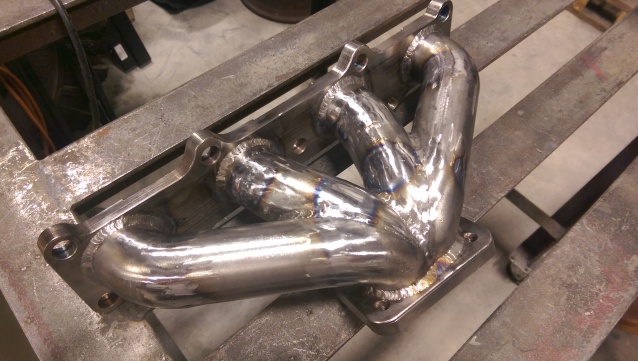
Cleaning up the welds on the manifold
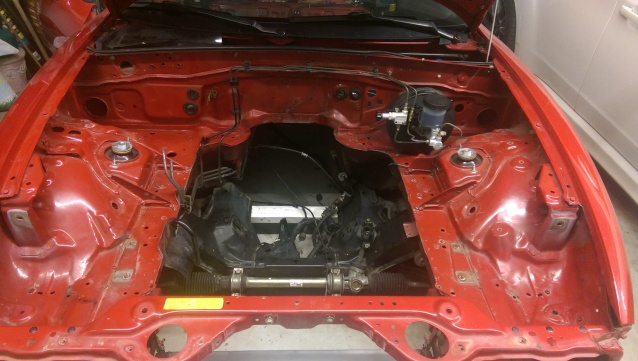
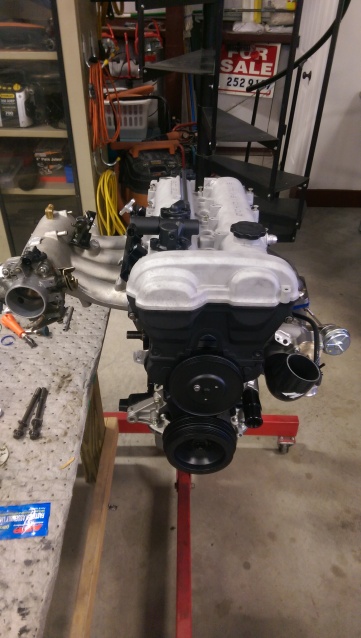
Semi-Assembled Engine Pic
I'll add some more as they get uploaded.
Cleaning up the welds on the manifold
Semi-Assembled Engine Pic
I'll add some more as they get uploaded.
Reply
0
0
Thread Starter
Former Vendor
iTrader: (8)
Joined: Mar 2005
Posts: 1,185
Total Cats: 57
From: Broken Arrow,Ok
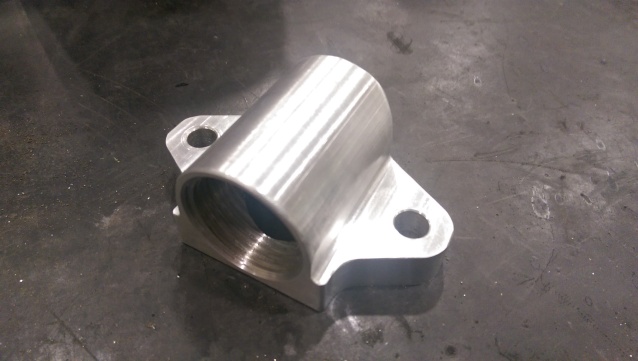
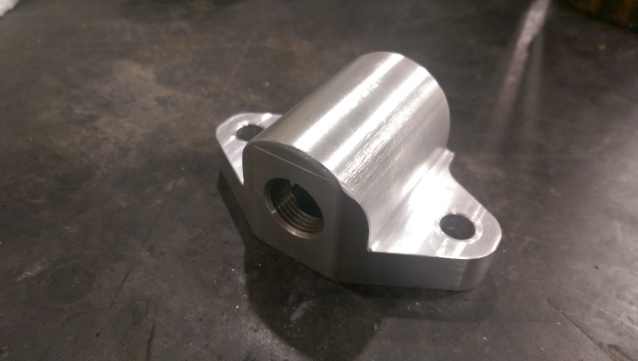
Came across a deal I couldn't pass up on a square top. Of course I took it all apart and sanded down the casting marks and such.
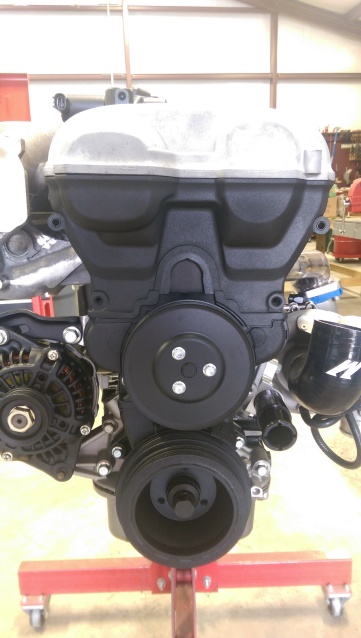
Engine is getting buttoned up slowly but surely. Getting to the point where I need to suck it up and paint the engine bay and shove this thing in.

Made a cover to close up the waterneck hole that was driving my crazy.
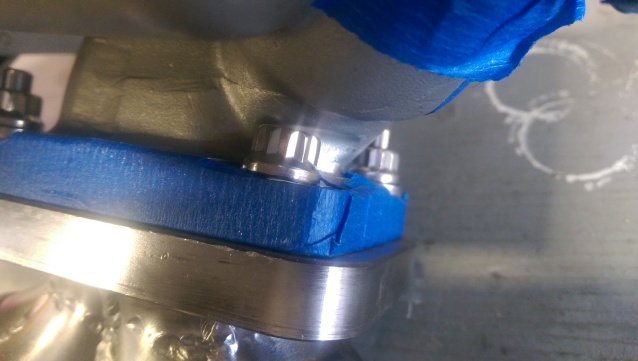
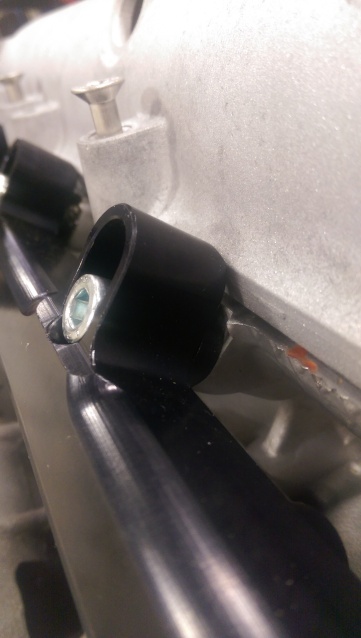
Not sure what I'm going to here. Not enough room to get any kind of 12 point wrench or socket to tighten this nut down. Has anyone run into this and came out with a solution? All I'm coming up with is just using a high strength bolt if I can source one.
Looks like I'm going to have to take this to the shop and mill it down a bit. I can't remove the valve cover without pulling the fuel rail at the moment.
Obligatory pic of one of our furballs from a recent car meet.

Engine is getting buttoned up slowly but surely. Getting to the point where I need to suck it up and paint the engine bay and shove this thing in.
Made a cover to close up the waterneck hole that was driving my crazy.
Not sure what I'm going to here. Not enough room to get any kind of 12 point wrench or socket to tighten this nut down. Has anyone run into this and came out with a solution? All I'm coming up with is just using a high strength bolt if I can source one.
Looks like I'm going to have to take this to the shop and mill it down a bit. I can't remove the valve cover without pulling the fuel rail at the moment.
Obligatory pic of one of our furballs from a recent car meet.
Reply
0
0
Elite Member

Joined: Mar 2007
Posts: 5,298
Total Cats: 884
From: Santa Clara, CA
--Ian
Reply
0
0
Thread Starter
Former Vendor
iTrader: (8)
Joined: Mar 2005
Posts: 1,185
Total Cats: 57
From: Broken Arrow,Ok
I'm planning on using studs and nuts as can be seen in the picture on the other mounting holes.
I'm not sure the picture adequately depicts the space constraints. There is genuinely barely enough distance between the flange and the housing for even a nut to fit. I had intended on shortening up my fab9 studs but I'm not sure that's going to be a feasible option.
I'm not sure the picture adequately depicts the space constraints. There is genuinely barely enough distance between the flange and the housing for even a nut to fit. I had intended on shortening up my fab9 studs but I'm not sure that's going to be a feasible option.
Reply
0
0


