
TZ's build-a documentary of adequacy and hopes for more


Thread Starter
Elite Member
iTrader: (6)
Joined: May 2011
Posts: 1,656
Total Cats: 64
From: Albuquerque, NM
So decided to start a build thread. My old laptop fried so a little short on earlier pics. I bought a '97 M edition back in dec of '08 for $2k. Had a little bit of body damage. Dented door and some dings. Cracked radiator and heater wasn't hooked up. Not a bad deal.
Fast forward to June of '11. I was planning on putting a FM2 in the '97 soon. Wanted to build the motor first. However, I found a '99 with a FM2 already in it for $6k. Picked it up. Figured I was basically getting my FM2 with a car attached to it on the cheap.
Mods list the '99 came with:
FM2 w/ Hydra GT2560r
FM 2.5in exhaust
ACT clutch
FM 10lb flywheel
HD double diaganal roll bar + harness bar
Really nice hard top
FM shocks/springs/sway bars
Double feed rail
RC 550 injectors
The shift light thing FM sells
I hate the wheels, he wanted to keep his enkei's and I really didn't like them anyway. So he gave me these. Don't laugh I know they suck.
Buddy Club seats I sold to DJP cause I am either to fat or they are way to small. 5'9" 180lb ish, being broken makes being small hard
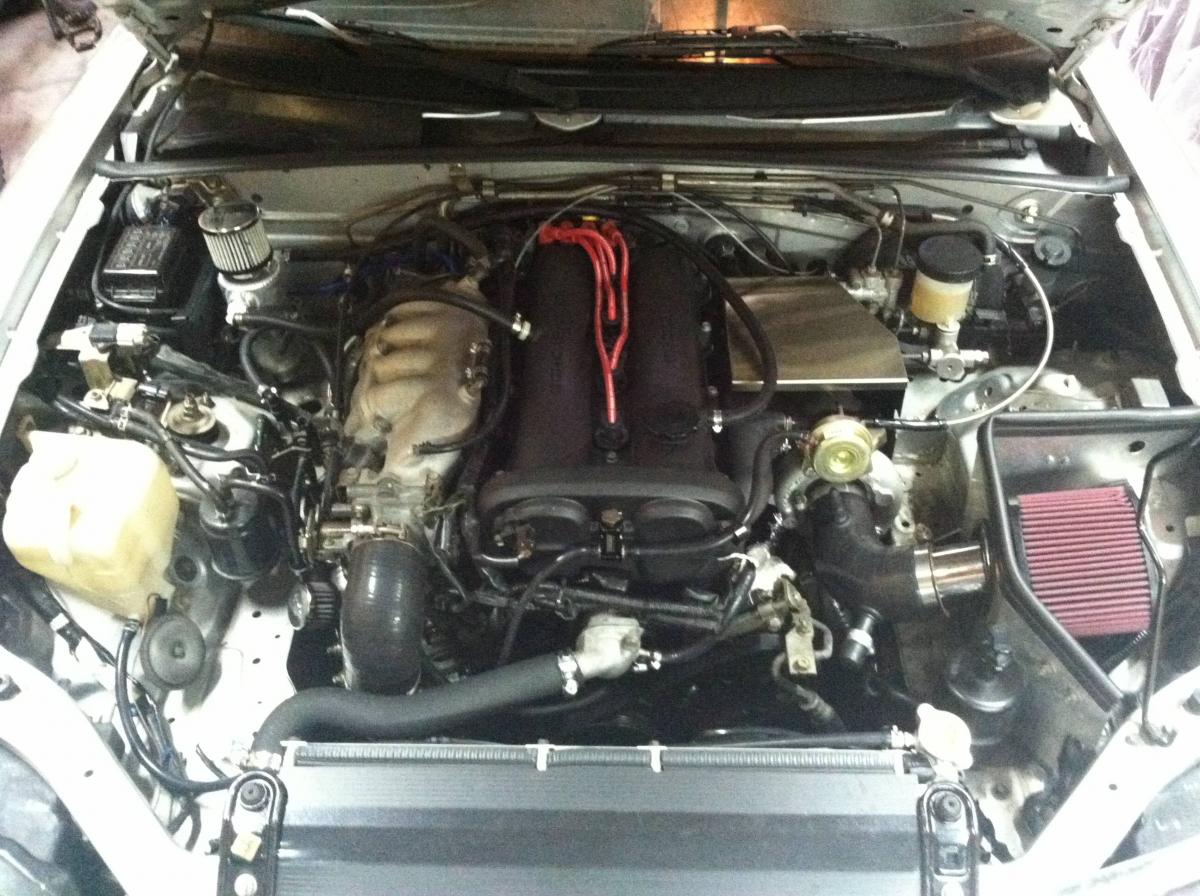
When I picked up the car I pretty much knew the turbo was blown. Smoked a hair and the PO never hooked the BOV to a source. Car ran well otherwise. Got it home hooked up the BOV and the turbo was toast. So did a engine bay rebuild. Added/did:
Took the turbo off and sent it off to rebuild
Sent injectors off to clean and blueprint
Also disassybled the intake mani and cleaned. Plus took off everything else and cleaned.
Added
FM cross flow rad +fan kit
Got the car back up and running. Still smoking on hard throttle. Put the project aside for a bit and winter hit. Took the car to school and was over boosting like a mo fo. Turbo off again for porting.
Ported turbo
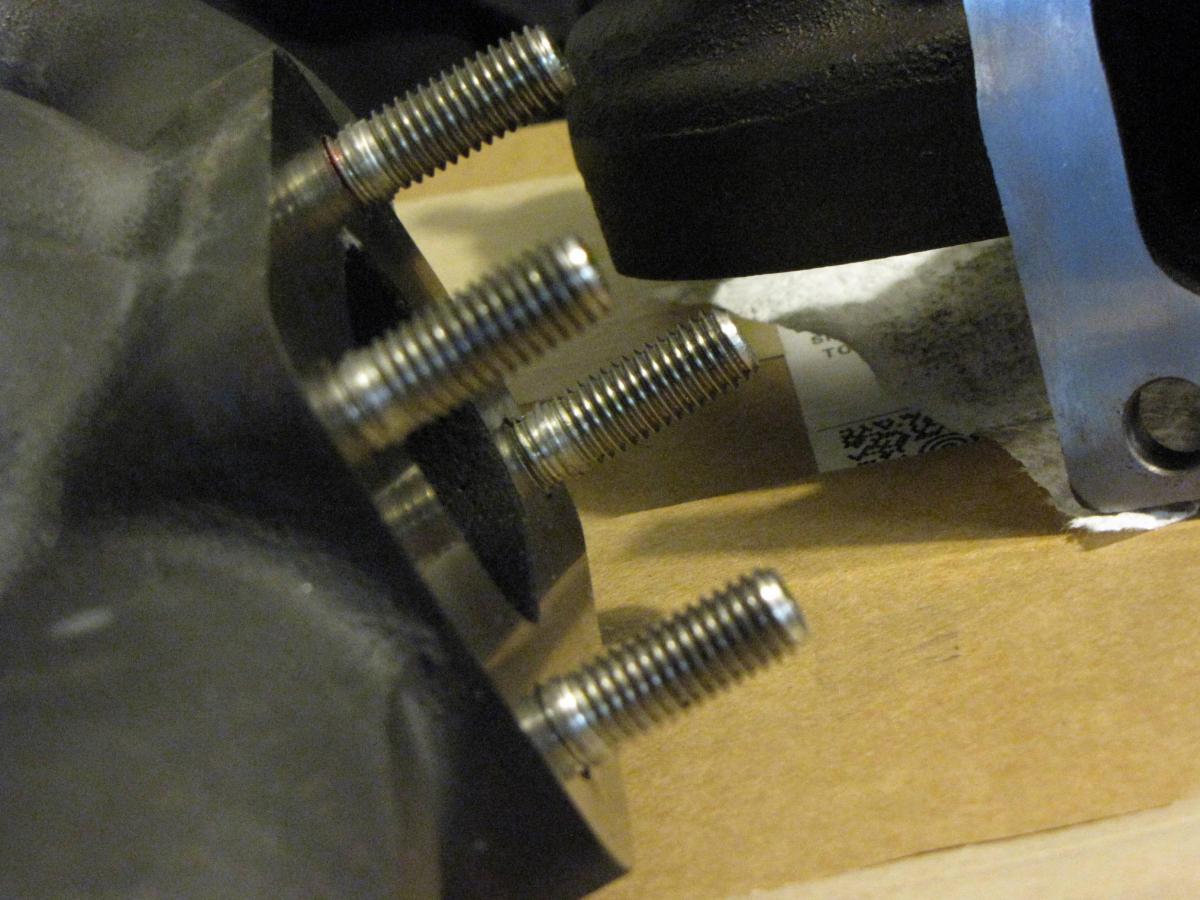
added 10mm inconel studs small nightmare with machine shop
Got it all running again. Car smokes a lot now under throttle. Compression tested
Results +oil in cyl
Cyl 1--195 198
Cyl 2--125 130
Cyl 3--155 195
Cyl 4--195 198 I'm going off memory. To lazy to find my memo
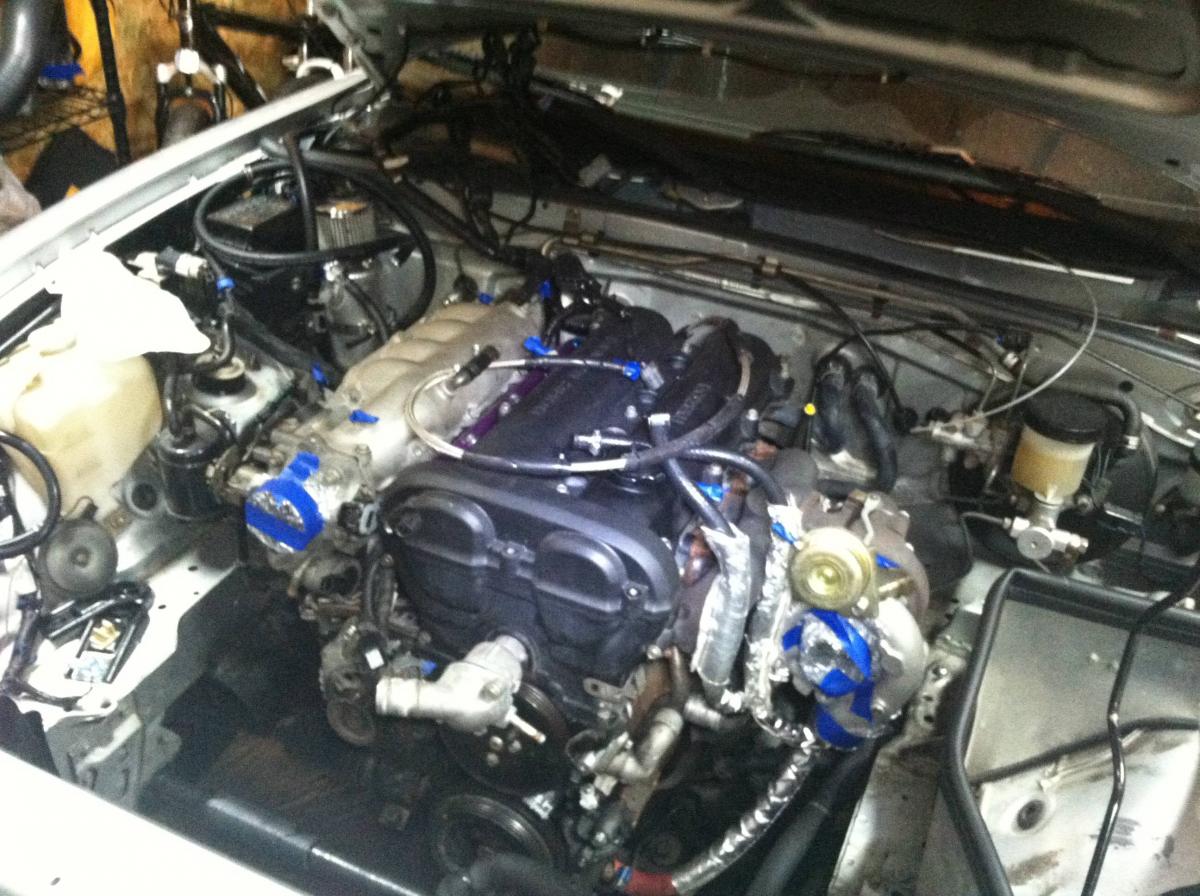
So now it's time for a motor. Engine is almost ready to come out.
-Plan on de powering the steering rack with welded shaft.
-Modding the the valve cover for catchcan awesomeness
-coolant reroute
-changing the turbo coolant lines to -AN
-stage 2 FM clutch
-whatever comes up
-there are a lot of "mights" on the list
-actual engine specs are in the air at the moment thinking this
CP pistons maybe coated
Scat rods
Full balance
Boundry oil pump
mild head port-just to clean it up
All new gaskets, main pulley, and other little things that just need replacing when you get near it.

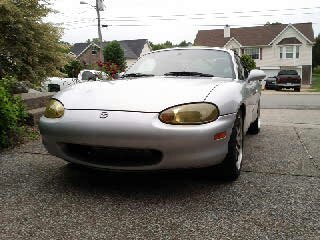
The car when I got it home. It took me around 10-12 hours to get the yellow crap off the headlights. They look pretty good now. Need to attack them one more time with some polish.
After the clean up
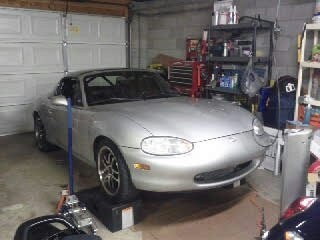
As it sat as of last week
As it sits now as of a few hours ago
This is what the first machine shop though "installed" was
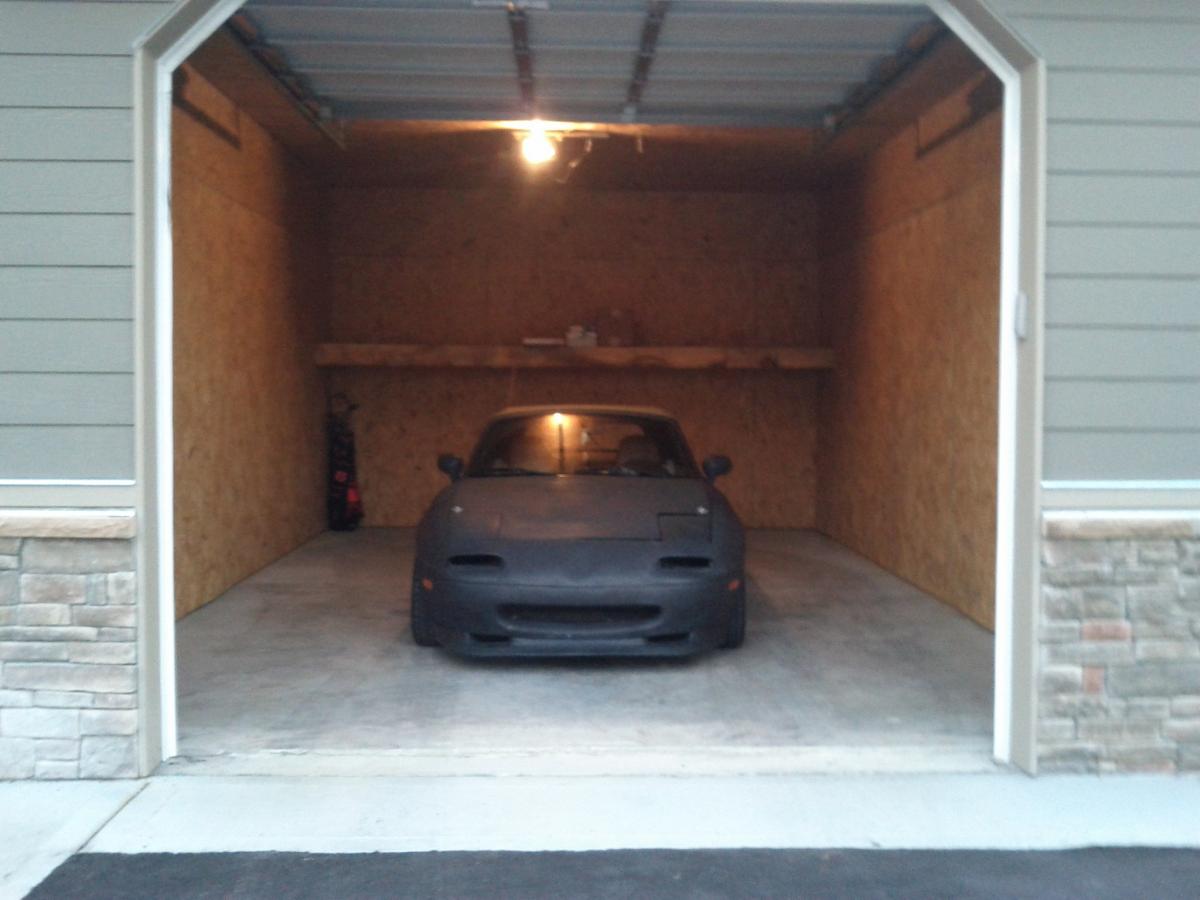
A pic of my garage before moving into my apartment. No reason just wanted to show off. It's the only big one in the complex.
The two

Random piece of metal I found stuck to my drain plug today when I drained to oil. It's ruff looking like a piece of cast metal, thin, and really magnetic. Like a magnet wand will pull it into the air from a half inch away.

and a bunch of kittens for ya ----- lovers. Look at them all piled together. And yes it's racist if you think the black one is the criminal, but that's ok.

Fast forward to June of '11. I was planning on putting a FM2 in the '97 soon. Wanted to build the motor first. However, I found a '99 with a FM2 already in it for $6k. Picked it up. Figured I was basically getting my FM2 with a car attached to it on the cheap.
Mods list the '99 came with:
FM2 w/ Hydra GT2560r
FM 2.5in exhaust
ACT clutch
FM 10lb flywheel
HD double diaganal roll bar + harness bar
Really nice hard top
FM shocks/springs/sway bars
Double feed rail
RC 550 injectors
The shift light thing FM sells
I hate the wheels, he wanted to keep his enkei's and I really didn't like them anyway. So he gave me these. Don't laugh I know they suck.
Buddy Club seats I sold to DJP cause I am either to fat or they are way to small. 5'9" 180lb ish, being broken makes being small hard
When I picked up the car I pretty much knew the turbo was blown. Smoked a hair and the PO never hooked the BOV to a source. Car ran well otherwise. Got it home hooked up the BOV and the turbo was toast. So did a engine bay rebuild. Added/did:
Took the turbo off and sent it off to rebuild
Sent injectors off to clean and blueprint
Also disassybled the intake mani and cleaned. Plus took off everything else and cleaned.
Added
FM cross flow rad +fan kit
Got the car back up and running. Still smoking on hard throttle. Put the project aside for a bit and winter hit. Took the car to school and was over boosting like a mo fo. Turbo off again for porting.
Ported turbo
added 10mm inconel studs small nightmare with machine shop
Got it all running again. Car smokes a lot now under throttle. Compression tested
Results +oil in cyl
Cyl 1--195 198
Cyl 2--125 130
Cyl 3--155 195
Cyl 4--195 198 I'm going off memory. To lazy to find my memo
So now it's time for a motor. Engine is almost ready to come out.
-Plan on de powering the steering rack with welded shaft.
-Modding the the valve cover for catchcan awesomeness
-coolant reroute
-changing the turbo coolant lines to -AN
-stage 2 FM clutch
-whatever comes up
-there are a lot of "mights" on the list
-actual engine specs are in the air at the moment thinking this
CP pistons maybe coated
Scat rods
Full balance
Boundry oil pump
mild head port-just to clean it up
All new gaskets, main pulley, and other little things that just need replacing when you get near it.
The car when I got it home. It took me around 10-12 hours to get the yellow crap off the headlights. They look pretty good now. Need to attack them one more time with some polish.
After the clean up
As it sat as of last week
As it sits now as of a few hours ago
This is what the first machine shop though "installed" was
A pic of my garage before moving into my apartment. No reason just wanted to show off. It's the only big one in the complex.
The two
Random piece of metal I found stuck to my drain plug today when I drained to oil. It's ruff looking like a piece of cast metal, thin, and really magnetic. Like a magnet wand will pull it into the air from a half inch away.
and a bunch of kittens for ya ----- lovers. Look at them all piled together. And yes it's racist if you think the black one is the criminal, but that's ok.
Last edited by TorqueZombie; May 4, 2012 at 02:24 PM.
Reply
 0
0

0


Reply
0
0
Thread Starter
Elite Member
iTrader: (6)
Joined: May 2011
Posts: 1,656
Total Cats: 64
From: Albuquerque, NM
Pics are fixed. Don't know what happened. I just reset the imgur links and it worked. I hope. The pics show up on the tablet now, and didn't before.
Also some pics are cell photos and others are taken with a real camera. It really depends on what I have near me at the time. This goes for the whole thread.
Also some pics are cell photos and others are taken with a real camera. It really depends on what I have near me at the time. This goes for the whole thread.
Reply
0
0
Thread Starter
Elite Member
iTrader: (6)
Joined: May 2011
Posts: 1,656
Total Cats: 64
From: Albuquerque, NM
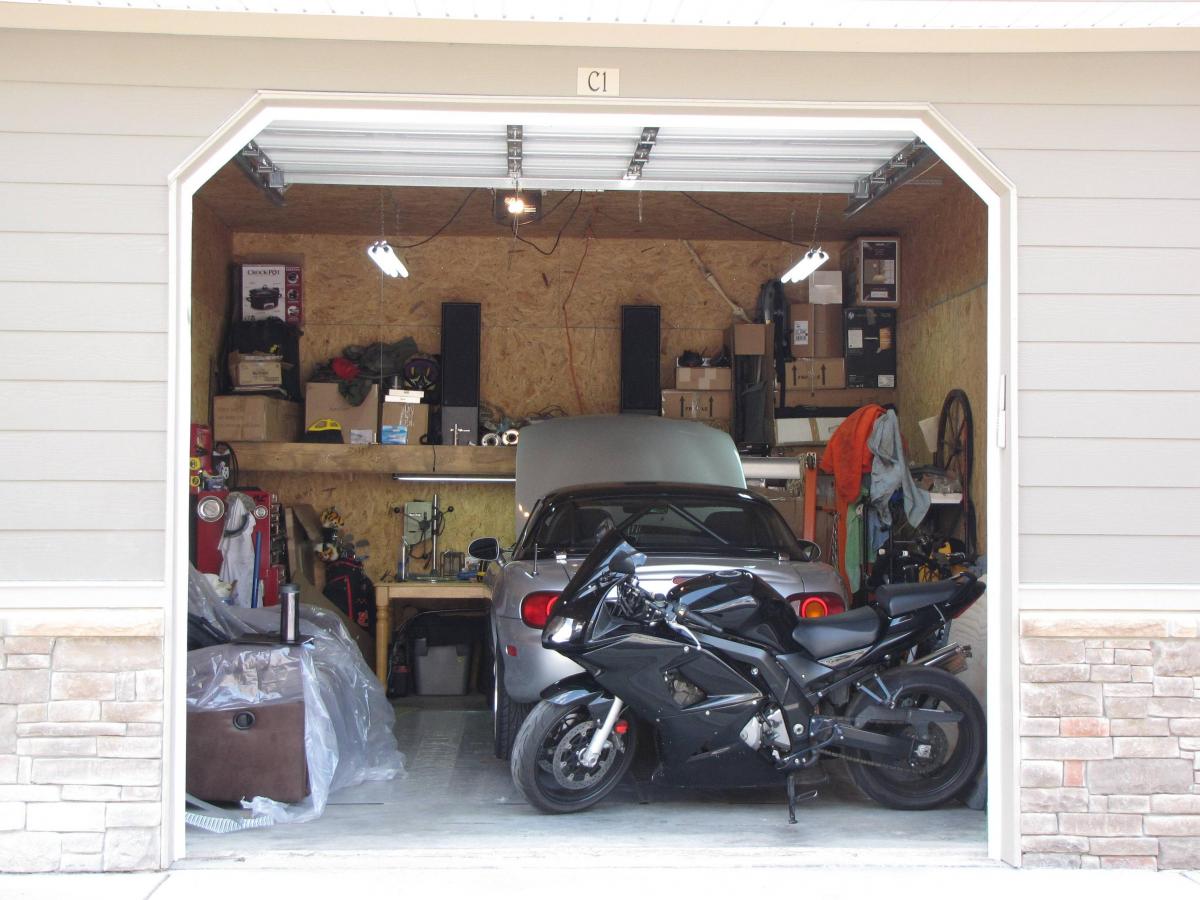
Garages tend to fill up after moving in
My first try at ducting the sides. They held up to 70-80mph, just in city driving and a little highway made a noticable difference. Coolant temps were fine before, but they would raise to 90-92c at a light and take a while to cool down to 88c. Now they would come down before the next light. Also fans didn't seem to want to run as much putting through traffic.
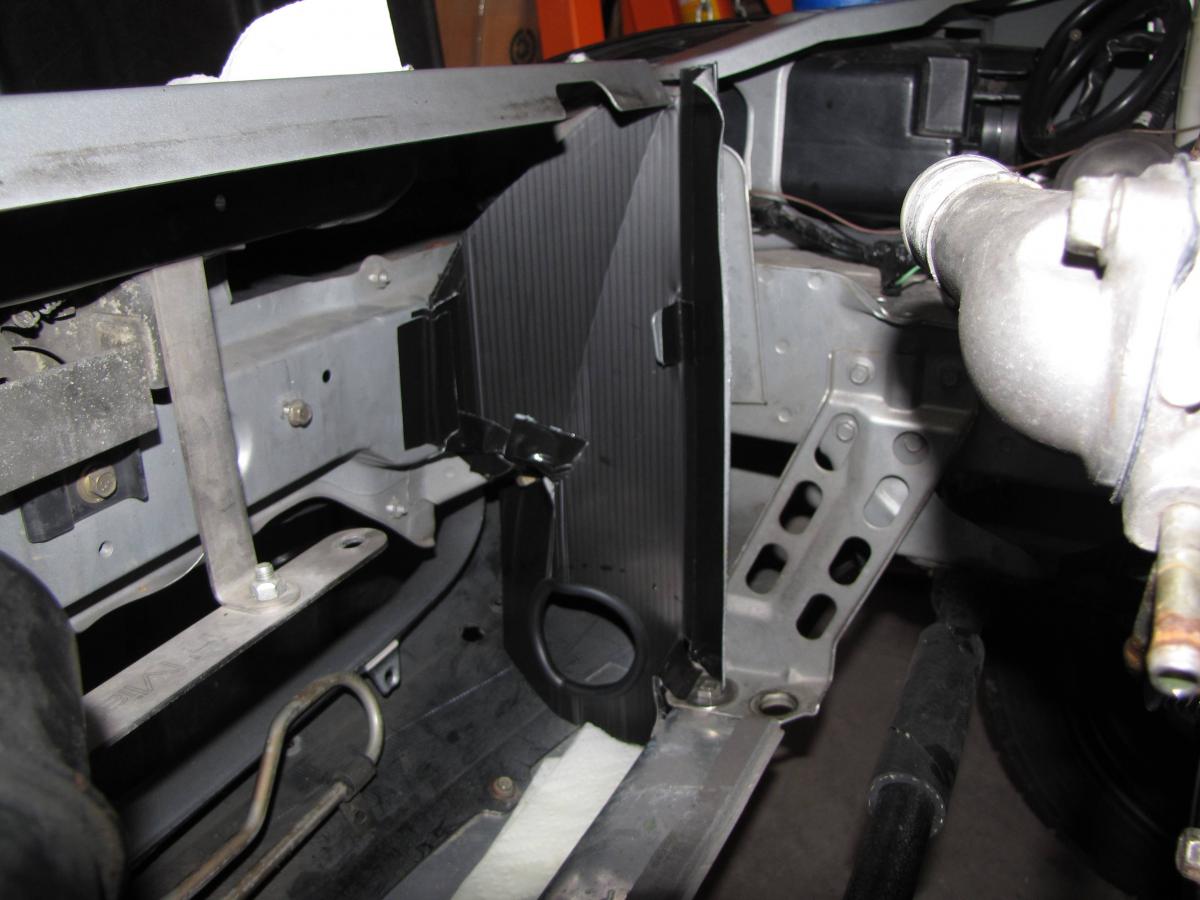
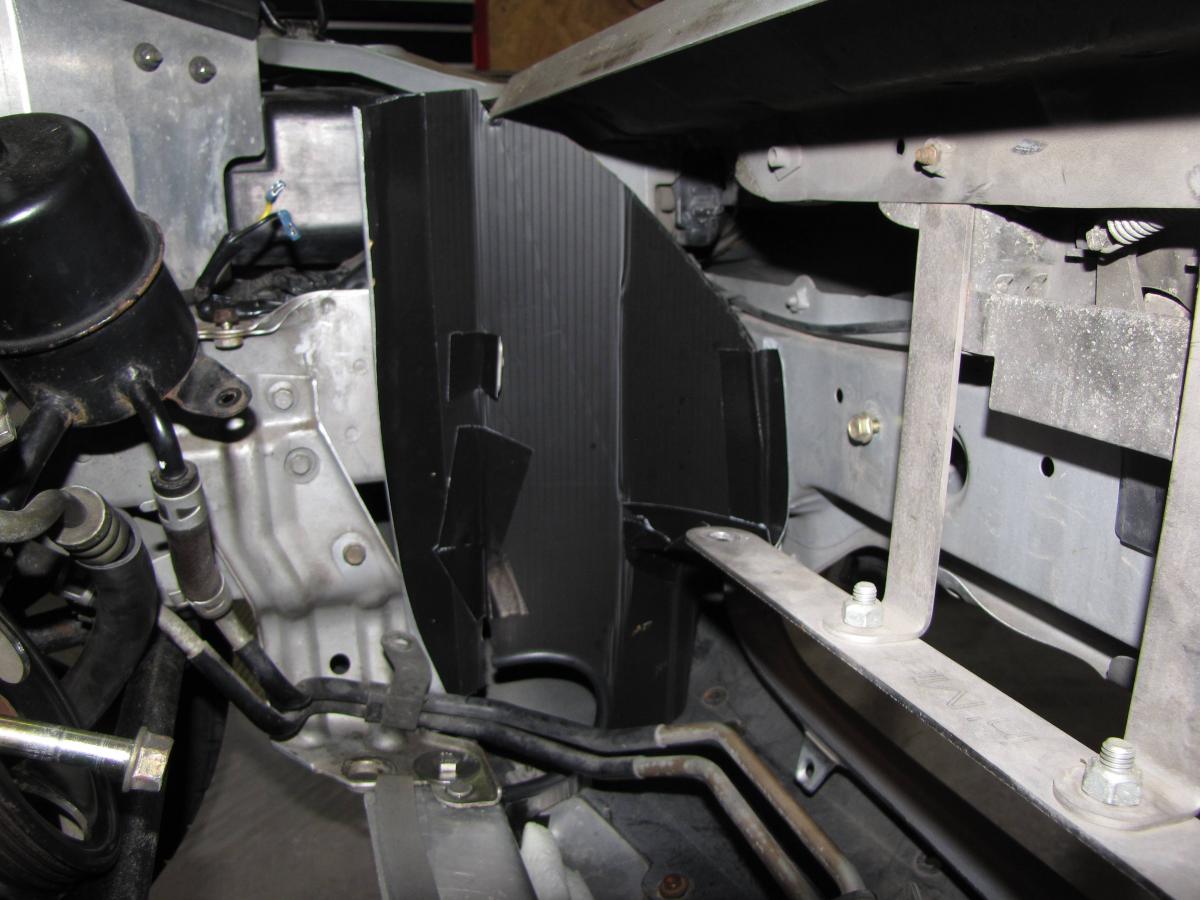
This helped the idle droop when the FM fans came on. They'd almost bog the motor before. Still drop it a bit, just doesn't act like it's about to stall anymore. Need to mess with the Hydra setting or maybe run bigger wires to the fans. I'll figure it out after the motor goes in. Could be the bad motor barely running in the first place.
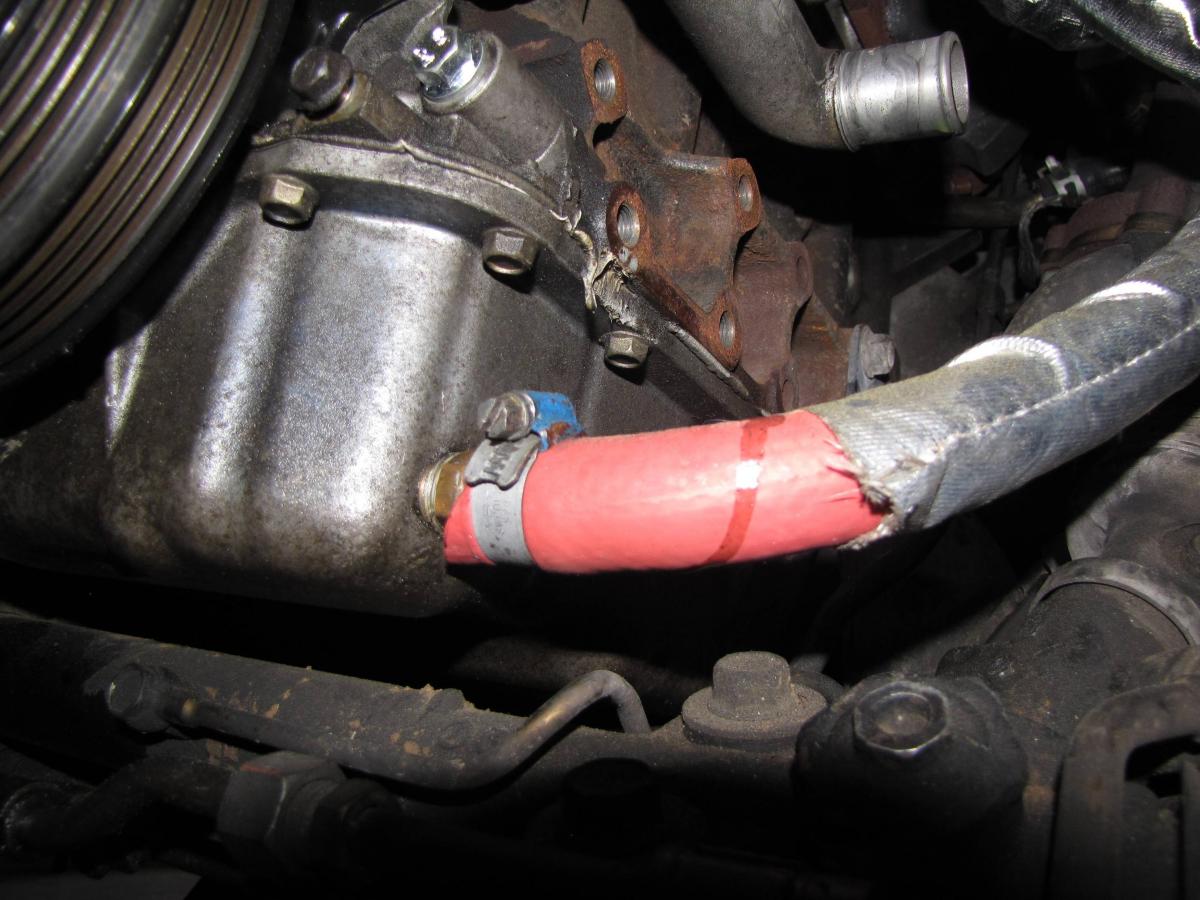
This is where the PO put the turbo drain. It seems a little low to me. Anyone see any issues? I'm thinking oof having the hole welded and remounting the return higher on the pan. 1-to shorten hose length 2-I don't know if that is in the oil in the pan itself low.
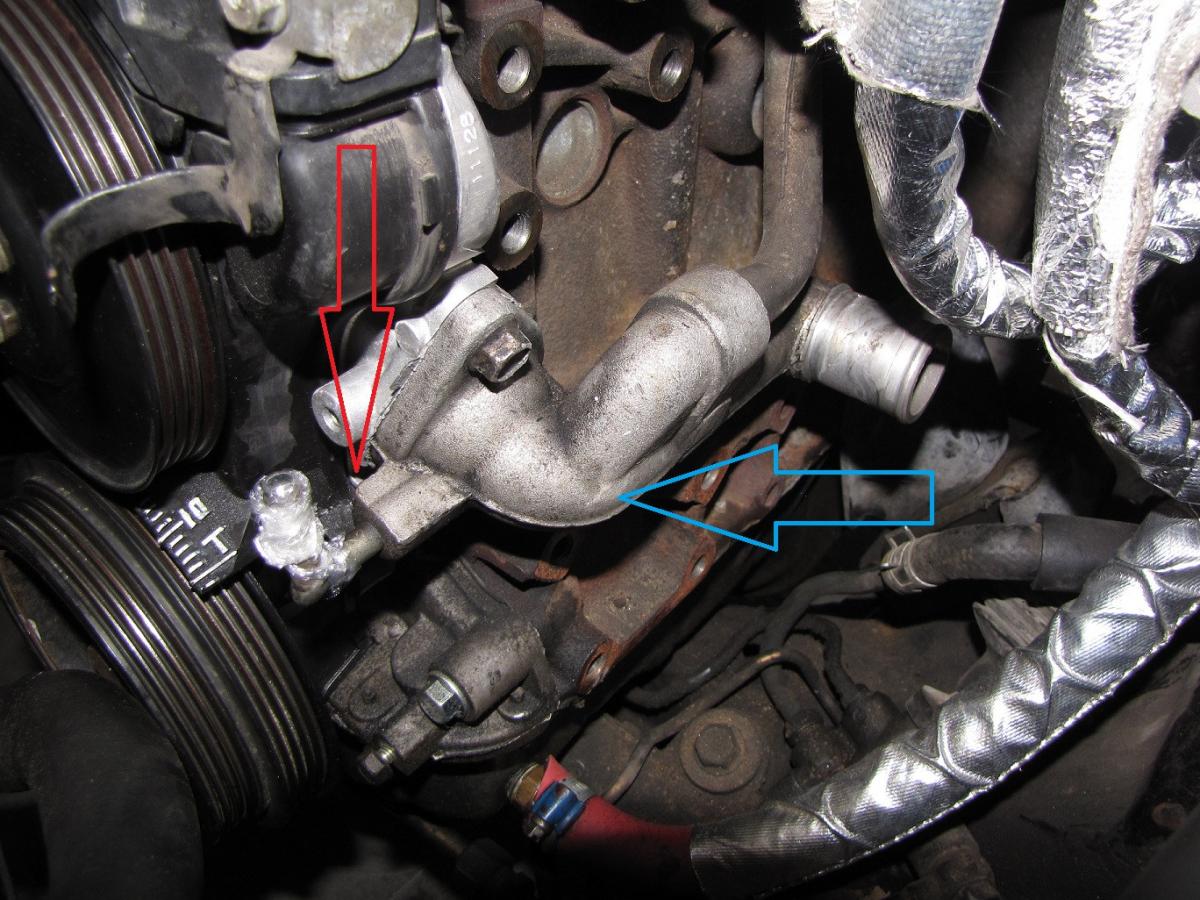
In the hunt for less fail I want to put the turbo coolant lines on -6AN lines. I'm looking at modding the water pump inlet.
Should I tap in a fitting at the red arrow?
Or weld/tap a fitting at the blue? Really just looking for cleanliness and simple hose routing.
My first try at ducting the sides. They held up to 70-80mph, just in city driving and a little highway made a noticable difference. Coolant temps were fine before, but they would raise to 90-92c at a light and take a while to cool down to 88c. Now they would come down before the next light. Also fans didn't seem to want to run as much putting through traffic.
This helped the idle droop when the FM fans came on. They'd almost bog the motor before. Still drop it a bit, just doesn't act like it's about to stall anymore. Need to mess with the Hydra setting or maybe run bigger wires to the fans. I'll figure it out after the motor goes in. Could be the bad motor barely running in the first place.
This is where the PO put the turbo drain. It seems a little low to me. Anyone see any issues? I'm thinking oof having the hole welded and remounting the return higher on the pan. 1-to shorten hose length 2-I don't know if that is in the oil in the pan itself low.
In the hunt for less fail I want to put the turbo coolant lines on -6AN lines. I'm looking at modding the water pump inlet.
Should I tap in a fitting at the red arrow?
Or weld/tap a fitting at the blue? Really just looking for cleanliness and simple hose routing.
Reply
0
0
Thread Starter
Elite Member
iTrader: (6)
Joined: May 2011
Posts: 1,656
Total Cats: 64
From: Albuquerque, NM
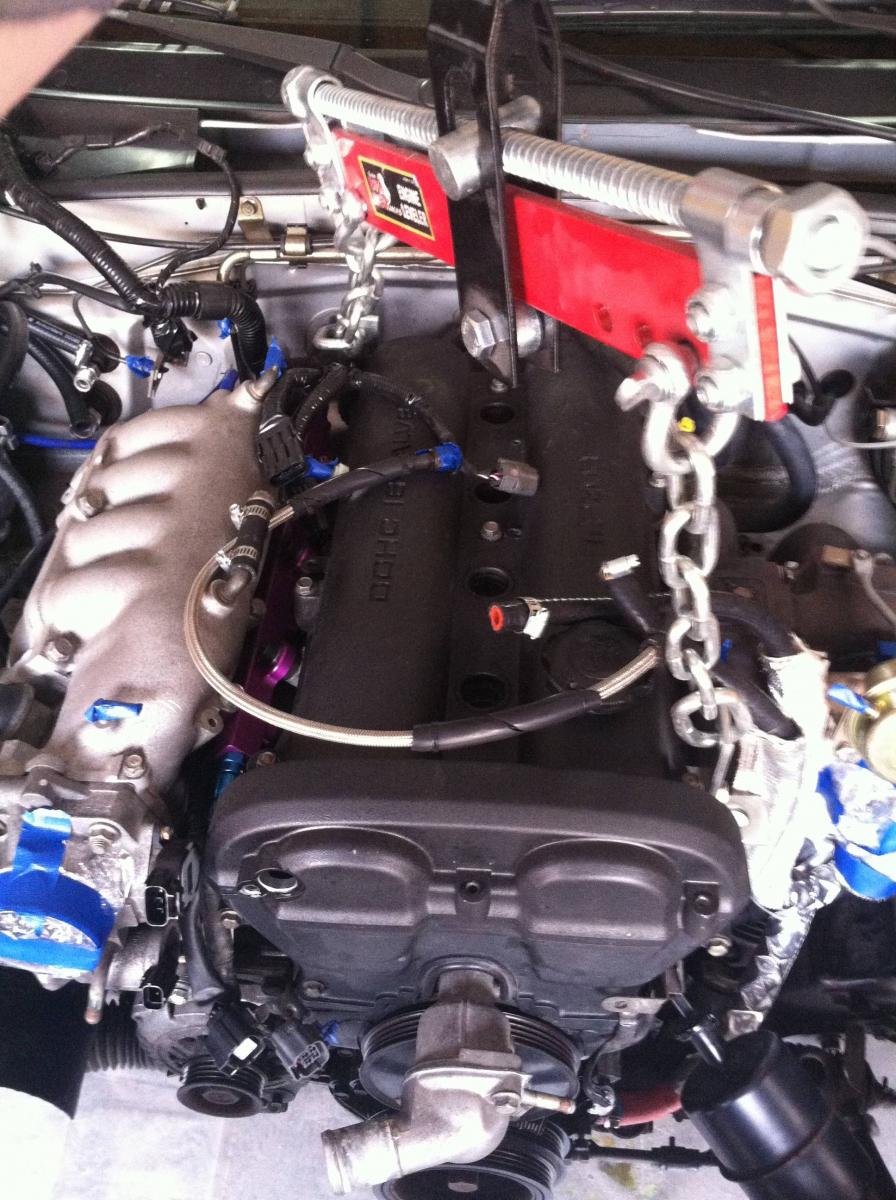
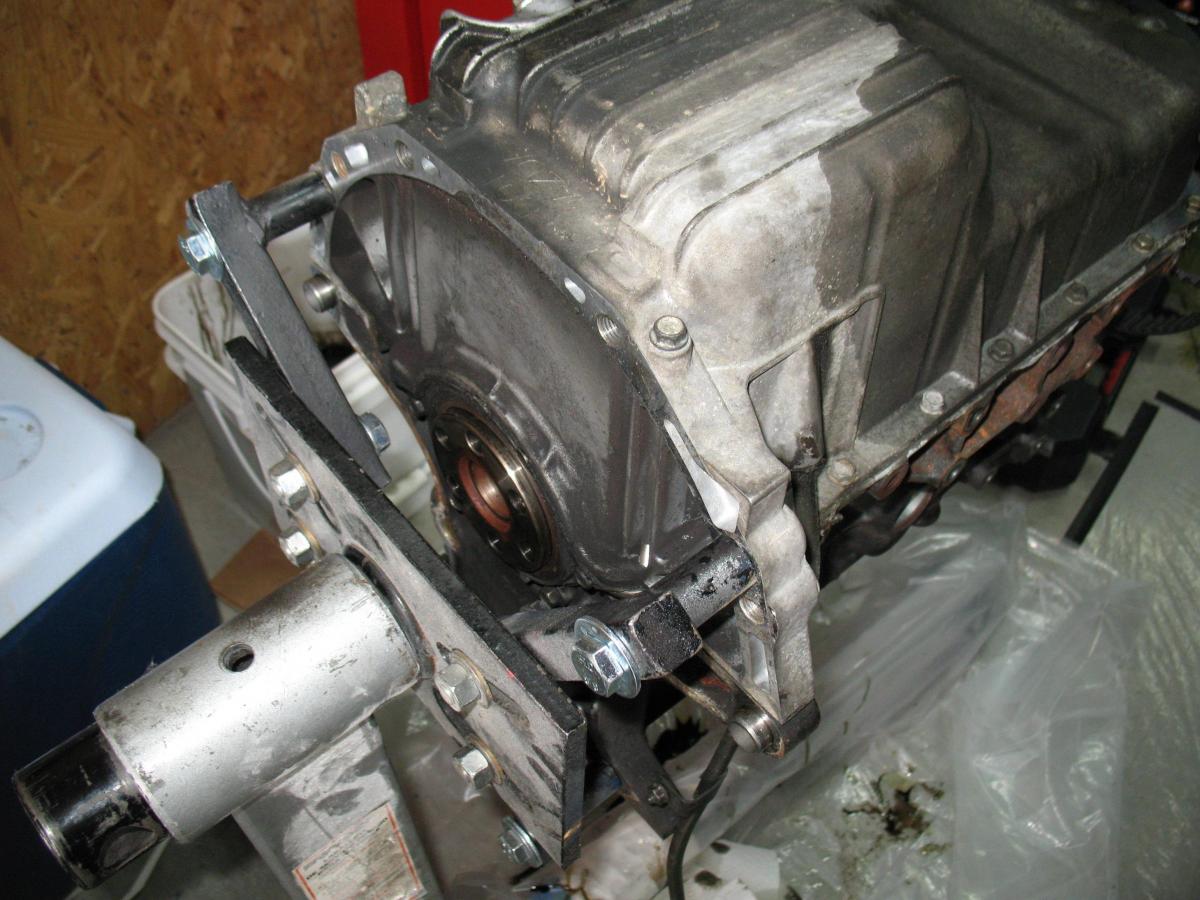
Anyone see any issues with mounting the hoist here? The factory has the back mount at the coil bracket. That's where I hooked the load leveler, with the most amount of bolt in the hole possible, and snugged tight. It just seems like a small amount of metal to lift the engine/trans out with. I figure the factory seems to use it, but figured I''d double check with you guys. Pulling it tomorrow.
Reply
0
0

Junior Member
Joined: Apr 2012
Posts: 55
Total Cats: 1
From: Sioux Falls, SD
Looks like you have a fun summer ahead of you for sure. Motor looks like a very solid setup so good luck with the build. Also am very jealous of the garage im stuck in a damn townhouse for at least 3 years until I buy a house and my garage isnt bad but yours is a mancave compared to mine 
Reply
0
0
Thread Starter
Elite Member
iTrader: (6)
Joined: May 2011
Posts: 1,656
Total Cats: 64
From: Albuquerque, NM
Got the motor out today. Trans and external stuff is all off. I have a few questions..probably stupid questions.
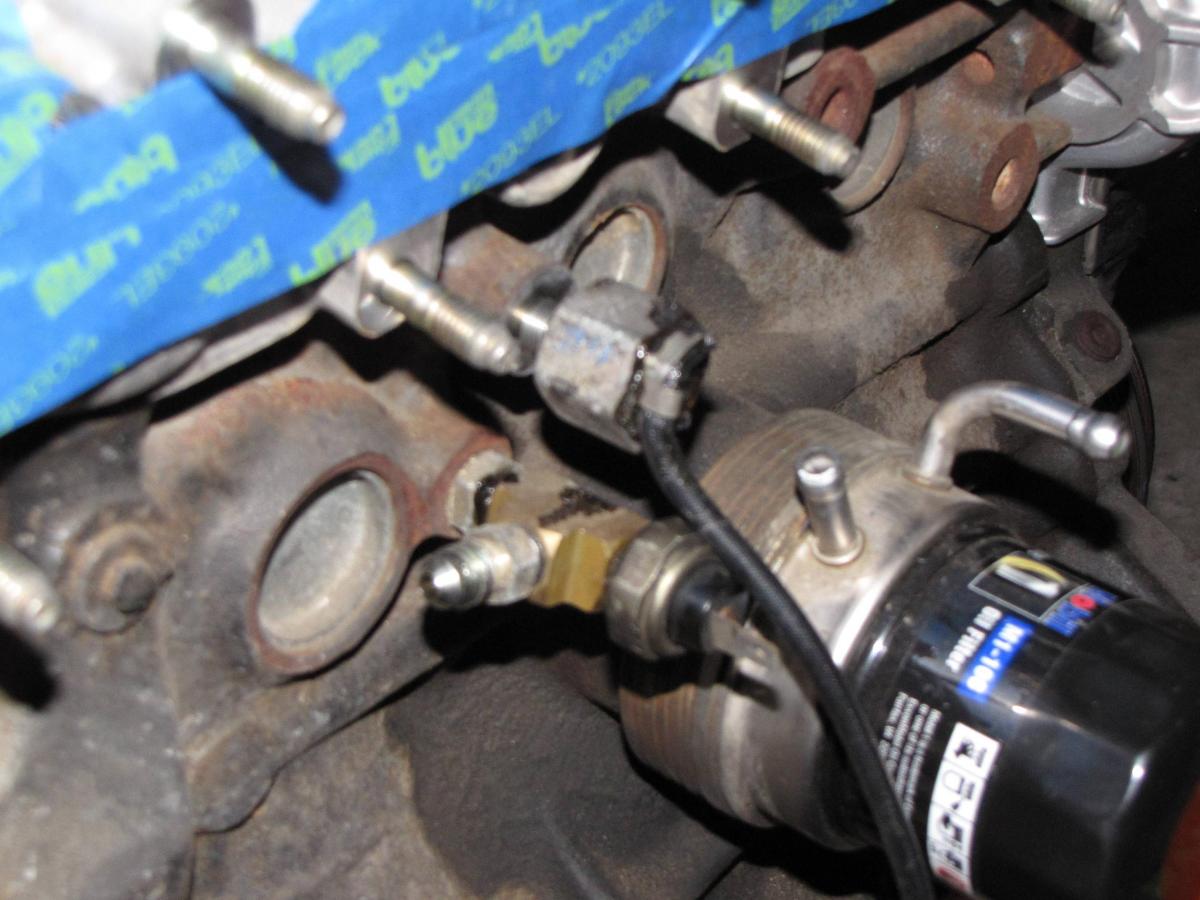
The bottom one is the T for oil supply and oil pressure. What is the one above it? I thought it was the knock sensor, but it had a few drops of oil in it so don't know if it was oily from previous owner or a sensor for something I don't know.
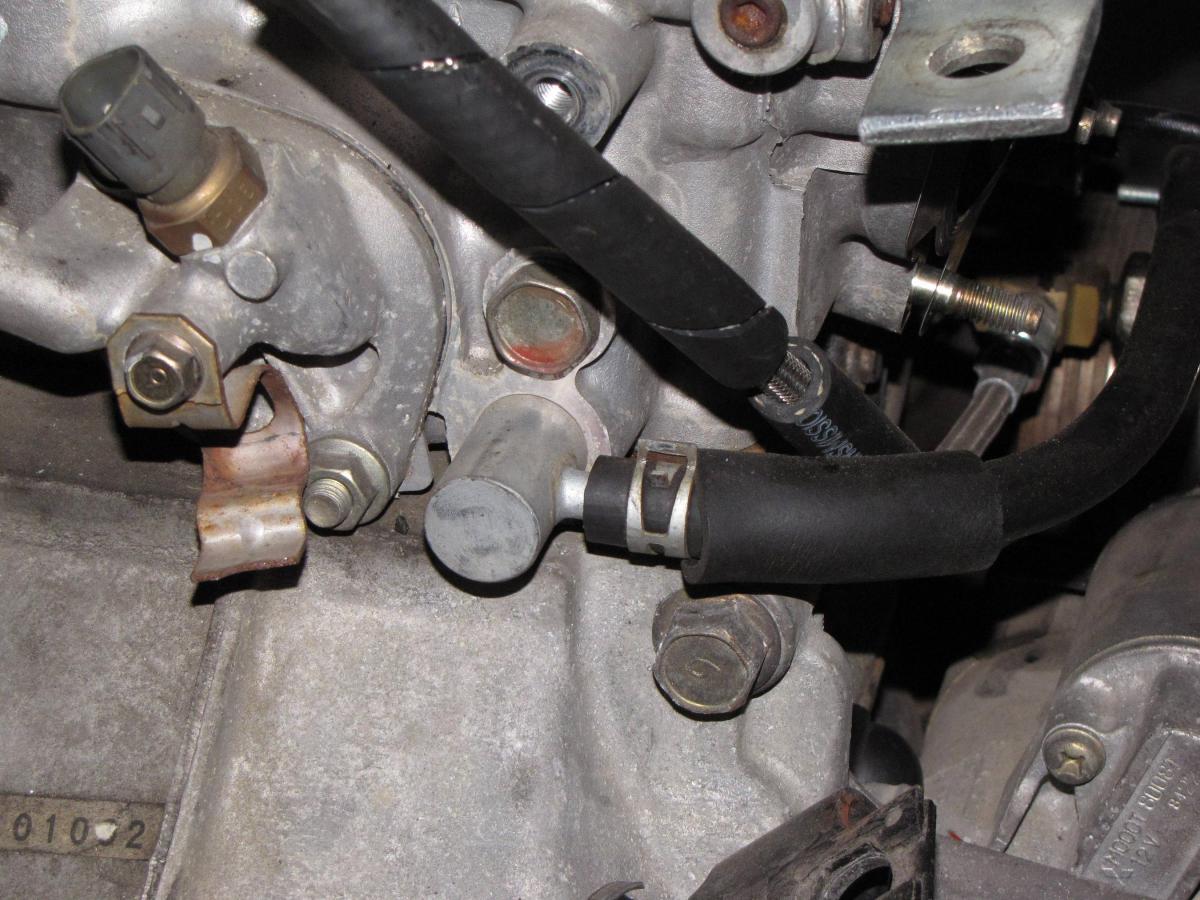
The water supply for the oil cooler/throttle body stuff just threads out? Grab it with some vise grips and twist right? Deleting the stock cooler stuff so plan on plugging this.
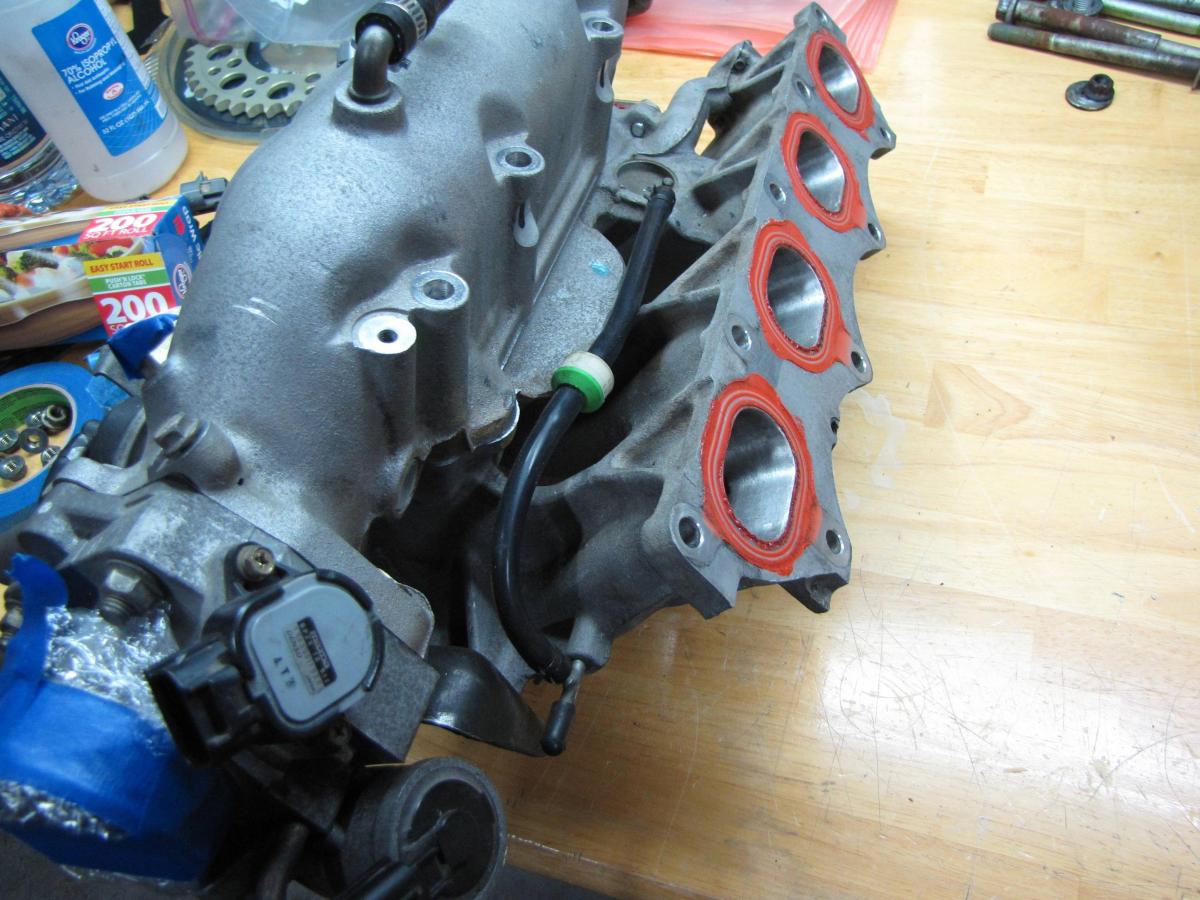
Seriously what does this vac line do? It just goes from one port to the other. I was thinking of having a few of these ports welded shut to limit the fail points. I have a few other things going in for welding. It'll only cost me a few bucks and I'd like to have one less this to worry about popping off.
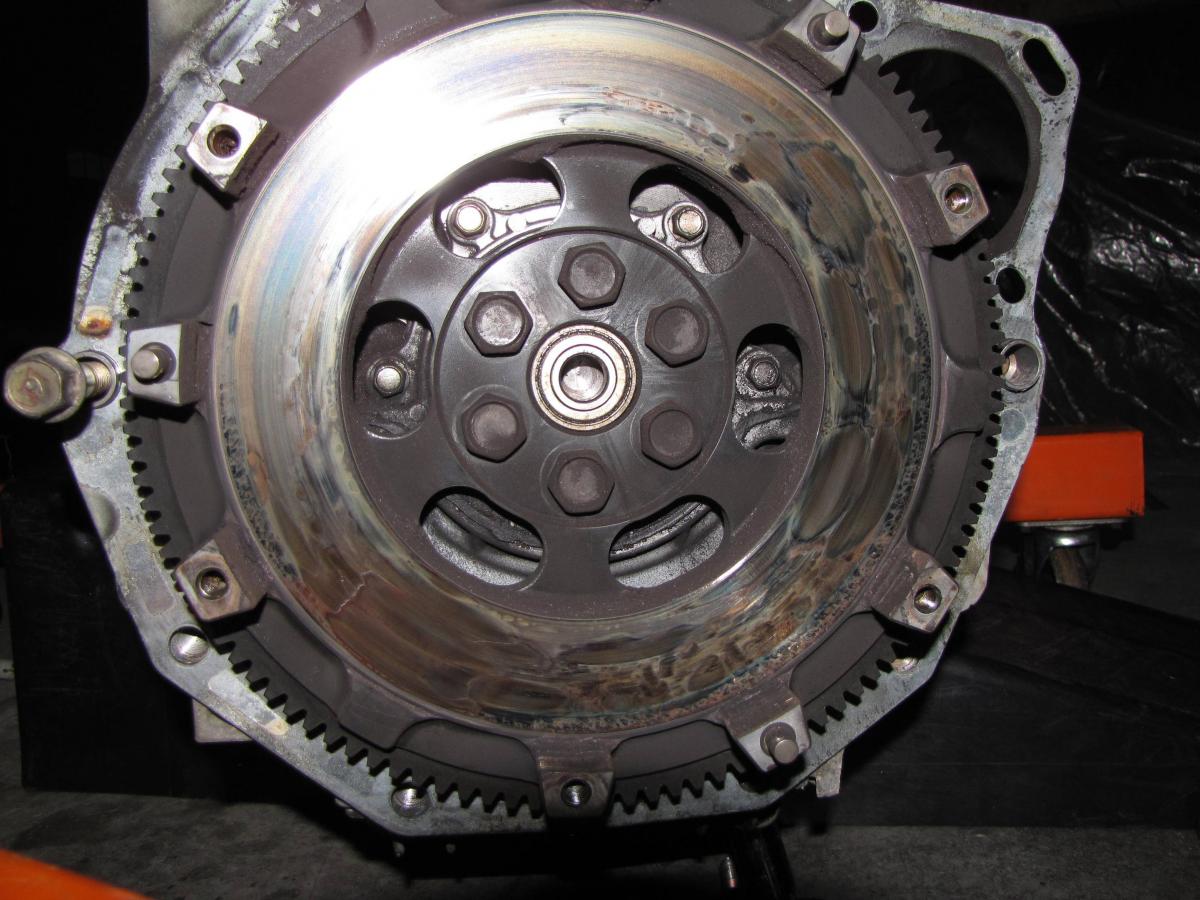
I have done some bad things to clutches when I was young. Seen a few really disturbing things working at a machine shop. I only put a few hundred miles on this motor so I know this wasn't from me. PO autocrossed it. What makes a clutch discolor way more on one side than another? If you run your finger around it there are ruff spots in the dark spots. Poor pressure plate torque? I've changed a bunch of clutches. Never seen this. Best pics I could get.

Also would like to relocate PO's oil return location higher and with -10AN line. Like I said getting some other stuff welded. Anyone think its worth $10-20 to move higher up? In my head-- under hard breaking oil would slosh to the front of the pan and cover the hole. Possibly backing oil up in the drain.

The bottom one is the T for oil supply and oil pressure. What is the one above it? I thought it was the knock sensor, but it had a few drops of oil in it so don't know if it was oily from previous owner or a sensor for something I don't know.
The water supply for the oil cooler/throttle body stuff just threads out? Grab it with some vise grips and twist right? Deleting the stock cooler stuff so plan on plugging this.
Seriously what does this vac line do? It just goes from one port to the other. I was thinking of having a few of these ports welded shut to limit the fail points. I have a few other things going in for welding. It'll only cost me a few bucks and I'd like to have one less this to worry about popping off.
I have done some bad things to clutches when I was young. Seen a few really disturbing things working at a machine shop. I only put a few hundred miles on this motor so I know this wasn't from me. PO autocrossed it. What makes a clutch discolor way more on one side than another? If you run your finger around it there are ruff spots in the dark spots. Poor pressure plate torque? I've changed a bunch of clutches. Never seen this. Best pics I could get.
Also would like to relocate PO's oil return location higher and with -10AN line. Like I said getting some other stuff welded. Anyone think its worth $10-20 to move higher up? In my head-- under hard breaking oil would slosh to the front of the pan and cover the hole. Possibly backing oil up in the drain.
Reply
0
0
Thread Starter
Elite Member
iTrader: (6)
Joined: May 2011
Posts: 1,656
Total Cats: 64
From: Albuquerque, NM
Lets try this without the double posting.
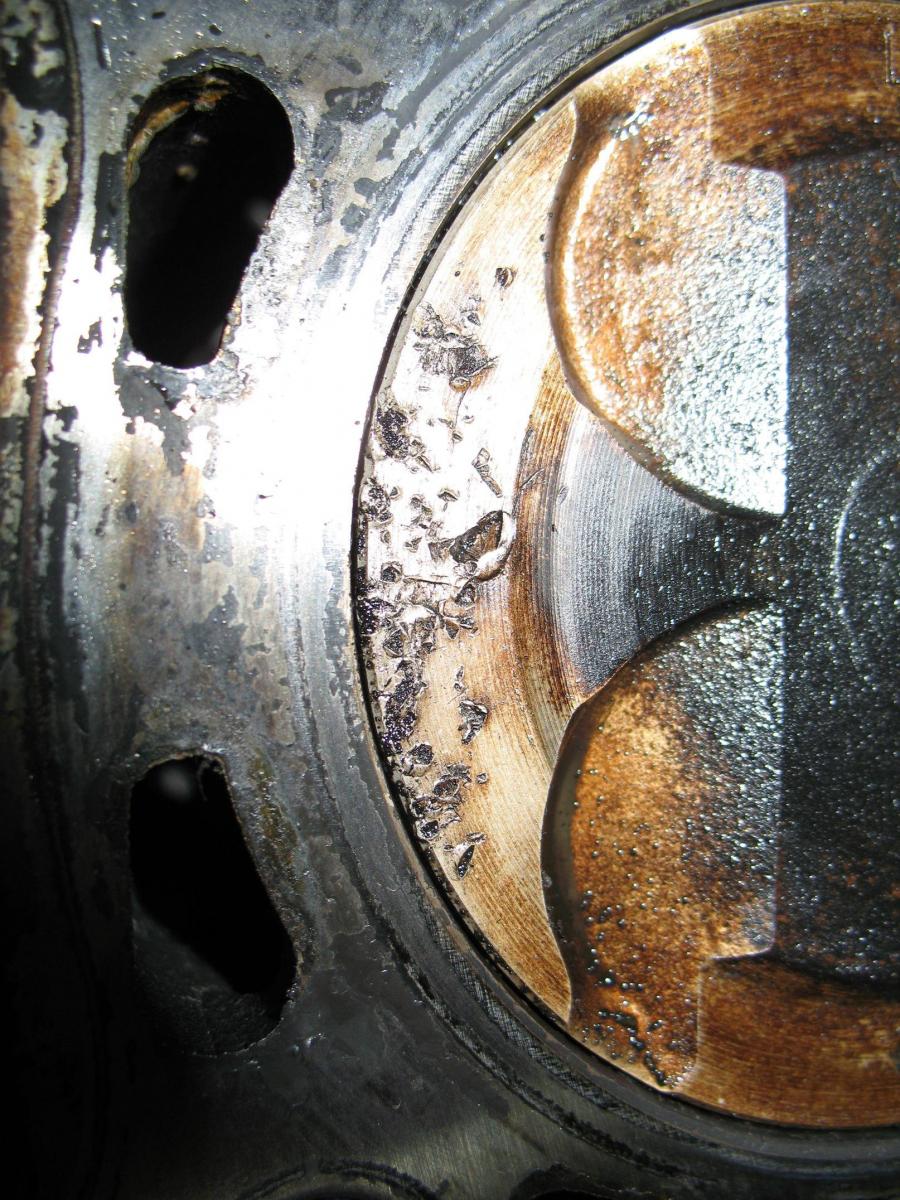
So here is what the motor looks like inside. I'd say that's bad
Here's a fun fact that made me feels stupid. When you put the motor on the engine stand don't bolt it to the oil pan if it has to come off. Thanks to me apartment manager driving by and helping a spine issued boy in need.
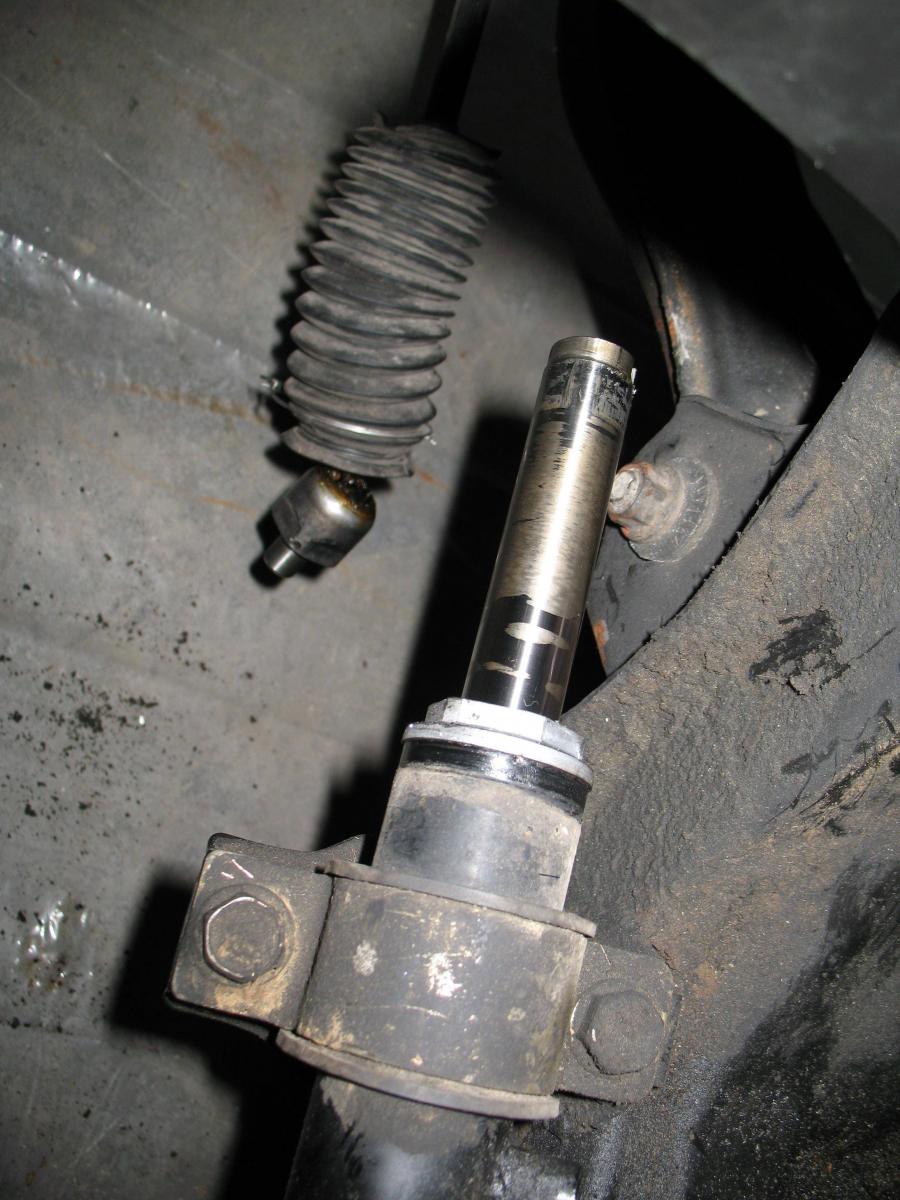
Decided to take the steering rack apart in the car. The tie rods wouldn't come out. I unbolted them, turned the castle nut upside down and wacked them with a hammer. Worked fine every other time I've ever done it. This car said F you and it wanted to start messing crap up. Decided to take the rack apart in the car to avoid destroying the tie rods. NOTE-the drivers side has to have all the lines come off to make it easier to get the inner tie rod off. Taking the steering shaft of the rack was a huge pain too. Took another round with a delicate hammer to remove. Done this a few times on the other Miata and never had this trouble.
So here is what the motor looks like inside. I'd say that's bad
Here's a fun fact that made me feels stupid. When you put the motor on the engine stand don't bolt it to the oil pan if it has to come off. Thanks to me apartment manager driving by and helping a spine issued boy in need.
Decided to take the steering rack apart in the car. The tie rods wouldn't come out. I unbolted them, turned the castle nut upside down and wacked them with a hammer. Worked fine every other time I've ever done it. This car said F you and it wanted to start messing crap up. Decided to take the rack apart in the car to avoid destroying the tie rods. NOTE-the drivers side has to have all the lines come off to make it easier to get the inner tie rod off. Taking the steering shaft of the rack was a huge pain too. Took another round with a delicate hammer to remove. Done this a few times on the other Miata and never had this trouble.
Reply
0
0
Thread Starter
Elite Member
iTrader: (6)
Joined: May 2011
Posts: 1,656
Total Cats: 64
From: Albuquerque, NM
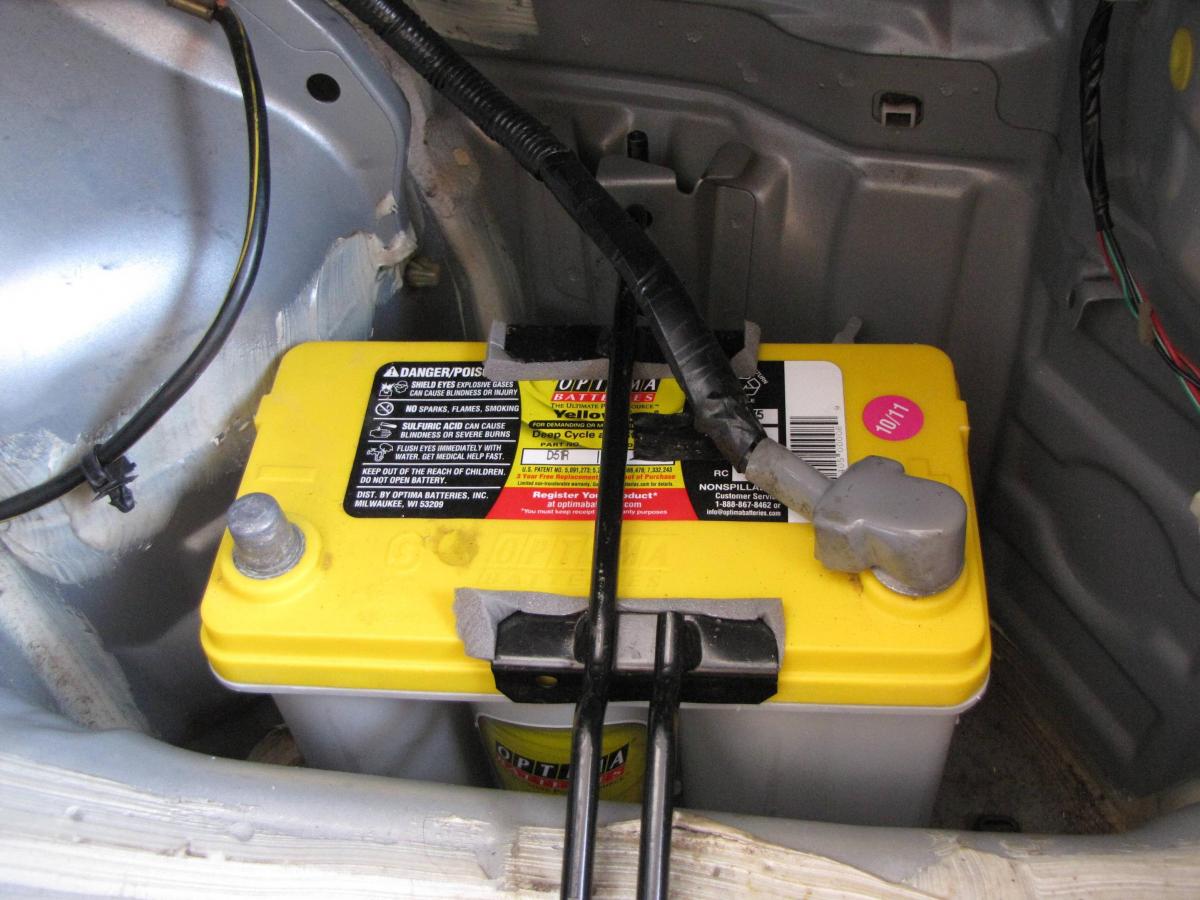
So far all it going ok. Rear diff is changed over to poly and almost have the rear suspension converted. Waiting on the front poly to show up. Bushings are out and A arms are sitting and waiting. Steering input shaft is out for welding, water mixing thing is getting drilled/tapped for a -6an fitting, and another O2 sensor fitting installed for the AEM gauge. Ordering a Tial BOV, I think the 10lb spring is what is recommended, no? VVT head just showed the other day, wooo. LS3 coils are here with 2 harnesses. Need to wire the coils and VVT stuff and figure out where I want my break balancer. Need to dig around the garage for stuff to sell to fund this out of control build. Poor college student doesn't pay enough. The VA needs to give me a raise. Too drunk to post more. I'll take pics later. Not a lot has changed really. Wish I was willing to run hood pins to run my oil cooler like Hustler.
Reply
0
0
Thread Starter
Elite Member
iTrader: (6)
Joined: May 2011
Posts: 1,656
Total Cats: 64
From: Albuquerque, NM
I haven't updated this in a while. Been a bit productive. need more pics maybe.
The tie rod boots were messed up so out they came and new '93 LE ones when in. Could have just done the boots, but this seemed like a good idea at the time. The old ones REALLY fought coming out. It took a torch and some force. Pretty sure they are the originals.
The new ones compared to old
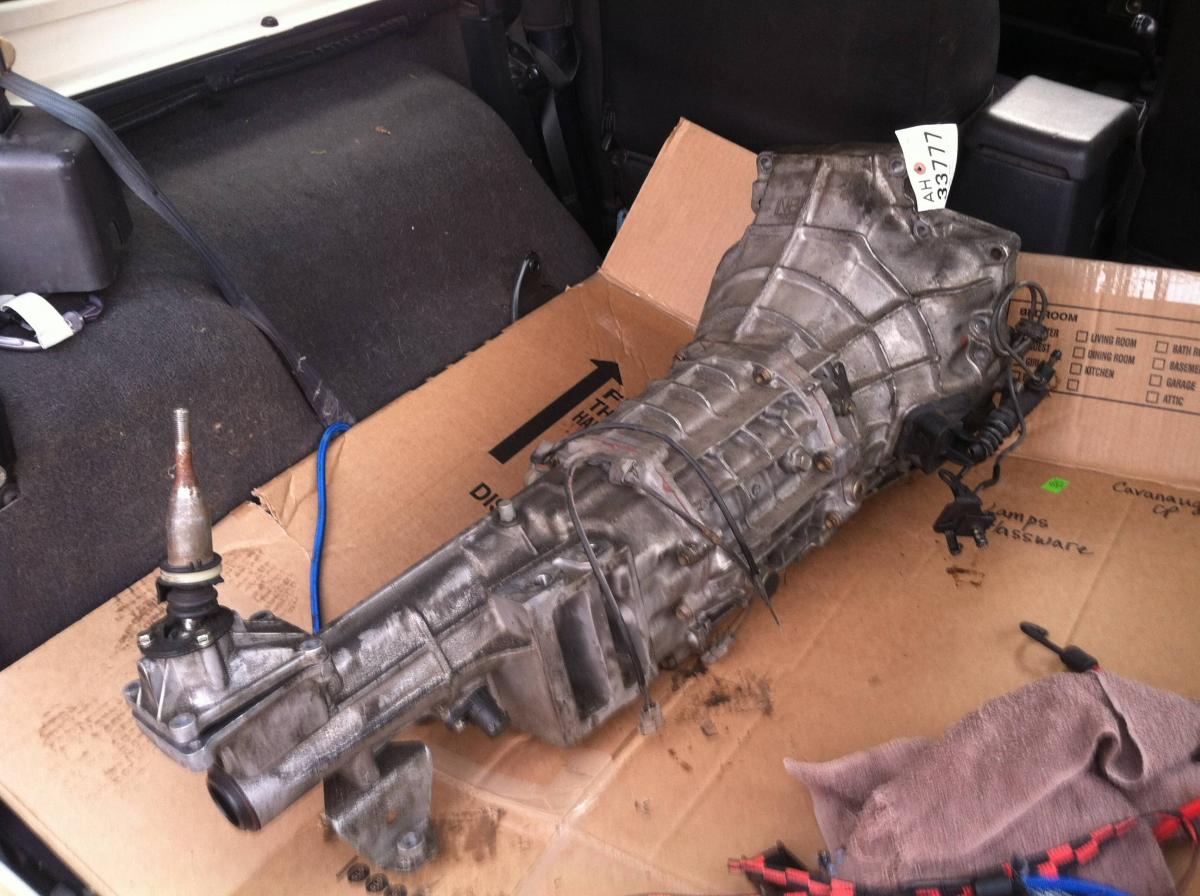
New to me diff is back in and back in its place under the car now. Couldn't ask for a better deal. Yay for a 3.9 torsen deals.
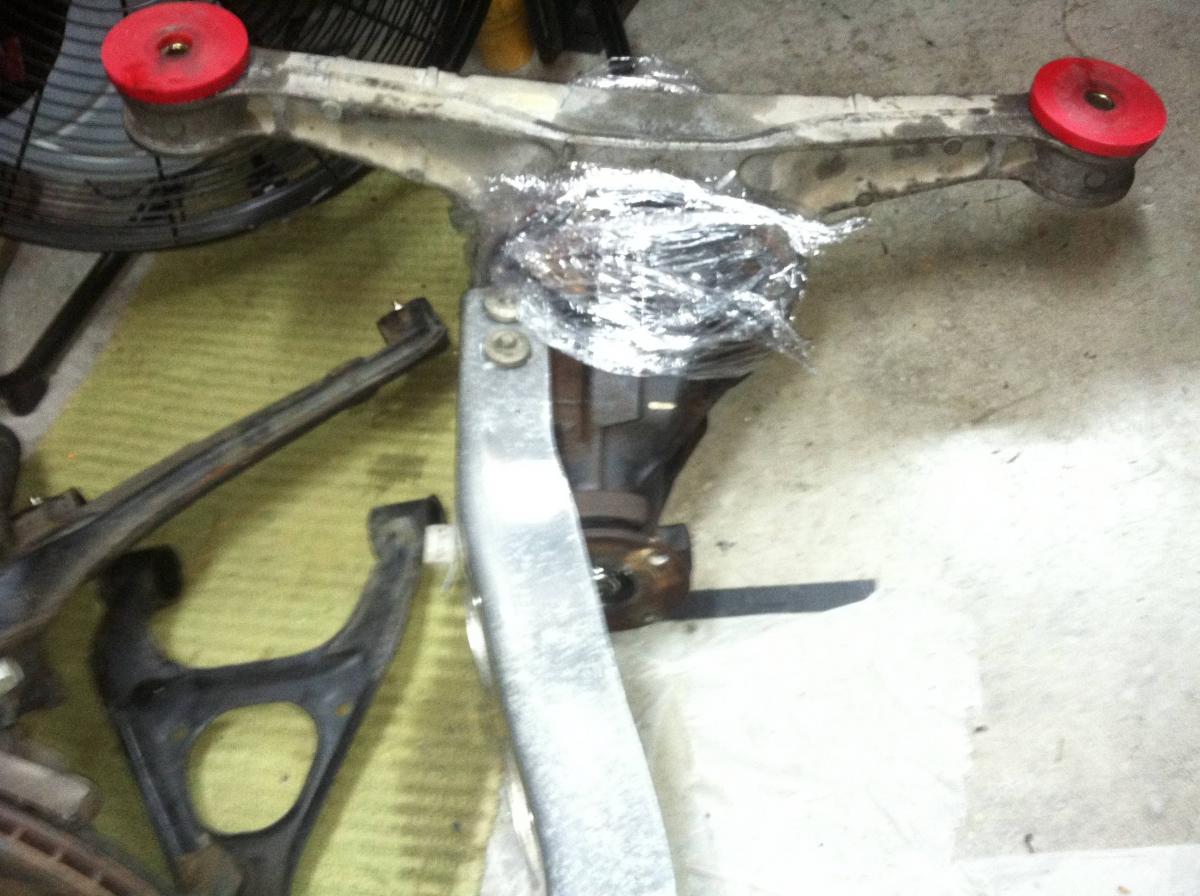
It goes with this little gem I found in a local yard for $380. Low miles out of a '99 10th anniversary. Replacing the seals and the shifter bracket gasket too. TSE sent me some fresh Amsoil for it and the diff.
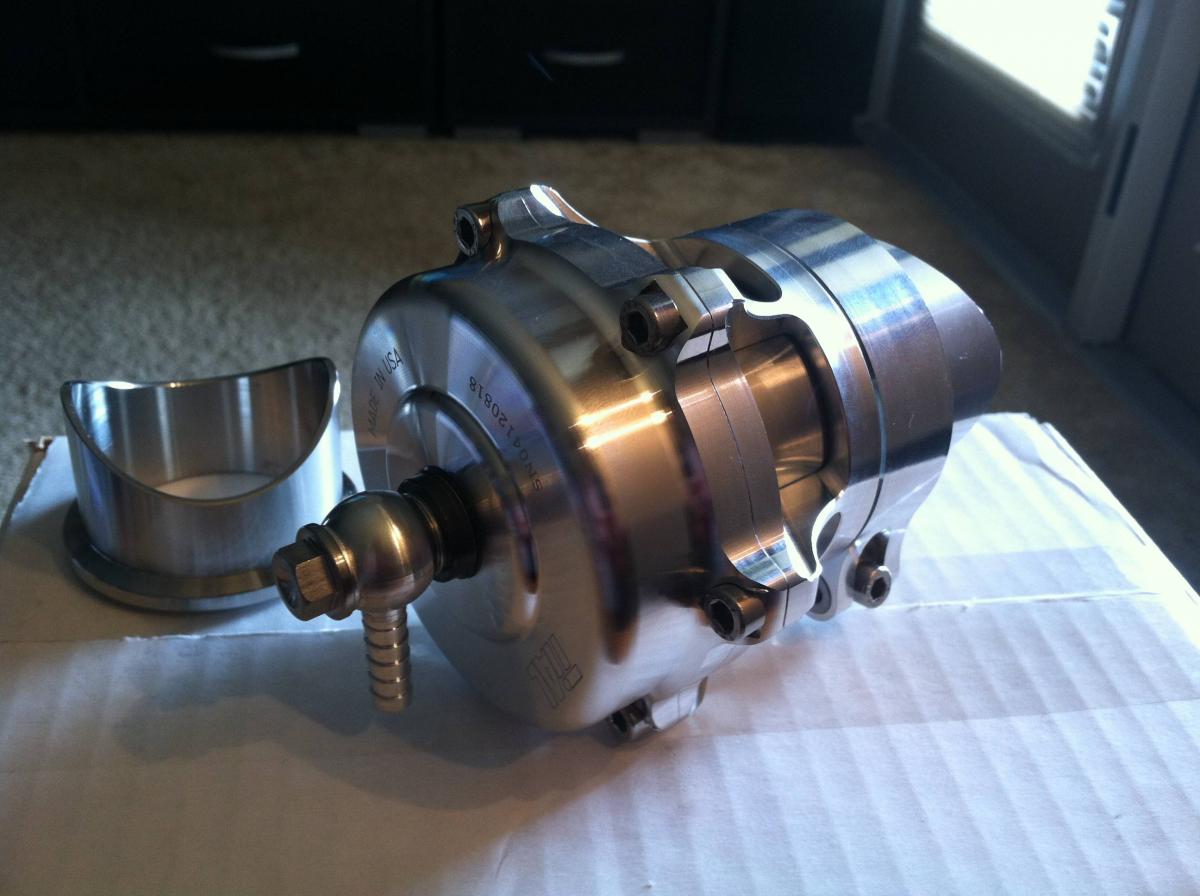
Been sitting and staring at this pretty thing for weeks. Need the pipe welded for the flange, but it's soo pretty.
Just finished putting in AWR sway brackets in. Figured it was decent insurance to not shear the factories. Probably not necessarily needed, but the goal is 225's and Xida's. Still in the mode of building htis car once and abusing it. I still need to finish modding hte radiator brackets to clear the mounts. It did take a little beating to get the brackets ti sit all the way up. The frame was a hair bigger than the brackets, hammer fixed the problem.
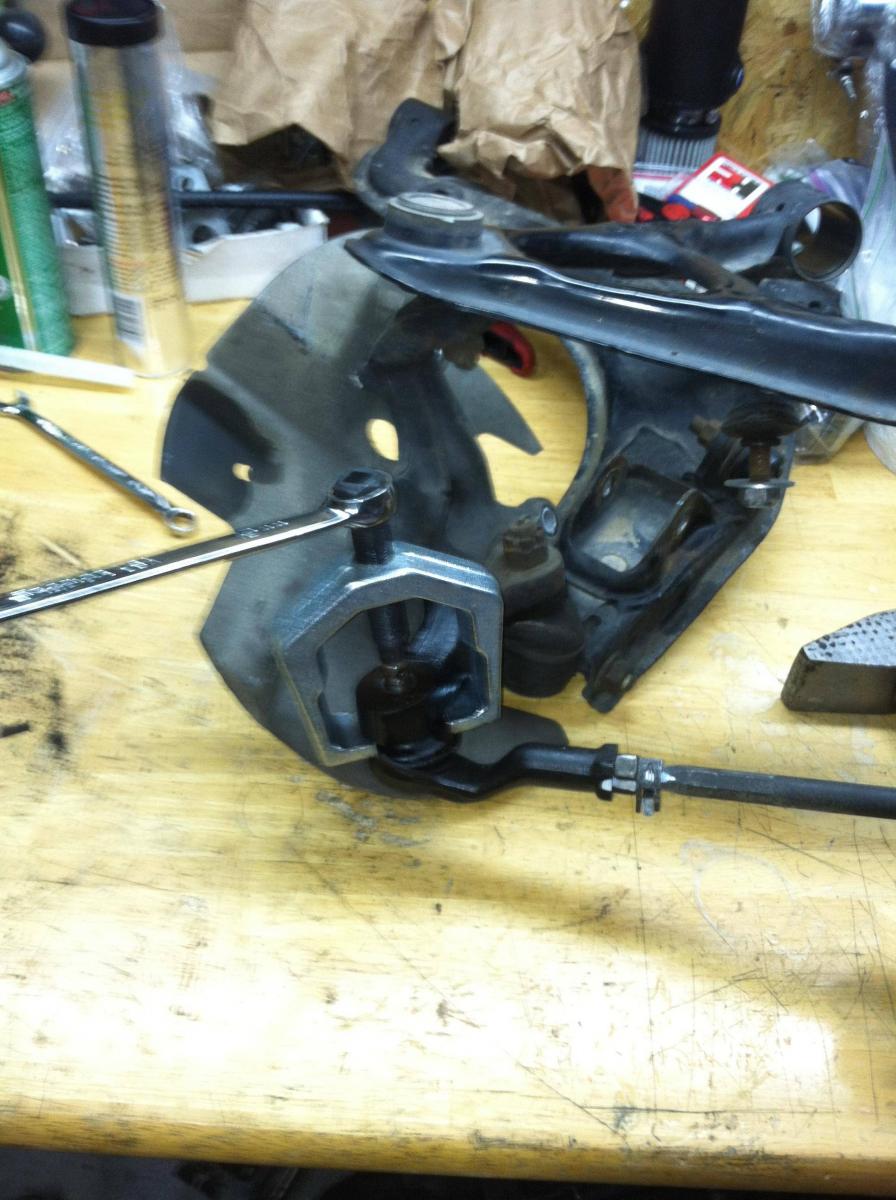
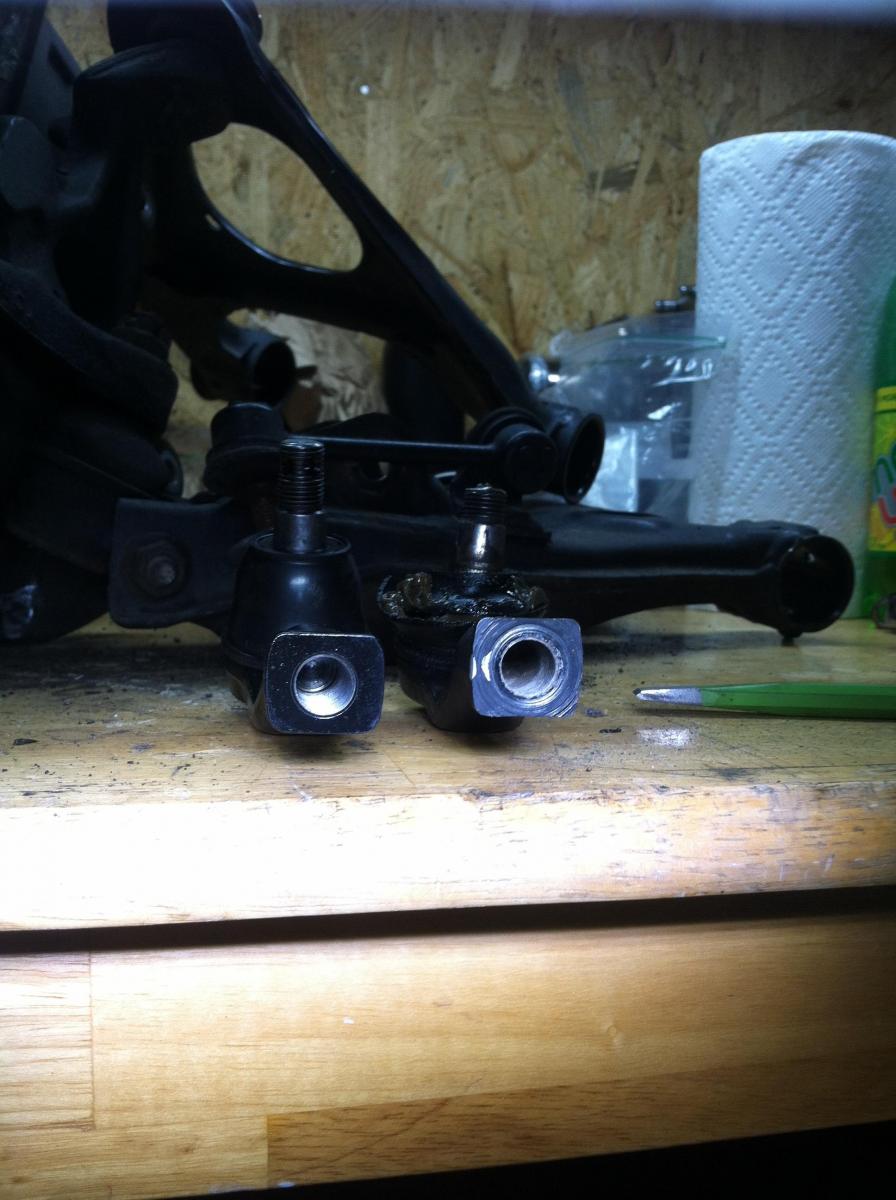
Almost done putting poly in all the A arms. Got stiffed on the upper bushings tho. Energy sent me everything, but the upper fronts. Odd. They have been cool though and I should have the uppers here by the weekend. Then 4 more zerks and the front goes back together and the car rolls. Yay.
My AEM ECU should be here soon and the motor "should" be done soon. Had to go to 84.5mm pistons to ditch the scoring in the cylinders. Still need to order the oil cooer stuff and I know there will be a ton of little crap that needs to be done. Just feel like I'm waiting on the motor. There are always the little things that just don't fit, or the one bolt ya need, or the wiring ya forgot. It's always something.
The tie rod boots were messed up so out they came and new '93 LE ones when in. Could have just done the boots, but this seemed like a good idea at the time. The old ones REALLY fought coming out. It took a torch and some force. Pretty sure they are the originals.
The new ones compared to old
New to me diff is back in and back in its place under the car now. Couldn't ask for a better deal. Yay for a 3.9 torsen deals.
It goes with this little gem I found in a local yard for $380. Low miles out of a '99 10th anniversary. Replacing the seals and the shifter bracket gasket too. TSE sent me some fresh Amsoil for it and the diff.
Been sitting and staring at this pretty thing for weeks. Need the pipe welded for the flange, but it's soo pretty.
Just finished putting in AWR sway brackets in. Figured it was decent insurance to not shear the factories. Probably not necessarily needed, but the goal is 225's and Xida's. Still in the mode of building htis car once and abusing it. I still need to finish modding hte radiator brackets to clear the mounts. It did take a little beating to get the brackets ti sit all the way up. The frame was a hair bigger than the brackets, hammer fixed the problem.
Almost done putting poly in all the A arms. Got stiffed on the upper bushings tho. Energy sent me everything, but the upper fronts. Odd. They have been cool though and I should have the uppers here by the weekend. Then 4 more zerks and the front goes back together and the car rolls. Yay.
My AEM ECU should be here soon and the motor "should" be done soon. Had to go to 84.5mm pistons to ditch the scoring in the cylinders. Still need to order the oil cooer stuff and I know there will be a ton of little crap that needs to be done. Just feel like I'm waiting on the motor. There are always the little things that just don't fit, or the one bolt ya need, or the wiring ya forgot. It's always something.
Reply
0
0
Thread Starter
Elite Member
iTrader: (6)
Joined: May 2011
Posts: 1,656
Total Cats: 64
From: Albuquerque, NM
So an update since it's been awhile. Back to 84mm pistons and bought another long block to put them in. Motor should be on its way to me soon. Been collecting parts along the way. At the moment looking at 9-1 compression unless someone can convince me otherwise for a 99% street fun car.
Decided to start looking for things not fitting now in hope of finding fitment issues before the motor gets done.
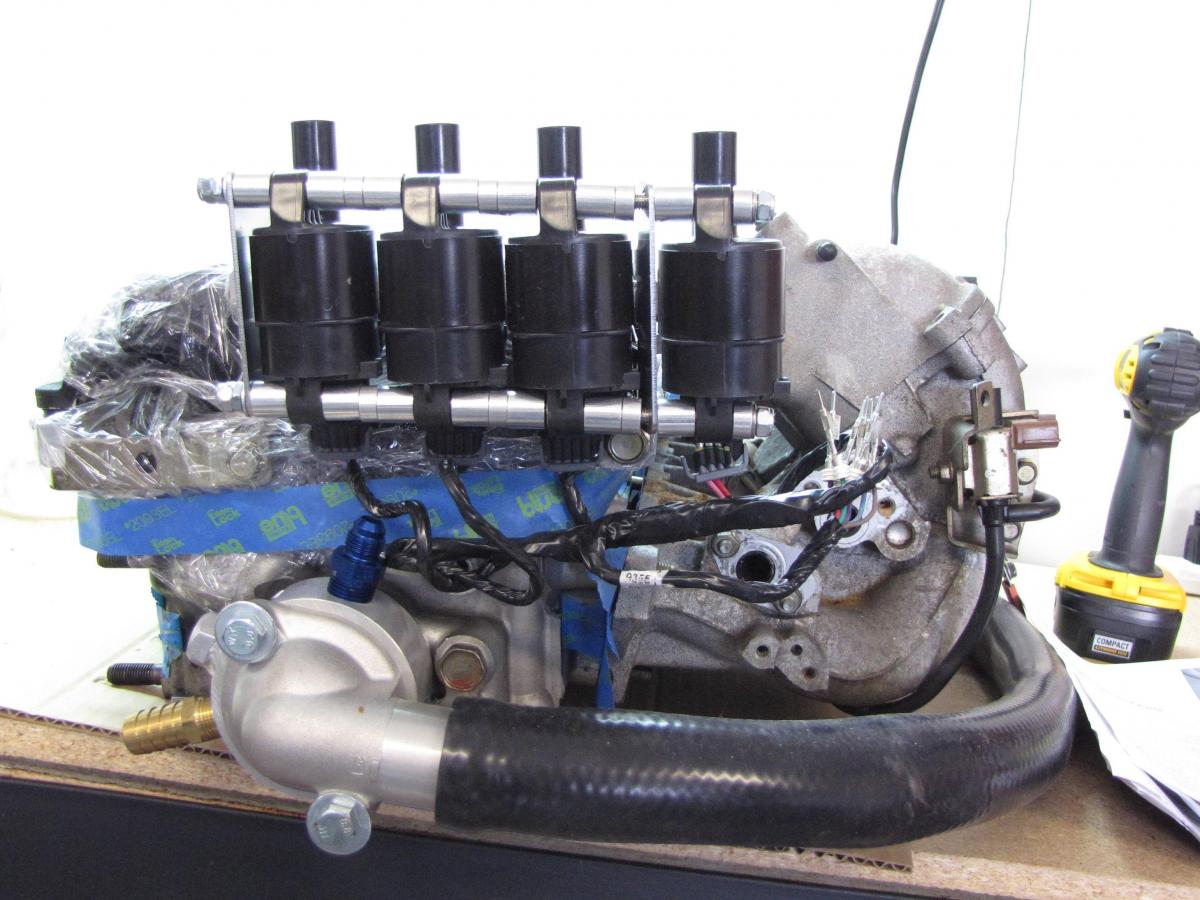
Begi reroute setup, LS coils on FM brackets. Just mocking up on a spare head/intake/valvecover. Everything is just set or finger tight together. Coils won't tilt like that bolted down and need to tweak one bracket.
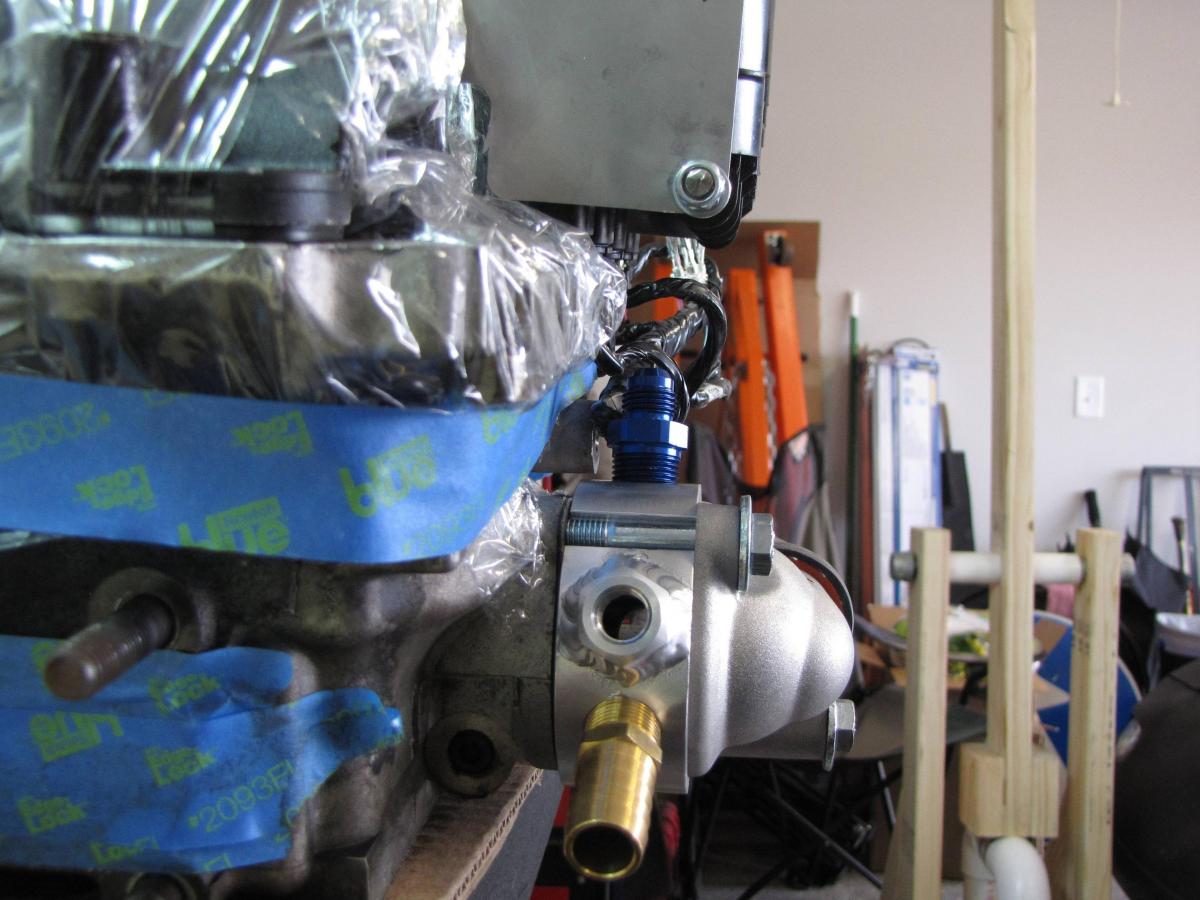
Going to need a 120/130degree -an fitting to make the bend for the turbo water feed. -6 should be enough. Turbo has -6an banjo fittings and the water neck thing at the pump has been drilled/tapped for a fitting.
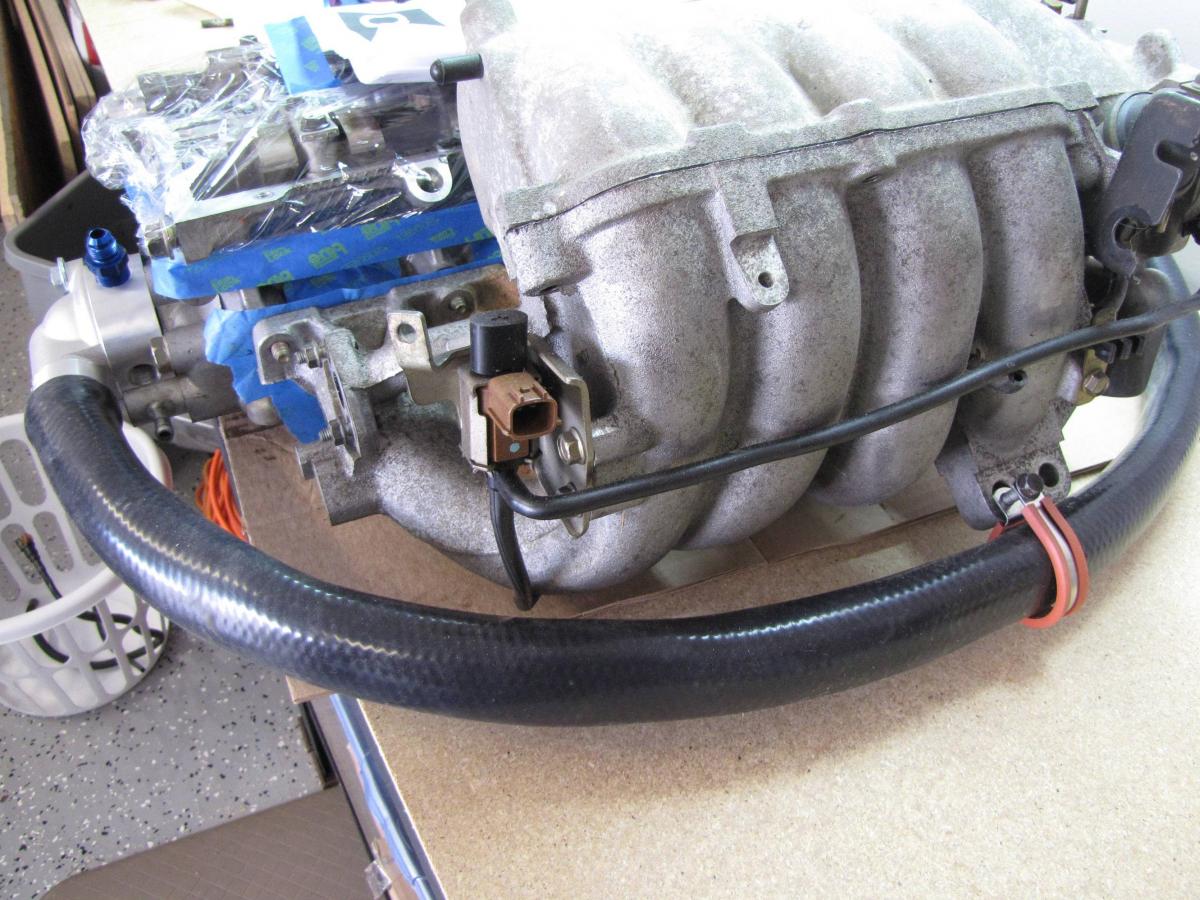
Using a 5ft section of Vibrants radiator hose. Going to make some type of bracket mid intake mani to keep it from going floppy. Looking at what is in my '97's engine bay should have room. Maybe push a fuel line one way or another. To my knowledge the intake mani's lower bracket to block isn't needed.
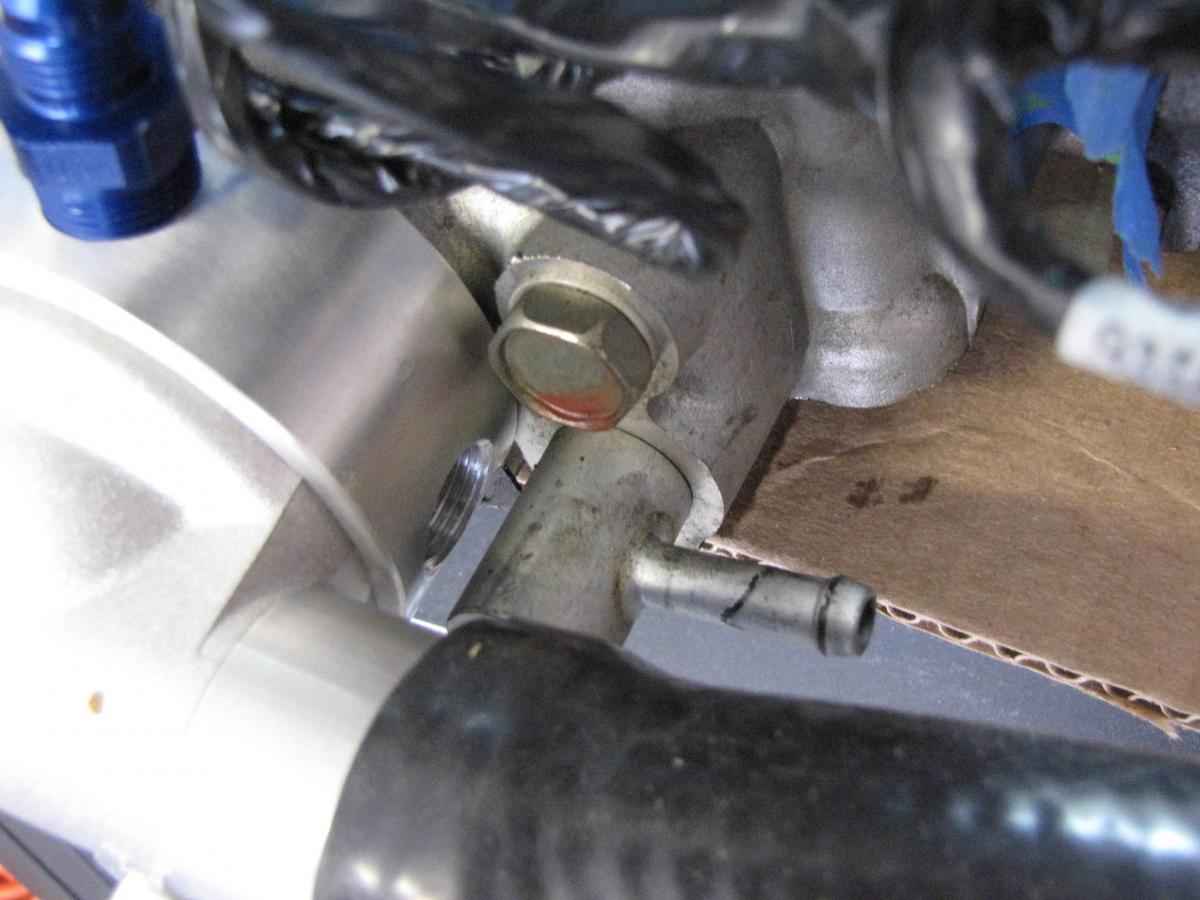
Also asking again. How does this nipple fitting come out? Before I go crazy and mangle it.
Decided to start looking for things not fitting now in hope of finding fitment issues before the motor gets done.
Begi reroute setup, LS coils on FM brackets. Just mocking up on a spare head/intake/valvecover. Everything is just set or finger tight together. Coils won't tilt like that bolted down and need to tweak one bracket.
Going to need a 120/130degree -an fitting to make the bend for the turbo water feed. -6 should be enough. Turbo has -6an banjo fittings and the water neck thing at the pump has been drilled/tapped for a fitting.
Using a 5ft section of Vibrants radiator hose. Going to make some type of bracket mid intake mani to keep it from going floppy. Looking at what is in my '97's engine bay should have room. Maybe push a fuel line one way or another. To my knowledge the intake mani's lower bracket to block isn't needed.
Also asking again. How does this nipple fitting come out? Before I go crazy and mangle it.
Reply
0
0
Thread Starter
Elite Member
iTrader: (6)
Joined: May 2011
Posts: 1,656
Total Cats: 64
From: Albuquerque, NM
Also thinking of locating the catchcan to the, what will be unused, front water neck. Need to find a welder to hack some off the front, then weld a plate on.

Would like as far back as possible to clear the radiator and all. Then -10an line to valve cover vents.
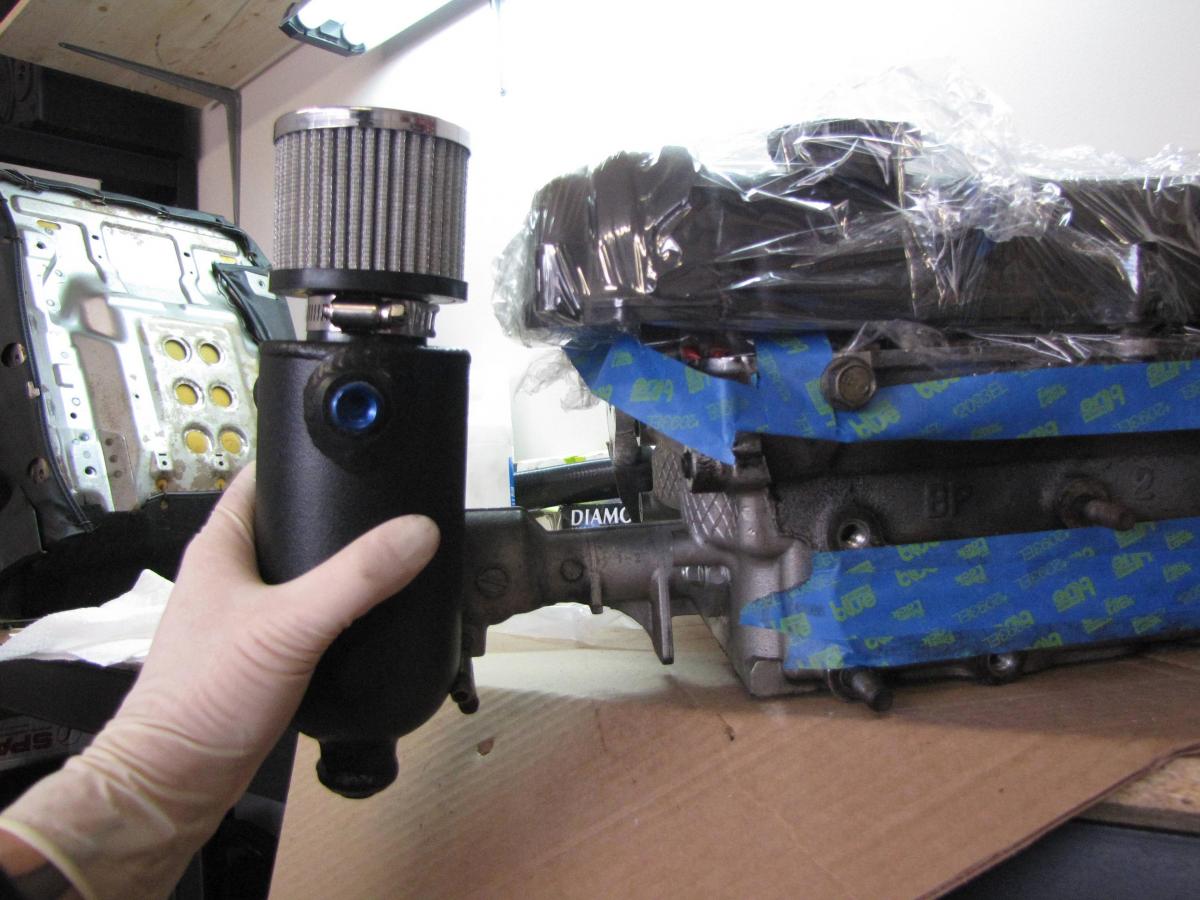
Would like as far back as possible to clear the radiator and all. Then -10an line to valve cover vents.
Reply
0
0


Joined: Sep 2005
Posts: 34,414
Total Cats: 7,531
From: Chicago. (The less-murder part.)
I remember Abe tried to remove that nipple from one of his heads. Messed everything up pretty good. That sucker does not want to come out cleanly by any method I've ever seen.
Reply
0
0

I feel like I've heard differently. Might wanna search around.
For the water return, I'd flip the mixing manifold, pull the barb out, tap it and have a nice 6" line right to the turbo. I know those ones pull out easy.
For the water return, I'd flip the mixing manifold, pull the barb out, tap it and have a nice 6" line right to the turbo. I know those ones pull out easy.
Reply
0
0


