
Went from one gay car to another. Now to make this one faster than the last.

Thread Starter
Junior Member
iTrader: (2)
Joined: Nov 2011
Posts: 252
Total Cats: 17
From: Troy, Michigan
Today I made brackets to secure the lights to the car. Since the lights were finally attached, I couldn't help but give them a rough aim and go for a quick drive. First of all, I hadn't driven the car in a few weeks and it was great to be behind the wheel of it again. Second, the lights work beautifully. I only had the low beams wired up for the drive, and I was really impressed by how well they worked. They blow away the Bosch e-codes, and they're better than most of the OEM HID setups that I have experienced.
After that, I got to work on the wiring and realized that the low beams shut off when the high beams come on. That's good for dual filament bulbs, but not for my setup. Fortunately, I was able to fix that after consulting a wiring diagram. Now, all the connectors are soldered in and everything does what it is supposed to.
Hooray! No more bundles of wires awkwardly draped over the fender.
Reply
 0
0

0
Thread Starter
Junior Member
iTrader: (2)
Joined: Nov 2011
Posts: 252
Total Cats: 17
From: Troy, Michigan
Too much. I think I'm a little past $600 now, not including wasted material or tools that I had to buy for this. Fortunately I have everything I need to finish them so that shouldn't be going up any further. Although, compared to products that are currently on the market, like the $500 AAC lights, mine are a better value because they genuinely work well.
Reply
0
0
Thread Starter
Junior Member
iTrader: (2)
Joined: Nov 2011
Posts: 252
Total Cats: 17
From: Troy, Michigan
Today I hurriedly got the lights and car to the point where I could safely drive around tonight. It was a nice day and I couldn't resist. None of the rushed assembly was particularly exciting but driving around topless in January with some fancy new headlights was pleasant. I cannot overstate how pleased I am with the functionality of these lights. The low beams do a fantastic job--fully illuminating my lower field of view and the peripherals. The high beams were even more impressive. Eventually I'll take some photos so that I can dispel the myth that flush mount headlights, by nature, cannot work well. These things, particularly the high beams, honestly do kick the out of any OEM headlights I've seen.
Reply
0
0
Thread Starter
Junior Member
iTrader: (2)
Joined: Nov 2011
Posts: 252
Total Cats: 17
From: Troy, Michigan

These things are basically done. They just need some caulk to be water tight. I'll add that tomorrow night after going for a drive to make sure that no changes are needed. I'll also take some more photos tomorrow, but with a proper camera.
Reply
0
0

Nice. You going to paint the fasteners black or leave em'? I'm not sure which would look better without seeing a pic of the whole car with the new lights. *hint hint*
Reply
0
0
Thread Starter
Junior Member
iTrader: (2)
Joined: Nov 2011
Posts: 252
Total Cats: 17
From: Troy, Michigan
I wish I knew of a good way to make the fasteners black. I feel like anything that is durable would also make a mess of the plastic.
Here are some more photos. They aren't perfect, but they look great from a few feet and are pretty clean for a diy.


Here are some more photos. They aren't perfect, but they look great from a few feet and are pretty clean for a diy.
Reply
0
0
Thread Starter
Junior Member
iTrader: (2)
Joined: Nov 2011
Posts: 252
Total Cats: 17
From: Troy, Michigan
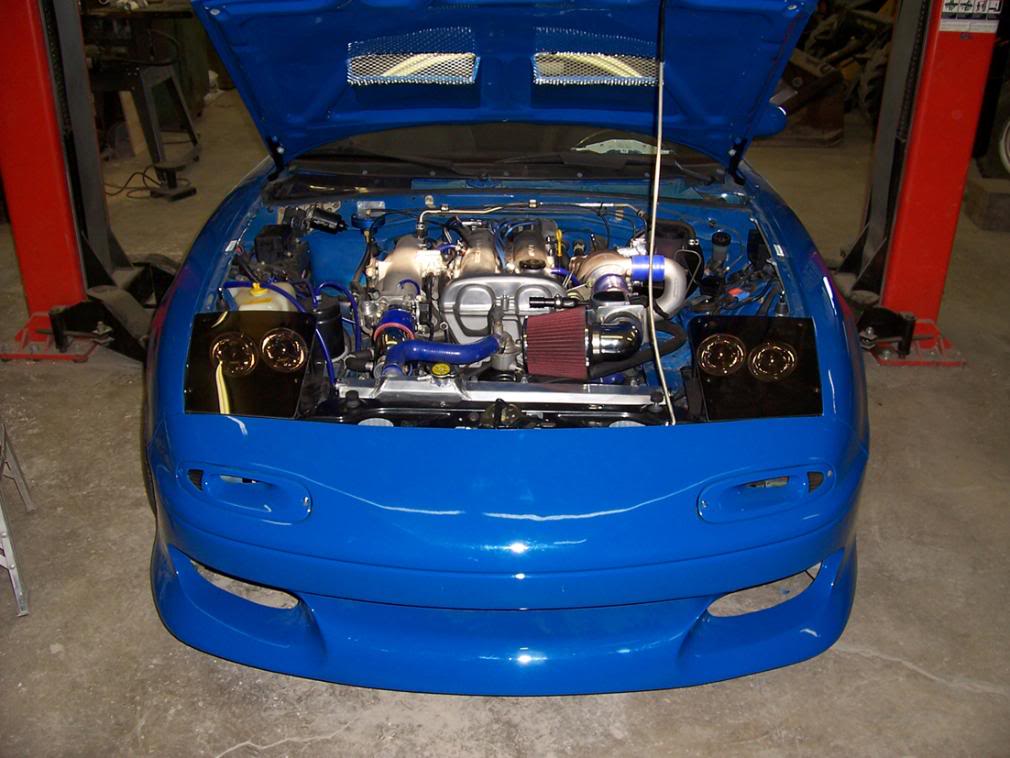
On another note, these headlights displaced the OEM coolant overflow tank. Fortunately Target had their overflow tanks on clearance for $3.50. I have this tucked away where in can't be seen on the side of the radiator. Now I need to get gas struts to hold the hood up since I lost the prop in making these headlights as well.

edit: these headlights also displaced the intake with the recirc fitting. Now the filter is directly on the compressor and the bypass valve is venting to atmosphere. Since the Megasqirt runs speed density, I'm not inclined to change this.
edit: these headlights also displaced the intake with the recirc fitting. Now the filter is directly on the compressor and the bypass valve is venting to atmosphere. Since the Megasqirt runs speed density, I'm not inclined to change this.
Reply
0
0

For painting the fasteners, I would painters tape over the whole assembly and weed out the tape over the fasteners leaving them exposed. Mask off the surrounding area very well and use a coating product of your choice, I tend to use POR15 because I have a can in the garage.
Looks great, and I really liked the Hawkeye Wagon, admired it over on Nasioc. I've got a Peanut Wagon.
-Sam
Looks great, and I really liked the Hawkeye Wagon, admired it over on Nasioc. I've got a Peanut Wagon.
-Sam
Reply
0
0
Thread Starter
Junior Member
iTrader: (2)
Joined: Nov 2011
Posts: 252
Total Cats: 17
From: Troy, Michigan
For painting the fasteners, I would painters tape over the whole assembly and weed out the tape over the fasteners leaving them exposed. Mask off the surrounding area very well and use a coating product of your choice, I tend to use POR15 because I have a can in the garage.
Looks great, and I really liked the Hawkeye Wagon, admired it over on Nasioc. I've got a Peanut Wagon.
-Sam
Looks great, and I really liked the Hawkeye Wagon, admired it over on Nasioc. I've got a Peanut Wagon.
-Sam
Thanks for the comment on the wagon. I really loved that car. It's sad to think that I'll be selling it, minus the roof vent, to somebody on the 14th for $6k so that he can tear it apart and use the parts for a swap.
Thanks. They have fewer issues than I feared that they might, and all the issues that they do have are aesthetic. I can live with that.
Here are some night shots.


Reply
0
0


Junior Member
Joined: Mar 2008
Posts: 252
Total Cats: 4
From: Seattle
Wow. I really wish more impreza enthusiasts like you would starting buying miatas, I genuinely feel that miatas are lacking lighting options and you impreza guys make some of the coolest ----.
Reply
0
0
Thread Starter
Junior Member
iTrader: (2)
Joined: Nov 2011
Posts: 252
Total Cats: 17
From: Troy, Michigan
My impression is that there's a decent bit of overlap in ownership. That said, most of the guys who own both or switch to Miatas seem to be older and not inclined to take on projects like this. I can't blame them though. This was a pain in the *** and the look won't be for everybody.
Reply
0
0
Thread Starter
Junior Member
iTrader: (2)
Joined: Nov 2011
Posts: 252
Total Cats: 17
From: Troy, Michigan
Does anybody know where this thing goes?

I was cleaning up some of the wiring in the engine bay and saw that the rubber hose on this thing was cracked to the point of being pointless. I suspect that it is for the no-longer-present evap system since the line that it plugs into is a hardline that is grouped with the fuel supply and return hard lines. What I can't figure out is where the other end goes. There's a rubber hose that goes down and to the back of the engine bay and I can't trace it while the car is on the ground. Perhaps the previous owner simply vented the evap line to underneath the car so that fumes don't accumulate in the engine bay?
edit: I searched some and confirmed that it's evap. I'll just bypass that metal piece and the cracked hose and let it vent to wherever it was venting.
Last edited by 573; Jan 13, 2012 at 12:03 PM.
Reply
0
0


Newb
Joined: Sep 2011
Posts: 18
Total Cats: 3
From: Texas
Flush-mounts aren't really for me but it looks like you built them solidly and they have really good output/cutoff. I had a set of projector housings with H7 bulbs in my '86 MR2 which was a nice upgrade but they were rectangular and not circular like the Miata.
Reply
0
0
Thread Starter
Junior Member
iTrader: (2)
Joined: Nov 2011
Posts: 252
Total Cats: 17
From: Troy, Michigan
I know that the look isn't for everybody. The popups were a major design feature of the car and doing away with them changes a lot. I'll have to find a way to smooth out the imperfections in the polycarbonate covers before I'm fully satisfied with them. That said, they work very well and removed some weight from the front of the car.
Reply
0
0


I had mintenns, then back to pop ups, then to AAC's. Both needed something custom done to make them work.
Since your car is black it might not look good, but I was using smoked lexan on mine.
Rather than trying paint, I'd just swap out the silver rivets for some black ones.
http://www.performance-pcs.com/catal...ducts_id=20432
They look like they light the road up pretty good so nice job.
Since your car is black it might not look good, but I was using smoked lexan on mine.
Rather than trying paint, I'd just swap out the silver rivets for some black ones.
http://www.performance-pcs.com/catal...ducts_id=20432
They look like they light the road up pretty good so nice job.
Reply
0
0
Thread Starter
Junior Member
iTrader: (2)
Joined: Nov 2011
Posts: 252
Total Cats: 17
From: Troy, Michigan
Those lights look really good. Your car is actually one of the ones that sold me on doing flush mounts.
I've thought about black rivets but I'm avoiding rivets because I would like for the plastic to be easily removable. They're currently held in with small stainless bolts. If I get sick of the current hardware, I'll probably just go with the black rivets anyway.
I've thought about black rivets but I'm avoiding rivets because I would like for the plastic to be easily removable. They're currently held in with small stainless bolts. If I get sick of the current hardware, I'll probably just go with the black rivets anyway.
Reply
0
0


