
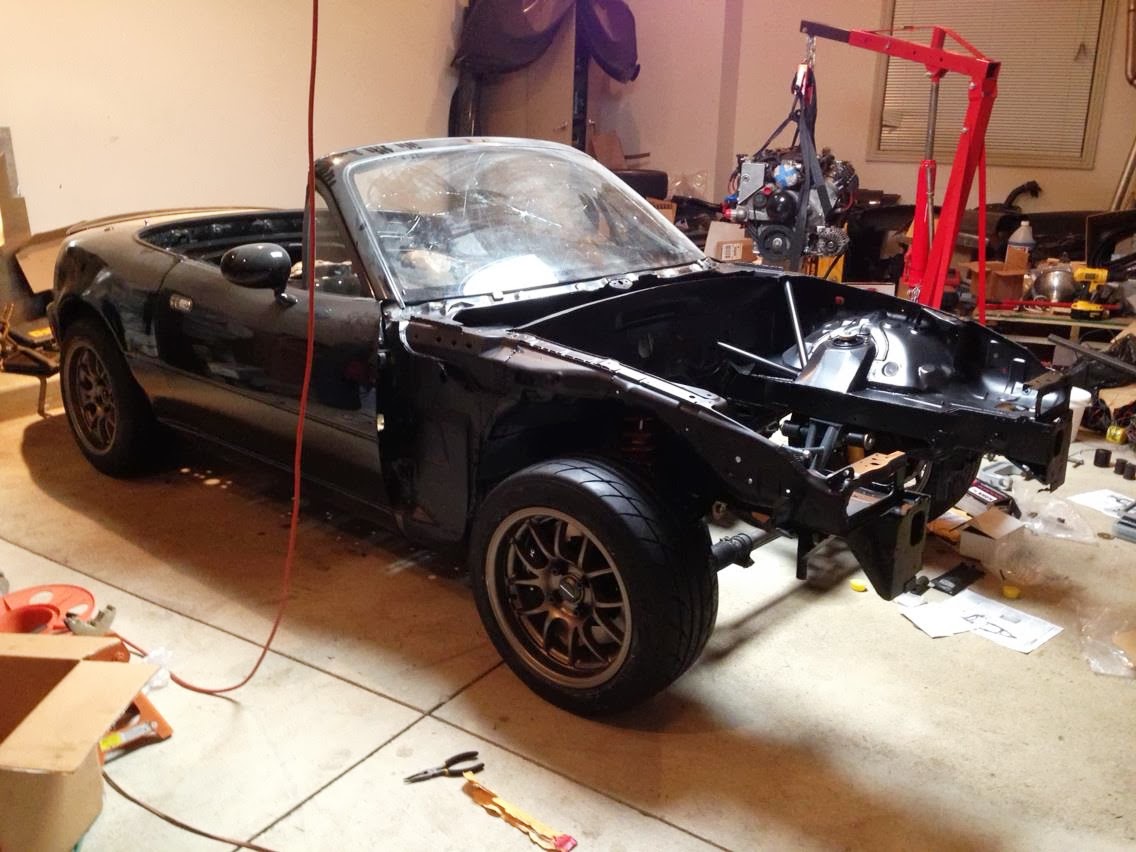
Went from one gay car to another. Now to make this one faster than the last.


 Since the car was already apart, I decided to put it back together a bit differently.
Thread Starter
Junior Member
iTrader: (2)
Joined: Nov 2011
Posts: 252
Total Cats: 17
From: Troy, Michigan
Hi guys!
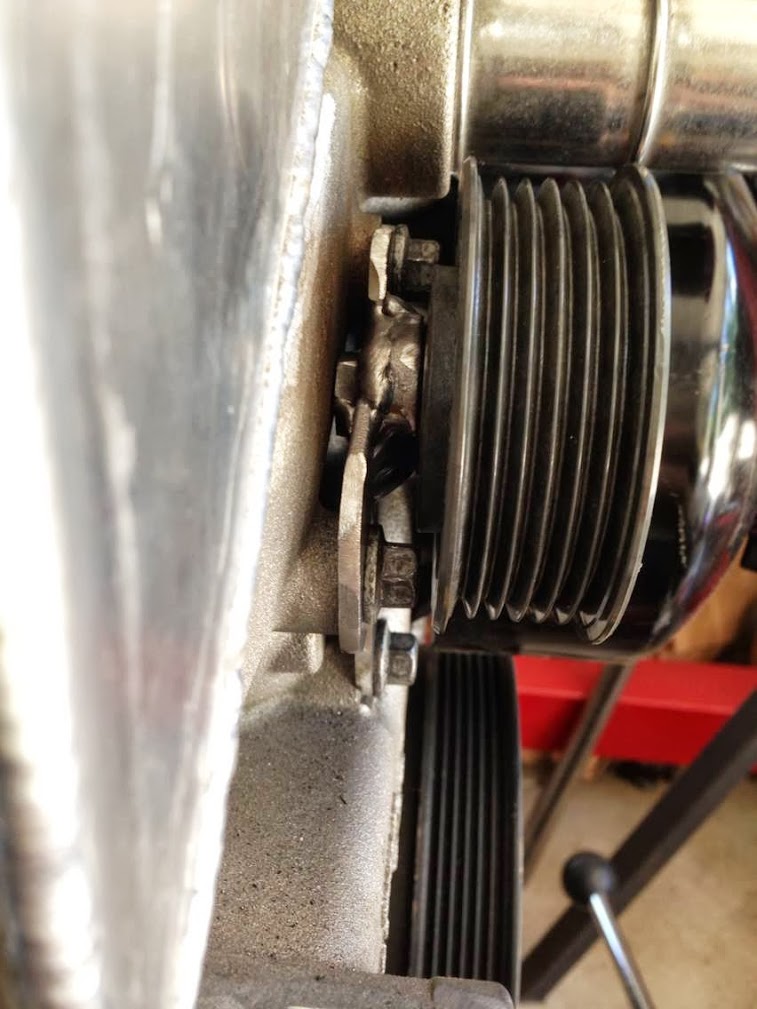
I've made an alternator bracket:
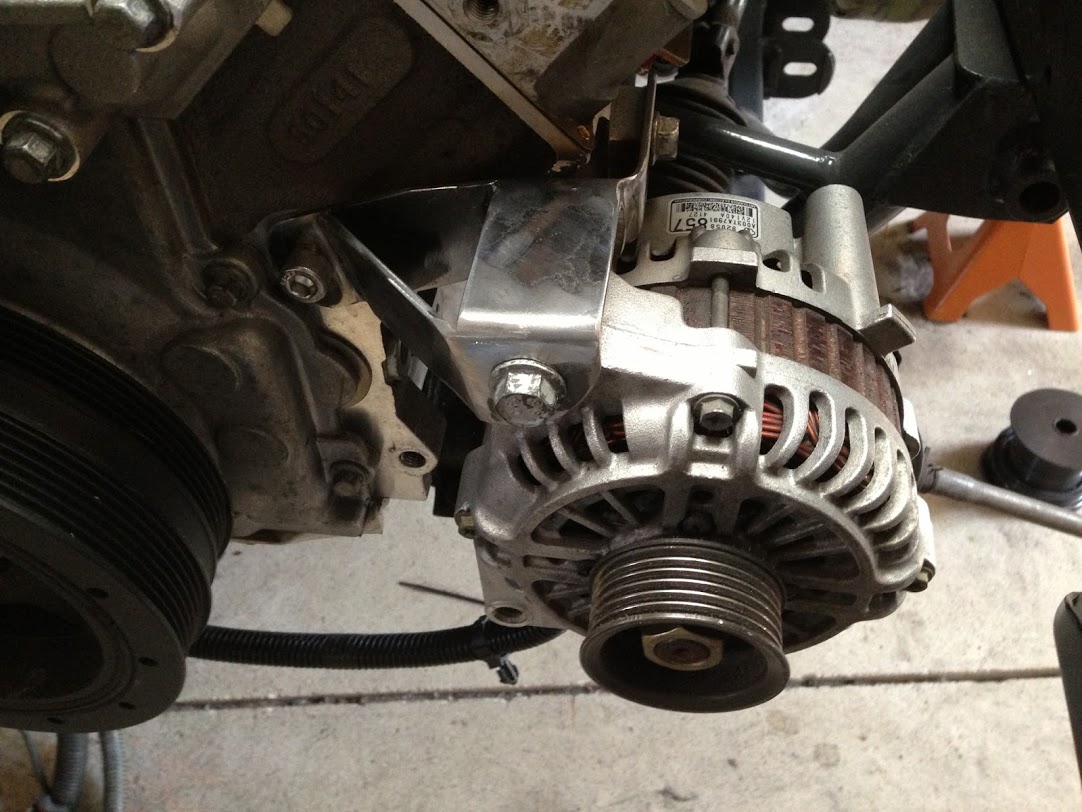
See the lowest hole on the block that's almost in line with the lower hole on the alternator? A turnbuckle will go between those so that the assembly can serve as a belt tensioner. As it so happens, the spacing is perfect for that.
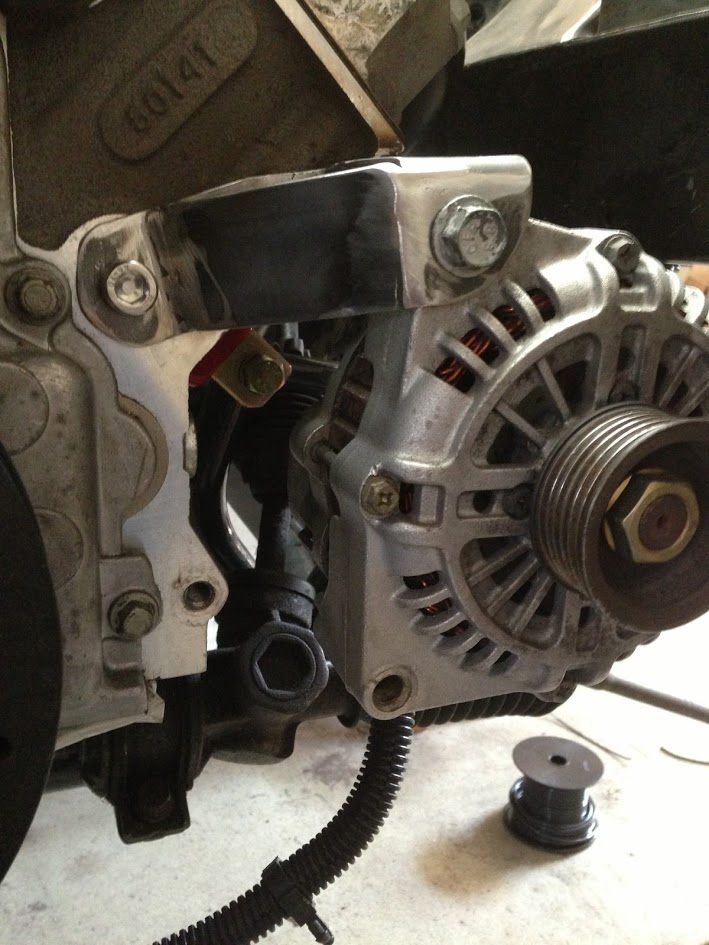
The alternator is supported both in the front and in the back on all axes. Once the long bolt is tightened down, the thing doesn't move...at all.
A new alternator bracket was necessary for a couple of reasons. First of all, I replaced the GTO crank pulley with a shorter Corvette/CTS-V/G8 crank pulley for more swaybar clearance. That meant that the alternator needed to be moved closer to the block so that the belt would line up properly. Some people mill down the stock alternator bracket to bring the alternator in further. I chose not to do that since I wanted the alternator so pivot as to serve as a belt tensioner. I removed the stock tensioner and the associated mounting tabs to make clearance for a coolant expansion tank that I bolted to the passenger side head. By making an adjustable alternator bracket, I killed two birds with one stone. All I have to do now for the accessory drive belt is fabricate a mount for an idler pulley so that the water pump is driven. Fortunately, that should be a simple task.
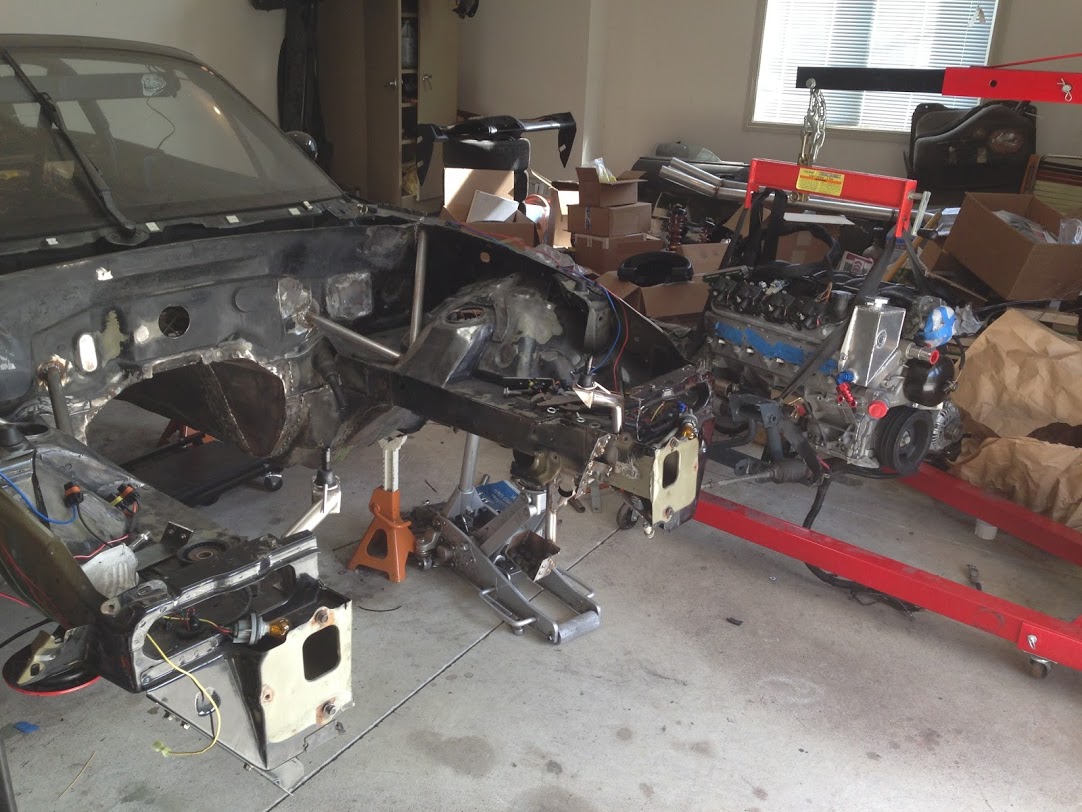
This doesn't look a whole lot like progress however the drivetrain no longer needed to be in for mockup purposes. Now I can finalize a few things in the bay, and before long, I'll be able to begin prepping it for paint. The next time the drivetrain goes in, it should be going in to stay.
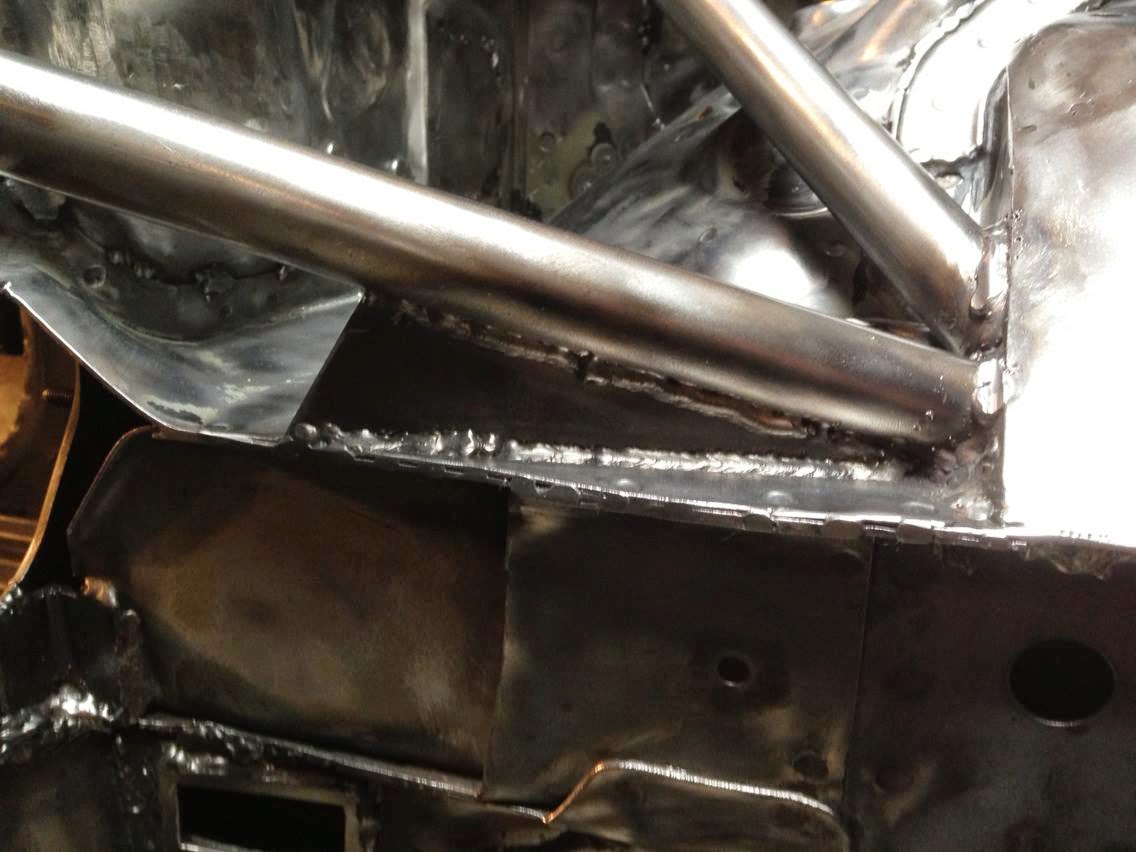
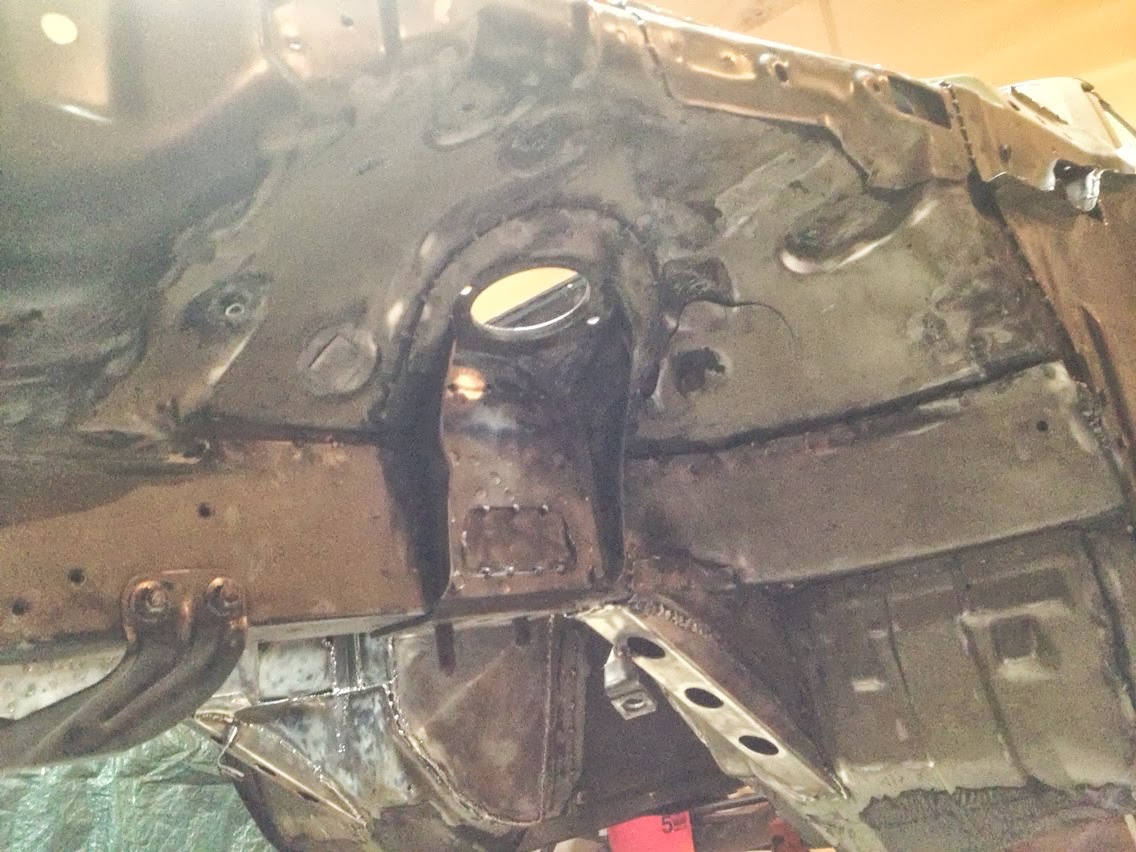
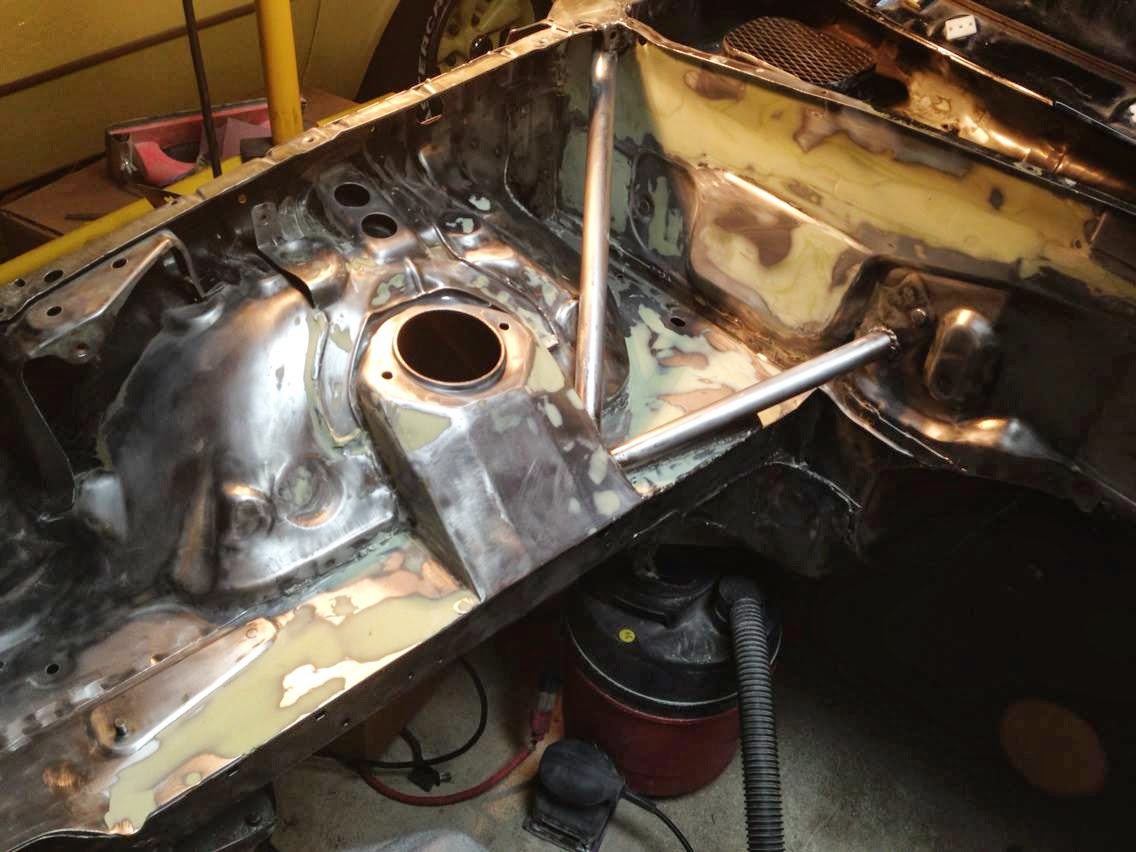
Now for the weird bit. I've put a window in the upper frame rail. You know, so the frame rail gnomes can get some light and fresh air.
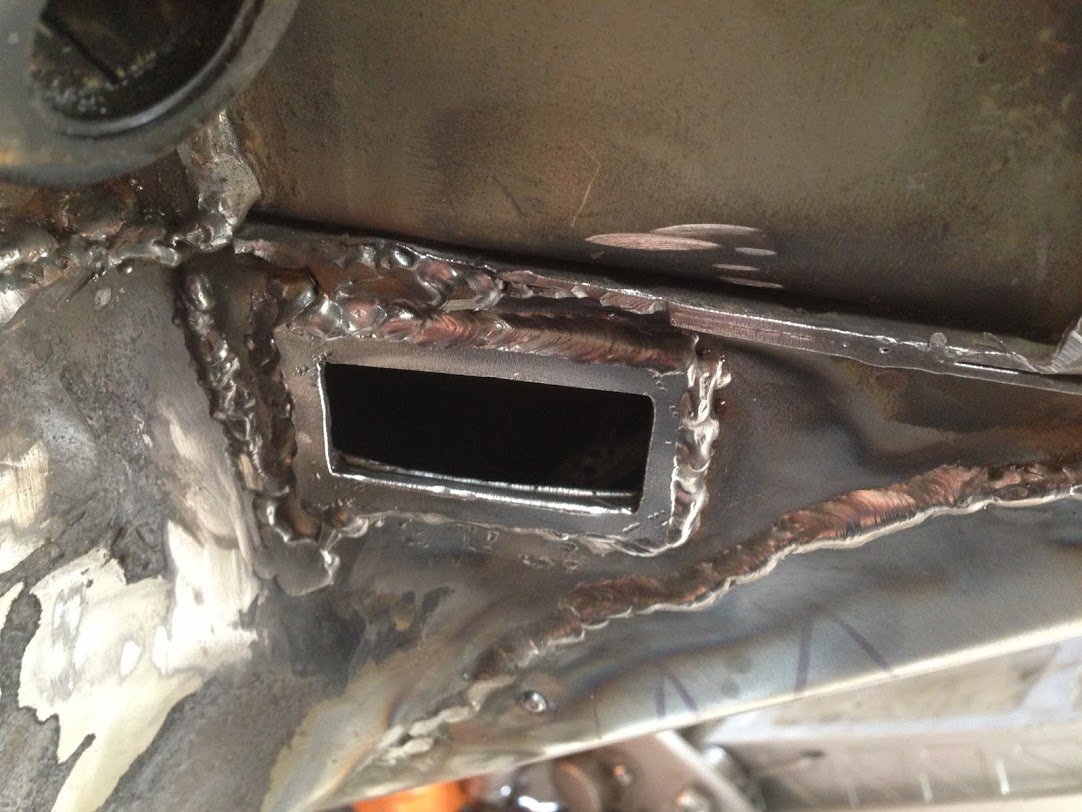
But no, the window is actually there for the fuel line and accusump oil line to be fed through.
The lines go through the frame rails, beneath the floor, such that they're protected from heat and impact, and I'm protected from them.
Most people put the lines in the transmission tunnel or under the car next to the frame rail. I don't like the tunnel route because it places the lines above a hot exhaust system. In addition to prolonged exposure to heat, a driveshaft failure could potentially split a line and almost certainly cause a fire since gravity, which tends to be pretty reliable, will cause the fuel to end up on the hot exhaust pipes beneath. That would be quite lousy. I don't think along the frame rail is a good place either since running a nylon braided line inches off the ground seems a poor choice due to the potential for bottoming out, road debris, and slow abrasion from particulates.
I've made an alternator bracket:
See the lowest hole on the block that's almost in line with the lower hole on the alternator? A turnbuckle will go between those so that the assembly can serve as a belt tensioner. As it so happens, the spacing is perfect for that.
The alternator is supported both in the front and in the back on all axes. Once the long bolt is tightened down, the thing doesn't move...at all.
A new alternator bracket was necessary for a couple of reasons. First of all, I replaced the GTO crank pulley with a shorter Corvette/CTS-V/G8 crank pulley for more swaybar clearance. That meant that the alternator needed to be moved closer to the block so that the belt would line up properly. Some people mill down the stock alternator bracket to bring the alternator in further. I chose not to do that since I wanted the alternator so pivot as to serve as a belt tensioner. I removed the stock tensioner and the associated mounting tabs to make clearance for a coolant expansion tank that I bolted to the passenger side head. By making an adjustable alternator bracket, I killed two birds with one stone. All I have to do now for the accessory drive belt is fabricate a mount for an idler pulley so that the water pump is driven. Fortunately, that should be a simple task.
This doesn't look a whole lot like progress however the drivetrain no longer needed to be in for mockup purposes. Now I can finalize a few things in the bay, and before long, I'll be able to begin prepping it for paint. The next time the drivetrain goes in, it should be going in to stay.
Now for the weird bit. I've put a window in the upper frame rail. You know, so the frame rail gnomes can get some light and fresh air.
But no, the window is actually there for the fuel line and accusump oil line to be fed through.
The lines go through the frame rails, beneath the floor, such that they're protected from heat and impact, and I'm protected from them.
Most people put the lines in the transmission tunnel or under the car next to the frame rail. I don't like the tunnel route because it places the lines above a hot exhaust system. In addition to prolonged exposure to heat, a driveshaft failure could potentially split a line and almost certainly cause a fire since gravity, which tends to be pretty reliable, will cause the fuel to end up on the hot exhaust pipes beneath. That would be quite lousy. I don't think along the frame rail is a good place either since running a nylon braided line inches off the ground seems a poor choice due to the potential for bottoming out, road debris, and slow abrasion from particulates.
Last edited by 573; Mar 31, 2013 at 06:08 PM.
Reply
 0
0

0
Thread Starter
Junior Member
iTrader: (2)
Joined: Nov 2011
Posts: 252
Total Cats: 17
From: Troy, Michigan
06-13-2013:
School, a graduation, some semblance of a social life, and a three week trip to South Africa, which was amazing, has slowed this project down a tad.
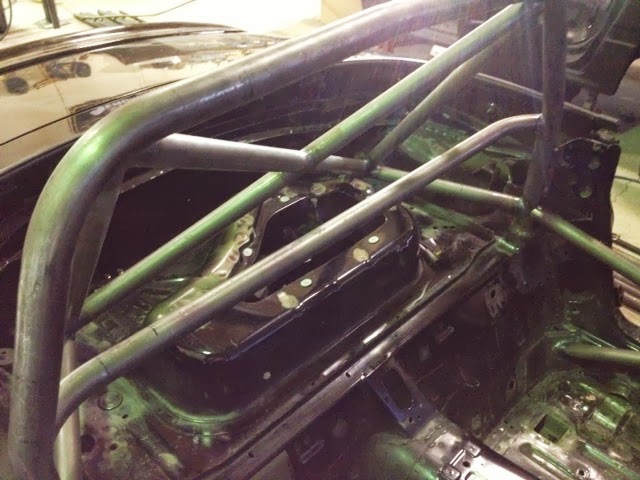
While away, I was in touch with a fabricator who will be installing a 3/4 cage in my car at the end of the month. Ryan, of Thompson Racing Fabrication, has installed roll cages in many of the rally cars in the area. I've seen his products prove themselves effective a couple of times and look forward to having his work in my car. The cage will get a full writeup upon completion. In the mean time, I'll just say that Ryan and I have come up with what should be quite a good design given the constraints.
As for material progress, here's what I've been up to:
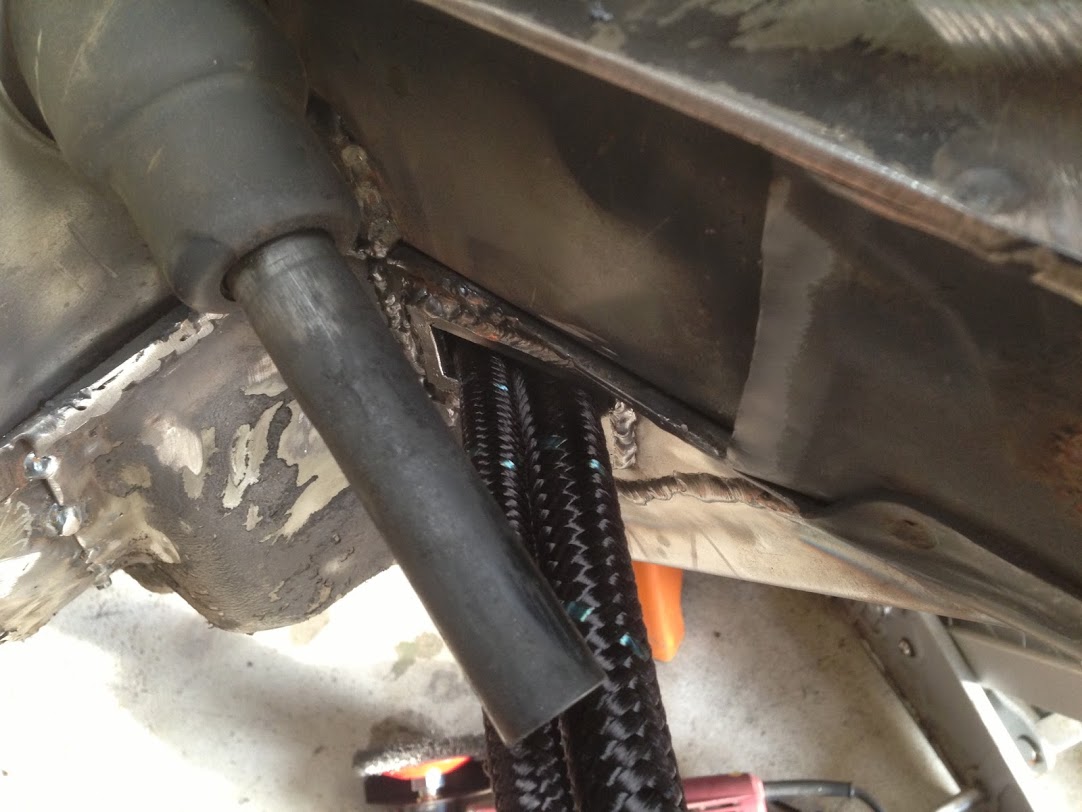
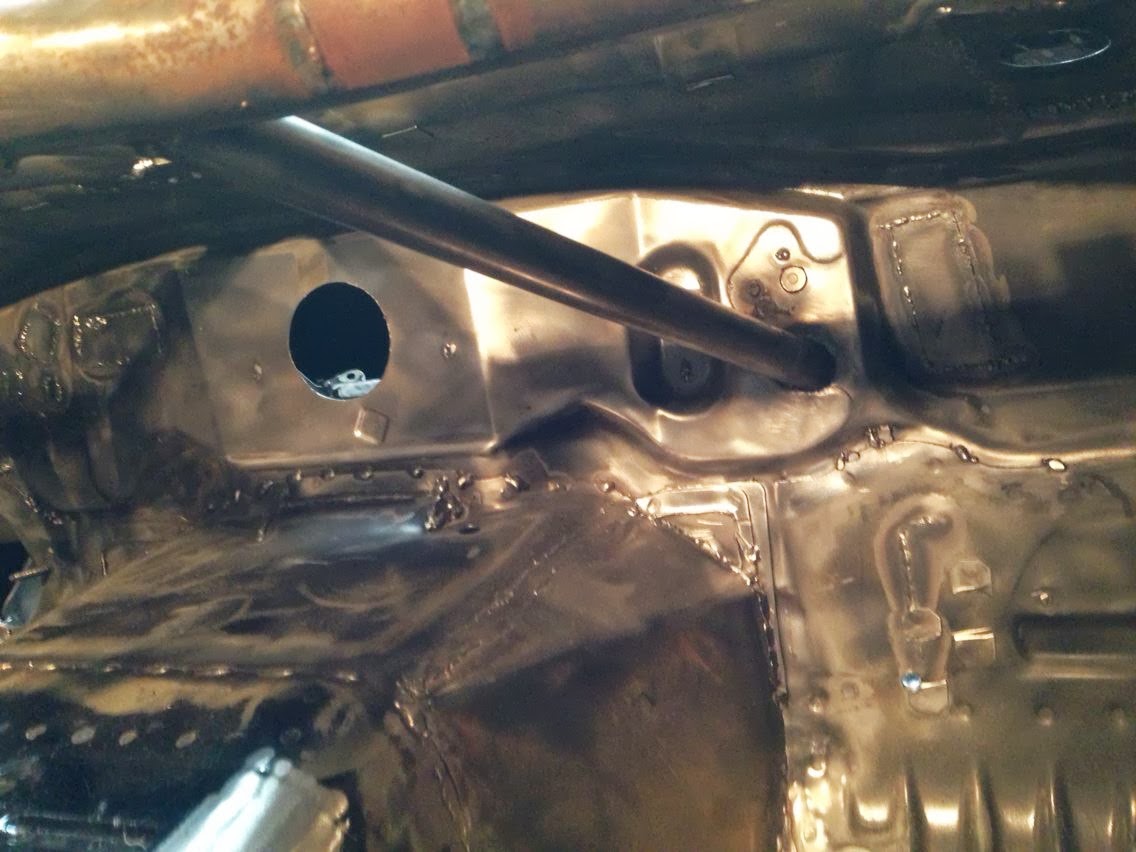
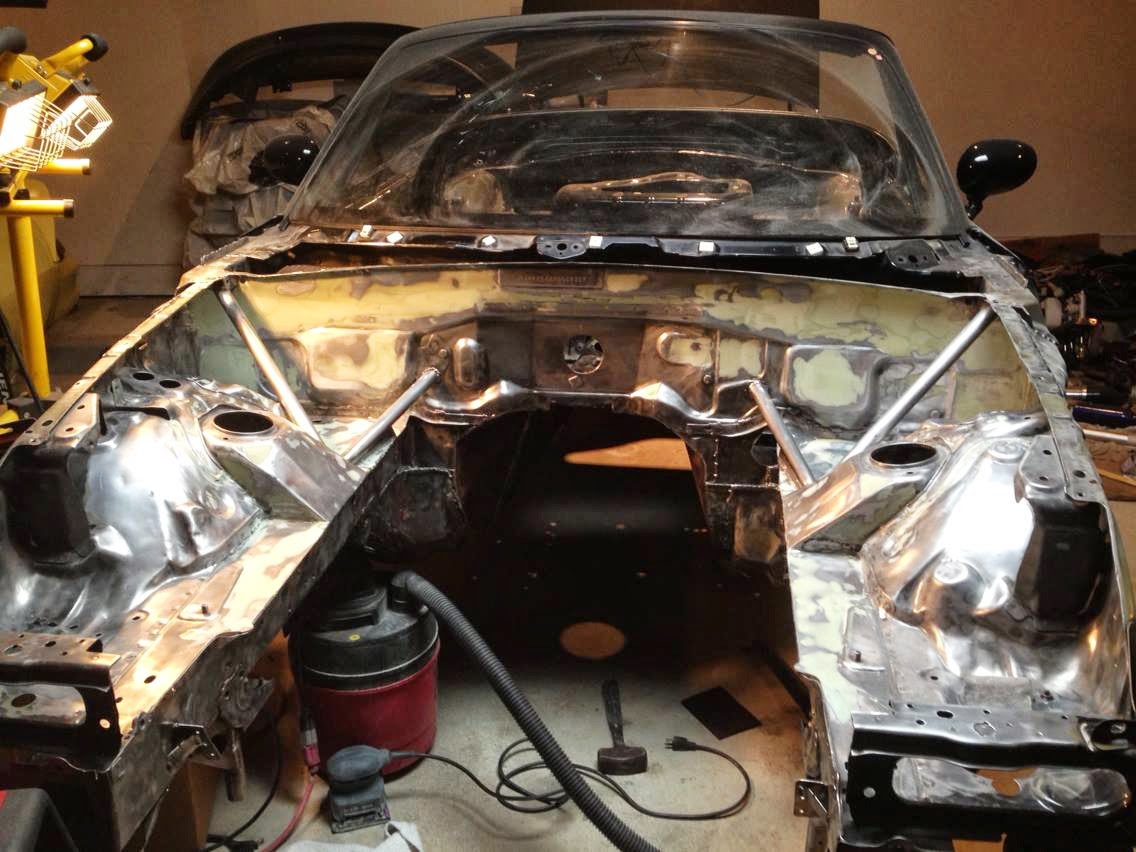
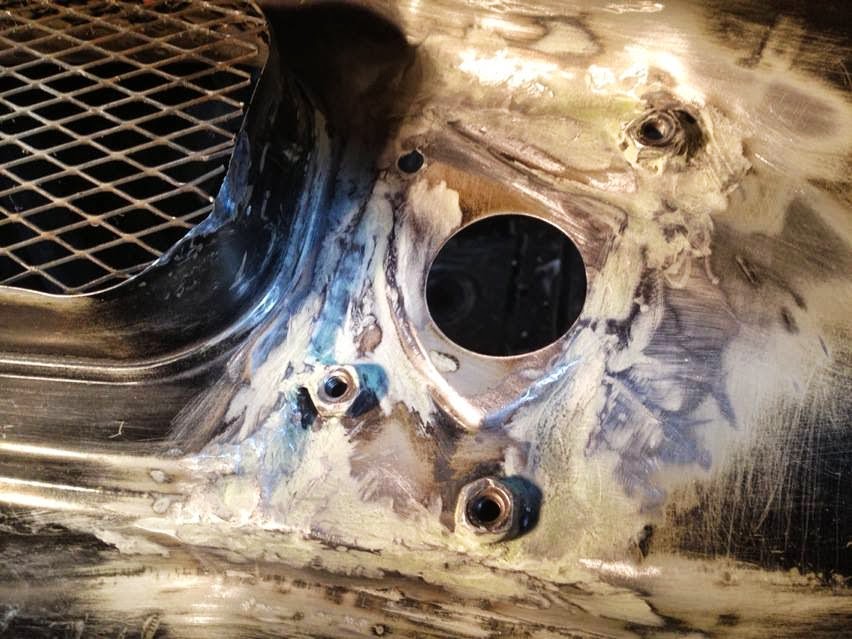
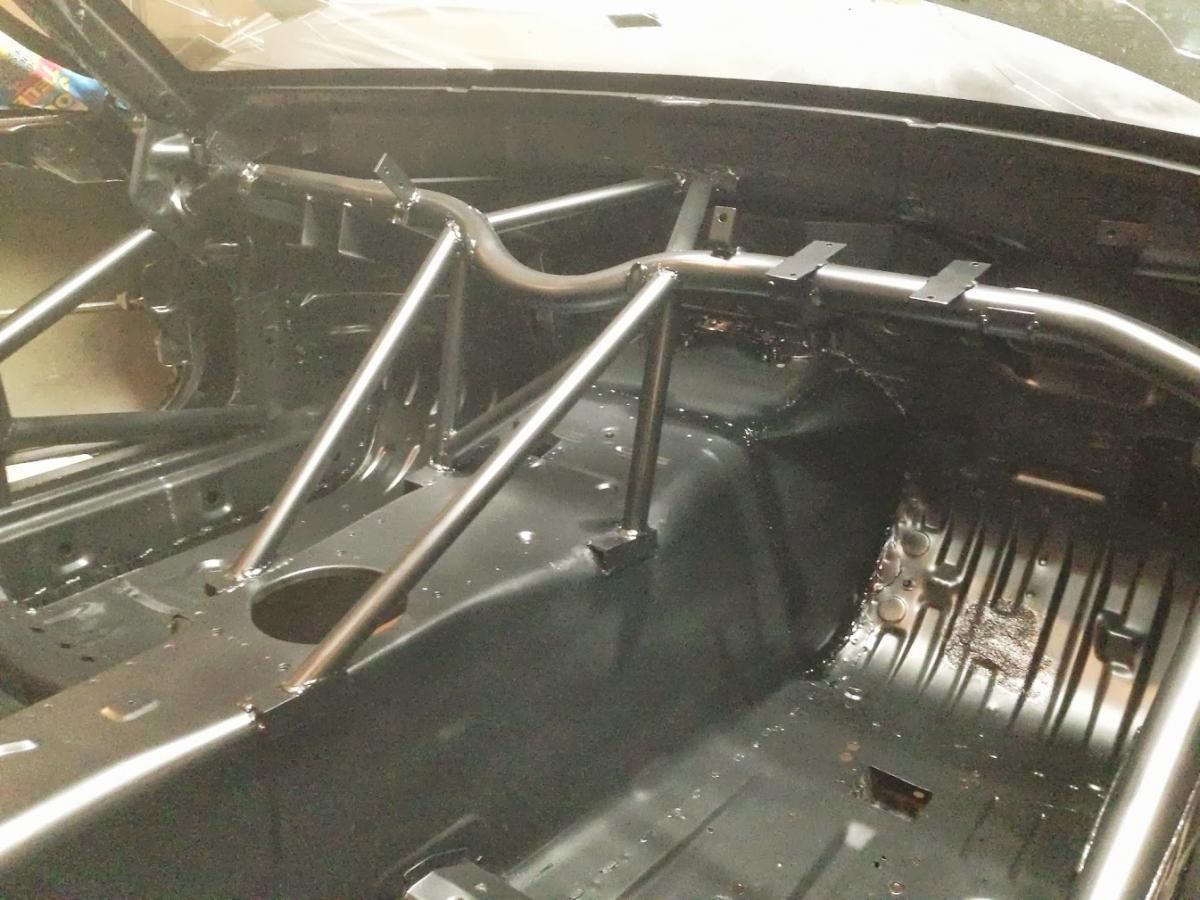
In a previous post, I showed a window in the frame rail, in the engine bay. Fuel and oil lines pass through that hole and come out here, inches from the fuel tank.
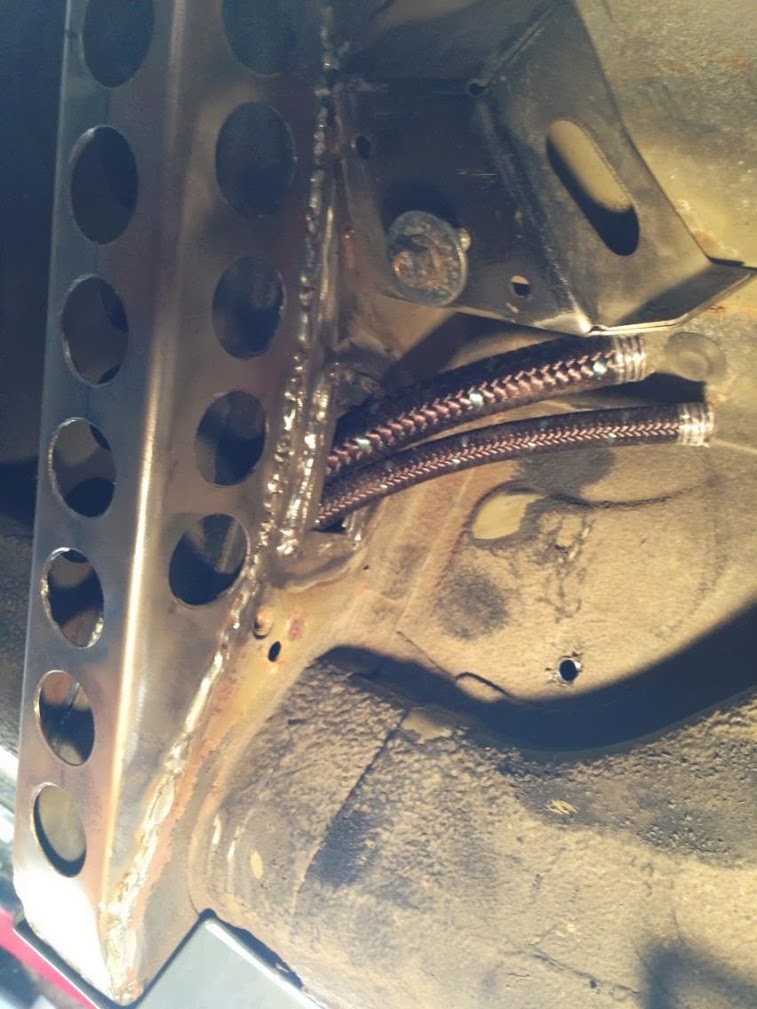
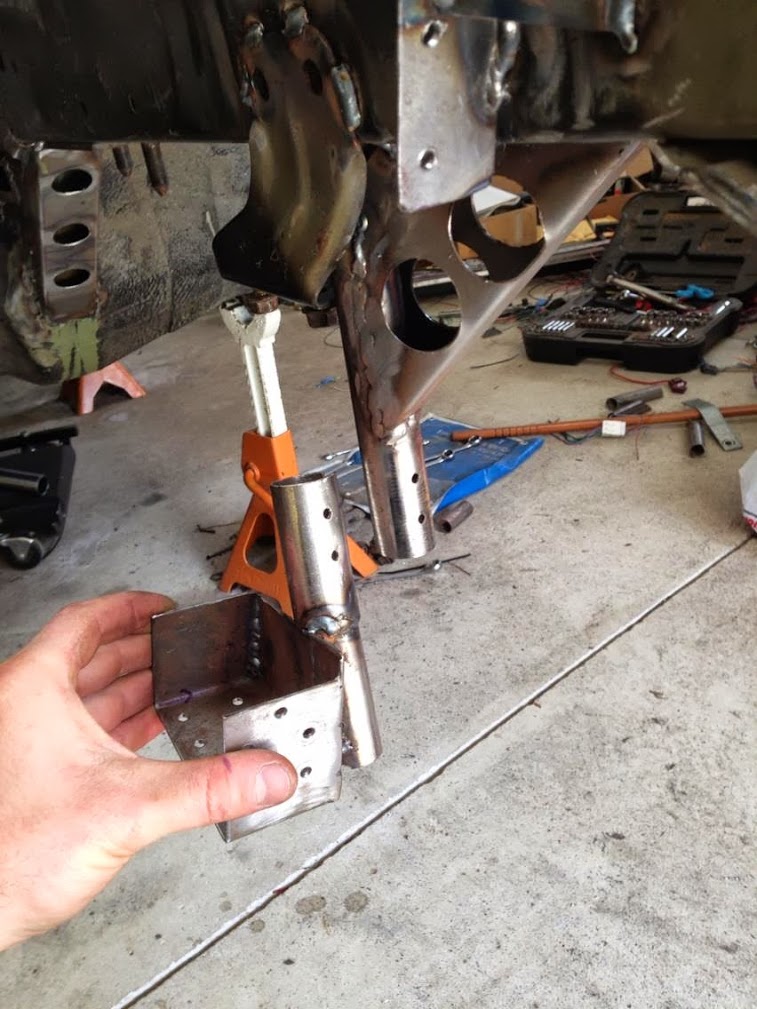
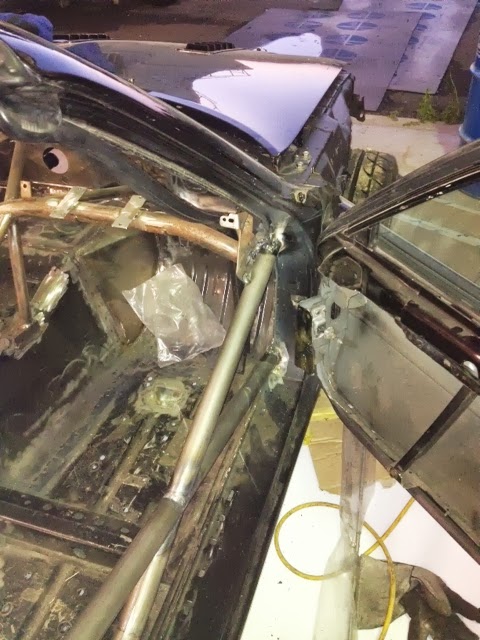
This bar, passing from the dash bar to the frame rail, will experience quite a bit of load. I added a gusset to distribute that load across the frame rail.
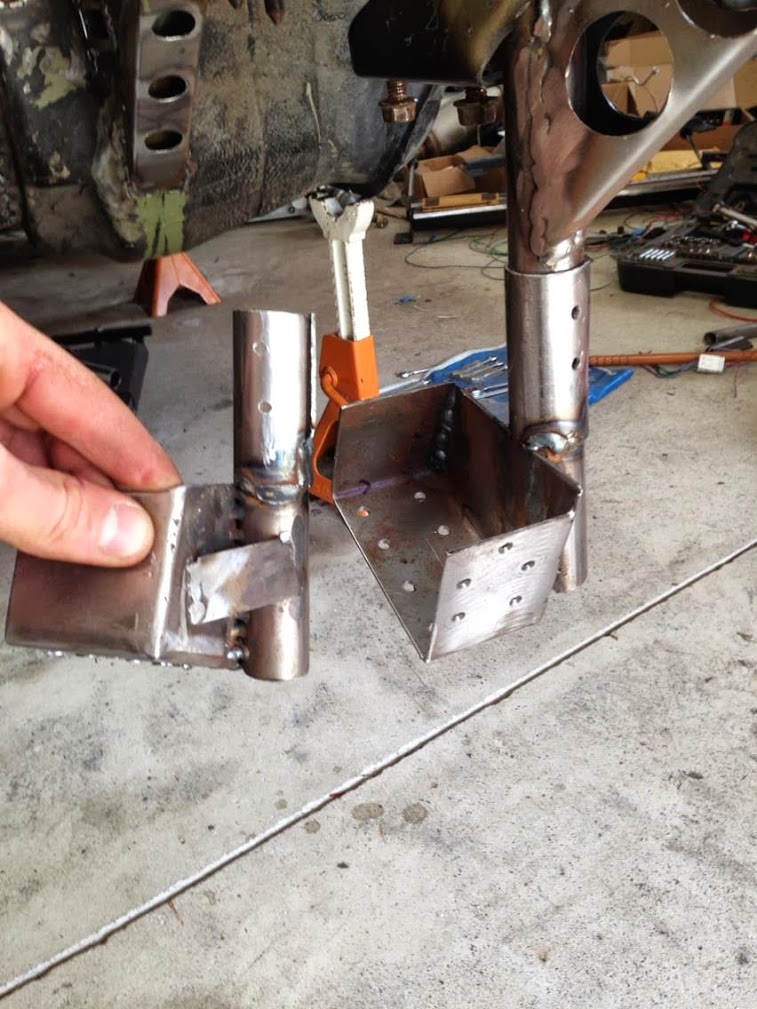
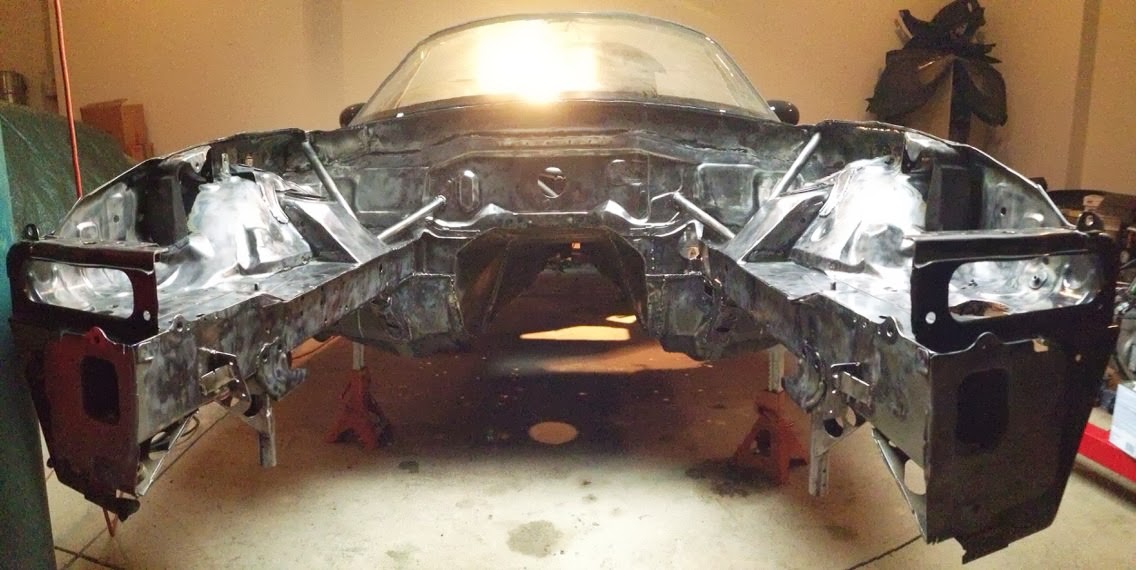
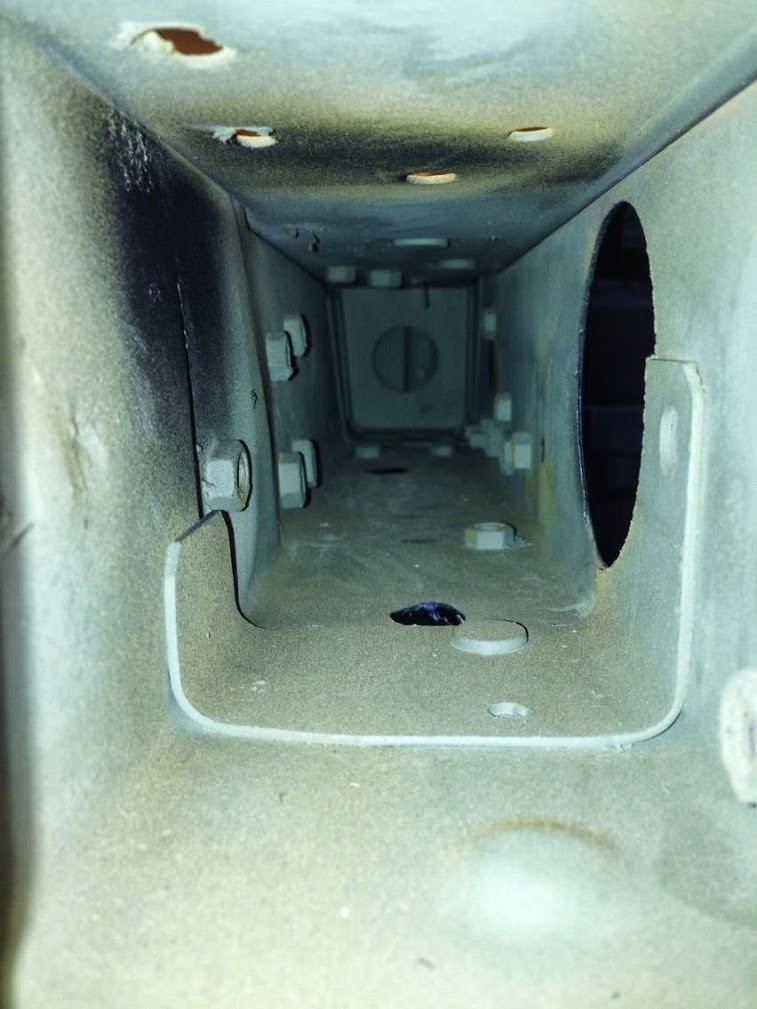
Removing the drivetrain with the headers installed proved to be a bit of a challenge with these radiator supports in place as they protrude inward and reduce the available width. My simple solution to that was to make the radiator supports removable. The supports now slip over the post and bolt in, whereas before they were non-removable. Not depicted in this photo are the tabs that I welded to the bases of the supports for the attachment of a splitter.
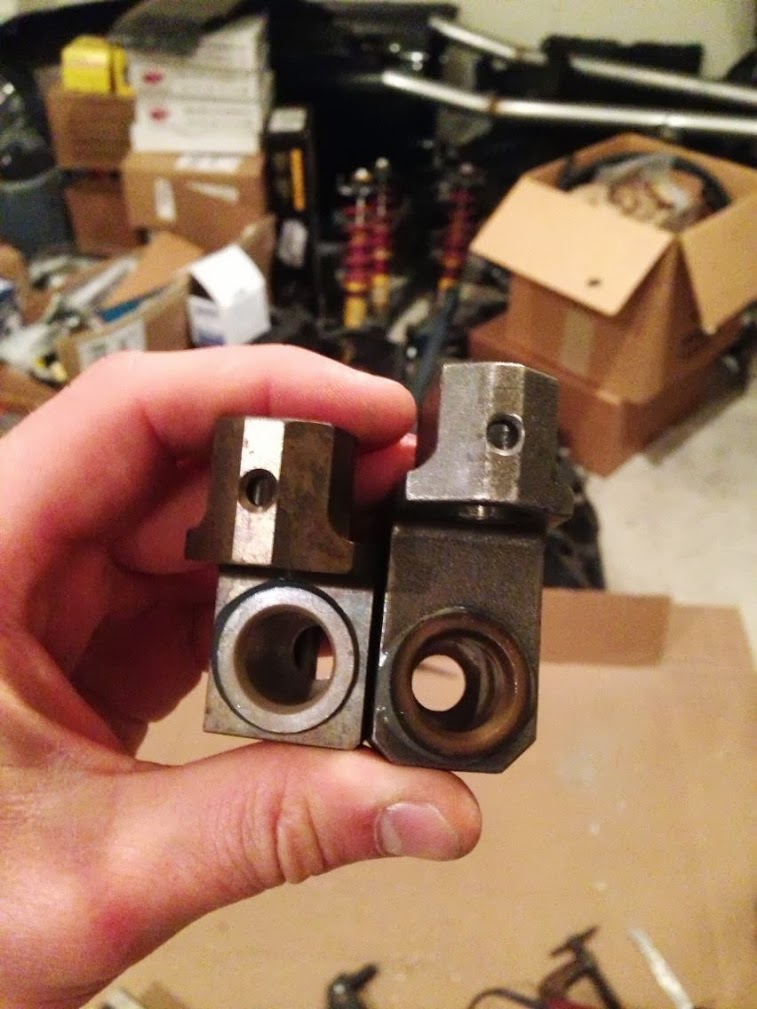
My T56 transmission is out of a 2004 GTO. The GTO transmission has better syncros than the Camaro T56, however a Camaro shifter is strongly preferred for this swap due to its location. I had to replace the GTO offset lever with a Camaro offset lever in order to make the Camaro shifter work with my trans. The Camaro offset lever is the shorter of the two.
I chose an MGW F-body Camaro shifter because I needed a Camaro shifter anyway and this one has phenomenal reviews. The **** is a delryn piece that I ordered from ebay. It has a nice shape and isn't very thermally conductive.

School, a graduation, some semblance of a social life, and a three week trip to South Africa, which was amazing, has slowed this project down a tad.
While away, I was in touch with a fabricator who will be installing a 3/4 cage in my car at the end of the month. Ryan, of Thompson Racing Fabrication, has installed roll cages in many of the rally cars in the area. I've seen his products prove themselves effective a couple of times and look forward to having his work in my car. The cage will get a full writeup upon completion. In the mean time, I'll just say that Ryan and I have come up with what should be quite a good design given the constraints.
As for material progress, here's what I've been up to:
In a previous post, I showed a window in the frame rail, in the engine bay. Fuel and oil lines pass through that hole and come out here, inches from the fuel tank.
This bar, passing from the dash bar to the frame rail, will experience quite a bit of load. I added a gusset to distribute that load across the frame rail.
Removing the drivetrain with the headers installed proved to be a bit of a challenge with these radiator supports in place as they protrude inward and reduce the available width. My simple solution to that was to make the radiator supports removable. The supports now slip over the post and bolt in, whereas before they were non-removable. Not depicted in this photo are the tabs that I welded to the bases of the supports for the attachment of a splitter.
My T56 transmission is out of a 2004 GTO. The GTO transmission has better syncros than the Camaro T56, however a Camaro shifter is strongly preferred for this swap due to its location. I had to replace the GTO offset lever with a Camaro offset lever in order to make the Camaro shifter work with my trans. The Camaro offset lever is the shorter of the two.
I chose an MGW F-body Camaro shifter because I needed a Camaro shifter anyway and this one has phenomenal reviews. The **** is a delryn piece that I ordered from ebay. It has a nice shape and isn't very thermally conductive.
Reply
0
0
Thread Starter
Junior Member
iTrader: (2)
Joined: Nov 2011
Posts: 252
Total Cats: 17
From: Troy, Michigan
6-13-2013
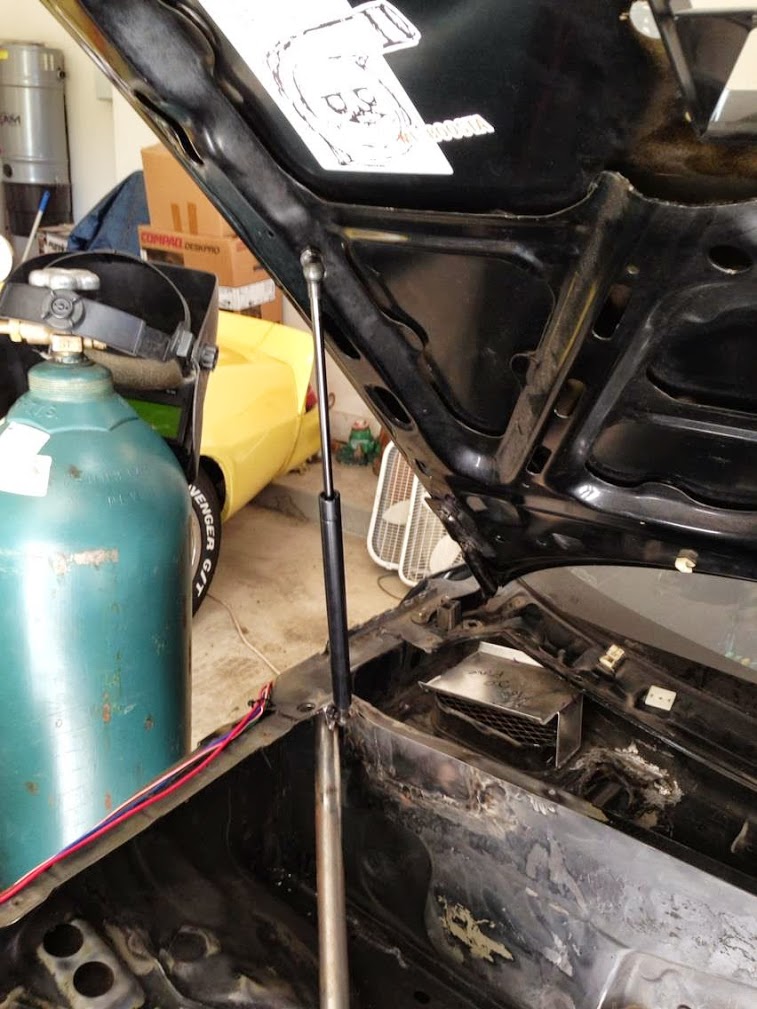
The hood is held up with a universal gas strut that I picked up on Amazon. One of them is enough to get the job done and while some companies charge over $100 for hood strut kits, I have about $10 into this setup.
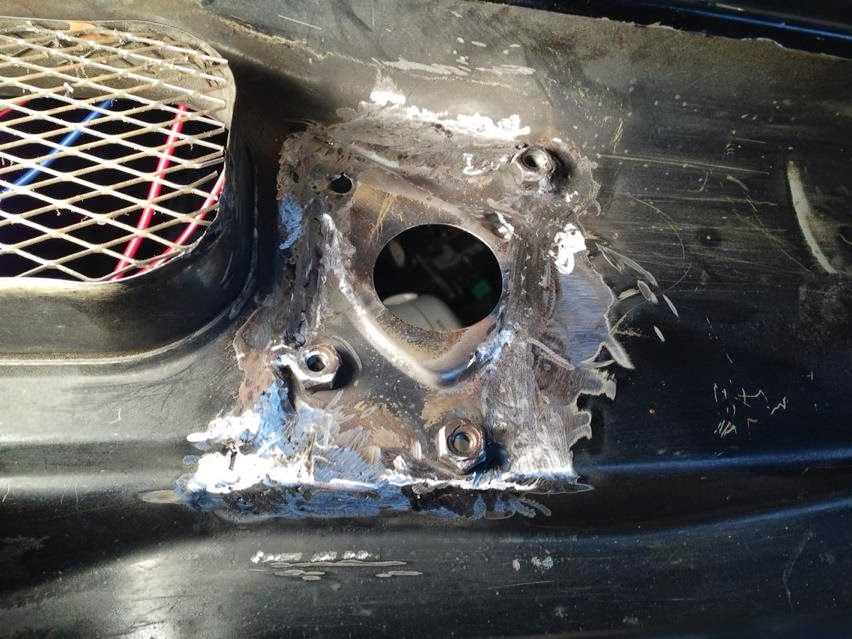
My wiper motor relocation looked pretty haggard for a while because I didn't have a tool that fit into this small space to clean up the welds. Fortunately, I was able to borrow an electric die grinder from a friend and that made short work of this job. With a tiny bit of body filer and some paint, this will practically look OEM.
After some CAD(cardboard aided design) work, I determined that a F-body Camaro air intake fits perfectly on top of the radiator ducting. I also picked up a K&N panel filter. The volume that this intake will draw from is a great source of cool, pressurized air.

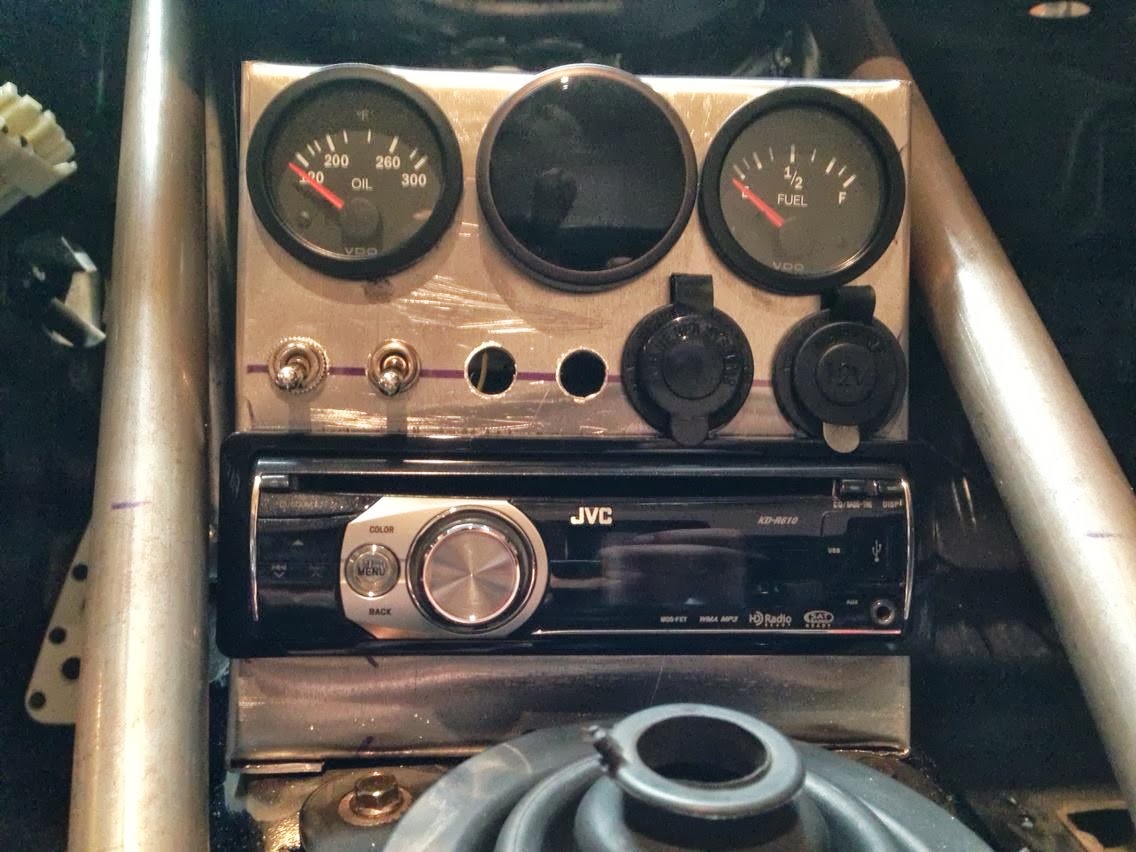
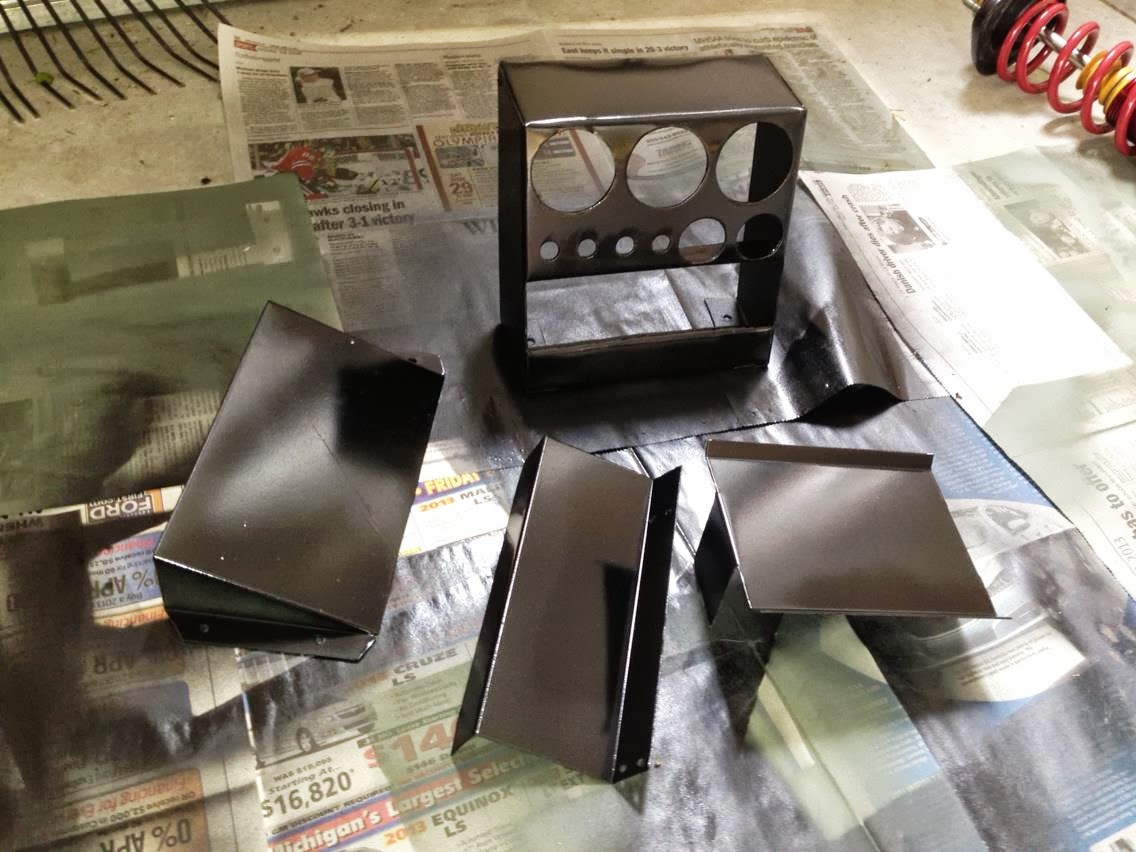
For weight savings, the OEM dash is hacked up and this car is not going to get much of an interior. Accordingly, I needed a utilitarian housing for gauges, switches, power sources, and the radio. Yes, this car is still going to have a radio. Anyway, I used my metal break to make an aluminum structure to handle this task. The structure bolts to the transmission tunnel via nuts that I welded to the inside of the tunnel. This center console is easy to reach and is short enough for my GPS to mount to the top of it without hitting the bottom of the dash.

There's a 12v outlet, and something that looks like a 12v outlet that is actually a pair of USB plugs. Those will be handy for keeping my phone and other gadgets charged during longer drives.
The hood is held up with a universal gas strut that I picked up on Amazon. One of them is enough to get the job done and while some companies charge over $100 for hood strut kits, I have about $10 into this setup.
My wiper motor relocation looked pretty haggard for a while because I didn't have a tool that fit into this small space to clean up the welds. Fortunately, I was able to borrow an electric die grinder from a friend and that made short work of this job. With a tiny bit of body filer and some paint, this will practically look OEM.
After some CAD(cardboard aided design) work, I determined that a F-body Camaro air intake fits perfectly on top of the radiator ducting. I also picked up a K&N panel filter. The volume that this intake will draw from is a great source of cool, pressurized air.
For weight savings, the OEM dash is hacked up and this car is not going to get much of an interior. Accordingly, I needed a utilitarian housing for gauges, switches, power sources, and the radio. Yes, this car is still going to have a radio. Anyway, I used my metal break to make an aluminum structure to handle this task. The structure bolts to the transmission tunnel via nuts that I welded to the inside of the tunnel. This center console is easy to reach and is short enough for my GPS to mount to the top of it without hitting the bottom of the dash.
There's a 12v outlet, and something that looks like a 12v outlet that is actually a pair of USB plugs. Those will be handy for keeping my phone and other gadgets charged during longer drives.
Reply
0
0
Thread Starter
Junior Member
iTrader: (2)
Joined: Nov 2011
Posts: 252
Total Cats: 17
From: Troy, Michigan
6-13-2013
I gutted the doors and removed the OEM seatbelt towers in preparation for the cage. This lot of stuff weighed quite a bit.
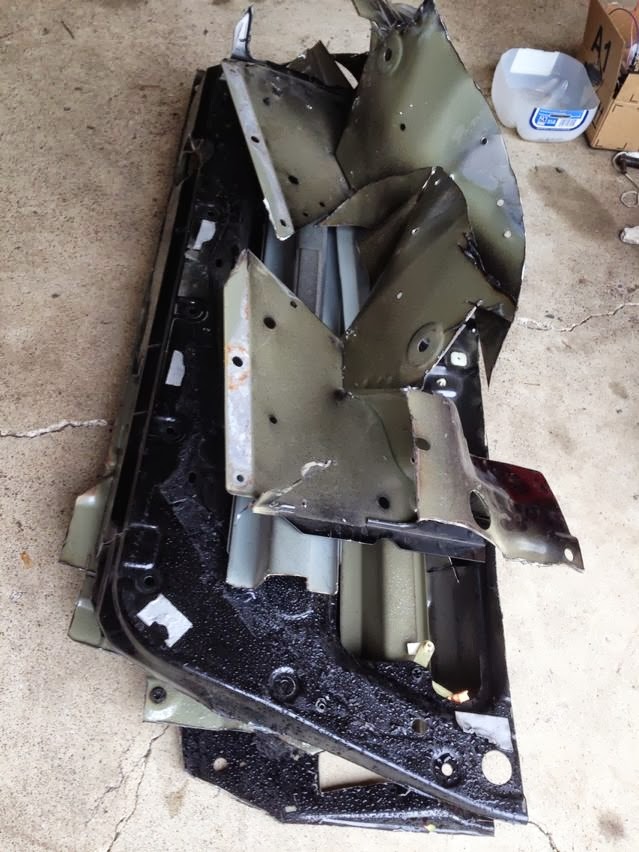
As you can see in this photo of the passenger side door, there is not much left. The windows mechanisms were largely left in tact and I moved the cranks to locations that will be easy for occupants, whom are strapped in, to reach.
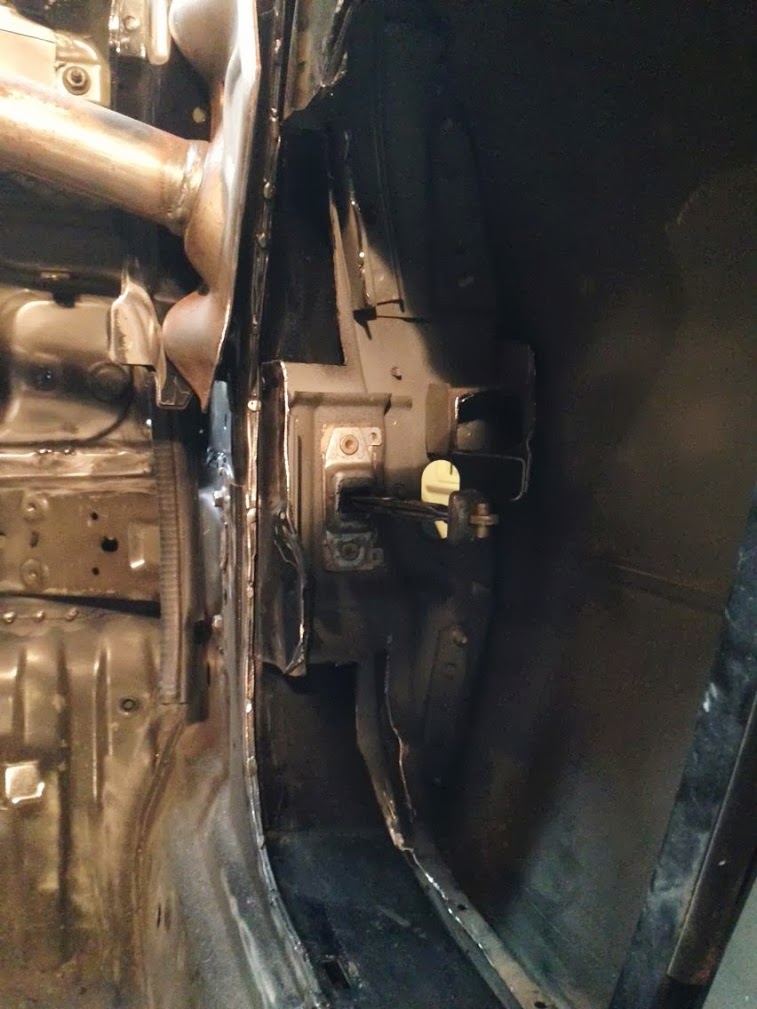
This is a brake line mount, positioned approximately how it was from the factory.

The other big task has been preparing the car for paint. The engine bay, interior, and wheel wells will all need to be painted. Accordingly, the engine bay has been stripped to bare metal, the inner firewall has also been stripped, and the wheel wells have mostly been stripped. The paint work, engine bay included, will most likely take place after the cage is complete.
I also fabricated mounts for the driver and passenger seats. This was something that needed to be done before the car goes in for the cage. I don't have photos at the moment, however they are basic fixed position mounts with attachment points for the anti-sub straps welded in.
I gutted the doors and removed the OEM seatbelt towers in preparation for the cage. This lot of stuff weighed quite a bit.
As you can see in this photo of the passenger side door, there is not much left. The windows mechanisms were largely left in tact and I moved the cranks to locations that will be easy for occupants, whom are strapped in, to reach.
This is a brake line mount, positioned approximately how it was from the factory.
The other big task has been preparing the car for paint. The engine bay, interior, and wheel wells will all need to be painted. Accordingly, the engine bay has been stripped to bare metal, the inner firewall has also been stripped, and the wheel wells have mostly been stripped. The paint work, engine bay included, will most likely take place after the cage is complete.
I also fabricated mounts for the driver and passenger seats. This was something that needed to be done before the car goes in for the cage. I don't have photos at the moment, however they are basic fixed position mounts with attachment points for the anti-sub straps welded in.
Reply
0
0
Thread Starter
Junior Member
iTrader: (2)
Joined: Nov 2011
Posts: 252
Total Cats: 17
From: Troy, Michigan
6-22-2013
Here's the latest, copied and pasted from: An engine that’s ready for action. | TheTurtleBuild
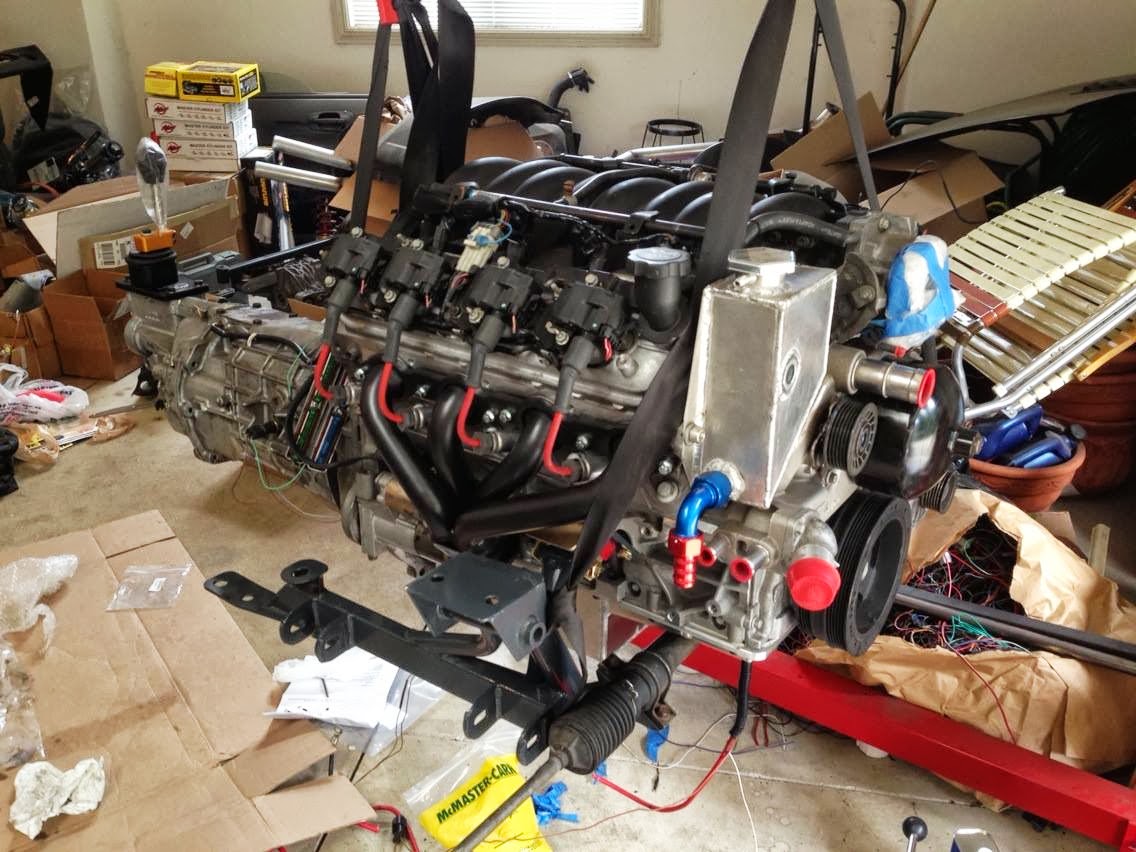
Where I left off in my last post, the oil pan was not installed and the accessory drive was incomplete. I've fixed that...and a few other things
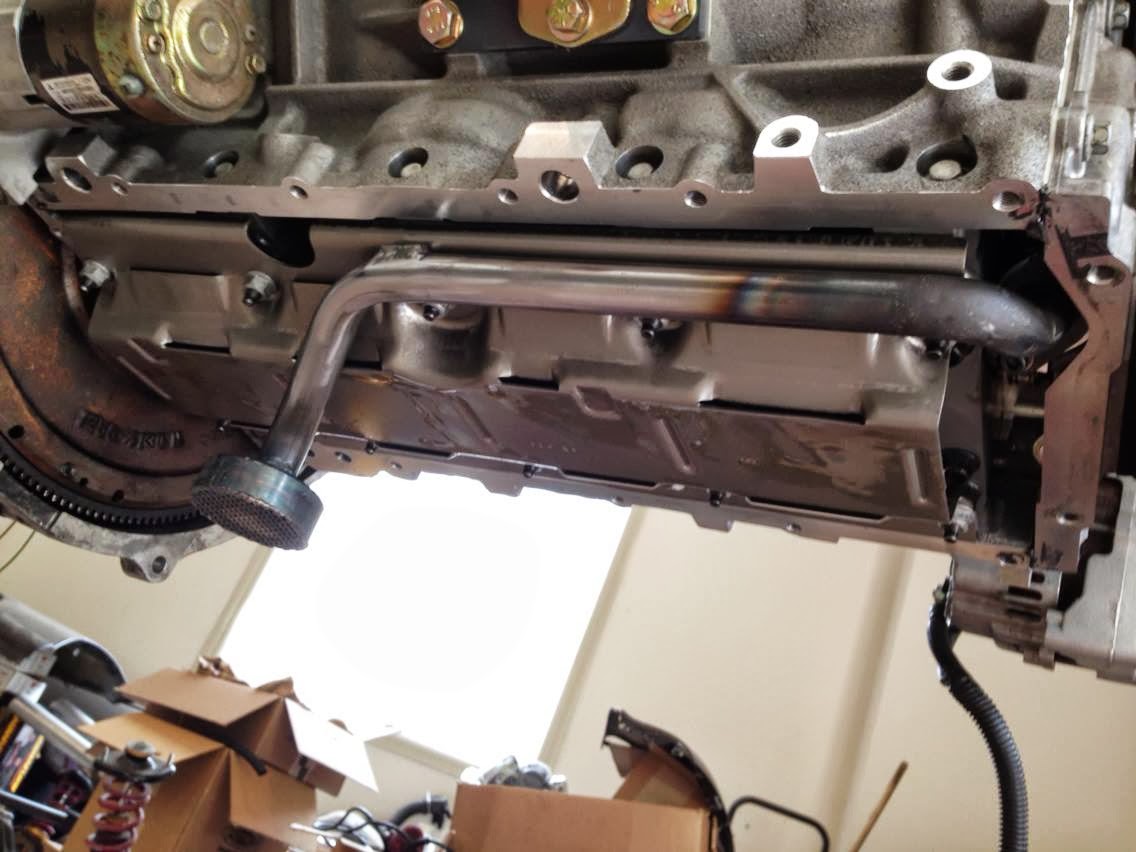
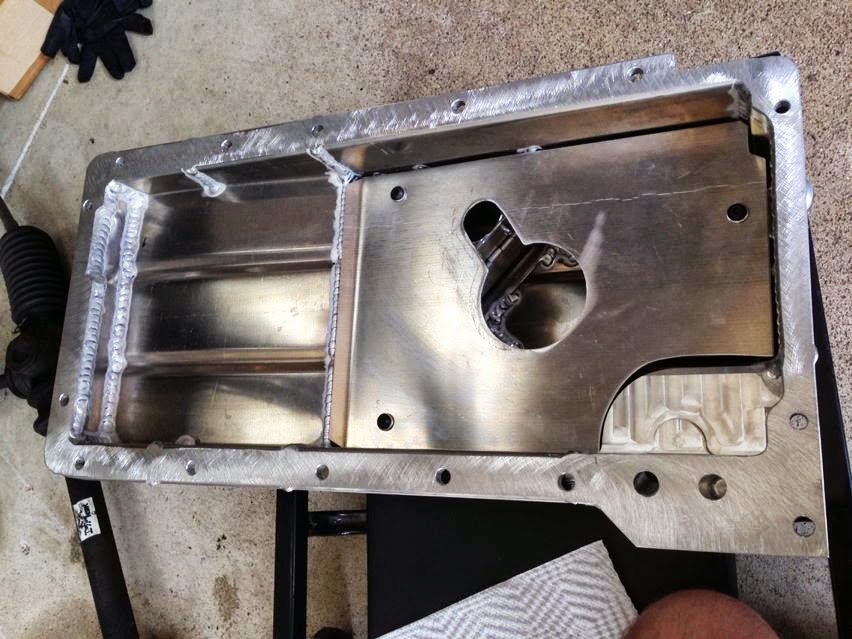
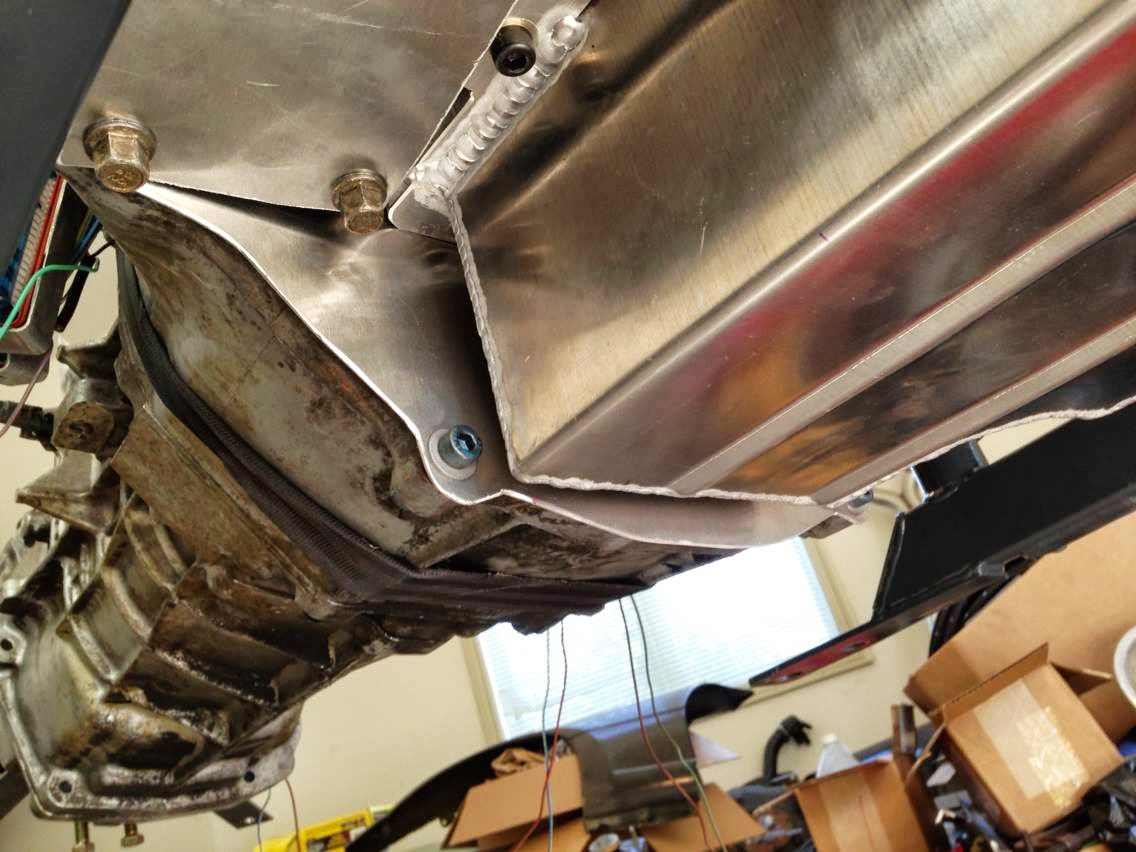
This is the V8Roadsters aluminum oil pan. A rear sump pan is necessary for this swap, and the front of the pan must be shallow enough to clear the steering rack. The V8R pan is made specifically for this swap and meets that criteria. Additionally, the V8R pan is baffled with trap doors to prevent oil starvation--a tremendous plus for car that sees track time. This model has provisions for an oil filter to screw on, which eliminates the need for an external filter and the additional complexity that a remote filter setup adds. This pan comes with an oil pickup tube and has just enough clearance to accommodate an unmodified GTO windage tray.
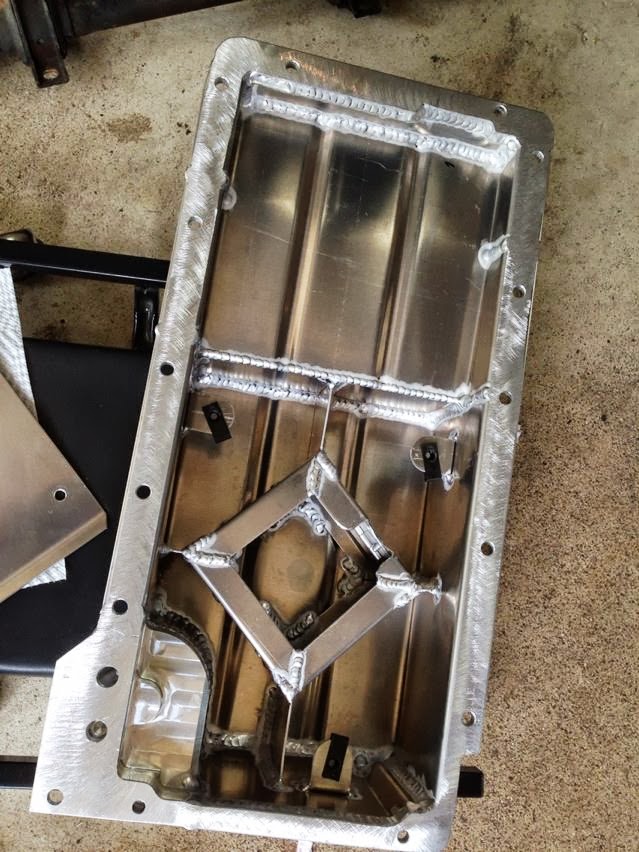
I took the pan apart prior to installation and cleaned it thoroughly. I also removed the inspection stickers which resided on the inside.
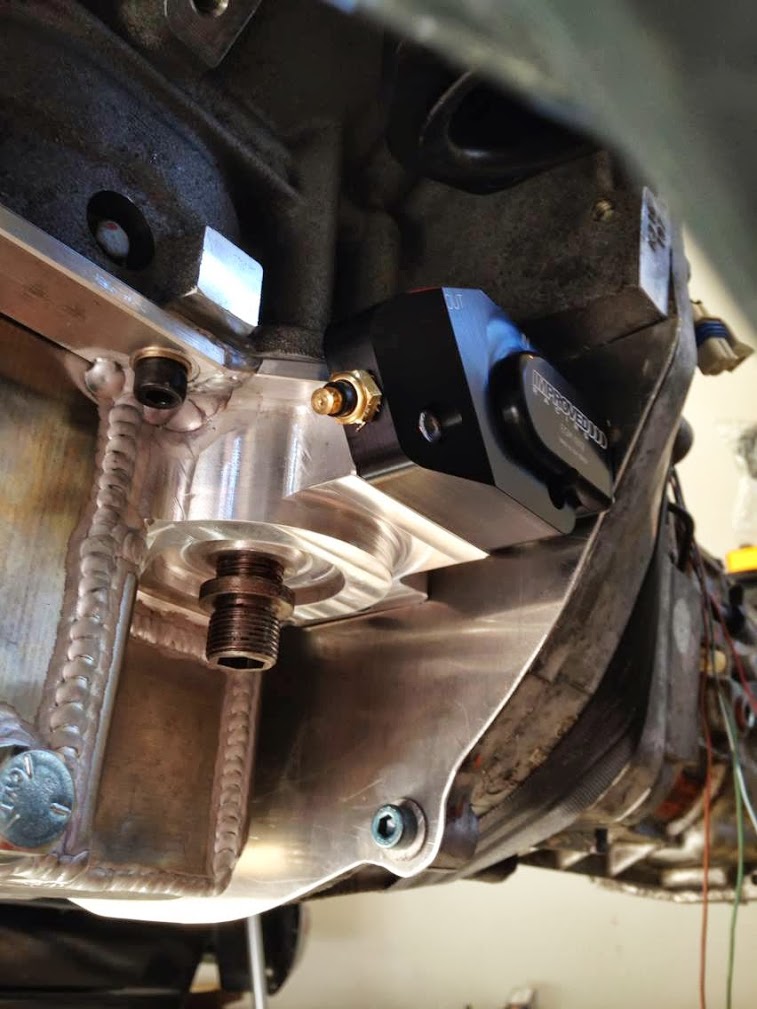
This nifty product by Improved Racing is an oil thermostat that bolts directly to the oil pan. A thermostat ensures that the oil quickly reaches a suitable operating temperature, and diverts flow to the oil cooler once that threshold has been reached.

Here's the latest, copied and pasted from: An engine that’s ready for action. | TheTurtleBuild
Where I left off in my last post, the oil pan was not installed and the accessory drive was incomplete. I've fixed that...and a few other things
This is the V8Roadsters aluminum oil pan. A rear sump pan is necessary for this swap, and the front of the pan must be shallow enough to clear the steering rack. The V8R pan is made specifically for this swap and meets that criteria. Additionally, the V8R pan is baffled with trap doors to prevent oil starvation--a tremendous plus for car that sees track time. This model has provisions for an oil filter to screw on, which eliminates the need for an external filter and the additional complexity that a remote filter setup adds. This pan comes with an oil pickup tube and has just enough clearance to accommodate an unmodified GTO windage tray.
I took the pan apart prior to installation and cleaned it thoroughly. I also removed the inspection stickers which resided on the inside.
This nifty product by Improved Racing is an oil thermostat that bolts directly to the oil pan. A thermostat ensures that the oil quickly reaches a suitable operating temperature, and diverts flow to the oil cooler once that threshold has been reached.
Reply
0
0
Thread Starter
Junior Member
iTrader: (2)
Joined: Nov 2011
Posts: 252
Total Cats: 17
From: Troy, Michigan
6-22-2013
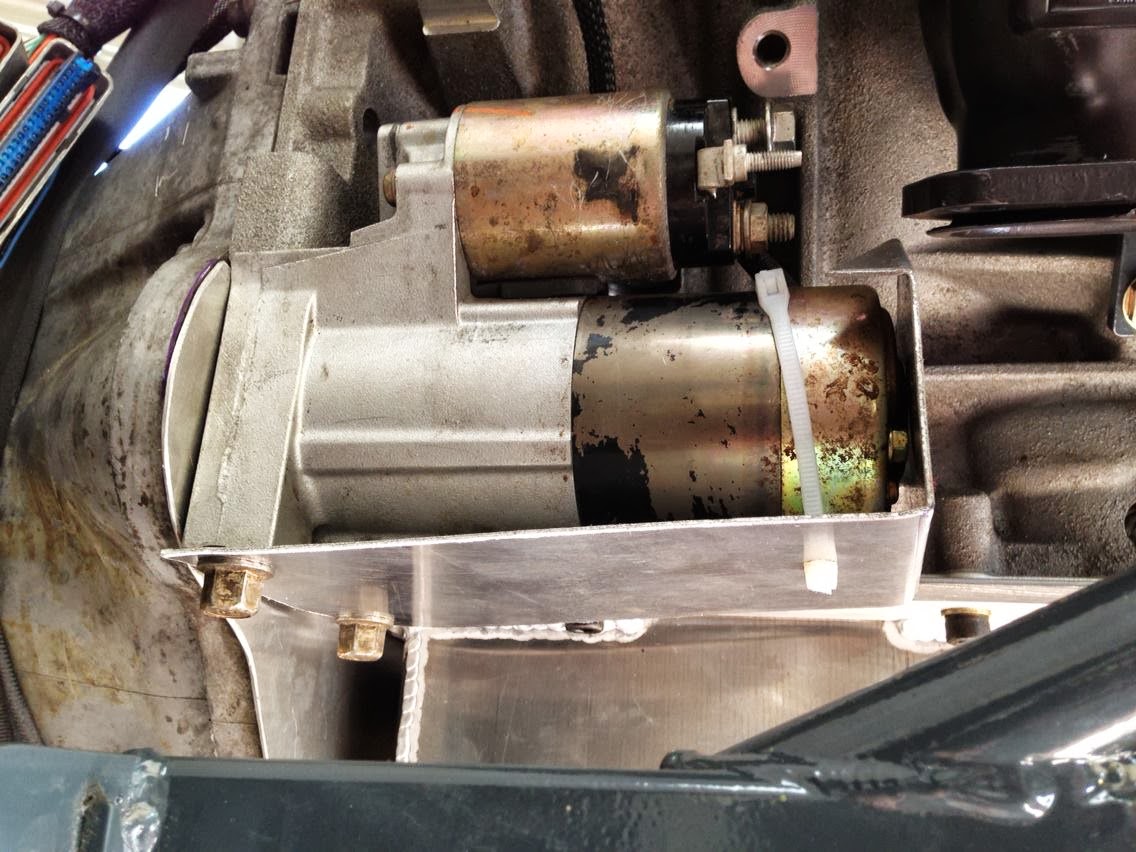
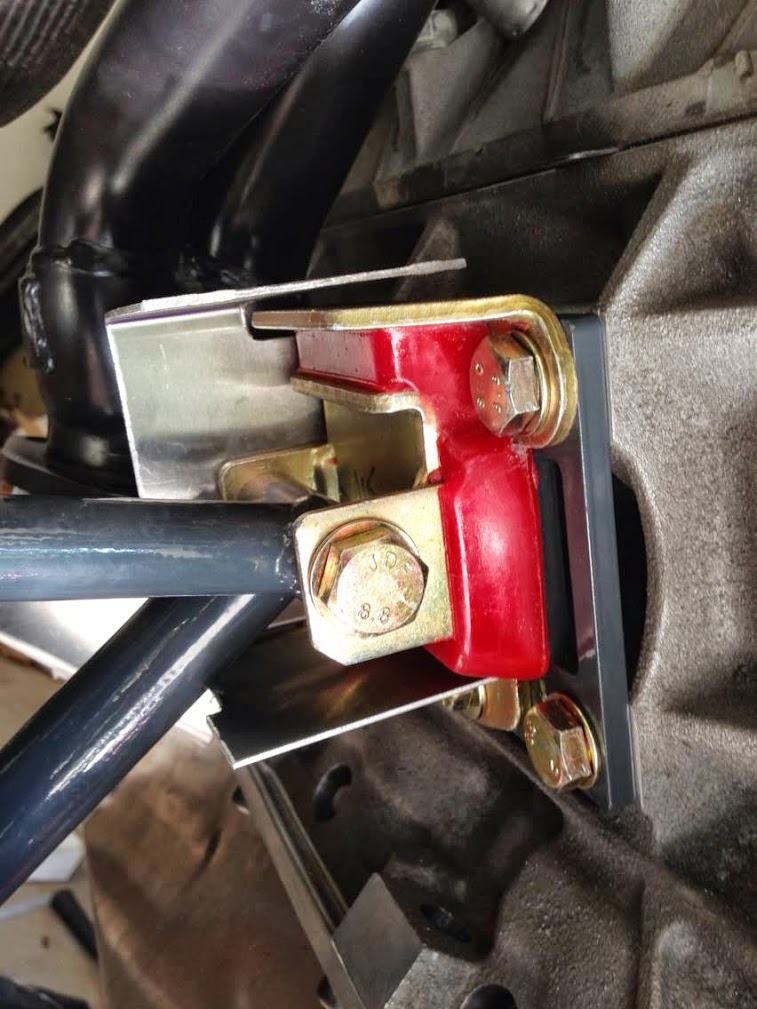
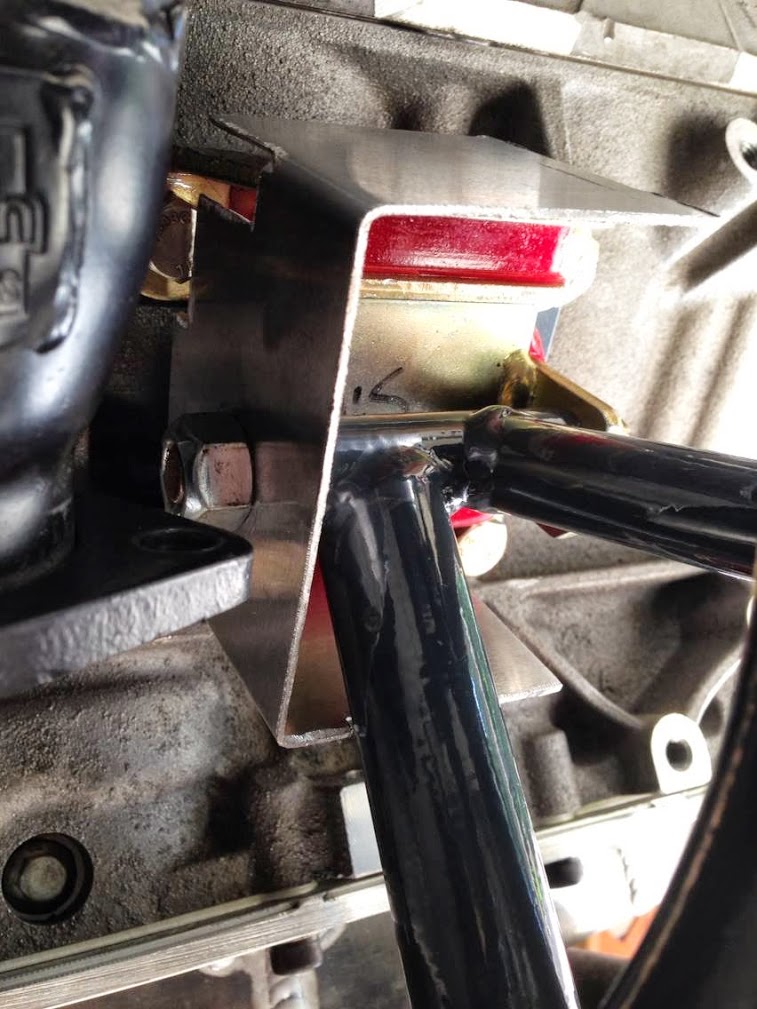
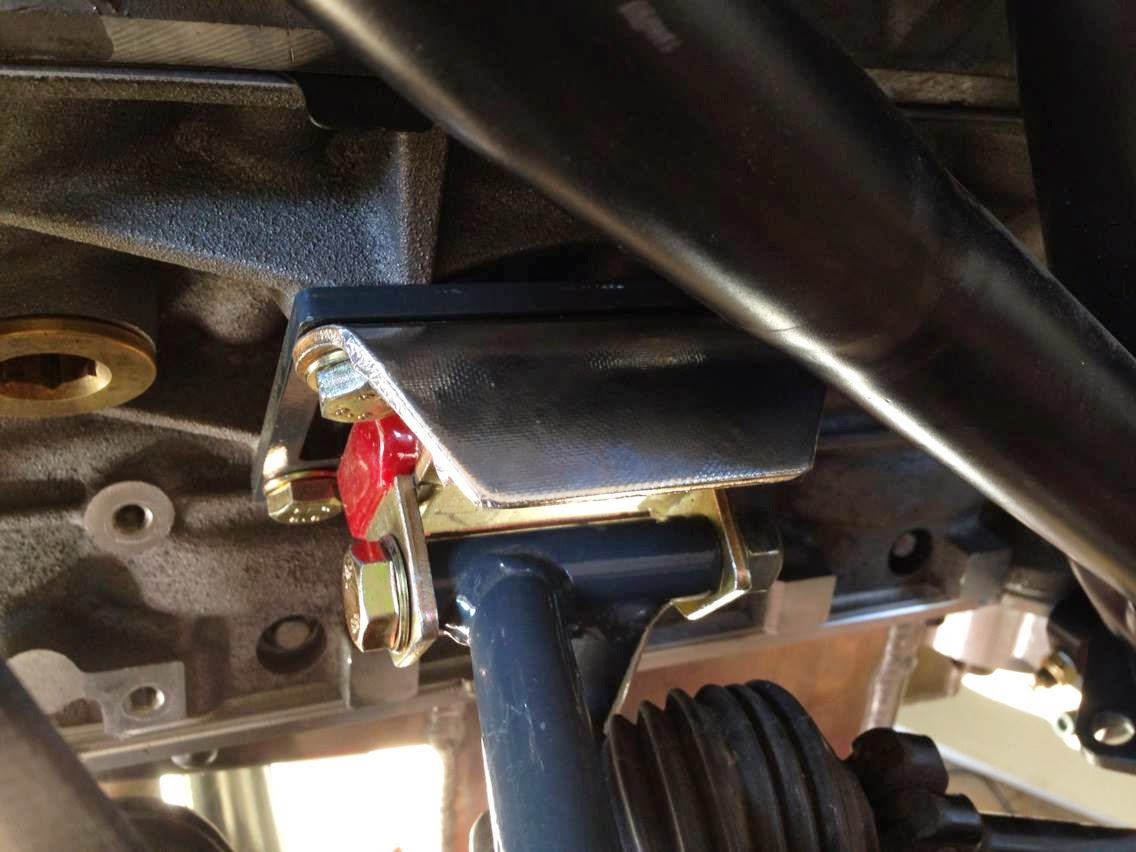
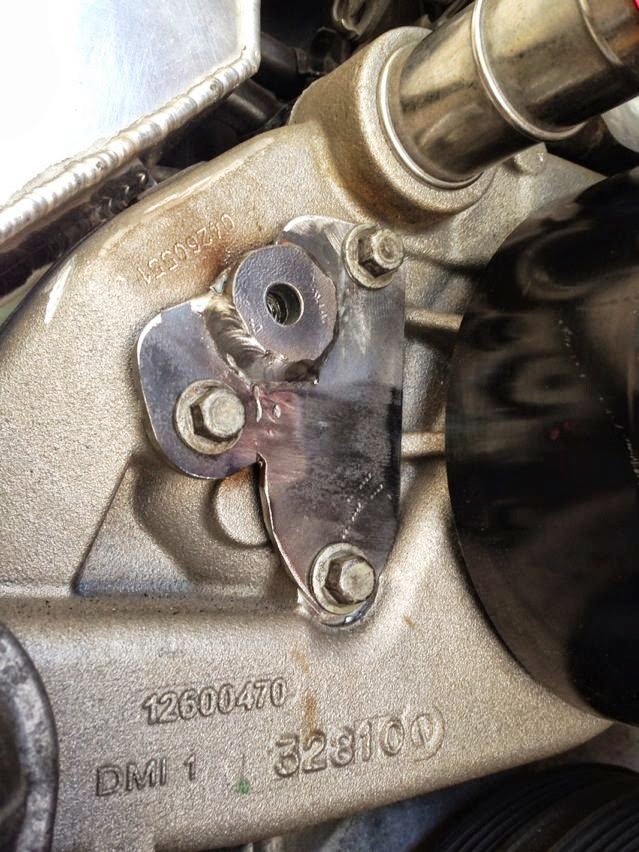
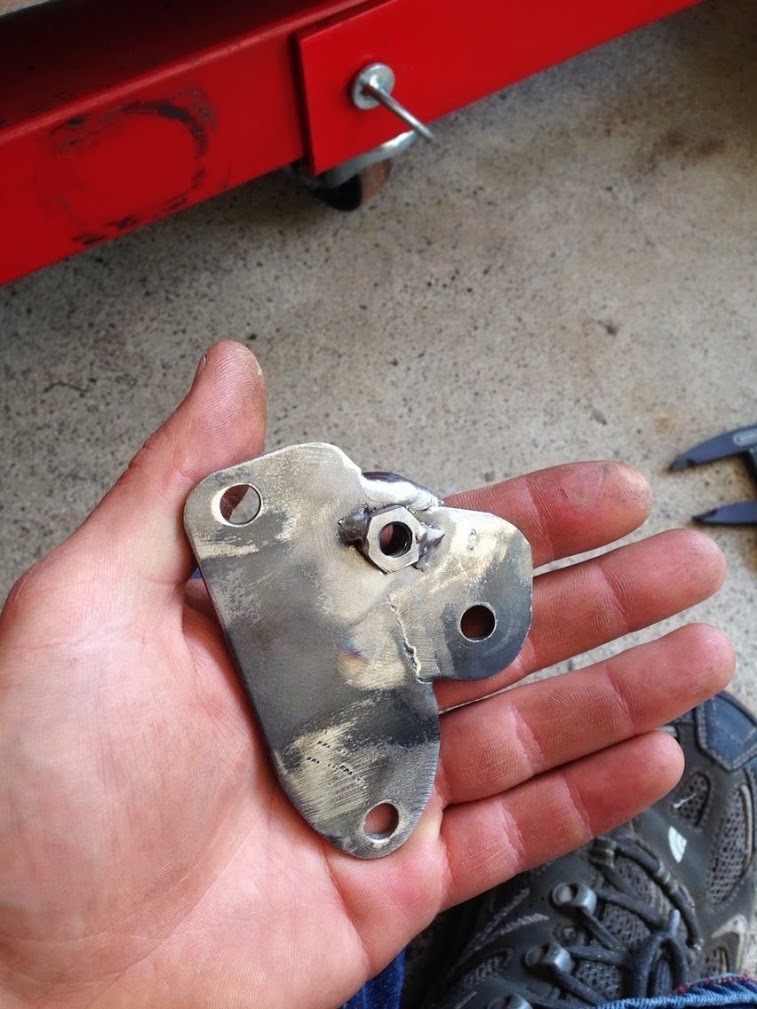
Some swappers have reported heat related woes that can be ameliorated by protecting prone components from radiant heat, which comes off of the headers and exhaust pipes. Two known problems are difficulty with starting and melted motor mounts. My headers are ceramic coated, which will help greatly, however I've made shields anyway in the name of reliability.
This shield protects the starter from the flange area on the header and from the exhaust pipe that runs beneath.
The passenger side motor mount is in close proximity to the headers so a shield with good coverage was made.
The top of the drivers side mount is the only part which appears to be vulnerable. Rather than making a full heat shield for this side, I cleaned the top of the mount with acetone and applied some adhesive-backed reflective thermal barrier.
Reply
0
0
Thread Starter
Junior Member
iTrader: (2)
Joined: Nov 2011
Posts: 252
Total Cats: 17
From: Troy, Michigan
6-22-2013
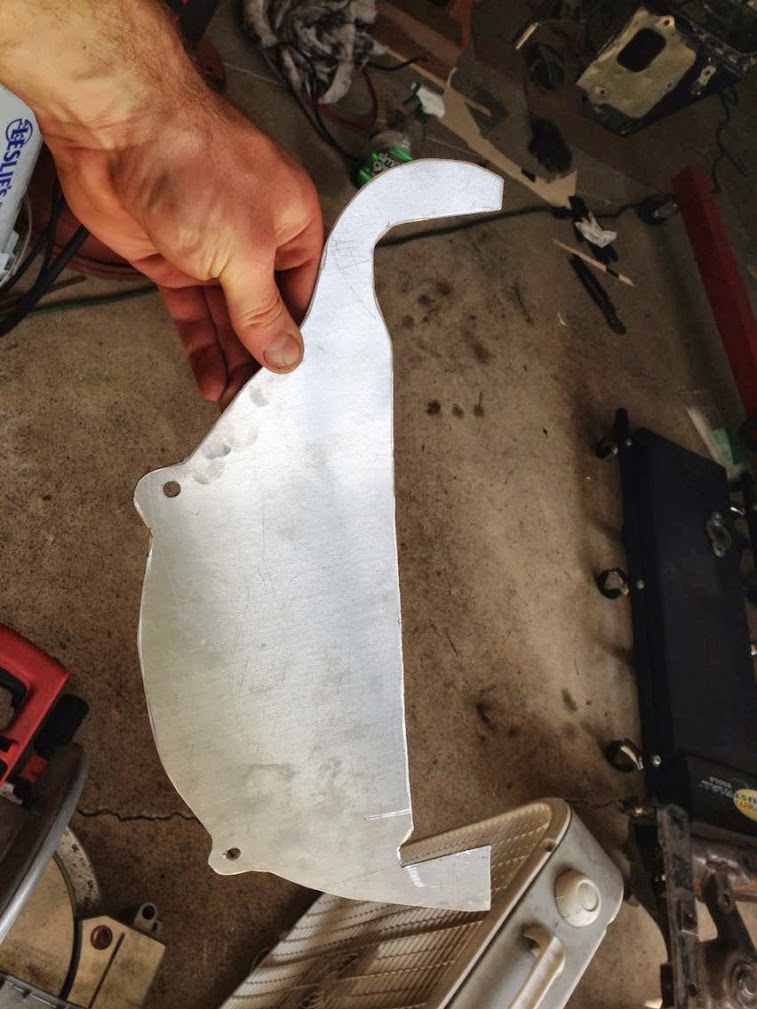
The bottom of the flywheel was exposed to the elements. I made an aluminum panel which bolts on and covers the opening.
-----------------------------------------------------------
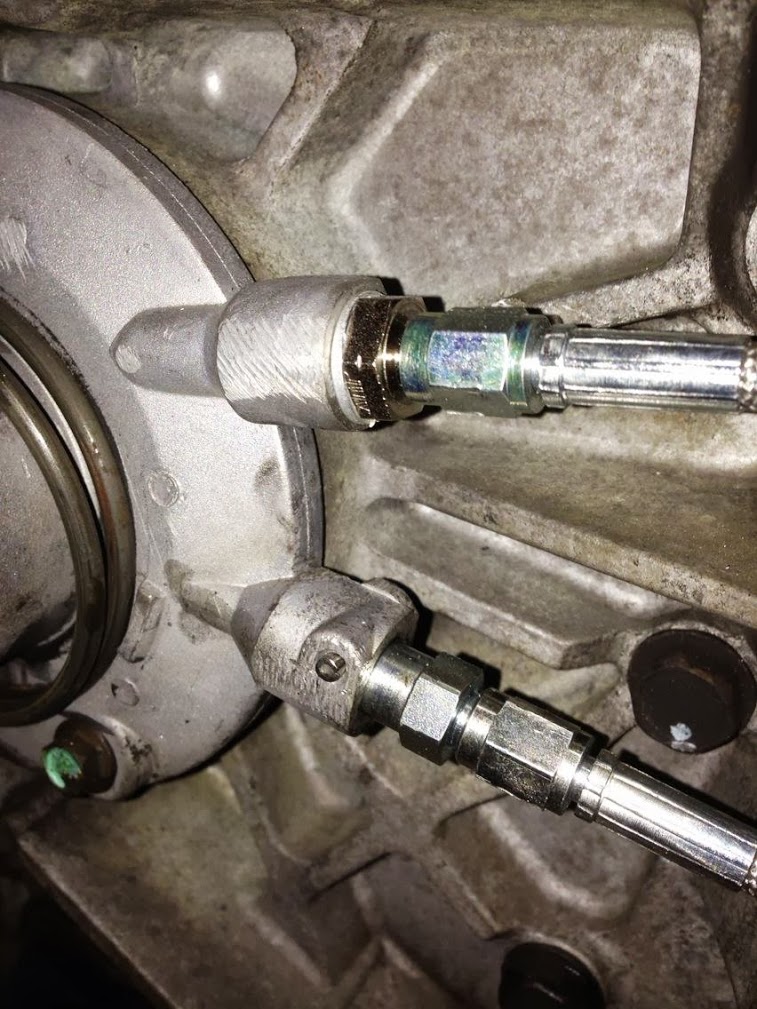
Lines to the clutch slave cylinder needed to be installed. The line on the bottom runs to the clutch master cylinder and the line on top is a remote bleeder, which allows the clutch to be bled with the drivetrain installed in the vehicle.
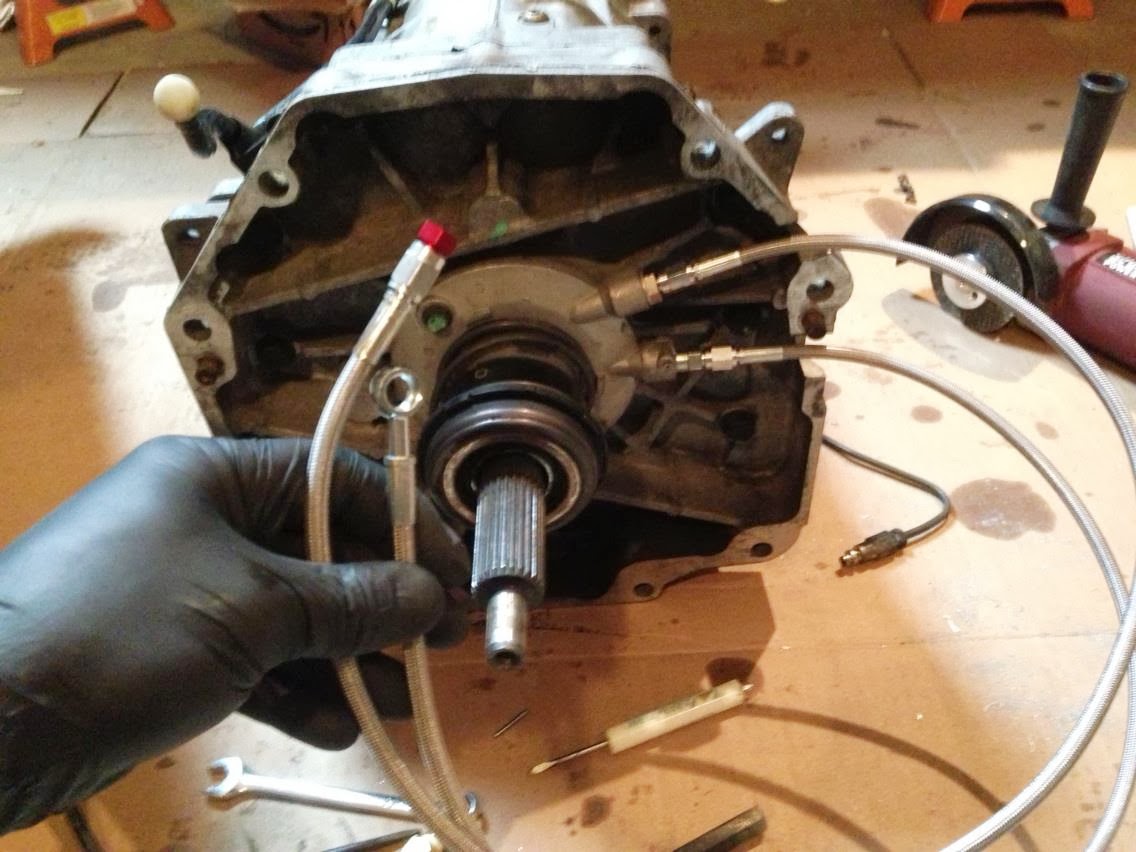
The top line simply screws in, while the bottom line is held in with a pin which needs to be hammered in.
The bottom of the flywheel was exposed to the elements. I made an aluminum panel which bolts on and covers the opening.
-----------------------------------------------------------
Lines to the clutch slave cylinder needed to be installed. The line on the bottom runs to the clutch master cylinder and the line on top is a remote bleeder, which allows the clutch to be bled with the drivetrain installed in the vehicle.
The top line simply screws in, while the bottom line is held in with a pin which needs to be hammered in.
Reply
0
0
Thread Starter
Junior Member
iTrader: (2)
Joined: Nov 2011
Posts: 252
Total Cats: 17
From: Troy, Michigan
6-22-2013
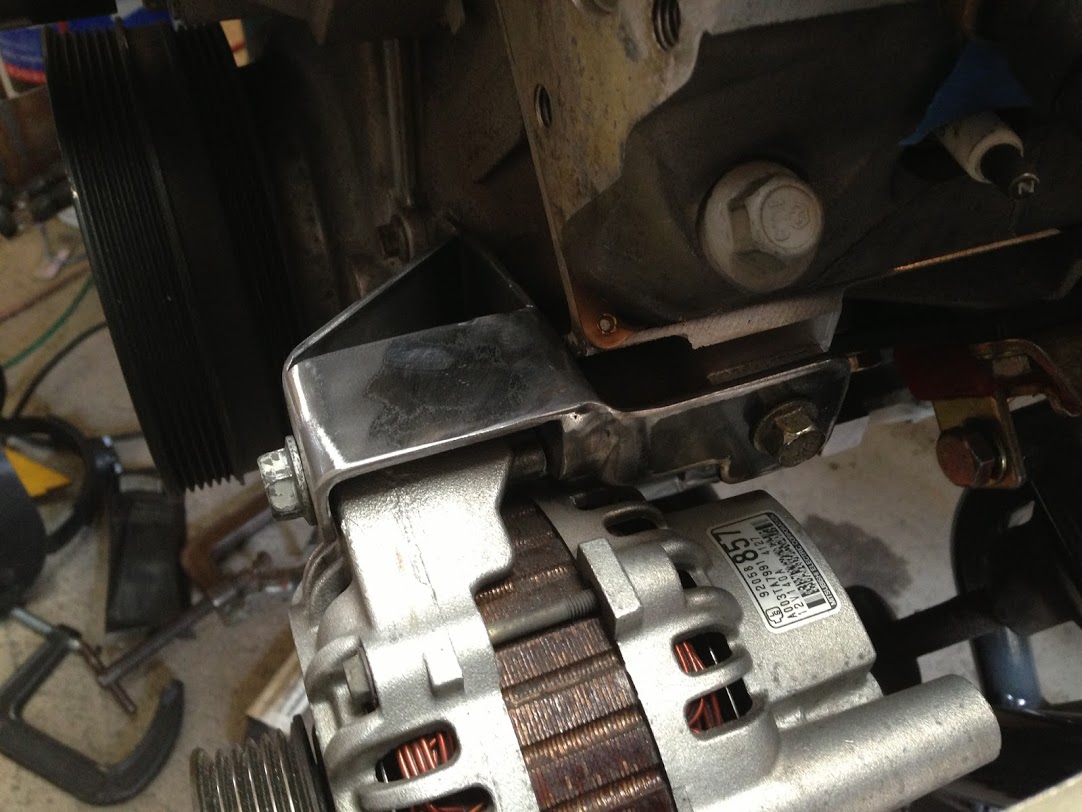
I've shown my custom alternator bracket in this post: An alternator bracket, a little window, and some hoses. | TheTurtleBuild. Still in need of completion at that point were a tensioner and an idler pulley. The tensioner consists of two rod ends, two bolts, and a couple of nuts.
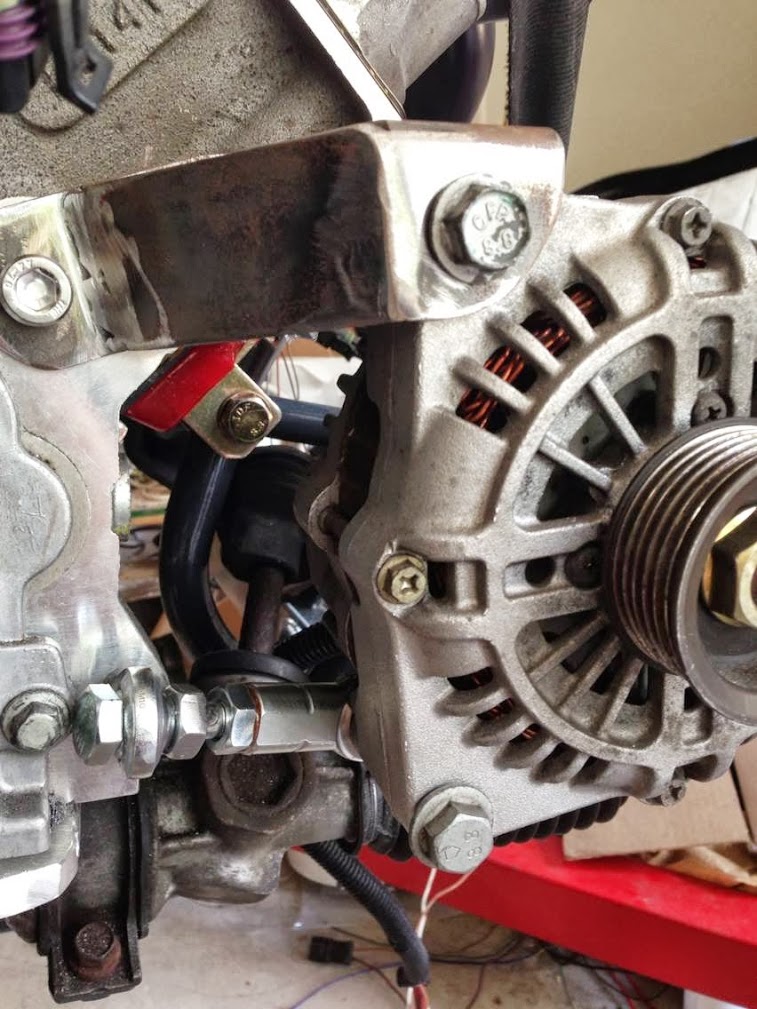
This is the idler pulley mount, simple and strong.
This is the finished product, with a 50" belt.
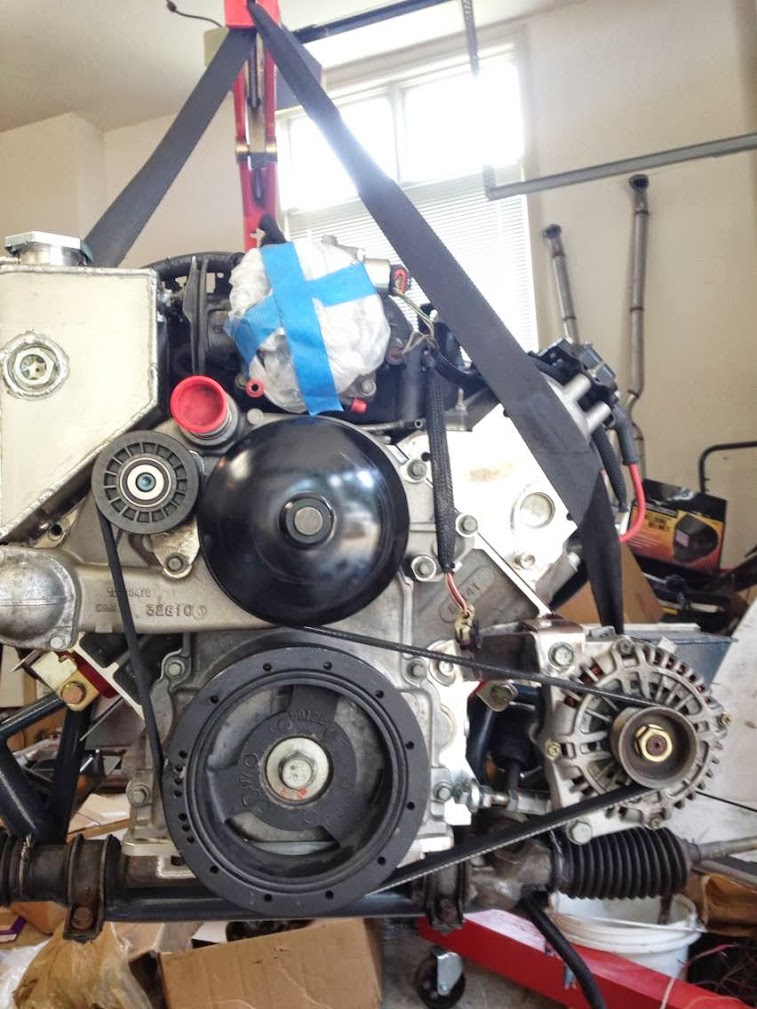
And now the drivetrain is ready to be dropped in!
I've shown my custom alternator bracket in this post: An alternator bracket, a little window, and some hoses. | TheTurtleBuild. Still in need of completion at that point were a tensioner and an idler pulley. The tensioner consists of two rod ends, two bolts, and a couple of nuts.
This is the idler pulley mount, simple and strong.
This is the finished product, with a 50" belt.
And now the drivetrain is ready to be dropped in!
Reply
0
0
Thread Starter
Junior Member
iTrader: (2)
Joined: Nov 2011
Posts: 252
Total Cats: 17
From: Troy, Michigan
6-27-2013
Here's a quick photo update. I'll write some more about the process, when I get a chance, and share the link.
Don't mind the state of the windshield.
I started pressing in bushings and installing the suspension tonight. I'm taking the wheels and tires in for mounting and balancing tomorrow. On Friday, the car will be rolled onto a trailer and hauled in for a 3/4 cage. Once I get the car back from the fabricator, I hope to have it driving within a couple of weeks. The objective now is to turn the car into a roller for the sake of easier transportation.
Reply
0
0
Thread Starter
Junior Member
iTrader: (2)
Joined: Nov 2011
Posts: 252
Total Cats: 17
From: Troy, Michigan
6-30-2013
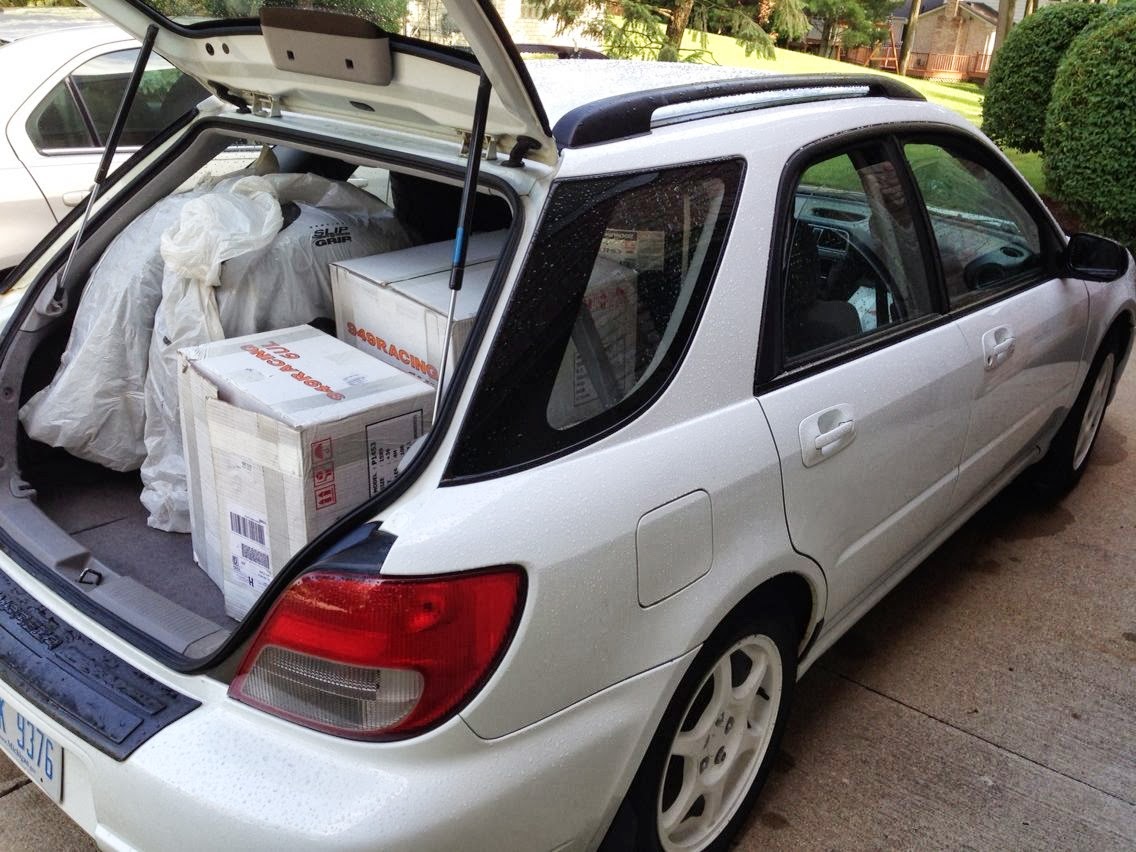
On Thursday, I loaded my car with wheels and tires to meet up with my buddy, who is a tire technician. He hooked it up, and now I have summer tires on the Subaru again, and the RS3's are mounted on my 6ul's. Here's my wagon doing what wagons do best!
Once the tires were mounted, I assembled the rest of the suspension so that I could mount the wheels and put the car on the ground. I also installed the rear differential and axles since the wheel bearings felt a bit sloppy before the axles were in, and the nuts torqued down. I forgot to mention before that the V8R hubs, new wheel bearings, and extended ARP wheel studs have been pressed together so everything was ready to go. This is the first time the car has been on the ground in nearly a year.
Although I have absolutely no desire to slam this car, the 4x4 status which you see in this picture will not be retained, and is in part due to the lack of weight in the car at this point in time. This height, however, is very useful for getting the car on and off of trailers.
Speaking of trailers, I loaded the car up on Friday and hauled it to TRF for a 3/4 cage. I should have the car back in about three weeks.
Reply
0
0
Thread Starter
Junior Member
iTrader: (2)
Joined: Nov 2011
Posts: 252
Total Cats: 17
From: Troy, Michigan
7-11-2013:
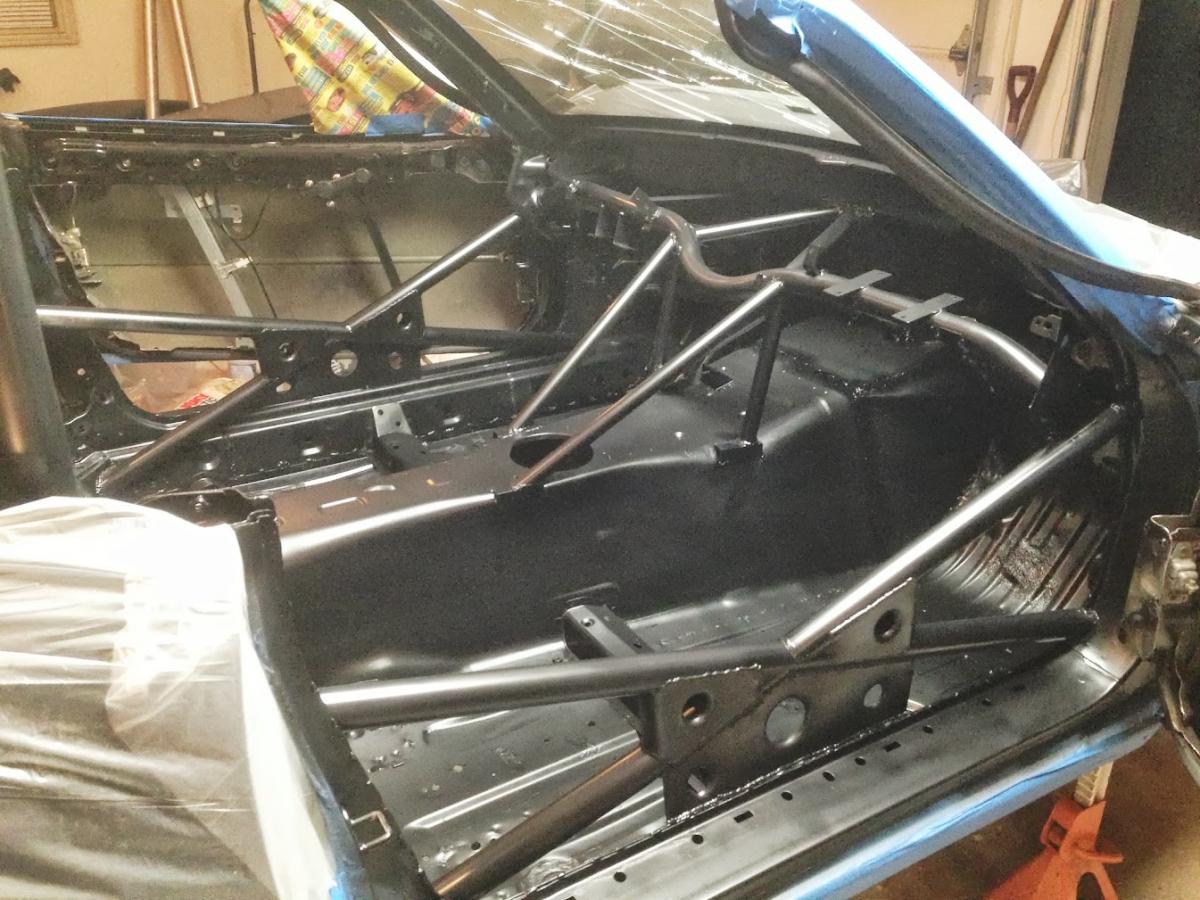
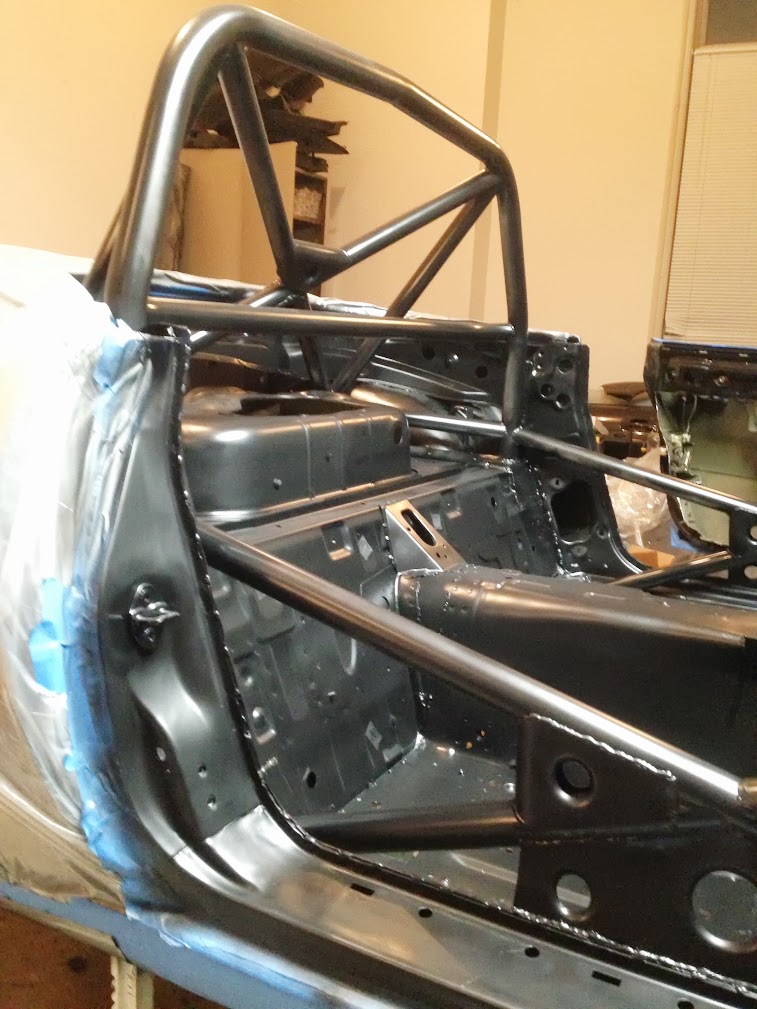
I got an update on the cage last night and it's nearly done! Ryan is doing great work and I can't wait to pick the car up and see everything in person. All the cage needs now is some gussets. The main hoop is 1-3/4" .095 DOM and everything else is 1.5" .095 DOM.

I got an update on the cage last night and it's nearly done! Ryan is doing great work and I can't wait to pick the car up and see everything in person. All the cage needs now is some gussets. The main hoop is 1-3/4" .095 DOM and everything else is 1.5" .095 DOM.
Reply
0
0
Thread Starter
Junior Member
iTrader: (2)
Joined: Nov 2011
Posts: 252
Total Cats: 17
From: Troy, Michigan
Here's another update, consisting almost entirely of deplorably bad iphone photos. Enjoy!
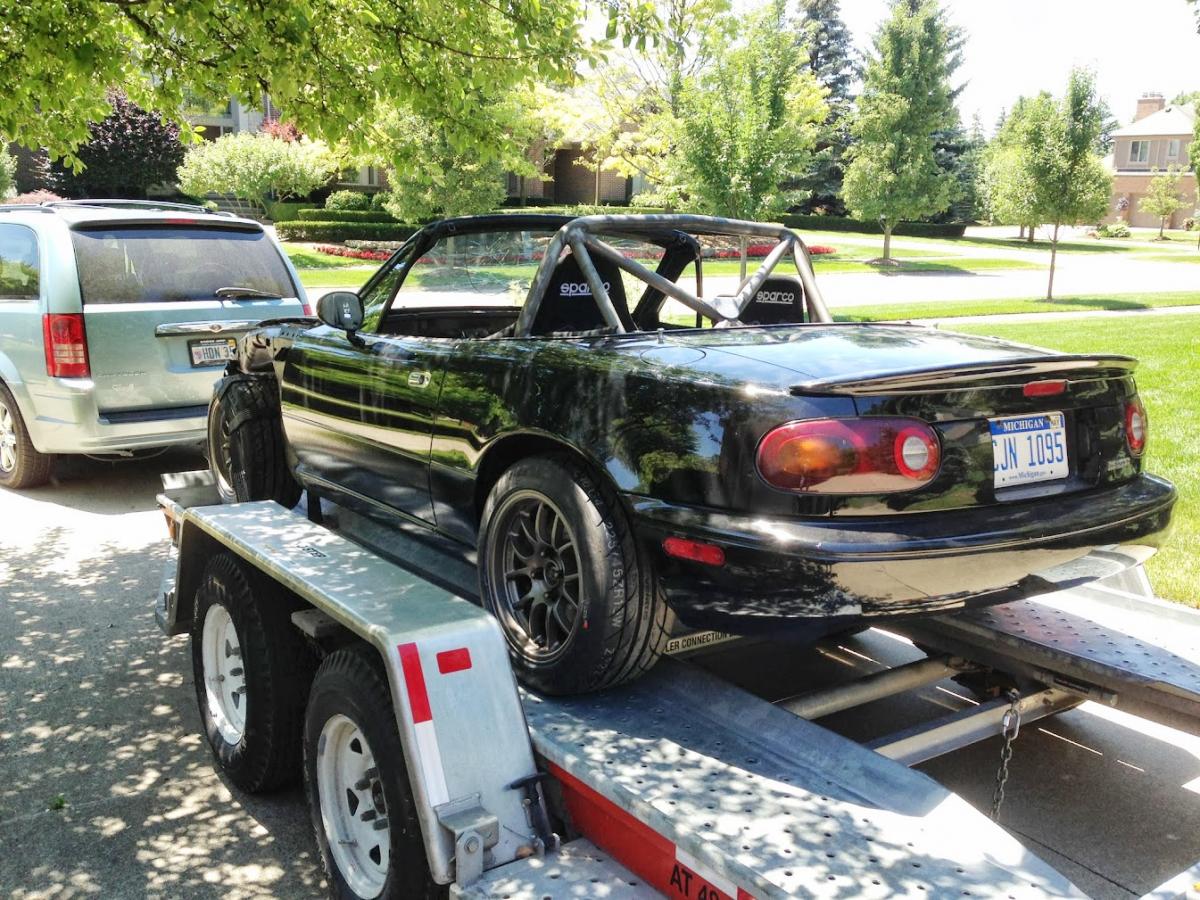
The car has arrived home from the fabricator with the addition of a cage. The Town and Country tows like a champ!
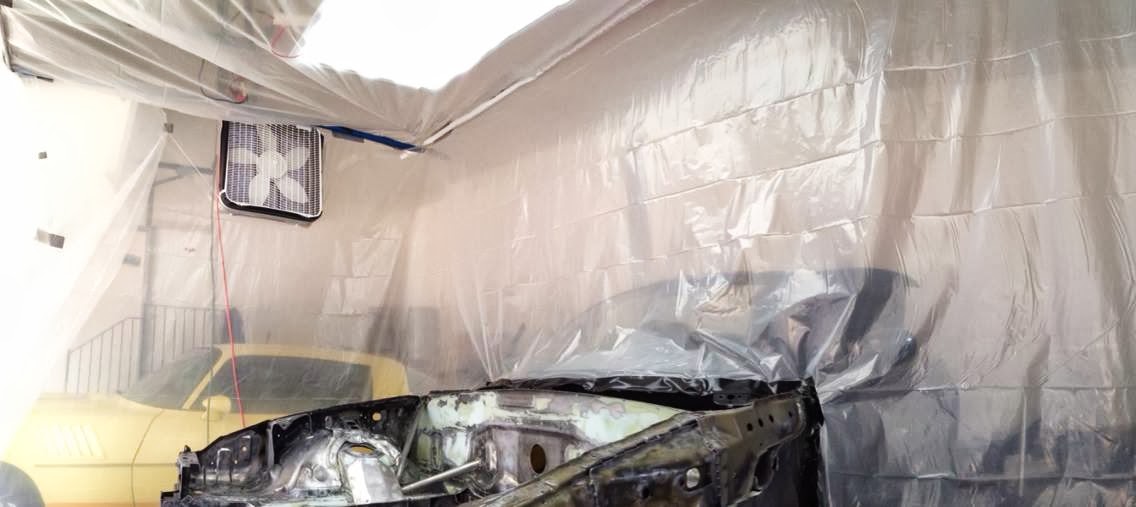
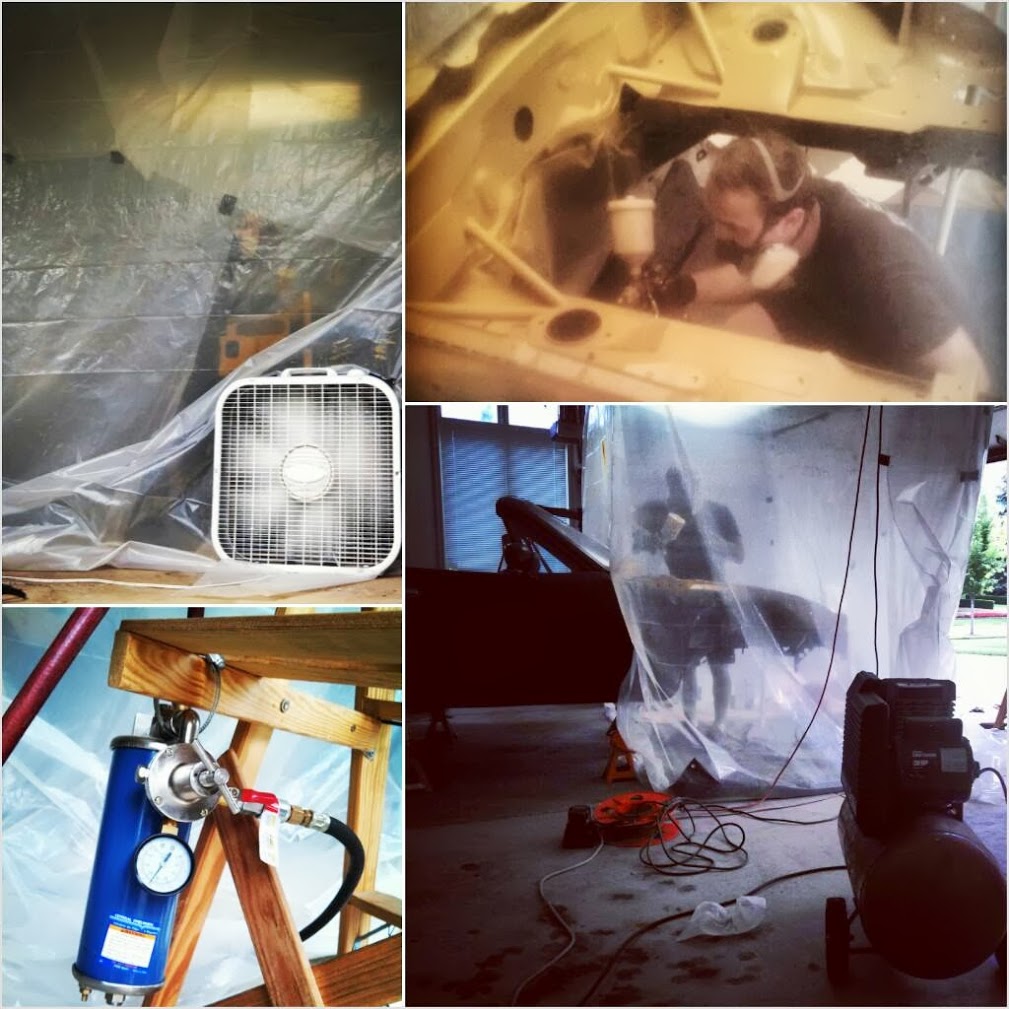
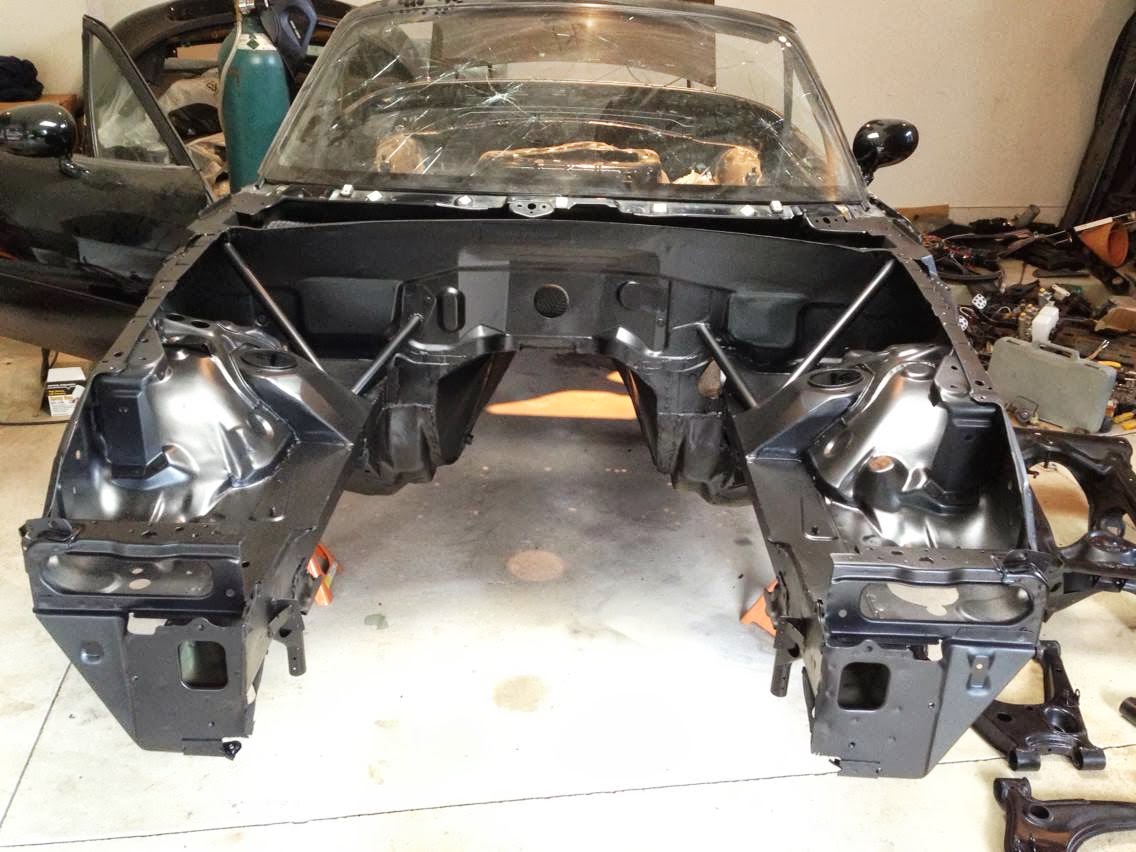
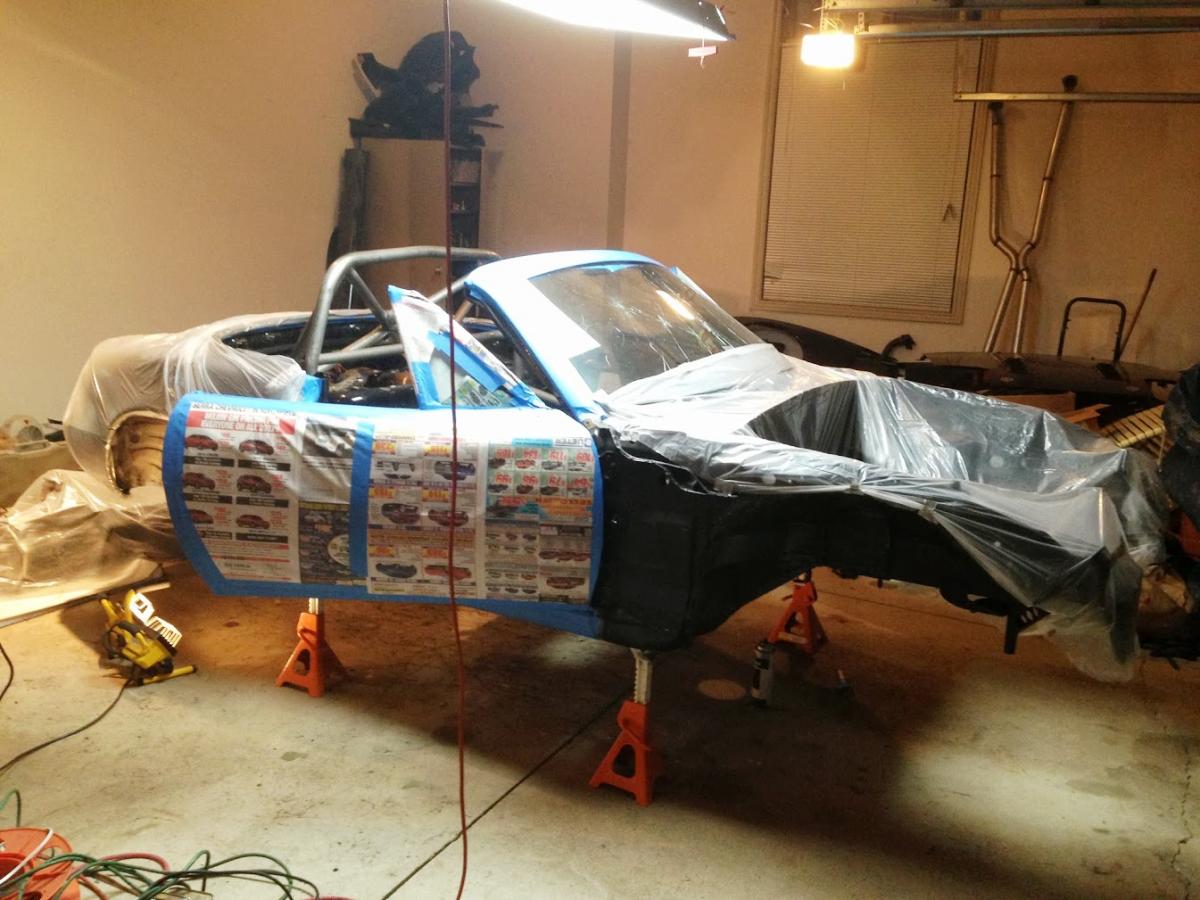
I masked off the exterior as soon as I could in order to safely paint the interior and underbody.
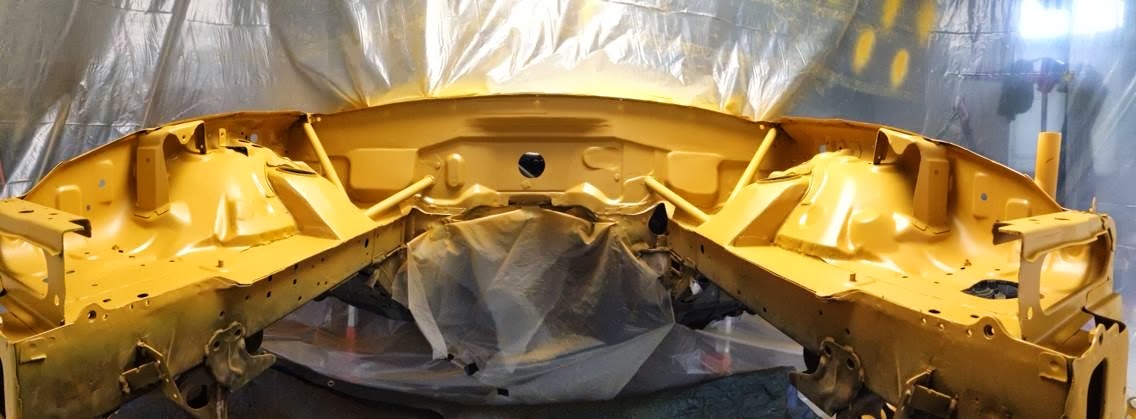
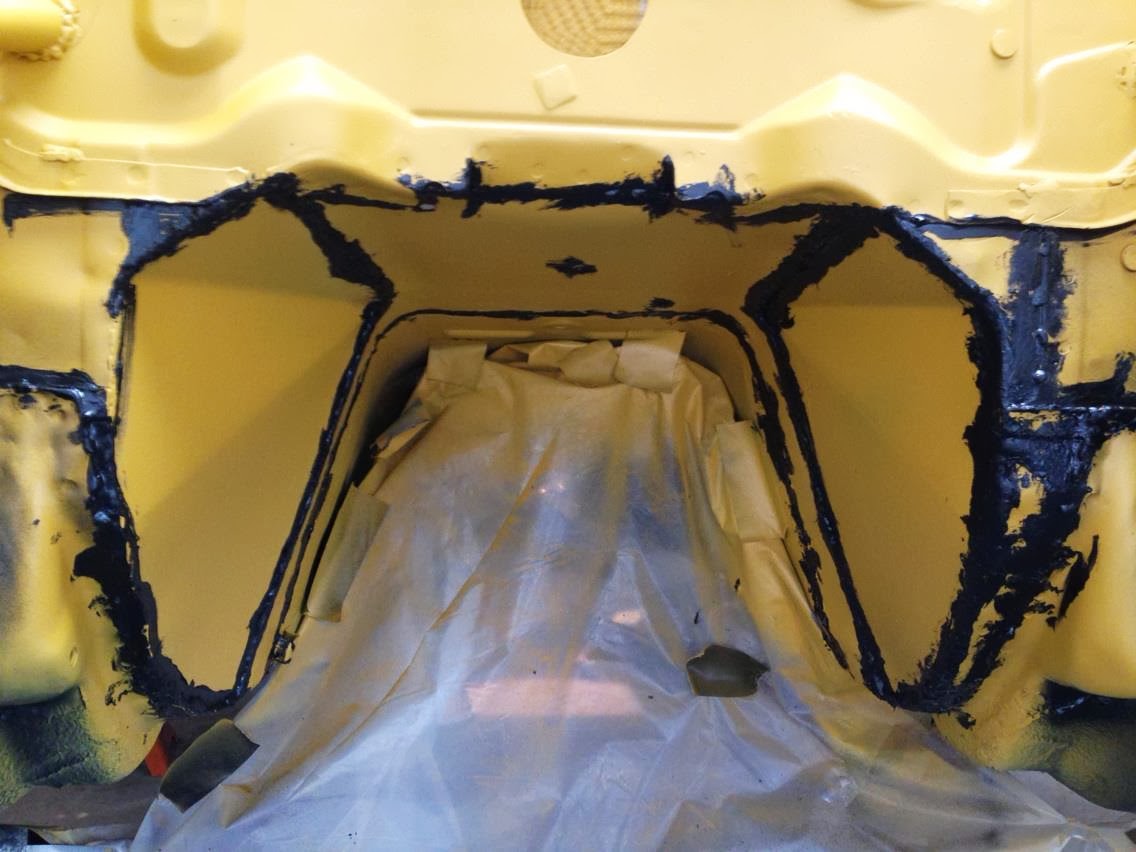
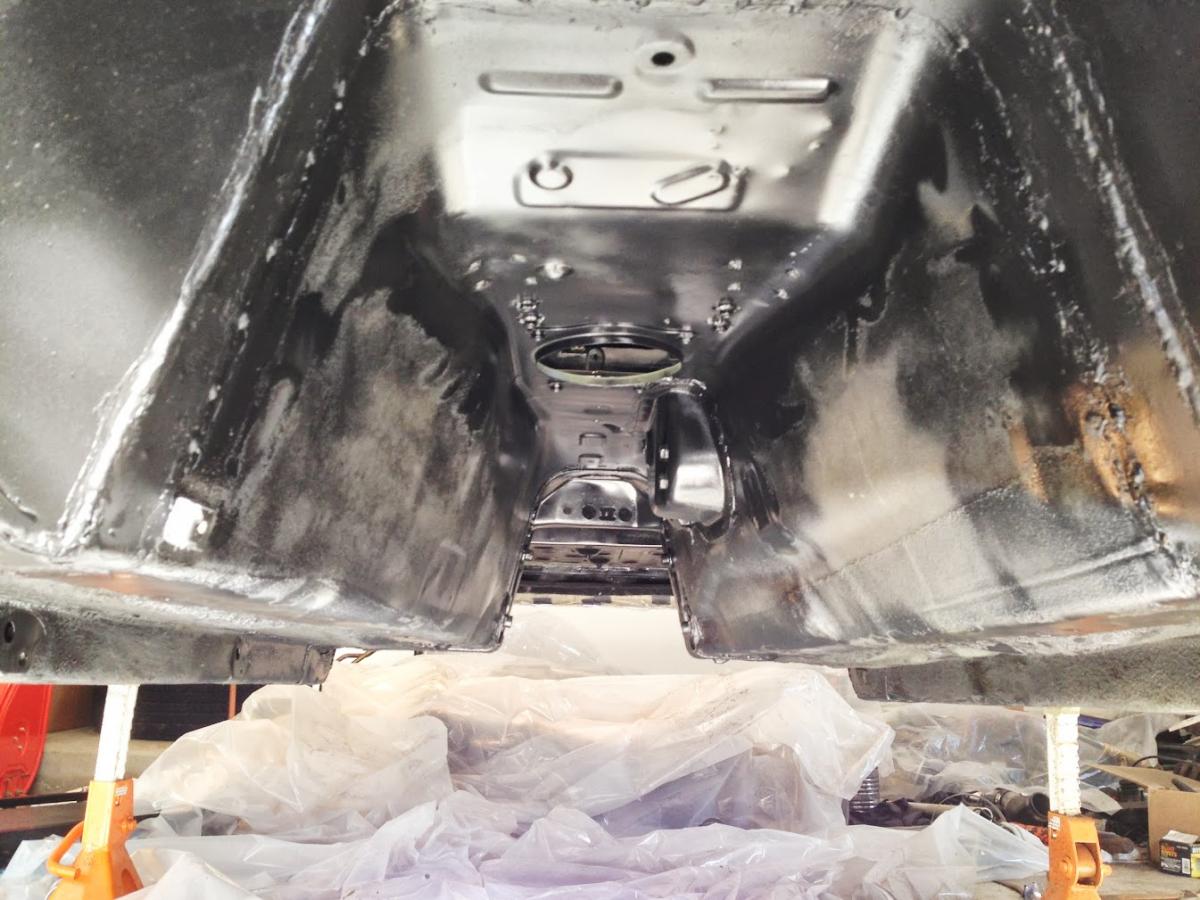
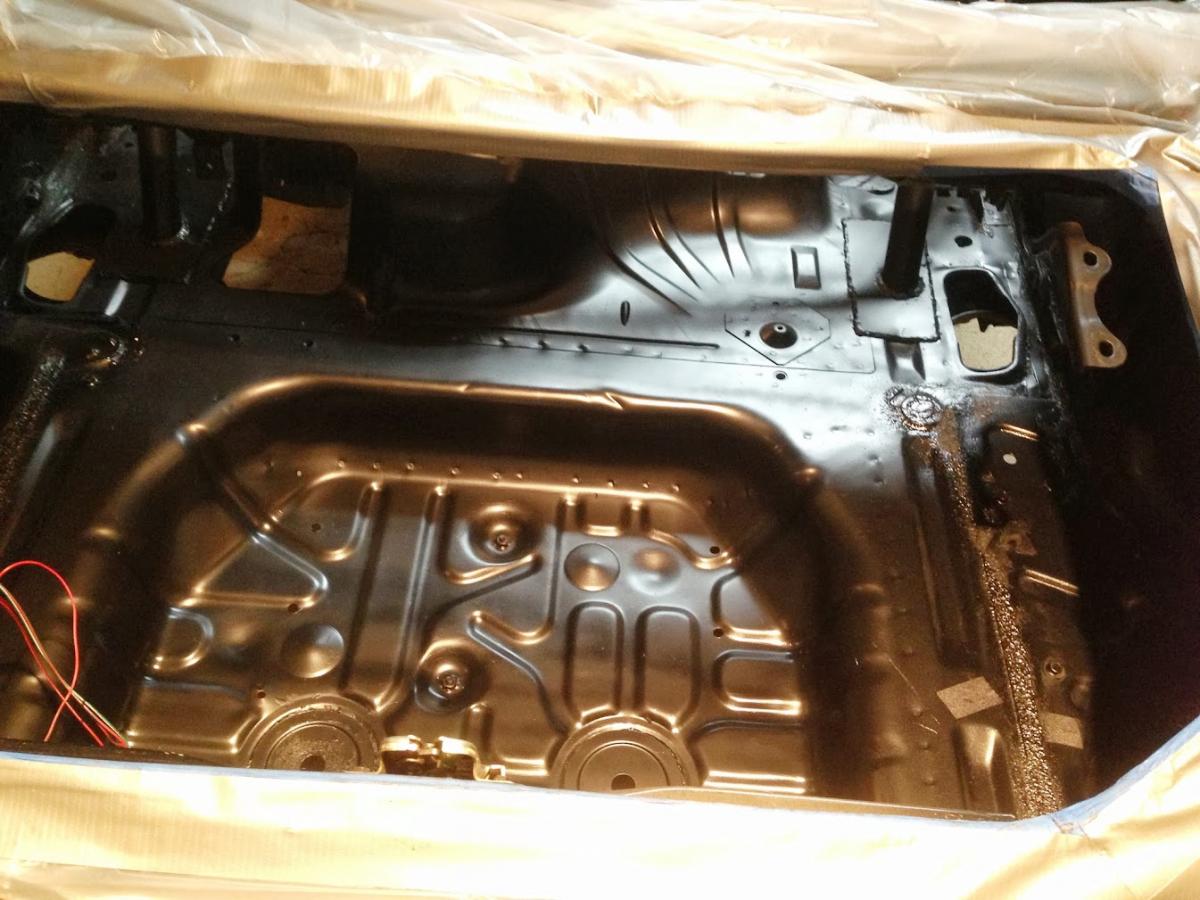
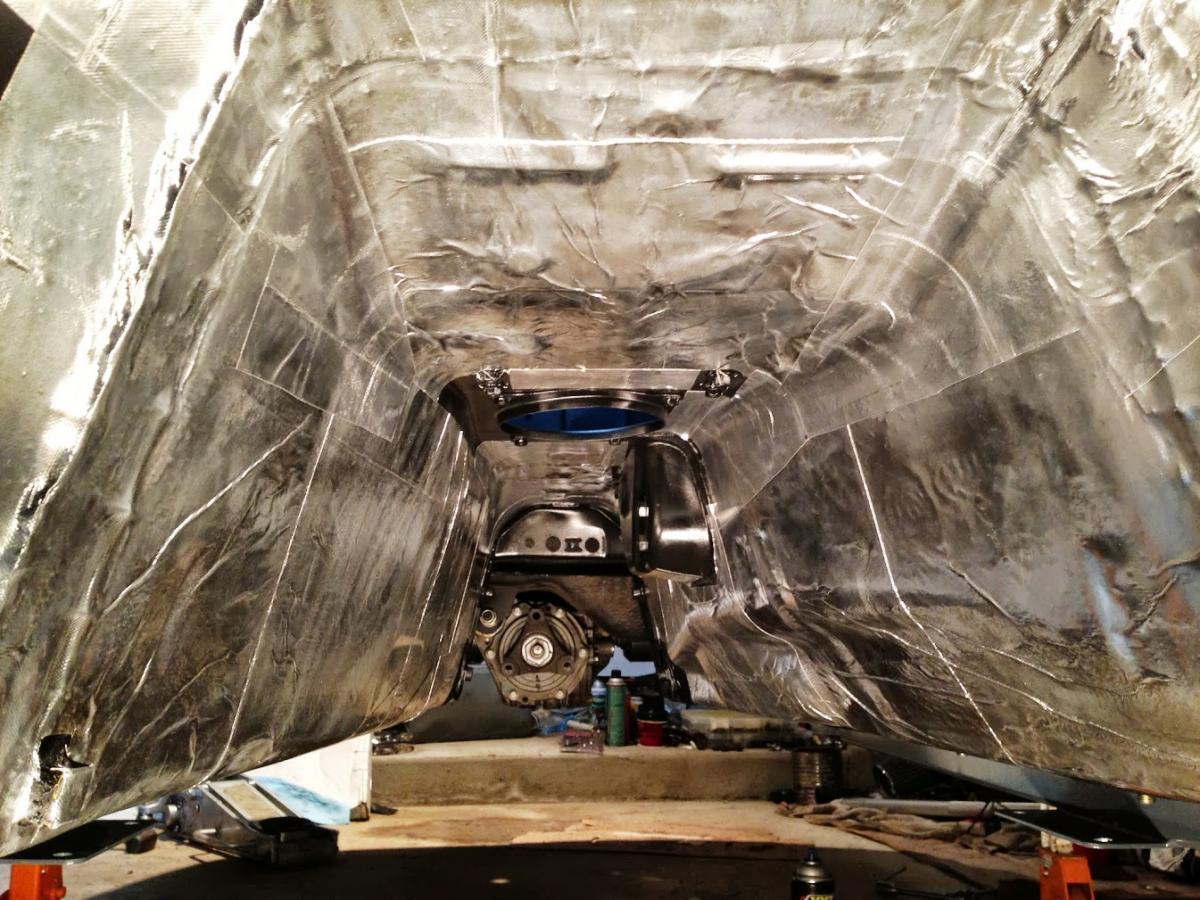
I tackled the underbody before painting the interior. Anything that had any semblance to rust was attacked with a wire wheel, rubbed down with lacquer thinner, painted, and sprayed with undercoat. Due to the base plates of the cage and the stitch welding of the chassis, quite a few areas had to be touched up. I also used this as an opportunity to spray the insides of the frame rails and other tight areas with internal frame rail coating, which is a sticky rust encapsulator that can be sprayed almost anywhere via a multidirectional nozzle at the end of a skinny hose.
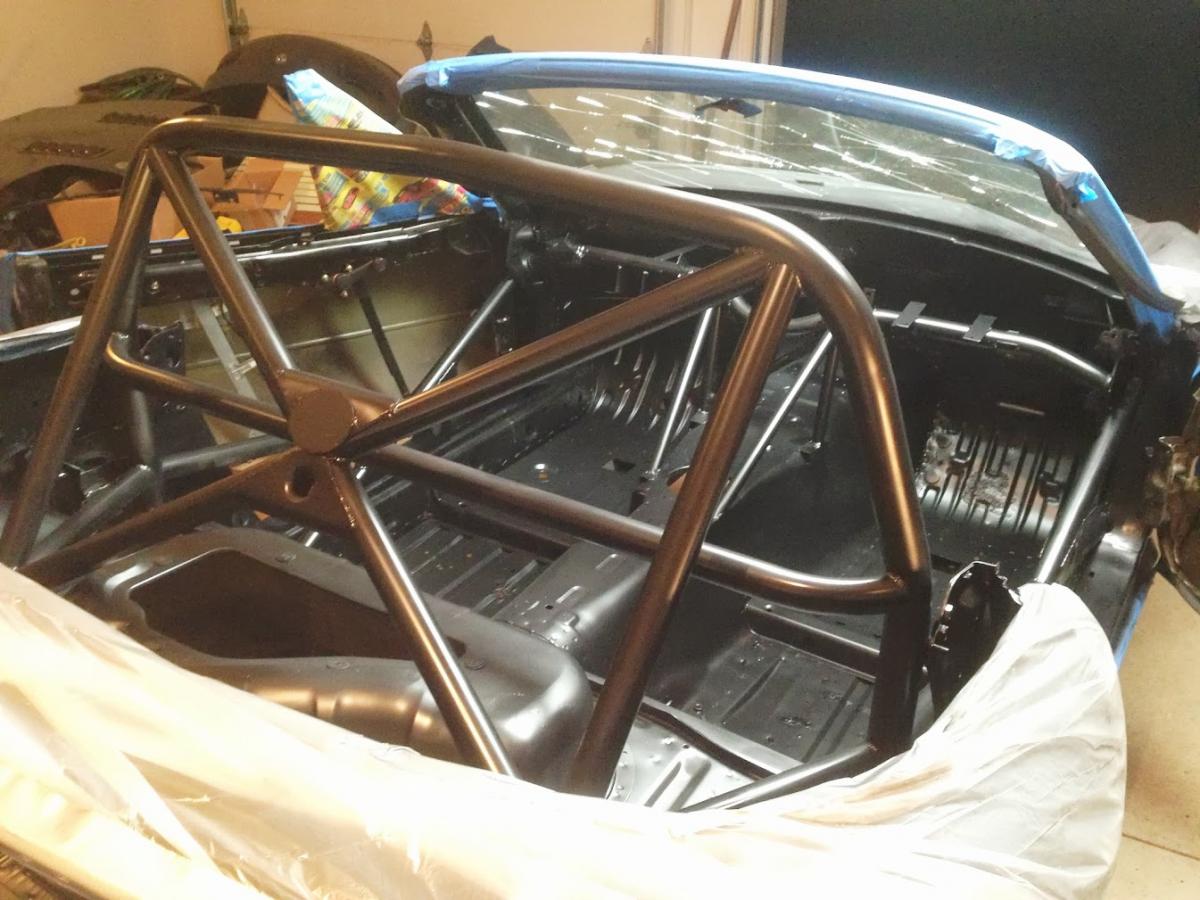
Interior paint prep involved the extensive wire-wheeling of all accessible surfaces with extra attention paid to the welds, vacuuming, attacks via red Scotch Brite pads, and a few lacquer thinner rub downs. I used VHT roll bar paint. The stuff comes in matte and glossy. I chose the glossy since I read that it produces a nice semi-gloss finish--it did and looks good. It's an epoxy paint that dries quickly and apparently has a self etching component so that it can be sprayed directly over bare metal. Initial impressions are great. This stuff seems to be very durable.
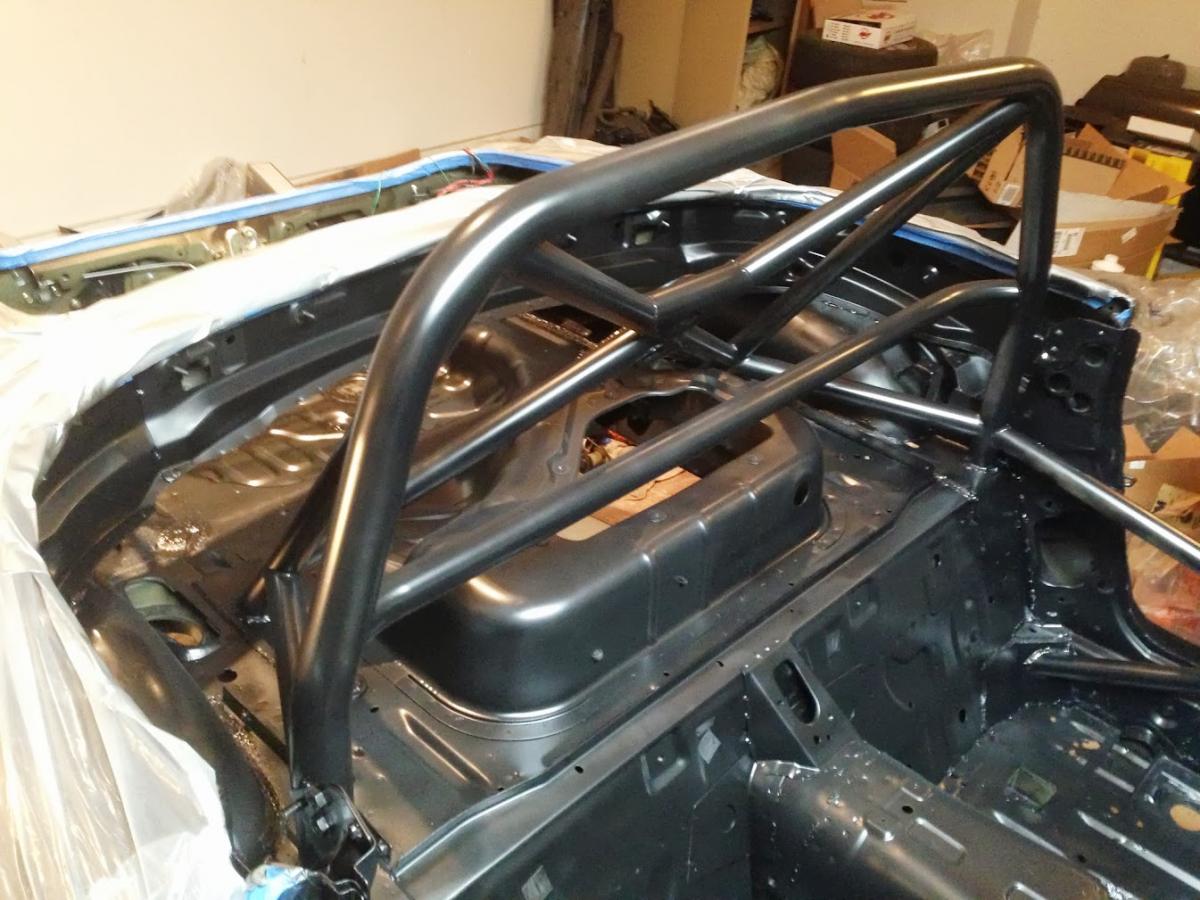
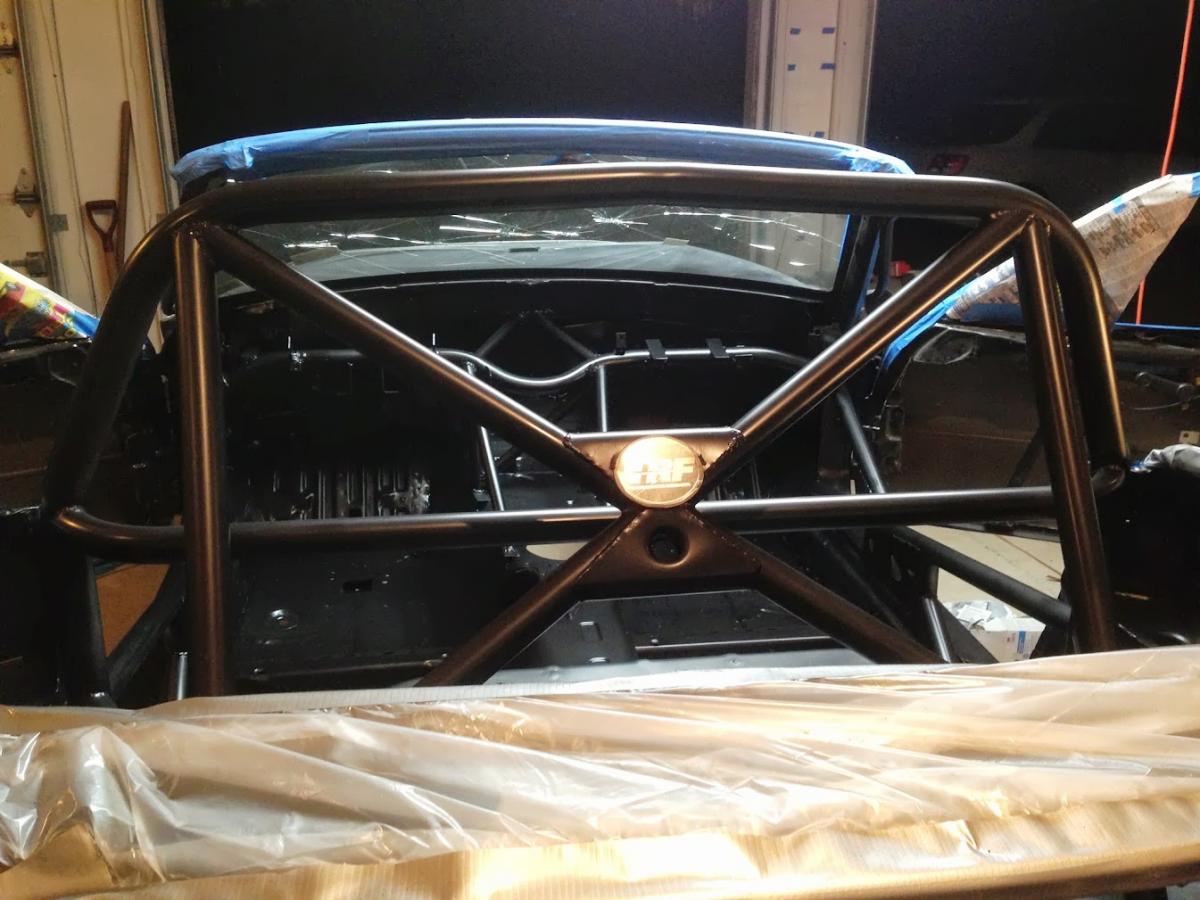
The car has arrived home from the fabricator with the addition of a cage. The Town and Country tows like a champ!
I masked off the exterior as soon as I could in order to safely paint the interior and underbody.
I tackled the underbody before painting the interior. Anything that had any semblance to rust was attacked with a wire wheel, rubbed down with lacquer thinner, painted, and sprayed with undercoat. Due to the base plates of the cage and the stitch welding of the chassis, quite a few areas had to be touched up. I also used this as an opportunity to spray the insides of the frame rails and other tight areas with internal frame rail coating, which is a sticky rust encapsulator that can be sprayed almost anywhere via a multidirectional nozzle at the end of a skinny hose.
Interior paint prep involved the extensive wire-wheeling of all accessible surfaces with extra attention paid to the welds, vacuuming, attacks via red Scotch Brite pads, and a few lacquer thinner rub downs. I used VHT roll bar paint. The stuff comes in matte and glossy. I chose the glossy since I read that it produces a nice semi-gloss finish--it did and looks good. It's an epoxy paint that dries quickly and apparently has a self etching component so that it can be sprayed directly over bare metal. Initial impressions are great. This stuff seems to be very durable.
Reply
0
0
Thread Starter
Junior Member
iTrader: (2)
Joined: Nov 2011
Posts: 252
Total Cats: 17
From: Troy, Michigan
I added speed holes to my steering wheel spacer and painted it. My only regret is not adding more speed holes.
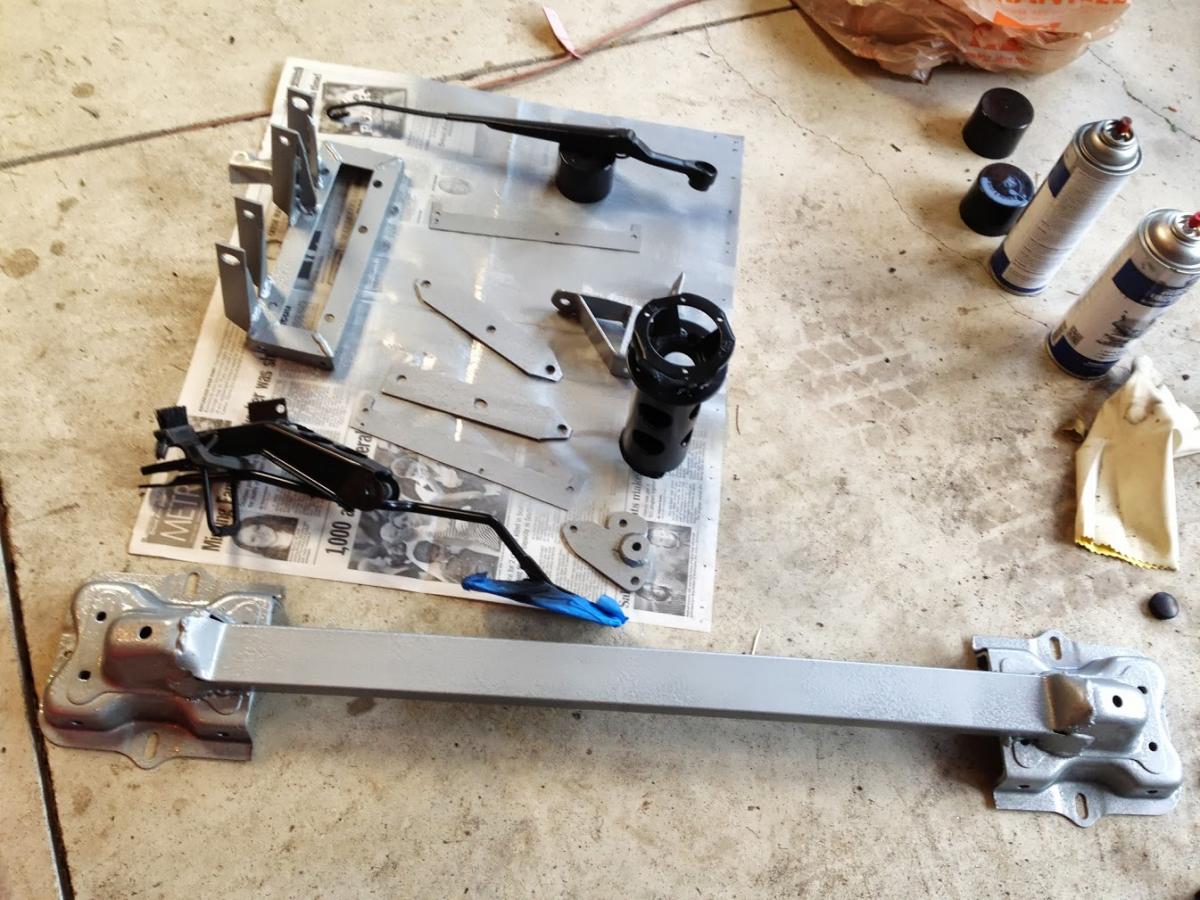
I painted the seat mounts and some other nonsense. Rustoleum hammertone for the silver bits and Eastwood extreme chassis black for the rest.
From this perspective, my car is indistinguishable from a lunar lander.
Here's my bird.
And there you have it--this thread is finally current.
I painted the seat mounts and some other nonsense. Rustoleum hammertone for the silver bits and Eastwood extreme chassis black for the rest.
From this perspective, my car is indistinguishable from a lunar lander.
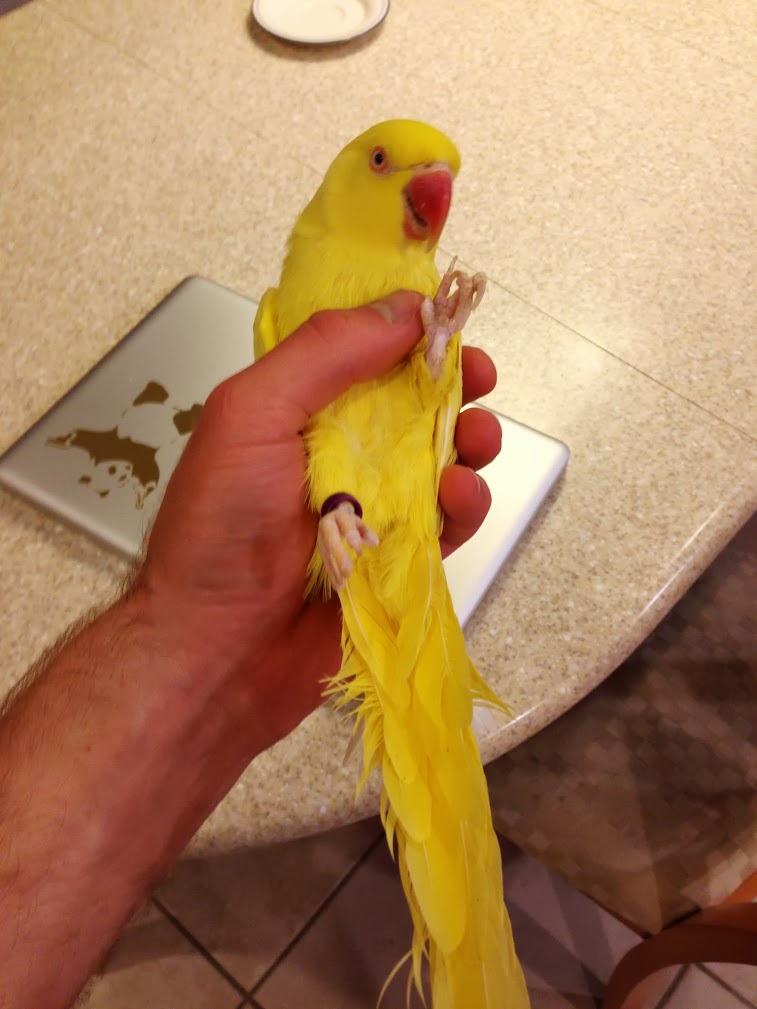
Here's my bird.
And there you have it--this thread is finally current.
Reply
3
3


