
Yezzir Montego 94-M Turbo Build


Are you talking about the ziptie and the rubber? that was just to serve as padding, to keep it from denting when the exhaust was knocking against the diff. It was taken off after the flanges on the test pipe were modified. The before and after pics just show the gap distance. However, it still knocks a couple times under load
Reply
 0
0

0

Thread Starter
Junior Member
Joined: Mar 2013
Posts: 111
Total Cats: 42
From: Redmond, WA
I got my hardtop painted!
Dropped it off last Thursday along with my gas lid for color matching. Got it back today.
Before this, It had a crap maaco-quality red paintjob and they did a fail masking job on the window moulding, so there was red paint on the edge of it all over.
The guy painting this was saying that the moulding would need to be replaced so he ordered the oem part. However, this thing will just not fit right at the tighter corners on the sides unless you take the window out. So, it's currently without the rubber moulding until i get around to having that done. Good thing it still looks decent without it on, and it doesn't leak.
Pics soon after i got home. It was raining...
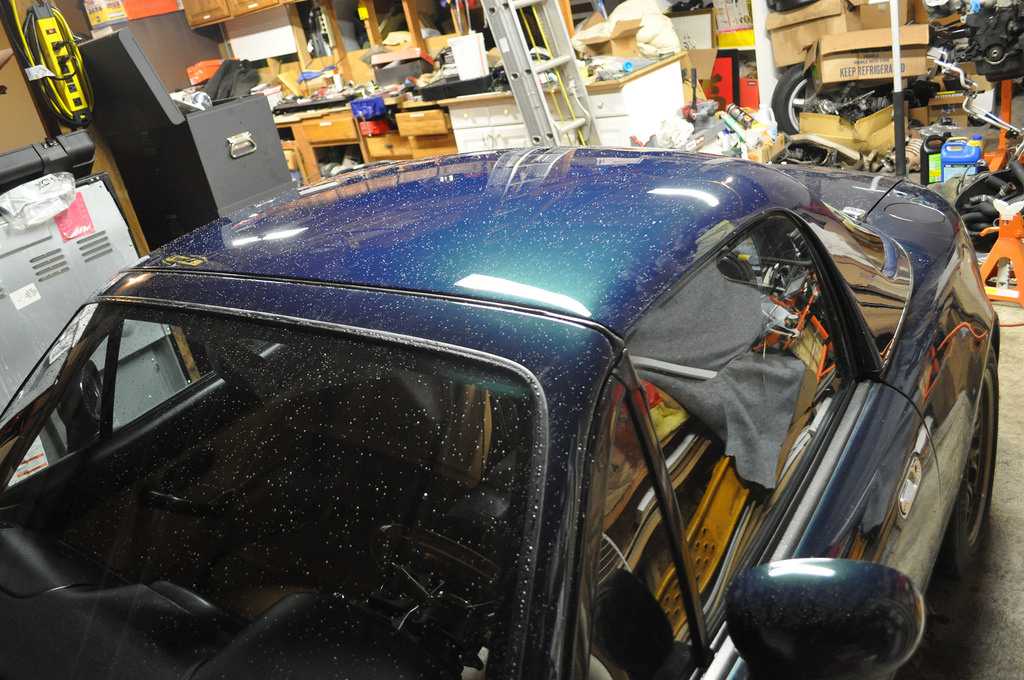
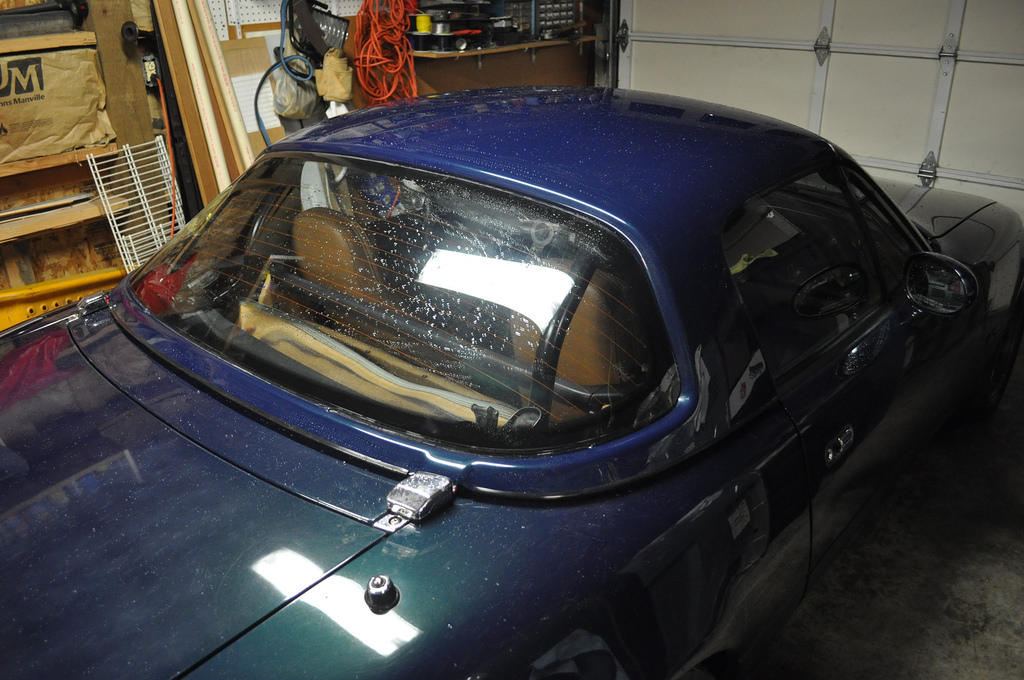
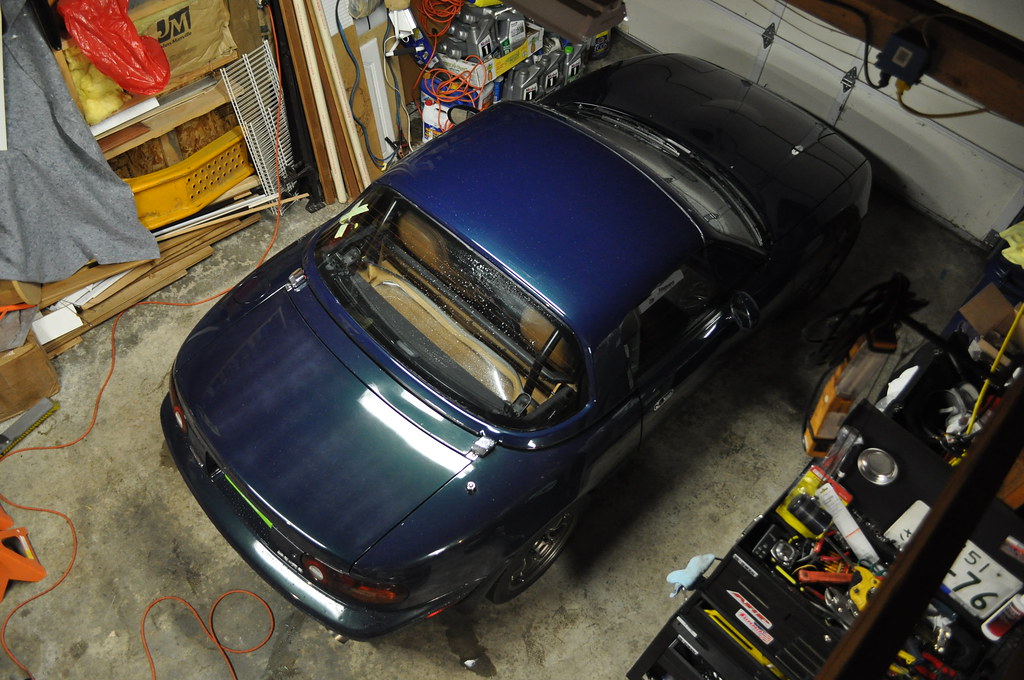
The lighting/angle of this shot makes the blue look off but the match is actually spot on. Still some old, red paint on the chrome latches that I need to get rid of or hide...
Dropped it off last Thursday along with my gas lid for color matching. Got it back today.
Before this, It had a crap maaco-quality red paintjob and they did a fail masking job on the window moulding, so there was red paint on the edge of it all over.
The guy painting this was saying that the moulding would need to be replaced so he ordered the oem part. However, this thing will just not fit right at the tighter corners on the sides unless you take the window out. So, it's currently without the rubber moulding until i get around to having that done. Good thing it still looks decent without it on, and it doesn't leak.
Pics soon after i got home. It was raining...
The lighting/angle of this shot makes the blue look off but the match is actually spot on. Still some old, red paint on the chrome latches that I need to get rid of or hide...
Reply
1
1


Thread Starter
Junior Member
Joined: Mar 2013
Posts: 111
Total Cats: 42
From: Redmond, WA
Not as much to post nowadays but I'll continue to update
Reply
0
0
Haha there is always more to do! I'm sure there will be changes here and there to update us on!
Reply
0
0

Thread Starter
Junior Member
Joined: Mar 2013
Posts: 111
Total Cats: 42
From: Redmond, WA
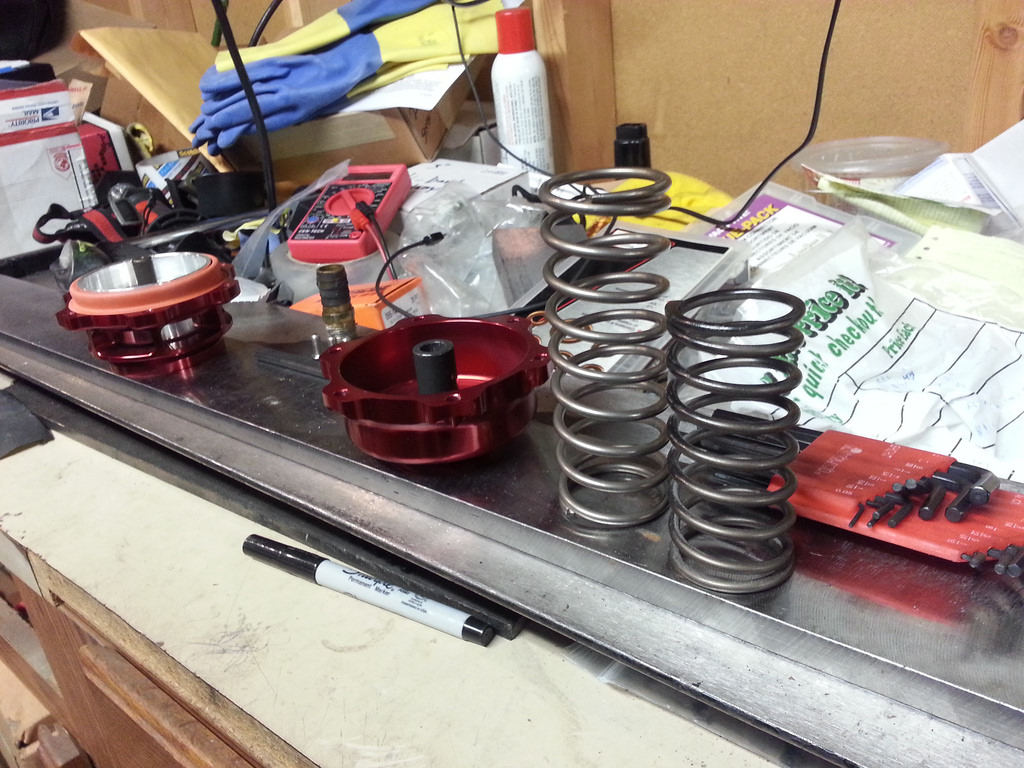
Changed out the spring on my BOV (TiAL Q 50mm) today. The longer one is spec'd for 11psi and the shorter one is 6psi. Now, it should be able to open up and make the proper *pshhhh* sound instead of the fluttering sound.
Reply
0
0


Thread Starter
Junior Member
Joined: Mar 2013
Posts: 111
Total Cats: 42
From: Redmond, WA
 Turbo is an Isis T25/28 SR20DET replacement, from enjukuracing.com
Reply
0
0
FAUK that sucks. Many people have this issue(including myself) and just run it. Mine for instance is a GFB Mach 1001 and it leaks at idle. However seals as soon as I touch throttle then releases when I release preventing surge. Since I run off of MAP it doesn't effect idle and since it leaks blowing out at idle nothings going in. Im still waiting for my GFB replacement spring to come in but nonetheless a lot of people leave it and run a leaking at idle BOV with no issues.
Reply
0
0
Thread Starter
Junior Member
Joined: Mar 2013
Posts: 111
Total Cats: 42
From: Redmond, WA
WHAT YOU DO WHEN YOU CAN'T WELD - some more delicious fabrication
Note: This is for my brother's miata, not mine (he doesn't care enough to make a build thread). He upgraded to ARTech manifold and downpipe so his old heat shield doesn't fit the new setup. He decided to make a custom one and I documented the process.
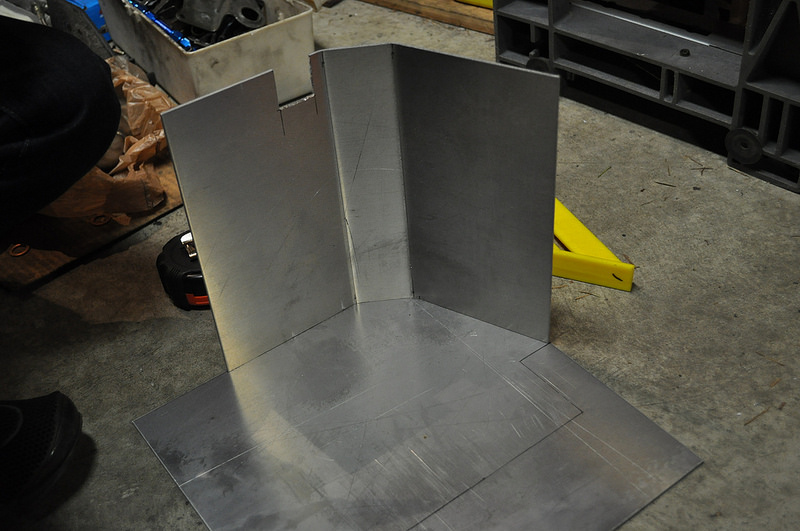
Bent the aluminum and matching up with the cardboard template
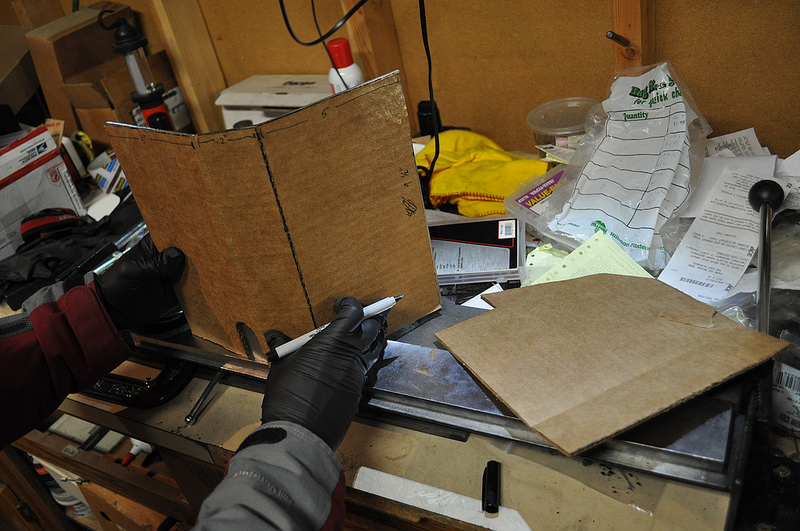
The scenario
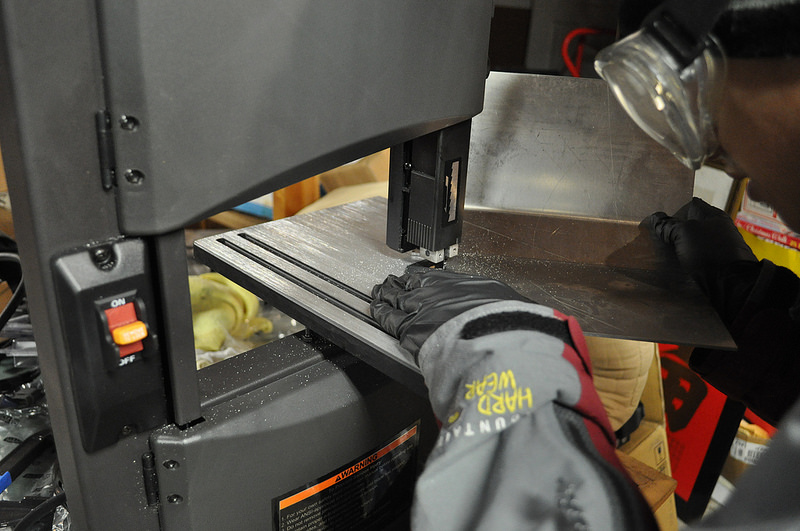
We bought a bandsaw for this!
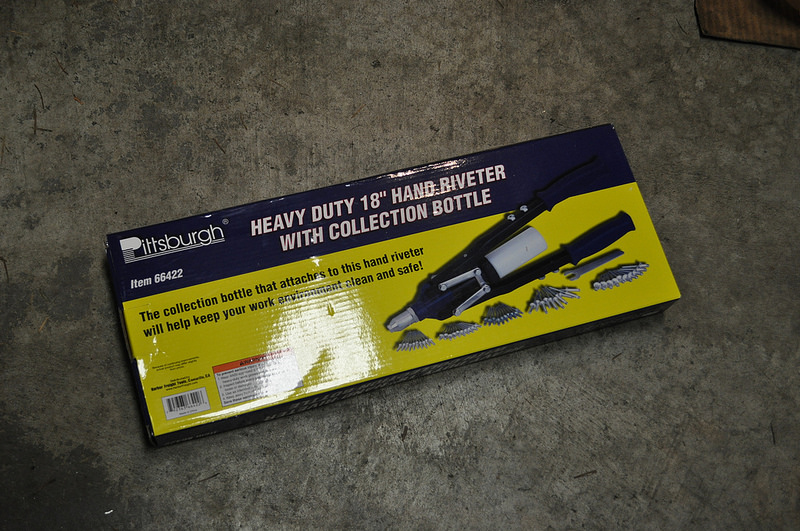
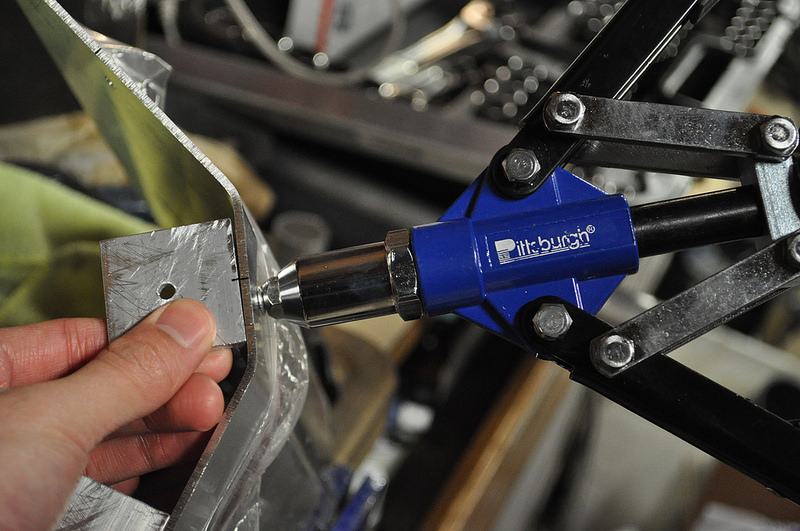
And also a riveter
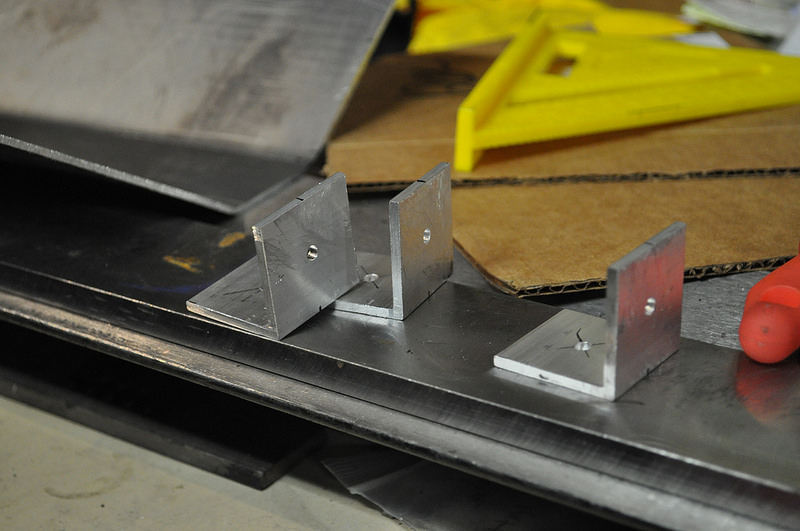
Brackets for the rivets
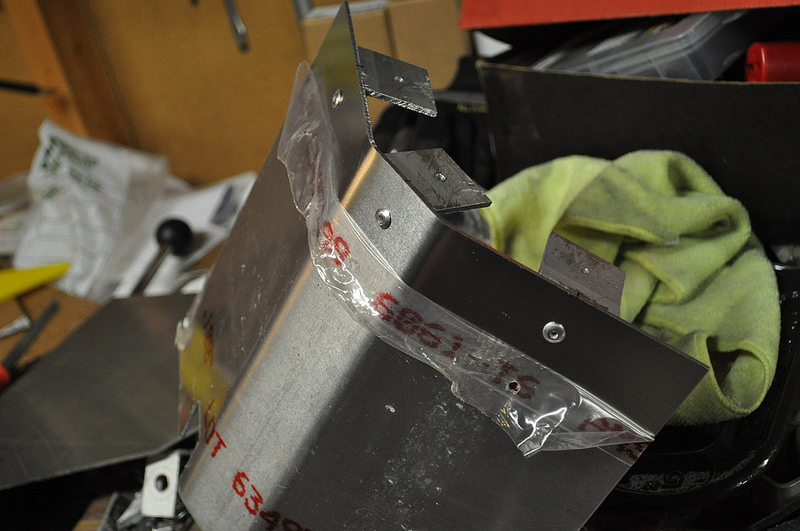
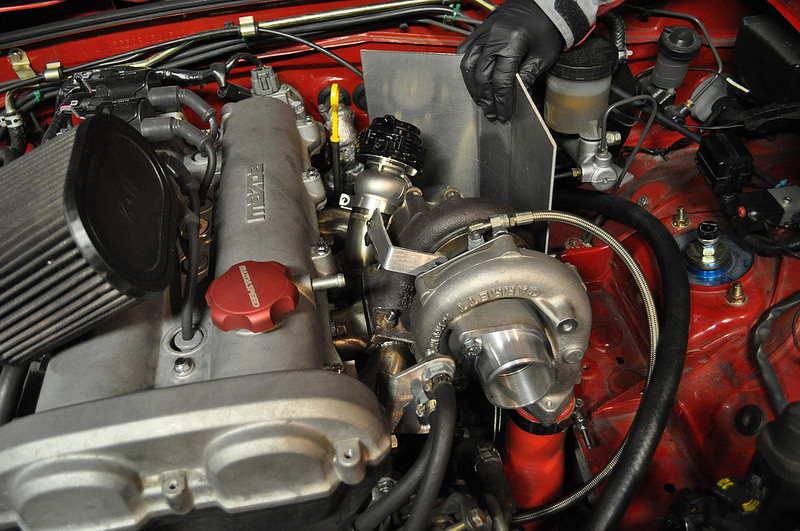
Test fitting and adjusting
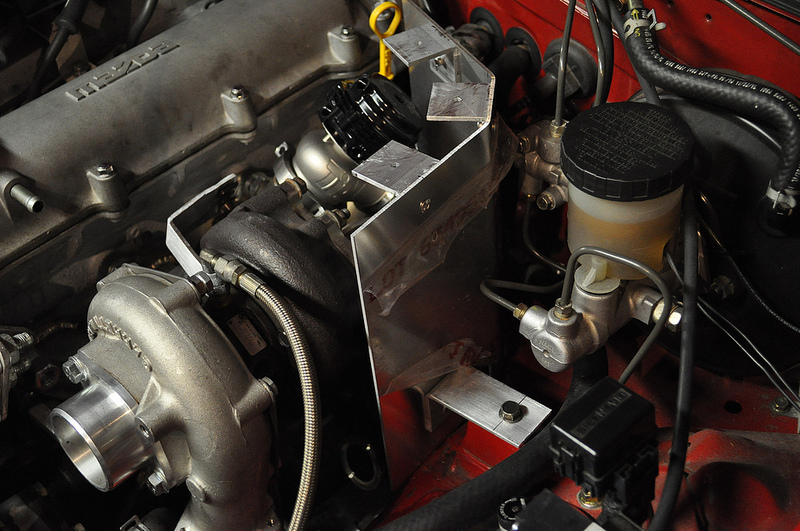
and boom!
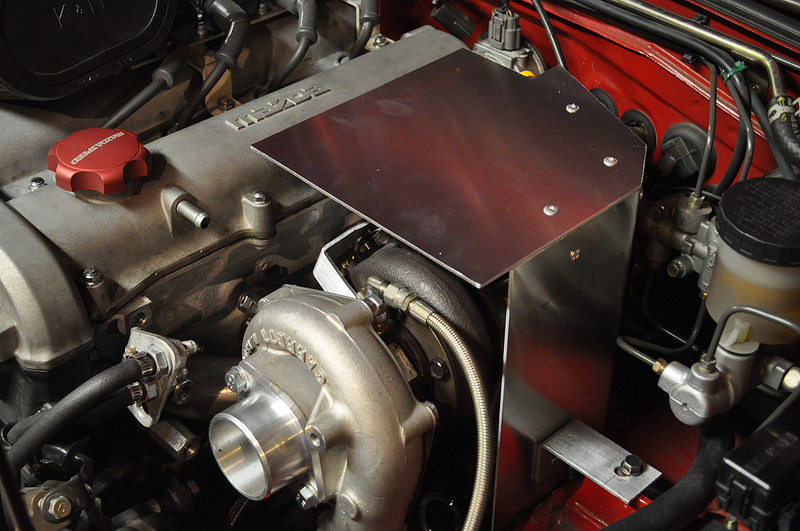
Spent hours in the freezing garage but i guess it was worth it
Note: This is for my brother's miata, not mine (he doesn't care enough to make a build thread). He upgraded to ARTech manifold and downpipe so his old heat shield doesn't fit the new setup. He decided to make a custom one and I documented the process.
Bent the aluminum and matching up with the cardboard template
The scenario
We bought a bandsaw for this!
And also a riveter
Brackets for the rivets
Test fitting and adjusting
and boom!
Spent hours in the freezing garage but i guess it was worth it
Reply
3
3
Junior Member
Joined: Jun 2008
Posts: 414
Total Cats: 69
From: Finland
Reply
0
0
Thread Starter
Junior Member
Joined: Mar 2013
Posts: 111
Total Cats: 42
From: Redmond, WA
My bro made it! I just took pictures and wanted to share because he won't. But I helped a little.
Yeah, I thought they were pretty sharp too. Thanks for the +1!
Reply
0
0
Thread Starter
Junior Member
Joined: Mar 2013
Posts: 111
Total Cats: 42
From: Redmond, WA
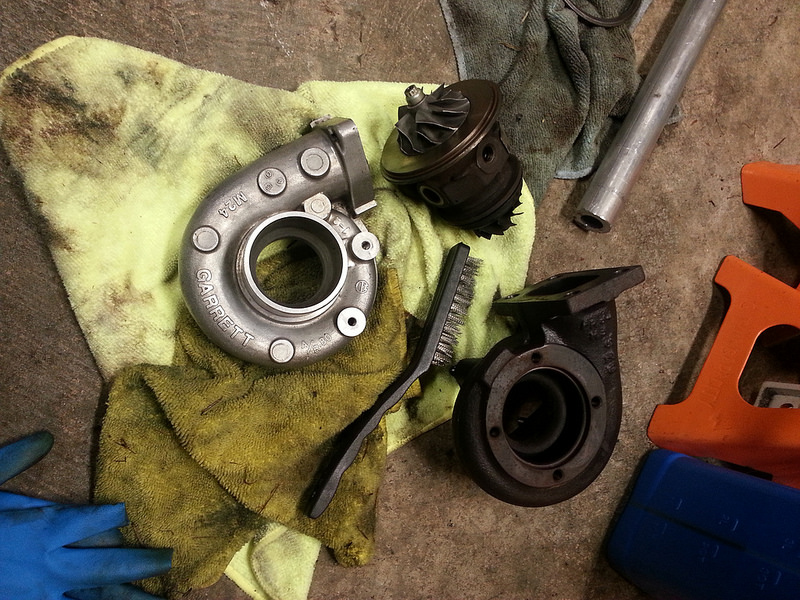
Decided to rebuild a T25 turbo on the side and possibly use it instead of the Isis one that I currently have on. This is actually the turbo that I had originally intended to use for my build, but it was pretty seized and I wanted to skip all that and go with something brand new. Now it's time to do something with the Garrett.
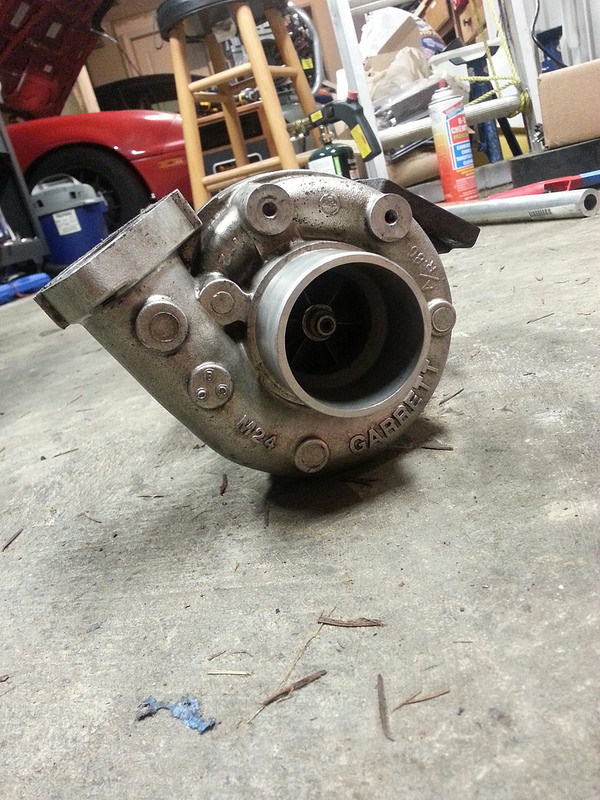
Well tonight, after a lot of PB blaster, flame torch and a harbor freight snap ring pliers set, the turbo finally came apart. The rebuild kit arrives tomorrow, but I started the cleaning process.
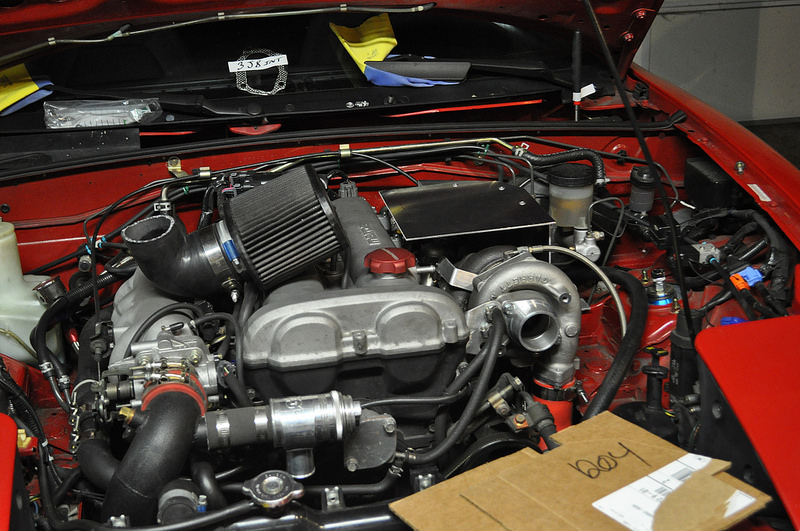
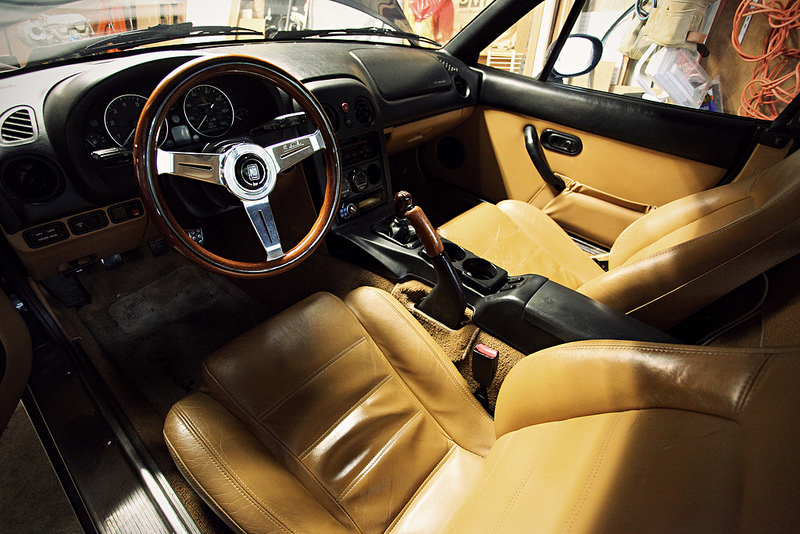
Aaand a nice photo of my interior that my buddy took when he was over.
Well tonight, after a lot of PB blaster, flame torch and a harbor freight snap ring pliers set, the turbo finally came apart. The rebuild kit arrives tomorrow, but I started the cleaning process.
Aaand a nice photo of my interior that my buddy took when he was over.
Reply
2
2


