
New Manifold and DP


Thread Starter
Elite Member
iTrader: (30)
Joined: Aug 2007
Posts: 7,329
Total Cats: 12
From: Va Beach
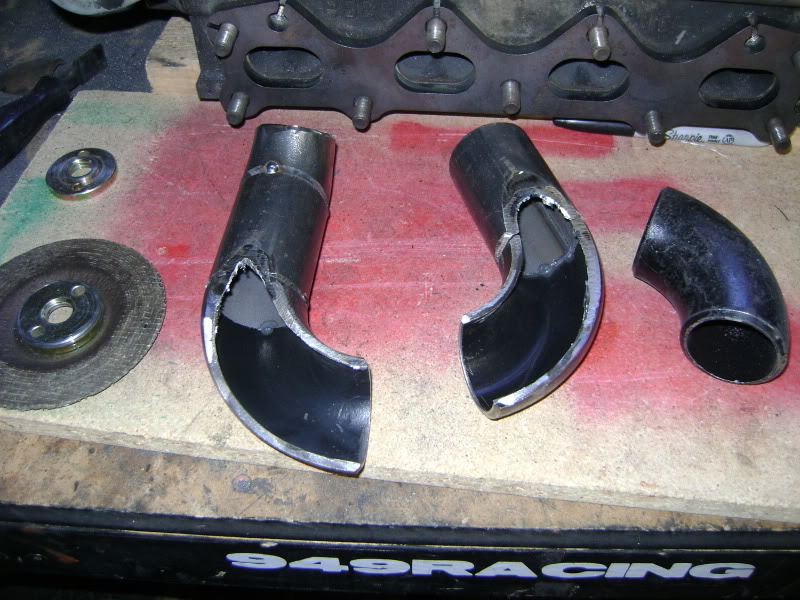
In the quest for more power and better spool I needed a new manifold and definitely a better down pipe. Wayne Curr is hooking it up with a replica Absurd flow manifold. I would've gone with Tim but he dosen't make 1.6 stuff. I've already talked to Tim and he's cool with us replicating his. Tim's design is IMO the best design for spool and top end.
Before and after dyno numbers coming soon.
__________________
Best Car Insurance | Auto Protection Today | FREE Trade-In Quote
Before and after dyno numbers coming soon.
__________________
Best Car Insurance | Auto Protection Today | FREE Trade-In Quote
Reply
 0
0

0

Thread Starter
Elite Member
iTrader: (30)
Joined: Aug 2007
Posts: 7,329
Total Cats: 12
From: Va Beach
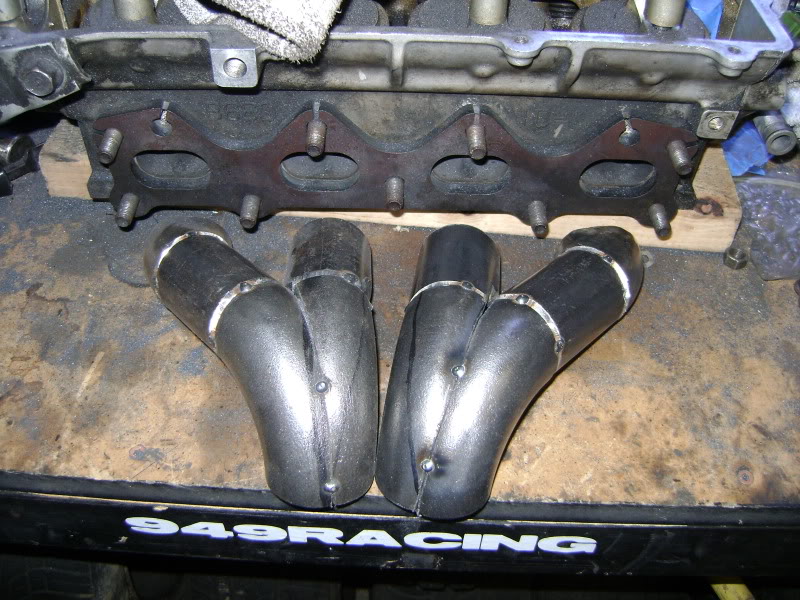
This should flow way better than my old cast mani and down pipe.
__________________
Best Car Insurance | Auto Protection Today | FREE Trade-In Quote
Reply
0
0


Very nice. I've got something similar on my bench and a new tank of argon in my back seat for the snow day tomorrow.
EDIT: I could do 1.6 manifolds, just not the downpipes, and not for wayne curr's price.
EDIT: I could do 1.6 manifolds, just not the downpipes, and not for wayne curr's price.
Reply
0
0


Actually I might make one for myself if I dont end up making a ramhorn. But that will definitely be the last one. These are a major bear to make in more ways than 5.
Reply
0
0
Thread Starter
Elite Member
iTrader: (30)
Joined: Aug 2007
Posts: 7,329
Total Cats: 12
From: Va Beach
Not at the moment, I probably will eventually though.
__________________
Best Car Insurance | Auto Protection Today | FREE Trade-In Quote
Reply
0
0

Reply
0
0
Reply
0
0
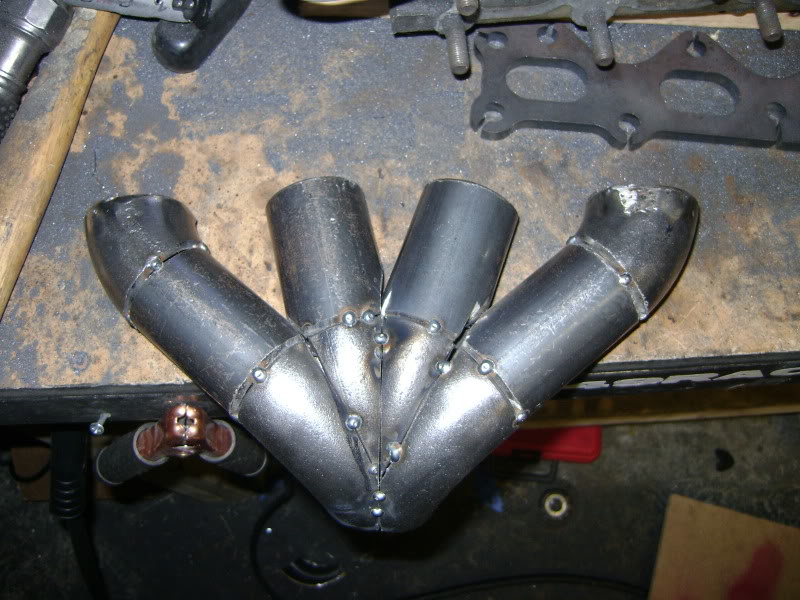
After that fourth photo above- is the next step for the flange ends to cut them straight across to fit flush on the flange face, or will there be more pipe making the connection to the flange? And isn't now the time to build the EWG setup given the project is in the works? Seems like the built engine and high boost are just asking for it. 
Reply
0
0

 People have no idea.
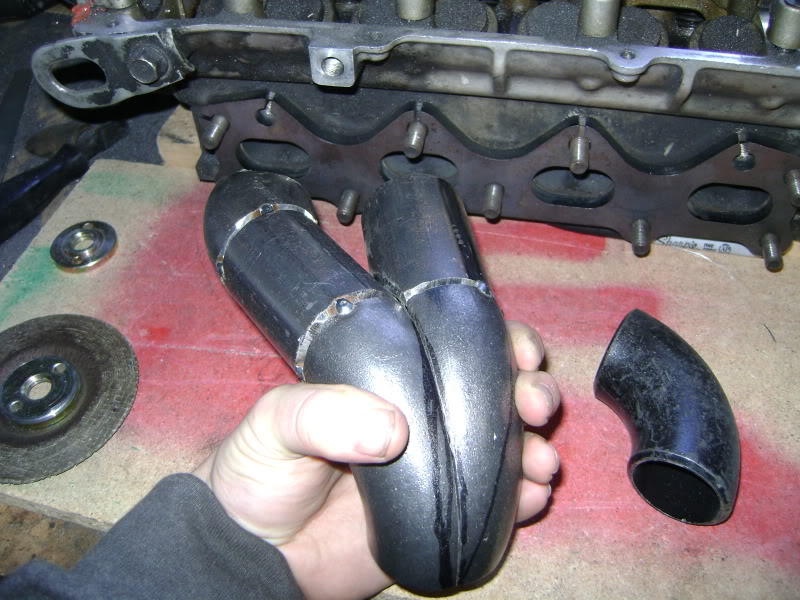
 It definitely takes some serious time getting all 4 pipes pointed where they should be pointed. Off just a hair on the collector means off a bunch at the head flange. You'll be looking good while everything's tacked, then as you weld things may move (more with stainless). Then you smoosh the primaries into ovals...whoops things moved again. Fun stuff!
Reply
0
0
What? It's a simple straight cut. What can be so hard about it? I ram horn is sooo much harder to build........ People have no idea.
It definitely takes some serious time getting all 4 pipes pointed where they should be pointed. Off just a hair on the collector means off a bunch at the head flange. You'll be looking good while everything's tacked, then as you weld things may move (more with stainless). Then you smoosh the primaries into ovals...whoops things moved again. Fun stuff!
People have no idea. It definitely takes some serious time getting all 4 pipes pointed where they should be pointed. Off just a hair on the collector means off a bunch at the head flange. You'll be looking good while everything's tacked, then as you weld things may move (more with stainless). Then you smoosh the primaries into ovals...whoops things moved again. Fun stuff!
Reply
0
0

Reply
0
0
Althought I spent all afternoon working on it, the pictures I took dont make it look any different than the original ones in the first post so i'm not going to bother uploading them.
I lengthened runners 2 and 3. Doing this meant I had to re fit the collector so the runners matched the ports in the flange. After all that I took the dremel and spent some quality time smoothing and deburring everything on the inside. I'm trying to make it as perfect as I can since all eyes are now on this project =P
I lengthened runners 2 and 3. Doing this meant I had to re fit the collector so the runners matched the ports in the flange. After all that I took the dremel and spent some quality time smoothing and deburring everything on the inside. I'm trying to make it as perfect as I can since all eyes are now on this project =P
Reply
0
0


