Quick Preview of The Setup


 12-23-2008, 12:44 AM
#25
Junior Member
Thread Starter

Join Date: Nov 2006
Posts: 158
Total Cats: 0
yup lol!! there's no nylon in it now lol. but its holding now..... i lost my jet nut when i was working on the turbo.... so i thew on that one and shes chillin.
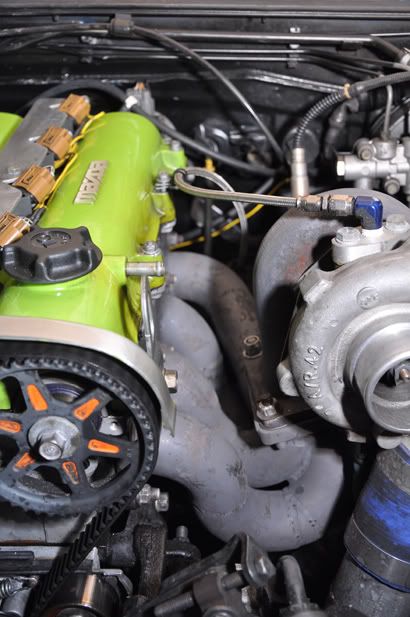
and to answer the other question, the manifold was made by a friend and i. the only top mount tubular able to run a/s and ps. prob going to take it off soon and get it nickle plated.
and to answer the other question, the manifold was made by a friend and i. the only top mount tubular able to run a/s and ps. prob going to take it off soon and get it nickle plated.

Reply
 0
0

0


 12-23-2008, 03:31 AM
#29
Former Vendor

iTrader: (31)

Join Date: Nov 2006
Location: Sunnyvale, CA
Posts: 15,442
Total Cats: 2,100
Requesting pics of the collector. Looks like the 4th runner is aimed into the side of everything. No bueno.
Also requesting pics of the water temp gauge in the stock cluster. How'd you do that?
Also requesting pics of the water temp gauge in the stock cluster. How'd you do that?
Reply
0
0
12-23-2008, 03:53 AM
#30
Elite Member
iTrader: (1)
Join Date: Feb 2008
Location: Birmingham Alabama
Posts: 7,930
Total Cats: 45
Pretty cool car. Love the valve cover, almost looks like green ivory or something. Has a very plastic look to it. I also like that temp gauge. I was thinking maybe doing all 3 of the smaller gauges aftermarket, and relocate the fuel gauge and water temp to the radio cluster, and move the wideband and boost gauge up with the oil pressure gauge. Get all of your good info right in front of you, water temp and fuel can wait (well, water temp sort of, not for long though...) This gave me some ideas for my upcoming build. Keep up the good work, again, awsome car.
Reply
0
0
12-23-2008, 08:33 AM
#31
Tour de Franzia
iTrader: (6)
Join Date: Jun 2006
Location: Republic of Dallas
Posts: 29,085
Total Cats: 375
I'd ******* kill to do a tach, digital speedo, and a bunch of little gaukges for afr, egt, clt, oil temp, and oil pressure.
c'mon dude, hook it up with the how-to pics on the cluster.
c'mon dude, hook it up with the how-to pics on the cluster.
Reply
0
0
 12-23-2008, 11:52 PM
#33
Junior Member
Thread Starter
Join Date: Nov 2006
Posts: 158
Total Cats: 0
um ill try to get some pics of the other cluster i tested to make it work..... remember i dont have the camera... my brother does, its when ever he has time..and about the manifold, the 4th runner runs down with an angel and half a 90 degree aims it up with the collector. not the best angle but it works.. but i tell u one thing i thing the manifold makes power. deff felt he difference from others...
Reply
0
0
 12-26-2008, 10:27 AM
#36
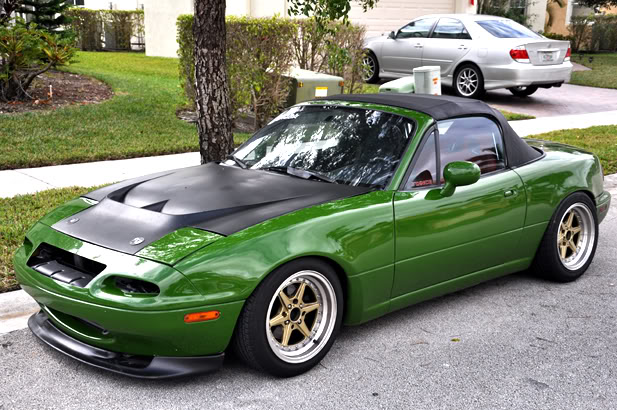
You rattle canned the hood I see. Looks way nicer like that than if we would have painted it green. Looks awesome man and im glad to see it finally doing what it was meant to do...drive lol. Heres pics of the car getting painted:


As far as the boost gauge and the temp gauge in the cluster go:
ClubRoadster.net • View topic - Got Gauges?? [ Guest ]
I copied his setup although I have my wideband in the center instead of the boost gauge.
1.Get an autometer gauge cup.
2.Take out the center piece on the upper steering cover. The little rectangular part.
3.Put the gauge in cup and and slide the aluminum pressure clamp over it so its snug.
4. Take the gauge assembly now and make sure you squeeze the bottom of the aluminum tabs from the pressure clamp a little so the guage is snug. Place the tabs on the center piece and while still holding them snug, Place them on the steering cover where you want the gauge to sit, and mark the the two spots that the tabs will slide into.
5. Make two slits on the area you marked for the tabs.
6. Insert the tabs with the whole gauge unit assembled into the two slits and then bend the tabs on the bottom so the the gauge is held in place.
7. Put the center piece back on the steering cover and thats it.
Reply
0
0
12-26-2008, 07:27 PM
#37
Tour de Franzia
iTrader: (6)
Join Date: Jun 2006
Location: Republic of Dallas
Posts: 29,085
Total Cats: 375
thanks for the how-to. Can i use the stock sender, or is the replace sender the same size and thread pitch as the stocker?
http://www.jegs.com/i/Auto%20Meter/1...0002/-1?CT=999
I'd like to use the stock 1.6 sensor hole (on the side of my 99 head) 1/8npt?
http://www.jegs.com/i/Auto%20Meter/1...0002/-1?CT=999
I'd like to use the stock 1.6 sensor hole (on the side of my 99 head) 1/8npt?
Last edited by hustler; 12-26-2008 at 07:46 PM.
Reply
0
0


