
Time for my very own build thread! (oh god please help me)


Thread Starter

Joined: Nov 2006
Posts: 15,442
Total Cats: 2,106
From: Sunnyvale, CA
I was either going to use Bandit from the forums, or Royal Brass in SJ as Juhani suggested. Cjernigan, what were the other sizes on your T25? I'm betting most of them are the same.
Reply
 0
0

0


Oil feed was 7/16, drain required an adapter plate i already had that accepted 1/2 NPT fitings. The coolant passages were something weird and instead of buying them online or something similar i just went to the hardware store. Look for compression nut fittings for 3/8" hardline. Take the turbo with you and just test fit them till you figure it out cause I don't know off hand.
You do plan to use hardline extentions right?
My bad on the photo, wasn't sure what the focus was to be.
You do plan to use hardline extentions right?
My bad on the photo, wasn't sure what the focus was to be.
Reply
0
0
Thread Starter
Joined: Nov 2006
Posts: 15,442
Total Cats: 2,106
From: Sunnyvale, CA
I'm still confused on the oil/water lines. Adaptor block? Photos would be awesome.

Reply
0
0
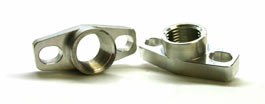
That is the flange i used on mine for the oil drain on mine. I had it from a previous project, you might be able to get it cheaper somewhere else?
Are you going to need some sort of feed adapter? Do you plan to T off the oil sender or are you going to use some sort of filter sandwich?
Reply
0
0
Thread Starter
Joined: Nov 2006
Posts: 15,442
Total Cats: 2,106
From: Sunnyvale, CA
Swung by Royal Brass in SJ today. The answer I got was a little confusing. I'm pretty sure he said that it was a 7/16" inverted flare, but then he said it was a #5 fitting which equated to a 5-16, something like #5 fitting, 16 threads per inch. Can someone clarify this?
Also, my turbo has a fitting that looks remarkably like that drain adaptor already in the center section. I am going to have to clock the center section to get the oil drain to point downwards.
Also, my turbo has a fitting that looks remarkably like that drain adaptor already in the center section. I am going to have to clock the center section to get the oil drain to point downwards.
Reply
0
0
Sorry Savington, Ive been meaning to take a better picture of my piping for you, but honestly it is nothing to brag about. My manifold/downpipe/IC and piping were all made by BEGi. The piping was designed to work with Power steering and air conditioning. Looking at the car from the front, the hotside piping has the 90 off the compressor outlet(which points straight up), and then goes down and to the left, right in front of the crank pulley and then under the radiator. There is a lot of unnecessary piping and I am itching to modify it to run straight down and under, but was unable to do so with any combination of the 3 pipes I have on it currently. Yet another project for down the road.
Last edited by akaryrye; May 26, 2007 at 04:25 AM.
Reply
0
0
Thread Starter
Joined: Nov 2006
Posts: 15,442
Total Cats: 2,106
From: Sunnyvale, CA
Well ****.
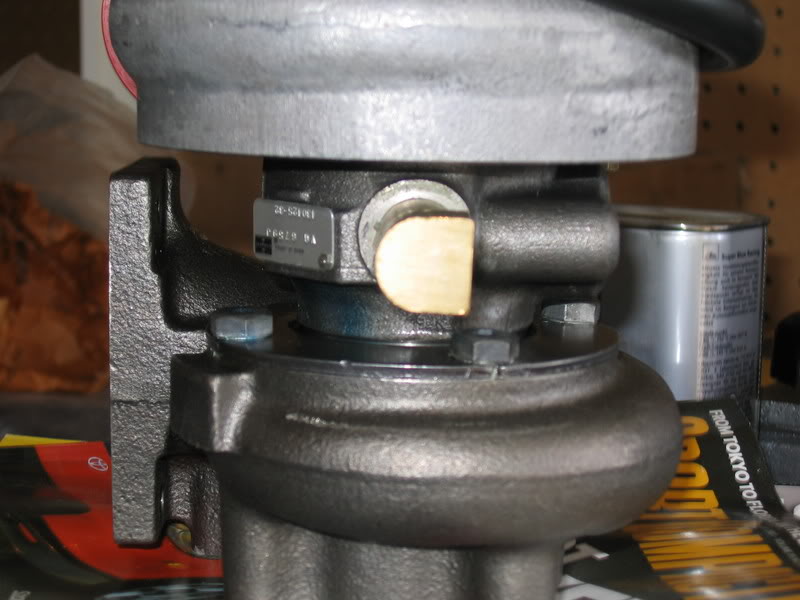
Looks like I'm going to have to figure out how to clock the hotside so that the oil drain faces down. I just loosen the four bolts that hold the center to the exhaust housing and spin the turbo, right?
Looks like I'm going to have to figure out how to clock the hotside so that the oil drain faces down. I just loosen the four bolts that hold the center to the exhaust housing and spin the turbo, right?
Reply
0
0
Yes just loosen them and turn it.
Don't use that 90* elbow. Get a different fitting that fits in there that points straight down.
It should be a 7/16 inverted flare, no idea what the #5 thing is he speaks of.
Don't use that 90* elbow. Get a different fitting that fits in there that points straight down.
It should be a 7/16 inverted flare, no idea what the #5 thing is he speaks of.
Reply
0
0
Thread Starter
Joined: Nov 2006
Posts: 15,442
Total Cats: 2,106
From: Sunnyvale, CA
Clocked the turbo tonight. Pointed the oil drain down, as well as the compressor outlet. ****, that snap ring is big and difficult to remove. Re-drilled the compressor housing for the wastegate and got it all hooked up properly. The final bits are intercooler piping and oil/water lines. TheBandit, if you read this, I'm eager to get a set of your lines ordered up. If I can't get ahold of you, I'm going to have to piece it together myself.
What has everyone else used for oil/water lines on their cars? Fittings, lengths, hose sizes?
What has everyone else used for oil/water lines on their cars? Fittings, lengths, hose sizes?
Last edited by Savington; May 28, 2007 at 05:42 AM.
Reply
0
0
Thread Starter
Joined: Nov 2006
Posts: 15,442
Total Cats: 2,106
From: Sunnyvale, CA
Answering my own questions, for the next newbie that searches and finds this thread. Oil and water lines:
M10x1.50 male to -3AN male fitting, $17.50 from paragonperformance.com
-3AN female to -3AN male 90deg fitting, $17.22 from ANPlumbing.com
-3AN female to -3AN female 24" stainless steel feed hose, $12.88 at Summit Racing
-3AN male to -3AN female 90deg fitting, $17.22 from ANPlumbing.com
-3AN male to 7/16-24 inverted flare male fitting, $12.99 a pair from Summit Racing
Oil return:
(you probably need a flange and a gasket, my turbo doesn't need a flange.)
turbo flange to 5/8" hose barb, $??? from your local pneumatic supply store
2ft of 5/8" high-temp silicone hose, $16 from ATPTurbo.com
1/2" NPT to 5/8" barb fitting, $9 from ATPTurbo.com
23/32" drill bit and 1/2"NPT tap, $?? from your local hardware store
Water lines:
fittings from your turbo (usually 7/16-24 inverted flare) to 5/16" hose barbs
5/16" heater hose
(optional) Thermo-Tec Thermo-Sleeve, 1/4" to 1/2" size, $14.95 per 3ft length at Summit or like $45 for 12ft of it. 3ft might be enough, two lengths of 3ft will be plenty.
There you have it. Around $130 not including the NPT tap and drill bit and the fittings to go to the two water fittings and the oil drain on the turbo. Hopefully I can keep it below $175 or so, since that's what I budgeted for this in the first place.
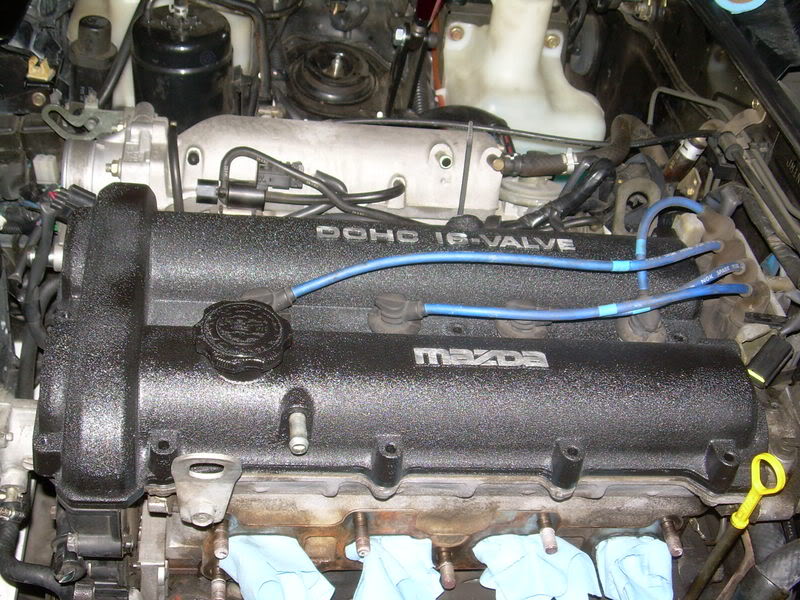
DP and Manifold arriving shortly. I'll post more photos once everything is a little more together.

Valve cover (3 coats of krinkle black, 2 coats of high-temp clearcoat. Used a wire brush on my drill to take the paint off the letters):
M10x1.50 male to -3AN male fitting, $17.50 from paragonperformance.com
-3AN female to -3AN male 90deg fitting, $17.22 from ANPlumbing.com
-3AN female to -3AN female 24" stainless steel feed hose, $12.88 at Summit Racing
-3AN male to -3AN female 90deg fitting, $17.22 from ANPlumbing.com
-3AN male to 7/16-24 inverted flare male fitting, $12.99 a pair from Summit Racing
Oil return:
(you probably need a flange and a gasket, my turbo doesn't need a flange.)
turbo flange to 5/8" hose barb, $??? from your local pneumatic supply store
2ft of 5/8" high-temp silicone hose, $16 from ATPTurbo.com
1/2" NPT to 5/8" barb fitting, $9 from ATPTurbo.com
23/32" drill bit and 1/2"NPT tap, $?? from your local hardware store
Water lines:
fittings from your turbo (usually 7/16-24 inverted flare) to 5/16" hose barbs
5/16" heater hose
(optional) Thermo-Tec Thermo-Sleeve, 1/4" to 1/2" size, $14.95 per 3ft length at Summit or like $45 for 12ft of it. 3ft might be enough, two lengths of 3ft will be plenty.
There you have it. Around $130 not including the NPT tap and drill bit and the fittings to go to the two water fittings and the oil drain on the turbo. Hopefully I can keep it below $175 or so, since that's what I budgeted for this in the first place.
DP and Manifold arriving shortly. I'll post more photos once everything is a little more together.
Valve cover (3 coats of krinkle black, 2 coats of high-temp clearcoat. Used a wire brush on my drill to take the paint off the letters):
Reply
0
0


Thread
Thread Starter
Forum
Replies
Last Post
elesjuan
Build Threads
7
Nov 3, 2015 01:51 PM


