build thread (TII drivetrain swap, built motor, cage, widebody, blah blah)
 07-26-2008, 11:00 PM
#81
Senior Member
Thread Starter
iTrader: (9)

Join Date: Jun 2007
Location: NH
Posts: 1,013
Total Cats: 21
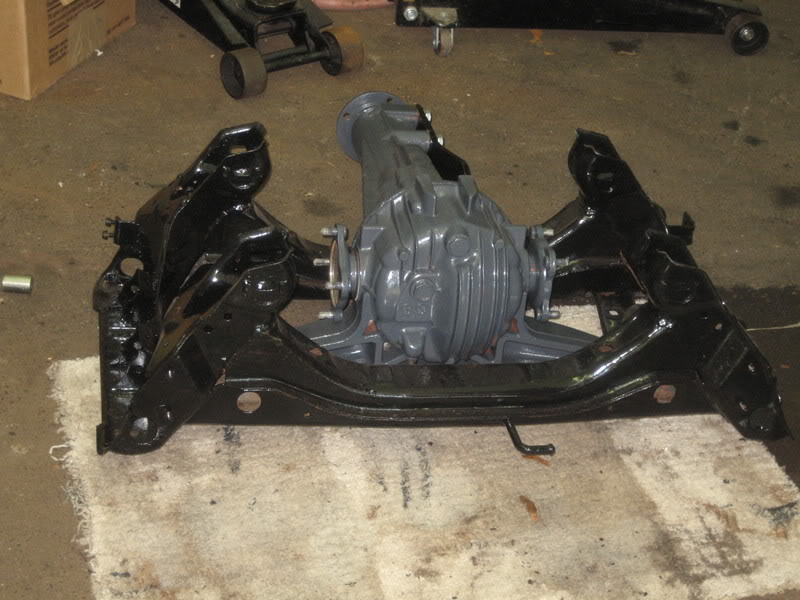
More progress. I got the rear end mounted to the subframe
The black and the gray look great together, I'm very pleased with the result.
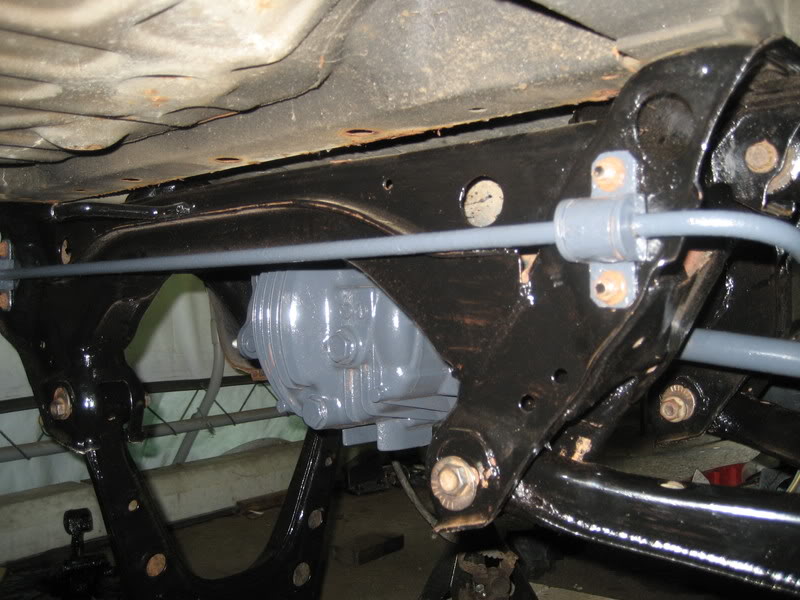
mounted under the car (yes I know I'm missing 2 nuts on the subframe)
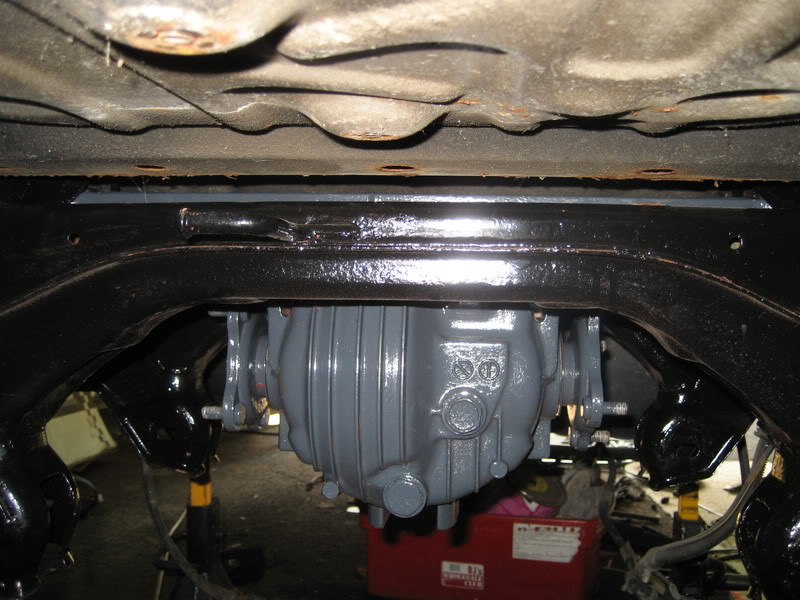
tight tolerances between the mount and the gas tank. However, my front diff mount allows for maximum exhaust clearance, as I plan on running a 3" turboback.
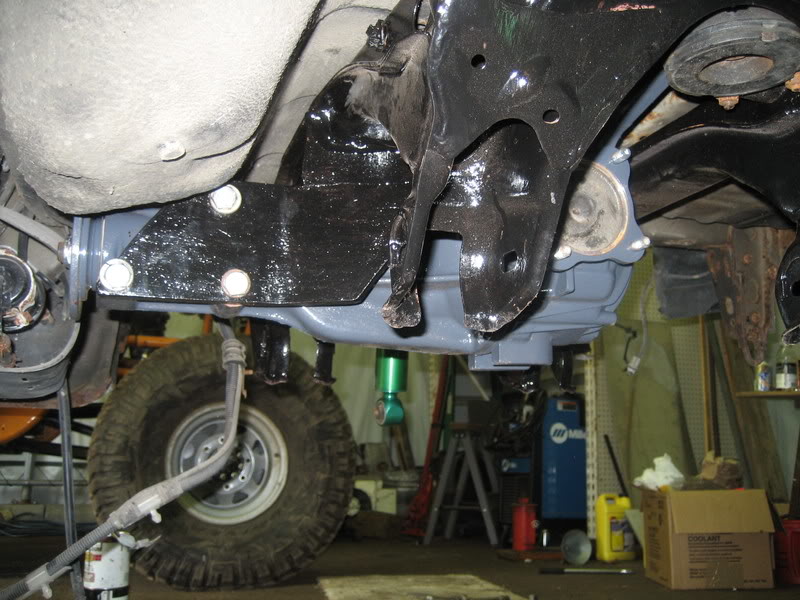
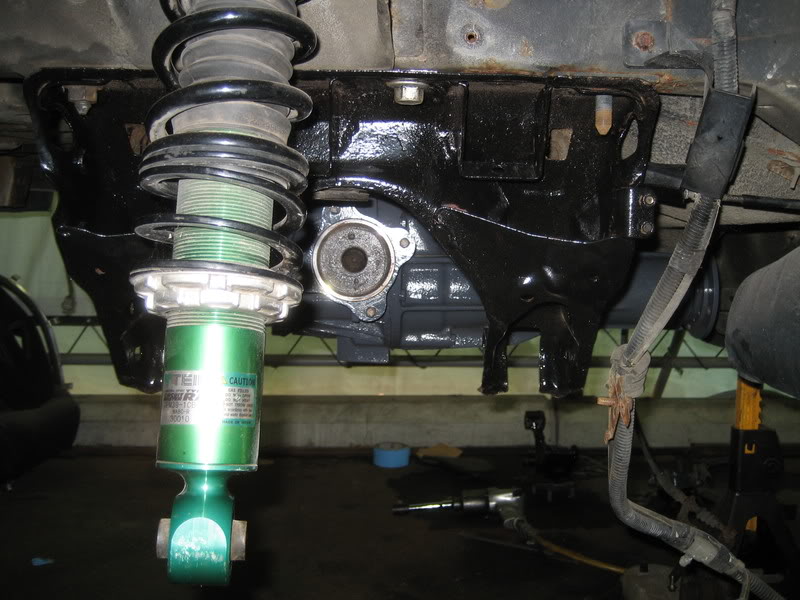
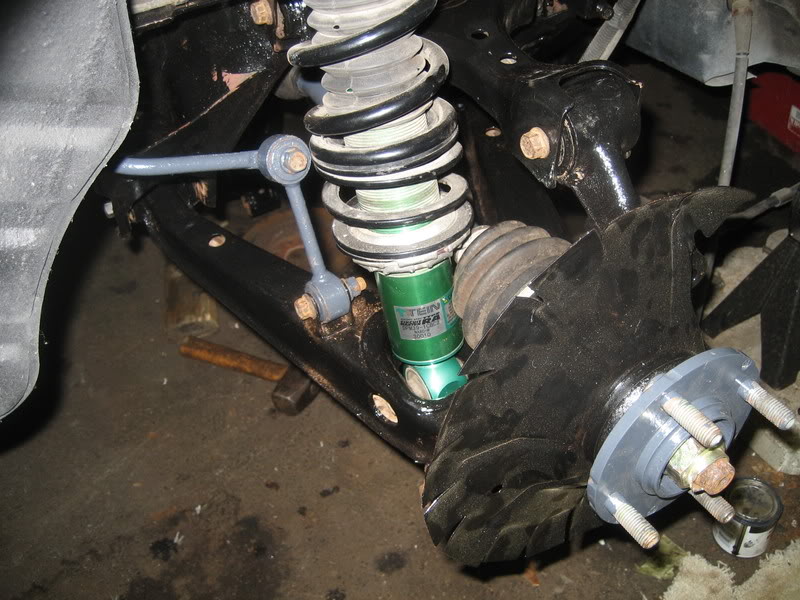
axles, control arms, and hubs installed
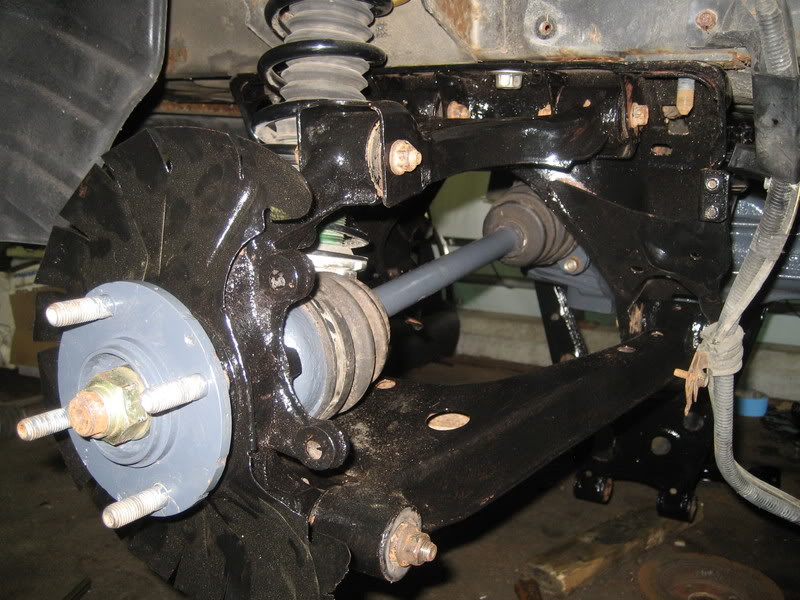
rear sway bar installed
I measured for the driveshaft, will be dropping that off Monday to get shortened. I still have to get the center hole in the rotors enlarged to clear the RX7 hubs. Once I get that done I can finally cross off the rear end from the to-do list. I pulled the tranny again so i can start working on getting the slave cylinder modified to fit.
The black and the gray look great together, I'm very pleased with the result.
mounted under the car (yes I know I'm missing 2 nuts on the subframe)
tight tolerances between the mount and the gas tank. However, my front diff mount allows for maximum exhaust clearance, as I plan on running a 3" turboback.
axles, control arms, and hubs installed
rear sway bar installed
I measured for the driveshaft, will be dropping that off Monday to get shortened. I still have to get the center hole in the rotors enlarged to clear the RX7 hubs. Once I get that done I can finally cross off the rear end from the to-do list. I pulled the tranny again so i can start working on getting the slave cylinder modified to fit.

Reply
 0
0

0
07-27-2008, 02:23 AM
#82

Looking great man, excellent progress.........
I have a few questions regarding the diff:
I found out my co-worker has a spare rx7 for me to raid, what all did you end up needing for the diff install? the diff itself, rx7 axles, and shortening your stock driveshaft?
Any info would be great. good job on the car
I have a few questions regarding the diff:
I found out my co-worker has a spare rx7 for me to raid, what all did you end up needing for the diff install? the diff itself, rx7 axles, and shortening your stock driveshaft?
Any info would be great. good job on the car
Reply
0
0
07-27-2008, 11:31 AM
#83
Senior Member
Thread Starter
iTrader: (9)
Join Date: Jun 2007
Location: NH
Posts: 1,013
Total Cats: 21
Looking great man, excellent progress.........
I have a few questions regarding the diff:
I found out my co-worker has a spare rx7 for me to raid, what all did you end up needing for the diff install? the diff itself, rx7 axles, and shortening your stock driveshaft?
Any info would be great. good job on the car
I have a few questions regarding the diff:
I found out my co-worker has a spare rx7 for me to raid, what all did you end up needing for the diff install? the diff itself, rx7 axles, and shortening your stock driveshaft?
Any info would be great. good job on the car
You need the diff, miata diff bushings in place of the rx7 bushings, either stock rx7 axles and a custom machined hub, or custom axles made that fit miata hubs, the rx7 driveshaft (if you are using a TII tranny as well, if not then you can get an rx7 end welded on the miata shaft), and then some form of bracket to mount the nose of the diff to the subframe. I opted to just solid mount mine. I've explained the entire process of what I did in these pages, read through them all, and if you still have questions, I gave you a site below which I used as my "bible" for this swap.
http://www.geocities.com/Crash41301/
Reply
0
0
07-27-2008, 11:45 AM
#84
Elite Member
iTrader: (12)

Join Date: Jan 2007
Location: Hermosa Beach, CA
Posts: 2,573
Total Cats: 12
Id go with poly diff mounts instead of the mazdaspeed ones... but looking at how the diff would move I dont think you will have too much problem with the front mount cracking, atleast not for awhile.
Reply
0
0
 07-27-2008, 09:17 PM
#87
Elite Member
iTrader: (15)

Join Date: Sep 2007
Location: Incline Village, NV
Posts: 2,034
Total Cats: 5
Looking great man, excellent progress.........
I have a few questions regarding the diff:
I found out my co-worker has a spare rx7 for me to raid, what all did you end up needing for the diff install? the diff itself, rx7 axles, and shortening your stock driveshaft?
Any info would be great. good job on the car
I have a few questions regarding the diff:
I found out my co-worker has a spare rx7 for me to raid, what all did you end up needing for the diff install? the diff itself, rx7 axles, and shortening your stock driveshaft?
Any info would be great. good job on the car
Reply
0
0
07-28-2008, 11:13 AM
#88
Senior Member
Thread Starter
iTrader: (9)
Join Date: Jun 2007
Location: NH
Posts: 1,013
Total Cats: 21
If its a t2 then you will have to mod alot of **** like the OPer stated, however what he didnt say was if its a clutch type with the 7inch R&P then it can be installed into your 99 housing. If your 99 has a torsen then you could probably sell that for 900 ish and buy get installed and have an rx7 clutch type and make a few bucks.
Reply
0
0

 07-28-2008, 08:05 PM
#91
Not quite...
You need the diff, miata diff bushings in place of the rx7 bushings, either stock rx7 axles and a custom machined hub, or custom axles made that fit miata hubs, the rx7 driveshaft (if you are using a TII tranny as well, if not then you can get an rx7 end welded on the miata shaft), and then some form of bracket to mount the nose of the diff to the subframe. I opted to just solid mount mine. I've explained the entire process of what I did in these pages, read through them all, and if you still have questions, I gave you a site below which I used as my "bible" for this swap.
http://www.geocities.com/Crash41301/
If its a t2 then you will have to mod alot of **** like the OPer stated, however what he didnt say was if its a clutch type with the 7inch R&P then it can be installed into your 99 housing. If your 99 has a torsen then you could probably sell that for 900 ish and buy get installed and have an rx7 clutch type and make a few bucks.
thanx again
Reply
0
0
07-29-2008, 02:36 PM
#92
Senior Member
Thread Starter
iTrader: (9)
Join Date: Jun 2007
Location: NH
Posts: 1,013
Total Cats: 21
MM i did read your entire thread, but maybe missed a few posts. But thank you both for that info. Ill find out which one he has, and hopefully will get away with just throwing the internals in and not having to modify all that stuff. (so hoping its a clutch tipe)...
thanx again
thanx again
Reply
0
0
08-11-2008, 07:54 PM
#94
Senior Member
Thread Starter
iTrader: (9)
Join Date: Jun 2007
Location: NH
Posts: 1,013
Total Cats: 21
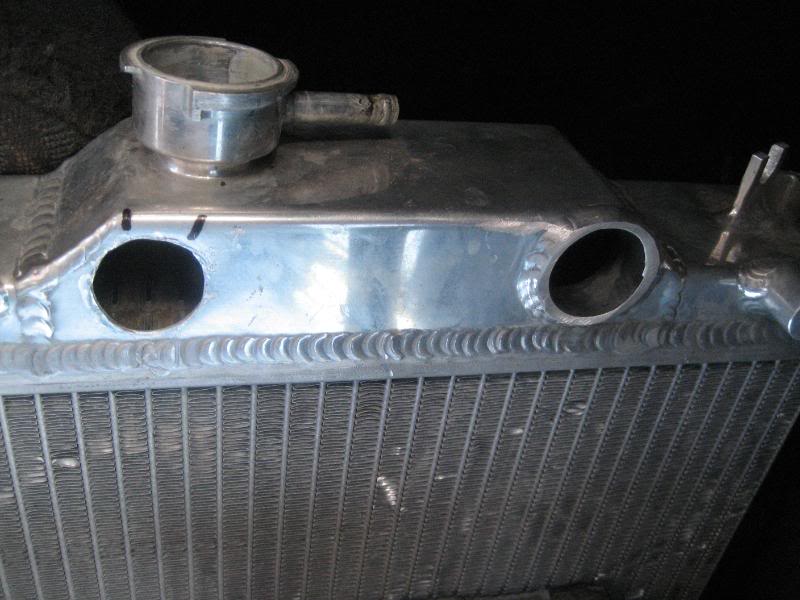
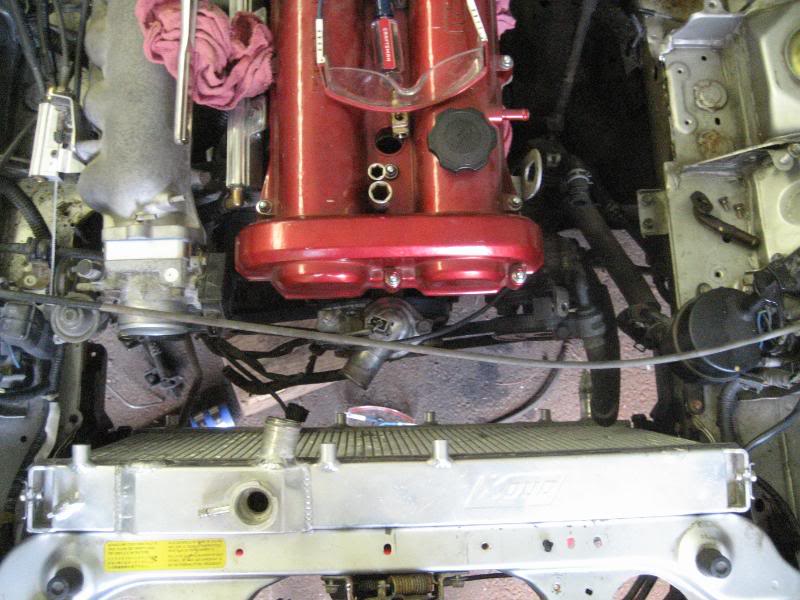
Back at it again. I ran into a couple fairly big hiccups the other day. The first being the radiator. I have a koyo 55mm radiator, and with the 1.8 in my 90 with the fm throttle body adapter, there was about 1" of clearance between the throttle body elbow and the upper radiator outlet, so that needed to be moved over a bit. I tried to see if I could take out the adapter, but no good. The only option was to modify the radiator- no biggie.
I cut off the old mount and cut a hole out as far over to the driver's side as I could manage, and angled the outlet so that it was pointed more or less at the thermostat housing.
Here is a picture of the cut before I cleaned it up with the dremel tool:
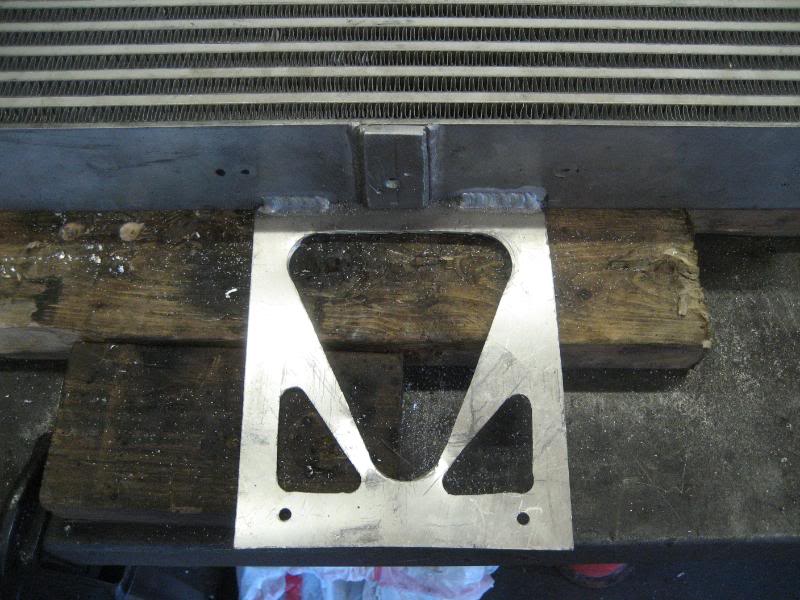
The second problem was the intercooler I bought had the mounting brackets cut off of it for some reason, so I had to design a new mounting system for it. Also, not that big of a deal. What I decided on doing was since my radiator was aluminum, I cut out some 1x2.5" brackets out of some scrap aluminum I had laying around. These will be welded to the bottom of the radiator and the intercooler, and then I would drill out a hole and put a bolt through them. Here is a picture of the 4 tabs, the modified upper radiator outlet, and the block off plate to cover the old inlet hole:
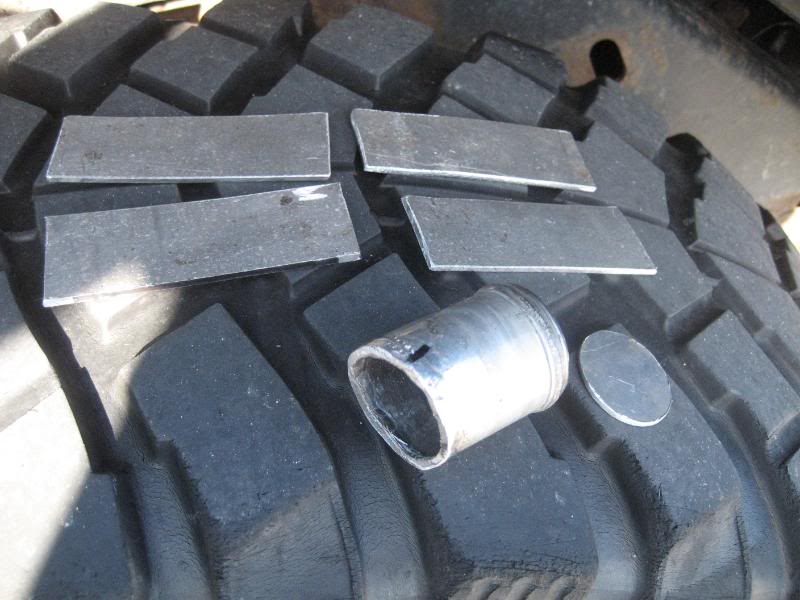
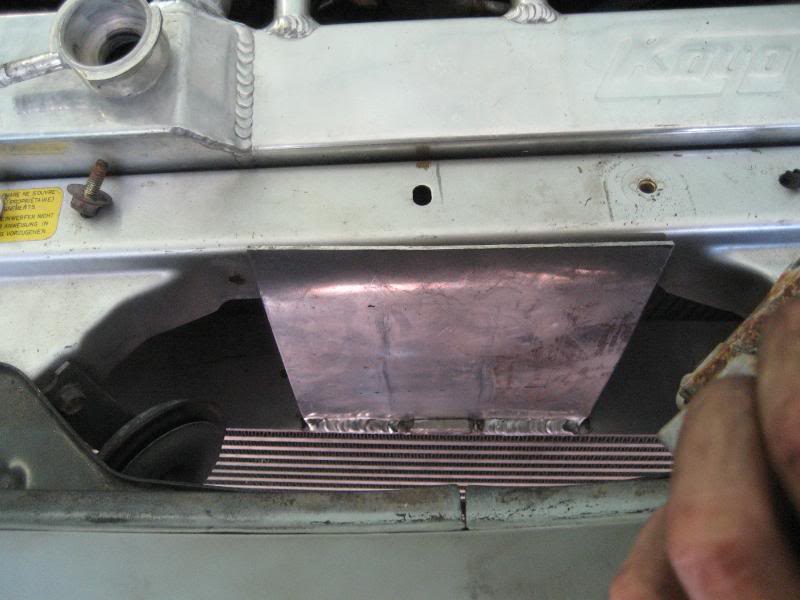
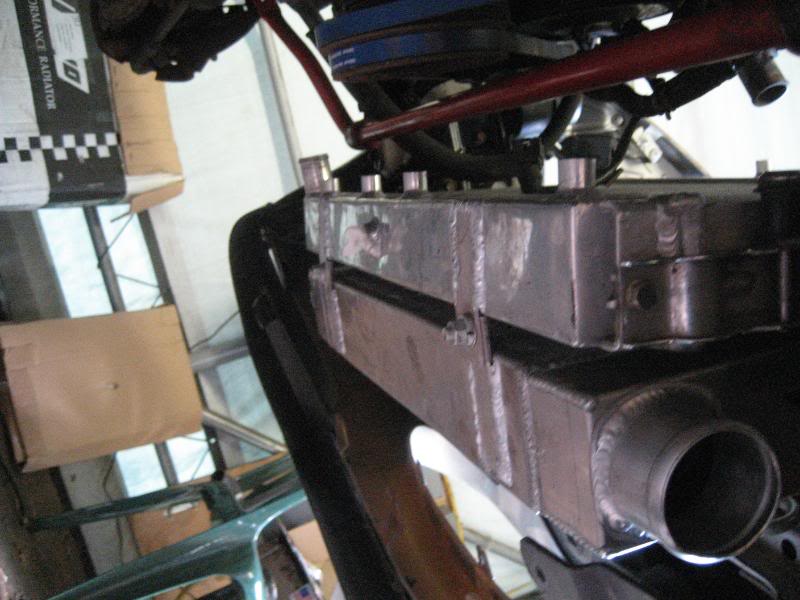
For the upper intercooler mount, I decided to take an idea out of FM and Begi's book, and go up and grab the hood latch mount. I cut out a 7.5x6.5" piece of aluminum and had that welded onto the center of the intercooler, in the front. Then it was off to see the welder...
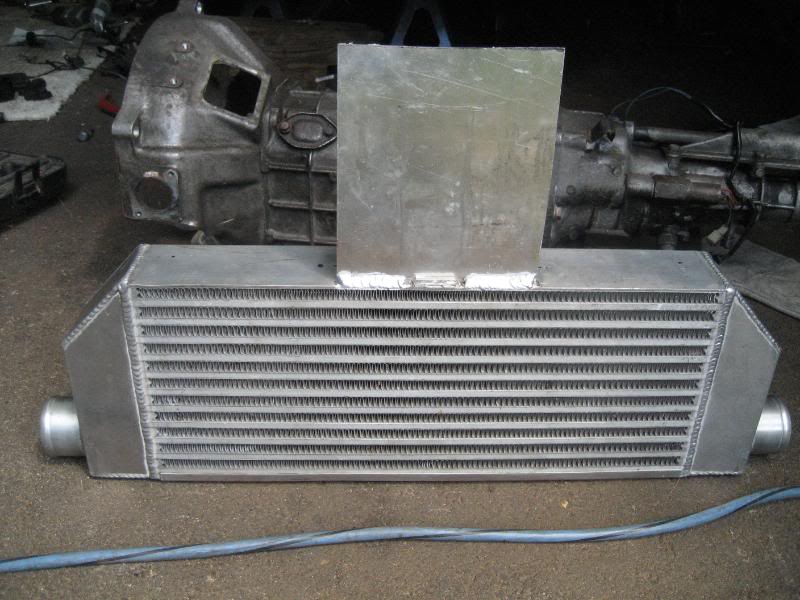
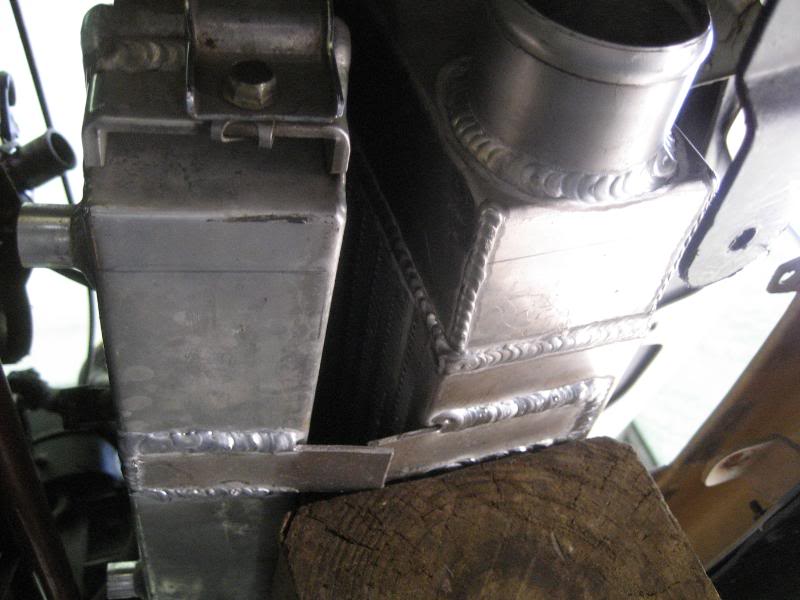
Here are the tabs welded on the intercooler
new radiator inlet and blockoff plate
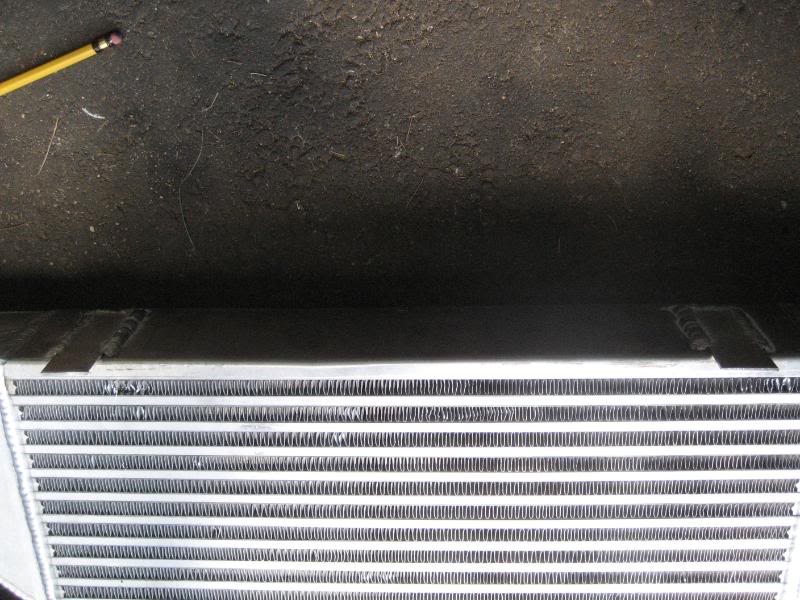
and the radiator tabs
The tabs are placed 4" in from the edges (my intercooler was the exact same width as my radiator- 24.5" which made measuring pretty easy
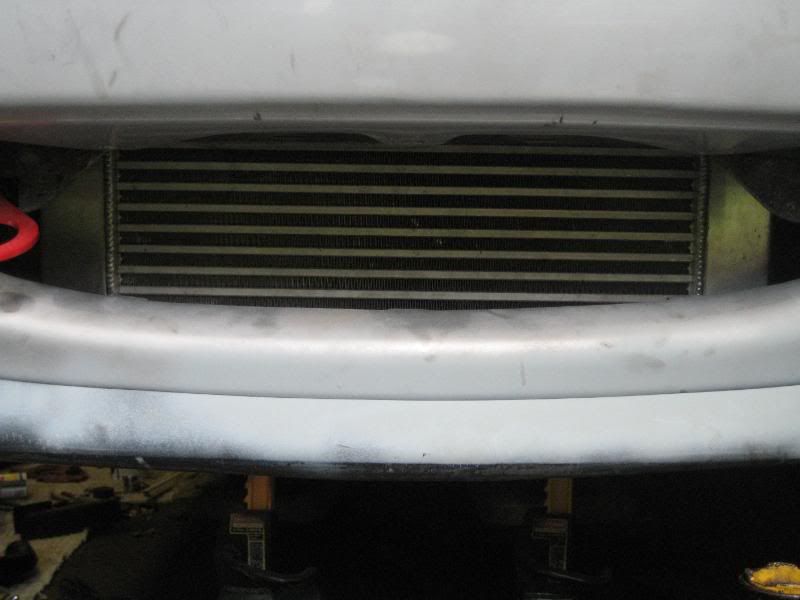
Here is a shot during fitment of the intercooler/radiator
upper intercooler mount
I had to modify the lower radiator mounts slightly as the intercooler wouldn't sit properly. Here is a pic of the cuts I had to make

intercooler/radiator bolted together
I cut off the old mount and cut a hole out as far over to the driver's side as I could manage, and angled the outlet so that it was pointed more or less at the thermostat housing.
Here is a picture of the cut before I cleaned it up with the dremel tool:
The second problem was the intercooler I bought had the mounting brackets cut off of it for some reason, so I had to design a new mounting system for it. Also, not that big of a deal. What I decided on doing was since my radiator was aluminum, I cut out some 1x2.5" brackets out of some scrap aluminum I had laying around. These will be welded to the bottom of the radiator and the intercooler, and then I would drill out a hole and put a bolt through them. Here is a picture of the 4 tabs, the modified upper radiator outlet, and the block off plate to cover the old inlet hole:
For the upper intercooler mount, I decided to take an idea out of FM and Begi's book, and go up and grab the hood latch mount. I cut out a 7.5x6.5" piece of aluminum and had that welded onto the center of the intercooler, in the front. Then it was off to see the welder...
Here are the tabs welded on the intercooler
new radiator inlet and blockoff plate
and the radiator tabs
The tabs are placed 4" in from the edges (my intercooler was the exact same width as my radiator- 24.5" which made measuring pretty easy
Here is a shot during fitment of the intercooler/radiator
upper intercooler mount
I had to modify the lower radiator mounts slightly as the intercooler wouldn't sit properly. Here is a pic of the cuts I had to make
intercooler/radiator bolted together
Reply
0
0
08-11-2008, 07:55 PM
#95
Senior Member
Thread Starter
iTrader: (9)
Join Date: Jun 2007
Location: NH
Posts: 1,013
Total Cats: 21
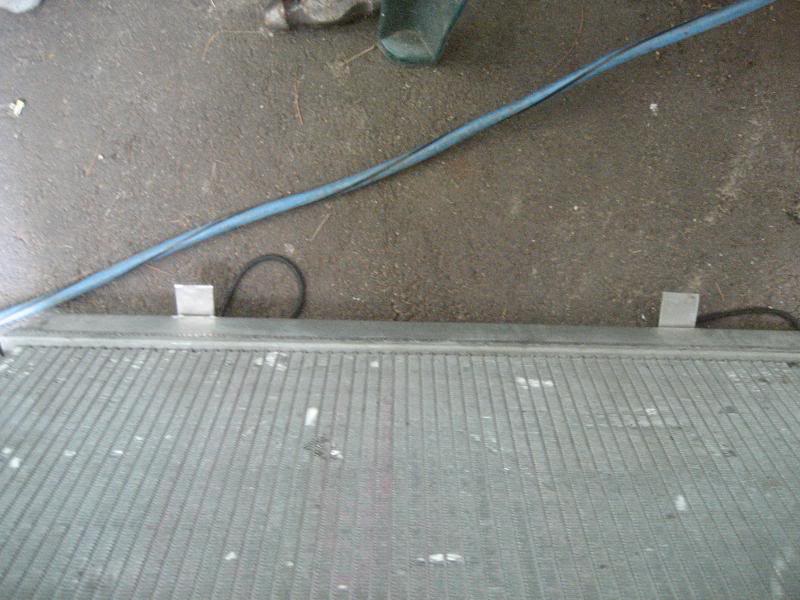
Here is a shot of the lower radiator supports installed.
another shot of the radiator from above
Upper mount bolted to the rad. support
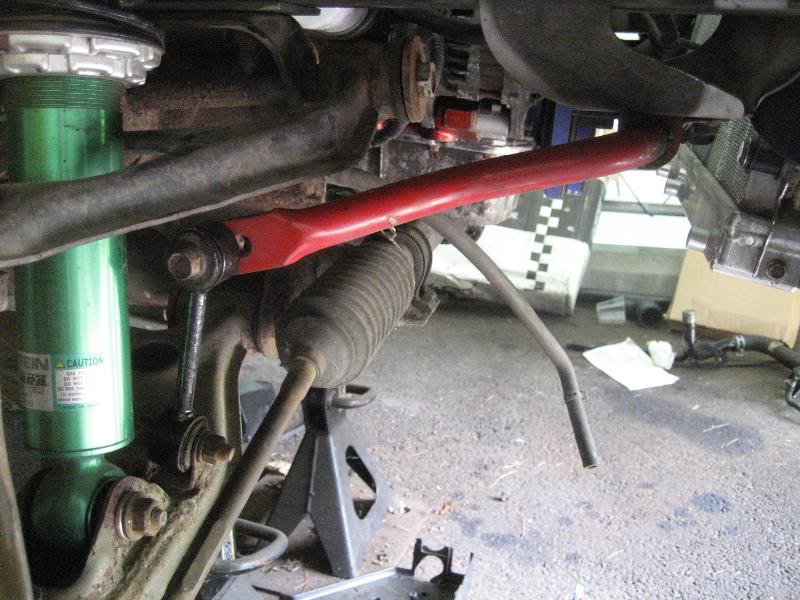
Here is a shot from the passenger side. I also installed the sway bar (RB tubular) at this time as well. I painted the end links black this time instead of the gray.
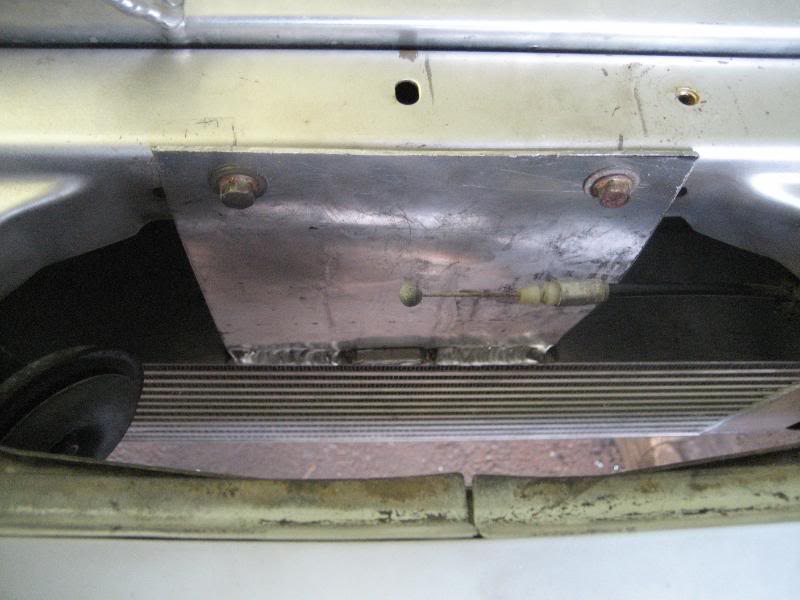
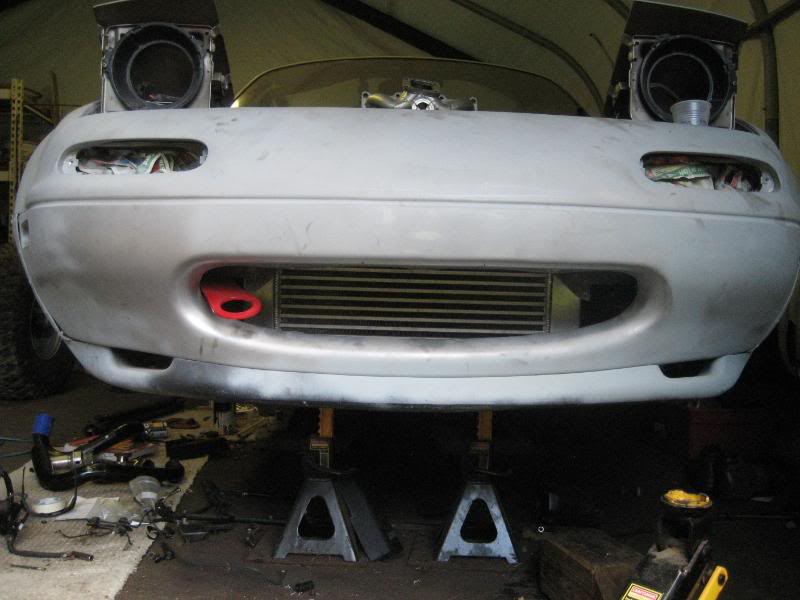
The upper intercooler mount was ugly, and blocked off a ton of airflow to the radiator, so I decided to make some cuts in it. Here's a shot during the process...

and a completed one
Then I reinstalled it back into the car for the final time (hopefully)
one a little farther back
I also installed the radiator block off plate for the top.
Sweet.
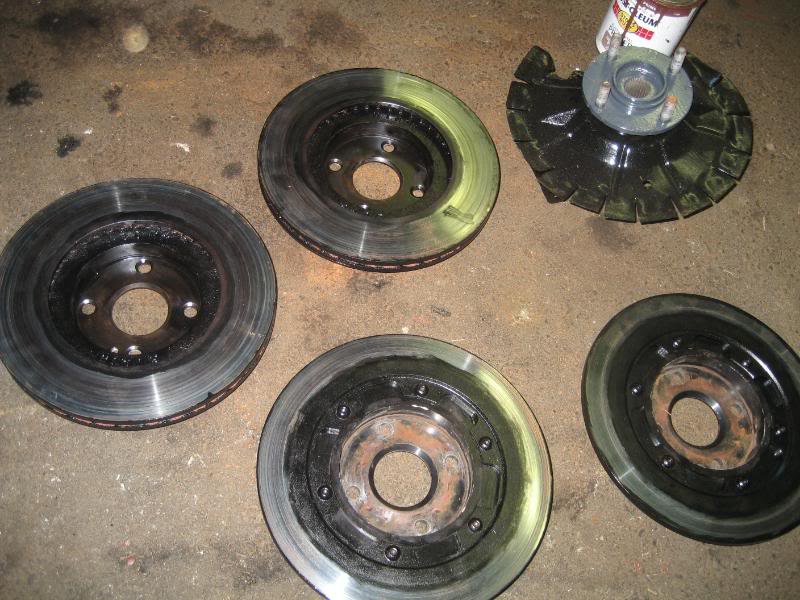
The next thing I did was to paint my rotors and the rear calipers. I used that duplicolor caliper paint and did 2 coats.
Here is a shot of the rotors.
another shot of the radiator from above
Upper mount bolted to the rad. support
Here is a shot from the passenger side. I also installed the sway bar (RB tubular) at this time as well. I painted the end links black this time instead of the gray.
The upper intercooler mount was ugly, and blocked off a ton of airflow to the radiator, so I decided to make some cuts in it. Here's a shot during the process...
and a completed one
Then I reinstalled it back into the car for the final time (hopefully)
one a little farther back
I also installed the radiator block off plate for the top.
Sweet.
The next thing I did was to paint my rotors and the rear calipers. I used that duplicolor caliper paint and did 2 coats.
Here is a shot of the rotors.
Reply
0
0
08-11-2008, 07:56 PM
#96
Senior Member
Thread Starter
iTrader: (9)
Join Date: Jun 2007
Location: NH
Posts: 1,013
Total Cats: 21
I don't have a shot of the calipers (oops). I also painted the front wheel hubs with 2 coats of the black caliper paint as well. Again, no shot of that either.
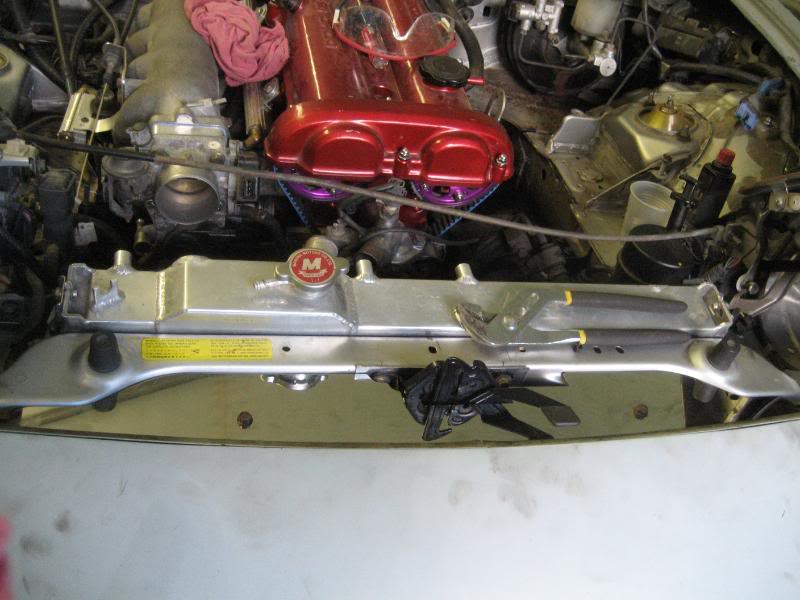
Lower radiator hard lines primed, painted, and installed
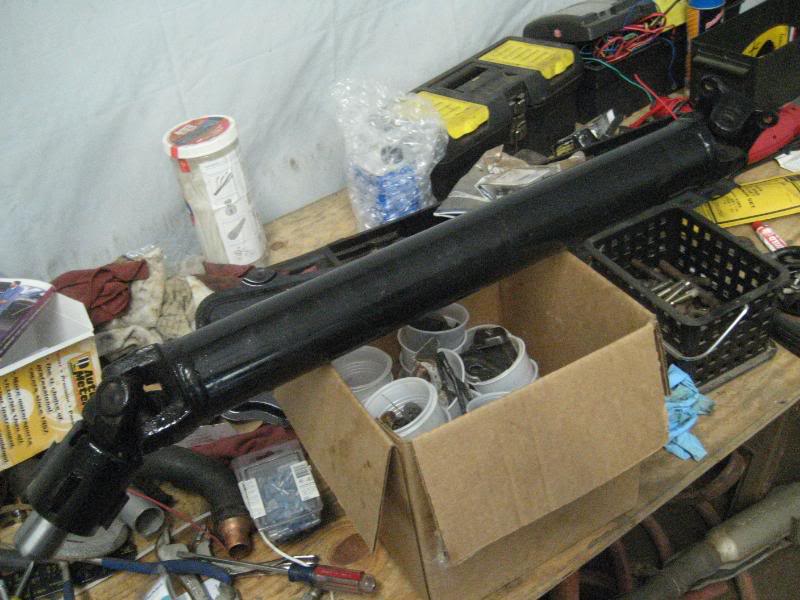
TII driveshaft back from the shop shortened and balanced. I painted it too.
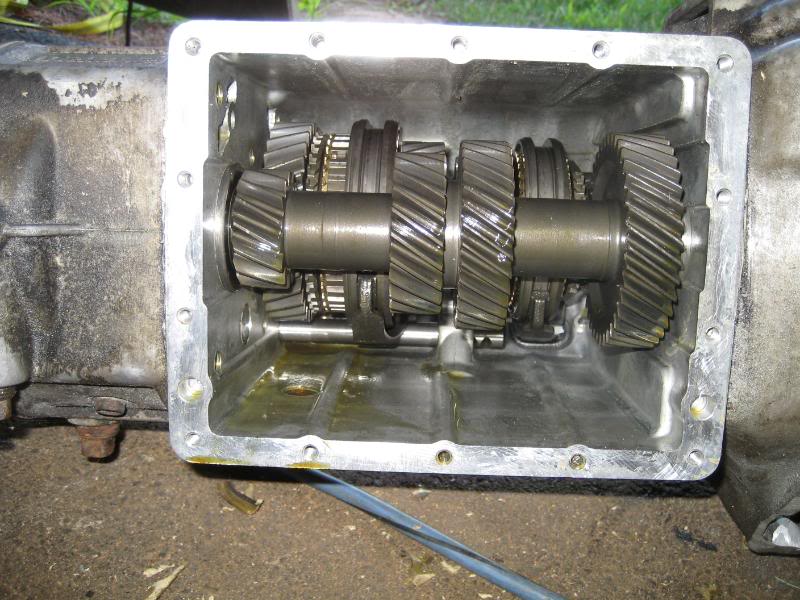
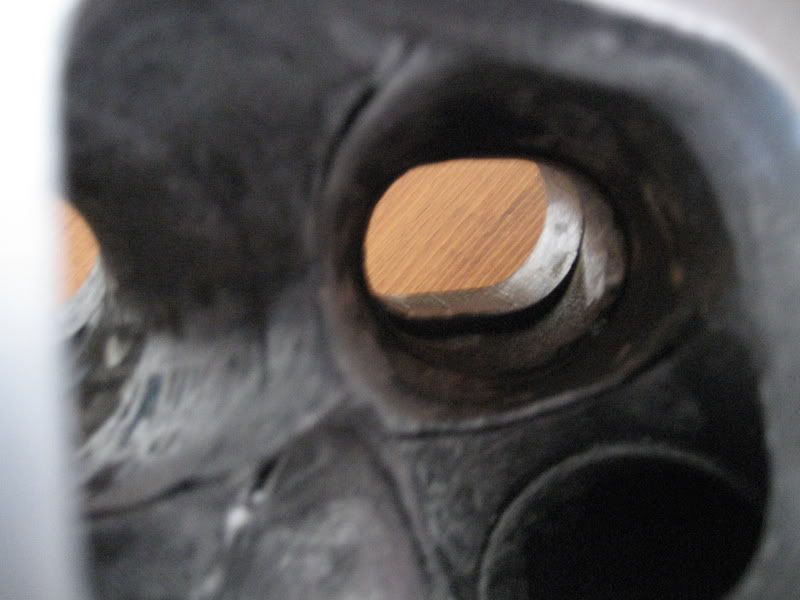
I then went back to the tranny and replaced some of the seals as they had been leaking trans fluid. Here is a shot of some of the guts inside a TII transmission
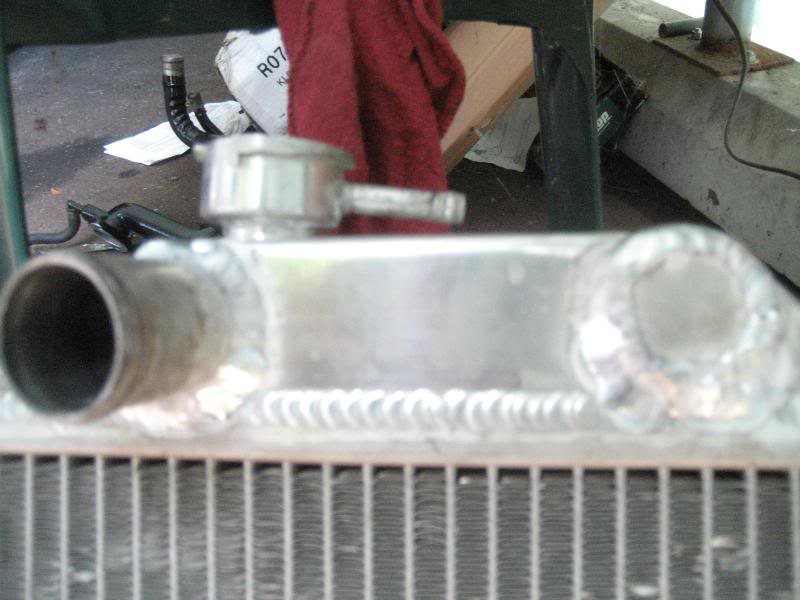
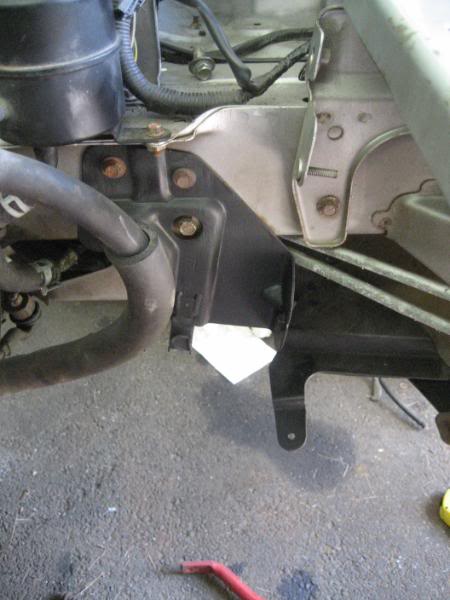
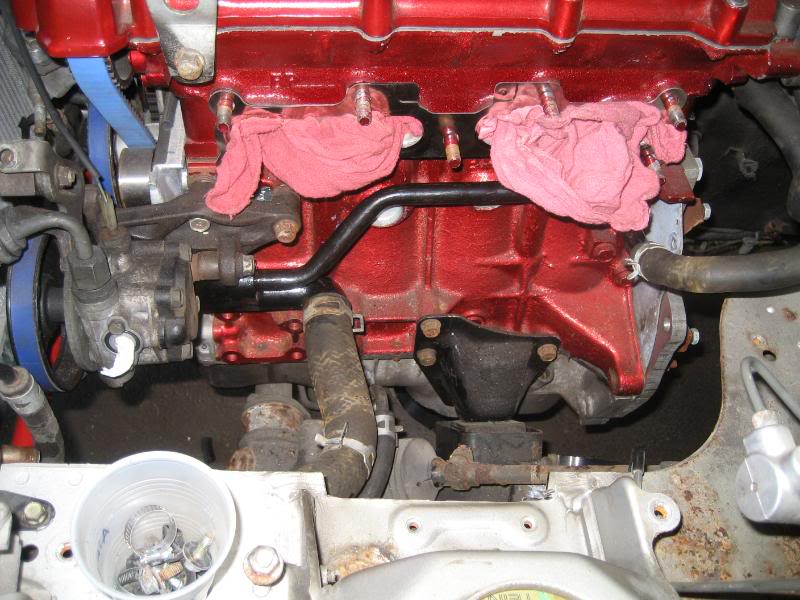
I also cut off the hard 90 elbow on the power steering pump, shortened it some, and ground the flange smooth. I don't like how the line loops back as it did. I plan on running intercooler piping in that space, so I'd like all the room I can get. Here is a shot of the cut and the flange all cleaned up.
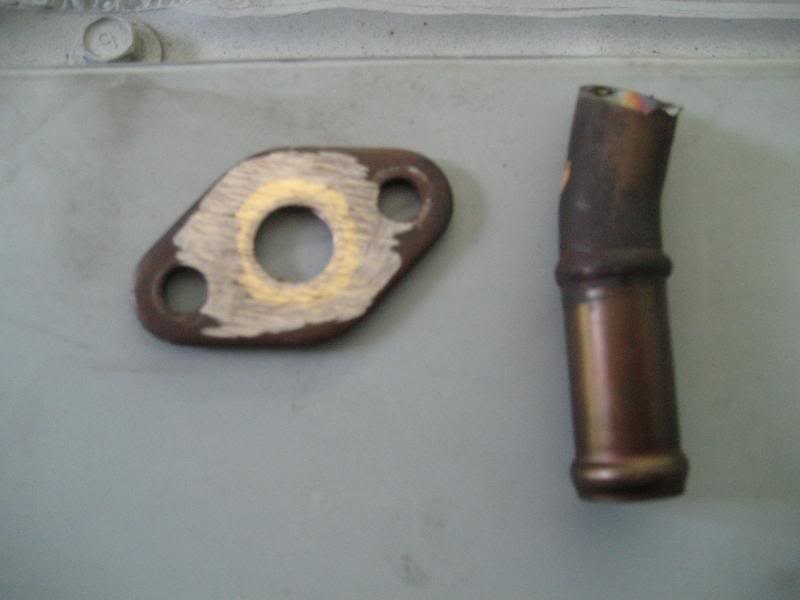
I angled it towards the outlet from the reservoir so it's a more direct route now.
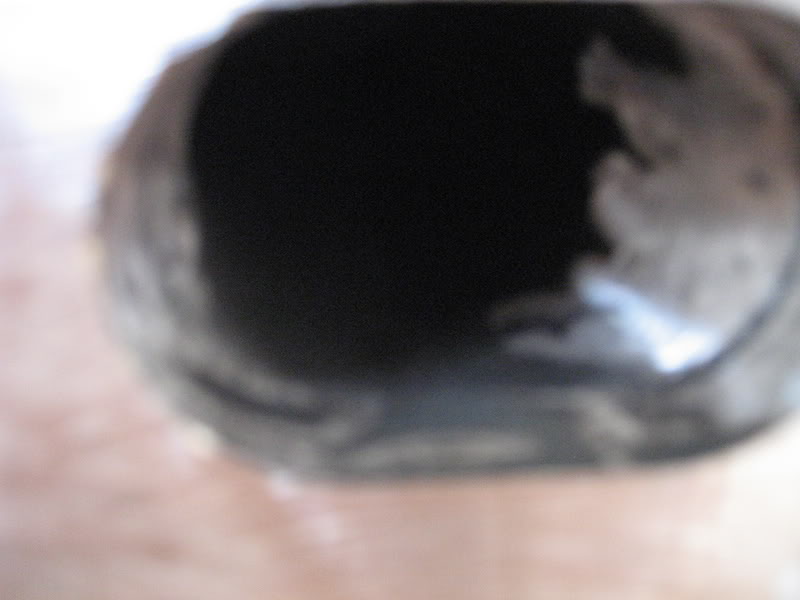
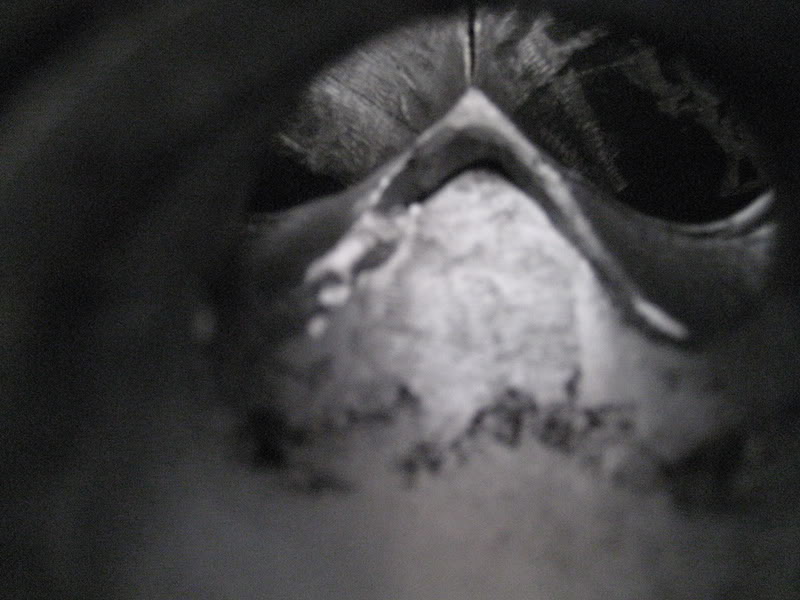
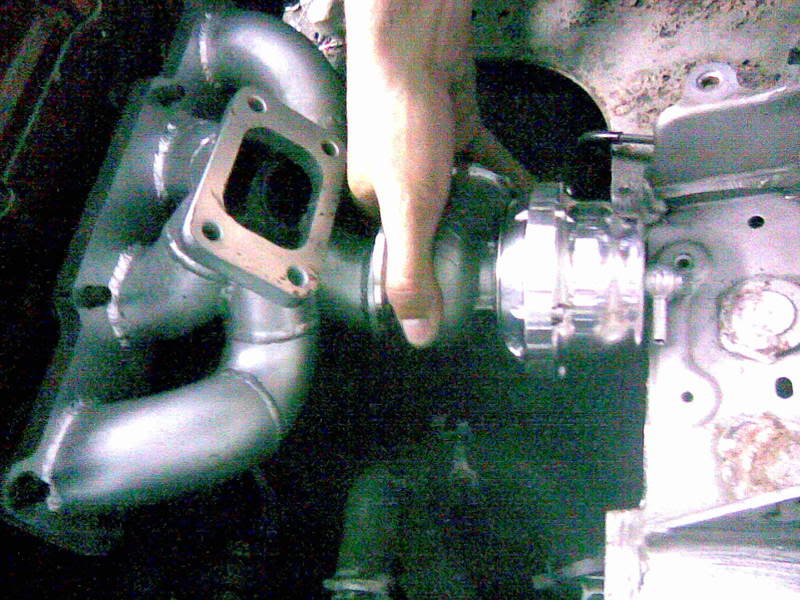
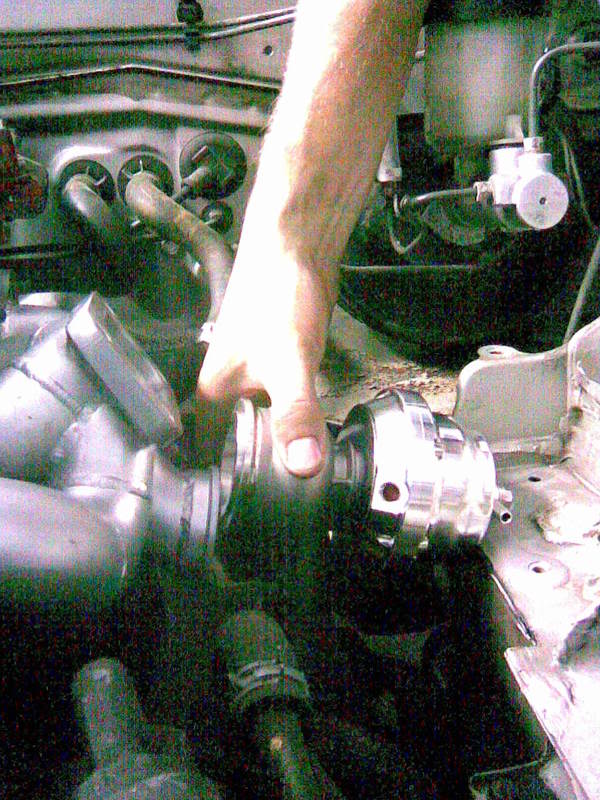
The next problem is a major one. The manifold I got is an ETD Racing/M-tuned one. I paid 500 and change for it. I had a tial 44mm wastegate flange put on instead of the 38mm flange. I was unhappy about the fit and finish inside of the runners and especially in the collector, and emailed/called ETD racing about it. They assured me this was how they made manifolds, and as long as the outside was Ok it was going to be fine. To me, it looks terrible....There are big gaps between the joints, excess metal sticking out, and there are jagged edges. The coating is already flaking off from the inside too.
I apologize for the crappy pics as they were taken on a cell phone.

OK, well I'll just run it and if it breaks they said they'll take it back and either fix or replace it. Whatever then. So I go to install the turbo and wastegate and the wastegate doesn't even come close to fitting. I tried cutting out the lip of sheet metal between the shock towers, but it still is off by about an inch. Now I'm pissed.
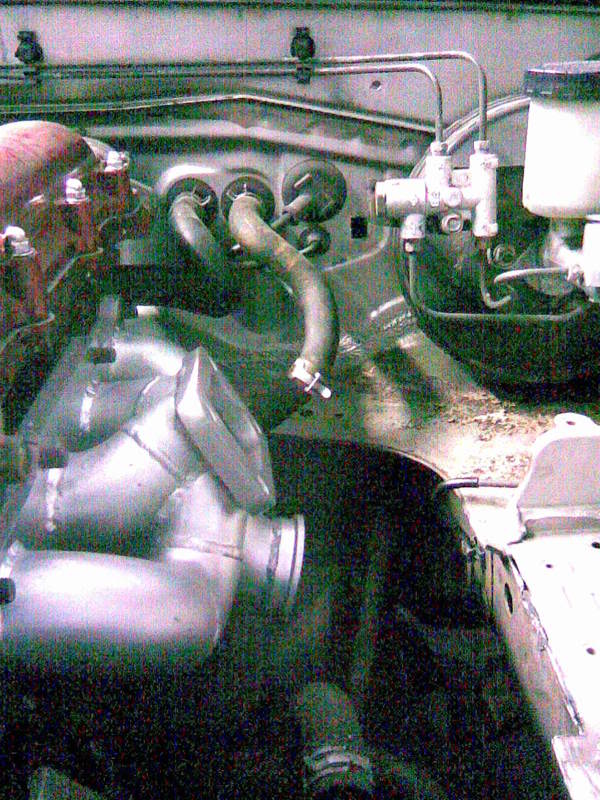
I emailed Marc from M-tuned about it, and sent him these pictures. He said he would get in contact with John about it for me and get back to me. They get back to me and tell me that they welded the tial 44mm flange in the exact same spot on their jig as the tial 38mm flange, and ask for the dimensions of the 44. John had originally told me they had done a 44mm flange on this manifold for another miata and that it was not a problem at all. I was never told it would fit, just that they had done it in the past and that there was no problem doing so, which I assumed meant it would fit. Here is the email I got from Marc.
"Hi Andy,
I spoke to John this afternoon regarding your situation. John recalls you calling and the conversation you and he had in regards to changing the flange to a Tial 44mm vs. the regular 38mm flange the manifold normally ships with. He mentioned to you that he has welded different flanges to the manifolds in the past, one of which was the 44mm V-Band (never heard back from this customer however) and would be able to do that for you. He is adamant that at no point did he assure it was tried and tested to have a 44mm flange. The only configuration tested is a 38mm flange on all of our Miata Manifolds and therefore sold on our retail site.
* You would be surprised at some of the requests. John makes a ton with no wastegate flange (Just the pipe) and the user will position it themselves.
The 44mm V-Band was welded in the exact same spot (Placed in the JIG) as a 38mm flange would be welded; the fitment issue is due to the size of the Tial Gate in question.
At this point Andy, we have to apologize for the misunderstanding, and offer our apologizes. Your best bet would be to modify the wastegate outlet on the manifold to fit in your car with the Tial 44mm gate. I know this is not optimal, but we don�t have a way of building it and ensuring if would not hit.
In the future if you require any ETD or M-Tuned product I would be happy to hook you up with a deal due to the trouble this may have caused.
I hope you understand our position making a one of manifold on request. Please let me know if I can be of more assistance.
Thanks, Marc"
I feel like they went about this in a pretty sneaky way. By telling me they had done it in the past I assumed that it would fit and they would make the necessary changes to the flange for the size increase of the 2 wastegates. It's pretty obvious the wastagates are larger. I know I should have asked the direct question, but I again assumed that ETD racing was a reputable company in the turbo miata relm. I feel like I was taken advantage of and steered down a path of 1/2 right answers by not being up front with me. They also offered me a discount any any future purchases, but the only things they have for a miata is a manifold. I inquired about a downpipe, and their response was "they don't make them because of all the variations, involved- now how is that different than putting a different flange on a manifold?? I sent them an email back to which I have not gotten a response from. I definitely will not be doing business with them in the future, and wanted to warn any other potential buyer of any of their products. I also can't believe their solution is for me to modify the manifold- that was why I paid the extra cash for them to do it in the first place! I also have a feeling that if I do modify it, and it cracks because of the spaces between the joints on the inside, that they won't honor their warranty with me and blame the modification I did as the cause of the failure.
I am extremely dissatisfied with ETD Racing/ M-tuned.com, John, and Marc. Way to take care of your customers...
I'm still fuming about this, but I will end my rant for now. What I've decided on doing is cutting the frame out and boxing it in to create enough space for the wastegate.
Lower radiator hard lines primed, painted, and installed
TII driveshaft back from the shop shortened and balanced. I painted it too.
I then went back to the tranny and replaced some of the seals as they had been leaking trans fluid. Here is a shot of some of the guts inside a TII transmission
I also cut off the hard 90 elbow on the power steering pump, shortened it some, and ground the flange smooth. I don't like how the line loops back as it did. I plan on running intercooler piping in that space, so I'd like all the room I can get. Here is a shot of the cut and the flange all cleaned up.
I angled it towards the outlet from the reservoir so it's a more direct route now.
The next problem is a major one. The manifold I got is an ETD Racing/M-tuned one. I paid 500 and change for it. I had a tial 44mm wastegate flange put on instead of the 38mm flange. I was unhappy about the fit and finish inside of the runners and especially in the collector, and emailed/called ETD racing about it. They assured me this was how they made manifolds, and as long as the outside was Ok it was going to be fine. To me, it looks terrible....There are big gaps between the joints, excess metal sticking out, and there are jagged edges. The coating is already flaking off from the inside too.
I apologize for the crappy pics as they were taken on a cell phone.
OK, well I'll just run it and if it breaks they said they'll take it back and either fix or replace it. Whatever then. So I go to install the turbo and wastegate and the wastegate doesn't even come close to fitting. I tried cutting out the lip of sheet metal between the shock towers, but it still is off by about an inch. Now I'm pissed.
I emailed Marc from M-tuned about it, and sent him these pictures. He said he would get in contact with John about it for me and get back to me. They get back to me and tell me that they welded the tial 44mm flange in the exact same spot on their jig as the tial 38mm flange, and ask for the dimensions of the 44. John had originally told me they had done a 44mm flange on this manifold for another miata and that it was not a problem at all. I was never told it would fit, just that they had done it in the past and that there was no problem doing so, which I assumed meant it would fit. Here is the email I got from Marc.
"Hi Andy,
I spoke to John this afternoon regarding your situation. John recalls you calling and the conversation you and he had in regards to changing the flange to a Tial 44mm vs. the regular 38mm flange the manifold normally ships with. He mentioned to you that he has welded different flanges to the manifolds in the past, one of which was the 44mm V-Band (never heard back from this customer however) and would be able to do that for you. He is adamant that at no point did he assure it was tried and tested to have a 44mm flange. The only configuration tested is a 38mm flange on all of our Miata Manifolds and therefore sold on our retail site.
* You would be surprised at some of the requests. John makes a ton with no wastegate flange (Just the pipe) and the user will position it themselves.
The 44mm V-Band was welded in the exact same spot (Placed in the JIG) as a 38mm flange would be welded; the fitment issue is due to the size of the Tial Gate in question.
At this point Andy, we have to apologize for the misunderstanding, and offer our apologizes. Your best bet would be to modify the wastegate outlet on the manifold to fit in your car with the Tial 44mm gate. I know this is not optimal, but we don�t have a way of building it and ensuring if would not hit.
In the future if you require any ETD or M-Tuned product I would be happy to hook you up with a deal due to the trouble this may have caused.
I hope you understand our position making a one of manifold on request. Please let me know if I can be of more assistance.
Thanks, Marc"
I feel like they went about this in a pretty sneaky way. By telling me they had done it in the past I assumed that it would fit and they would make the necessary changes to the flange for the size increase of the 2 wastegates. It's pretty obvious the wastagates are larger. I know I should have asked the direct question, but I again assumed that ETD racing was a reputable company in the turbo miata relm. I feel like I was taken advantage of and steered down a path of 1/2 right answers by not being up front with me. They also offered me a discount any any future purchases, but the only things they have for a miata is a manifold. I inquired about a downpipe, and their response was "they don't make them because of all the variations, involved- now how is that different than putting a different flange on a manifold?? I sent them an email back to which I have not gotten a response from. I definitely will not be doing business with them in the future, and wanted to warn any other potential buyer of any of their products. I also can't believe their solution is for me to modify the manifold- that was why I paid the extra cash for them to do it in the first place! I also have a feeling that if I do modify it, and it cracks because of the spaces between the joints on the inside, that they won't honor their warranty with me and blame the modification I did as the cause of the failure.
I am extremely dissatisfied with ETD Racing/ M-tuned.com, John, and Marc. Way to take care of your customers...
I'm still fuming about this, but I will end my rant for now. What I've decided on doing is cutting the frame out and boxing it in to create enough space for the wastegate.
Reply
0
0
08-11-2008, 10:48 PM
#98

I feel like they went about this in a pretty sneaky way. By telling me they had done it in the past I assumed that it would fit and they would make the necessary changes to the flange for the size increase of the 2 wastegates. It's pretty obvious the wastagates are larger. I know I should have asked the direct question, but I again assumed that ETD racing was a reputable company in the turbo miata relm. I feel like I was taken advantage of and steered down a path of 1/2 right answers by not being up front with me. They also offered me a discount any any future purchases, but the only things they have for a miata is a manifold. I inquired about a downpipe, and their response was "they don't make them because of all the variations, involved- now how is that different than putting a different flange on a manifold?? I sent them an email back to which I have not gotten a response from. I definitely will not be doing business with them in the future, and wanted to warn any other potential buyer of any of their products. I also can't believe their solution is for me to modify the manifold- that was why I paid the extra cash for them to do it in the first place! I also have a feeling that if I do modify it, and it cracks because of the spaces between the joints on the inside, that they won't honor their warranty with me and blame the modification I did as the cause of the failure.
I am extremely dissatisfied with ETD Racing/ M-tuned.com, John, and Marc. Way to take care of your customers...
I'm still fuming about this, but I will end my rant for now. What I've decided on doing is cutting the frame out and boxing it in to create enough space for the wastegate.
I am extremely dissatisfied with ETD Racing/ M-tuned.com, John, and Marc. Way to take care of your customers...
I'm still fuming about this, but I will end my rant for now. What I've decided on doing is cutting the frame out and boxing it in to create enough space for the wastegate.
Did you know that there are even different of the 45mm.. I believe the Turbonetics 45mm Wastegate is smaller.
I did not send you a return email as your last comment was how you were going to trash me on the forums.. Sorry Dude, I don't play that way.
Reply
0
0
08-11-2008, 11:01 PM
#99
Elite Member

iTrader: (9)
Join Date: Jun 2006
Location: Chesterfield, NJ
Posts: 6,905
Total Cats: 400
The next problem is a major one. The manifold I got is an ETD Racing/M-tuned one. I paid 500 and change for it. I had a tial 44mm wastegate flange put on instead of the 38mm flange. I was unhappy about the fit and finish inside of the runners and especially in the collector, and emailed/called ETD racing about it. They assured me this was how they made manifolds, and as long as the outside was Ok it was going to be fine. To me, it looks terrible....There are big gaps between the joints, excess metal sticking out, and there are jagged edges. The coating is already flaking off from the inside too.
I apologize for the crappy pics as they were taken on a cell phone.
I apologize for the crappy pics as they were taken on a cell phone.

Just kidding man, sorry to hear about your troubles on an otherwise killer build. The issues with the wastegate are exactly why I won't build a manifold other than the std. Absurdflow without the car in my person. To me, it's not worth the personal aggravation and diminished reputation for ~$300 profit.
Reply
0
0
08-12-2008, 12:14 AM
#100
Newb

Join Date: Aug 2008
Posts: 31
Total Cats: 0
your turbo diff solid mount is very clean. I did a RX7 turbo II diff approx 2 yrs ago used a plate and welded to subframe then placed a rubber mount in between the solid plate and diff. Here is a link to my install.
http://www.cardomain.com/ride/613741
Please let me know if anything cracks in your mount due to fact may revamp my mount. Good luck on your build looks very nice.
http://www.cardomain.com/ride/613741
Please let me know if anything cracks in your mount due to fact may revamp my mount. Good luck on your build looks very nice.
Reply
0
0


