1.8L NA Miata Useless Underhood Crap Removal Guide
 06-17-2008, 02:38 PM
#1
Elite Member
Thread Starter
iTrader: (1)

Join Date: Jun 2007
Location: VA, Germany, Afghanistan
Posts: 2,945
Total Cats: 3
This is my start to a thread that some may find usefull....If anyone else has any input let me know and i'll add it.
 ONE: Colant overflow resevoir, options here include:
A: Leaving it alone,
B: Moving it ghetto-style into the front bumper using zip-ties, wire, something of that sort.
C: Sourcing a smaller universal styl resevoir to use in the front bumper
D: Using something along the lines of a catch can or even a soda bottle in the front bumper for the truly ghetto approach.
E: Tucking the overflow hose down the nose with no overflow and keep an eye on coolant levels
TWO: Charcoal Canister Crap
Rip it out, tuck away any loose electricl connectors left over, plug any vaccum lines
THREE: The Charcoal canister itself
Rip it out and loop the hard lines with the hose coming out of the top of the canister in the middle. (shown in detail in Picture Two)
FOUR: Fuel Lines
While these obviously can't be removed, they can be tucked underneath of the intake manifold if bent VERY slowly and carefully, try not to pinch the fuel lines in any way...
FIVE: EGR Crap
Shown better in a later picture...
SIX: Part of the A/C system which can be removed, more details on that later.
SEVEN: Windshield washer fluid resevoir
Rip it out..pretty much all there is to that one..

PICTURE THREE:

ONE: More EGR parts
Simply remove them, cap/loop any vaccum lines
TWO: Power steering fluid resevoir
Will be removed along with power steering later
THREE: Cruise Control
1. Remove the vaccum line from the intake manifold and cap it.
2. Unbolt the main body of the actuator from the body and the airbox,
3. Remove the cable from the gas pedal leading to the actuator,
4. Unplug all electrical connections and remove,
5. Go the extra mile and remove the interior switches to you can sell off all the pieces to someone without CC to make a few bucks
FOUR: Diagnostics box bracket
Unbolt the bracket from the body, remove the diag. box from the bracket throw away the bracekt and tuck the diagnostics box under the inside lip of the fender
Pretty straightforward, three 14mm bolts and she's out of there, just in front of the oil filter, beside the fuel lines.
1.8L NA Miata useless crap removal guide
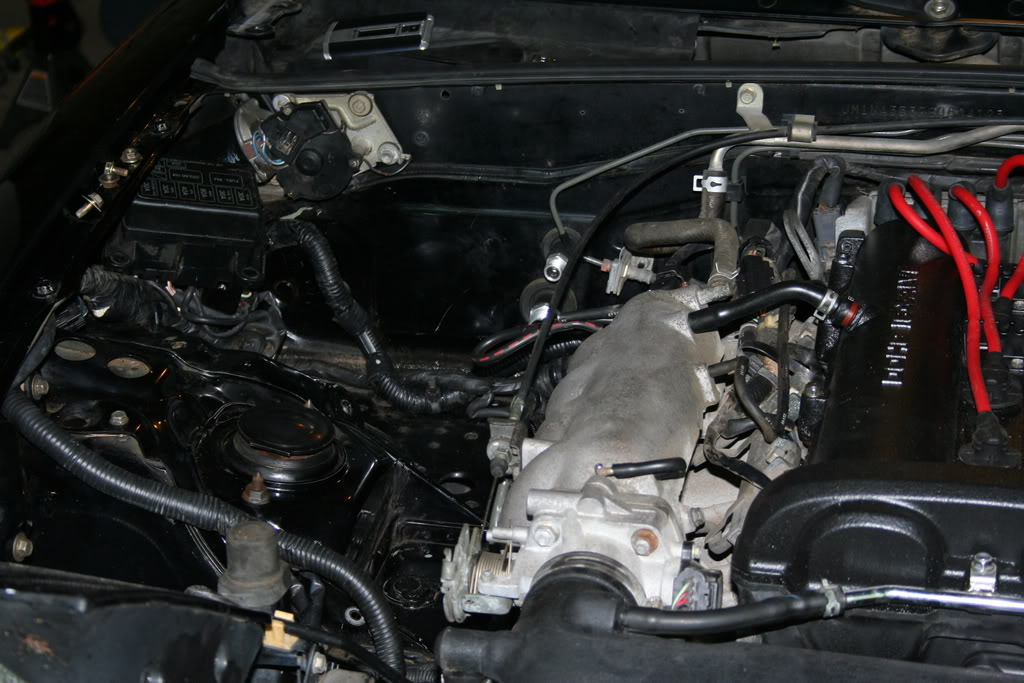
PICTURE ONE:
A: Leaving it alone,
B: Moving it ghetto-style into the front bumper using zip-ties, wire, something of that sort.
C: Sourcing a smaller universal styl resevoir to use in the front bumper
D: Using something along the lines of a catch can or even a soda bottle in the front bumper for the truly ghetto approach.
E: Tucking the overflow hose down the nose with no overflow and keep an eye on coolant levels
TWO: Charcoal Canister Crap
Rip it out, tuck away any loose electricl connectors left over, plug any vaccum lines
THREE: The Charcoal canister itself
Rip it out and loop the hard lines with the hose coming out of the top of the canister in the middle. (shown in detail in Picture Two)
FOUR: Fuel Lines
While these obviously can't be removed, they can be tucked underneath of the intake manifold if bent VERY slowly and carefully, try not to pinch the fuel lines in any way...
FIVE: EGR Crap
Shown better in a later picture...
SIX: Part of the A/C system which can be removed, more details on that later.
SEVEN: Windshield washer fluid resevoir
Rip it out..pretty much all there is to that one..
PICTURE TWO: CLOSE UP OF LOOPED CHARCOAL CANISTER HARD LINES
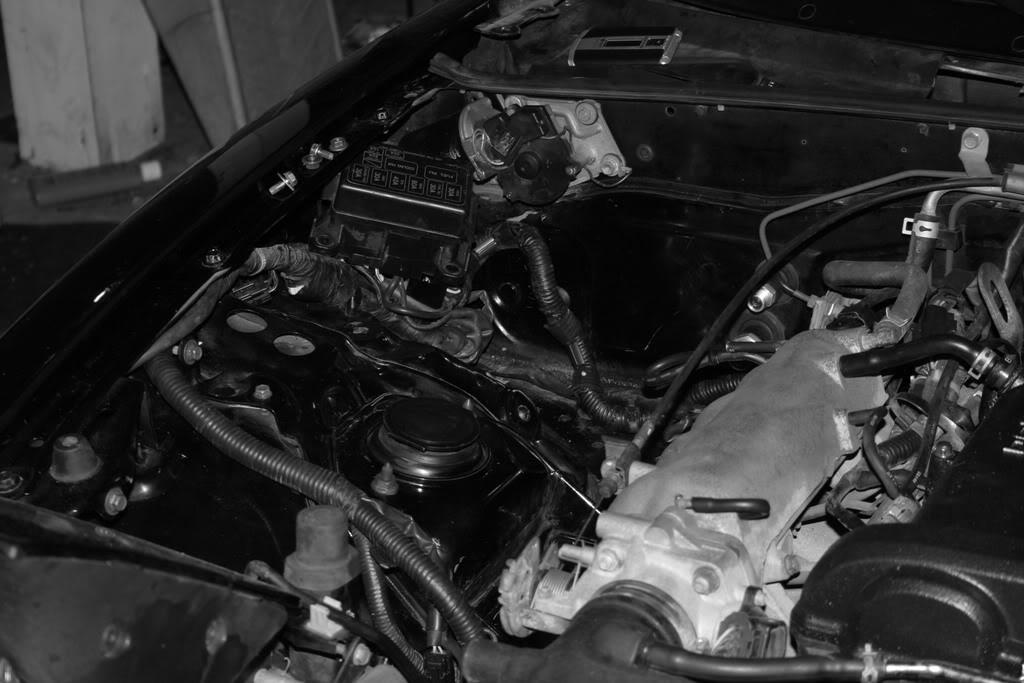
PICTURE THREE:
ONE: More EGR parts
Simply remove them, cap/loop any vaccum lines
TWO: Power steering fluid resevoir
Will be removed along with power steering later
THREE: Cruise Control
1. Remove the vaccum line from the intake manifold and cap it.
2. Unbolt the main body of the actuator from the body and the airbox,
3. Remove the cable from the gas pedal leading to the actuator,
4. Unplug all electrical connections and remove,
5. Go the extra mile and remove the interior switches to you can sell off all the pieces to someone without CC to make a few bucks
FOUR: Diagnostics box bracket
Unbolt the bracket from the body, remove the diag. box from the bracket throw away the bracekt and tuck the diagnostics box under the inside lip of the fender
PICTURE FOUR: Intake Manifold Brace/bracket

Pretty straightforward, three 14mm bolts and she's out of there, just in front of the oil filter, beside the fuel lines.
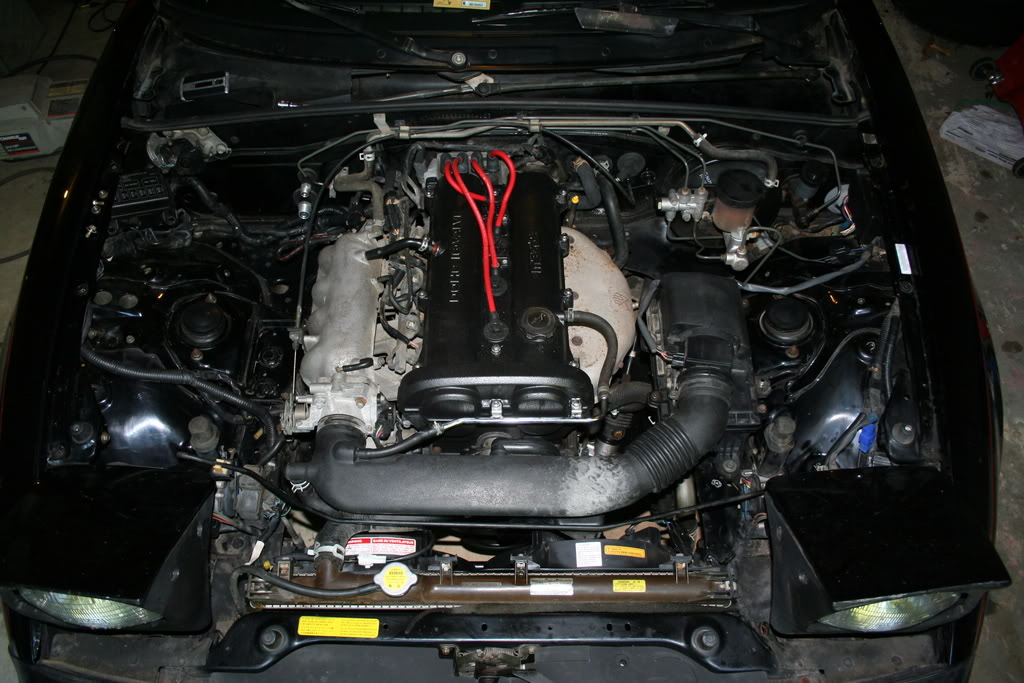
PICTURE FIVE: What your driver's side will look like with diag. box, cruise, Power steering removed

PICTURE SIX: What your passenger's side will look like with EGR, charcoal canister, coolant overflow, and A/C Lines removed

More Pictures:
All Power Steering Components removed
All Air Conditioning components that will be removed
All Cruise Control components that will be removed (will be more if you tackle the pieces in the cabin)
Some EGR components that will be removed (more can be removed if you make/purchase block-off plates) and the intake manifold brace
All Charcoal Canister components that will be removed
One "Ghetto" method of moving the radiator overflow
PICTURE SIX: What your passenger's side will look like with EGR, charcoal canister, coolant overflow, and A/C Lines removed
More Pictures:
All Power Steering Components removed
All Air Conditioning components that will be removed
All Cruise Control components that will be removed (will be more if you tackle the pieces in the cabin)
Some EGR components that will be removed (more can be removed if you make/purchase block-off plates) and the intake manifold brace
All Charcoal Canister components that will be removed
One "Ghetto" method of moving the radiator overflow
Last edited by KPLAFIN; 06-17-2008 at 03:12 PM.

Reply
 0
0

0
 06-17-2008, 03:14 PM
#3
Elite Member
Thread Starter
iTrader: (1)
Join Date: Jun 2007
Location: VA, Germany, Afghanistan
Posts: 2,945
Total Cats: 3
No im really not am i....going back and reading it again it's not reaaly all tht helpful, wish i would have thought about doing this thread before i started doing this stuff myself, ill see what i can do though...don't lose faith quite yet.
Reply
0
0
06-17-2008, 03:31 PM
#5
Elite Member
Thread Starter
iTrader: (1)
Join Date: Jun 2007
Location: VA, Germany, Afghanistan
Posts: 2,945
Total Cats: 3

Parallel parking really isn't that bad, no nice suit needed, i'm 19, nd in the odd chance that situation aarose, that's why i have my explorer.....
Last edited by KPLAFIN; 06-17-2008 at 04:22 PM.
Reply
0
0


 06-17-2008, 05:15 PM
#9
Elite Member
Thread Starter
iTrader: (1)
Join Date: Jun 2007
Location: VA, Germany, Afghanistan
Posts: 2,945
Total Cats: 3
I know this sounds weird aafter all the other things i've removed from the caar but i really dont wanna ditch my washer fluid resevoir! LOL i probably will soon though. how do you get that damn fender off, i took a shot aat it earlier nd got to a point where i felt like i had just one bolt left right in the very front but gave up when i couldnt find it, it looked to me like to get the bumper off the fenders had to go, but the bumper has to go to get the fenders off...(body work noob)
Reply
0
0


 06-17-2008, 05:59 PM
#15
Elite Member
Thread Starter
iTrader: (1)
Join Date: Jun 2007
Location: VA, Germany, Afghanistan
Posts: 2,945
Total Cats: 3
So i was convinced:
Washer bottle and bracket for washer bottle/fuse block removed, fuse block tucked in the corner by the firewal....
Have i mentioned that i think im in love with my new DSLR?
Washer bottle and bracket for washer bottle/fuse block removed, fuse block tucked in the corner by the firewal....
Have i mentioned that i think im in love with my new DSLR?
Reply
0
0
06-17-2008, 06:19 PM
#16
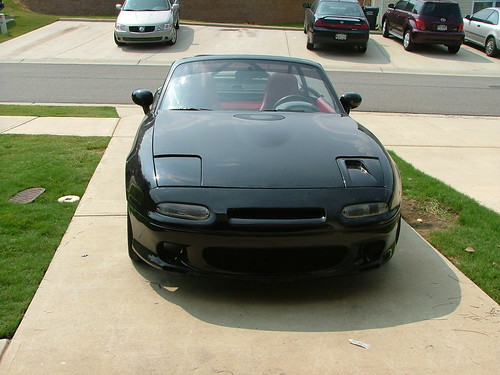
Ditch it, then you can get rid of those silly black pimples on the hood.
http://img.photobucket.com/albums/v6...e/DSCN0195.jpg
http://img.photobucket.com/albums/v6...e/DSCN0195.jpg

Reply
0
0
06-17-2008, 06:37 PM
#18
Elite Member
iTrader: (11)

Join Date: Jun 2007
Location: Overland Park, Kansas
Posts: 5,360
Total Cats: 43

404: Useless Crap not found Captain!
Well... Except the EGR which is coming off when I install my turbo manifold, and maybe the calibration push button and LED for the LC1... Those are kinda useless just sitting there.

Reply
0
0
06-17-2008, 08:24 PM
#20
Elite Member
iTrader: (11)
Join Date: Jun 2007
Location: Overland Park, Kansas
Posts: 5,360
Total Cats: 43
If, and only IF the car gets totaled or I sell it to someone who doesn't want A/C. Average summer temp here is 98 degrees with 90+% humidity. I'm fat and nothing is worse than sitting in a car sweating my *** off... Well, I'm 6'1 210, but you get the idea.
Cliffs: Never. A/C isn't useless, it was installed for a reason.
Cliffs: Never. A/C isn't useless, it was installed for a reason.
Reply
0
0


