
More Oil Catch Can Contents


Elite Member

Joined: Jul 2005
Posts: 2,502
Total Cats: 146
From: Anacortes, WA
Think there is any real benefit with going with this type of EVAC fitting with the Venturi style tip? Only $2 more then Summit kit. I have heard that Venturi tips draw vacuum better?
Vibrant EVAC Kit
Vibrant EVAC Kit
It has an AN fitting on it though. I wonder if they have a Check valve with AN fittings.
Bob
Reply
 0
0

0

Yes none of that oil smoke was going through the combustion chamber or turbo. It was getting sucked out my catch can through my exhaust slash cut pulling a vacuum on the crank case. Oil was entering the exhaust flow at about where the Cat normally is. If I took the vacuum hose going to the exhaust loose the catch can would fill up and over flow.
I have an update though.
I removed the valve cover vent from the intake side (The OEM PCV port), just blocked it off still have the exhaust side valve cover breather and -10 vent port in the side of the block. I also found a PCV valve that works perfect in my -10 return line to the bottom of the pan. No more puking lots of oil into the catch can at all.
I am fairly confident that I have learned that using the OEM PCV port as a vent source doesn�t work well. Oil must pool up in the aft right corner of the valve cover when you have high cornering G�s, Hard acceleration, and some on/off throttle it will puke oil out. You can drive around hard on street tires all day and not have an issue. Put sticky tires on it and flog it on the track with some hard left hand turns and it is a different story.
The vent on the exhaust side is baffled with it�s opening right in the center of the valve cover and the oil doesn�t slosh into it.
Bob
Do you have just a simple rubber hose coming off your slash cut still or did you upgrade to a different material? Do you have any pictures of the whole setup completely hooked up?
Reply
0
0

Im seriously considering doing this after reading through the entire thread. Im currently having issues with my newly built motor and set up.
Im at 20psi, 320whp 1.6 on e85. Im running 1000cc injectors (which i think are the problem) My problem is after about 150miles of driving and hard pulls my catch can is 95% e85 fuel and 5% oil residue. And this is full to the top of the catch can.
The way i have my catch can set-up is a little unique and rarely seen on miata's but common for honda's. So where the OEM pvc port is i had a -6an male bung welded and about 2inches next to I drilled out another hole right over the baffled area and had another -6an bung welded. These 2 ports vent directly to the catch can with NO vaccum. Exhaust side OEM port is plugged off.
Reply
0
0
Elite Member
Joined: Jul 2005
Posts: 2,502
Total Cats: 146
From: Anacortes, WA
Bob
Reply
0
0
Elite Member
Joined: Jul 2005
Posts: 2,502
Total Cats: 146
From: Anacortes, WA
Im seriously considering doing this after reading through the entire thread. Im currently having issues with my newly built motor and set up.
Im at 20psi, 320whp 1.6 on e85. Im running 1000cc injectors (which i think are the problem) My problem is after about 150miles of driving and hard pulls my catch can is 95% e85 fuel and 5% oil residue. And this is full to the top of the catch can.
The way i have my catch can set-up is a little unique and rarely seen on miata's but common for honda's. So where the OEM pvc port is i had a -6an male bung welded and about 2inches next to I drilled out another hole right over the baffled area and had another -6an bung welded. These 2 ports vent directly to the catch can with NO vaccum. Exhaust side OEM port is plugged off.
Im at 20psi, 320whp 1.6 on e85. Im running 1000cc injectors (which i think are the problem) My problem is after about 150miles of driving and hard pulls my catch can is 95% e85 fuel and 5% oil residue. And this is full to the top of the catch can.
The way i have my catch can set-up is a little unique and rarely seen on miata's but common for honda's. So where the OEM pvc port is i had a -6an male bung welded and about 2inches next to I drilled out another hole right over the baffled area and had another -6an bung welded. These 2 ports vent directly to the catch can with NO vaccum. Exhaust side OEM port is plugged off.
I�m pretty sure the OEM exhaust side valve cover port and baffle setup works and the other side doesn�t work so well.
Seems like if you started sucking mostly ethanol out the tailpipe instead of oil you would have a flame thrower instead of a smoke screen.
Bob
Reply
0
0
I have no problem at all relocating the ports to the exhaust side of the valve cover instead of using the intake side, but another thing i was thinking of trying is using both the OEM pvc port and the exhaust side port. Run them both to the catch can then run another line to the exhaust ?
At this point i'll have to make a custom catch thats baffled with 3 ports
At this point i'll have to make a custom catch thats baffled with 3 ports
Reply
0
0
Elite Member
Joined: Jul 2005
Posts: 2,502
Total Cats: 146
From: Anacortes, WA
I have no problem at all relocating the ports to the exhaust side of the valve cover instead of using the intake side, but another thing i was thinking of trying is using both the OEM pvc port and the exhaust side port. Run them both to the catch can then run another line to the exhaust ?
At this point i'll have to make a custom catch thats baffled with 3 ports
At this point i'll have to make a custom catch thats baffled with 3 ports
Eliminating the one vent to the OEM pcv port in my system seems to have eliminated the filling up of my catch can with oil in a short amount of time when track driven. I also added a check valve to the drain line back to the pan.
Bob
Reply
0
0
I wonder if your first configuration would have behaved differently on a clockwise track. BMP and Pacific both have sustained high-g left handers (Pacific more than Bremerton). I'm also curious if the check valve in the drain would have fixed it by itself.
Regarding the baffling on the exhaust side that isn't there on the intake (stock PCV) side, is there room inside the cover to add a baffle system? I fully understand the 'If it ain't broke, don't fix it' school of thought but the curiosity is still there.
-hyde
Regarding the baffling on the exhaust side that isn't there on the intake (stock PCV) side, is there room inside the cover to add a baffle system? I fully understand the 'If it ain't broke, don't fix it' school of thought but the curiosity is still there.
-hyde
Reply
0
0

Elite Member
Joined: Mar 2008
Posts: 2,054
Total Cats: 14
From: Enschede, NL
I had both OEM valve cover ports plus a port in the side of the block going to a custom baffled catch can that also has a drain back to the very bottom of the sump. The catch can has a vaccume pulled out the top of it it using the exhaust flow post cat.
Eliminating the one vent to the OEM pcv port in my system seems to have eliminated the filling up of my catch can with oil in a short amount of time when track driven. I also added a check valve to the drain line back to the pan.
Bob
Eliminating the one vent to the OEM pcv port in my system seems to have eliminated the filling up of my catch can with oil in a short amount of time when track driven. I also added a check valve to the drain line back to the pan.
Bob
Reply
0
0
Elite Member
Joined: Jul 2005
Posts: 2,502
Total Cats: 146
From: Anacortes, WA
Reply
0
0

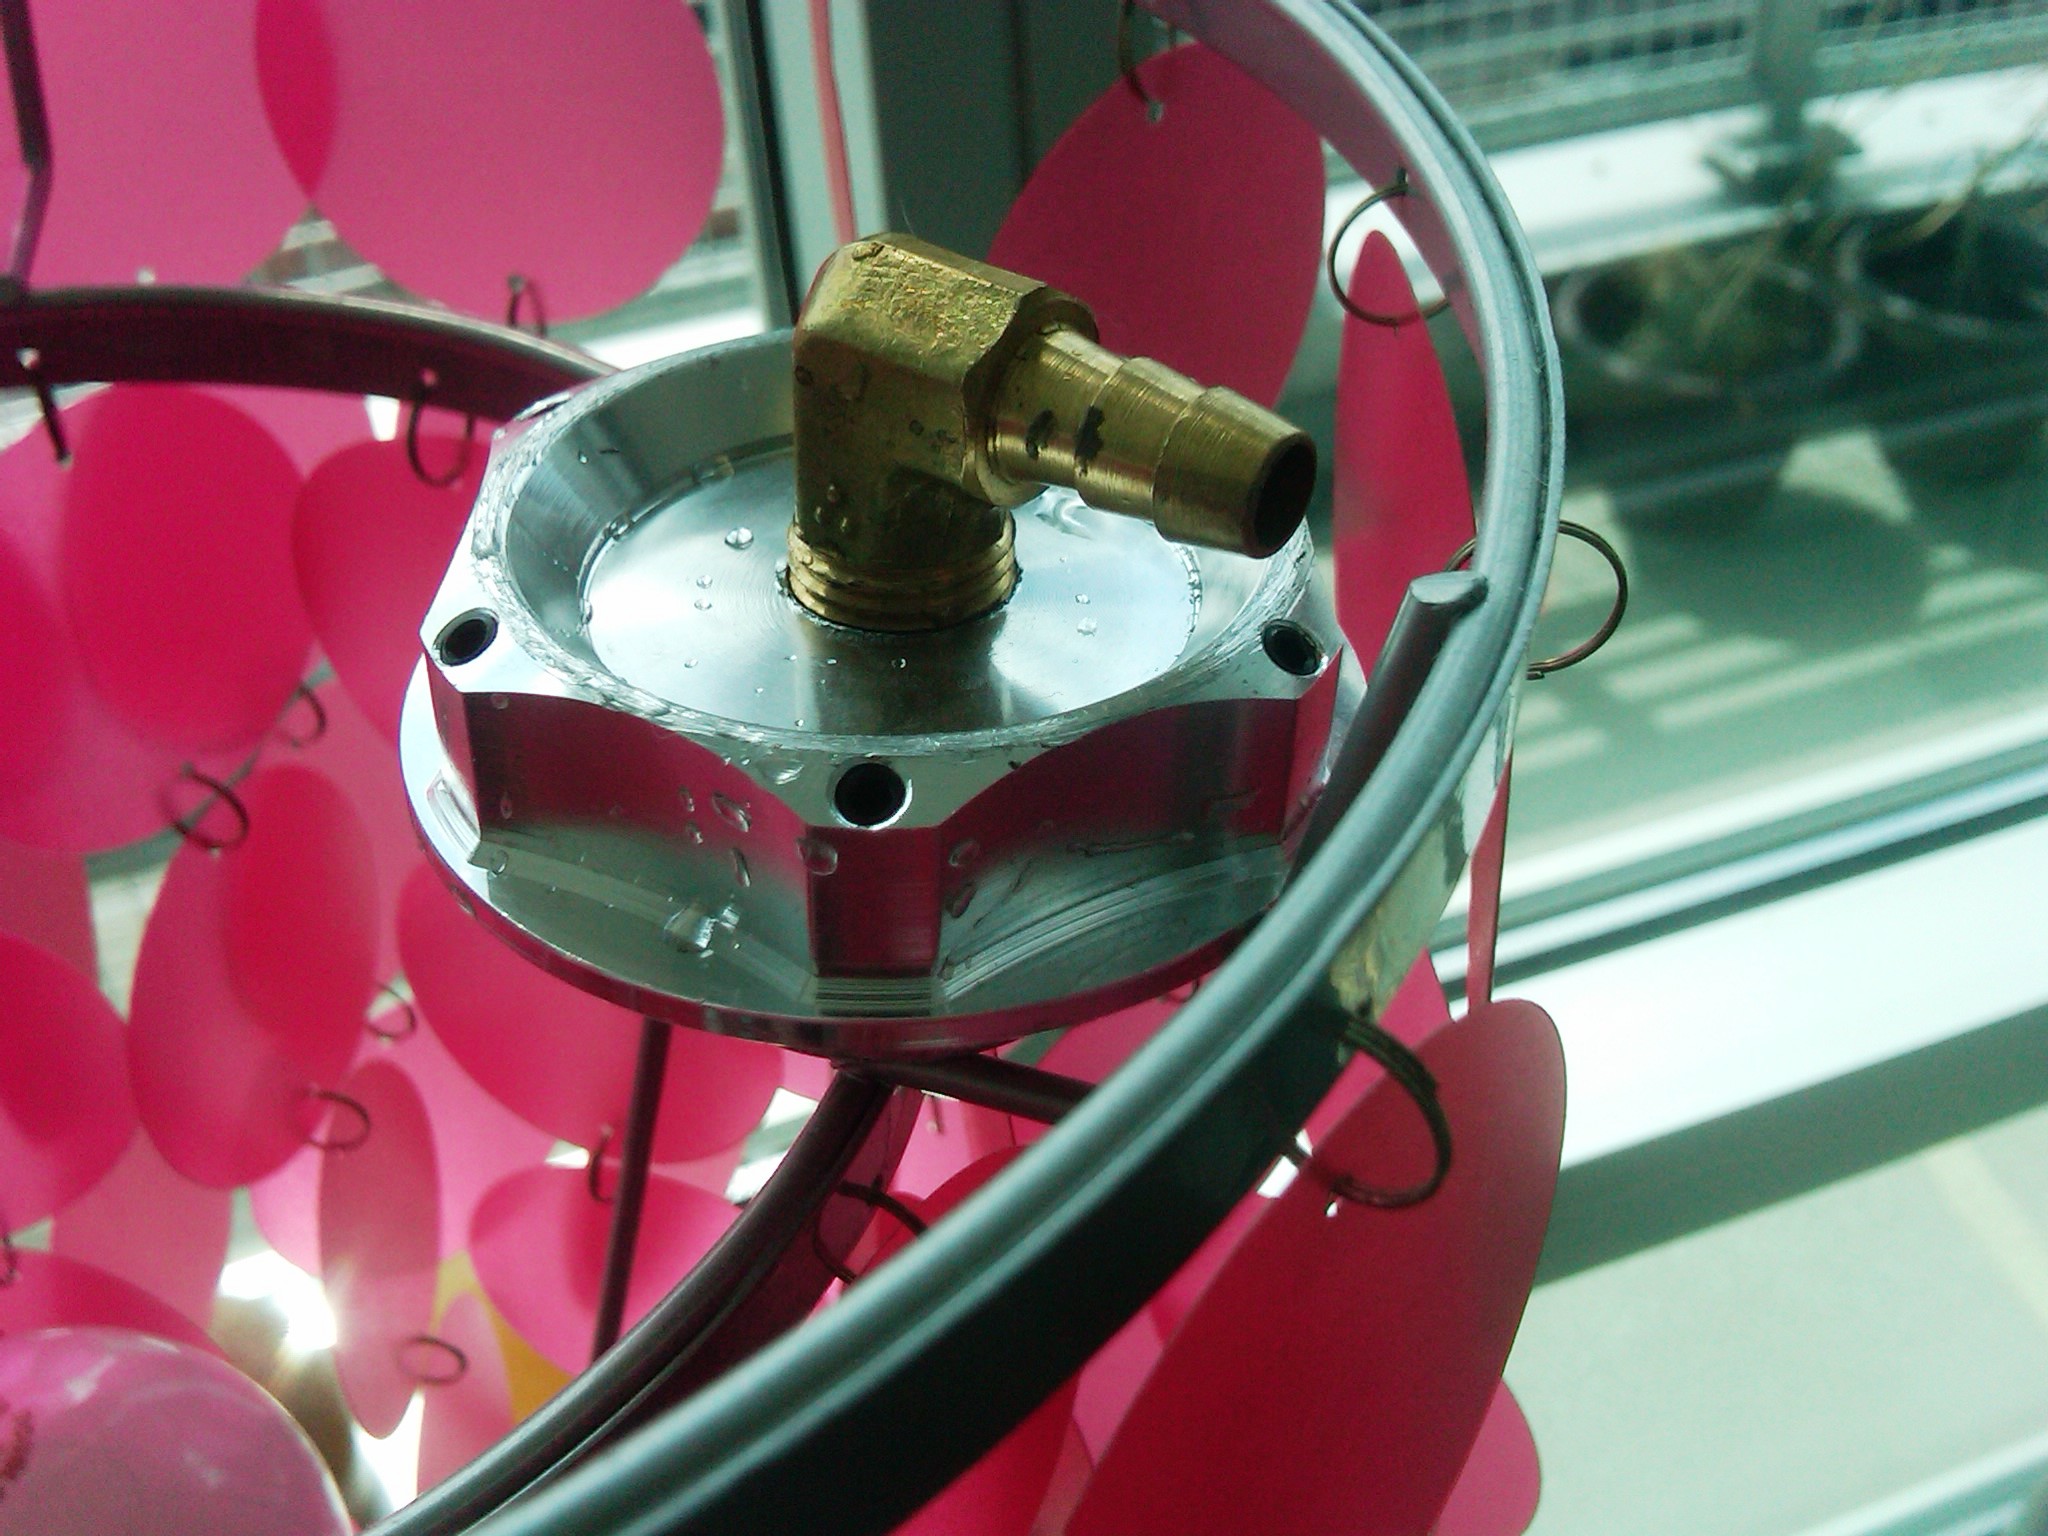
I have a vibrant slash-cut and Moroso. Compared the two. They are very similar. Oddly enough, Vibrant does not make a check valve with -10AN fitting. I ended up using the Vibrant slash-cut and Moroso check valve. Used this to join the two: -10AN Female swivel to 1/2"NPT Male. I brazed a 5/8" fitting to the Moroso check valve and ran a -10AN line from it to the catch can.
The breather port and PCV valve port on my valve cover were drilled out, and -10AN fittings were welded in their place. I also picked up a couple of these -10AN female caps, expecting to cap off the passenger side.
Installed everything and it seemed great! There was a good amount of vacuum at idle and again while blipping the throttle with the car parked in the garage. Headed to my dyno (Dyno Dynamics, steady-state dyno), and the results were not good.
Under load, the slash-cut ADDED up to 2.5-3 PSI of pressure into the system. Power was down 6 hp from baseline. Test was repeated a few times, and yielded the same results. Running through the gears on the dyno, the pressure would drop to vacuum while shifting between gears.
I removed the hose to the slash-cut and vented the catch can to atmo. Pressure dropped to 0.2 PSI (max), power went up by 8 hp from baseline.
I ran a bunch more tests and came up with the following:
My previous trip to the dyno was my baseline. That day, I had the stock valve cover, both ports running to a catch can, catch can VTA. Pressure climbed with RPMs under load, maxing out at about 0.40 PSI.
On this day, my new setup had the -10AN fittings in the valve cover, catch can, slash-cut, etc.
1. Both -10AN fittings to catch can + slash cut = -6 hp, +2.5 PSI of crank case pressure compared to the baseline.
2. Both -10AN fittings to catch can + VTA, = +2 hp, -0.20 PSI of crank case pressure from baseline.
3. Same as #2 but with pass side port capped off, = +2 hp, ~-0.17 PSI of crank case pressure from baseline.
Spent the day at the track yesterday, and the engine did not puke a drop of oil. Zip, nada! Had both ports going to the catch can. Had the vent on the catch can going to a secondary catch can, and the secondary catch can vented to atmo (VTA). Engine ran absolutely awesome. The reason for the secondary catch can was that I wanted to actually catch the oil if it puked. I dumped a giant amount of oil into my engine bay on last trip to the track, when I had only one catch can that vented to atmo.
The biggest change to my system, I think, was putting the catch can as high in the engine bay as possible. I have my can attached to the firewall near the brake booster, and just about touching the hood.
I ran clear tubes from the valve cover to the catch can while on the dyno and again at the test day. Neither hose ever showed any signs of oil whatsoever. Not even misting. The first catch can has a drain-back to the oil pan with a check valve in line. The secondary catch can does not. At the end of the track day, I opened the valve on the secondary catch can and about 10 drops of clear water came out. Looked clean enough to drink.
I really think that positioning the catch can high up in the engine bay, and angling the hoses up made all the difference in the world. That, combined with the larger breather ports in the VC seem to make a winning combination.
My experience with the slash cut was a total disappointment, and I wouldn't recommend it.
If I go any further with this, my next step would be to connect the catch can to a PCV and then to the intake manifold. I base lined a stock Miata's crank case pressure and found that the higher the RPM, the greater amount of vacuum, even with the PCV blocked off.
That said, I'm so happy to have finally fixed this problem, that I'm afraid to screw with it. Hopefully the problem is gone for good...
- Will
Reply
0
0
Elite Member
Joined: Jul 2005
Posts: 2,502
Total Cats: 146
From: Anacortes, WA
I have a vibrant slash-cut and Moroso. Compared the two. They are very similar. Oddly enough, Vibrant does not make a check valve with -10AN fitting. I ended up using the Vibrant slash-cut and Moroso check valve. Used this to join the two: -10AN Female swivel to 1/2"NPT Male. I brazed a 5/8" fitting to the Moroso check valve and ran a -10AN line from it to the catch can.
The breather port and PCV valve port on my valve cover were drilled out, and -10AN fittings were welded in their place. I also picked up a couple of these -10AN female caps, expecting to cap off the passenger side.
Installed everything and it seemed great! There was a good amount of vacuum at idle and again while blipping the throttle with the car parked in the garage. Headed to my dyno (Dyno Dynamics, steady-state dyno), and the results were not good.
Under load, the slash-cut ADDED up to 2.5-3 PSI of pressure into the system. Power was down 6 hp from baseline. Test was repeated a few times, and yielded the same results. Running through the gears on the dyno, the pressure would drop to vacuum while shifting between gears.
I removed the hose to the slash-cut and vented the catch can to atmo. Pressure dropped to 0.2 PSI (max), power went up by 8 hp from baseline.
I ran a bunch more tests and came up with the following:
My previous trip to the dyno was my baseline. That day, I had the stock valve cover, both ports running to a catch can, catch can VTA. Pressure climbed with RPMs under load, maxing out at about 0.40 PSI.
On this day, my new setup had the -10AN fittings in the valve cover, catch can, slash-cut, etc.
1. Both -10AN fittings to catch can + slash cut = -6 hp, +2.5 PSI of crank case pressure compared to the baseline.
2. Both -10AN fittings to catch can + VTA, = +2 hp, -0.20 PSI of crank case pressure from baseline.
3. Same as #2 but with pass side port capped off, = +2 hp, ~-0.17 PSI of crank case pressure from baseline.
Spent the day at the track yesterday, and the engine did not puke a drop of oil. Zip, nada! Had both ports going to the catch can. Had the vent on the catch can going to a secondary catch can, and the secondary catch can vented to atmo (VTA). Engine ran absolutely awesome. The reason for the secondary catch can was that I wanted to actually catch the oil if it puked. I dumped a giant amount of oil into my engine bay on last trip to the track, when I had only one catch can that vented to atmo.
The biggest change to my system, I think, was putting the catch can as high in the engine bay as possible. I have my can attached to the firewall near the brake booster, and just about touching the hood.
I ran clear tubes from the valve cover to the catch can while on the dyno and again at the test day. Neither hose ever showed any signs of oil whatsoever. Not even misting. The first catch can has a drain-back to the oil pan with a check valve in line. The secondary catch can does not. At the end of the track day, I opened the valve on the secondary catch can and about 10 drops of clear water came out. Looked clean enough to drink.
I really think that positioning the catch can high up in the engine bay, and angling the hoses up made all the difference in the world. That, combined with the larger breather ports in the VC seem to make a winning combination.
My experience with the slash cut was a total disappointment, and I wouldn't recommend it.
If I go any further with this, my next step would be to connect the catch can to a PCV and then to the intake manifold. I base lined a stock Miata's crank case pressure and found that the higher the RPM, the greater amount of vacuum, even with the PCV blocked off.
That said, I'm so happy to have finally fixed this problem, that I'm afraid to screw with it. Hopefully the problem is gone for good...
- Will
The breather port and PCV valve port on my valve cover were drilled out, and -10AN fittings were welded in their place. I also picked up a couple of these -10AN female caps, expecting to cap off the passenger side.
Installed everything and it seemed great! There was a good amount of vacuum at idle and again while blipping the throttle with the car parked in the garage. Headed to my dyno (Dyno Dynamics, steady-state dyno), and the results were not good.
Under load, the slash-cut ADDED up to 2.5-3 PSI of pressure into the system. Power was down 6 hp from baseline. Test was repeated a few times, and yielded the same results. Running through the gears on the dyno, the pressure would drop to vacuum while shifting between gears.
I removed the hose to the slash-cut and vented the catch can to atmo. Pressure dropped to 0.2 PSI (max), power went up by 8 hp from baseline.
I ran a bunch more tests and came up with the following:
My previous trip to the dyno was my baseline. That day, I had the stock valve cover, both ports running to a catch can, catch can VTA. Pressure climbed with RPMs under load, maxing out at about 0.40 PSI.
On this day, my new setup had the -10AN fittings in the valve cover, catch can, slash-cut, etc.
1. Both -10AN fittings to catch can + slash cut = -6 hp, +2.5 PSI of crank case pressure compared to the baseline.
2. Both -10AN fittings to catch can + VTA, = +2 hp, -0.20 PSI of crank case pressure from baseline.
3. Same as #2 but with pass side port capped off, = +2 hp, ~-0.17 PSI of crank case pressure from baseline.
Spent the day at the track yesterday, and the engine did not puke a drop of oil. Zip, nada! Had both ports going to the catch can. Had the vent on the catch can going to a secondary catch can, and the secondary catch can vented to atmo (VTA). Engine ran absolutely awesome. The reason for the secondary catch can was that I wanted to actually catch the oil if it puked. I dumped a giant amount of oil into my engine bay on last trip to the track, when I had only one catch can that vented to atmo.
The biggest change to my system, I think, was putting the catch can as high in the engine bay as possible. I have my can attached to the firewall near the brake booster, and just about touching the hood.
I ran clear tubes from the valve cover to the catch can while on the dyno and again at the test day. Neither hose ever showed any signs of oil whatsoever. Not even misting. The first catch can has a drain-back to the oil pan with a check valve in line. The secondary catch can does not. At the end of the track day, I opened the valve on the secondary catch can and about 10 drops of clear water came out. Looked clean enough to drink.
I really think that positioning the catch can high up in the engine bay, and angling the hoses up made all the difference in the world. That, combined with the larger breather ports in the VC seem to make a winning combination.
My experience with the slash cut was a total disappointment, and I wouldn't recommend it.
If I go any further with this, my next step would be to connect the catch can to a PCV and then to the intake manifold. I base lined a stock Miata's crank case pressure and found that the higher the RPM, the greater amount of vacuum, even with the PCV blocked off.
That said, I'm so happy to have finally fixed this problem, that I'm afraid to screw with it. Hopefully the problem is gone for good...
- Will
I do not see how my slash cut is not pulling vacuum under load. It literally sucked all the oil out of the catch can when it started to fill up. Full throttle after making a High G left hand turn.
Zero problems so far after eliminating the breather port from the intake side (PCV) of the valve cover and there were zero problems before that until I took it to the track and cornered hard with it.
Bob
Reply
0
0

Wildo, interesting results.
Are you sure that your check valve worked?
Also, did you install the slash pipe at the proper angle?
And.. how were you measuring vacuum?
Are you sure that your check valve worked?
Also, did you install the slash pipe at the proper angle?
And.. how were you measuring vacuum?
Reply
0
0


I bet either Wildo's check valve is bad or he has higher pressure in his exhaust (restriction due to muffler, cat, or smaller than necessary diameter) than in his crankcase. On my other car it could pull an entire gallon jug of water into the exhaust in a matter of a few seconds when I revved it up. I know because I did it one day just to see if it would.
Reply
0
0
All good questions and comments.
The check valve was working the same way before it went in and after it came out. The check valve allows slight pressure in either direction, but blocks high-pressure in one direction. The valve was installed correctly, as there is only one way to install it (by screwing it directly onto the slash cut tube).
The slash-cut tube was indexed and installed correctly and at the correct angle. It was NOT inistalled in the collector, as some recommend for optimum performance. The slash-cut tube was installed a bit further down stream (immediately after the header). I got a good amount of vacuum at at idle in my garage and on the dyno, but not under load on the dyno.
I installed an NPT fitting on a spare oil cap and used this port to measure vacuum. I have a water-filled Dwyer slack tube (U-tube) manometer that I used for initial testing. It is very sensitive and reads in inches of water. For the results below, the oil cap port was connected to the dyno's MAP sensor. We checked the dyno's MAP sensor for accuracy by comparing its readings against the Dwyer manometer, and the two agreed.
Here is what my stock valve cover, with both the stock PCV port and breather port going to a catch can, and venting to atmo looked like.
Positive pressure built with cylinder pressures, topping off at slightly more than 0.40 PSI.

The stock Miata system never sees positive pressure. Here is a stock engine with the stock PCV and breather ports. Same dyno and test configuration. The lower pressure graph is with the PCV connected as usual, the slightly higher number is with the PCV completely blocked off. Both show crank case vacuum that builds with engine speed. Seems that at WOT, there is quite a bit more vacuum generated by the breather port than the PCV.

I returned to the dyno with drilled-out breather & PCV ports, and the slash cut installed. Here are the results.
Plot #1 - Both breather ports vent to atmosphere
Plot #2 - Sensor connected directly to the slash cut tube
Plot #3 - Combined breathers & slash cut
Notice how strong the vacuum is in the red trace (Plot #2) below 2700 RPMs.

The final test was to see what happens between shifts:

I believe my slash-cut was installed correctly. A professional restorer friend suggested I try one of these about a year ago. He has installed several on bigger motors, and installed the one on my car.
That said, of course it is possible that there was still something wrong with my setup, but I think it is more likely that the slash-cut simply does not work for my application. Perhaps my exhaust is restrictive, but it is relatively large for a naturally aspirated motor, 2.5" to the tail pipe with free flowing Magnaflow.
All of the success i've had in eliminating oil spooging out of the breather ports comes from having larger breather ports, and moving the catch can high up in the engine bay. In my case, the slash cut did not help the oiling situation at all. Things worked so well that I am afraid to touch anything, but that said, I will likely cap off the PCV side and simply run the driver-side port to the catch can The difference between using both ports versus using only one was very small, perhaps 0.02 - 0.05 PSI. Now that the testing is done, the clear tubes can come out and the engine bay can be cleaned up quite a bit. Here is my setup as it sits today.


The check valve was working the same way before it went in and after it came out. The check valve allows slight pressure in either direction, but blocks high-pressure in one direction. The valve was installed correctly, as there is only one way to install it (by screwing it directly onto the slash cut tube).
The slash-cut tube was indexed and installed correctly and at the correct angle. It was NOT inistalled in the collector, as some recommend for optimum performance. The slash-cut tube was installed a bit further down stream (immediately after the header). I got a good amount of vacuum at at idle in my garage and on the dyno, but not under load on the dyno.
I installed an NPT fitting on a spare oil cap and used this port to measure vacuum. I have a water-filled Dwyer slack tube (U-tube) manometer that I used for initial testing. It is very sensitive and reads in inches of water. For the results below, the oil cap port was connected to the dyno's MAP sensor. We checked the dyno's MAP sensor for accuracy by comparing its readings against the Dwyer manometer, and the two agreed.
Here is what my stock valve cover, with both the stock PCV port and breather port going to a catch can, and venting to atmo looked like.
Positive pressure built with cylinder pressures, topping off at slightly more than 0.40 PSI.
The stock Miata system never sees positive pressure. Here is a stock engine with the stock PCV and breather ports. Same dyno and test configuration. The lower pressure graph is with the PCV connected as usual, the slightly higher number is with the PCV completely blocked off. Both show crank case vacuum that builds with engine speed. Seems that at WOT, there is quite a bit more vacuum generated by the breather port than the PCV.
I returned to the dyno with drilled-out breather & PCV ports, and the slash cut installed. Here are the results.
Plot #1 - Both breather ports vent to atmosphere
Plot #2 - Sensor connected directly to the slash cut tube
Plot #3 - Combined breathers & slash cut
Notice how strong the vacuum is in the red trace (Plot #2) below 2700 RPMs.
The final test was to see what happens between shifts:
I believe my slash-cut was installed correctly. A professional restorer friend suggested I try one of these about a year ago. He has installed several on bigger motors, and installed the one on my car.
That said, of course it is possible that there was still something wrong with my setup, but I think it is more likely that the slash-cut simply does not work for my application. Perhaps my exhaust is restrictive, but it is relatively large for a naturally aspirated motor, 2.5" to the tail pipe with free flowing Magnaflow.
All of the success i've had in eliminating oil spooging out of the breather ports comes from having larger breather ports, and moving the catch can high up in the engine bay. In my case, the slash cut did not help the oiling situation at all. Things worked so well that I am afraid to touch anything, but that said, I will likely cap off the PCV side and simply run the driver-side port to the catch can The difference between using both ports versus using only one was very small, perhaps 0.02 - 0.05 PSI. Now that the testing is done, the clear tubes can come out and the engine bay can be cleaned up quite a bit. Here is my setup as it sits today.
Reply
0
0


