When you click on links to various merchants on this site and make a purchase, this can result in this site earning a commission. Affiliate programs and affiliations include, but are not limited to, the eBay Partner Network.
Blackbird Fabworx BMW E36 M3 safety (re)build and many many hours later...
Are you guys interested seeing what we're doing in the shop other than just Miata stuff?
Let's see
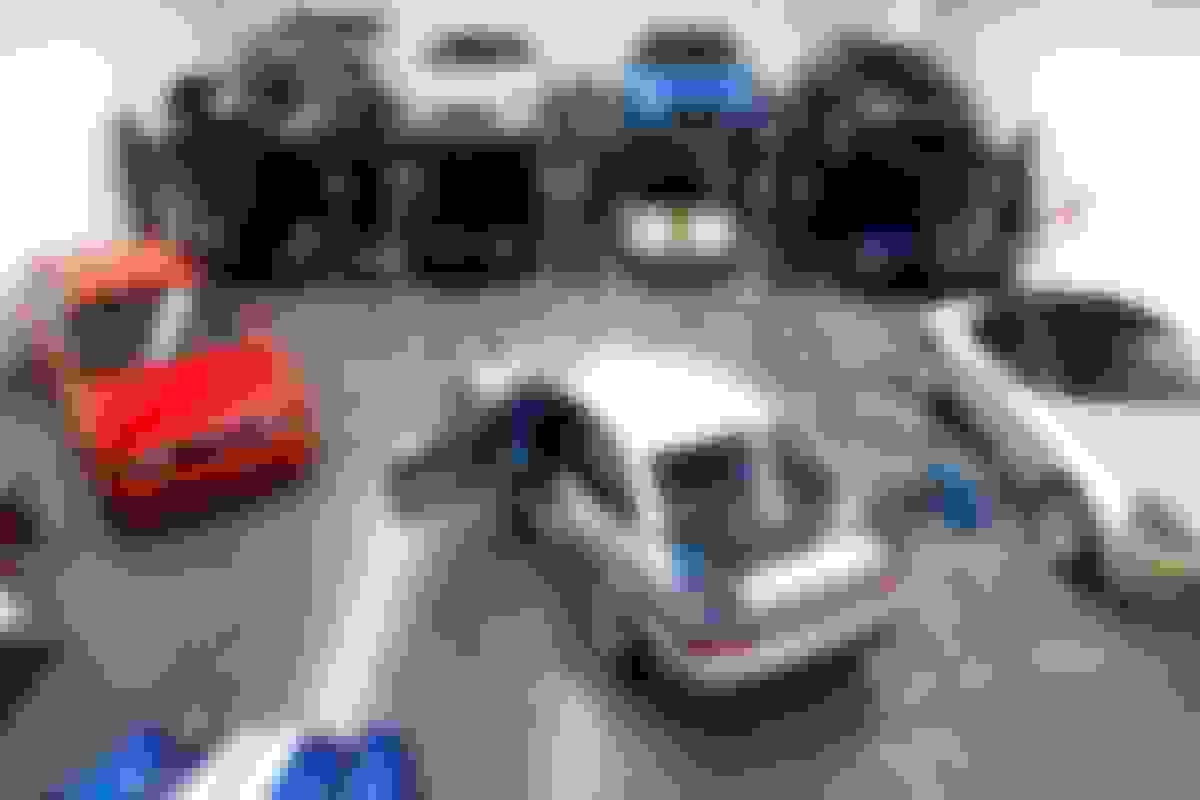
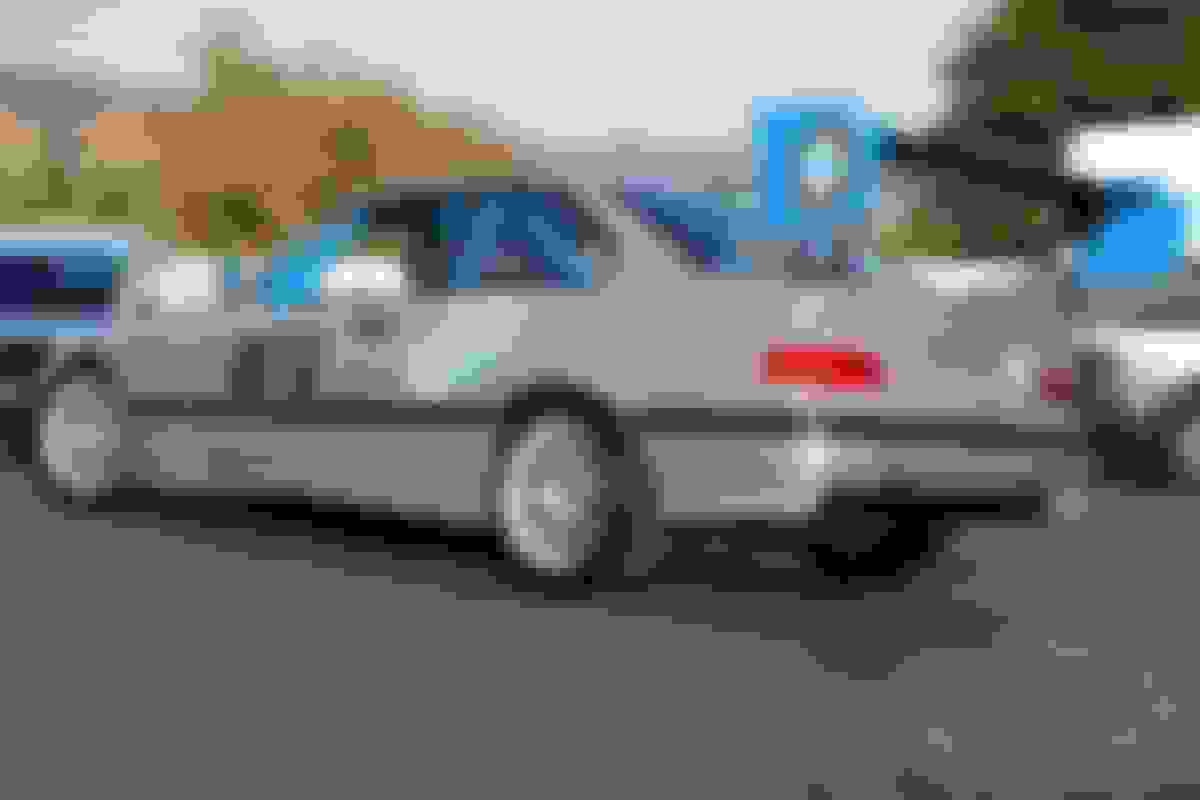
We finished this one a few days ago, and the gentleman that owns the car has kindly suggested that we take some of the photos at his "Toy Box", which until yesterday I only heard about.
And there's the newly finished toy in the toy box -
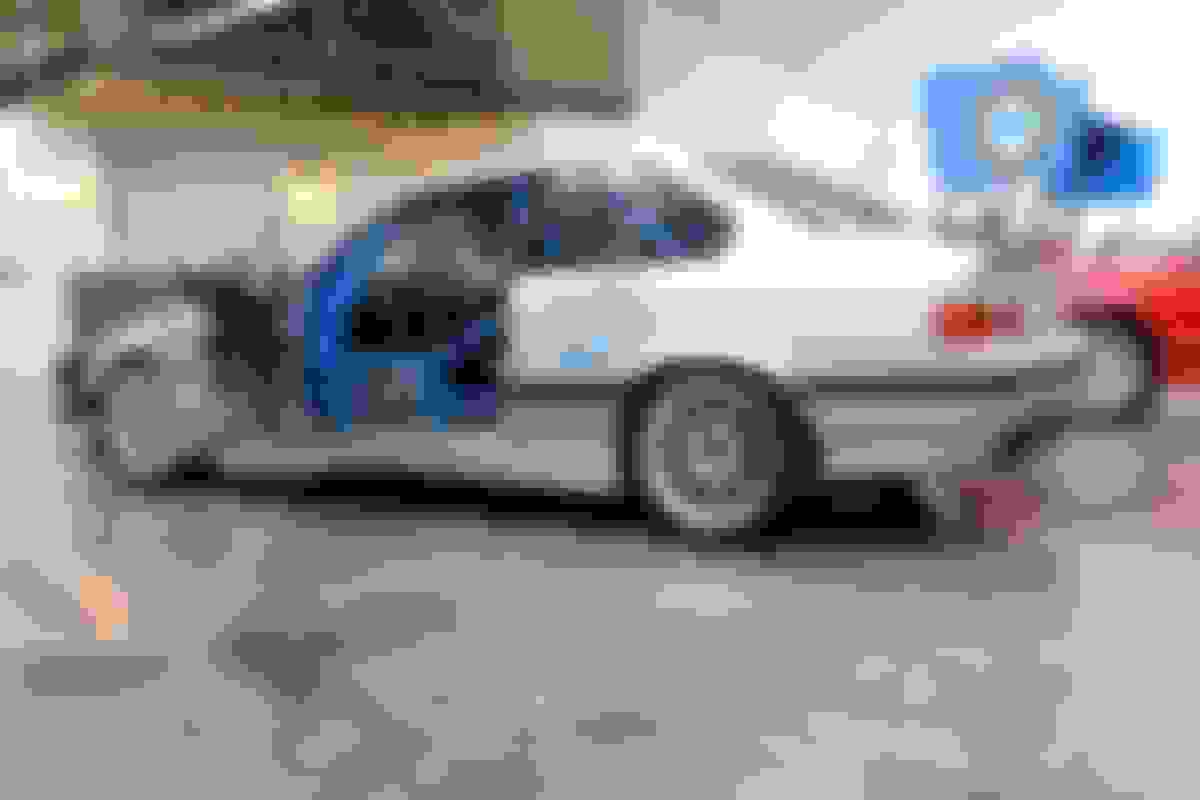
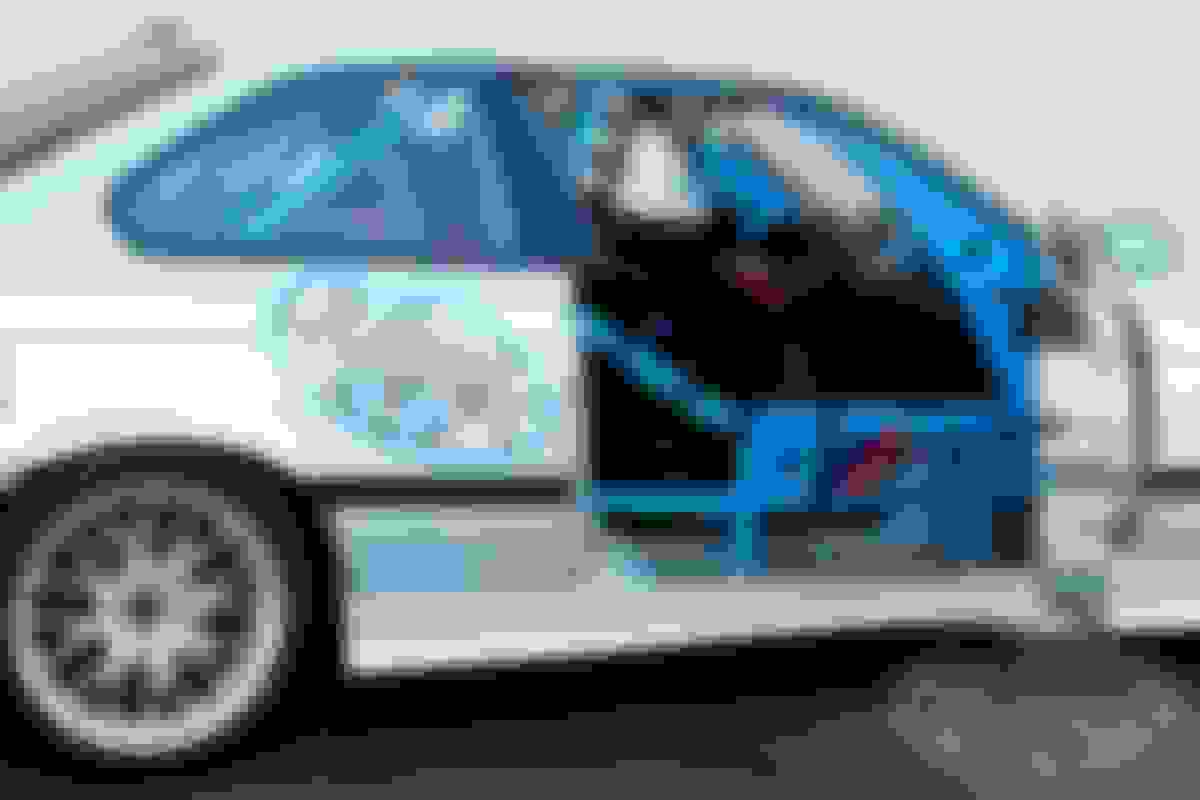
The car arrived at our shop when it already had a cage in it, however, the layout of the cage was severely compromised and there were several places where the welding was compromised (incomplete and/or just done badly).
Looking at our options, the owner decided to have us redoing the cage and additional safety systems and add a few more things while at it, such as Lexan windows.
We took the long route and cleaned the tub, gutted the doors properly and despite having a lot more cage after the job was done than what it came with, ended up reducing the weight of the car by 58 Lbs.
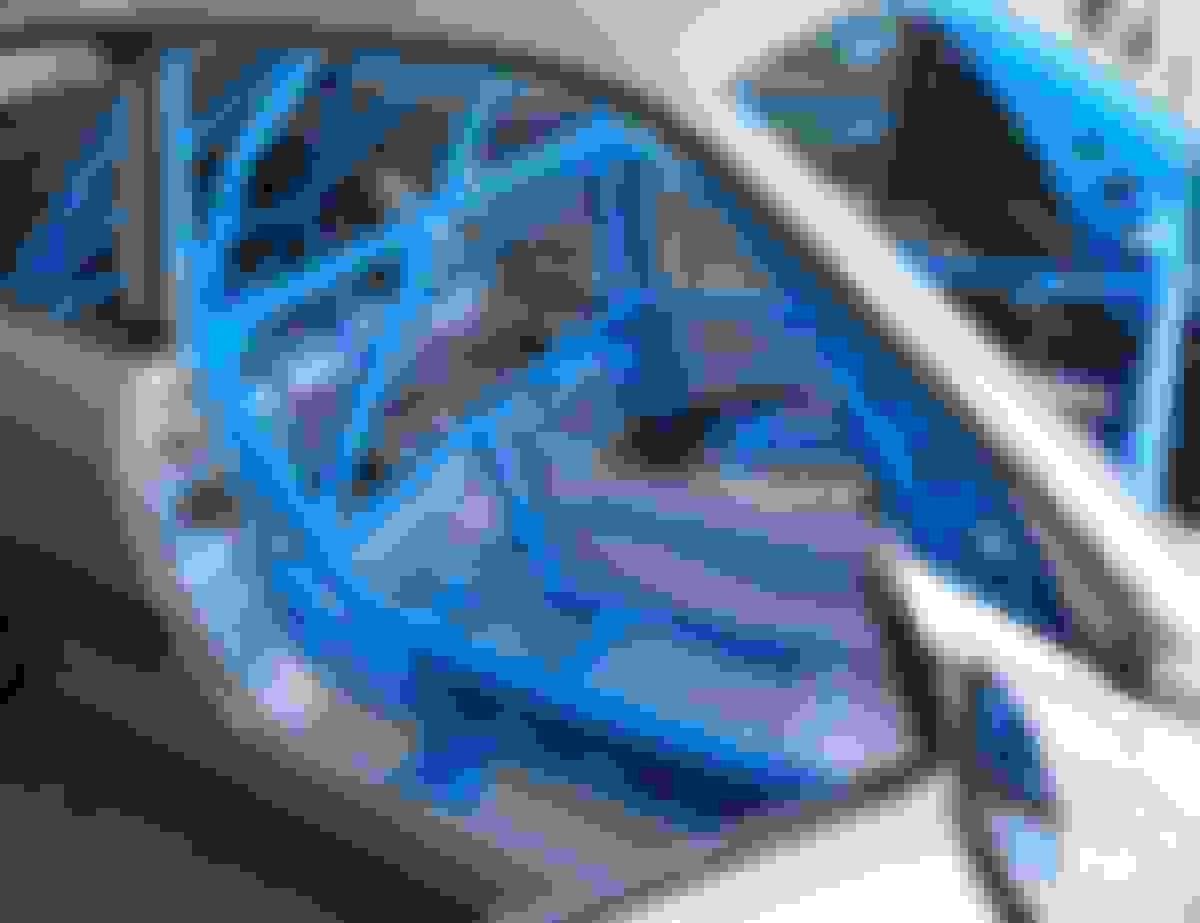
As we've done in the past with BMWs when rules allow it, the rear subframe was connected to the cage -
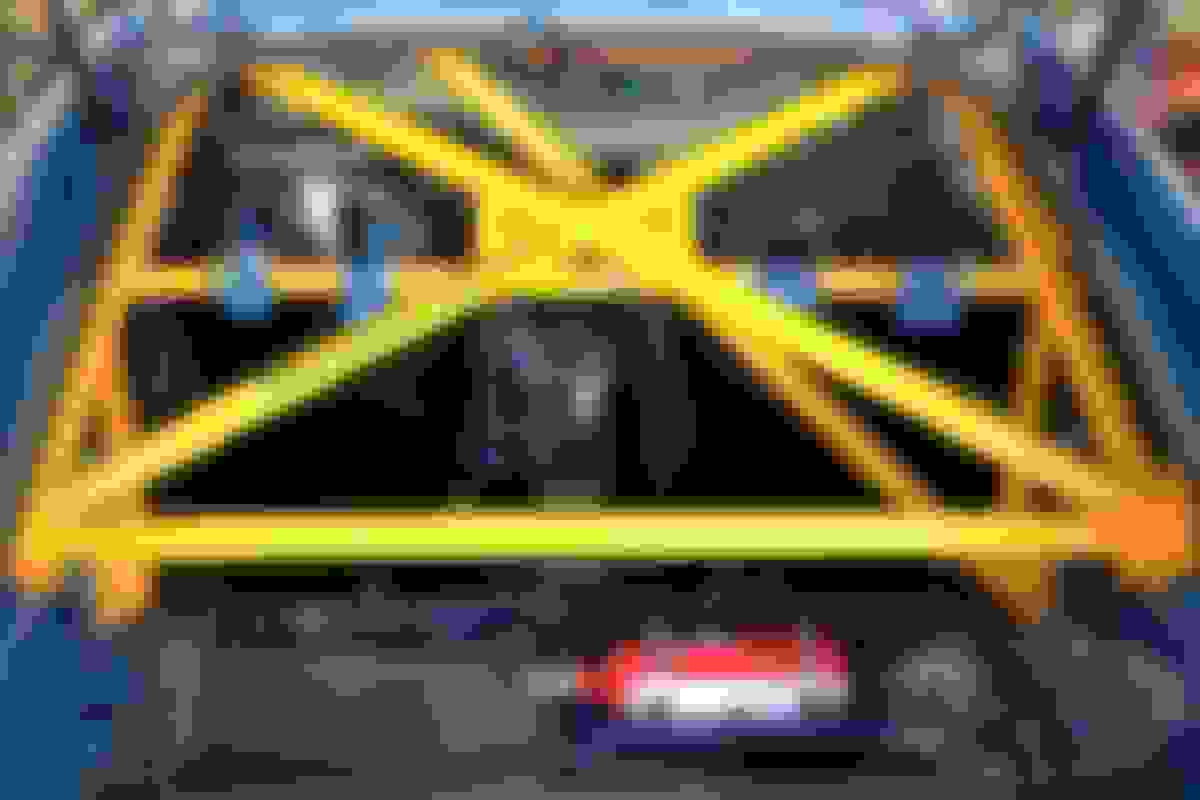
The owner has seen in person the C6Z that we finished a couple of months ago and was impressed by the design and properties of the curved A pillar gussets, and asked that we incorporate them into the design of his cage as well.
We ended up fabricating a new buck to form the gussets for this car to match the dimensions of this car better -
We also dropped the weight down and center in the chassis by moving both the battery and fire bottle right behind the seats, with a custom Aluminum battery box that we fabricated -
Thinking ahead, we built mounting points into the rear stubs of the cage and then fabricated mounts for the shock reservoirs -
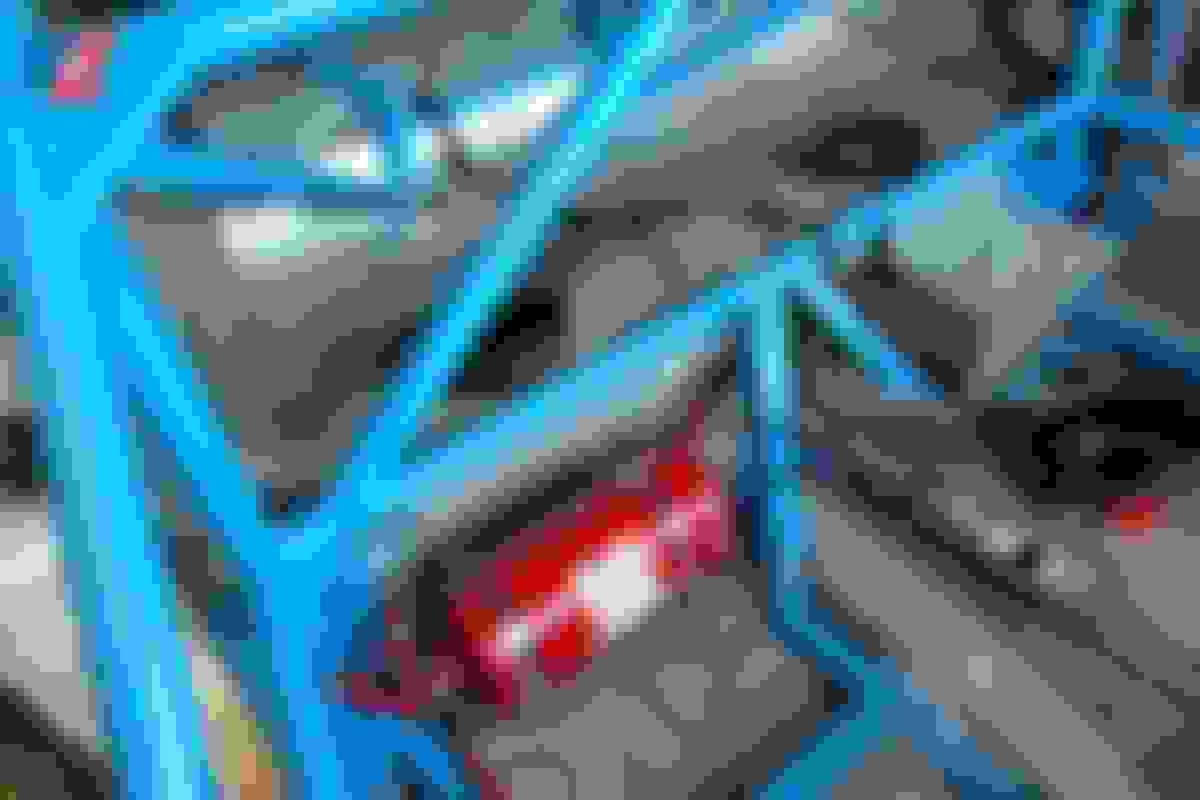
As you'd expect from Blackbird Fabworx, we take pride in the finished product and want things to look as good as they are built.
For this car we wanted to do something special and ended up doing a 3 tone paint job (read: lots of masking!).
The tub was painted in a combo of metallic Silver and flat Black, the cage and our wing end plates were finished in Laguna Blue.
The finishing touch came when we added a number of custom graphics -
Also visible above are the custom Lexan windows we made for the car, which unlike most windows out there, they are made to sit flush with the bodywork and taper inwards towards the front to reduce buffeting.
The windshield installation is a good example of attention to the small things, where not only that the heads of the bolts were painted in Silver and Black to blend into their respective background, the two that are located right at the cutoff of the windshield banner are painted with a Silver / Black cutoff as well.
OCD FTW!
...Aaaand straight from the stationary toy box to the moving toy box.
The car is heading to Laguna Seca for the weekend.
Enjoy!
We've actually started about two weeks ago working with a new web developer who did a bunch of automotive web stores and we're working on the site to make it happen.
Hoping to get it up and running by the end of the year, beginning of next year.
But, why are you waiting?
You do realize that we're talking orders and delivering without a website, right?
All it takes is a phone call or an email and I can send you an invoice and we're done...
We've actually started about two weeks ago working with a new web developer who did a bunch of automotive web stores and we're working on the site to make it happen.
Hoping to get it up and running by the end of the year, beginning of next year.
Sweet!
Originally Posted by Blackbird
But, why are you waiting?
Because I like pretty pictures?
Originally Posted by Blackbird
You do realize that we're talking orders and delivering without a website, right?
All it takes is a phone call or an email and I can send you an invoice and we're done...
Oh for sure, I understand. But I like seeing the fitment pics and options list for certain things. I'm quite familiar with you products as I tend to stop and drool when I see them in the wild (because you do great work) but I have no idea what I'm looking at or what to ask for. For instance, I really like what you did with Shaikh's Merlot NA but I have a feeling that was a one-off rather than a production product, but its the kind of thing that I would expect to find an entire album dedicated to on, you guess it, your website. If nothing else it gives me a better idea of what to ask for or what I'm willing to tolerate. I also love the work you've done on creampuff, but I'm not about to go to ClubRoadster, Facebook or TrackHQ and try to find pictures of that project. Again, I would expect to find at least a basic album on a website with a link to the build thread.
Originally Posted by Blackbird
170+ views later and one semi-off-topic reply later, guess not?
I was hoping for fabrication asshattery "before" pictures, but I'm suitably impressed with what was presented. For serious.
Sadly, I don't think the Media section gets a whole lot of traffic. I suspect that may be part of the issue. Don't let that dissuade you from posting more stuff though, because you do great work.
I read your posts and look at any and all pictures you post up, Moti. I just don't respond, because I have nothing constructive to say. I want to equip my '16 with your GT3 bar so badly, but no hard top is out yet.
I don't really care for BMW's all that much, but your Z06 build on trackhq was mesmerizing!
Sadly, I don't think the Media section gets a whole lot of traffic. I suspect that may be part of the issue.
Well, I did present a question and 170 viewers had a chance of saying "yes, let's see more" or even better, engage in some conversation about what they see and ask questions if there are any, unless of course everyone on MT.net already knows it all...
Well, I did present a question and 170 viewers had a chance of saying "yes, let's see more" or even better, engage in some conversation about what they see and ask questions if there are any, unless of course everyone on MT.net already knows it all...
Please post more, I appreciate the pictures. I don't have anything to add, but I always learn something from your threads.
Top notch. Triangles everywhere! Agree that tying into the rear subframe is an absolute must provided the rules allow for it. I love how beefy the plinth blocks/ floor plates are. The rear shock remote reservoir mounts are a nice touch. The curved A-pillar gusset plates are interesting. Do you design them in CAD, laser cut in flat sheet, dimple them then bend/form them using a wooden buck to get them into the taco shape?
Well, I did present a question and 170 viewers had a chance of saying "yes, let's see more" or even better, engage in some conversation about what they see and ask questions if there are any, unless of course everyone on MT.net already knows it all...
We do know it all
I definitely want to see more, even linked this thread to some bimmer nerd friends of mine.
How much do the front/curved gussets obstruct visibility from the driver's seat?
Negative, it's Sprint Blue which is close to the Nogaro but metallic.
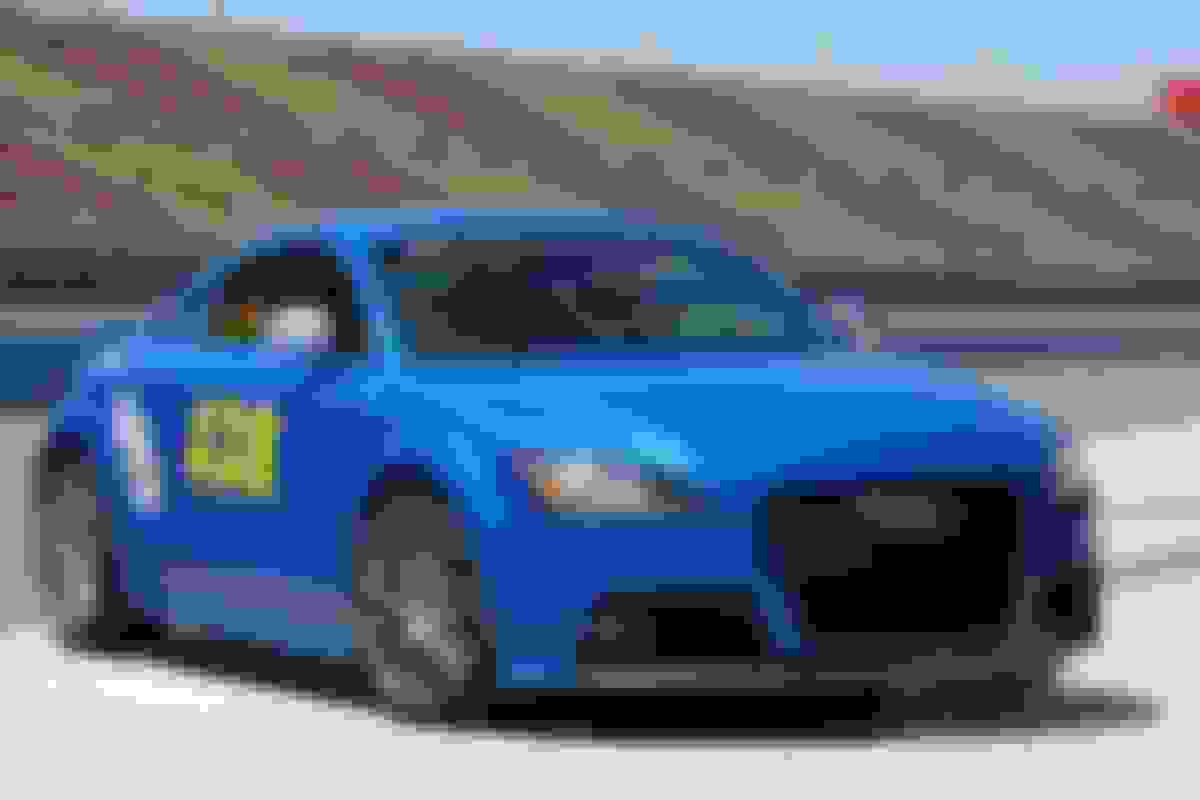
We've done a lot of work on that TT-S as well - half cage, seat mounts, seats, harnesses, battery box, fire sys, suspension work including building custom spec set of Penske DAs and even integration of the factory controls from the OEM steering wheel to an aftermarket wheel.
Frank was dying to try the Penskes when we were working on the suspension...
This car still has a lot more in store for it.
Looking at aero work, exhaust and a bunch of other things...
The curved A-pillar gusset plates are interesting. Do you design them in CAD, laser cut in flat sheet, dimple them then bend/form them using a wooden buck to get them into the taco shape?
The curved gussets are made as two mirrored halves formed individually on a buck, dimpled, then stitched together and polished.
The design and cutting are both done manually, I got that part down to a science and can rinse and repeat as needed.
A lot of people seem to be wondering about whether visibility is reduced with those gussets.
The answer is that the gussets are not reducing the visibility at all, the reason is that the gussets are aligned with the bend in the leg at the dash bar height, and because that bend brings the legs inboards towards the top of the windshield frame it's aligning the gussets visually with the legs themselves.
The driver side gusset is essentially invisible to the driver because it's perfectly in line with the front leg from the viewing angle, the passenger side is somewhat more visible to the driver, but the only thing that it hides is the A-pillar itself and the triangle part that the mirror mounts to, so it really isn't hiding anything at all...
Freedomgli, it's a Lister of the 900 HP with aero variety
You might have seen it in pics from PPIHC.
Originally Posted by 18psi
you guys didn't grovel enough
you get no more pics
move along peasants
Nah man, never meant it that way.
This was just an honest question whether there's interest, especially since MT.net doesn't have any section dedicated to OTM stuff.
Interest is hard to gauge when no one says anything...
 08-24-2016, 03:39 PM


 6
6


 Can I pay extra to not have the logo on it?


