Texafornian 95 Black Jumbata
 04-28-2013, 01:22 PM
#21
Supporting Vendor


iTrader: (1)
Join Date: Sep 2010
Location: Lake Forest, CA
Posts: 7,956
Total Cats: 1,008
I think the body kit is hideous, but whatever, you've done some other decent stuff and you like it so to each their own. Functional? No, but you know that. Also no need for a built motor for your goals so again, whatever. I don't know what kraftwerks uses for their kit for timing so cant comment there.

Reply
 0
0

0
05-28-2013, 03:13 PM
#22
Junior Member
Thread Starter

Join Date: Apr 2013
Location: Redondo Beach, CA
Posts: 86
Total Cats: 19
Getting deeper into the AEM. Collecting parts and just discovered a Crank Sensor signal modification that is required in order to play with the AEM.
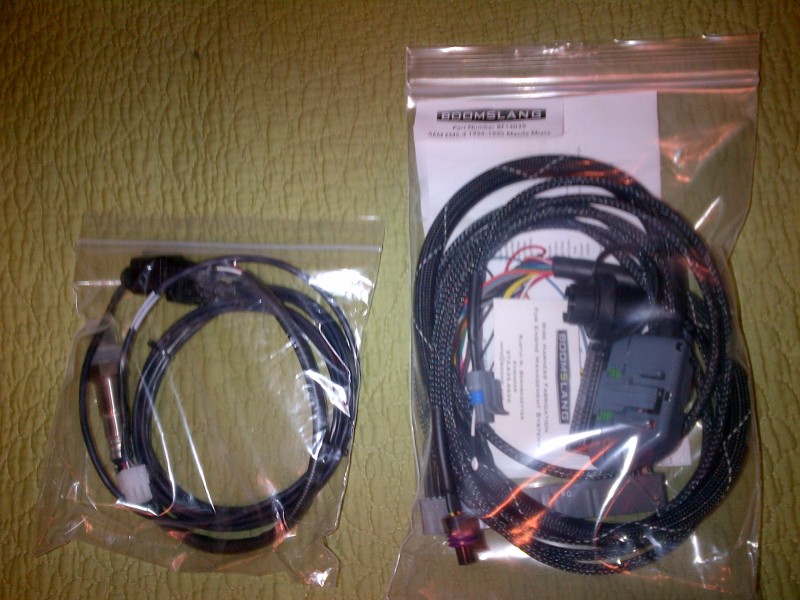
It looks like I need a 99+ sensor and will have to retrofit it to my 95. I also need the supermiata crank damper pulley with the 12+1 trigger wheel, which is another $441. No big deal - just not something I read about before buying the EMS-4. Got the computer from AEM, the harness from Boomslang and the crank damper pulley with trigger wheel from Trackspeed Engineering.
Got the AEM EMS-4 with 2 Bar MAP sensor and AEM IAT, pigtail 52" from OEM location. Boomslang wire harness for 1995 with power steering and AC. Disable check engine light, complete standalone install. PLX O2 sensor will daisy chain into my PLX multi-gauge already installed and have a comm wire to the AEM.
Since about half of what I do is because I think it looks cool and I can at least argue for functionality, I'm also getting Garage Star's lightweight pulley set. This way all the pulleys on the motor will be silver except for the AC compressor and I can live with that. Along with a lightened flywheel and an upgraded clutch, I expect to feel the motor spin up more freely.
Looking forward to getting a dyno run of the baseline Kraftwerks kit against a run with the AEM installed. Hopefully in the next month or so I'll have all the parts.
It looks like I need a 99+ sensor and will have to retrofit it to my 95. I also need the supermiata crank damper pulley with the 12+1 trigger wheel, which is another $441. No big deal - just not something I read about before buying the EMS-4. Got the computer from AEM, the harness from Boomslang and the crank damper pulley with trigger wheel from Trackspeed Engineering.
Got the AEM EMS-4 with 2 Bar MAP sensor and AEM IAT, pigtail 52" from OEM location. Boomslang wire harness for 1995 with power steering and AC. Disable check engine light, complete standalone install. PLX O2 sensor will daisy chain into my PLX multi-gauge already installed and have a comm wire to the AEM.

Since about half of what I do is because I think it looks cool and I can at least argue for functionality, I'm also getting Garage Star's lightweight pulley set. This way all the pulleys on the motor will be silver except for the AC compressor and I can live with that. Along with a lightened flywheel and an upgraded clutch, I expect to feel the motor spin up more freely.
Looking forward to getting a dyno run of the baseline Kraftwerks kit against a run with the AEM installed. Hopefully in the next month or so I'll have all the parts.
Reply
0
0
12-31-2015, 12:33 PM
#23
Junior Member
Thread Starter
Join Date: Apr 2013
Location: Redondo Beach, CA
Posts: 86
Total Cats: 19
I guess I abandoned this thread a while ago but sitting here at work sorta bored, I thought I'd chuck in an update.
The build has been complete for a while now but as anybody knows the project is never really complete. The front and rear bumpers have returned to stock. Added a lip & TDR splitter... which has been removed since this photo.

So many more parts have been added since I posted last but the current numbers are 236whp and 218wtq using the C30-94 compressor, AEM EMS4, ID 1000cc injectors, Sequential COP conversion, 5X racing APFR, MAF delete, Kraftwerks RRFPR delete, Koyo Rad with FM shroud, door bars, Wilwood 4 wheel LBBK with Carbotech pads (XP12/XP8), Autokonnexion Type II flares, CarbonMiata spoiler... and the list goes on.

Volk TE37V 15x9-15 with NT01 225/45/15 on all four corners


Last edited by Jumbosrule; 01-05-2016 at 02:57 PM.
Reply
0
0
12-31-2015, 01:45 PM
#24

I guess I abandoned this thread a while ago but sitting here at work sorta bored, I thought I'd chuck in an update.
The build has been complete for a while now but as anybody knows the project is never really complete. The front and rear bumpers have returned to stock. Added a lip & TDR splitter... which has been removed since this photo.
So many more parts have been added since I posted last but the current numbers are 236whp and 218wtq using the C30-94 compressor, AEM EMS4, ID 1000cc injectors, Sequential COP conversion, MAF delete, RRFPR delete...
Volk TE37V 15x9-15 with NT01 225/45/15 on all four corners
Reply
0
0
 12-31-2015, 02:53 PM
#27
Junior Member
Thread Starter
Join Date: Apr 2013
Location: Redondo Beach, CA
Posts: 86
Total Cats: 19
Schroth 4-pt ASM (anti-submarine) DOT legal and accepted on Buttonwillow, Willow Springs, Laguna Seca, AAA Speedway... everywhere I have been on track in Texas (MSRH) and California so far.
Last edited by Jumbosrule; 01-05-2016 at 02:59 PM.
Reply
0
0
01-11-2016, 04:33 PM
#28
Junior Member
Thread Starter
Join Date: Apr 2013
Location: Redondo Beach, CA
Posts: 86
Total Cats: 19
Finished up the Tein EDFC Active Pro install but still need to run calibrations on the speed and G-sensors. In-car manual adjustments are working and so is the assigned switch input.
I added in a Rowe Electronics PDM to handle the power & fusing for the control and rear EDFC modules. The front module is wired into the engine bay fuse box. The PDM is a pretty cool gadget - six power channels with programmable fuses, on & off time delays and both ACC and/or GND triggers.
Rear EDFC module and PDM

Front module

Control mounted

temporary switch panel. Thinking I'll relocate this into the glove box.

Alignment scheduled for tomorrow with all new hardware... then I'll start dialing in the programming for speed & G sensors. Will run the canyons this coming weekend as a maiden voyage.
Reply
0
0
 01-11-2016, 05:26 PM
#30
Junior Member
Thread Starter
Join Date: Apr 2013
Location: Redondo Beach, CA
Posts: 86
Total Cats: 19
I will attempt to avoid that by using a three pronged approach.
1) I won't be driving like an asshat when feeling out a new setup
2) I won't be taking any video
3) I wouldn't admit to screwing up that bad if it did happen, but there are dudes out there taking photos so my plan is not foolproof...

1) I won't be driving like an asshat when feeling out a new setup
2) I won't be taking any video
3) I wouldn't admit to screwing up that bad if it did happen, but there are dudes out there taking photos so my plan is not foolproof...

Reply
0
0
 05-16-2016, 11:57 AM
#32
Junior Member
Thread Starter
Join Date: Apr 2013
Location: Redondo Beach, CA
Posts: 86
Total Cats: 19
Car wouldnt start last weekend so I was busy with my DMM, checking voltages at the starter, ignition switch, etc. Turns out the Start wire power feed is bad somehow. No voltage from the ignition switch to the fusebox, but the ignition switch checks out just fine. Had to replace a burnt ignition switch about two years ago so I was surprised the fault seemed to be in that circuit.
So I decided to do a push to start button so I could bypass the bad wire. I picked up a Cruise Control switch and used it as my starter since it is a momentary switch (which is what you want for a start button). Using a relay, the CC button is now the trigger.

It worked perfectly the first time. Added bonus... security. Car will not start without the key in the ACC position and the start button depressed.
Reply
0
0
07-06-2016, 03:19 PM
#33
Junior Member
Thread Starter
Join Date: Apr 2013
Location: Redondo Beach, CA
Posts: 86
Total Cats: 19
Removed the R-package lip and TDR radical splitter. Could never feel any difference with this installed, good or bad.

Replaced it with a CCP fab front lip & splitter with flat bottom - a much larger and more sturdy product.

But for install I decided to use Rivnuts (or in this case, Plusnuts) so that I could remove and install the lip easily. Turns out there are 8 bolts total - it takes about 10 minutes to remove or install the lip.
Plusnut installation:

Mounted lip/splitter


So far so good - at highway speeds I perceive a difference in stability - the front end "floats" less and seems to be more precise. No track experience yet.
On the rear end, I cut the bumper and added GarageStar's rear brace/tow hook.


Finally got a new filter for the Supercharger intake - I've been using the same one for five years and there is no hint of red left on the element.

Given the location of the intake filter, I was thinking a vented or NACA duct driver's side headlight lid might be a good addition. Started looking around for which one jives with the car. You can also see the prop valve remote adjustment cable routed off the valve. From there it is routed into the cabin. No need to hot pit the car - I can bump the adjustment going down the straights and feel the difference immediately. You can see the blue adjustment **** under the door bar.

And finally I picked up GarageStar's COP billet COP bracket. Fitment is perfect - definitely better than the bracket I was using before.

Reply
0
0


Thread
Thread Starter
Forum
Replies
Last Post
stoves
Suspension, Brakes, Drivetrain
5
04-21-2016 03:00 PM


