
How did you gut your door
 09-12-2011, 08:12 AM
#1
Elite Member

Thread Starter
iTrader: (2)

Join Date: Aug 2009
Location: Dover, FL
Posts: 3,143
Total Cats: 174
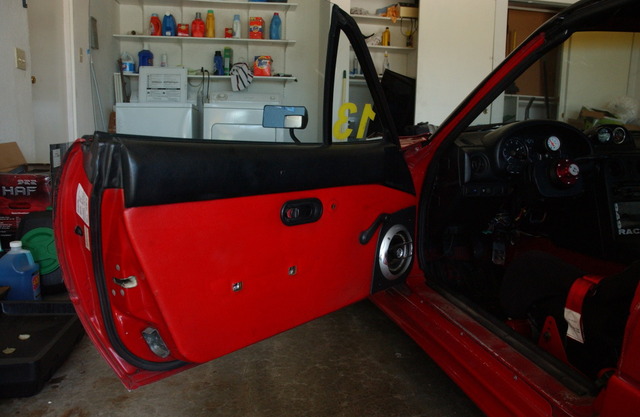
I got a door from sixshooter, and armed with a cut-off tool I started gutting the door. It looks like it will be a full on race gut job with lexan windows.
I would like to see how others here have gutted their doors. Looking for ideas to make it as aesthetically pleasing as possible.
I would really like to keep my stock doors intact, and have the gutted doors for the racetrack. Is this a bad idea?
I would like to see how others here have gutted their doors. Looking for ideas to make it as aesthetically pleasing as possible.
I would really like to keep my stock doors intact, and have the gutted doors for the racetrack. Is this a bad idea?

Reply
 0
0

0
09-12-2011, 12:45 PM
#2
Supporting Vendor

iTrader: (3)

Join Date: Jul 2006
Location: San Diego
Posts: 3,303
Total Cats: 1,216
I just gutted mine recently and did a bit of a break down with photos on the process I went through in my project thread. I'll copy/paste that post here, hope it helps!
The thread: http://clubroadster.net/vb_forum/showthread.php?t=44470
The thread: http://clubroadster.net/vb_forum/showthread.php?t=44470
So another few days spent working on the car in my spare time...
I've been meaning to lighten the doors for a while now. Lighter = faster, and in the words of Ricky Bobby, "I wanna go fast!!!"
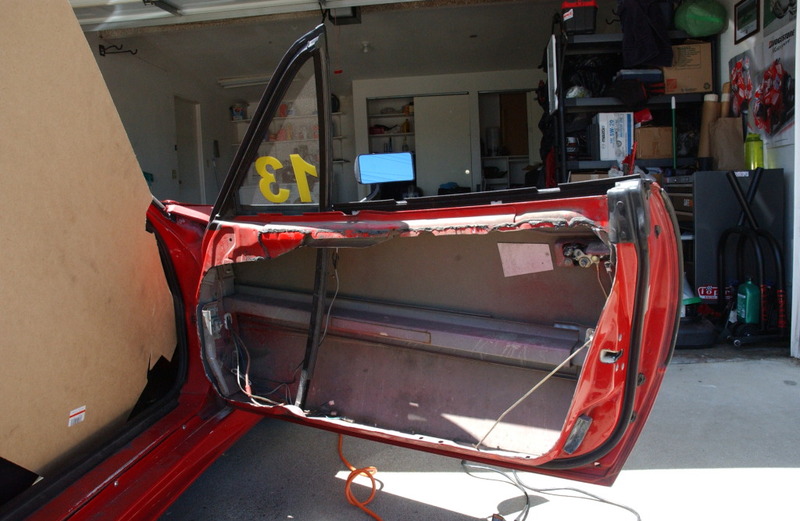
So here's how the doors looked Monday morning:
I began dissasembling things and recalled that back in the day I had added Fatmat to the driver's door to eliminate some rattling from the speakers (it never helped). This was not fun to scrape off:
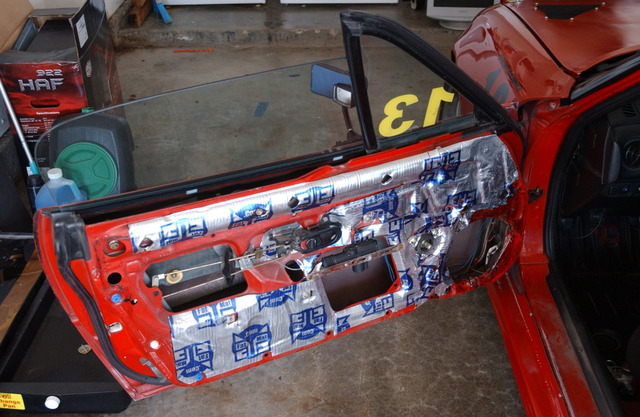
The passenger side thankfully did not have that. Here it is with aleverything that can be simply unbolted removed:
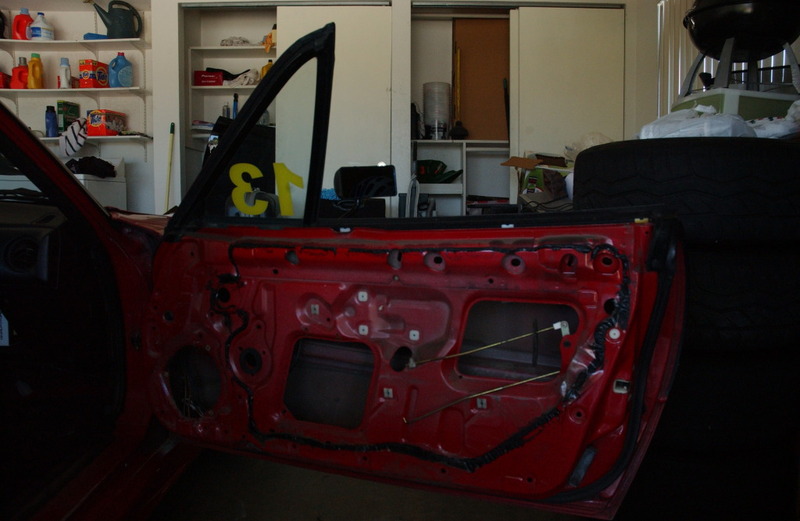
Then I got out the cutting tools and got to work:
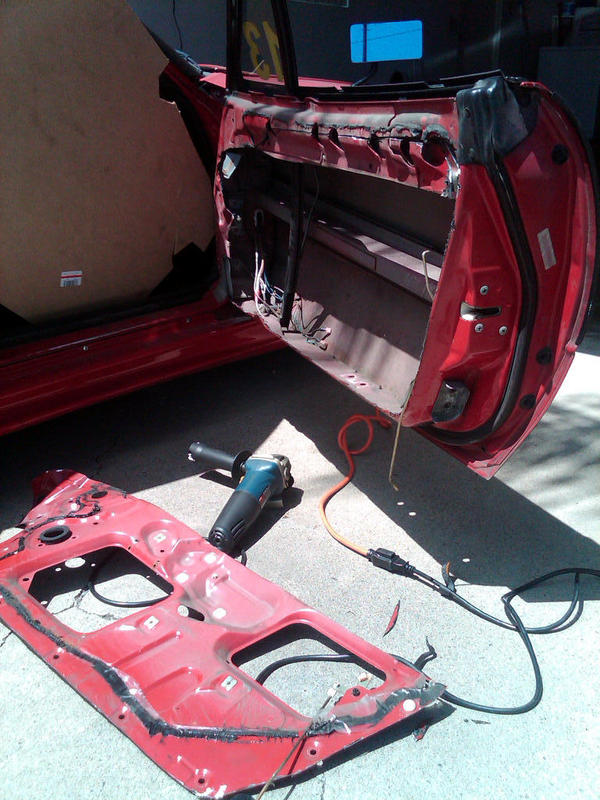
Near the top of the door there are three layers of steel, so I cut up into that and removed as much as I felt I could while keeping the door rigid:
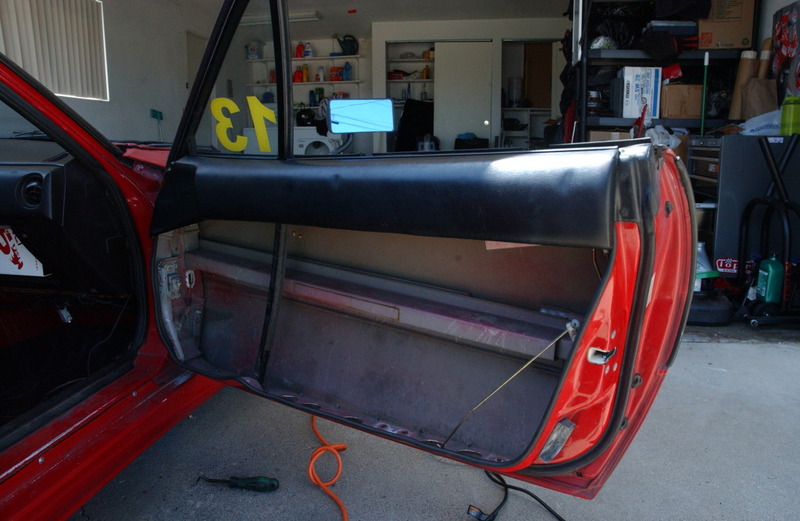
Test-fit the elbow pad and some rubber trim around the cut edge:
But, in the picture above, you can see that there is still a heavy cross-brace that runs through the door. This I cut out as well, but didn't take an in-progress picture of. In the finished pics you can see how it is missing.
Now we get on to the condundrum: how to keep the car streetable with gutted doors??
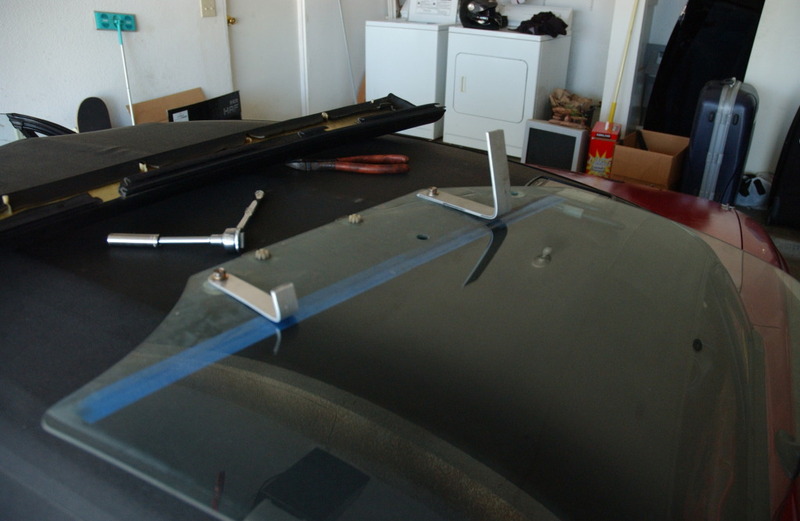
I wanted to be able to put the glass in place for street driving and so it could be secure when parked, but removeable for competetive use.
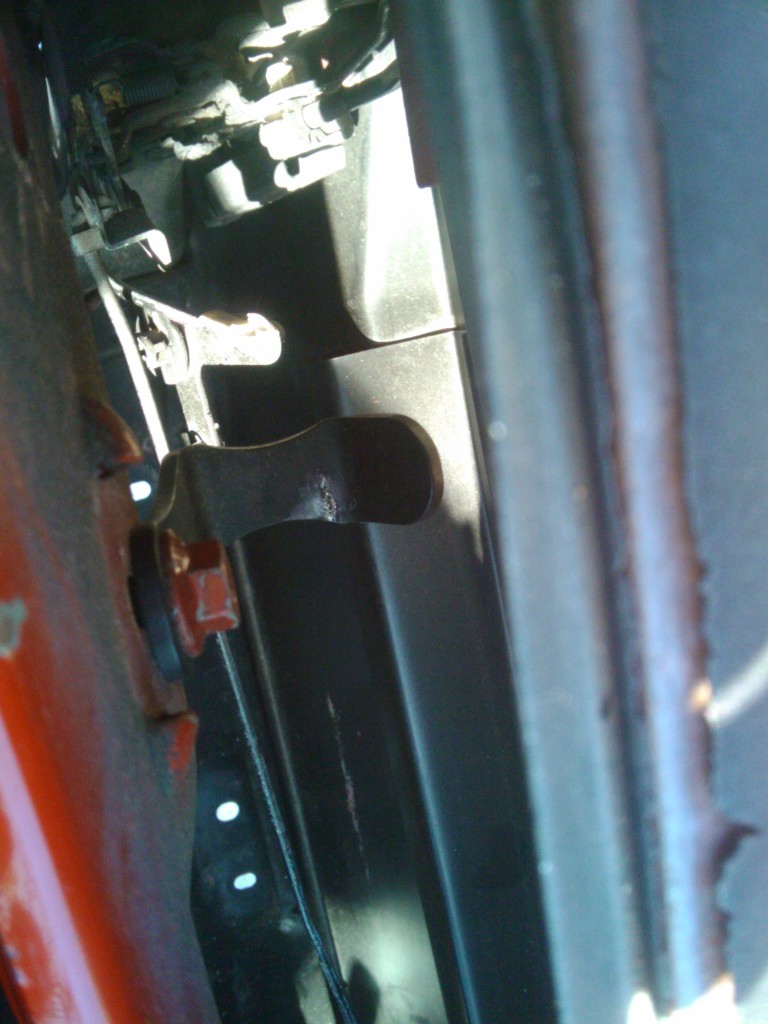
Here is the solution being made. The blue tape marked where the top edge of the door sat in relation to the window, so I could adjust these hooks so that the window sits exactly as it did when normally rolled up:
The hooks finished and awaiting paint:
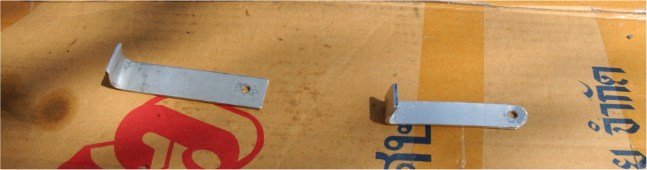
Notches needed to be cut in the rubber on the door where the hooks would sit:

The finished hooks mounted on the window:
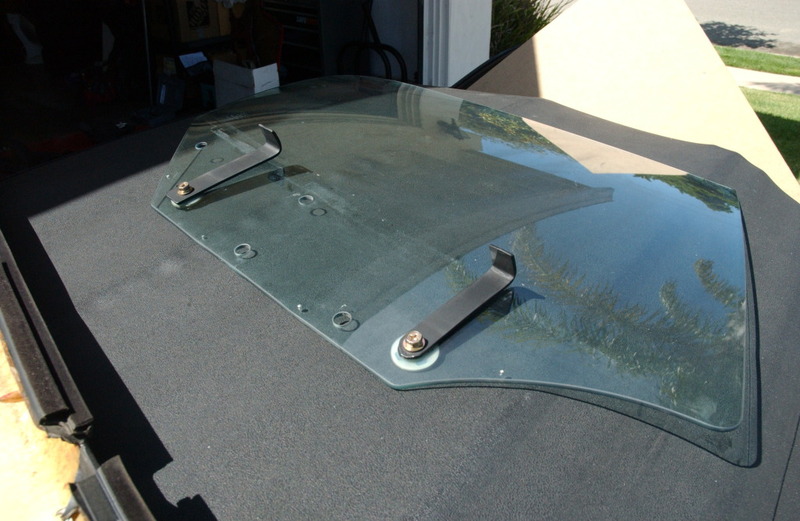
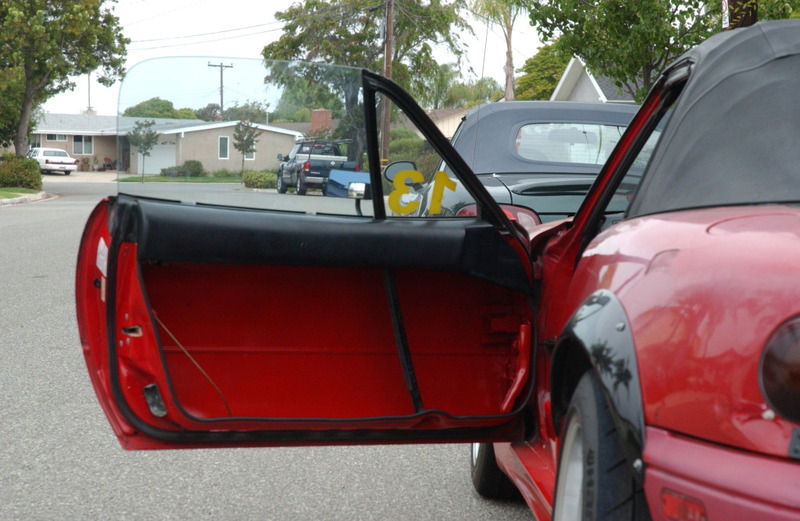
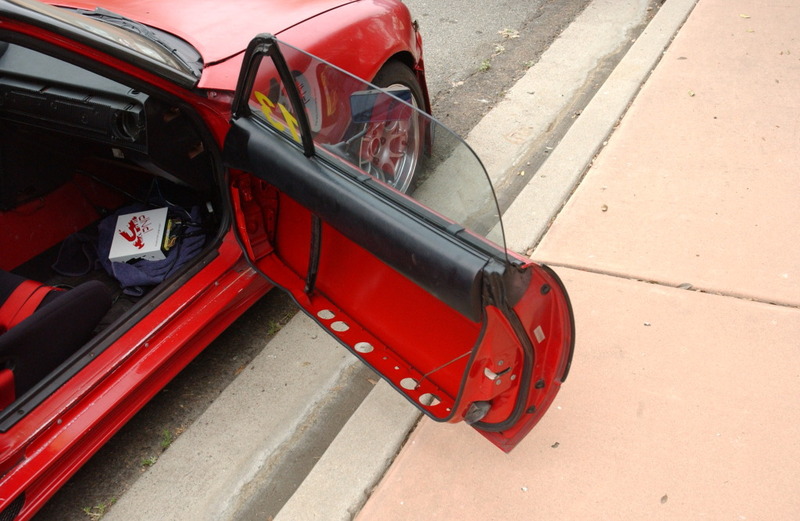
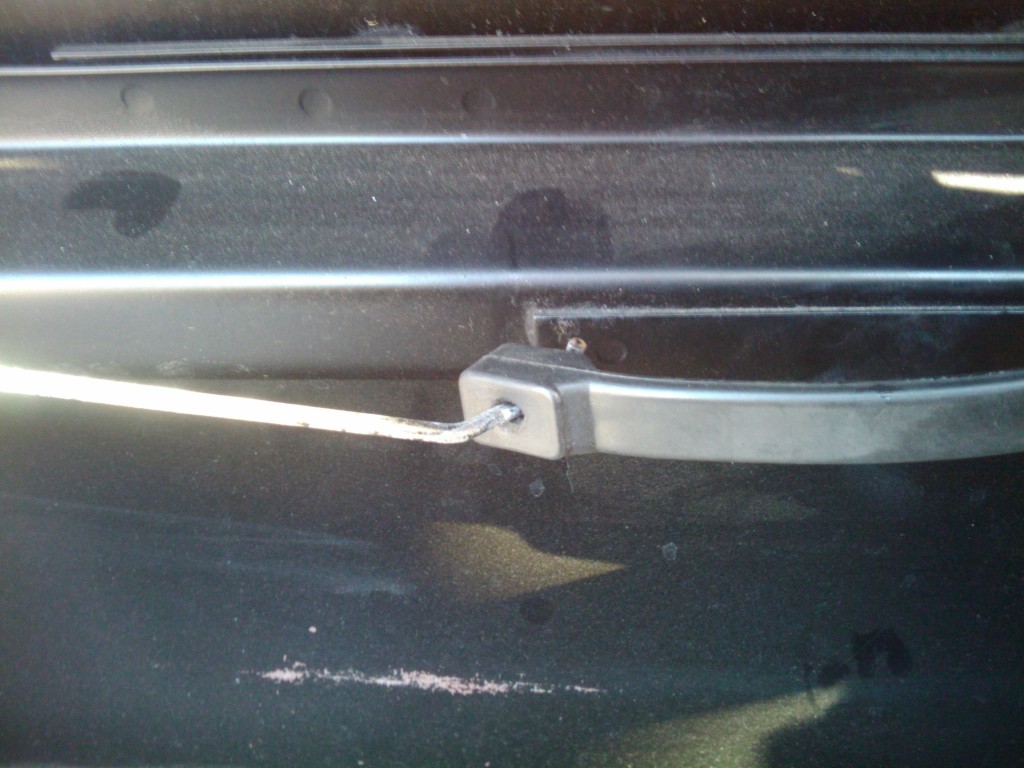
The window mounted in the door. It literally just sits in this position quite securely, but I can pull the windows out in 10 seconds. With the door shut, they can't be removed. Totally secure.
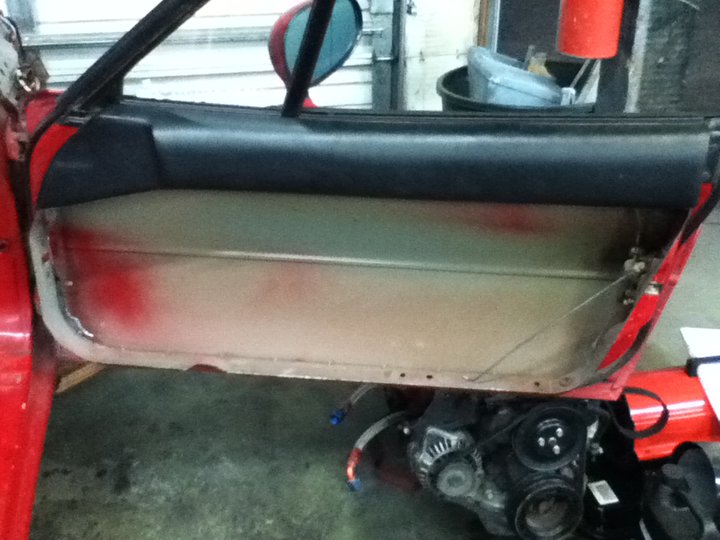
Then I painted the inside of the doors and finished them with the elbow pad and rubber trim. The finished product, window in place. I'll be adding a wire that will serve as the interior door latch pull later:
And the passenger door. You'll see that I removed a little more weight with the hole saw in the bottom of the doors:
The doors still have the exterior handle and lock, and the interior door handle will be a wire attached to the front of the door that runs back to the latch at the rear. Just pull on the wire and the door latch pops open.
But wait... how much weight was saved?
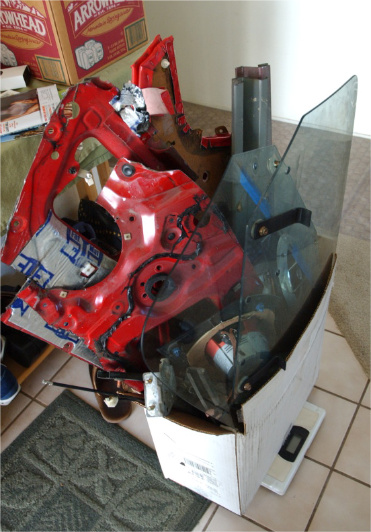
I threw everything I had removed in a cardboard box:
Then I remembered that the crossovers for the speakers were still in the footwells, so I removed those, which are easily another half pound together.
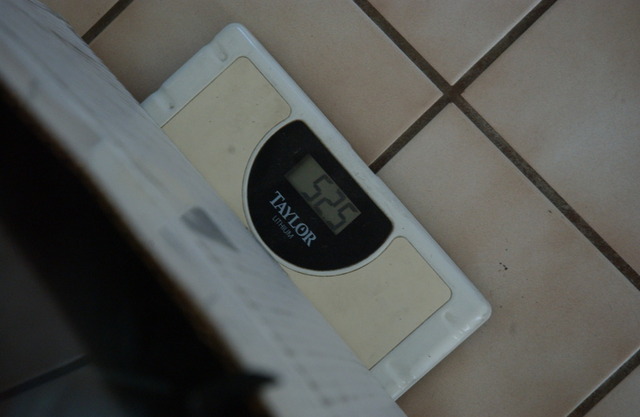
So, total weight pulled from both doors: 52.5 lbs
I then went through the car and pulled out all of the speaker wire and amplifier wiring, and weighed that with the amplifier that I removed: 12 lbs
So, total weight saved: 64.5 lbs
I've been meaning to lighten the doors for a while now. Lighter = faster, and in the words of Ricky Bobby, "I wanna go fast!!!"
So here's how the doors looked Monday morning:
I began dissasembling things and recalled that back in the day I had added Fatmat to the driver's door to eliminate some rattling from the speakers (it never helped). This was not fun to scrape off:
The passenger side thankfully did not have that. Here it is with aleverything that can be simply unbolted removed:
Then I got out the cutting tools and got to work:
Near the top of the door there are three layers of steel, so I cut up into that and removed as much as I felt I could while keeping the door rigid:
Test-fit the elbow pad and some rubber trim around the cut edge:
But, in the picture above, you can see that there is still a heavy cross-brace that runs through the door. This I cut out as well, but didn't take an in-progress picture of. In the finished pics you can see how it is missing.
Now we get on to the condundrum: how to keep the car streetable with gutted doors??
I wanted to be able to put the glass in place for street driving and so it could be secure when parked, but removeable for competetive use.
Here is the solution being made. The blue tape marked where the top edge of the door sat in relation to the window, so I could adjust these hooks so that the window sits exactly as it did when normally rolled up:
The hooks finished and awaiting paint:
Notches needed to be cut in the rubber on the door where the hooks would sit:
The finished hooks mounted on the window:
The window mounted in the door. It literally just sits in this position quite securely, but I can pull the windows out in 10 seconds. With the door shut, they can't be removed. Totally secure.
Then I painted the inside of the doors and finished them with the elbow pad and rubber trim. The finished product, window in place. I'll be adding a wire that will serve as the interior door latch pull later:
And the passenger door. You'll see that I removed a little more weight with the hole saw in the bottom of the doors:
The doors still have the exterior handle and lock, and the interior door handle will be a wire attached to the front of the door that runs back to the latch at the rear. Just pull on the wire and the door latch pops open.
But wait... how much weight was saved?
I threw everything I had removed in a cardboard box:
Then I remembered that the crossovers for the speakers were still in the footwells, so I removed those, which are easily another half pound together.
So, total weight pulled from both doors: 52.5 lbs
I then went through the car and pulled out all of the speaker wire and amplifier wiring, and weighed that with the amplifier that I removed: 12 lbs
So, total weight saved: 64.5 lbs

Reply
4
4
09-12-2011, 04:17 PM
#5
Supporting Vendor
iTrader: (3)
Join Date: Jul 2006
Location: San Diego
Posts: 3,303
Total Cats: 1,216
From what I have heard, you're not going to be able to make Lexan windows for the miata. The curvature has to be so spot on that there's nearly no chance of getting it right just by heating and bending the lexan. I read a big thread on the spec miata forums about the subject a while back.. I'm looking for it now but I can't seem to find it.. and the general consensus after much attempting was to just do what I did and be able to remove the glass for competitive use.
I believe I have seen actual Lexan windows for sale somewhere that were cut and formed to actually properly match our factory windows, but I also can't seem to find those anywhere now... and I remember them being expensive, hence why I just went with the removeable window option
I believe I have seen actual Lexan windows for sale somewhere that were cut and formed to actually properly match our factory windows, but I also can't seem to find those anywhere now... and I remember them being expensive, hence why I just went with the removeable window option
Reply
0
0
 09-12-2011, 04:54 PM
#8
Supporting Vendor
iTrader: (3)
Join Date: Jul 2006
Location: San Diego
Posts: 3,303
Total Cats: 1,216
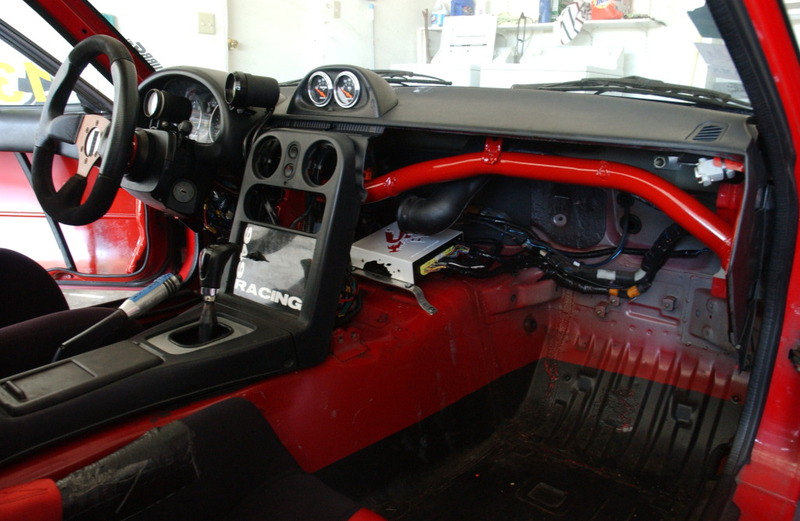
Haha thanks Hustler... the doors were part 1 of a two-part interior lightening project, so the rest of the interior was partially disassembled at that point as well. Now that part 2 has been completed as well, the ECU is happy and cozy in its new home:
Reply
0
0
09-12-2011, 05:17 PM
#9

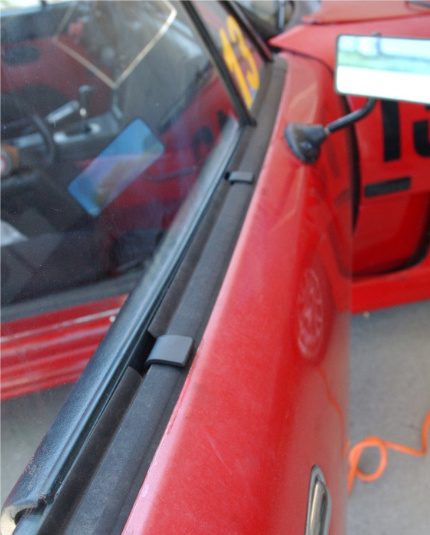
Nice, mine look identical. Except the holes @ the bottom which I will copy. And the window tabs. A company already makes them. I think I paid $10 shipped. Alot of sm racers use them. Ill see if I can find where I got them from. Only difference is they sit inside the door, using factory bolts. I used a rubber bungee cord for a door release. So easy, 1 factory bolt is all that's needed. I'll take some pics.
Reply
0
0
09-12-2011, 05:28 PM
#10
Elite Member
Thread Starter
iTrader: (2)
Join Date: Aug 2009
Location: Dover, FL
Posts: 3,143
Total Cats: 174
Is there a reason I can not cut the metal partition between the triangle window and the main window.
If I recall, it bolts to the top of the window sill like the window gliders. It seems like the added length is not necessary since the window is no longer moving up and down. I would cut it just below where it bolts to the sill.
If I recall, it bolts to the top of the window sill like the window gliders. It seems like the added length is not necessary since the window is no longer moving up and down. I would cut it just below where it bolts to the sill.
Reply
0
0
 09-12-2011, 06:30 PM
#12
Supporting Vendor
iTrader: (3)
Join Date: Jul 2006
Location: San Diego
Posts: 3,303
Total Cats: 1,216
Is there a reason I can not cut the metal partition between the triangle window and the main window.
If I recall, it bolts to the top of the window sill like the window gliders. It seems like the added length is not necessary since the window is no longer moving up and down. I would cut it just below where it bolts to the sill.
If I recall, it bolts to the top of the window sill like the window gliders. It seems like the added length is not necessary since the window is no longer moving up and down. I would cut it just below where it bolts to the sill.
Reply
0
0


 09-13-2011, 08:36 AM
#18
Elite Member
Thread Starter
iTrader: (2)
Join Date: Aug 2009
Location: Dover, FL
Posts: 3,143
Total Cats: 174
By the way, I like how you tastefully gutted the dash. I gutted my dash, but wanted the stock appearing look, and it appears stock

Reply
0
0
09-13-2011, 04:39 PM
#20

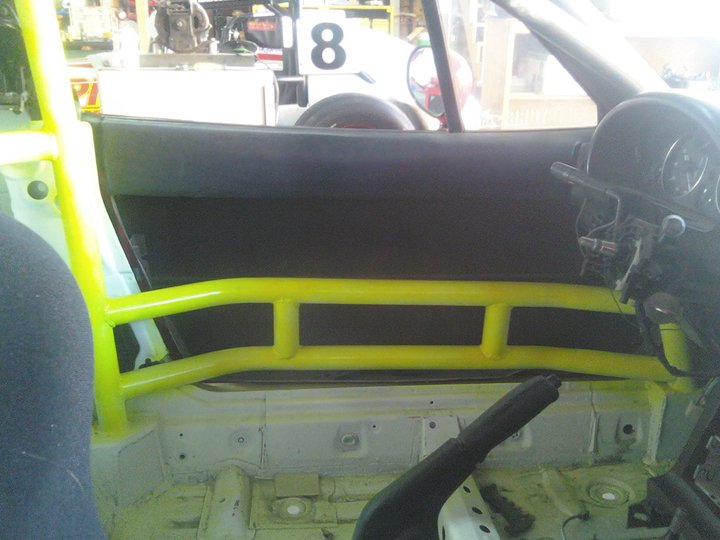
Mine looks similar, but I took the gutting a little further. I removed all of the factory door bar, the little things that hold the door open and the things on the back of the door that line it up for the latch. Those will probably go back on. I made my own window clips and cut the front window rail out. The door is pretty flimsy.
And a shot with the door closed with my door bars.
And a shot with the door closed with my door bars.
Reply
0
0


