
Managing heat with a flat underbody


 11-08-2012, 10:41 AM
#63

Hopefully OP will post some more pics. I'm also curious if he's planning to put a modified bumper cover back on or run like the most recent picture. Personally, I'm a year away from any of this kind of work on my car but I'm very curious how this works out.


Reply
 0
0

0
11-08-2012, 11:22 AM
#64
Supporting Vendor

Thread Starter
iTrader: (3)

Join Date: Jul 2006
Location: San Diego
Posts: 3,303
Total Cats: 1,216
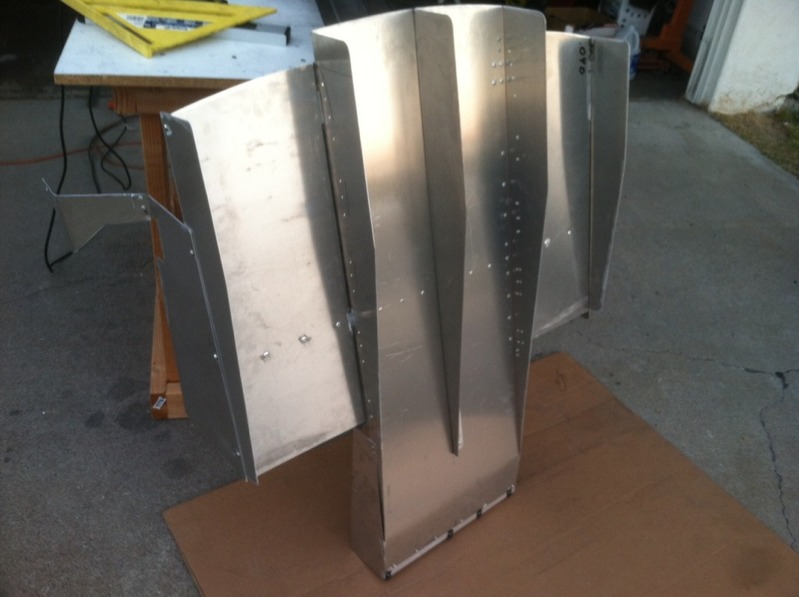
The diffuser by itself, without the covers that go under the control arms:
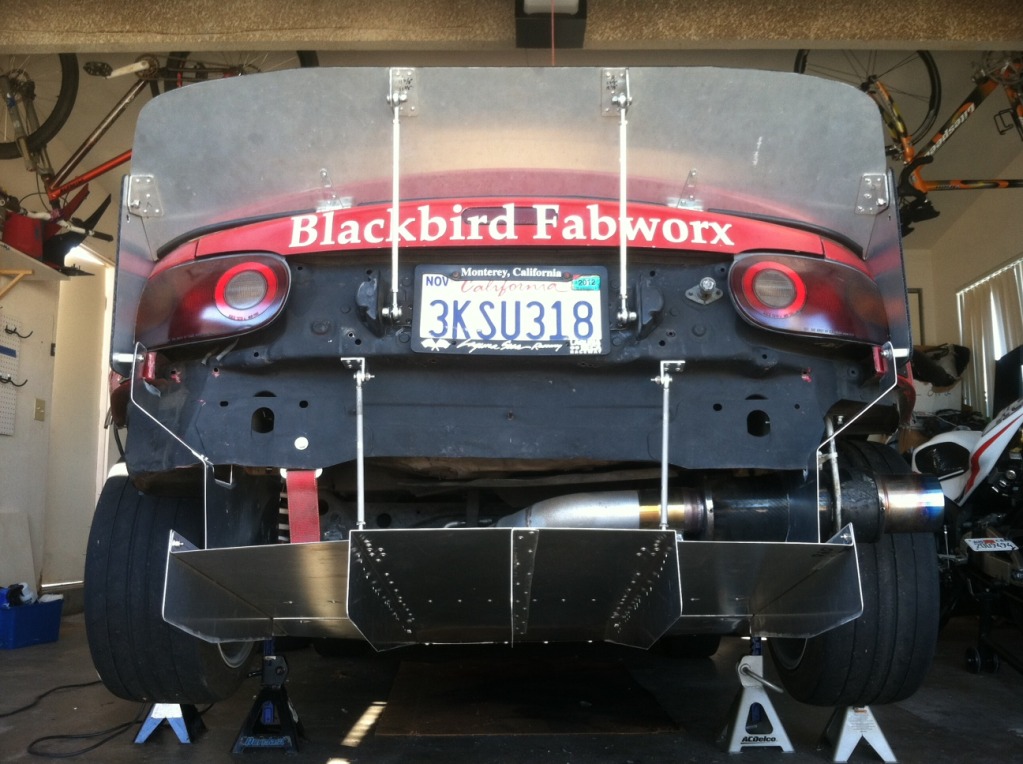
Mounted you can see the gap between diffuser and car where the diff heat can escape. Still need to add the NACA duct to get some cooler air to the diff:
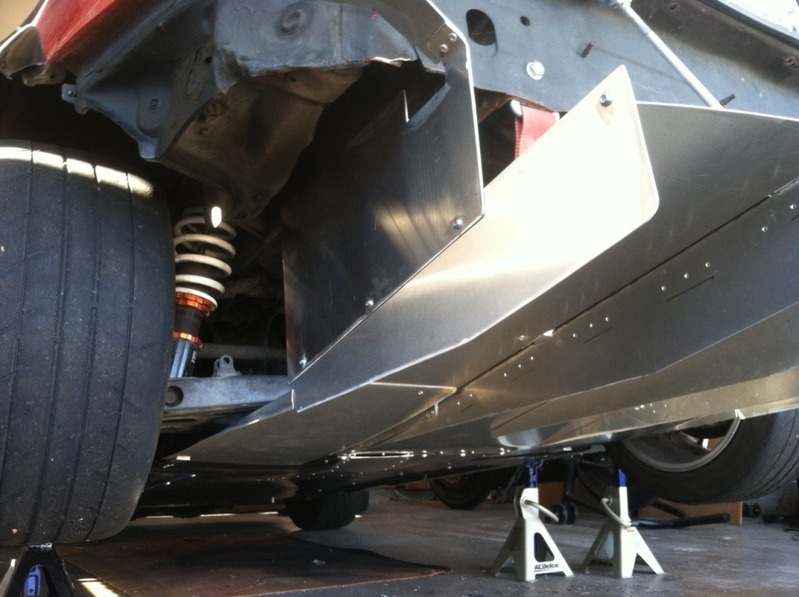
Driver's side:
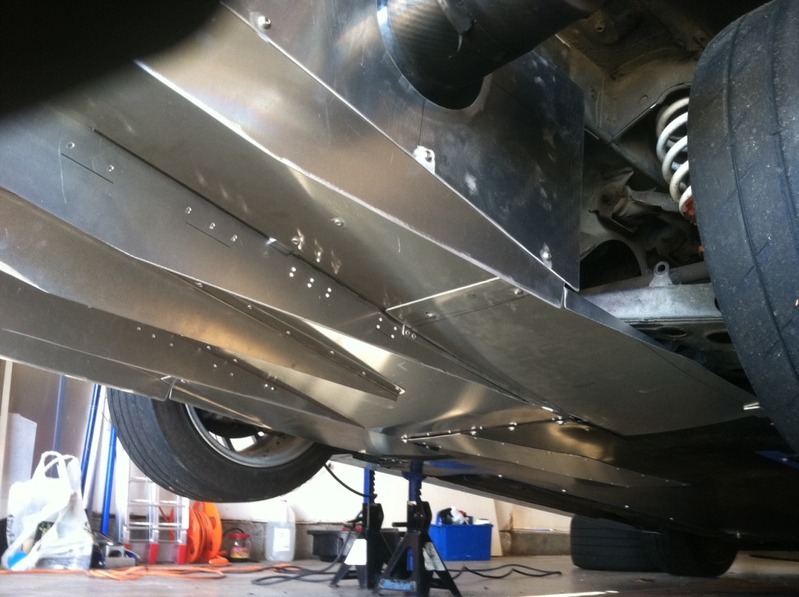
Passenger side:
Fins:

The diffuser sits at 8.5* from horizontal and is as long as I could possibly make it - stretching all the way up to the front side of the differential.
There will not be a bumper any more. I'm leaving it bare for ACS and then I'll paint it. Got a few more projects to do before the event.
I'm pretty happy with how it turned out. I made the whole thing with pretty basic garage tools. Everything was just drawn with a square and straight edge and cut with an angle grinder. I picked up a Harbor Freight sheet metal brake but it can't do everything so I still ended up making some bends with a hammer and 2x4.
-Ryan
Mounted you can see the gap between diffuser and car where the diff heat can escape. Still need to add the NACA duct to get some cooler air to the diff:
Driver's side:
Passenger side:
Fins:
The diffuser sits at 8.5* from horizontal and is as long as I could possibly make it - stretching all the way up to the front side of the differential.
There will not be a bumper any more. I'm leaving it bare for ACS and then I'll paint it. Got a few more projects to do before the event.
I'm pretty happy with how it turned out. I made the whole thing with pretty basic garage tools. Everything was just drawn with a square and straight edge and cut with an angle grinder. I picked up a Harbor Freight sheet metal brake but it can't do everything so I still ended up making some bends with a hammer and 2x4.
-Ryan

Reply
1
1
 11-08-2012, 01:27 PM
#66
Junior Member

Join Date: Aug 2009
Posts: 186
Total Cats: 2
A spoiler off the trunk lid would help with that. Granted, the air is a mess back there but at a glance, half the 'problem' is the thrashed air rolling out from under the OEM bumper. With the diffuser in place, it should be significantly better. I know exactly dick about fluid dynamics but this makes sense in my layman observation.
Hopefully OP will post some more pics. I'm also curious if he's planning to put a modified bumper cover back on or run like the most recent picture. Personally, I'm a year away from any of this kind of work on my car but I'm very curious how this works out.
Hopefully OP will post some more pics. I'm also curious if he's planning to put a modified bumper cover back on or run like the most recent picture. Personally, I'm a year away from any of this kind of work on my car but I'm very curious how this works out.
I do know what you mean though, which is why I've had something like 949's 25hr T-Hill spoiler in mind for some time now, but that was put on a hold because the diffuser I have now (JJ_Warhorse WHD1.0) made the aero more rear focused which calls for more attention to the front (current front end airdam/splitter was not setup for maximum downforce, but was rather optimized for my older DIY, less efficient diffuser).
The diffuser by itself, without the covers that go under the control arms:
The diffuser sits at 8.5* from horizontal and is as long as I could possibly make it - stretching all the way up to the front side of the differential.
There will not be a bumper any more. I'm leaving it bare for ACS and then I'll paint it. Got a few more projects to do before the event.
I'm pretty happy with how it turned out. I made the whole thing with pretty basic garage tools. Everything was just drawn with a square and straight edge and cut with an angle grinder. I picked up a Harbor Freight sheet metal brake but it can't do everything so I still ended up making some bends with a hammer and 2x4.
-Ryan
Reply
0
0
11-08-2012, 01:35 PM
#67
Supporting Vendor
Thread Starter
iTrader: (3)
Join Date: Jul 2006
Location: San Diego
Posts: 3,303
Total Cats: 1,216
The pinch welds running between the wheel wells are exposed, with neither the flat underbody or the flat sideskirts protruding below them, and I always jack the car up from the pinch welds. I've jacked the car up and down probably 10 times during the process of building this, never found myself wishing for any other jacking points.
I would be very sad panda to have to remove any of my aero pieces just to jack the car up. If I did, I'd be redesigning things so that I could jack the car up without removing stuff...
Jacking the car up from the rear doesn't work well for me anyways since the splitter is low - get the rear up in the air and the front splitter can contact the ground.
Your car is pretty low, I have no idea how you get a jack under the front subframe.
-Ryan
Reply
0
0
11-08-2012, 01:47 PM
#68
Junior Member
Join Date: Aug 2009
Posts: 186
Total Cats: 2
The pinch welds running between the wheel wells are exposed, with neither the flat underbody or the flat sideskirts protruding below them, and I always jack the car up from the pinch welds. I've jacked the car up and down probably 10 times during the process of building this, never found myself wishing for any other jacking points.
I would be very sad panda to have to remove any of my aero pieces just to jack the car up. If I did, I'd be redesigning things so that I could jack the car up without removing stuff...
Jacking the car up from the rear doesn't work well for me anyways since the splitter is low - get the rear up in the air and the front splitter can contact the ground.
Your car is pretty low, I have no idea how you get a jack under the front subframe.
-Ryan
I would be very sad panda to have to remove any of my aero pieces just to jack the car up. If I did, I'd be redesigning things so that I could jack the car up without removing stuff...
Jacking the car up from the rear doesn't work well for me anyways since the splitter is low - get the rear up in the air and the front splitter can contact the ground.
Your car is pretty low, I have no idea how you get a jack under the front subframe.
-Ryan
To get the car on 4 stands, I have to raise the front (wooden ramps, remove splitter, bends OEM bumper/airdam for jack lever to raise car), to get the rear high enough for my Craftsman stands (remove diffuser on ground, jack up at tow and/or diff). A quick release front bumper is something I want to incorporate into my revisions.
Reply
0
0

 11-08-2012, 02:04 PM
#70
I always jack the cars from the pinch welds too. Under the mirror is the approximate center of mass. Put the jack there and you have room to place the jackstands fore and aft. Repeat on the other side.
I have some blocks of oak from a kitchen project that I cut cross-grained and use as jack pads for the jack and stands. This helps distribute the load a bit and keeps my pinch welds looking pretty.
*Edit - Niklas beat me to it...
I have some blocks of oak from a kitchen project that I cut cross-grained and use as jack pads for the jack and stands. This helps distribute the load a bit and keeps my pinch welds looking pretty.
*Edit - Niklas beat me to it...
Reply
0
0
11-08-2012, 04:13 PM
#72
Junior Member
Join Date: Aug 2009
Posts: 186
Total Cats: 2
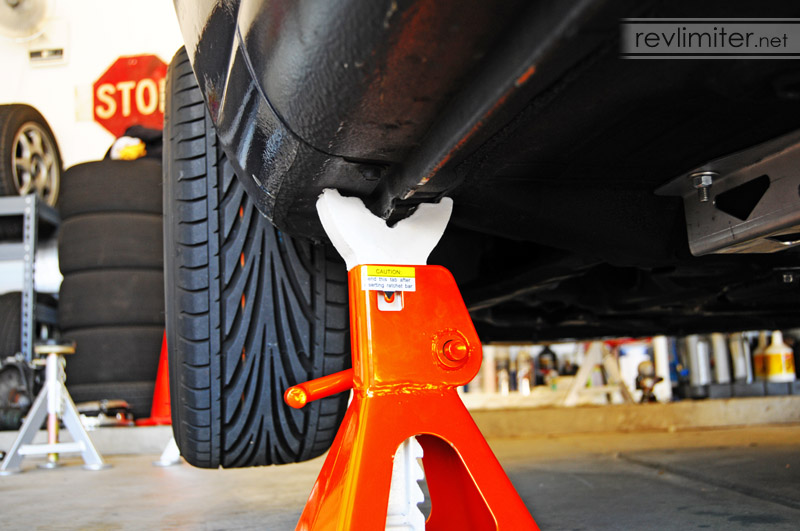
thanks to revlimiter for the pic.
I now place the stand parallel to the car, on the reinforced section behind the pinch. You can see it behind the pinch in this photo:
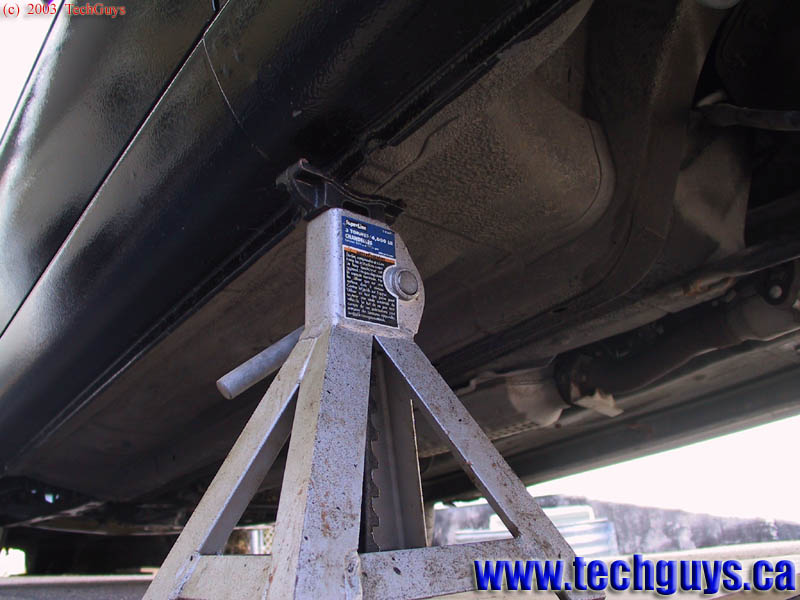
I'm sure I'm not jacking the car up anymore than anyone else here.
Anyway, sorry to go off a tangent, maybe my pinch welds are too old/weak compared to everyone elses, but they just constantly folded over. I once placed the stand too far back on the rear pinch (close to tire) and it folded over-- easily bent back with pliers as well.
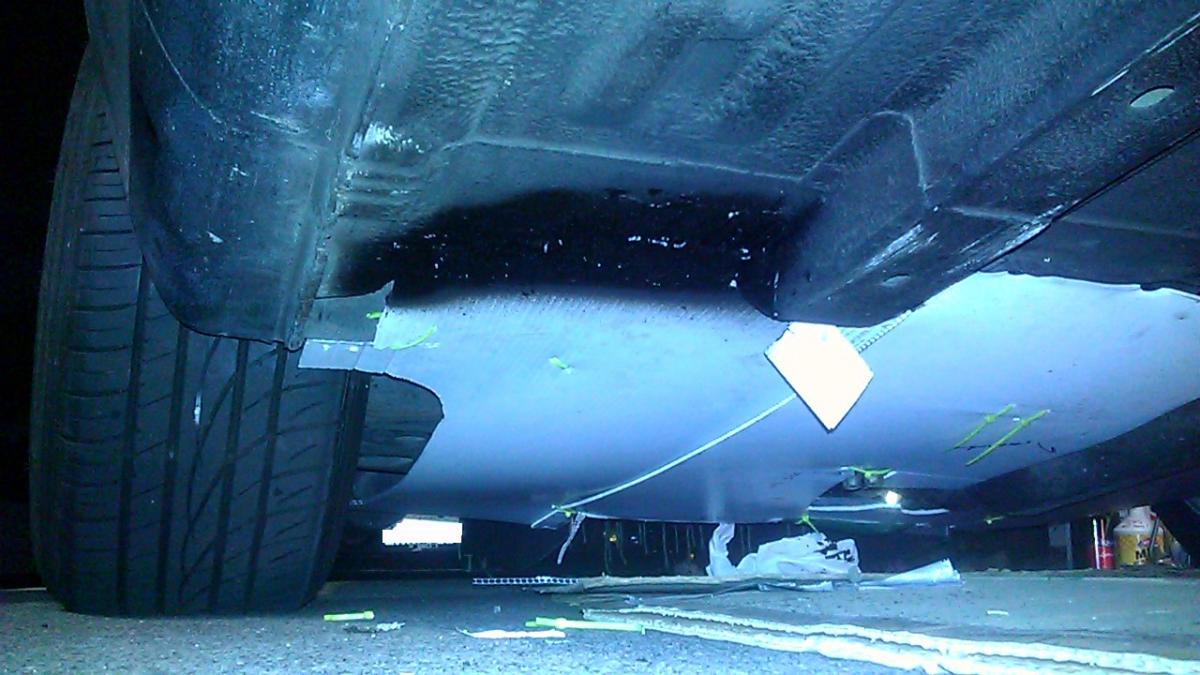
Just to keep the post slightly on-topic still, here's what I saw regarding airflow above and below diffuser surface. To the top left is the diff, to the right of the frame is the rear of the car. Once at higher speeds (as soon as 40mph or so), you'll see airflow goes above towards the diff. This happened until I kept covering up more underneath the rear subframe, covering the RLCAs and using a gurney flap-- only then did the airflow below do what was wanted-- airflow above was ignored, but it still flowed in the same direction.
Reply
0
0
11-08-2012, 06:09 PM
#73
Junior Member

Join Date: Jul 2010
Location: Home: Hatfield PA, School: Rochester NY
Posts: 52
Total Cats: 0
Last time I checked you can't jack up a car with jack stands. You jack up the car on the pinch weld with your jack (if you don't want to mess up your pinch welds FM sells a tool to go on your jack) and then your free to place your jack stands wherever you want (like on the reinforced frame rails which wont bend like the rest of the flimsy underbody).
Reply
0
0


 11-10-2012, 05:17 PM
#77
Junior Member
Join Date: Aug 2009
Posts: 186
Total Cats: 2
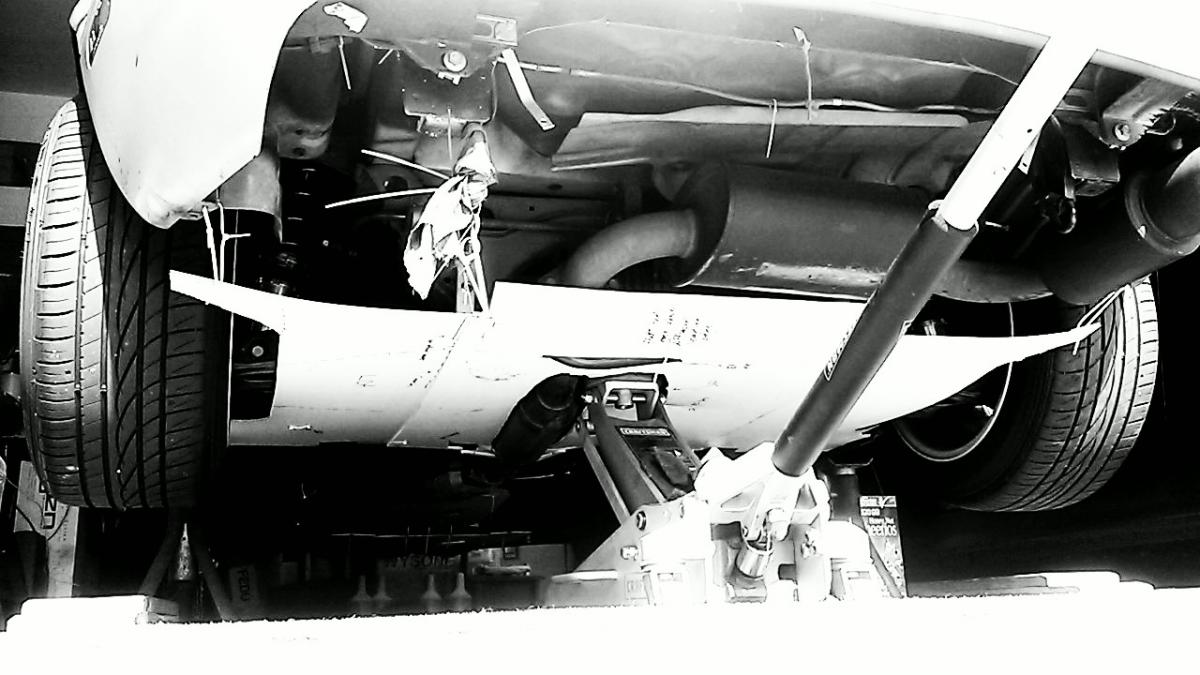
Was using the pinch to jack up the car, but on my car they are flimsy-- should I just not care? You can see on the pinch on the right of this photo where it folded a little bit-- that's under the mirror. That's when I started used the front sub and rear diff to get the car on stands to avoid that. It was easy to bend back with pliers which made me question if it's really the best place. Eventually it would make it hard to measure pinch heights... and I wanted to keep them in tact as I wanted to bolt some skirts along the pinch (which hasn't materialized yet).
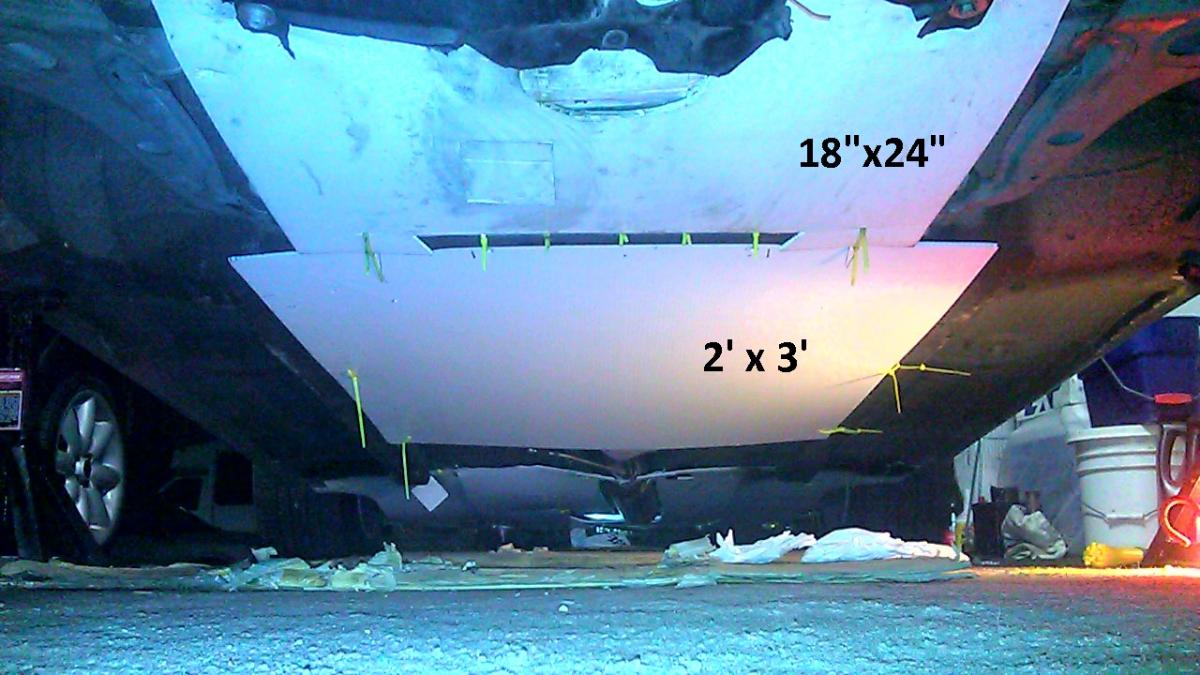
The 2'x3' after the front diff was experimental for material choice underneath a hot tranny and hotter pipe. Only the pipe before the cat gave issues.
Mainly covered everything after the flimsy frame rails (which will cave in if you place stands underneath them). That square piece is hanging on a thread to the rest of the coroplast... wanted to see how easy it is for the material to rip or tear ... it's still there after over a year and a few track days.
Since I don't use the pinch to lift the car, I needed front and rear aero to be removable while on the ground. This is such a design limitation, which ThePass has been able to circumvent with the best possible AOA, starting forward of the rear axles, giving more room for expansion and efficiency. This is why I had the pinch questions so I can start redoing the undertrays.
For the past year or so I've been toying with drag coast down tests, tufts at trailing edge of diffuser. Heat at the diff during track days is about 30-50 degree variance from street driving with these panels, but then again I am 1.6L powered so isn't transferrable to those with higher HP. Couldn't get temp measurements at the tranny.
Reply
0
0
11-10-2012, 06:29 PM
#78
Junior Member

Join Date: Apr 2011
Location: Oregon
Posts: 301
Total Cats: 4
interesting. with mine, I allowed even more air into throat thru a gap in my front chin spoiler. I focused the airstream venturi at a point about 1/3 past the front bumper, then gradually lifted the floor past the diff, with then about a 15 degree lift in the diffuser. It worked pretty nicely; except for the problems of access to the trans/diff/drivetrain. fluid collection, fire hazard.... and, if you did ever go agricultural because of a flat tire... expect to slide a good long time on that extended underbelly (you don't want to ask!)
btw, I found that a good way to evaluate your underbody downforce effectiveness was to race in the rain... the bigger the roostertail, the better your downforce.
Nice creativity.
btw, I found that a good way to evaluate your underbody downforce effectiveness was to race in the rain... the bigger the roostertail, the better your downforce.
Nice creativity.
Reply
0
0
11-10-2012, 07:08 PM
#79
Junior Member
Join Date: Jul 2010
Location: Home: Hatfield PA, School: Rochester NY
Posts: 52
Total Cats: 0
If you don't want to mess up your pinch welds, you can buy this tool: http://www.flyinmiata.com/index.php?...umber=35-70000
I guess you could try and make one if you didn't feel like spending the $20.
I have reinforced frame rails so I just put my jack stands underneath them. Or my mounting plates for my door bars. If you have neither putting the jack stand next to the pinch weld as described by a post above would probably be your best bet. Not having to compromise the aero design as well as not having to take it off ever time I jack the car up would be worth $20 to me
Reply
0
0


