

MR-S Rear Hub Discussion


Joined: Sep 2012
Posts: 4,560
Total Cats: 1,143
From: your mom's house phoenix, AZ
Reply
 0
0

0


Thread Starter
Elite Member
iTrader: (14)
Joined: Sep 2009
Posts: 2,101
Total Cats: 180
From: Birmingham, AL
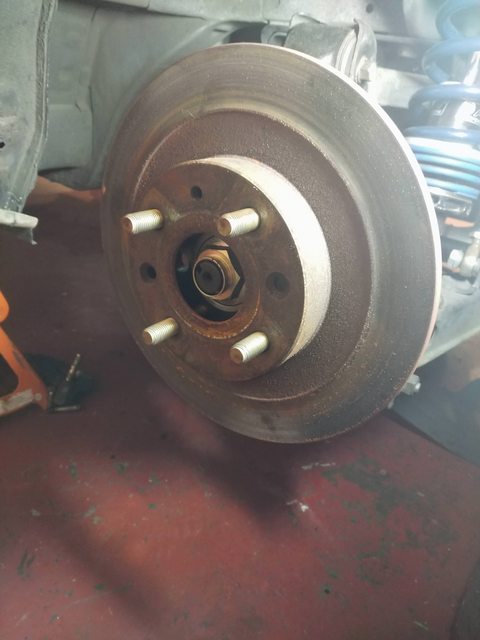
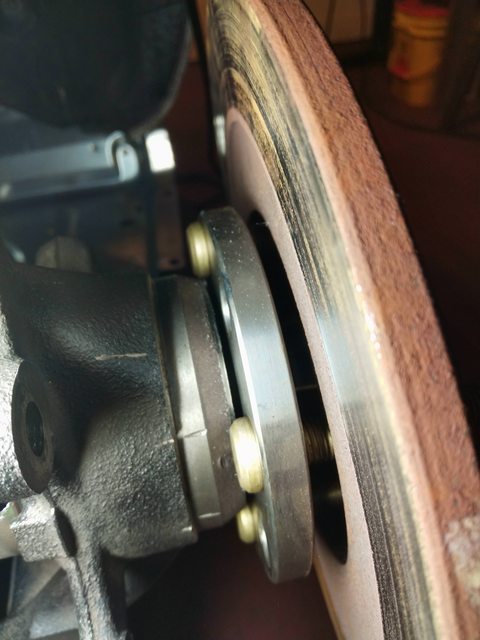
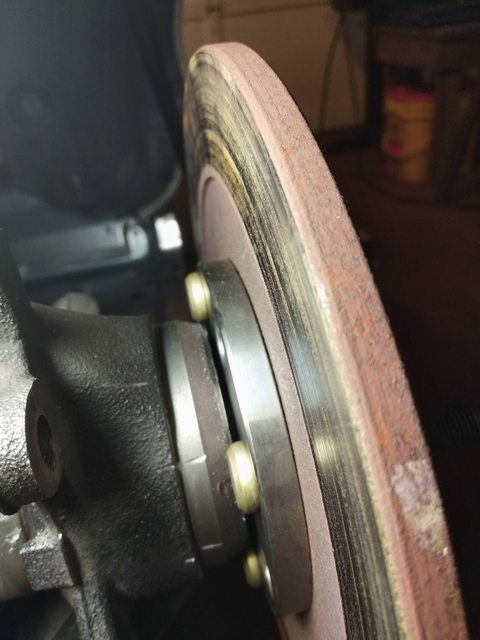
Well **** - Lars pointed out that the rear rotor won't fit over the OD of the hub face... checked my sports, sure enough. I Didn't even think to check the rotor fitting over the hub. Just a little off the edge should do.
4.916 hub OD
4.895 inner rotor hat
about 0.1mm shave should suffice, but remember to allow for heat expansion.
4.916 hub OD
4.895 inner rotor hat
about 0.1mm shave should suffice, but remember to allow for heat expansion.
Reply
0
0
Thread Starter
Elite Member
iTrader: (14)
Joined: Sep 2009
Posts: 2,101
Total Cats: 180
From: Birmingham, AL
I think he needs to put the rear end on jacks (which I'm sure it is already) , start the car, put in gear and take a file to those hubs! That'd be funny as hell... and it'd work! Until his arm gets wrapped up in the axle...
Reply
0
0

 I'll likely be doing this, but I don't have the time currently. Car goes to cage tomorrow, so I've zipped tied the rear calipers and turned my prop valve to close off the rear for now.
Thought it was guna work!
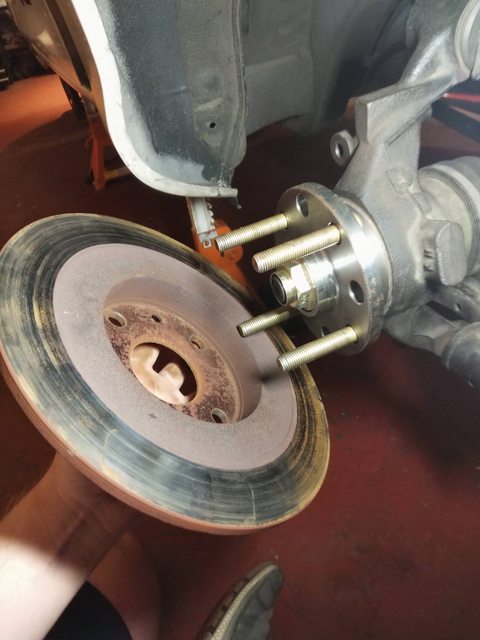
Ummmmm, what did I **** up?!
Queue the sad-trombone.
Took some quick measurements with a HF caliper.
MR-S hub OD: 125mm
Miata hub OD: 122mm
1.8 rear brake rotor ID: 124.5mm
I'd like to take ~1mm off so it's not a super tight fit for the rotor onto the hub. The rotor "hat" has to expand some while hot, correct? I figure if the tolerance was too tight it could potentially crack? Maybe I'm being overly paranoid.
This is just part of pioneering, I suppose. Thankfully this is fixable and Sean can add it to his process.
Reply
0
0

Joined: Sep 2012
Posts: 4,560
Total Cats: 1,143
From: your mom's house phoenix, AZ
I'll likely be doing this, but I don't have the time currently. Car goes to cage tomorrow, so I've zipped tied the rear calipers and turned my prop valve to close off the rear for now.Thought it was guna work!

Ummmmm, what did I **** up?!

Queue the sad-trombone.


Took some quick measurements with a HF caliper.
MR-S hub OD: 125mm
Miata hub OD: 122mm
1.8 rear brake rotor ID: 124.5mm
I'd like to take ~1mm off so it's not a super tight fit for the rotor onto the hub. The rotor "hat" has to expand some while hot, correct? I figure if the tolerance was too tight it could potentially crack? Maybe I'm being overly paranoid.
This is just part of pioneering, I suppose. Thankfully this is fixable and Sean can add it to his process.
Reply
0
0

Reply
0
0

Reply
0
0
Joined: Sep 2012
Posts: 4,560
Total Cats: 1,143
From: your mom's house phoenix, AZ
Pressure adjustments range from 100-1000 PSI and provide for a maximum decrease of 57% in line pressure, the most of any available valve
Wilwood Disc Brakes - Porportioning Valves & Pressure Valves
just for reference
Wilwood Disc Brakes - Porportioning Valves & Pressure Valves
just for reference
Reply
0
0

Reply
0
0


Reply
0
0


