
Turbo Smurfette - Build in progress (slow)


Thread Starter
Elite Member
iTrader: (4)
Joined: Mar 2012
Posts: 4,648
Total Cats: 544
From: Northern VA
Probably shorten by a centimeter amd **** it 45 degrees, I kust have to throw on the a/c compressor to check it doesn't interfere with anything else.
The turbo has been clocked amd I'm figuring out plumbing to the turbo. Pressure sensor will hang from a sandwich plate while the oil port on the side of the block will be a dedicated feed to turbo.
Bspt to npt adapters (and vice versa) have been ordered to facilitate the fittings amd AN lines.
Just gotta place the oil return, drill and find a welder to weld a bung on
Pictures up soon.
Reply
 0
0

0

Thread Starter
Elite Member
iTrader: (4)
Joined: Mar 2012
Posts: 4,648
Total Cats: 544
From: Northern VA
I was thinking about that, but wasn't sure what to do with the return for the heater core.
I just read recently that for those who don't use the heater core one could tap and just plug that hole, but maybe I could get a 180� AN/hose fitting and hook it up somehow
I just read recently that for those who don't use the heater core one could tap and just plug that hole, but maybe I could get a 180� AN/hose fitting and hook it up somehow
Reply
0
0

I feel like I've posted this a million times, but I clamp a 90* on to the heater core, run it underneath the brake booster, zip tie it to the edge of my master cylinder brace, and down into a "T" in the lower radiator hose. It's a long line, but a single piece that stays away from anything hot, it's never gotten in the way, and has never caused me any issues.
I also like the simplicity of the lower radiator line, just a 90* and a coupler after the T.
Pictures say a 1000 words, but I can't seem to find any.
I also like the simplicity of the lower radiator line, just a 90* and a coupler after the T.
Pictures say a 1000 words, but I can't seem to find any.
Reply
0
0
Thread Starter
Elite Member
iTrader: (4)
Joined: Mar 2012
Posts: 4,648
Total Cats: 544
From: Northern VA
Thinking about suggestions made by 18psi and Curly.....
.....can I just use the heater core as the source for coolant to run through the turbo?
I can run a braided hose from the heater core to the turbo and use hose fittings to adapt it to AN6 to attach to the banjo bolts I already have. Then from the turbo I can do as Curly said, and just T into the coolant inlet hose?
Reply
0
0
Thread Starter
Elite Member
iTrader: (4)
Joined: Mar 2012
Posts: 4,648
Total Cats: 544
From: Northern VA
I may end up having to sell everything because my school decided to not pay me since I finished my graduate course-load a semester early.
https://www.miataturbo.net/miata-par...e-build-77016/
https://www.miataturbo.net/miata-par...e-build-77016/
Reply
0
0
Thread Starter
Elite Member
iTrader: (4)
Joined: Mar 2012
Posts: 4,648
Total Cats: 544
From: Northern VA
I'm seeing how long I can hold out. I NEED to procure a job for graduation before my student loan payments kick in. The income I was expecting this semester would have been my cushion savings until I got a job, but if I take a gamble and it takes longer to find employment, I have to liquidate locked assets.
I am almost tempted to just bite the bullet and finish it. Tune it, enjoy the fruits of labor before selling the whole thing at a loss. It's easier to sell everything at once than to part things out and sit on odds and ends for a year.
I am almost tempted to just bite the bullet and finish it. Tune it, enjoy the fruits of labor before selling the whole thing at a loss. It's easier to sell everything at once than to part things out and sit on odds and ends for a year.
Reply
0
0
Thread Starter
Elite Member
iTrader: (4)
Joined: Mar 2012
Posts: 4,648
Total Cats: 544
From: Northern VA
So, slowly but surely I'm trying to continue with this build.
New:
-Installed a Walbro 190HP fuel pump, swapped for an aluminum radiator with the Flyin' Miata Stage 2 Airflow kit and wired the fans with a relay to run parallel.
-Installed AWR sway brackets, hopefully gaining clearance between the sway bar and A/C compressor on the BP4W
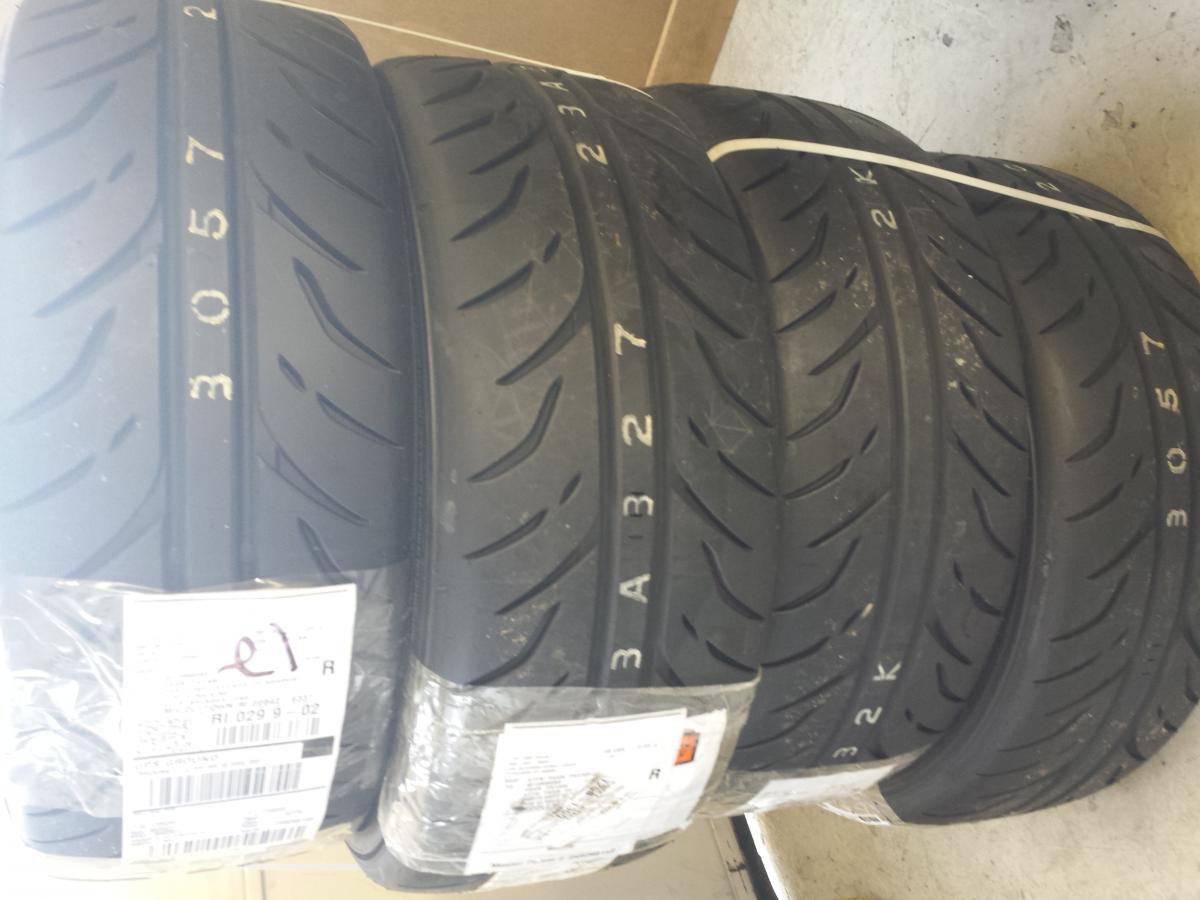
-Mounted/balanced Direzza ZII's on summer wheels
My under tray was trashed and broken in several spots, there was no way for me to mount it back up. I ordered a new one, but driving around, i notice the temps are a bit higher than normal. The fans are running constantly, resulting in a drained battery. I hope the cooling is rectified by the under tray such that the fans don't have to work so hard to cool the radiator, thus saving my puny NA6 alternator until I swap motors. It reads under 11 volts sitting; after a jump start, voltage spikes up to 14.3 volts, but fluctuates between 11.88 and 12.00volts while the fans are running. My gauges, radio and MTX-L go fritz.
I'm waiting for my oil pan to come back with a oil return bung welded to it then I need to find a place to do the actual swap.
Anyone in New England willing to loan me a driveway or garage for a couple days? In and out swap. Motor+6spd all in one go with just a couple merged wires.
I'm tired of snow tires
New:
-Installed a Walbro 190HP fuel pump, swapped for an aluminum radiator with the Flyin' Miata Stage 2 Airflow kit and wired the fans with a relay to run parallel.
-Installed AWR sway brackets, hopefully gaining clearance between the sway bar and A/C compressor on the BP4W
-Mounted/balanced Direzza ZII's on summer wheels
My under tray was trashed and broken in several spots, there was no way for me to mount it back up. I ordered a new one, but driving around, i notice the temps are a bit higher than normal. The fans are running constantly, resulting in a drained battery. I hope the cooling is rectified by the under tray such that the fans don't have to work so hard to cool the radiator, thus saving my puny NA6 alternator until I swap motors. It reads under 11 volts sitting; after a jump start, voltage spikes up to 14.3 volts, but fluctuates between 11.88 and 12.00volts while the fans are running. My gauges, radio and MTX-L go fritz.
I'm waiting for my oil pan to come back with a oil return bung welded to it then I need to find a place to do the actual swap.
Anyone in New England willing to loan me a driveway or garage for a couple days? In and out swap. Motor+6spd all in one go with just a couple merged wires.
I'm tired of snow tires
Last edited by psyber_0ptix; Mar 17, 2014 at 03:27 PM.
Reply
1
1
Thread Starter
Elite Member
iTrader: (4)
Joined: Mar 2012
Posts: 4,648
Total Cats: 544
From: Northern VA
The motor is done!
I just have to get a return hose for the turbo, find a pigtail for the cam position sensor, and transfer a sensor from the 1.6L motor during the swap.
Anyone in New England willing to loan out their garage or driveway so I can plop this in?

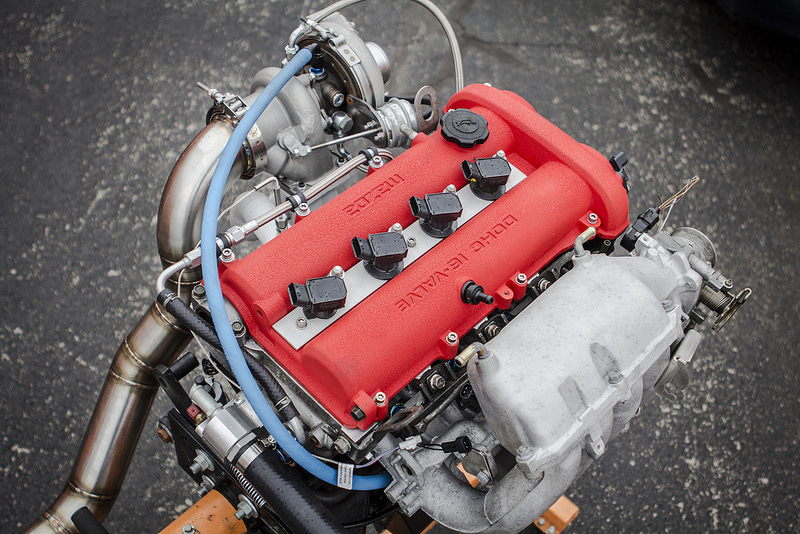
I just have to get a return hose for the turbo, find a pigtail for the cam position sensor, and transfer a sensor from the 1.6L motor during the swap.
Anyone in New England willing to loan out their garage or driveway so I can plop this in?
Reply
4
4

Elite Member
Joined: Oct 2013
Posts: 2,764
Total Cats: 951
From: Cedar City, UT
Not sure what they look like but just an option for yah.
Reply
0
0
Thread Starter
Elite Member
iTrader: (4)
Joined: Mar 2012
Posts: 4,648
Total Cats: 544
From: Northern VA
I appreciate the offer!
I need the CMP pigtail since the bp4w uses a sensor by the cam gear. I think I'm going to have to start this off running batch fuel/spark until I can get the plug and then wire fore sequential at a later date.
It will be easier in the interim to get the motor broken in and running since I can just manually enter settings for the 36-1 wheel. According to Brain, I'll have to take a composite log so a code can be developed to support the 36-1 with stock cam gear to utilize sequential.
Reply
1
1
Thread Starter
Elite Member
iTrader: (4)
Joined: Mar 2012
Posts: 4,648
Total Cats: 544
From: Northern VA
If anyone that follows this thread is knowledgable with wiring between miata's, can you please check out this thread:
https://www.miataturbo.net/engine-pe...5/#post1117257
I'm hoping to have this all markered before I try to swap this weekend.
I need to ensure that they are connected correctly.
____________________________________
For the Crank/Cam signal
Stock 1.6L CAS:
black w/ light green stripe = Ground
white w/ red stripe = +12V
white = crank signal
yellow w/ blue stripe = cam signal
on the BP4W Crank Sensor:
White w/red stripe = +12v
Black w/blue stripe = ground
Grey w/ Red = Crank signal
on BP4W Cam Sensor:
White w/red stripe = +12v
Black w/blue stripe = ground
Grey w/ Blue = Cam signal
essentially, I can split the power and ground from the stock CAS and wire it into the respective white/red and black wires on the BP4W sensors, then just hook up
[NA6:white to BP4W:grey/red] and
[NA6: yellow/blue to BP4W: grey/blue]
____________________________________
For IACV
just connect the wires as polarity doesn't matter?
source: http://forum.miata.net/vb/newreply.p...eply&p=5233397
____________________________________
TPS
NA6 Red = 5v reference
NA6 light green/white = TPS signal
NA6 black/green = Ground
BP4W Light Grn/Red = 5v reference
BP4W Green/Black = TPS signal
BP4W Black/Red = Ground
source: https://www.miataturbo.net/megasquir...-93-car-36271/
____________________________________
Electronic boost control solenoid
Is there a switched 12v source I could use for the EBC? I am pretty sure I can hijack one of the wires back to the ecu and relocate it to be used for Megasquirts Boost Control function.
I think that's it for the wiring. As I recall the fan switch that was at the front of the block is now obsolete since megasquirt controls the output.
ANY insight or correction to the above would be greatly appreciated
https://www.miataturbo.net/engine-pe...5/#post1117257
I'm hoping to have this all markered before I try to swap this weekend.
I need to ensure that they are connected correctly.
____________________________________
For the Crank/Cam signal
Stock 1.6L CAS:
black w/ light green stripe = Ground
white w/ red stripe = +12V
white = crank signal
yellow w/ blue stripe = cam signal
on the BP4W Crank Sensor:
White w/red stripe = +12v
Black w/blue stripe = ground
Grey w/ Red = Crank signal
on BP4W Cam Sensor:
White w/red stripe = +12v
Black w/blue stripe = ground
Grey w/ Blue = Cam signal
essentially, I can split the power and ground from the stock CAS and wire it into the respective white/red and black wires on the BP4W sensors, then just hook up
[NA6:white to BP4W:grey/red] and
[NA6: yellow/blue to BP4W: grey/blue]
____________________________________
For IACV
just connect the wires as polarity doesn't matter?
____________________________________
TPS
NA6 Red = 5v reference
NA6 light green/white = TPS signal
NA6 black/green = Ground
BP4W Light Grn/Red = 5v reference
BP4W Green/Black = TPS signal
BP4W Black/Red = Ground
____________________________________
Electronic boost control solenoid
Is there a switched 12v source I could use for the EBC? I am pretty sure I can hijack one of the wires back to the ecu and relocate it to be used for Megasquirts Boost Control function.
I think that's it for the wiring. As I recall the fan switch that was at the front of the block is now obsolete since megasquirt controls the output.
ANY insight or correction to the above would be greatly appreciated
Last edited by psyber_0ptix; Apr 2, 2014 at 09:59 AM.
Reply
0
0


Joined: Sep 2010
Posts: 8,154
Total Cats: 1,093
From: Lake Forest, CA
Awesome photos. This is going to be absolutely epic.
Any progress on the job front so you can keep the car?
Any progress on the job front so you can keep the car?
Reply
0
0


