

Another DIY splitter/air dam installation


Thread Starter
Elite Member
iTrader: (15)
Joined: Dec 2007
Posts: 4,847
Total Cats: 27
From: San Antonio, Texas
So though I had considered doing something like this before, I was not ready to take the plunge until I saw Handy_Man's installation on this thread...
https://www.miataturbo.net/race-prep-75/home-made-splitter-air-dam-ducting-60291/
I really like the way his turned out so I decided right there to use the same approach to remake the splitter and air dam for my car. The splitter is made from 3/8" birch plywood, which I had left over from the first splitter I had made. The front air dam is made from 1/8" black ABS purchased from my usual supplier, a local sign shop. The ducting is made from black coroplast, also from the same sign shop.
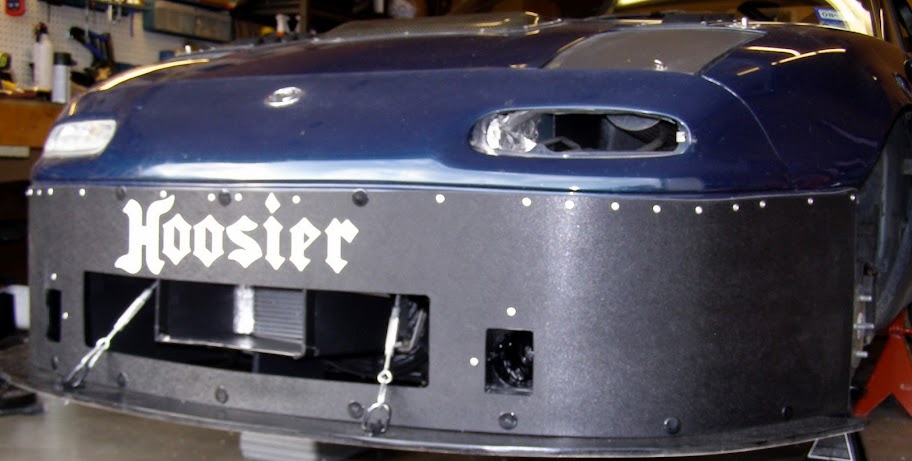
Here is the finished result...
The new splitter with a hammer shown for scale.

Front view
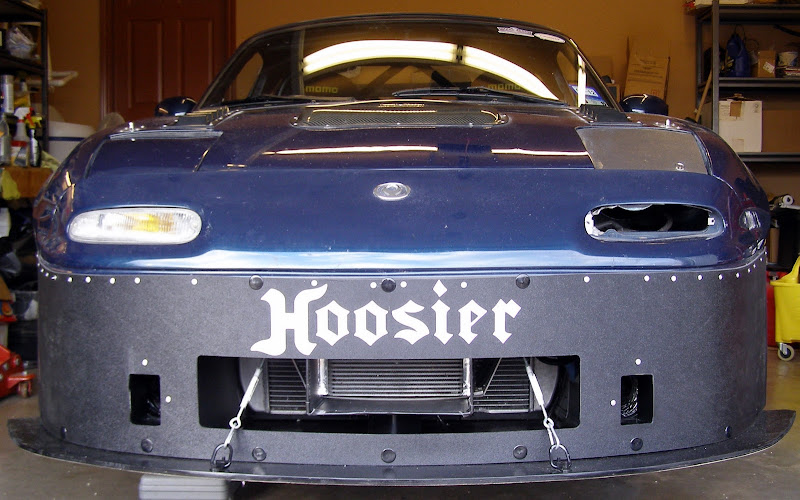
Ducting is visible on the sides inside of the dam, and around the oil cooler

Small holes on the sides are for the brake ducts
Inside the right side wheel well

The splitter from underneath

Miataturboz needs moar dogz, fast onez.

Canards and kitties to be added later.
https://www.miataturbo.net/race-prep-75/home-made-splitter-air-dam-ducting-60291/
I really like the way his turned out so I decided right there to use the same approach to remake the splitter and air dam for my car. The splitter is made from 3/8" birch plywood, which I had left over from the first splitter I had made. The front air dam is made from 1/8" black ABS purchased from my usual supplier, a local sign shop. The ducting is made from black coroplast, also from the same sign shop.
Here is the finished result...
The new splitter with a hammer shown for scale.
Front view
Ducting is visible on the sides inside of the dam, and around the oil cooler
Small holes on the sides are for the brake ducts
Inside the right side wheel well
The splitter from underneath
Miataturboz needs moar dogz, fast onez.
Canards and kitties to be added later.
Reply
 3
3

3


Thread Starter
Elite Member
iTrader: (15)
Joined: Dec 2007
Posts: 4,847
Total Cats: 27
From: San Antonio, Texas
Thanks I am happy with how it turned out. With canards it should look better still. When I get it back on the ground I'll take some more pictures.
Spoolin, keep trying. There should be some places where you are at that sell it, like the sign shops. They might not know WTF ABS is since it is not something they would normally use, but if you talk them through it I'll bet they can order it from their normal plastics supplier. I went through this the first time.
If not, let me know and I can buy you a sheet and bring it to TWS. It is about $75 for a 1/8" x 4' x 8' sheet.
Reply
0
0

I've looked at alot of these front splitter threads, and no one that saw mentions what the turnbunkles are mounted to on the car? Are you drilling and taping a hole, welding a nut on, or is it a pre-existing threaded hole?
Reply
0
0

This is happening to my car this winter too - thanks for starting another thread. What did you use for the little 'L' brackets mounted to the splitter in the first picture? I was going to just slice up pieces of aluminum angle but what you did looks better/easier/lighter.
-h
-h
Reply
0
0

Elite Member
Joined: Jul 2007
Posts: 3,215
Total Cats: 151
From: Houston, TX
That looks super effective, very similar to Spoolins. Get ready to tune the rear grip because you just increased the front a butt load 
This year the flat front is the new hottness, next year...
This year the flat front is the new hottness, next year...
Reply
0
0


Positive pressure on the top side of the splitter that sticks out forward of the airdam will also make downforce.
Reply
0
0
Thread Starter
Elite Member
iTrader: (15)
Joined: Dec 2007
Posts: 4,847
Total Cats: 27
From: San Antonio, Texas
[IMG]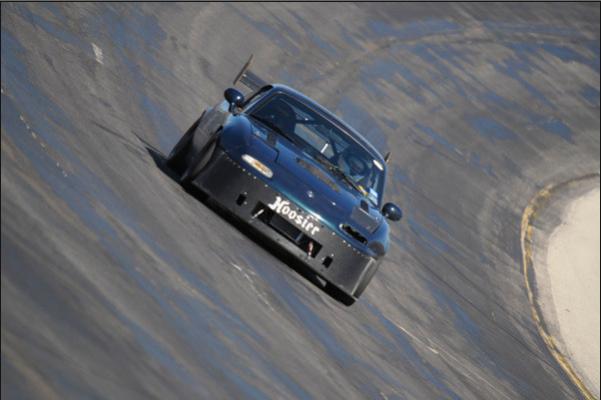 [/IMG]
The testing at the race track was successful. Here it is in action at Texas World Speedway on the NASCAR banking in Turns 3 and 4. I set my personal best lap time, about 1.5 seconds faster. There were a lot of other variables so I cannot attribute all of the speed to the new splitter and air dam. But they were definitely working. The aero balance of the car was great everywhere.
[/IMG]The testing at the race track was successful. Here it is in action at Texas World Speedway on the NASCAR banking in Turns 3 and 4. I set my personal best lap time, about 1.5 seconds faster. There were a lot of other variables so I cannot attribute all of the speed to the new splitter and air dam. But they were definitely working. The aero balance of the car was great everywhere.
Reply
0
0


